Building a Website Change Detection Tool with Yext
Author: Teddy Riker
Product: Knowledge Graph, Listings
Blog Date: July 2022
Building a Website Change Detection Tool with Yext
Search Engine Optimization (SEO) - the process of optimizing the rank of local listings on search engines is a critical piece of any brand's digital marketing strategy. On average, the first local result in a Google search gets 34% of organic traffic; more than the 2nd, 3rd, 4th, and 5th results put together. When it comes to SEO - every rank matters. Even jumping just one position from 11th to 10th can lead to a 143% increase in search traffic! It's no surprise that brands are constantly looking for the latest features and techniques that will help them move up the ranks.
At Yext, we specialize in helping brands optimize their local listings SEO to generate more views, clicks, and ultimately, more customer conversions. Search engines are constantly tweaking the algorithms, features, and optimizations that affect how search results are ranked; that's why it's crucial for us to stay on top of the latest SEO news and ensure our customers can harness all of the latest SEO tools and techniques available to them.
One of my favorite resources for staying on top of SEO news is Search Engine Land. Search Engine Land covers the latest news, tips, and analysis on topics such as search engine optimization (SEO), pay-per-click (PPC) advertising, social media, and more. Search Engine Land offers a daily newsletter which can be sent to your inbox, but like most people, I have a hard time keeping up with all of the emails that come through on a daily basis, nevertheless sift through every article in their newsletter to identify the ones that are relevant to me.
A few months ago, I set out to find a more effective solution for staying on top of relevant articles from Search Engine Land and other sites. One common solution for monitoring new and modified content changes to websites is to use a website change detection tool. There are many website change detection tools available, but they all essentially perform the same function: they monitor a website for changes and can notify the website owner when a change is detected, usually through an email. These are generally useful for checking for price changes on products, looking out for open restaurant reservations, spying on competitor websites, or even monitoring regulatory changes.
I signed up for a few trials with these tools to see how they could improve my strategy for monitoring changes on Search Engine Land and other sites. Unfortunately, the tools with the fancy features cost money, and even those that had all of the bells and whistles didn't quite satisfy my desire to customize the frequency, notification style, or organization of my monitoring strategy. So I looked for another solution.
Enter the Yext Crawler
The Yext Crawler is a product that can scrape the underlying content of a website and turn it into structured data within Yext's proprietary content management system, the Knowledge Graph. Once the Crawler captures web content, it passes it through Yext Data Connectors, where it can be massaged and transformed into any desired format. Data Connectors is a powerful framework that supports both out-of-the-box as well as custom data transforms, including an option to execute serverless functions, a proprietary Yext feature that can execute abstract snippets of typescript code to perform tasks such as complex data transforms or even making API requests to third parties.
Recognizing that monitoring website changes was the core of the problem I was trying to solve, I decided to try my hand at using the Crawler to solve this problem. Using the Crawler offered a few benefits to me:
- Rather than accepting a static list of URLs to scrape, the Crawler can spider across pages on a website, giving me a way to identify new pages in addition to changes to existing pages.
- Using Data Connectors and Knowledge Graph, I could be completely flexible with how I stored the retrieved data.
- Finally, I could use Knowledge Graph's webhooks to customize the format of my notifications. Rather than being notified of changes via email, I wanted them delivered directly to my Slack inbox to keep them organized and ensure I never missed a change.
Setting it Up
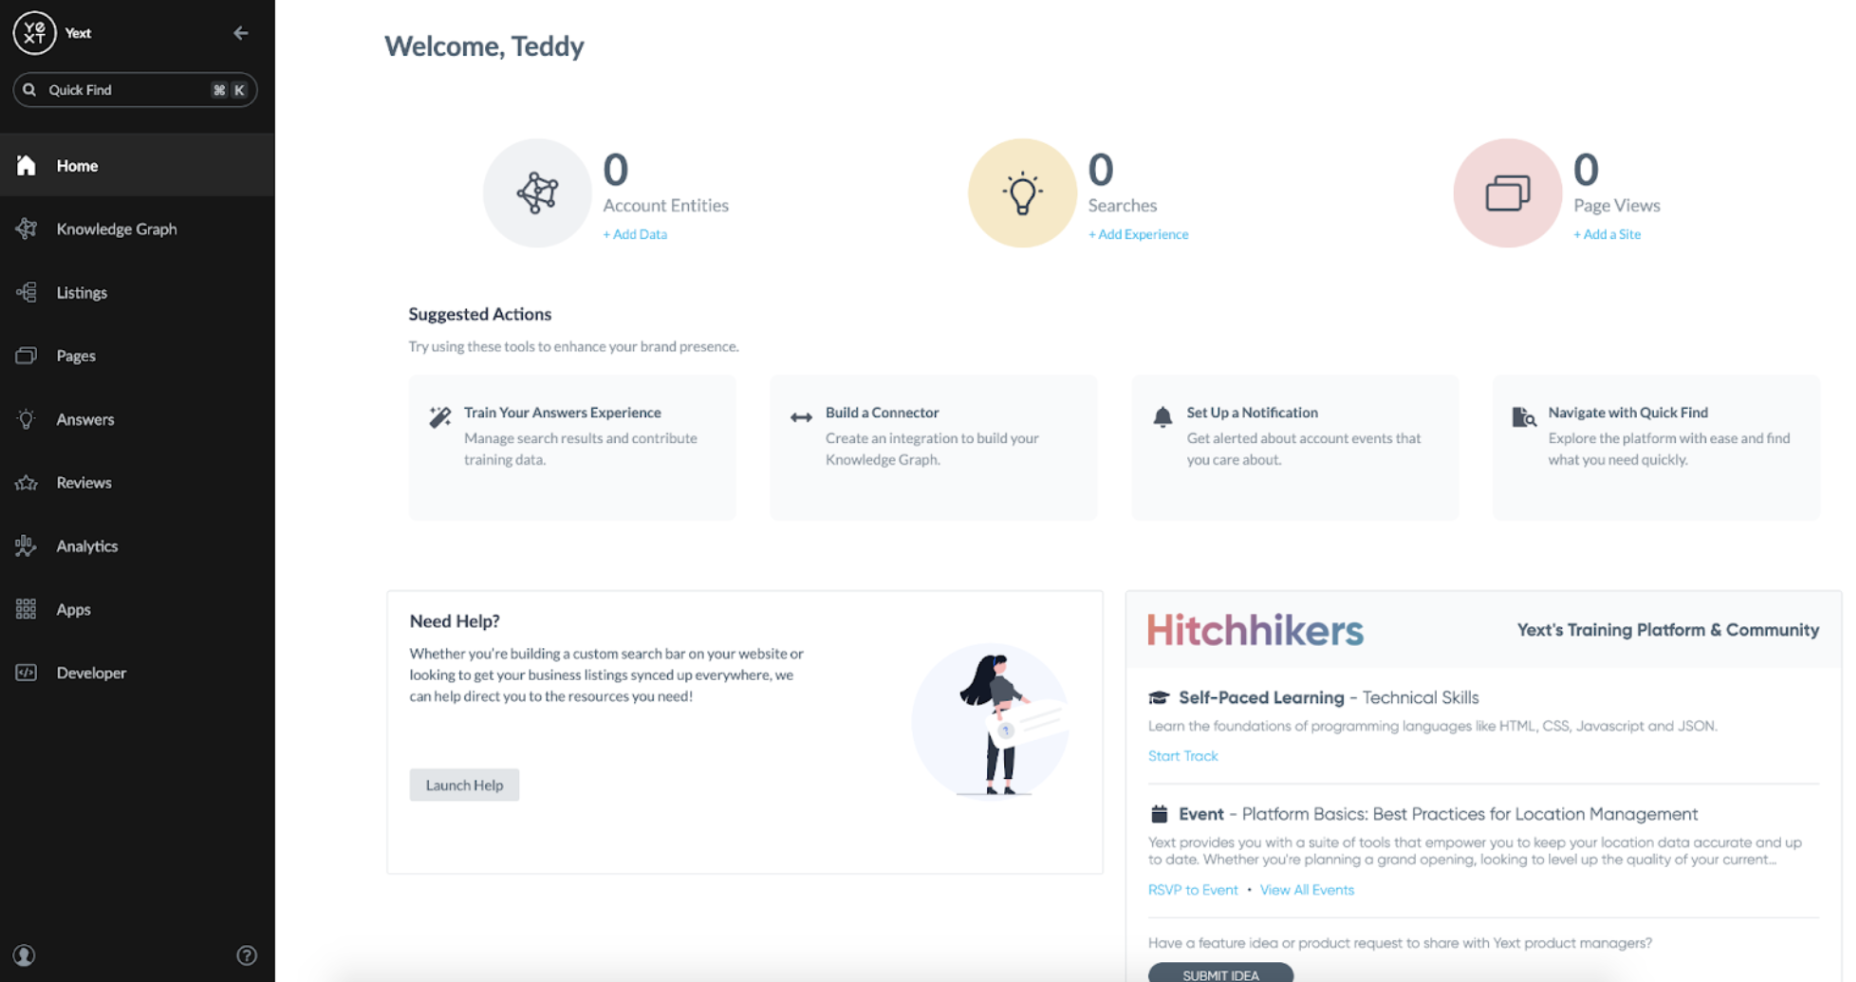
The Crawler, Data Connectors, and the underlying Knowledge Graph are all available with a Yext free trial account which can be set up at https://www.yext.com/free-trial:
Defining the Schema
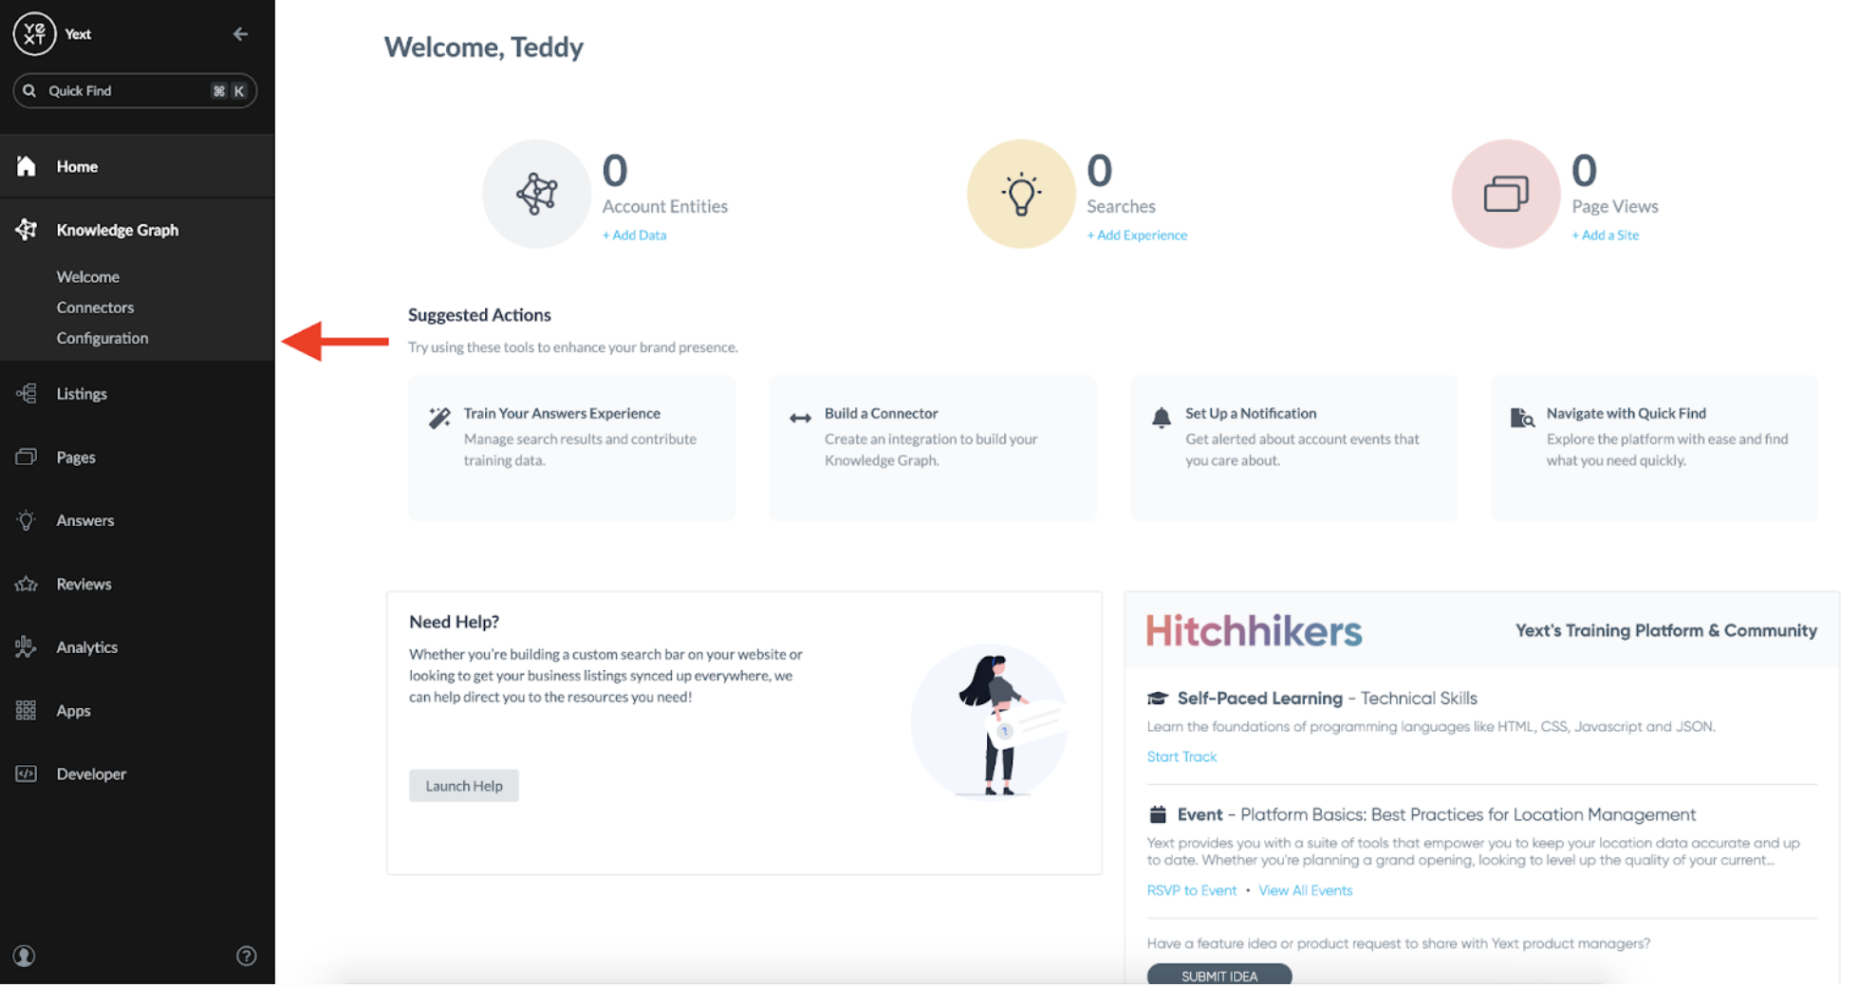
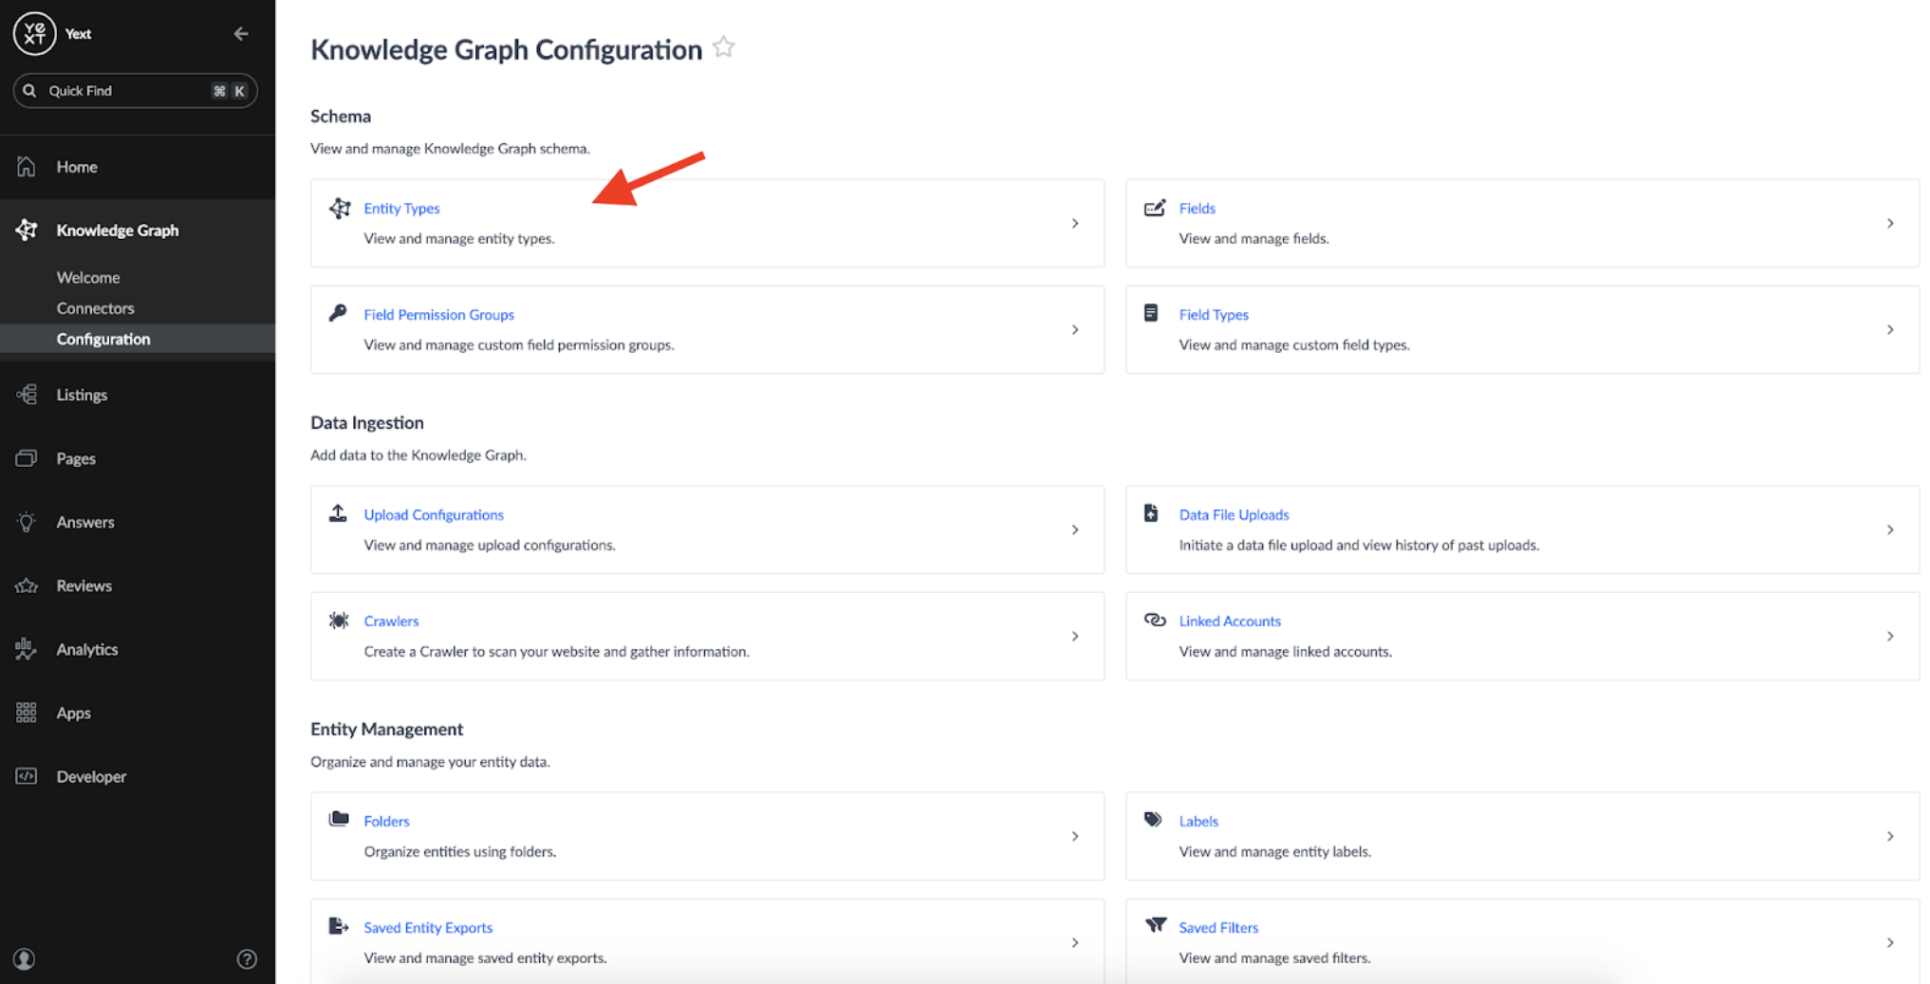
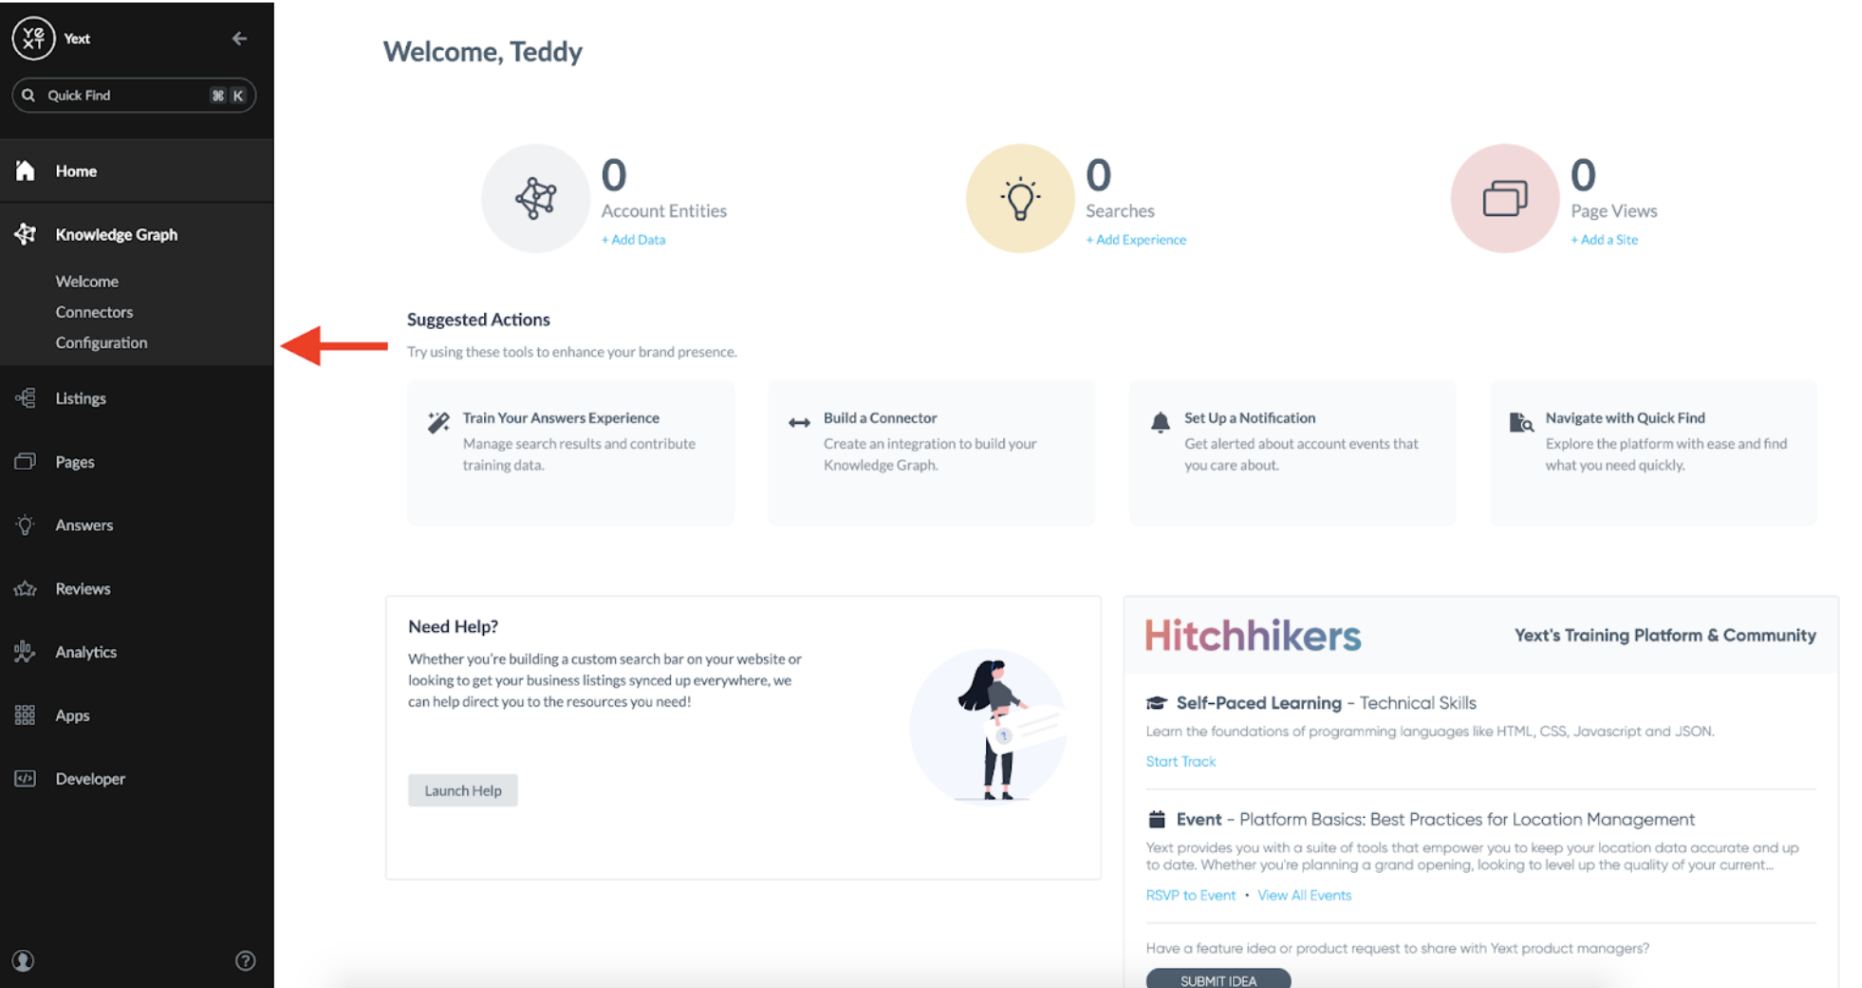
The first step to storing content from the web is to define the schema you want to store it in. This is done by defining an Entity Type, which can be done from the Configuration page in Knowledge Graph:
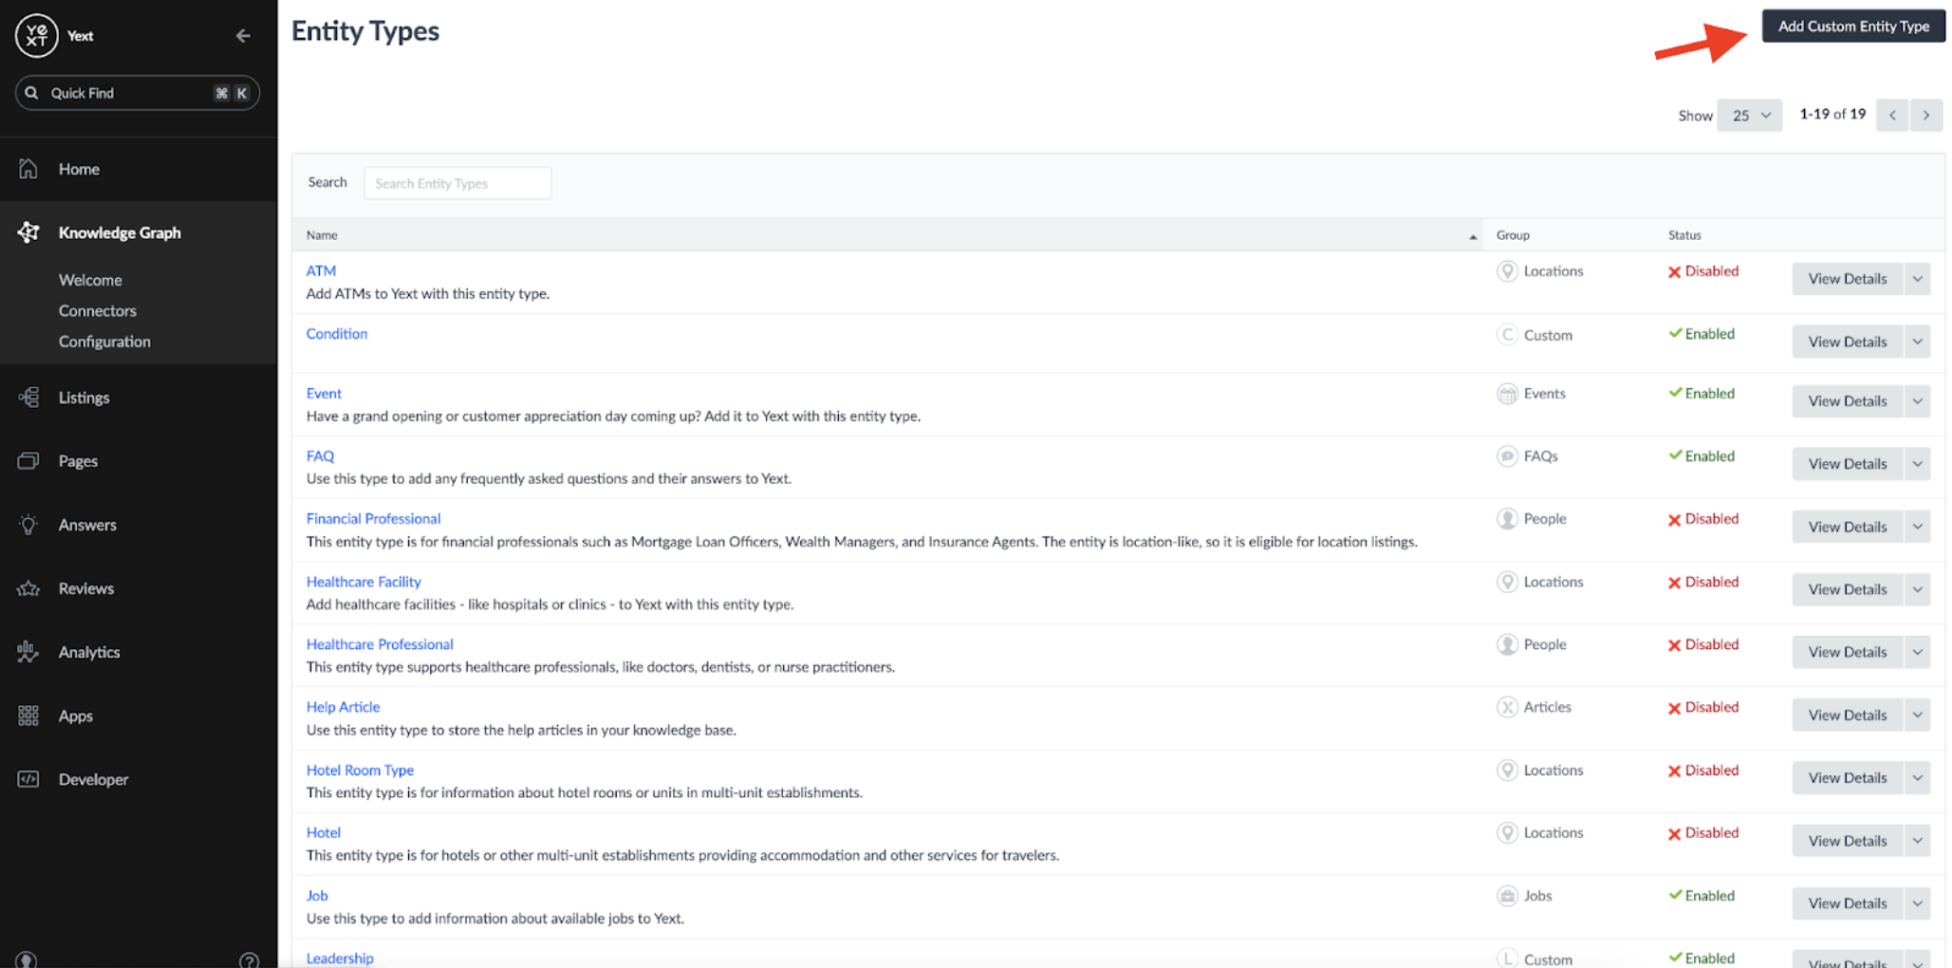
From here, you can define a custom entity type:
I called my custom entity type 'Article':
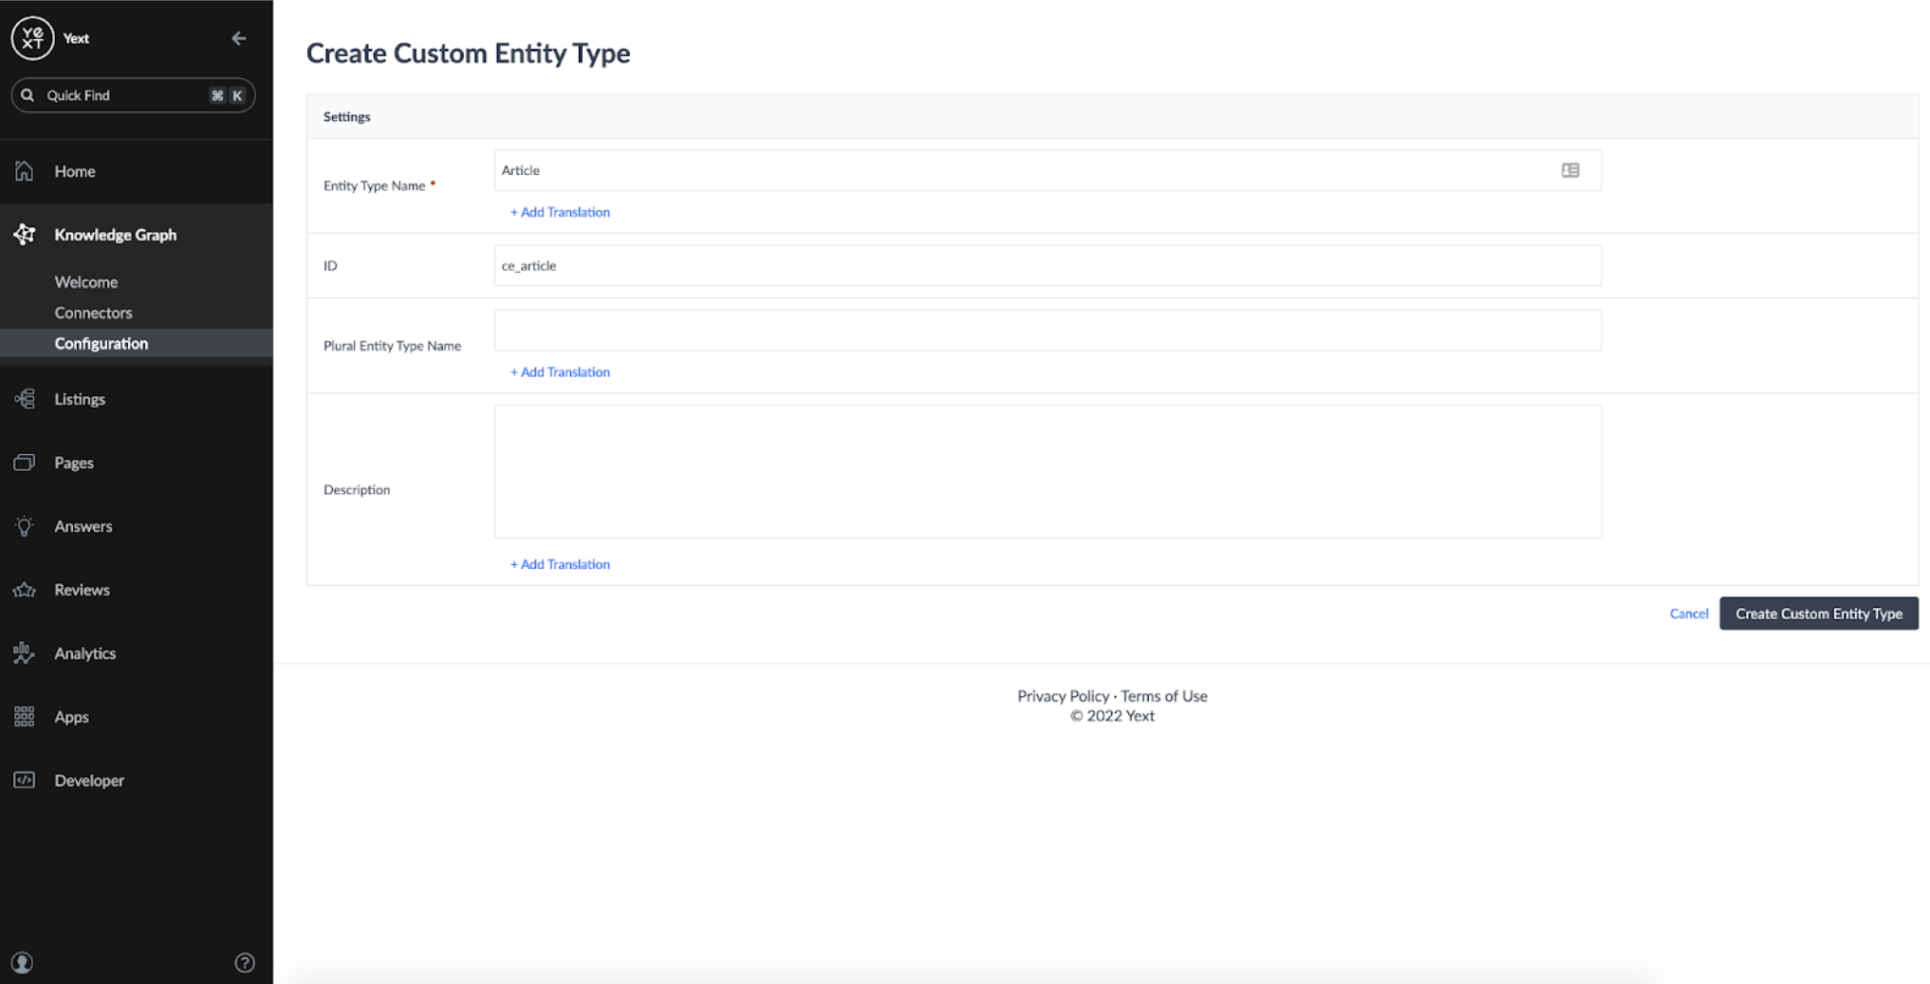
In addition to the default entity fields such as Name and ID, I chose a basic schema for the pages: one field to store the Article URL, and one field to store the Article Content:
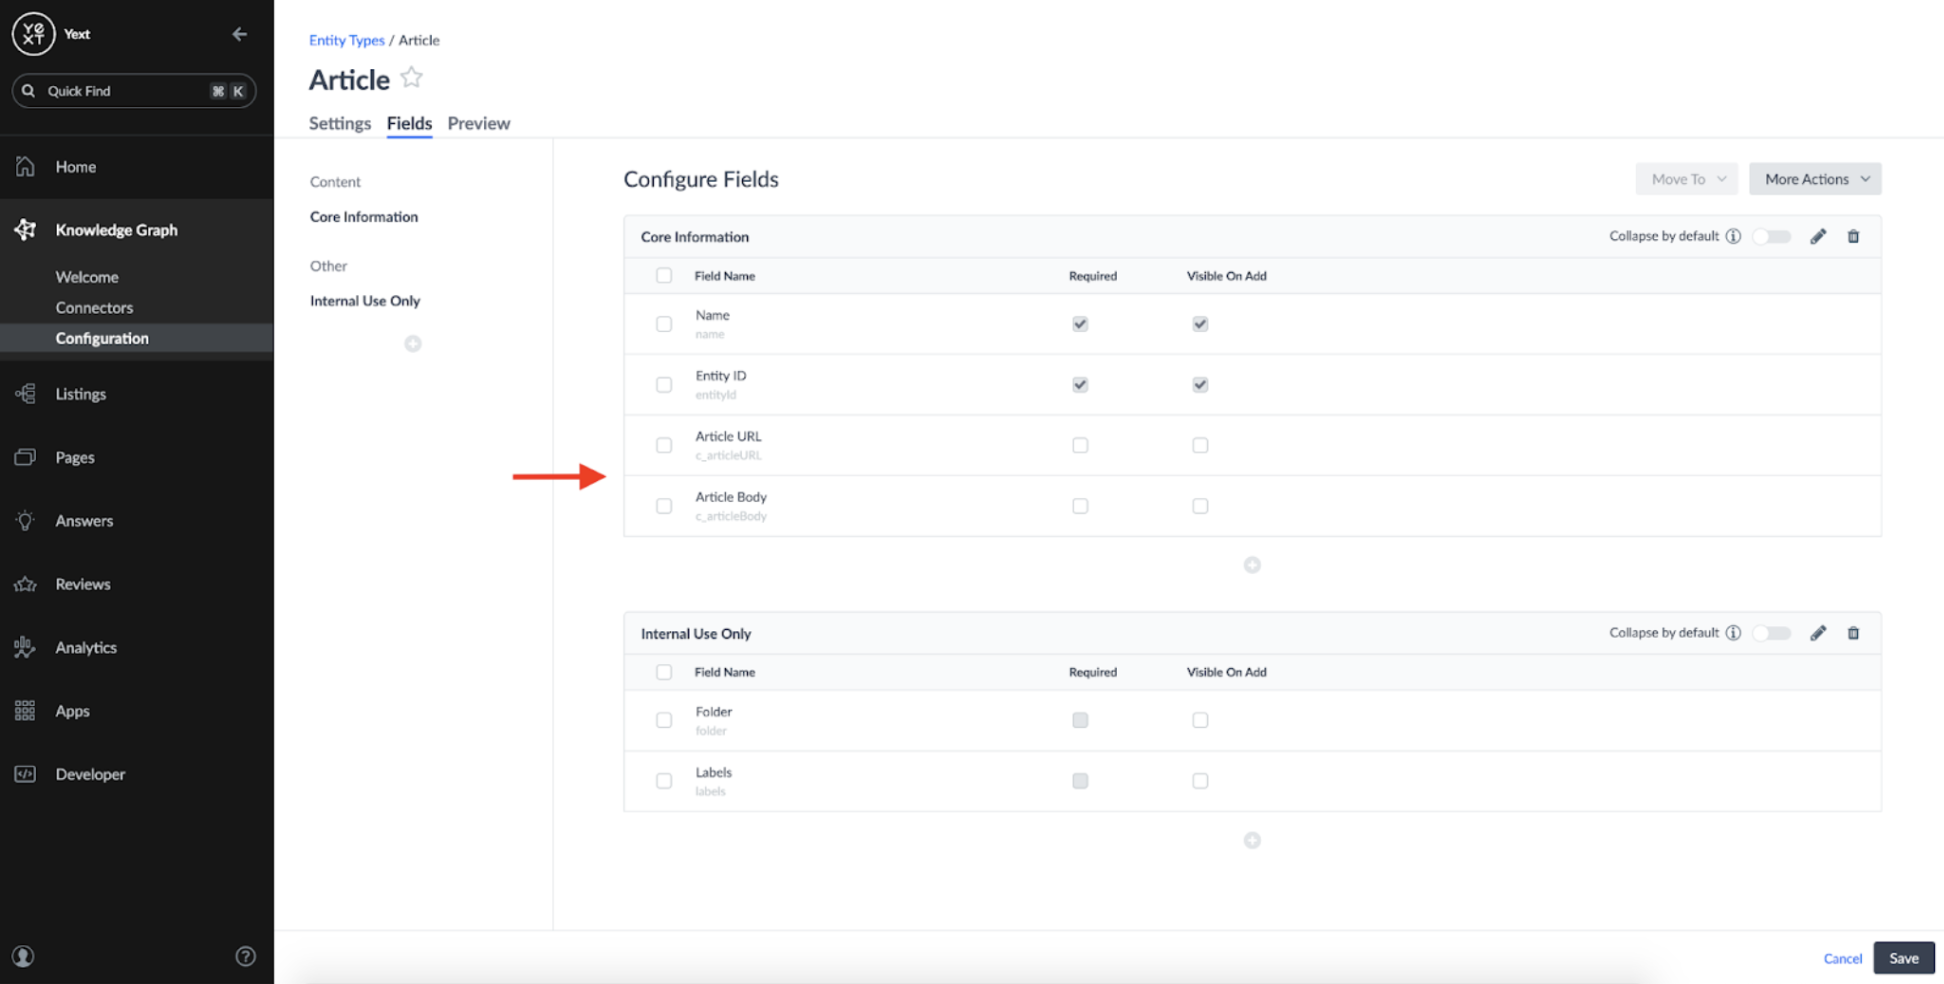
This schema could be more advanced with properties like Title, Sections, and more; but I chose to keep it simple for now.
Setting up a Crawler
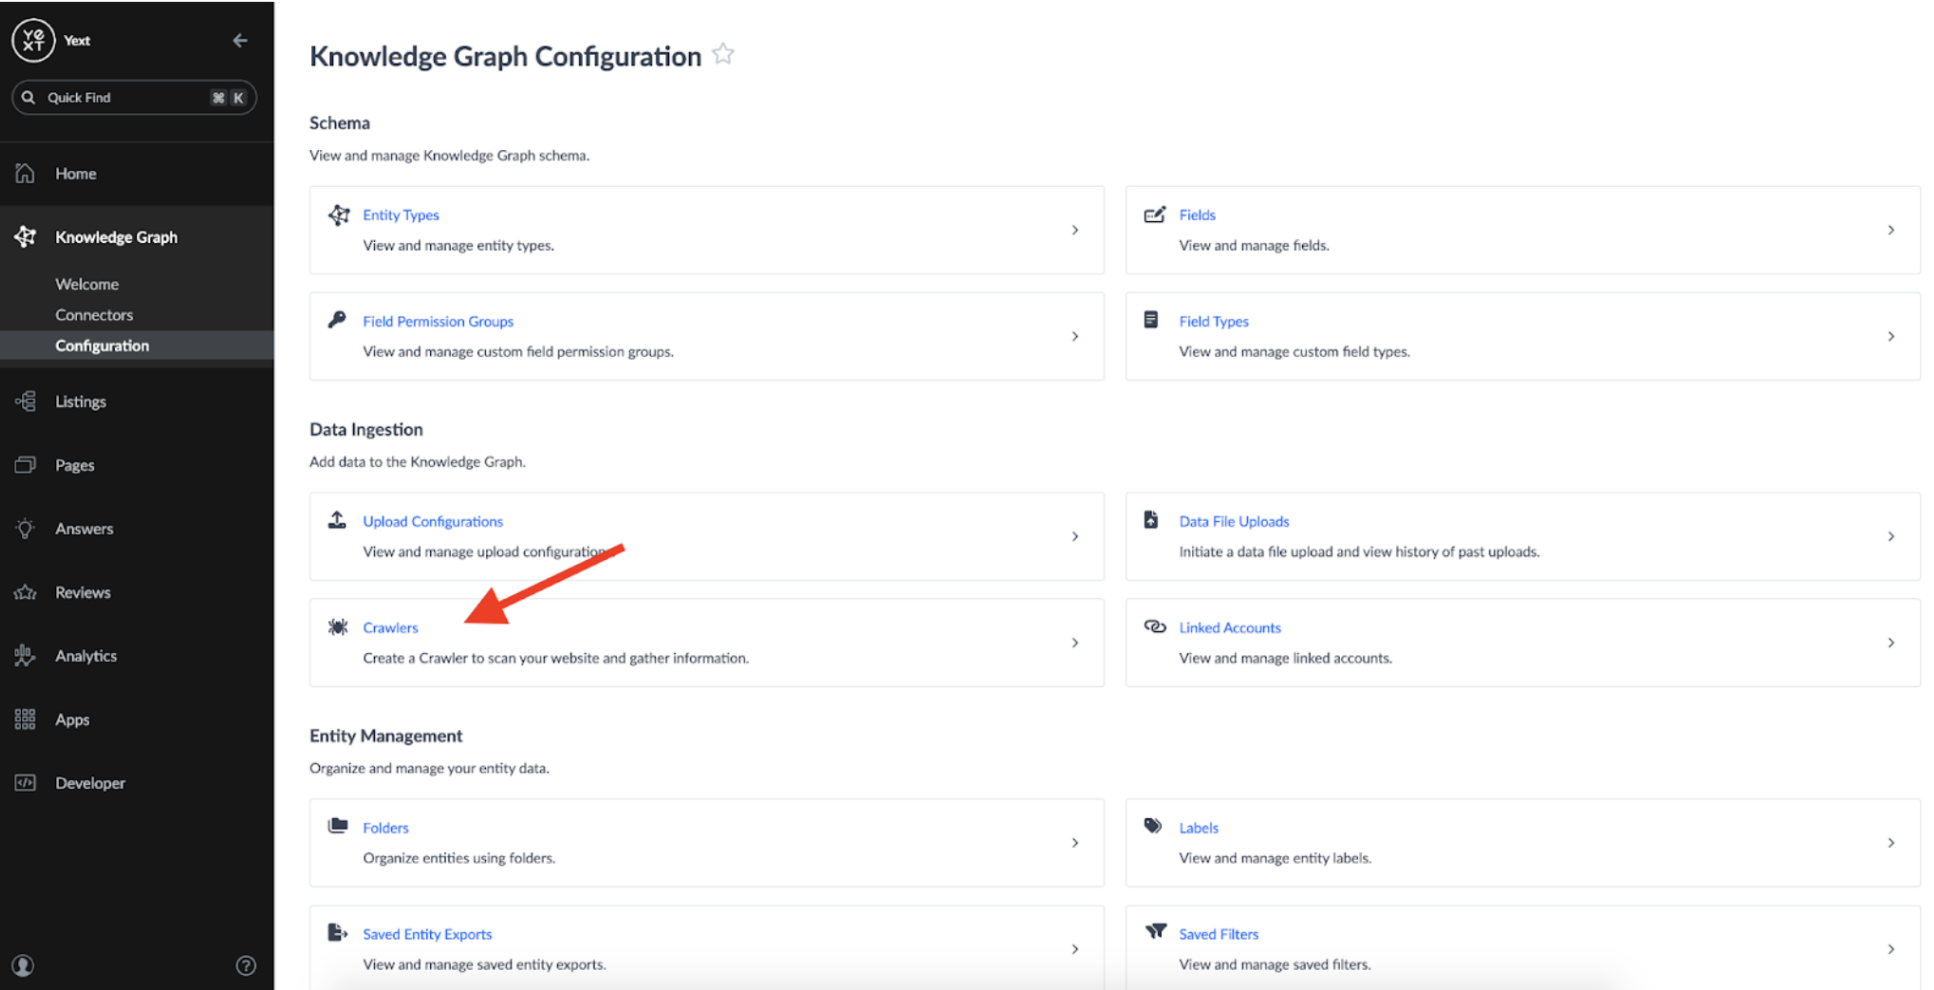
Once the schema is defined, we need to set up a Crawler which can fetch the data from Publisher websites. A Crawler can be created by accessing the Configuration page under the Knowledge Graph tab:
When configuring my Crawler I used the following settings:
- Schedule: Daily - To ensure I checked for new articles every day
- Crawl Strategy: All Pages - To ensure the Crawler spidered to all pages from the Domain.
- Domains - Domains define the start point of the crawler. For this Crawler, I added the URL for Search Engine Land's 'Local' articles, which are most relevant to me ( https://searchengineland.com/library/channel/local)
- Ignore Query Parameters: All - This setting allows you to parse out duplicate URLs that may occur due to query parameters (URLs that end in the format ?{some parameter})
- Max Depth: 1 - Specifies that I only want the crawler to spider to links that are found directly from the root domain. Increasing this number will cause the crawler to spider to links from other pages it finds as well, increasing it's 'depth'.
- Rate Limit: 10 - Allows me to decrease the frequency at which the Crawler scrapes pages; I brought this down to a low number because I don't expect this Crawler to have a high number of tasks due to the Max depth and lowering the rate limit decreases the chance of server errors.
Once the Crawler's settings are saved, it will automatically begin a scrape of the webpages you ask it to target.**
Setting up a Connector
The next step is to set up a Connector which will transform raw data from the Crawler into structured data for our Knowledge Graph. This can be done by navigating to the 'Connectors' tab:
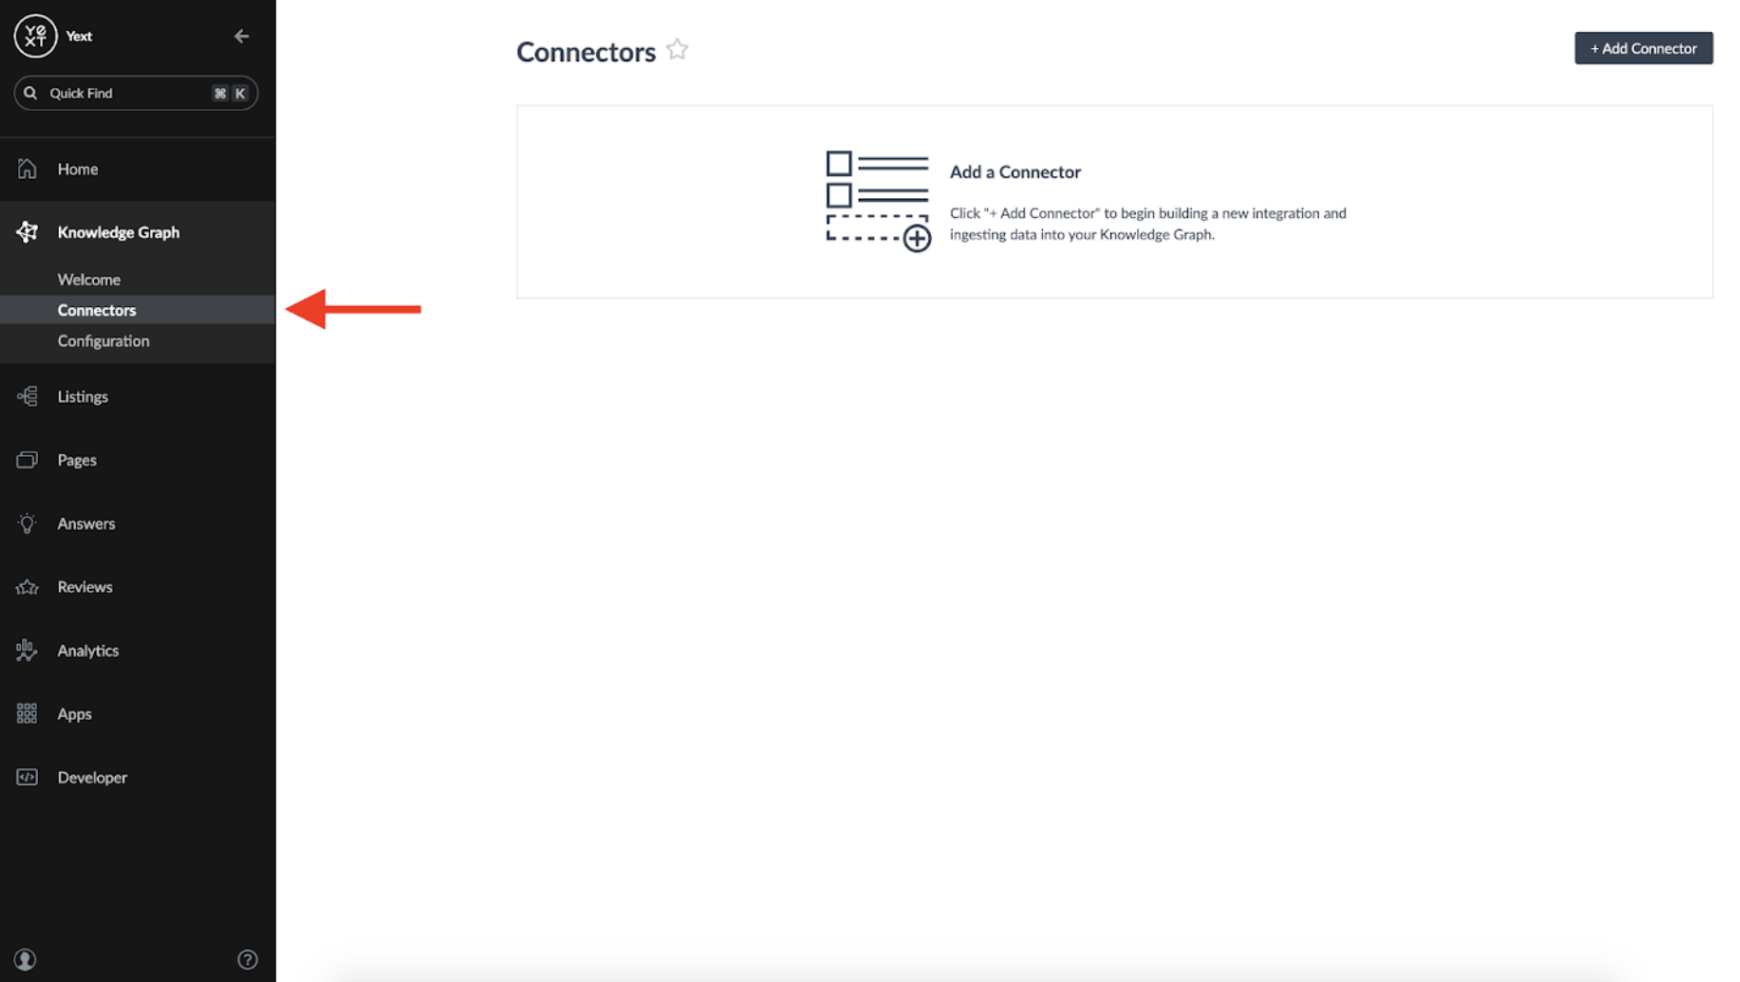
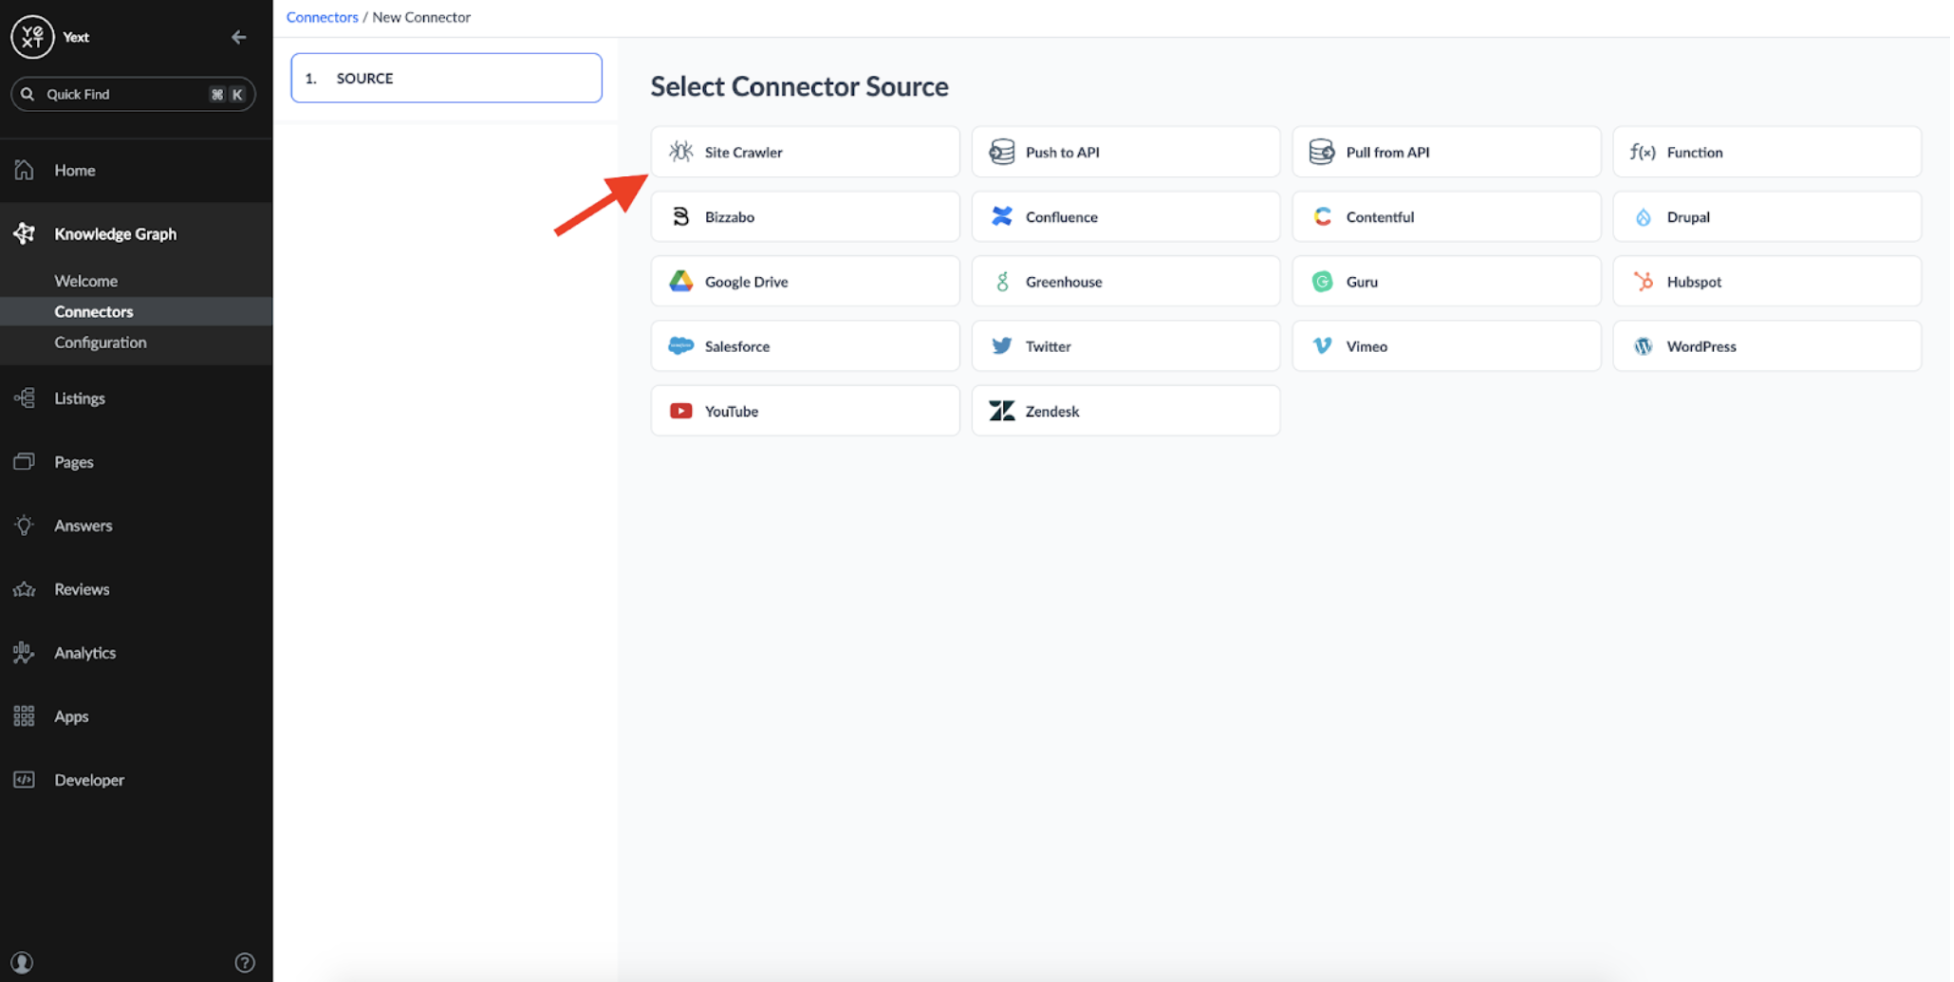
When we begin setting up a new Connector, we can choose 'Crawler' as a source.
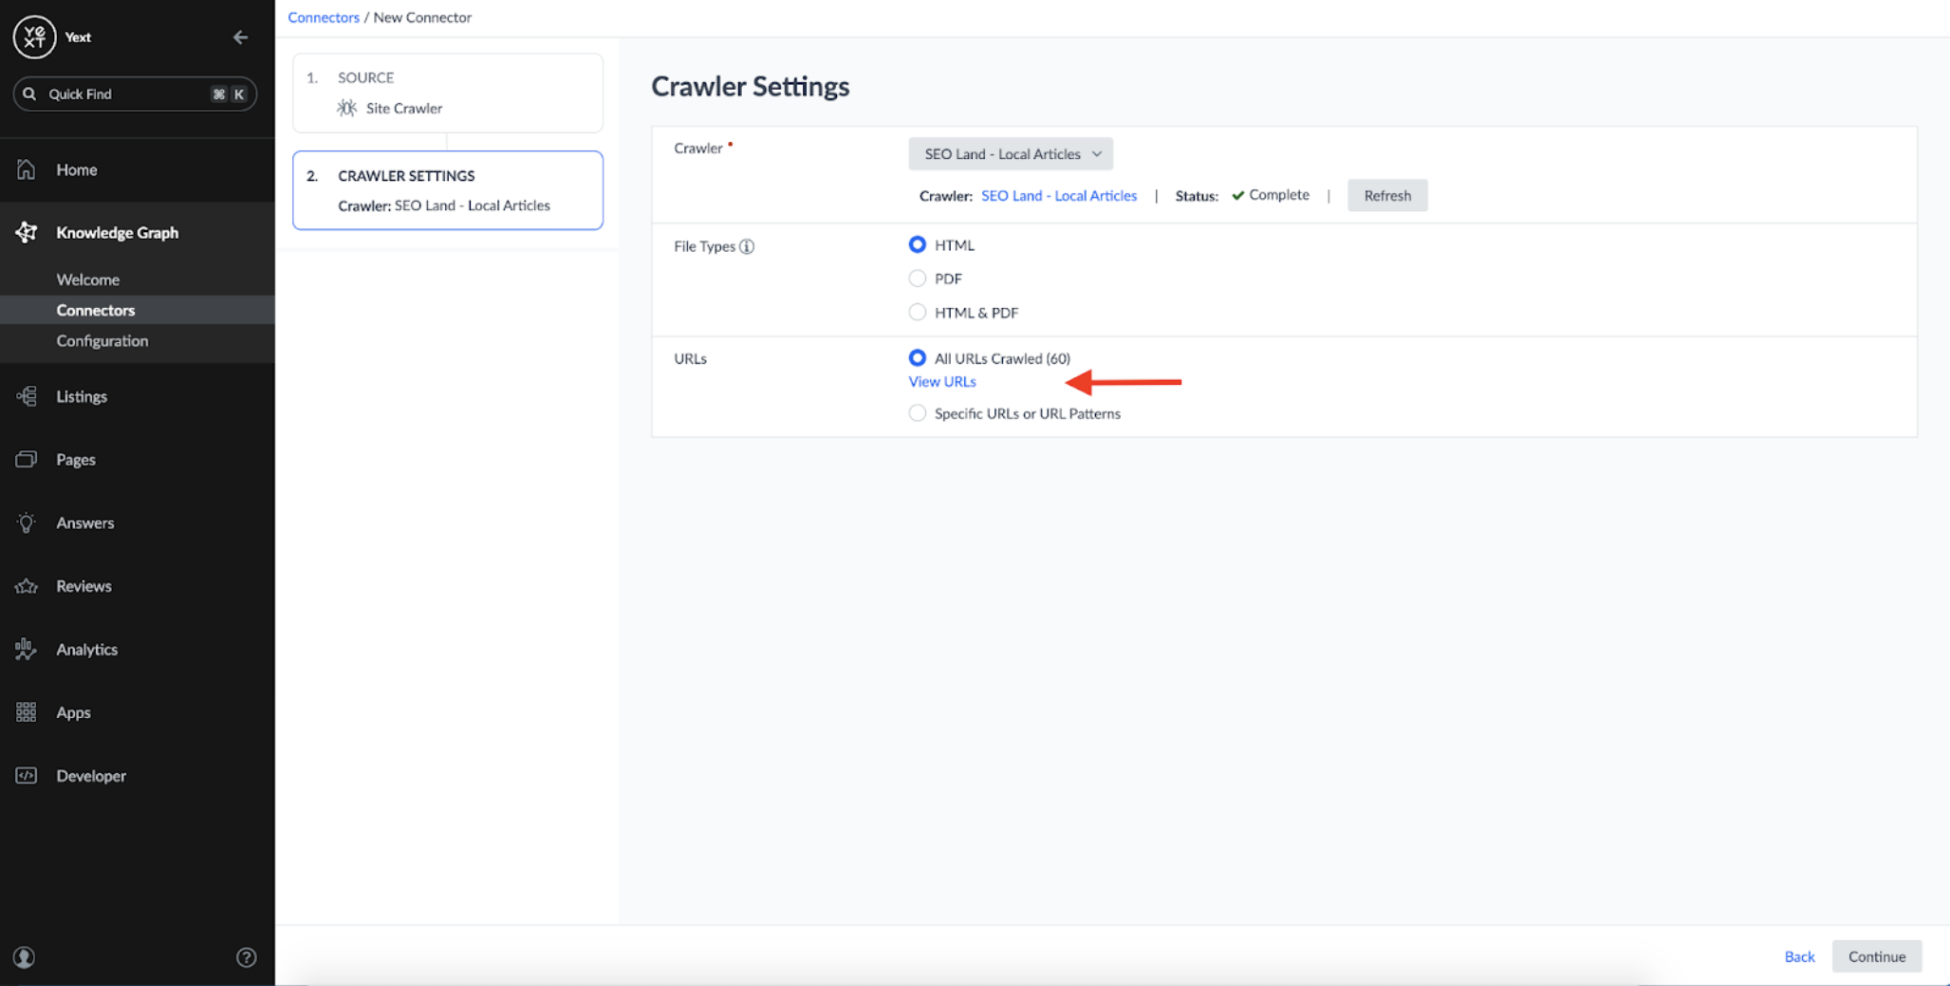
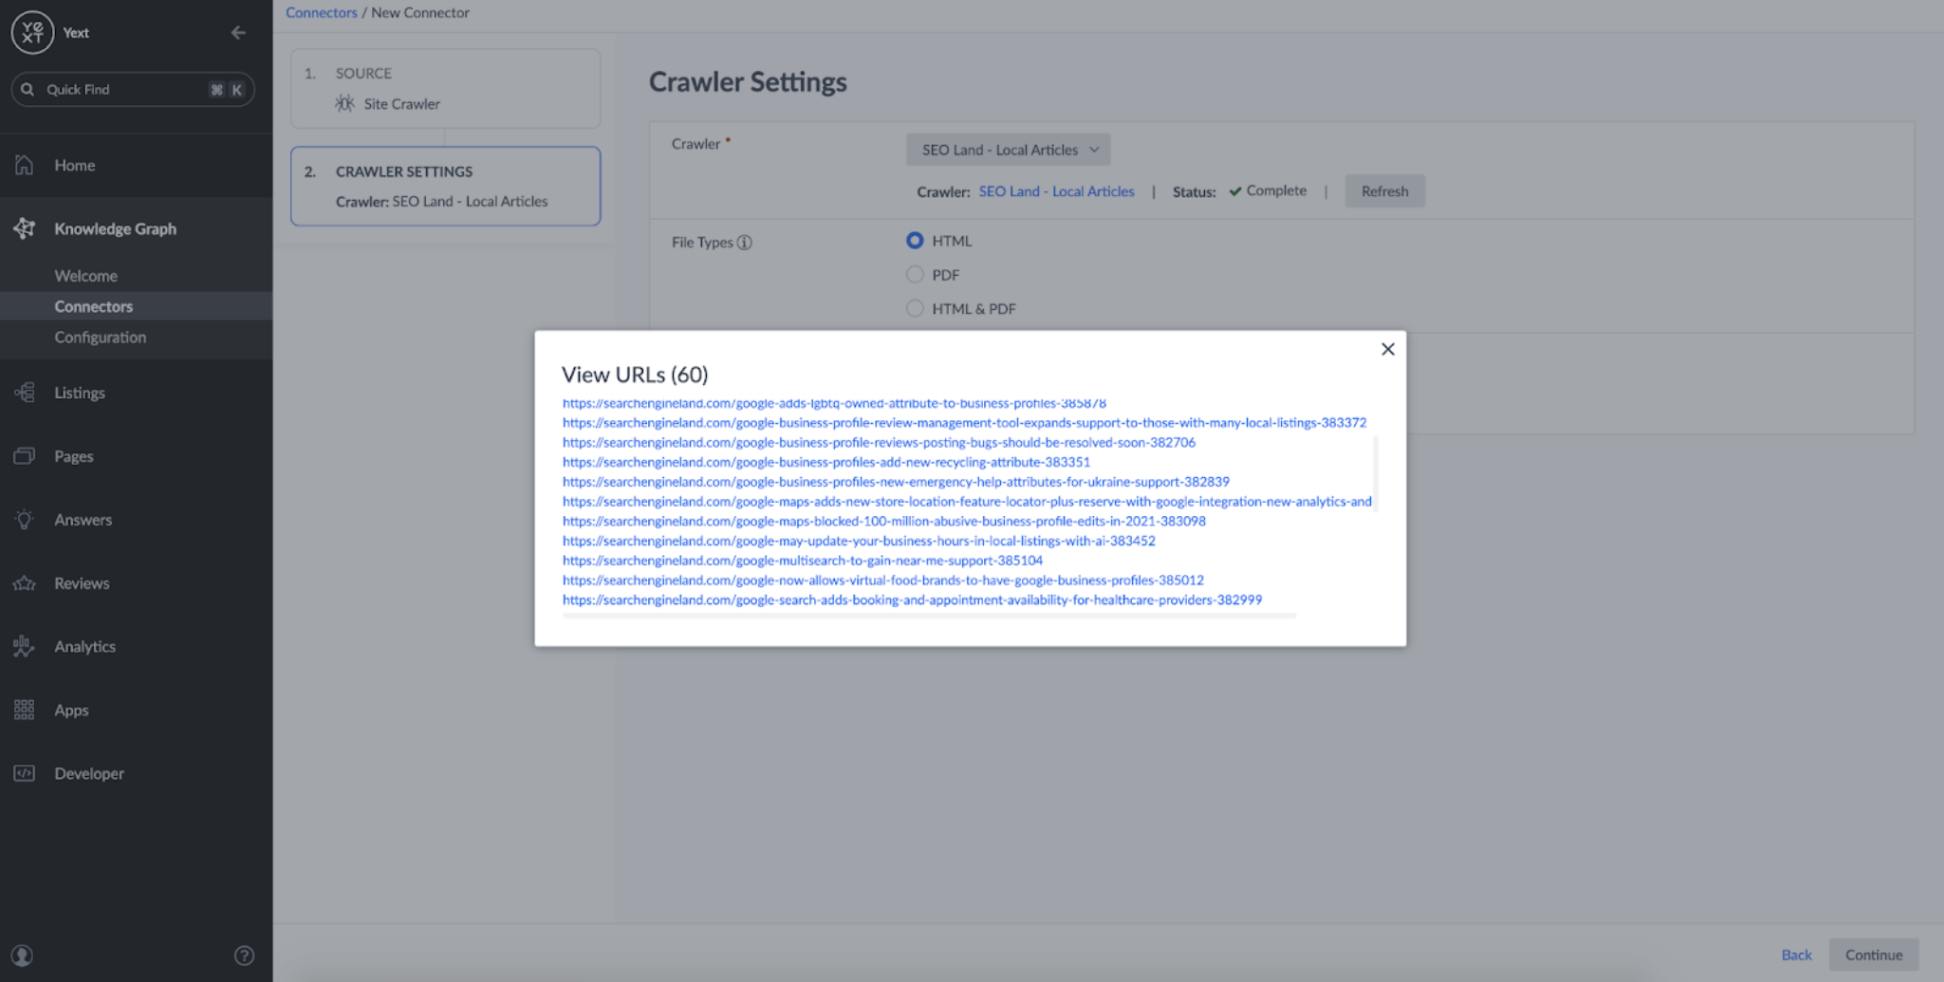
When a Crawler is used as a source, you can see the list of URLs the Crawler scraped data from the last time it ran:
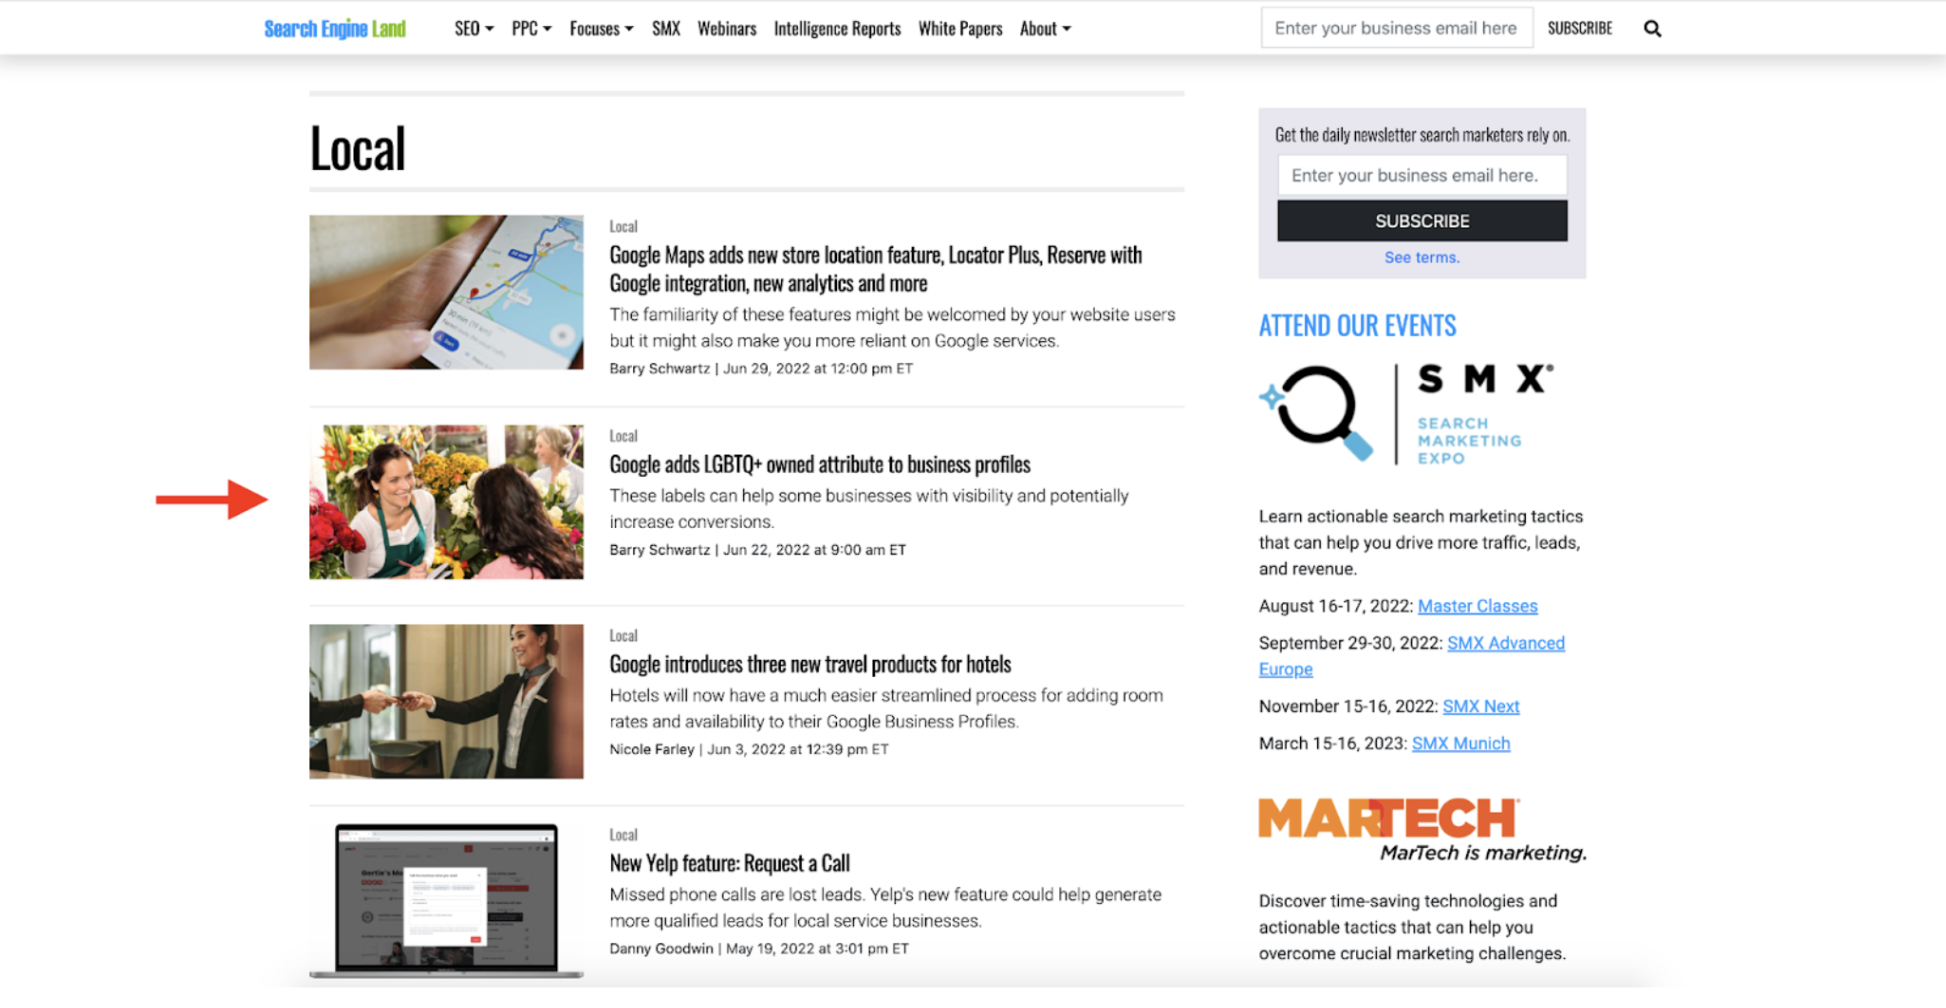
Here we can see that our Crawler successfully fetched the local-focused articles that were present as links on our original domain (https://searchengineland.com/library/channel/local):
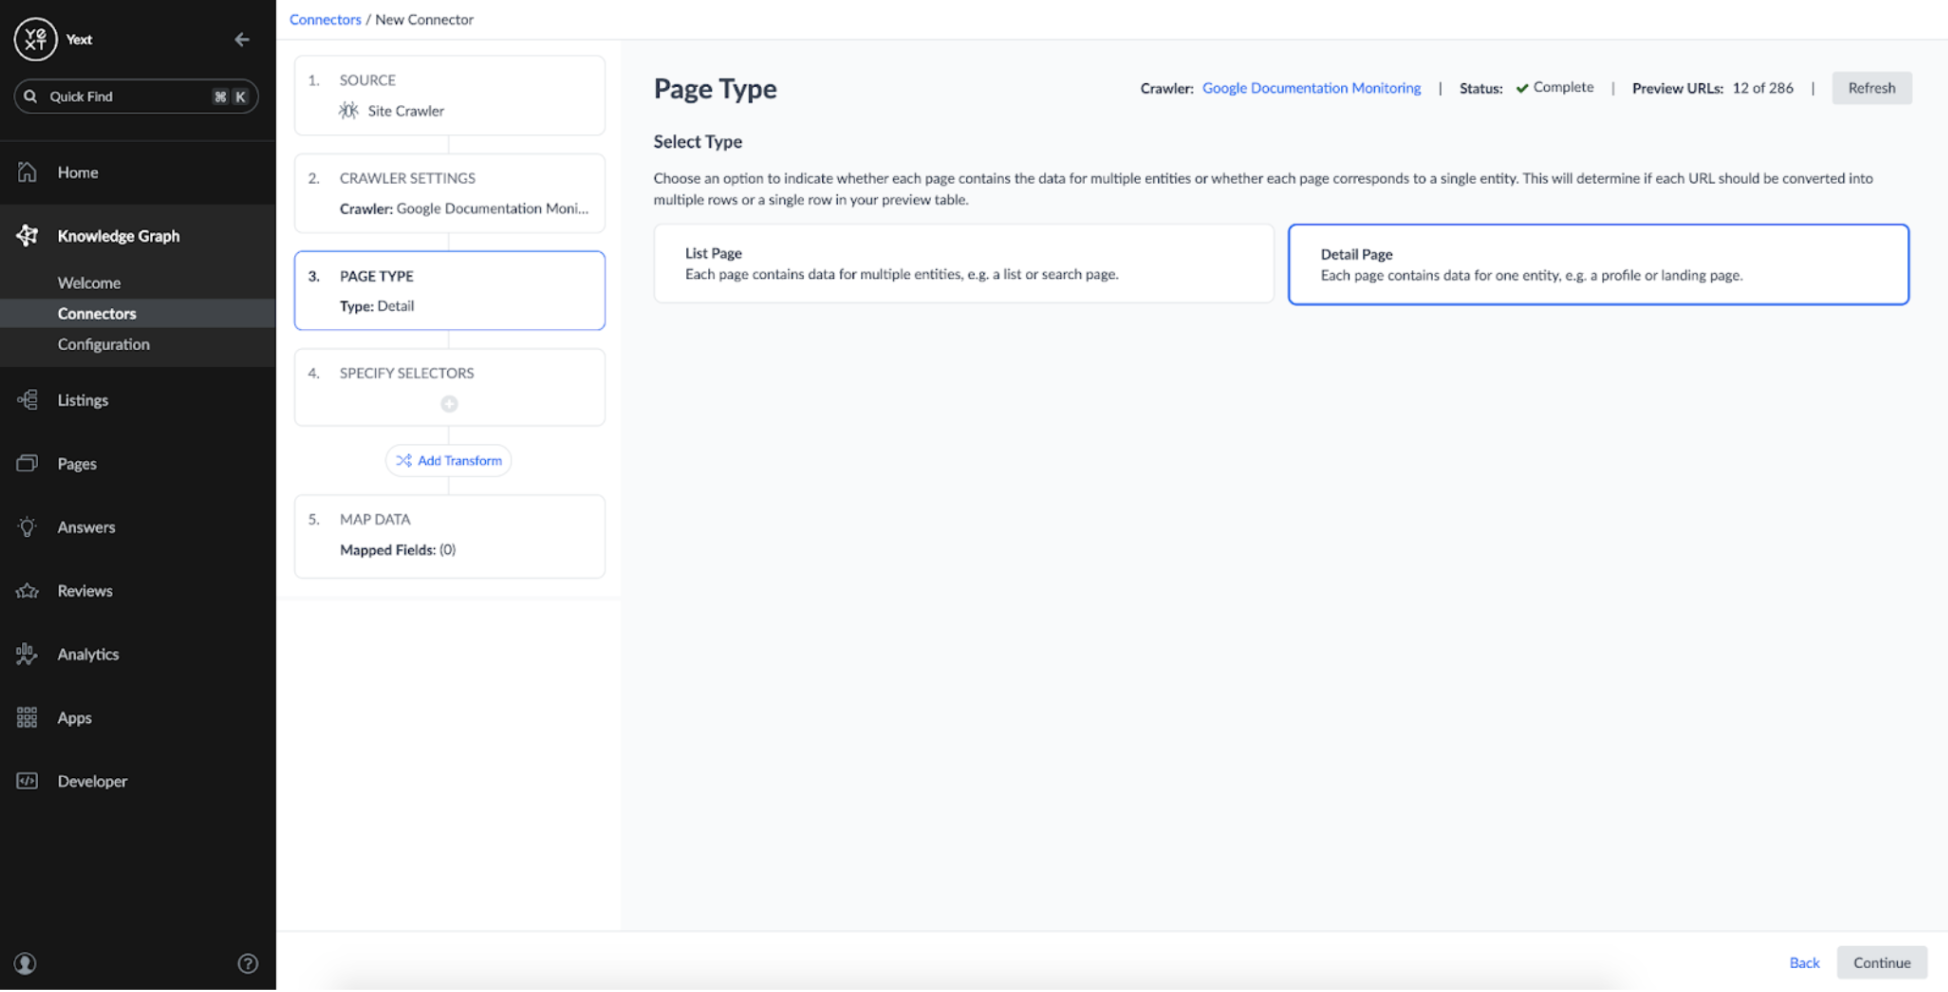
Everything looks good, so its time to continue setting up the crawler. In the next step, I chose a 'Detail Page' type, as we want each URL to correspond to a single Web Page entity we defined earlier:
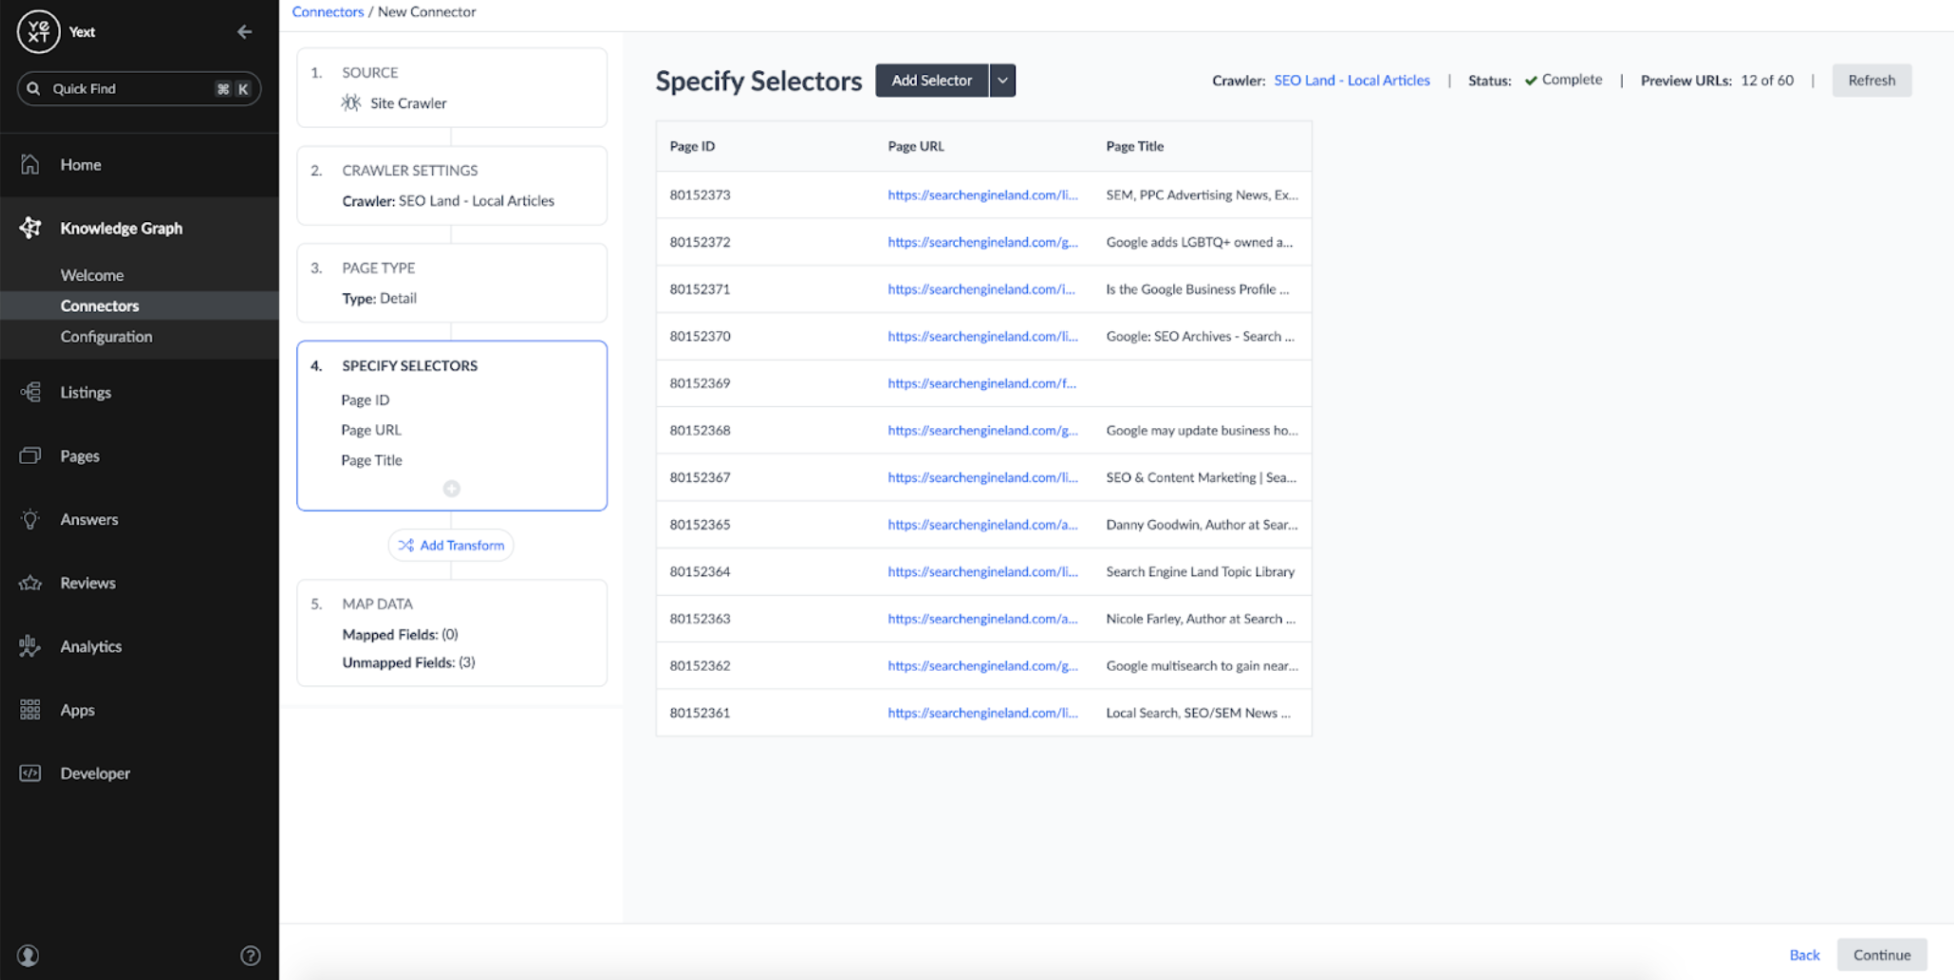
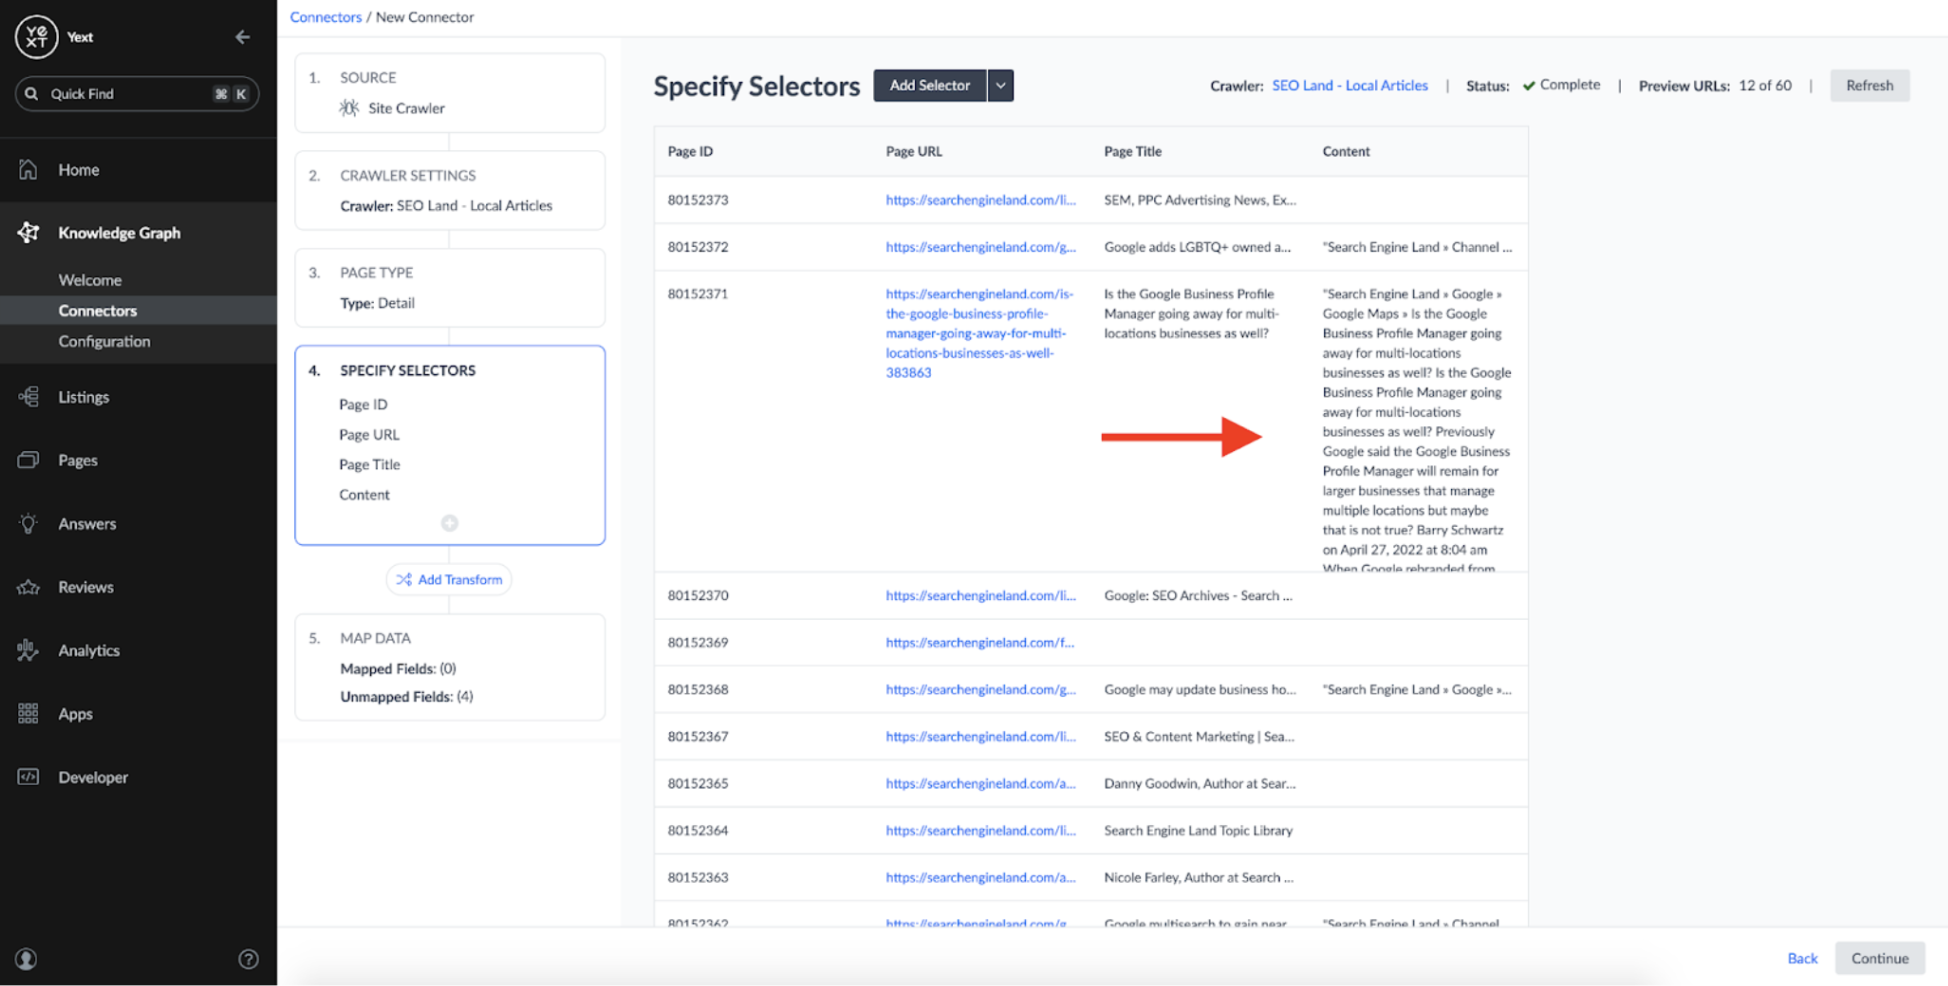
In order to turn the crawled content into structured content, we need to identify the CSS selectors on the webpages that contain the desired content. By default, Connectors has a set of default selectors which automatically identify the URL and Page Title of the URLs:
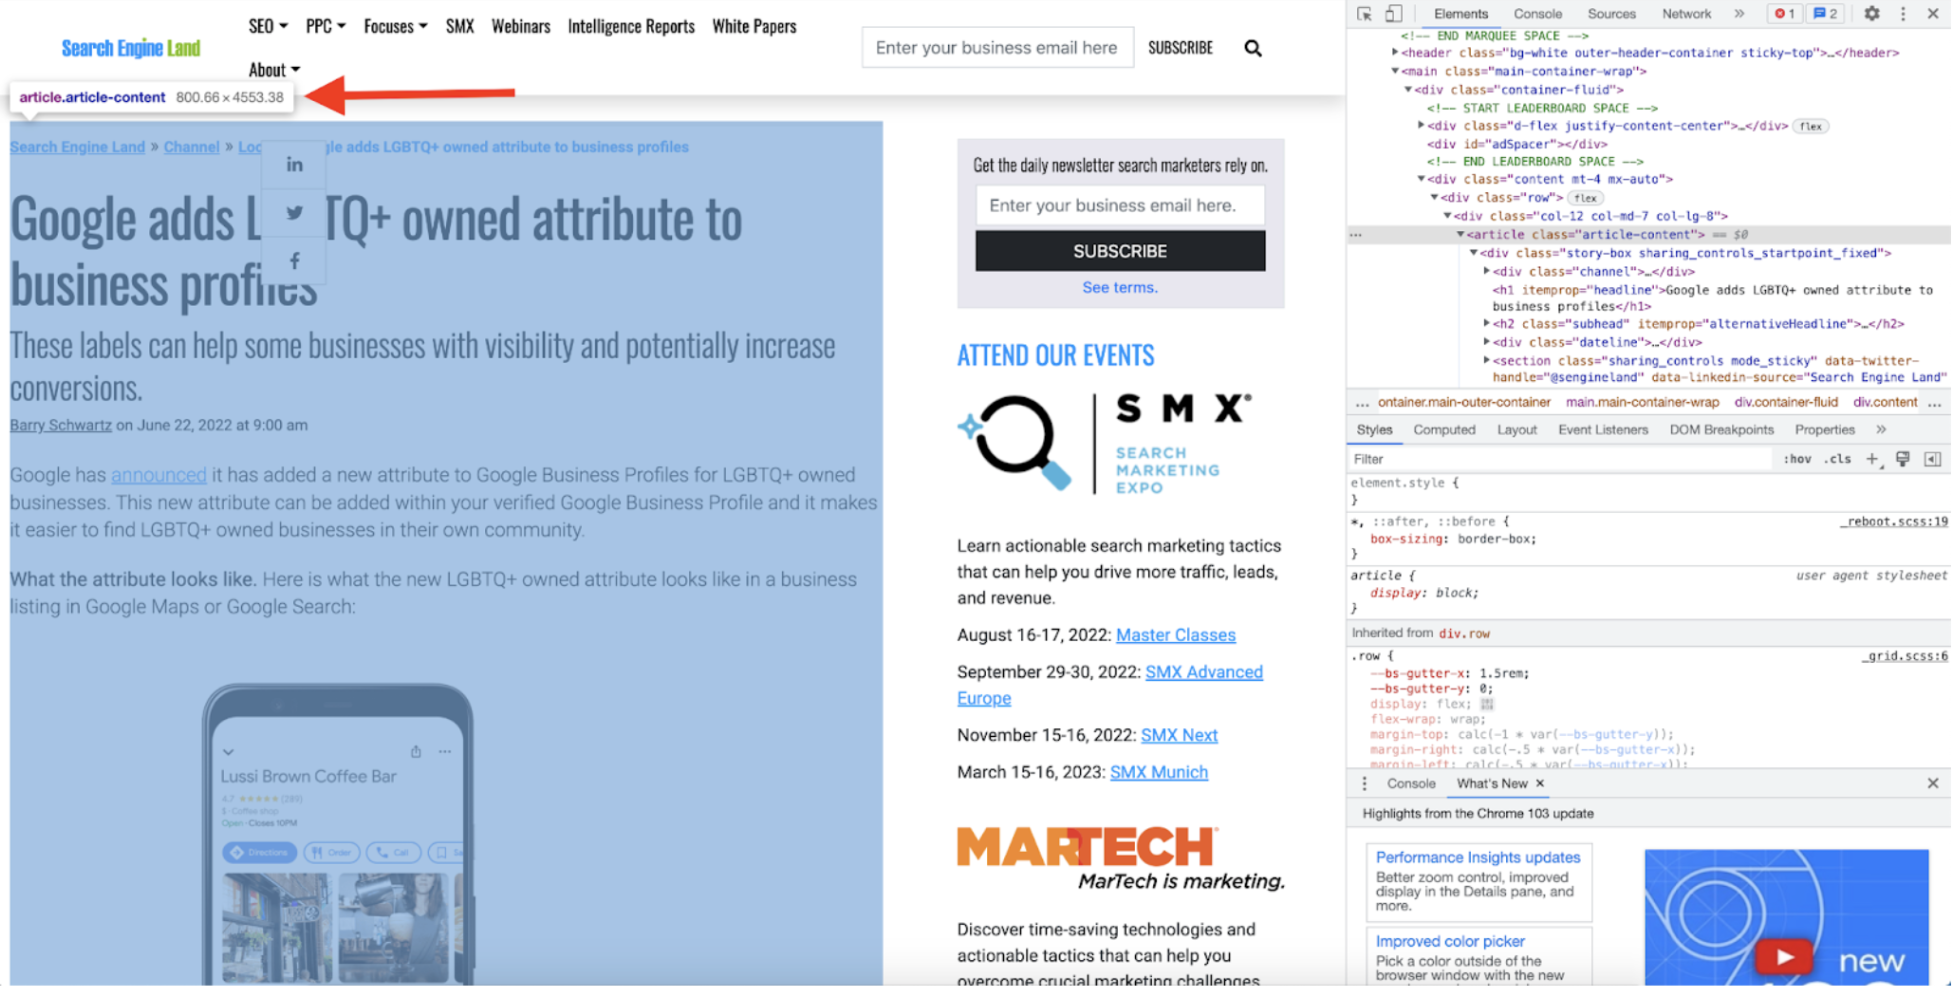
To get the content of the articles, I added a new CSS selector and used the CSS tag Search Engine Land uses to wrap the contents of each article, article.article-content:
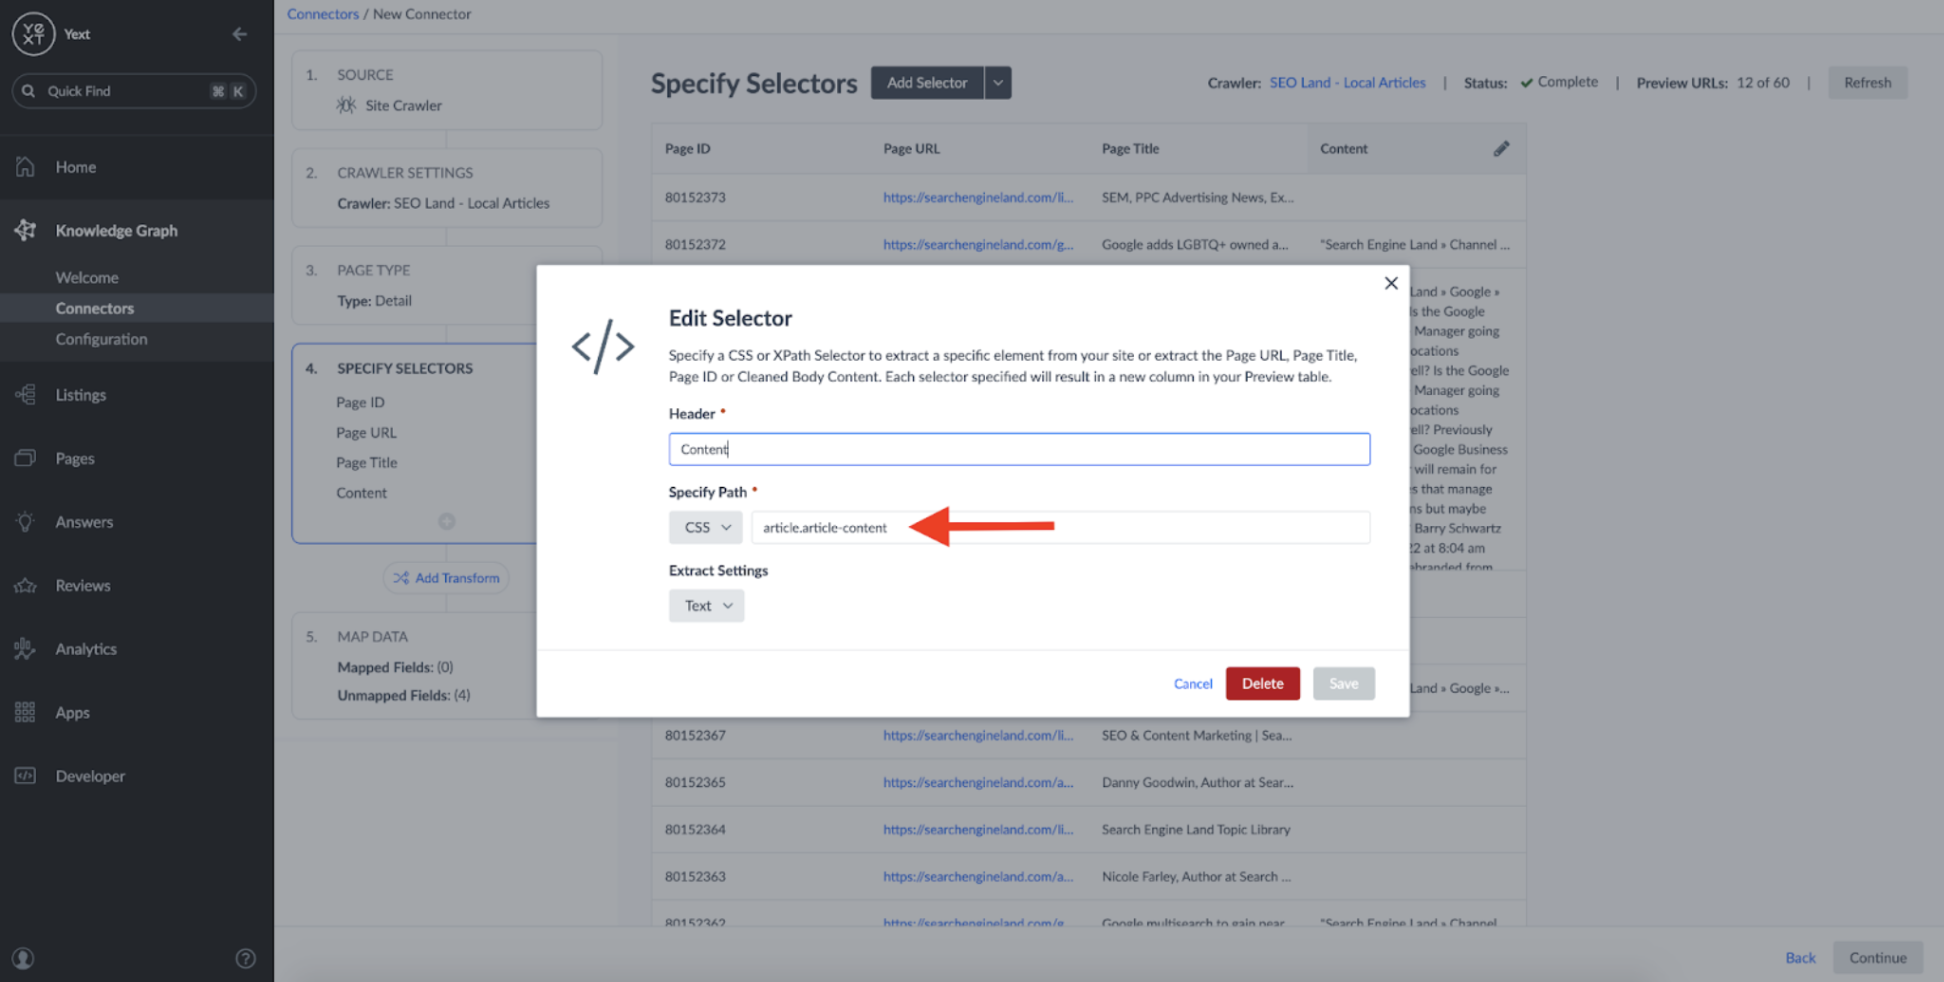
By applying the selector, you can see that the connector successfully parses the body of the articles:
At this stage, I could have also added transforms to perform basic operations like fixing capitalization or removing unwanted characters. Additionally, I could have applied a serverless function to the content and performed more complex operations:
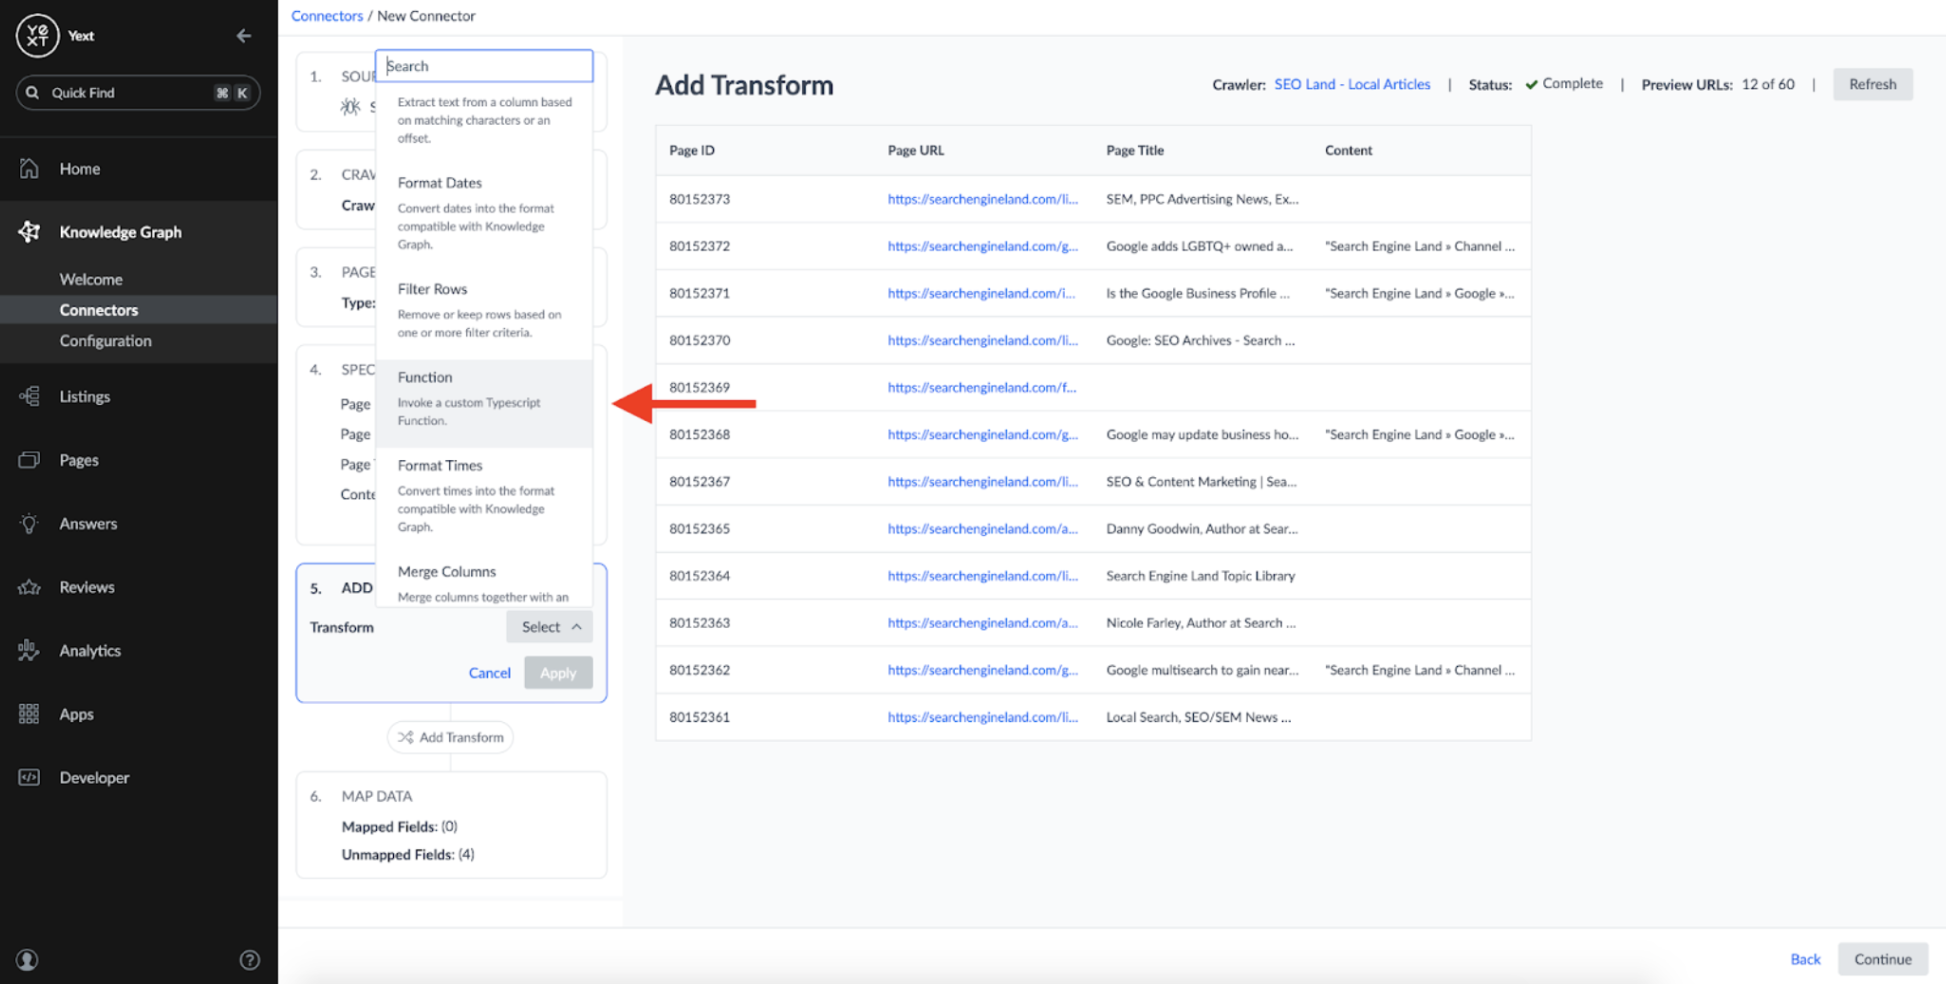
For the sake of this blog, I skipped implementing any complex Transforms, but you can learn more about them on the Yext Hitchhikers site.
The last step to set up the connector was to map the fields extracted from the Crawler to the Article schema we defined earlier. To do this, I selected the 'Article' entity type on the next screen:
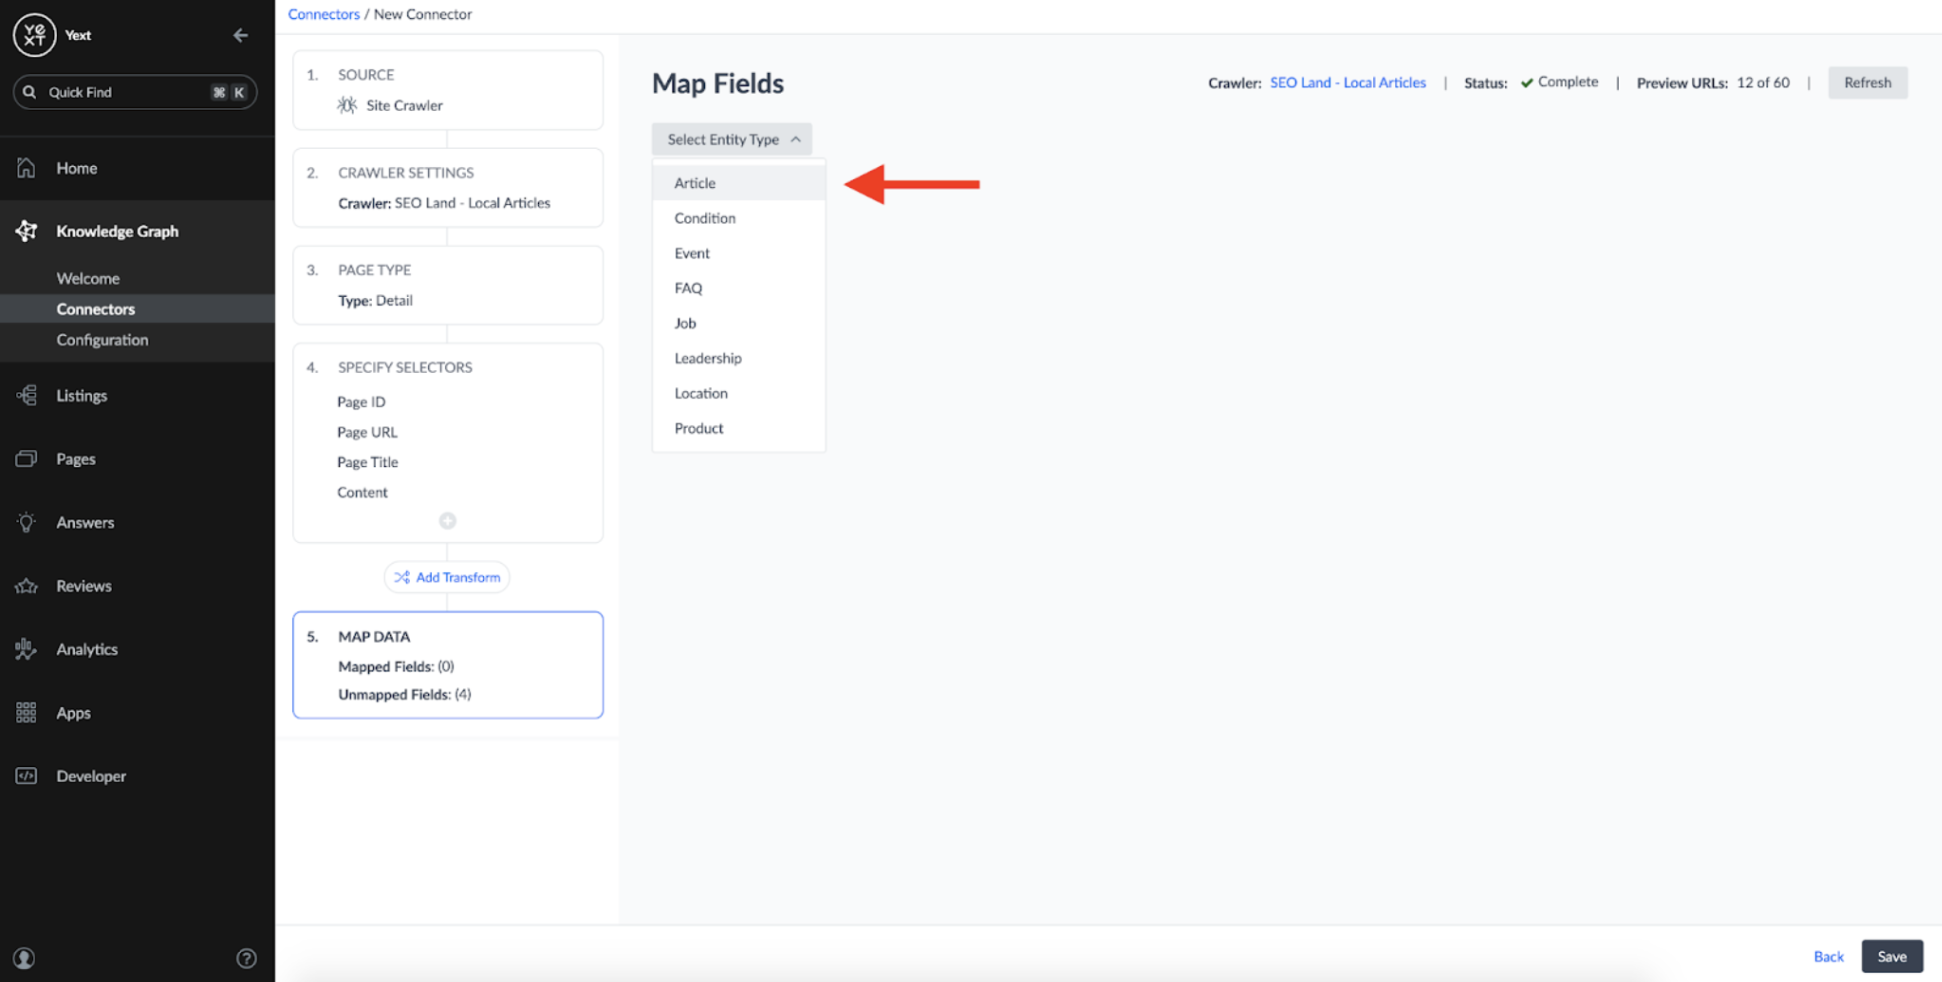
Then mapped fields from our crawl results to the fields on the Article entity type:
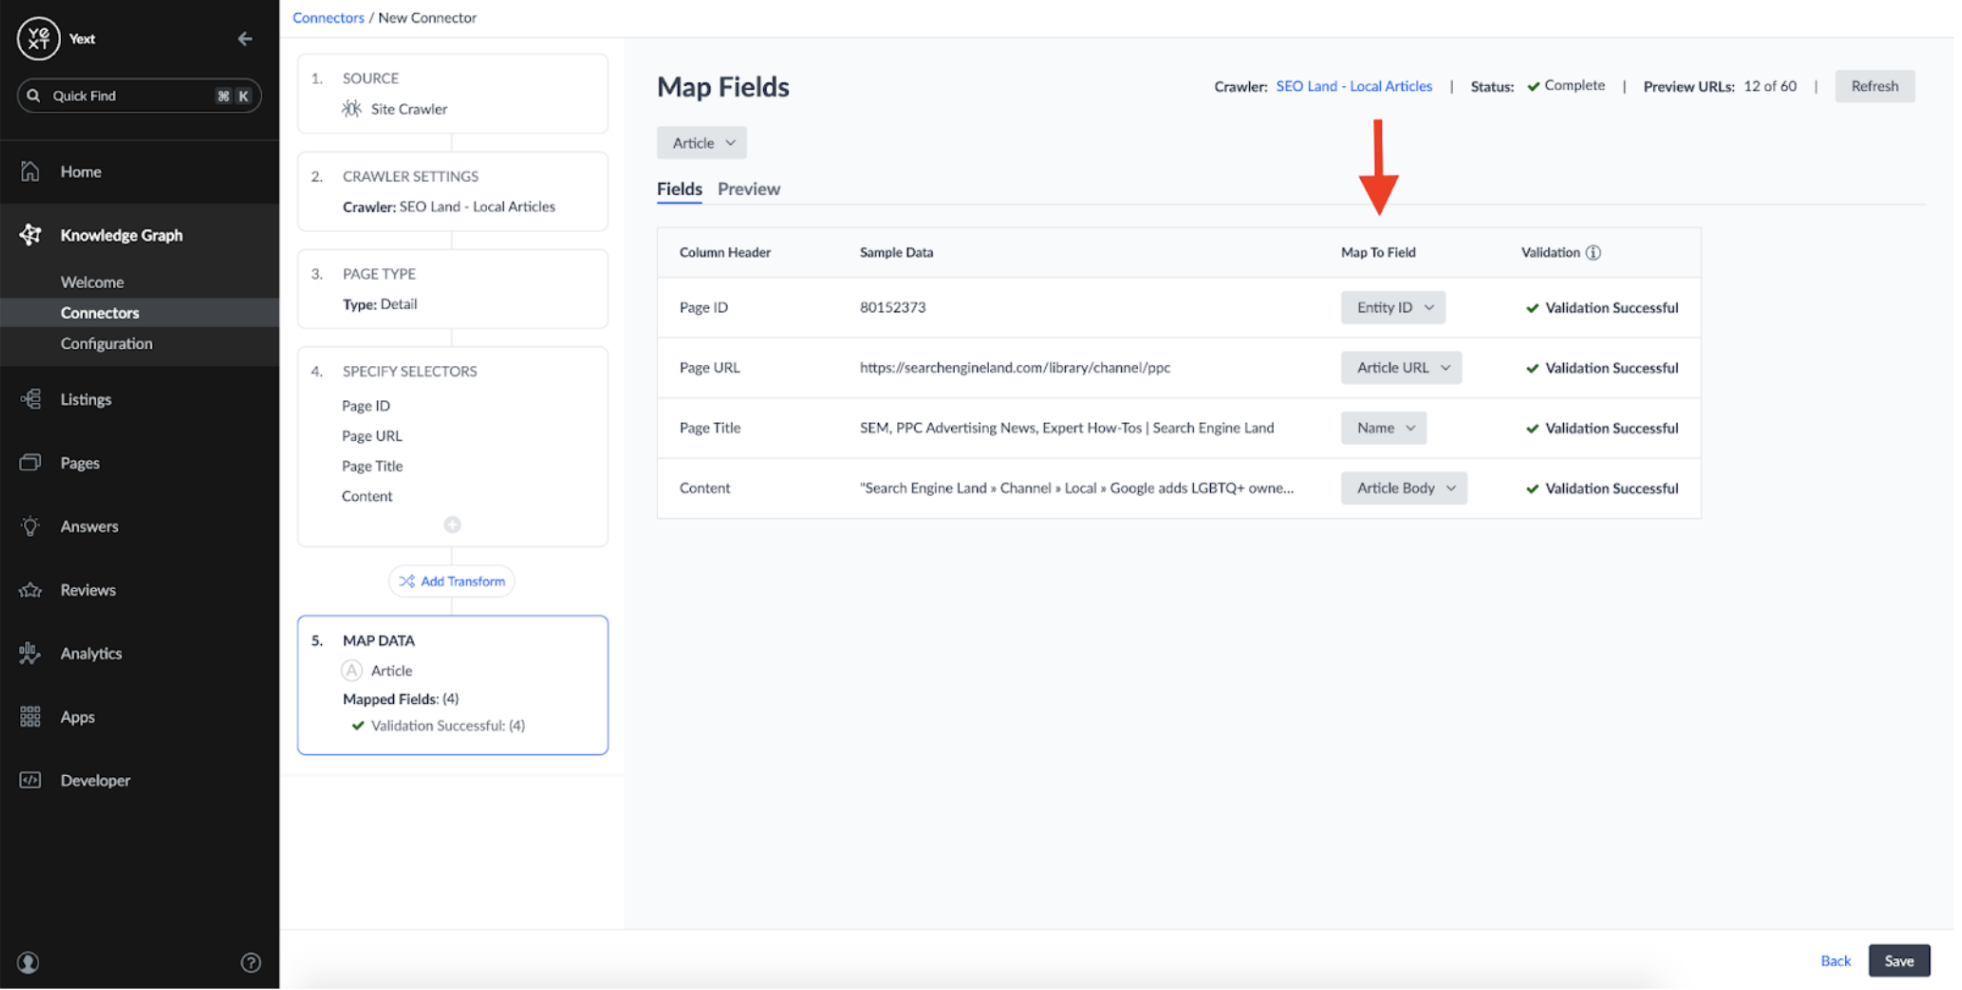
Once that's done, the connector can run and create an entity in the Knowledge Graph for each URL it crawled:
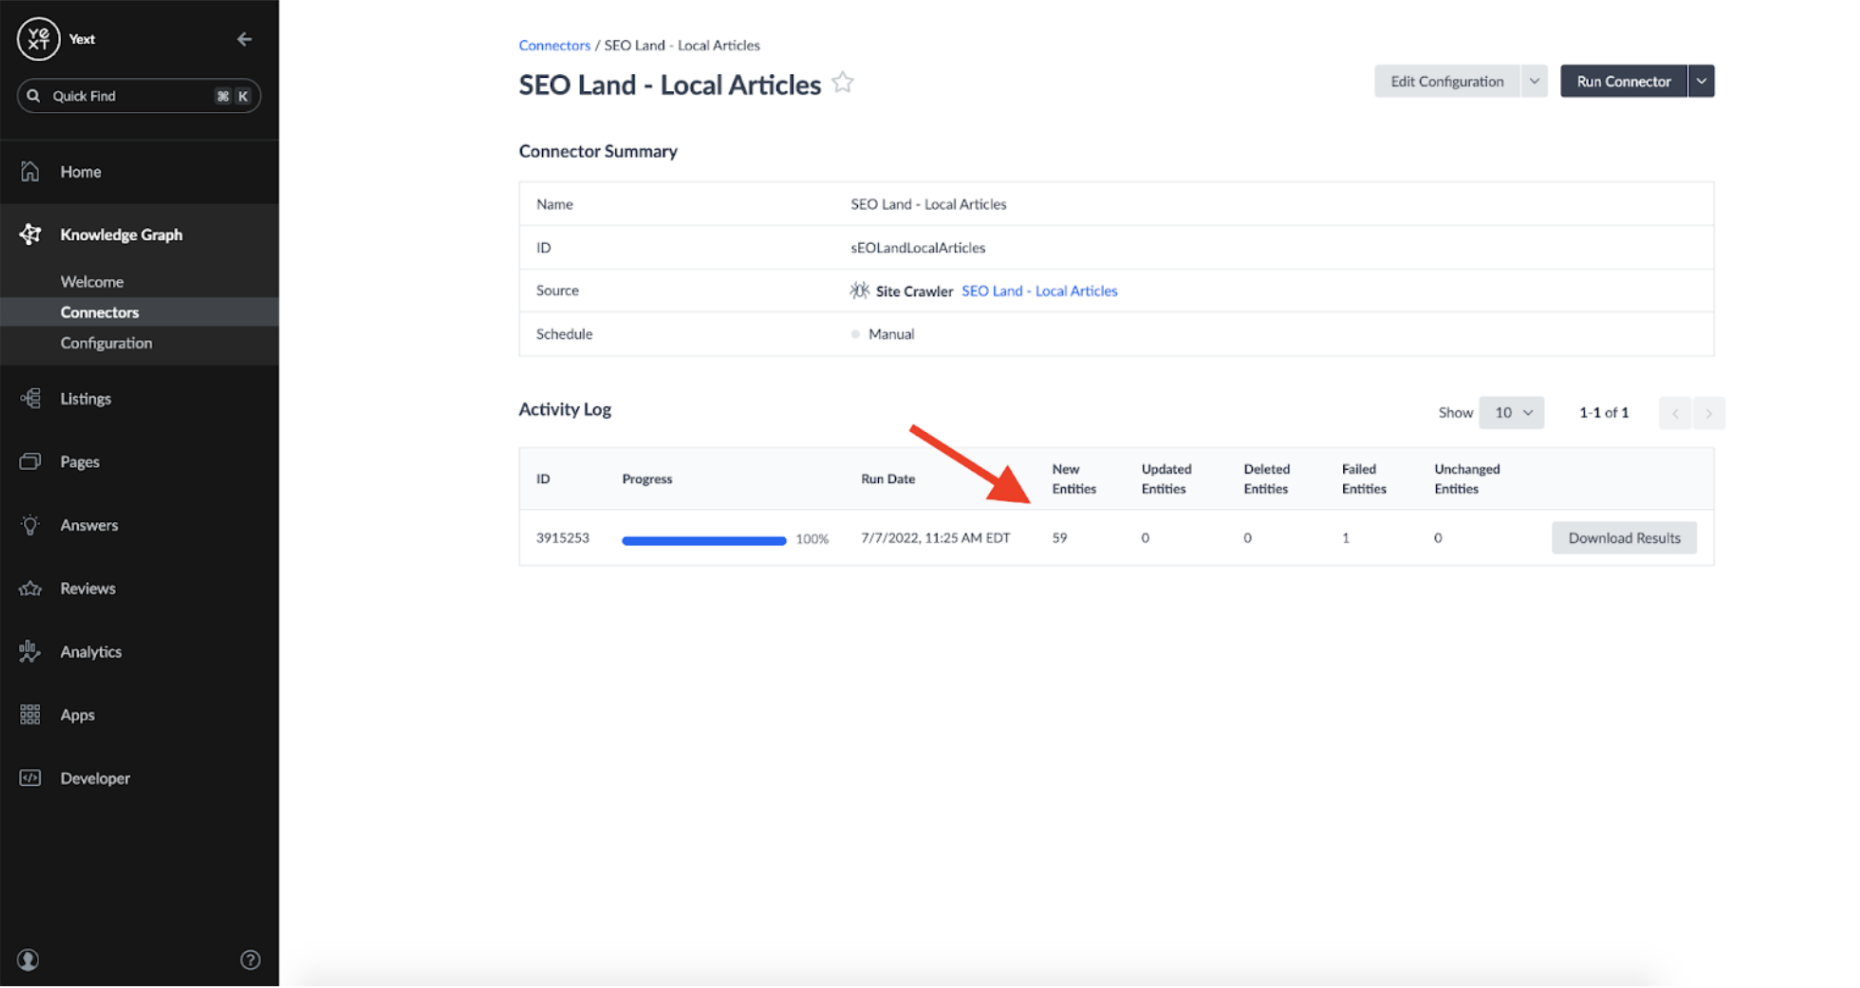
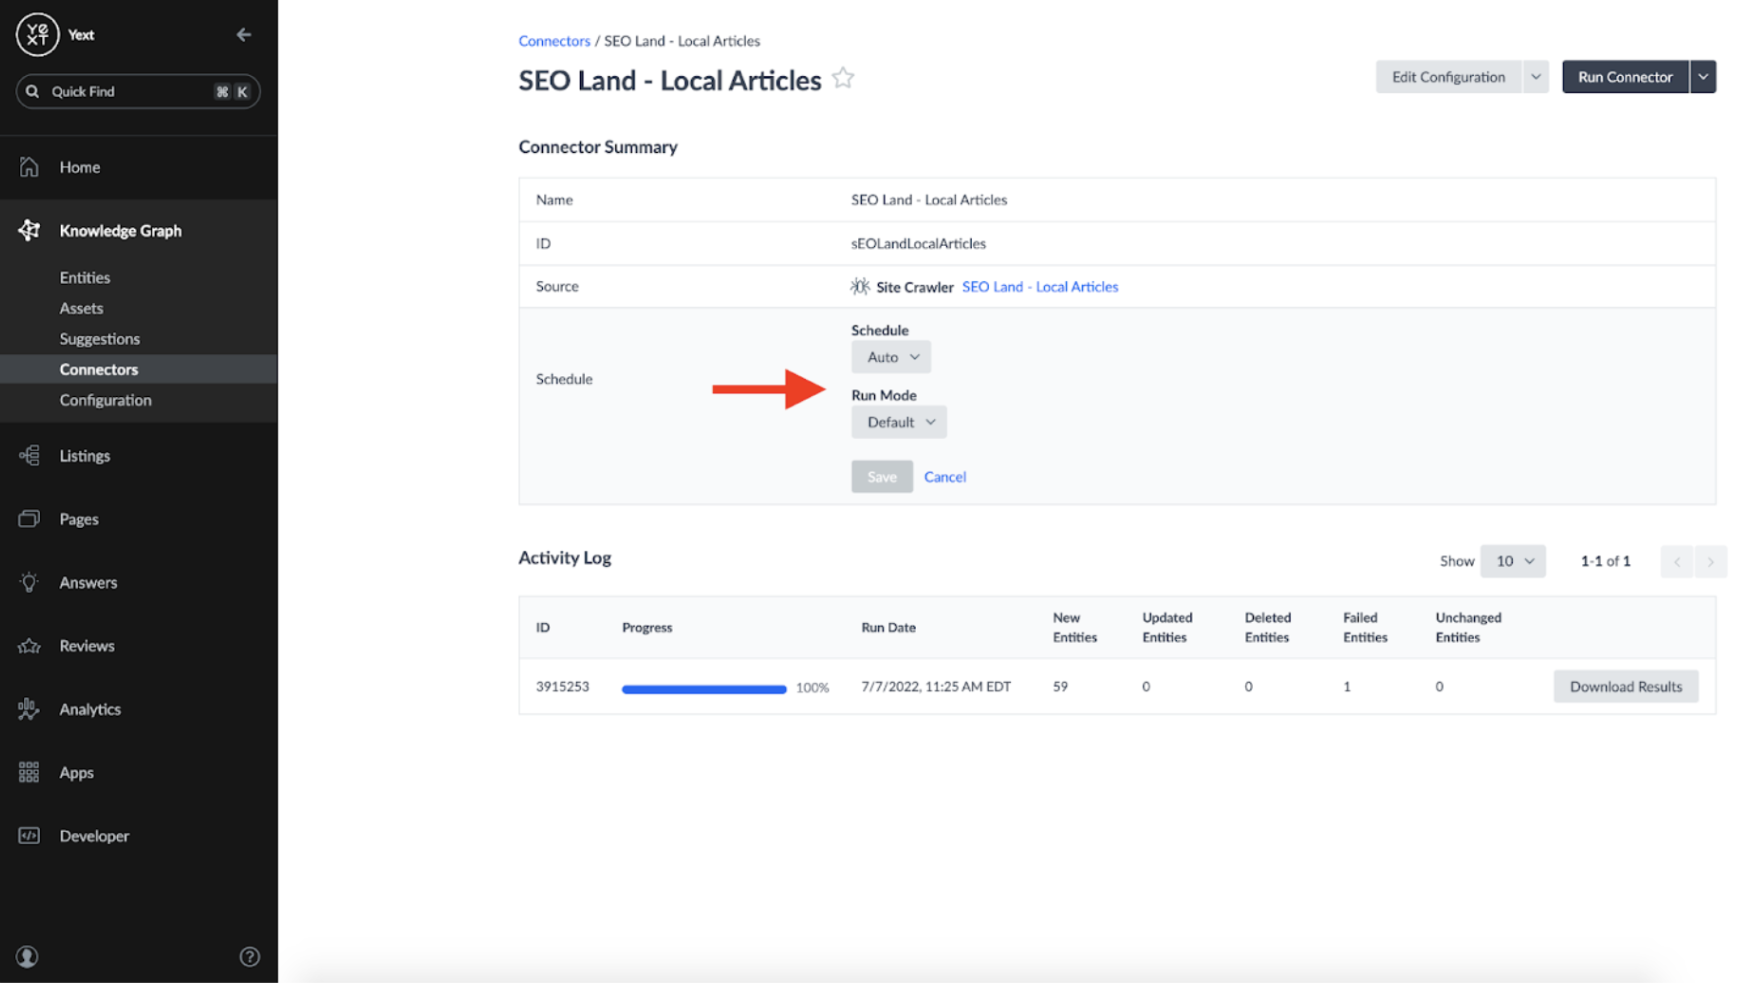
Because I wanted my connector to be responsive to any changes identified by the Crawler, I set the Connector's schedule to 'Auto' and Run Mode to 'Default':
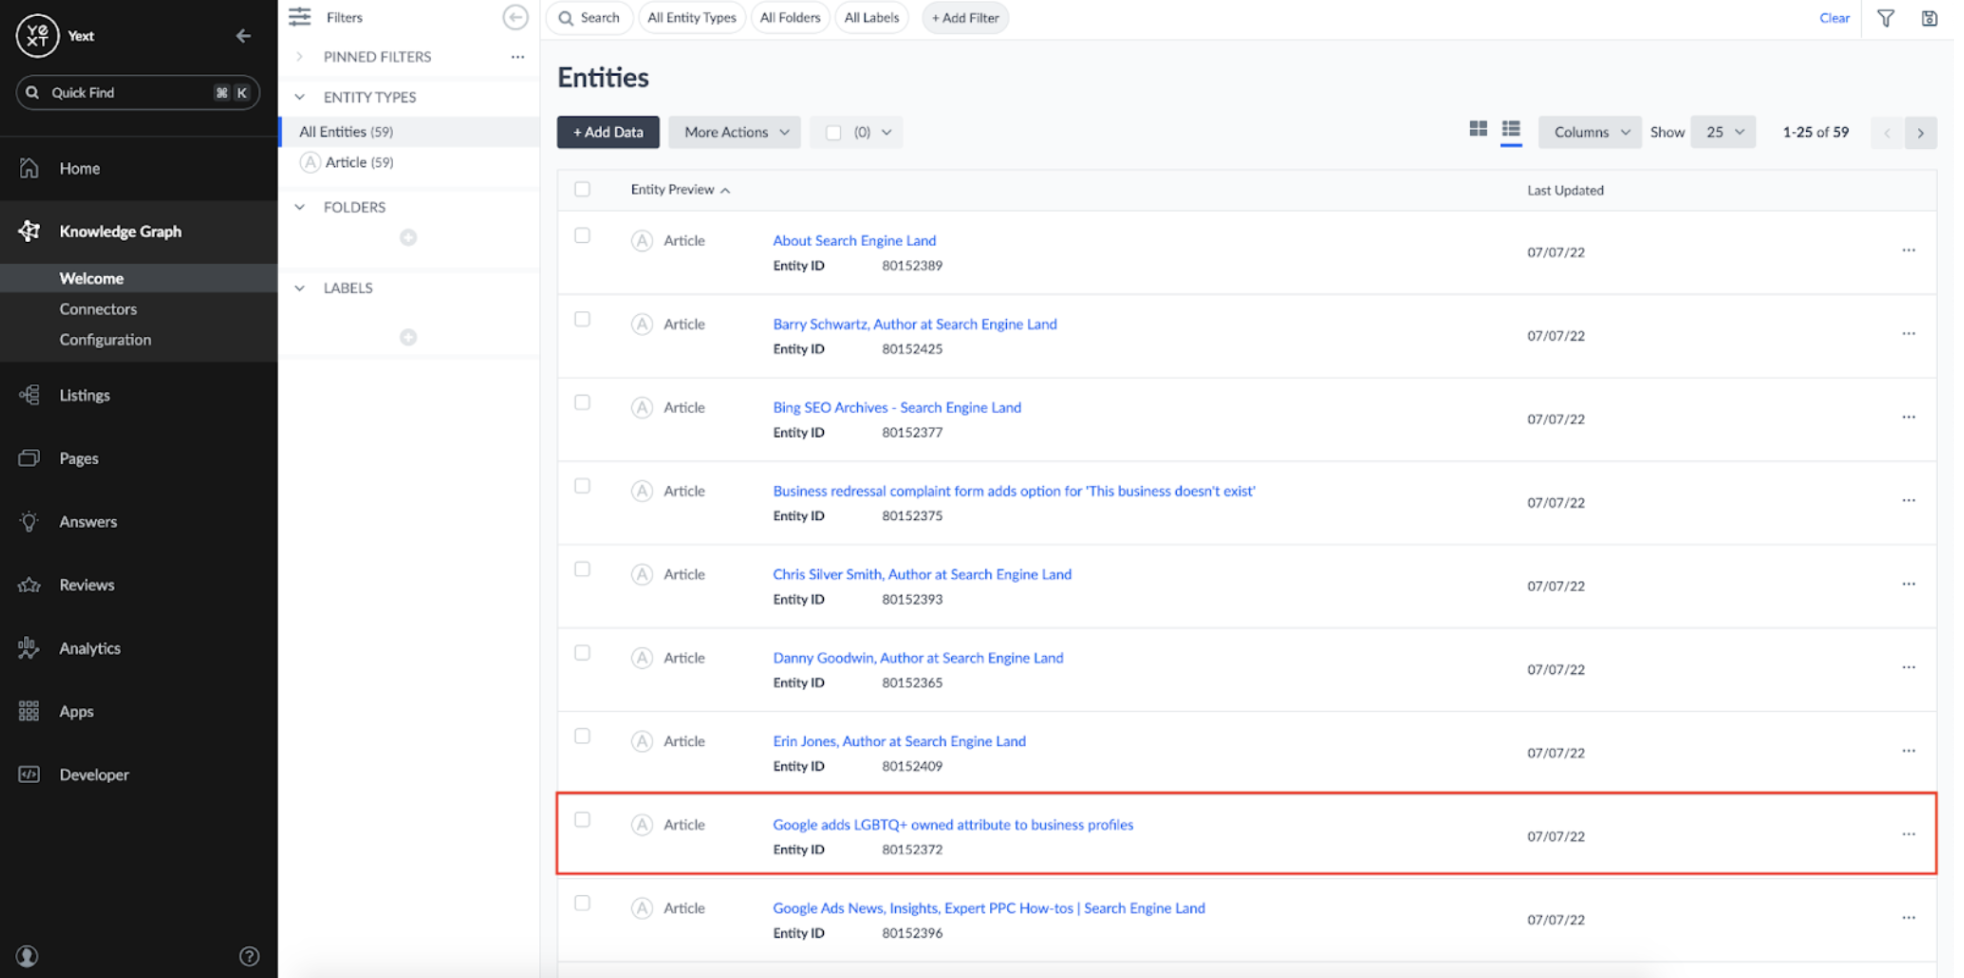
Now, I have a new Knowledge Graph entity for each Article:
Setting up a Webhook
Now that our Knowledge Graph is being updated when a new article is published, it's time to set up a way to notify ourselves of changes. The easiest way to be notified of changes to the Knowledge Graph is to set up an Entities Webhook. Entities Webhooks can be configured to notify external sources of changes within an account's Knowledge Graph.
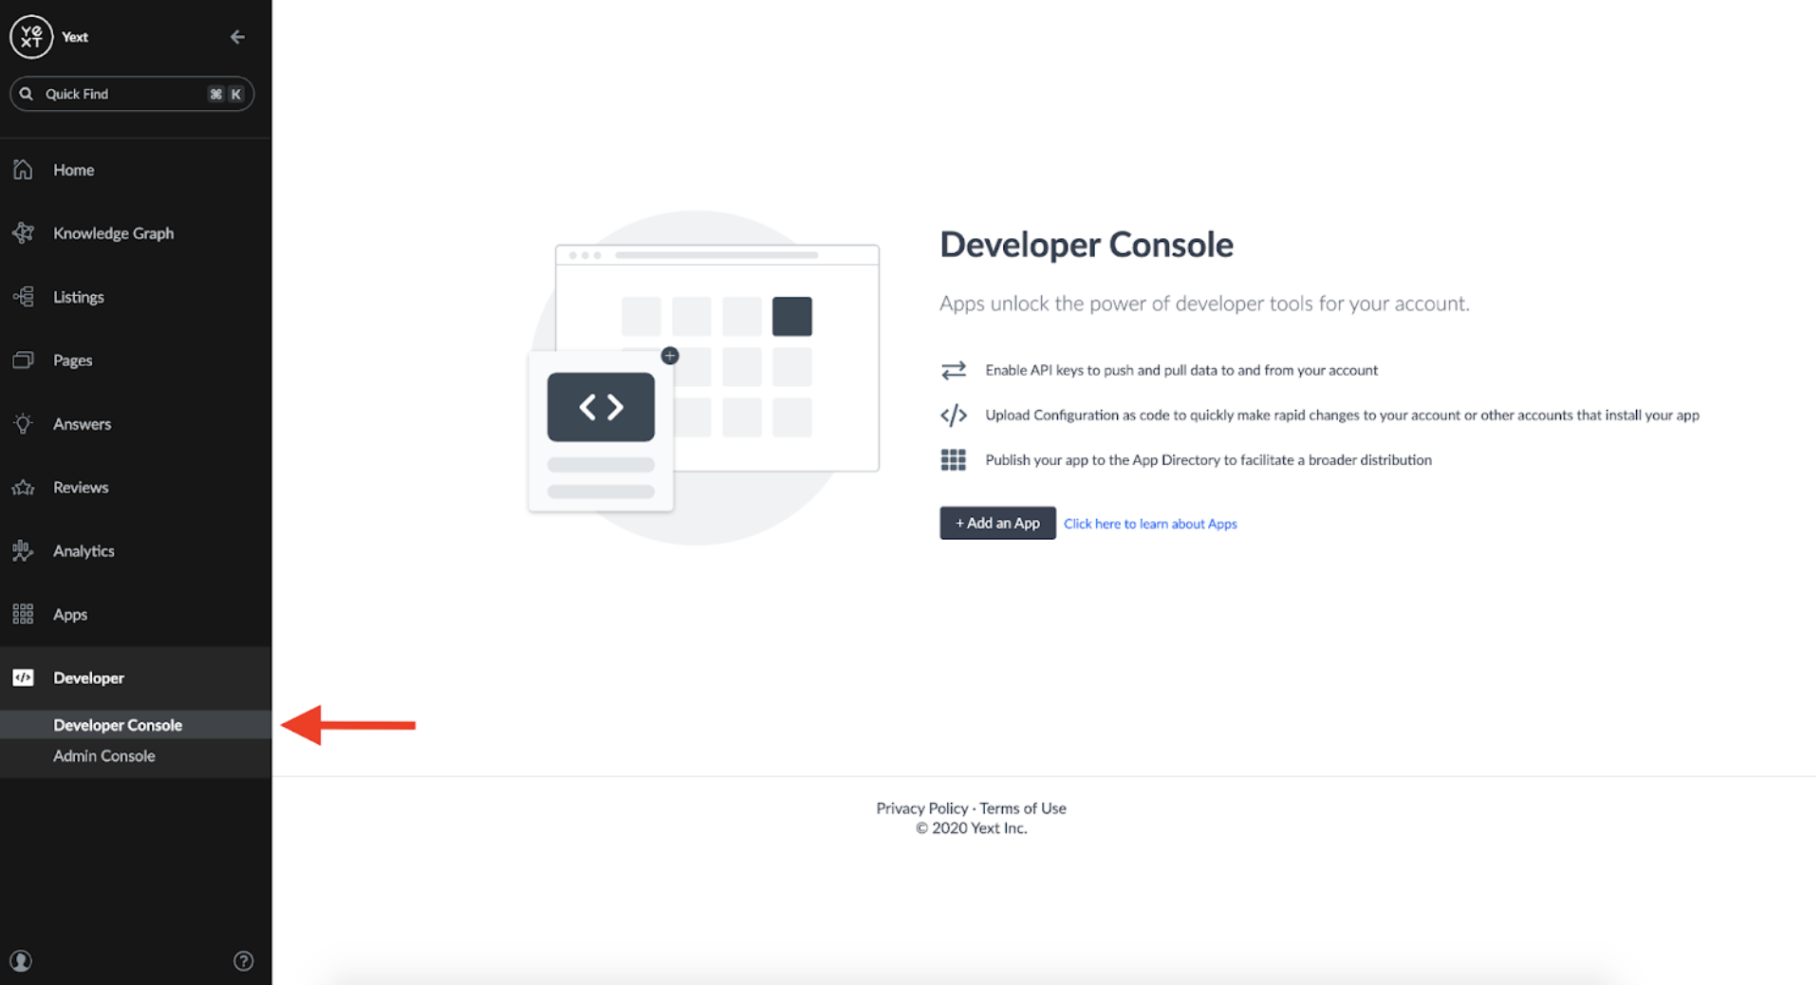
To set up a webhook, we'll need to create an App in the Developer Console:
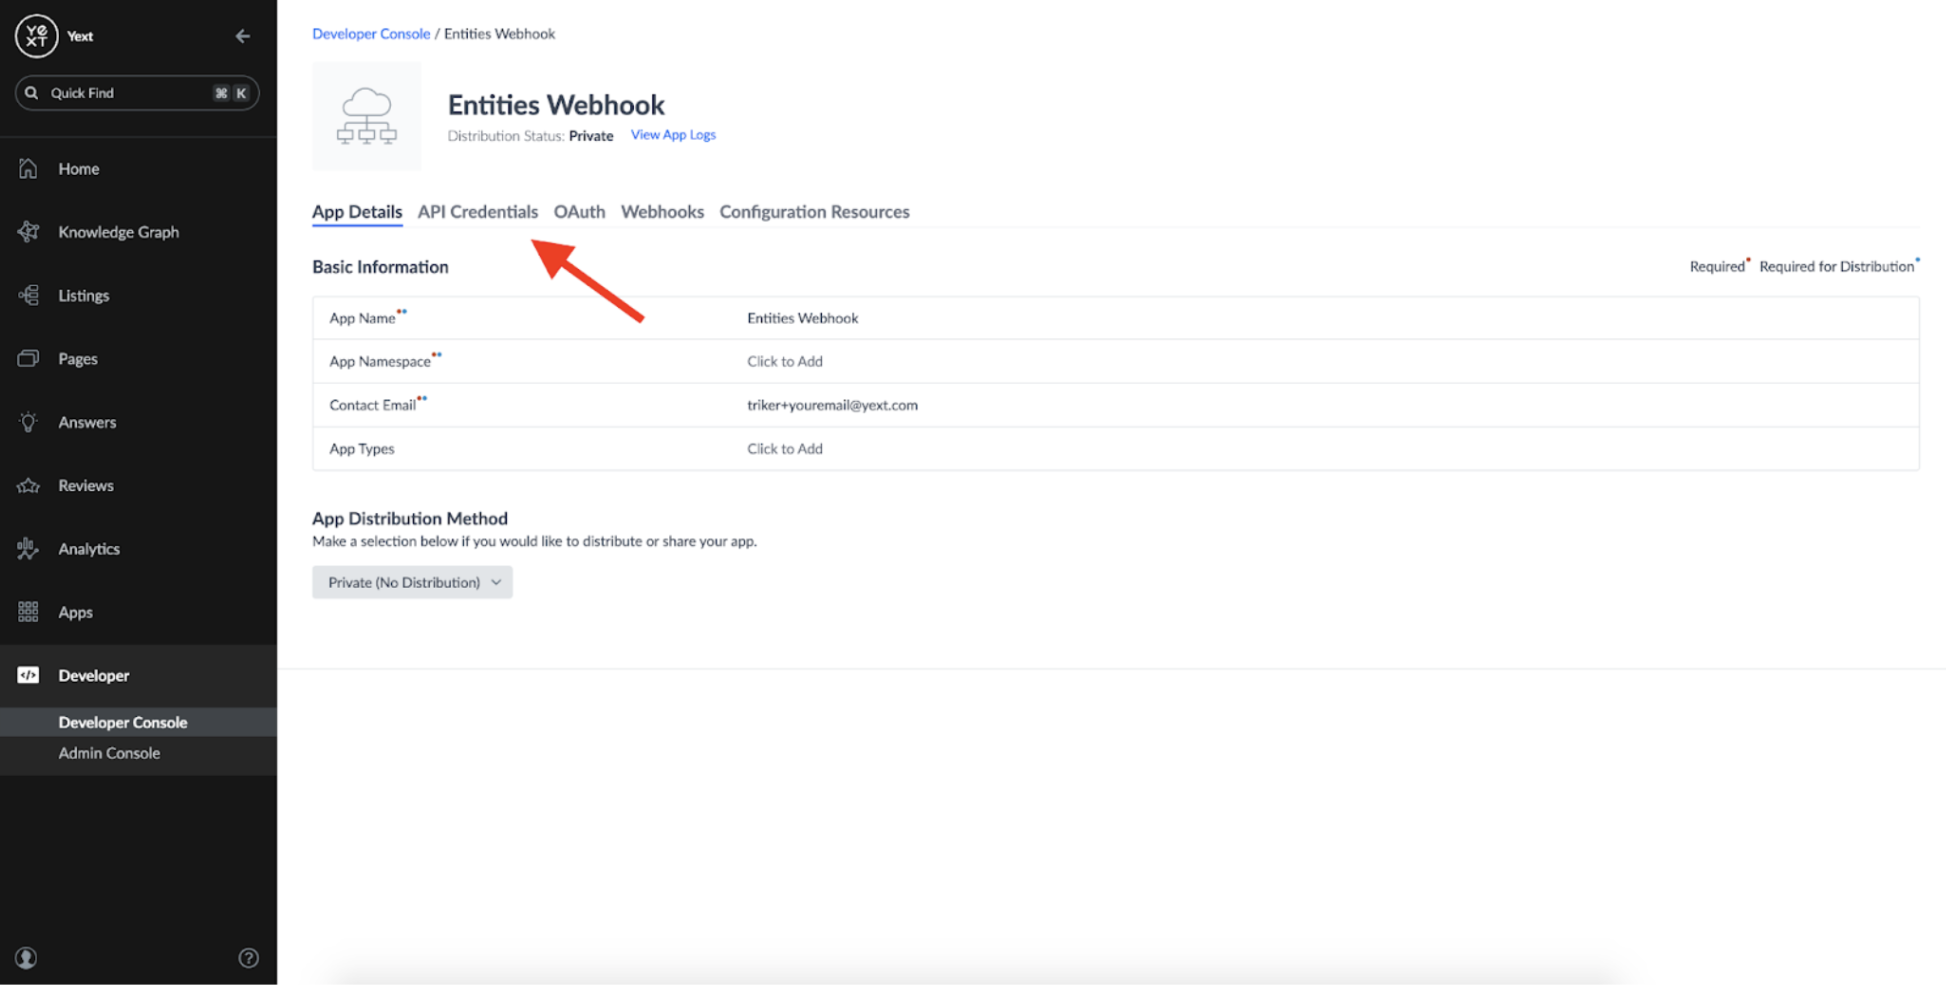
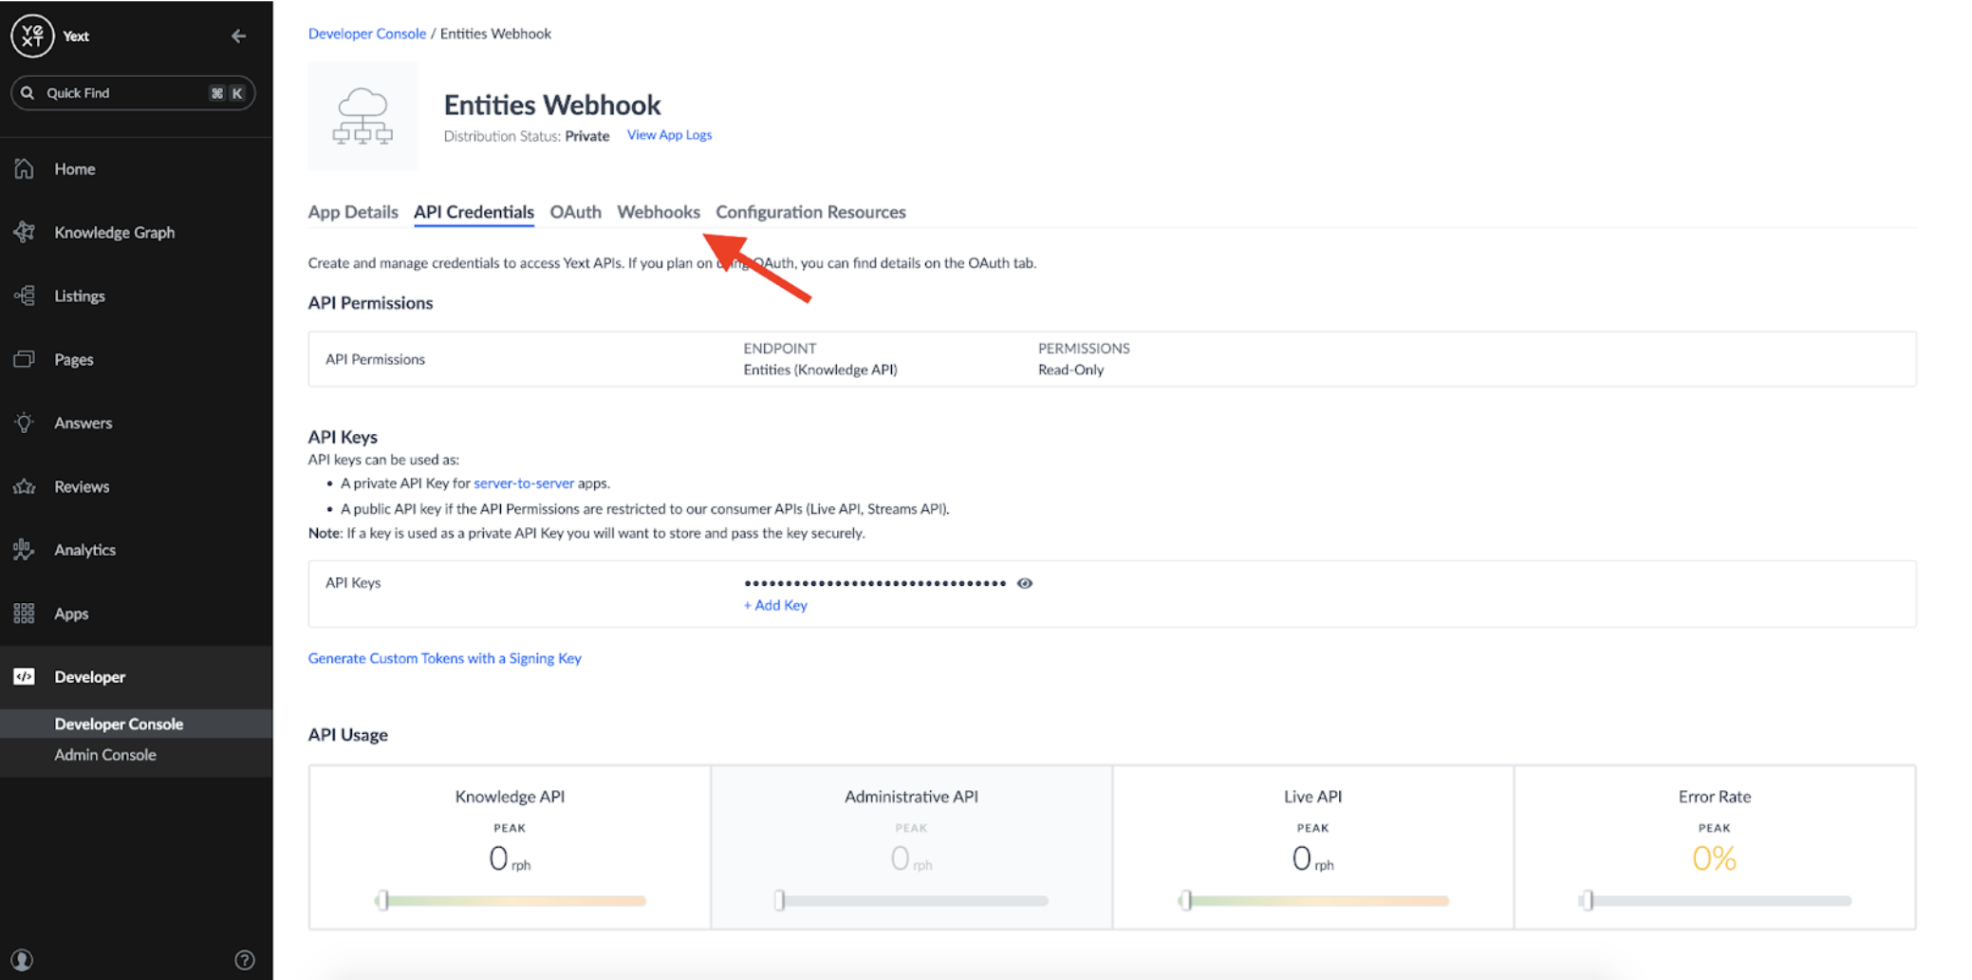
Once an app is created, we'll need to give it the appropriate permissions to read from the Knowledge Graph. We can do this by clicking into 'API Credentials':
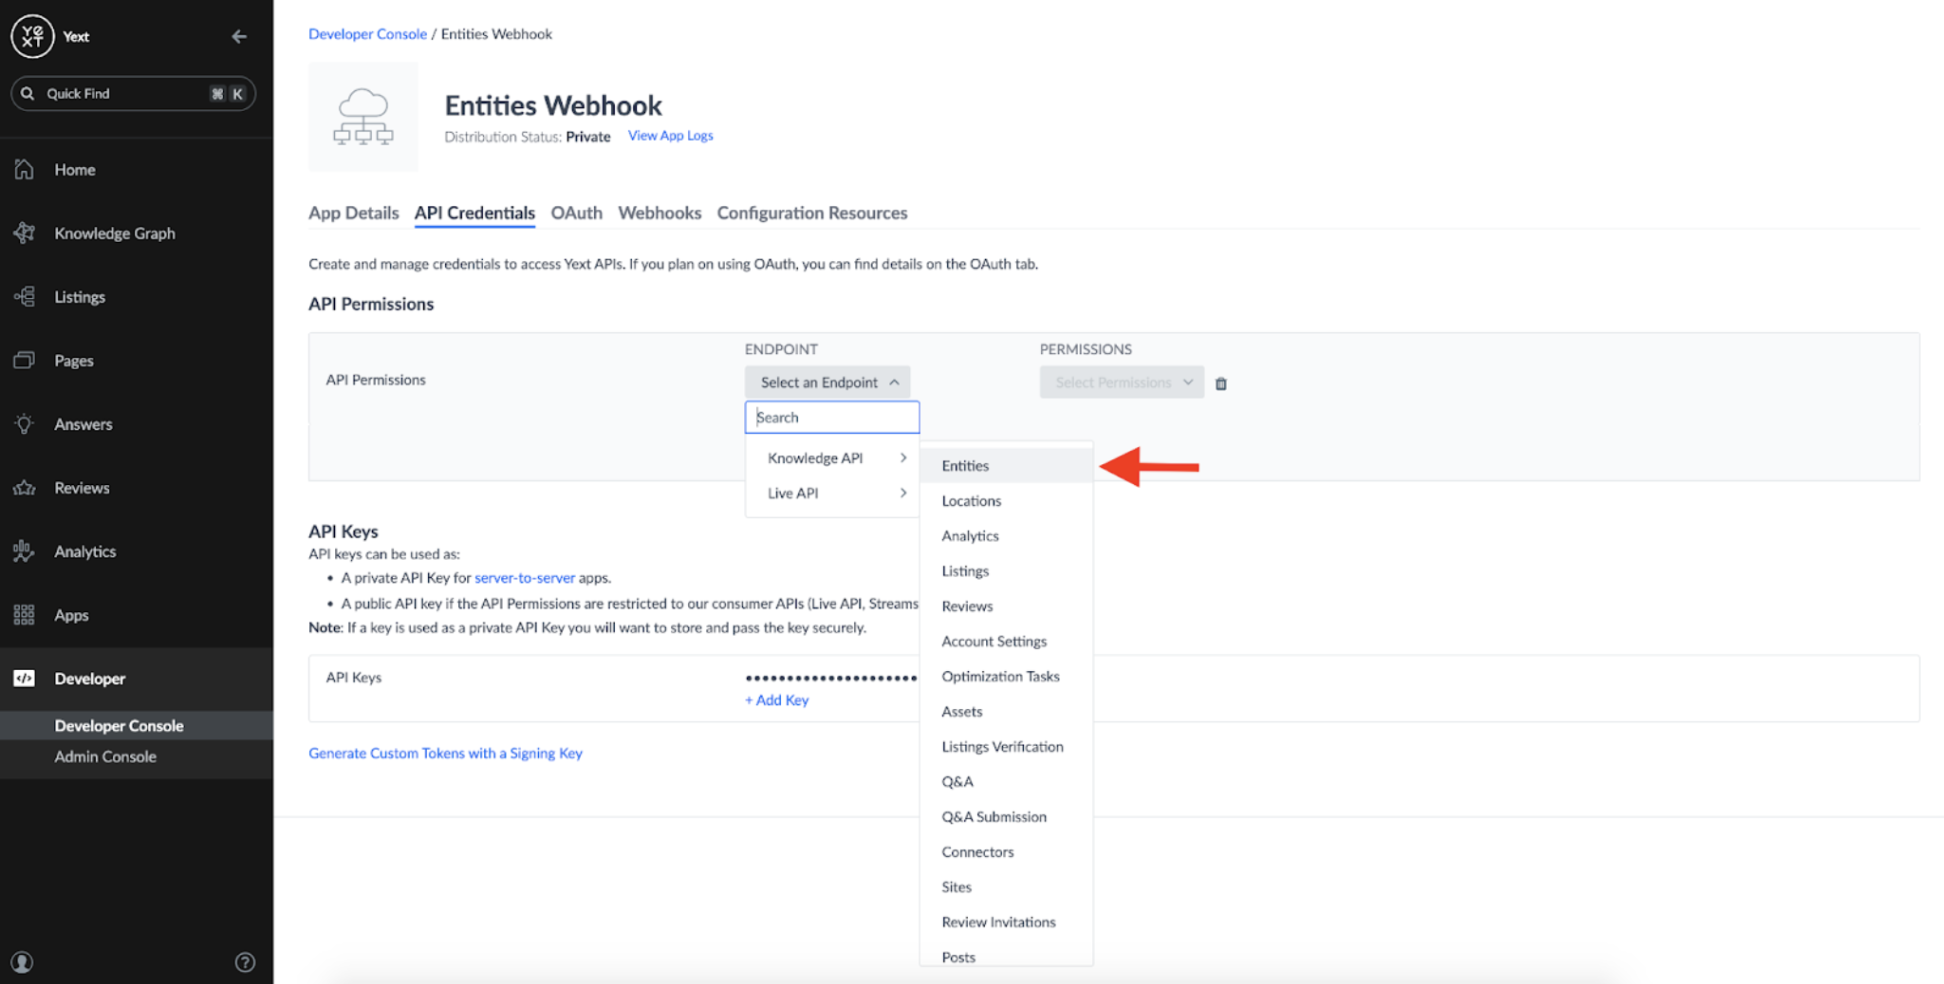
And adding the Knowledge API: Entities Endpoint:
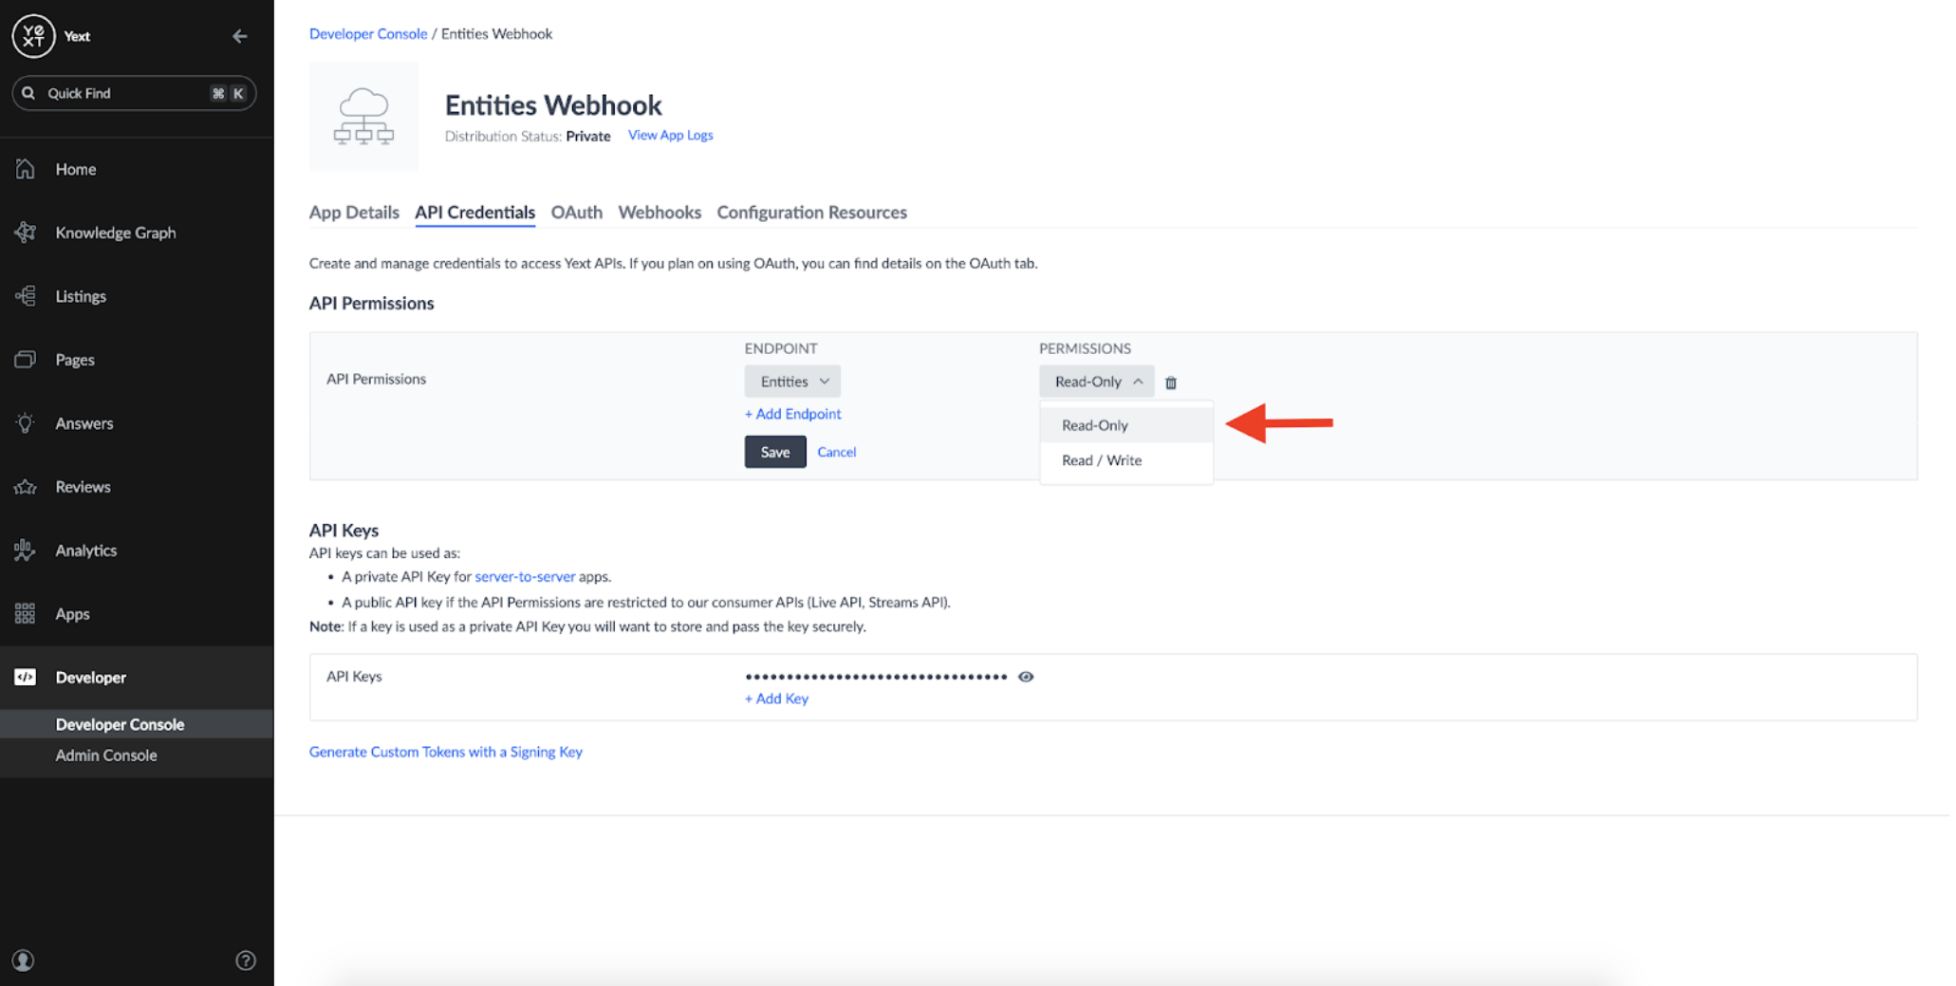
We only need a Read-Only permission as all this App will be doing is listening for changes to our Entities:
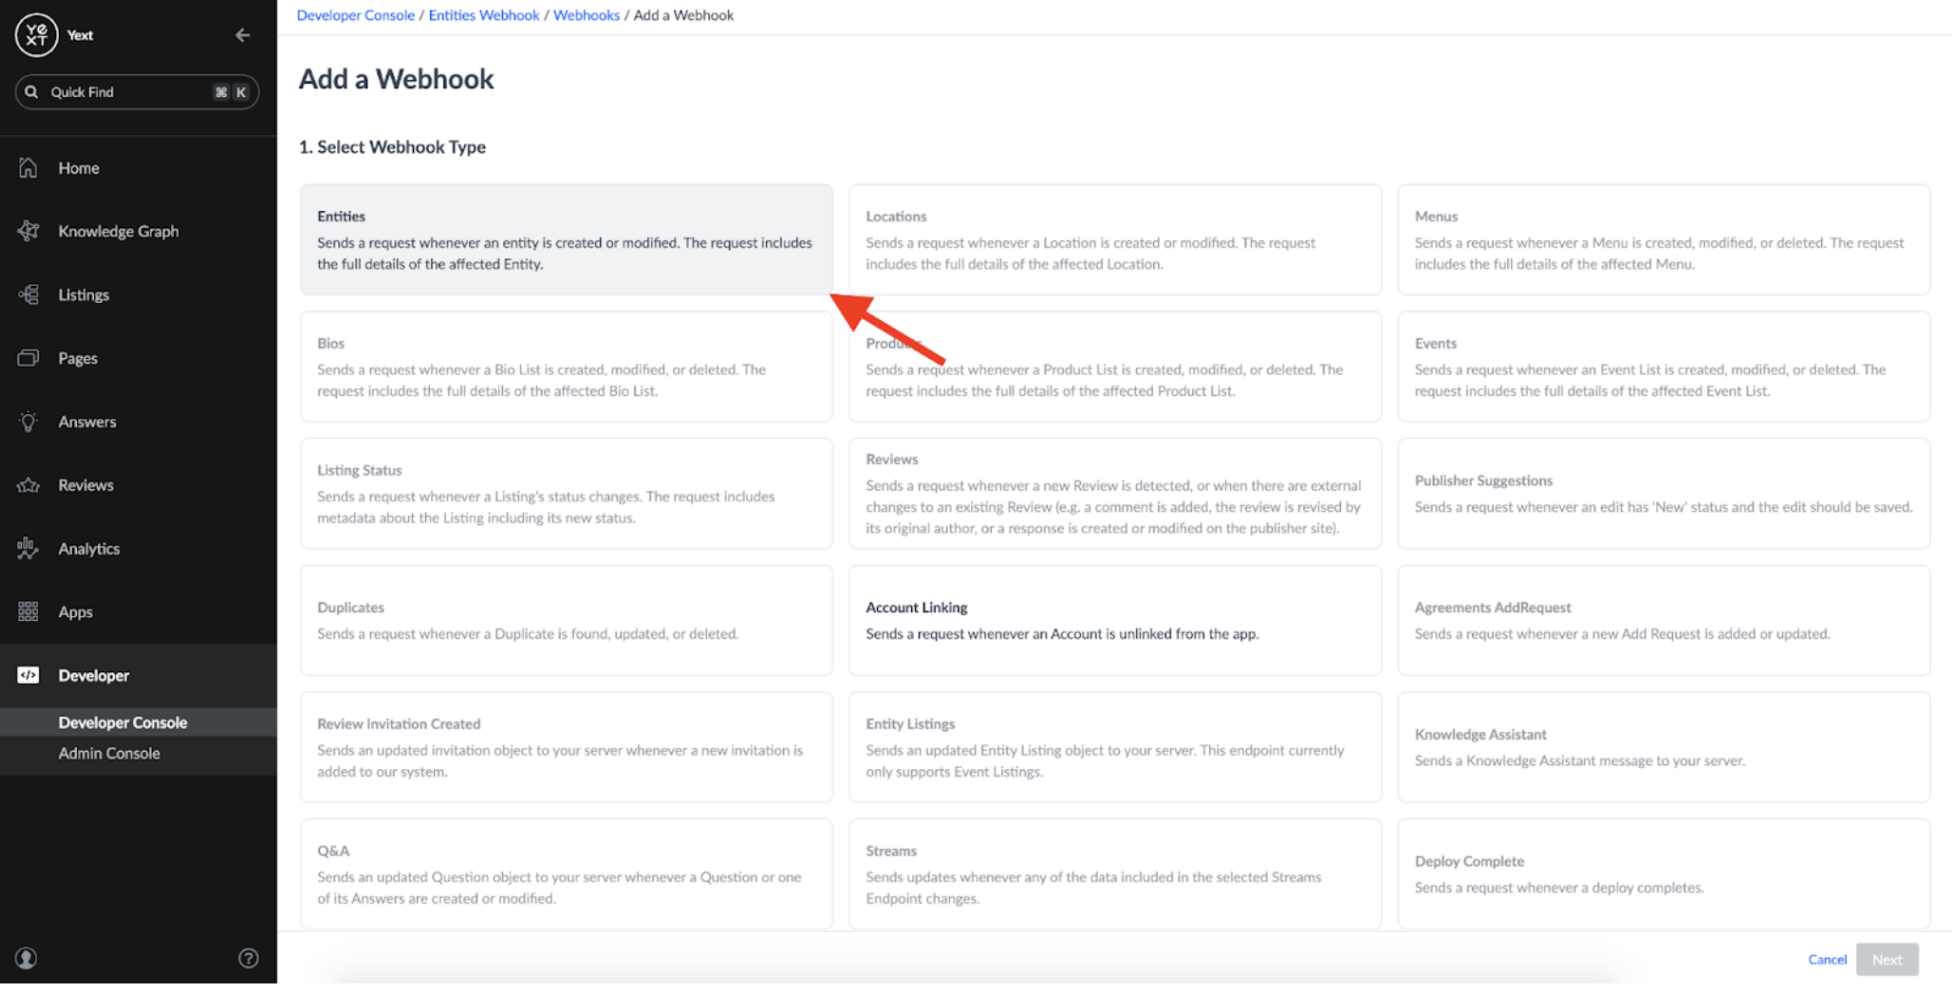
Once that's done, we can set up a Webhook:
When you add a webhook, you should see the option to create an Entities webhook:
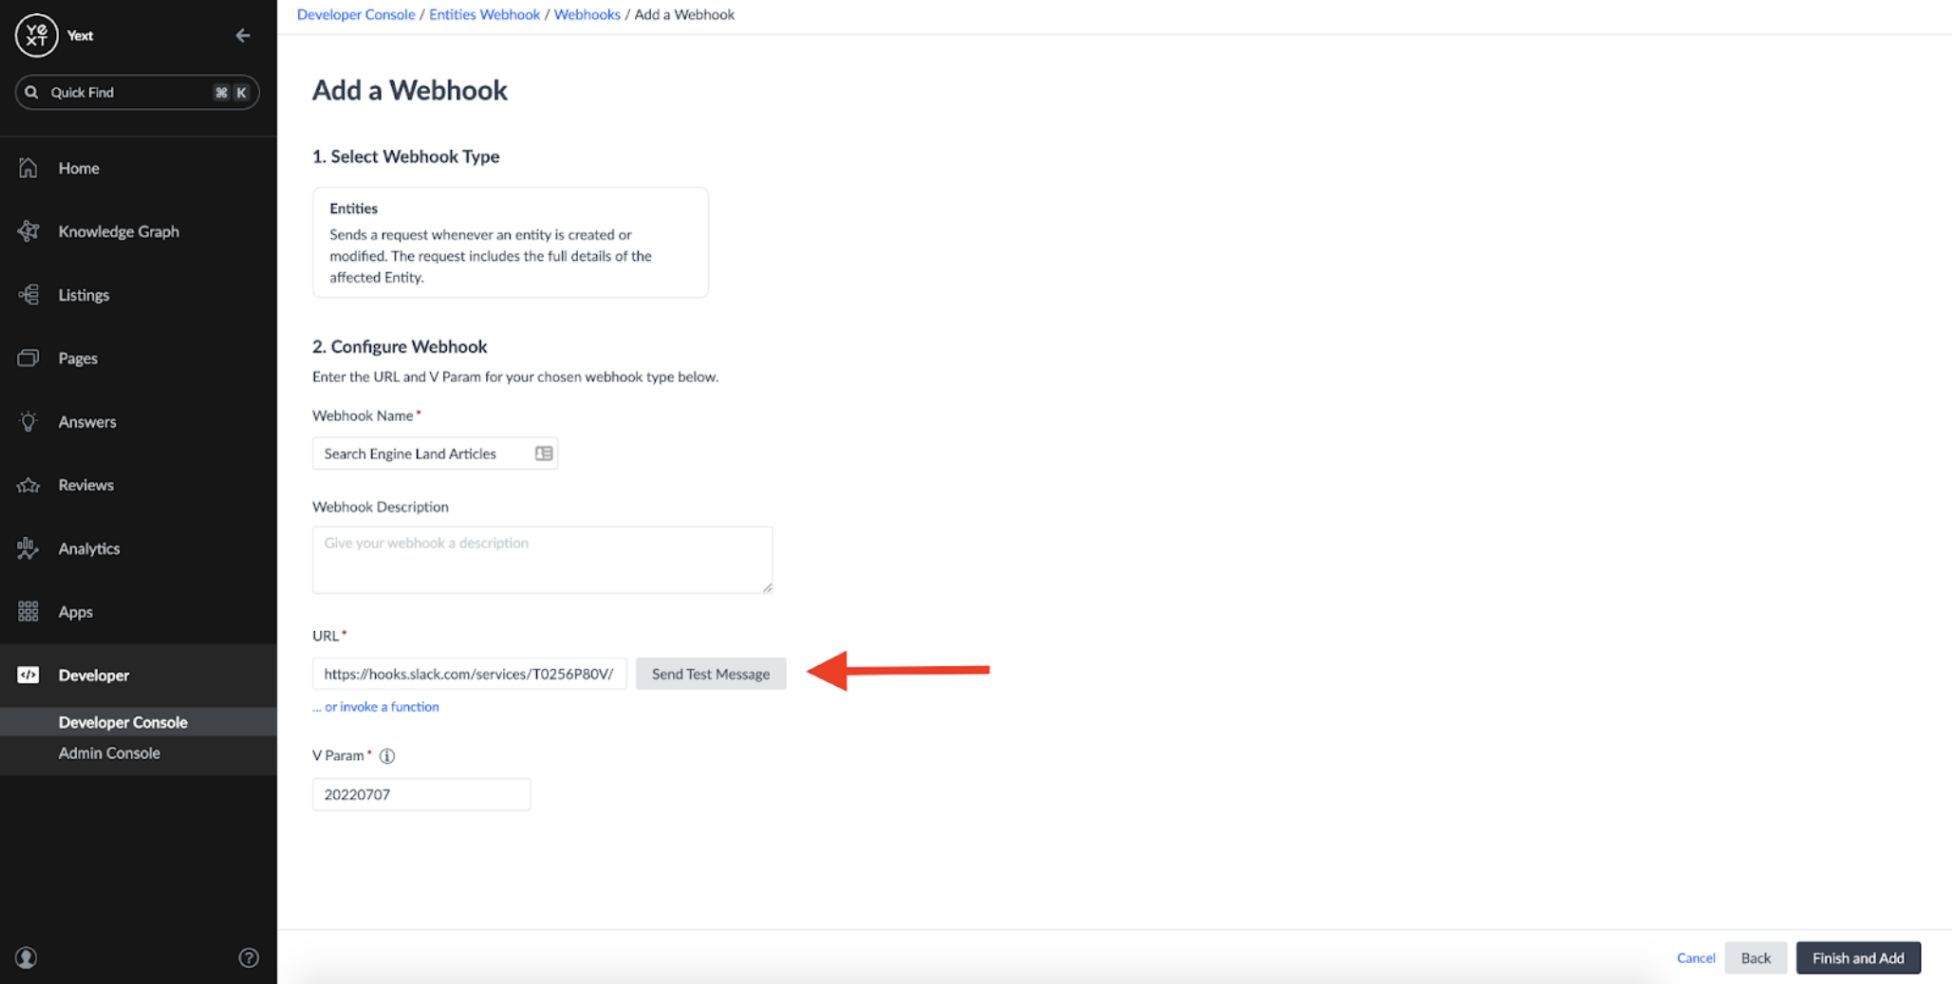
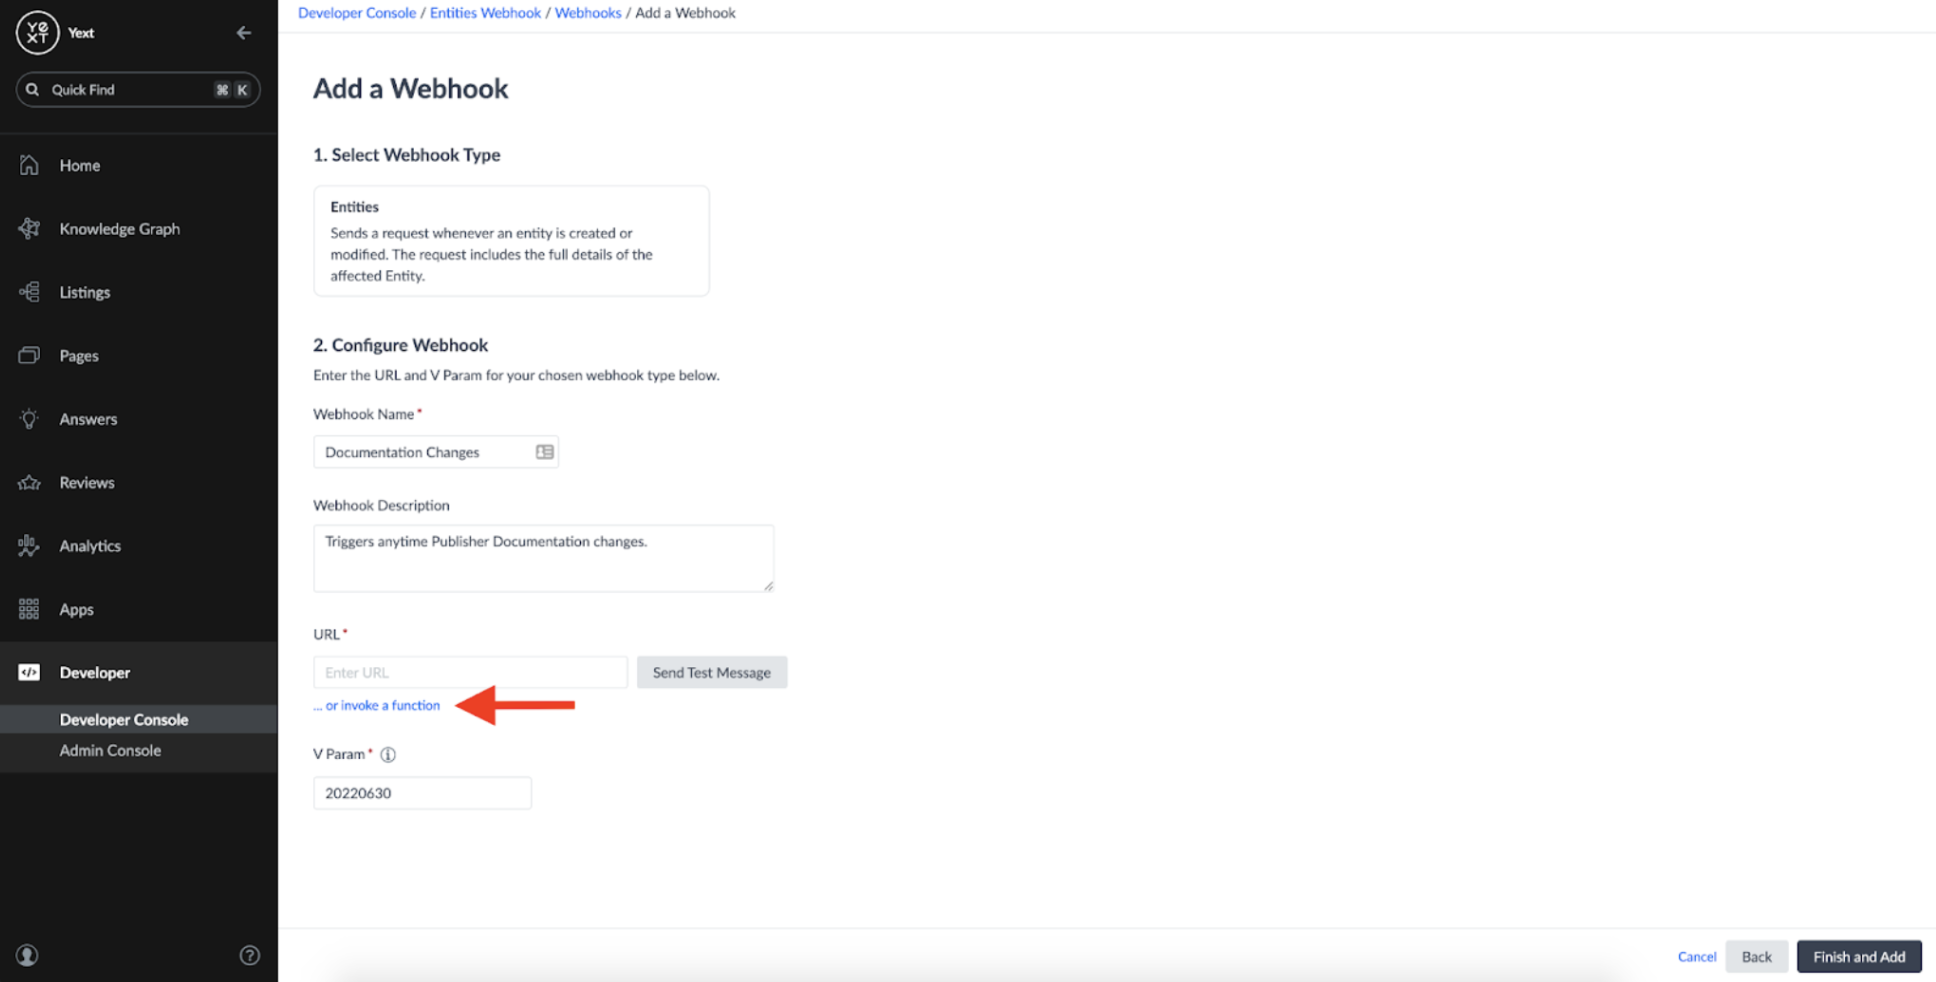
We can add a name and description to our webook, as well as provide a URL where the message should be sent:
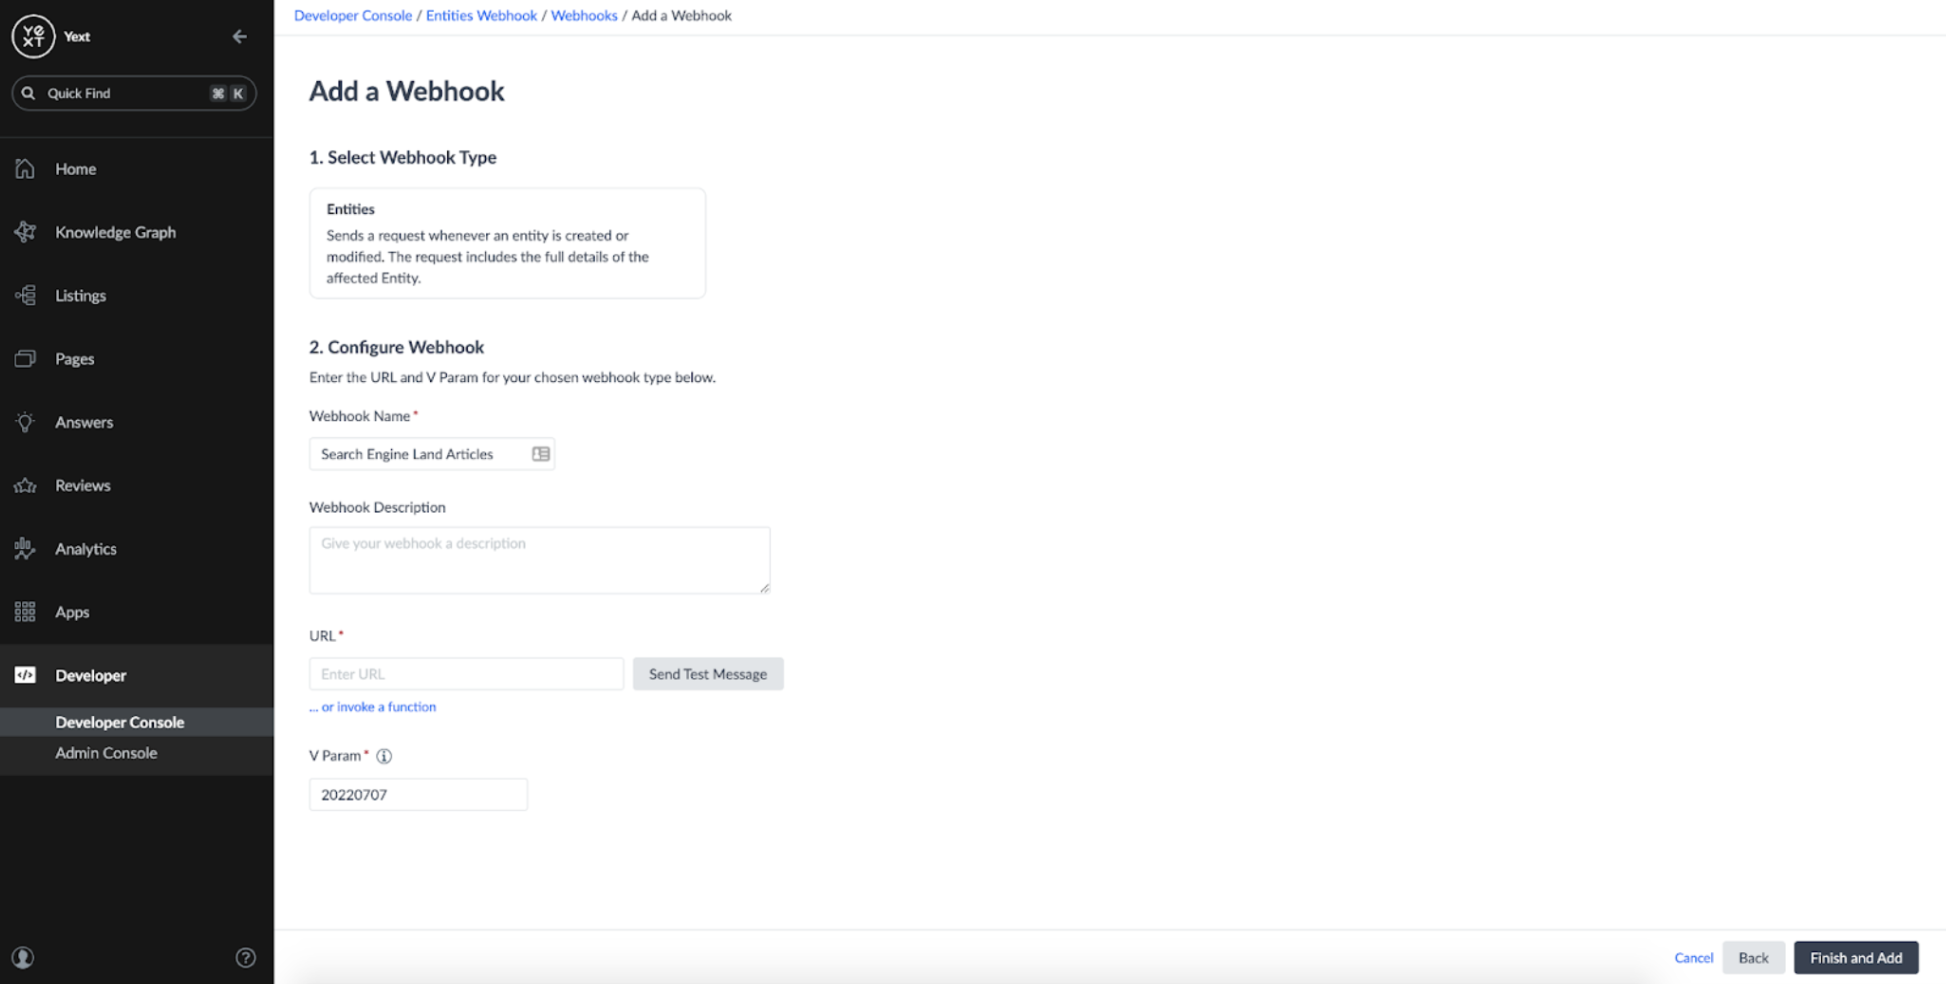
At this point, I need to decide the destination for my webhook. I can set it up to point towards some external server which can handle the messages. In this case, I want to set it up to trigger a Slack notification whenever the webhook fires.
Slack has a ton of great resources out there for creating custom experiences that interact with third parties. If you have Slack, you can set up an App from https://api.slack.com/apps. For this example, I set up a new App and configured it to listen to Incoming Webhooks:

We can configure this app to associate a unique Webhook URL with any channel in a Slack workspace. In this case, I set up a channel called #documentation-monitoring-v2, and Slack gave me a unique URL which could be used to listen to incoming Webhooks:
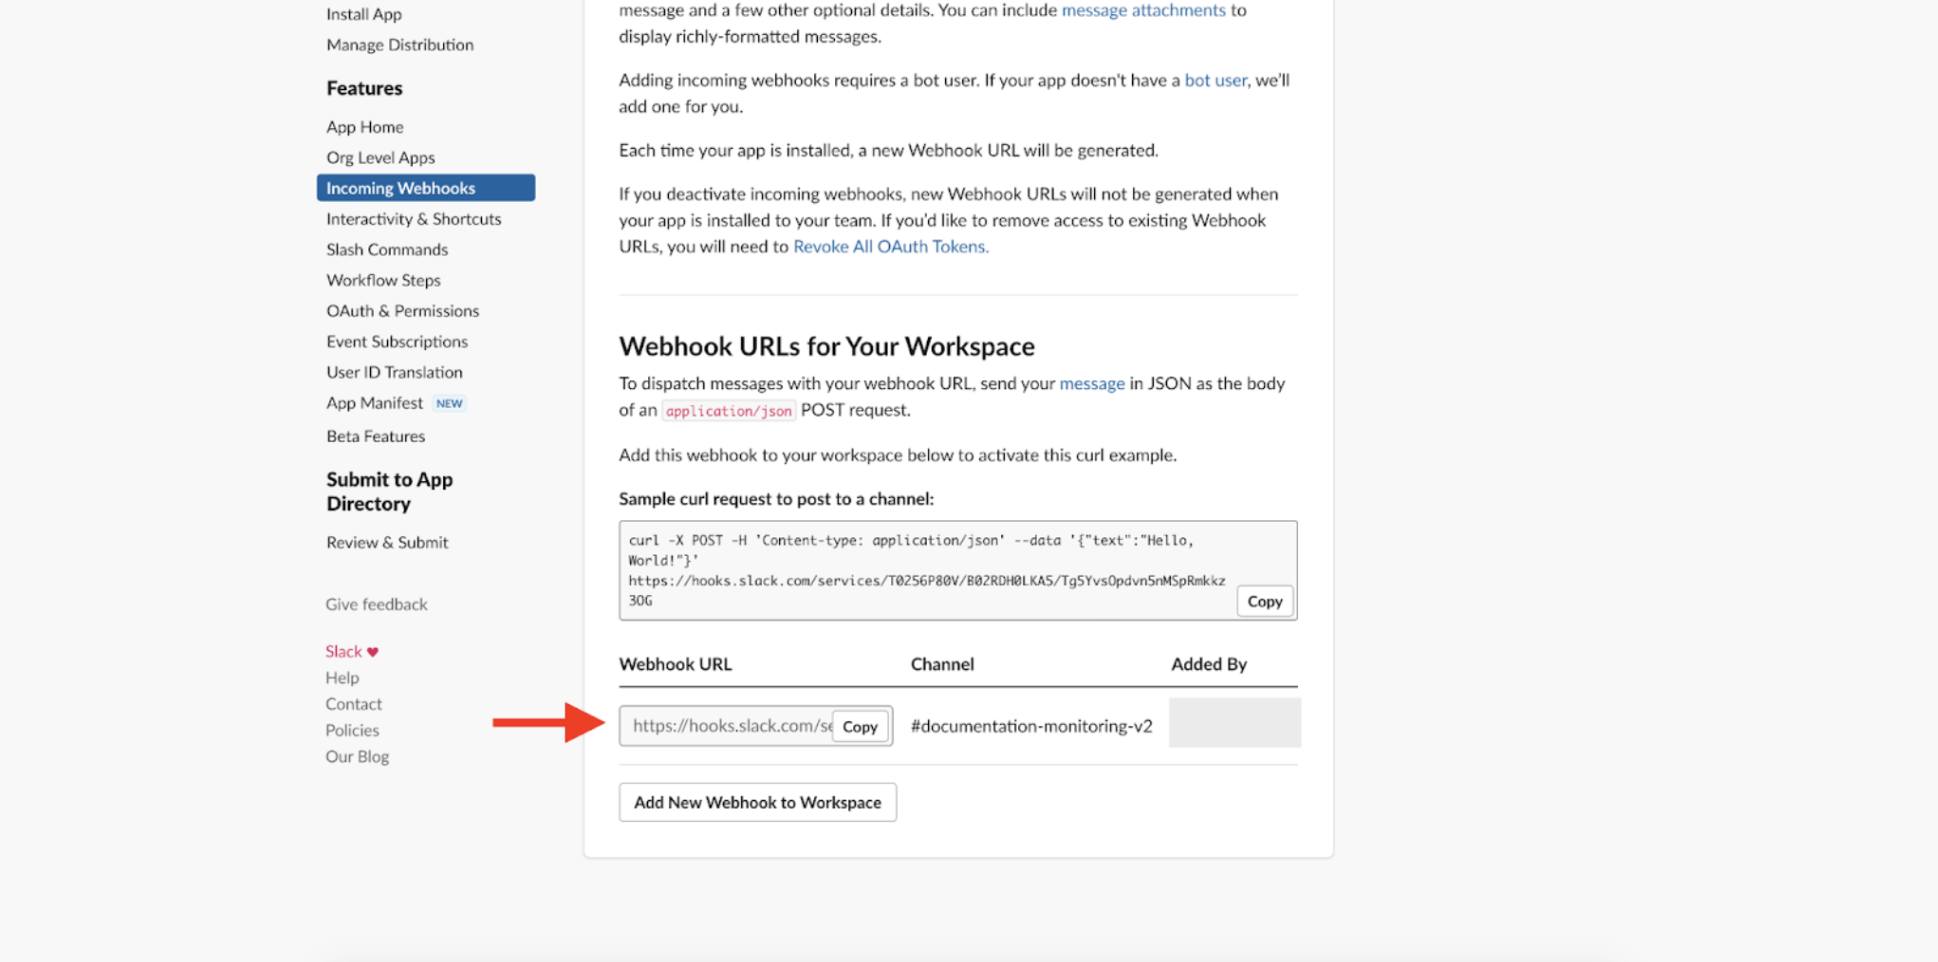
If we copy this URL and add it to the Webhook we set up earlier, it seems like we should be in business.
However, if we try sending a test message, we can see that the Webhook fails to deliver to Slack:
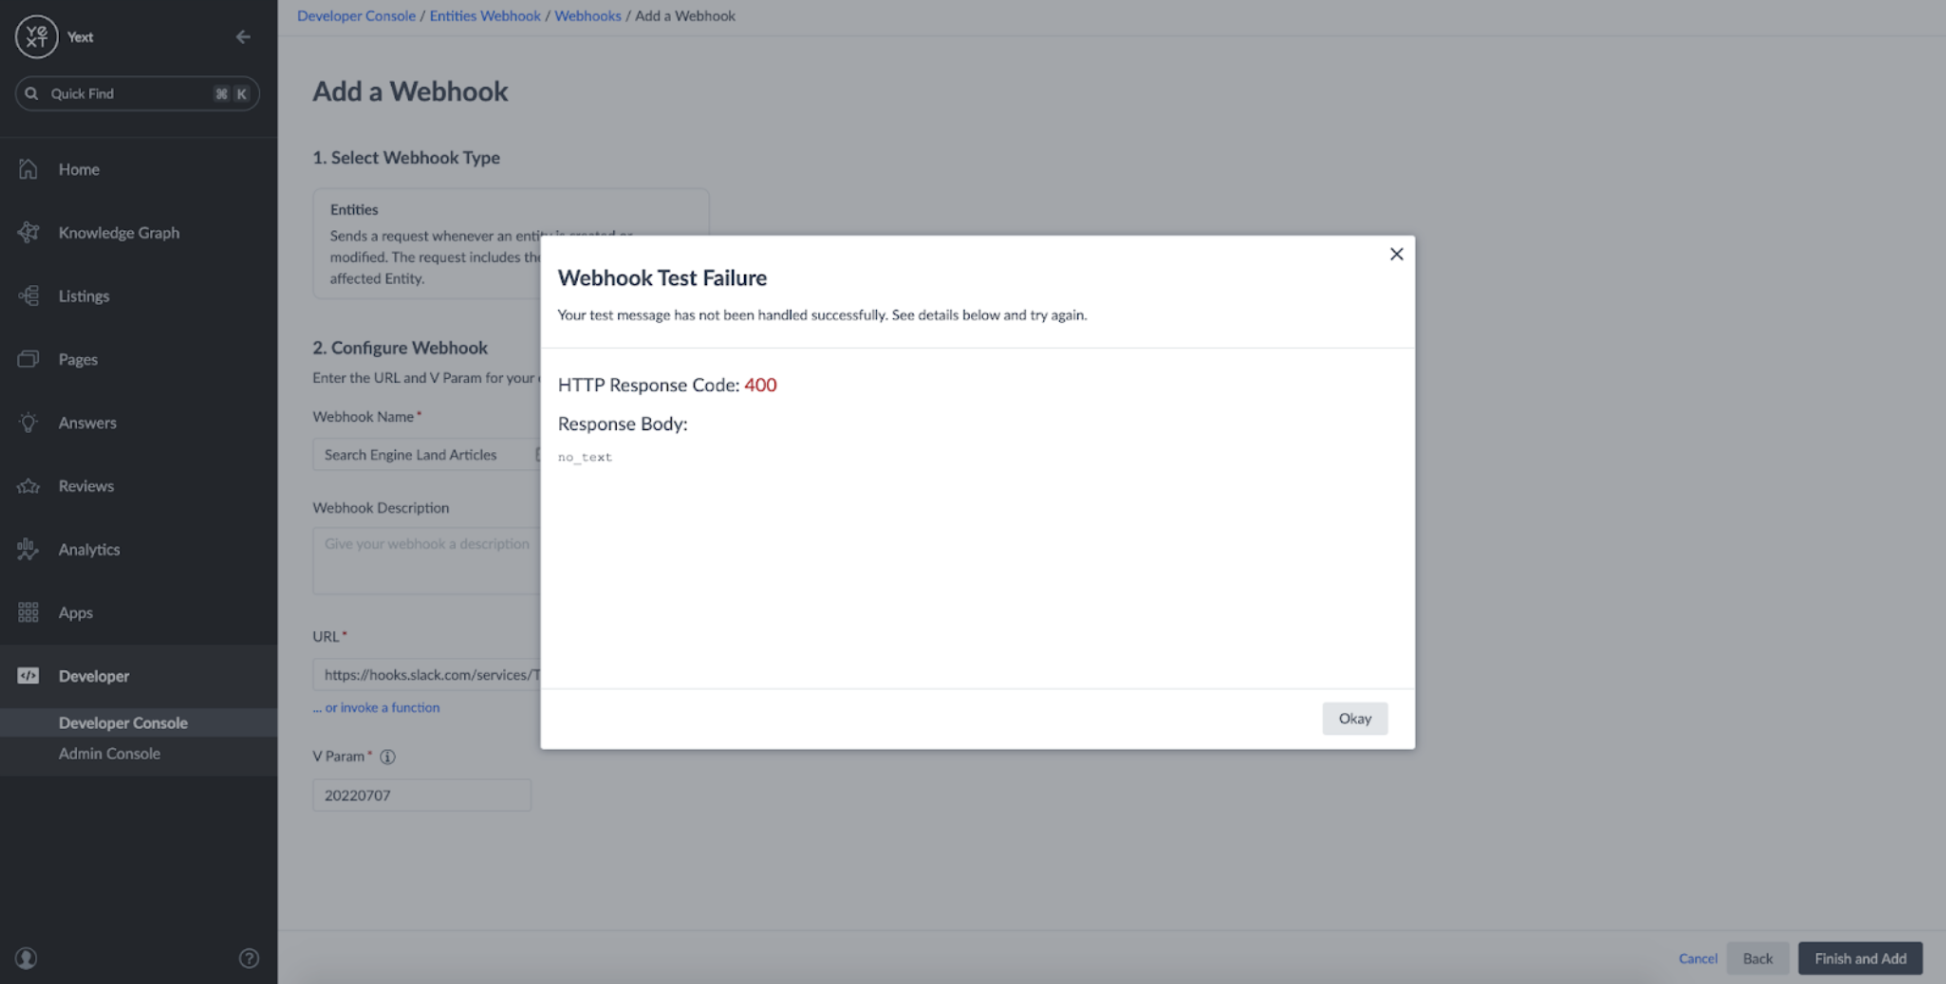
Why is this happening?
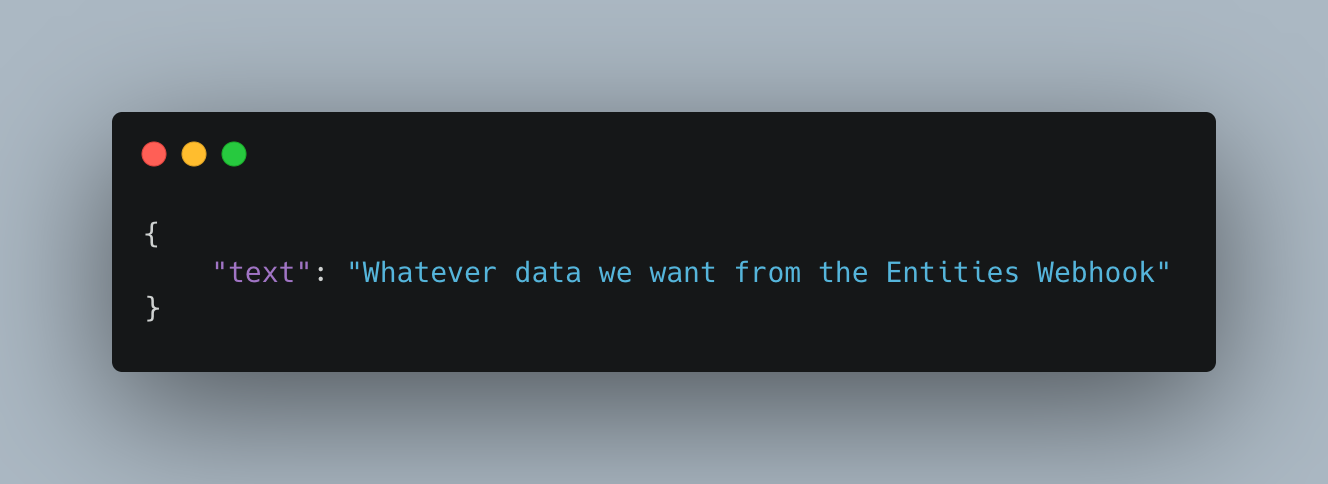
Well, to create a Slack message, Slack expects a webhook in a specific format of:
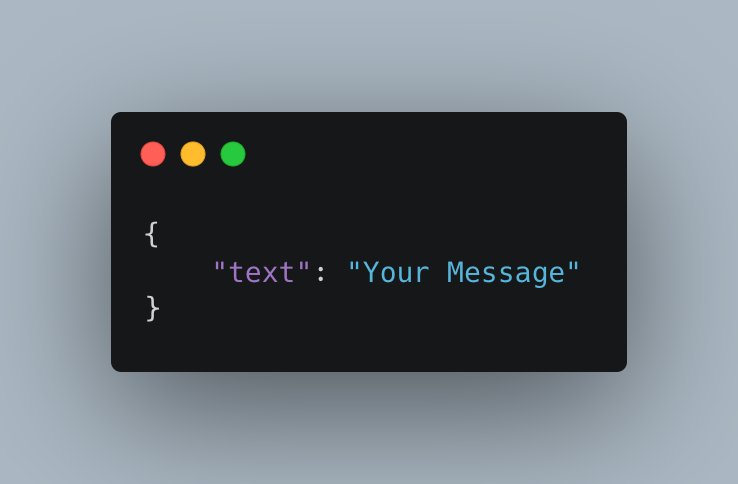
However, the entities webhook sends messages in the following format:
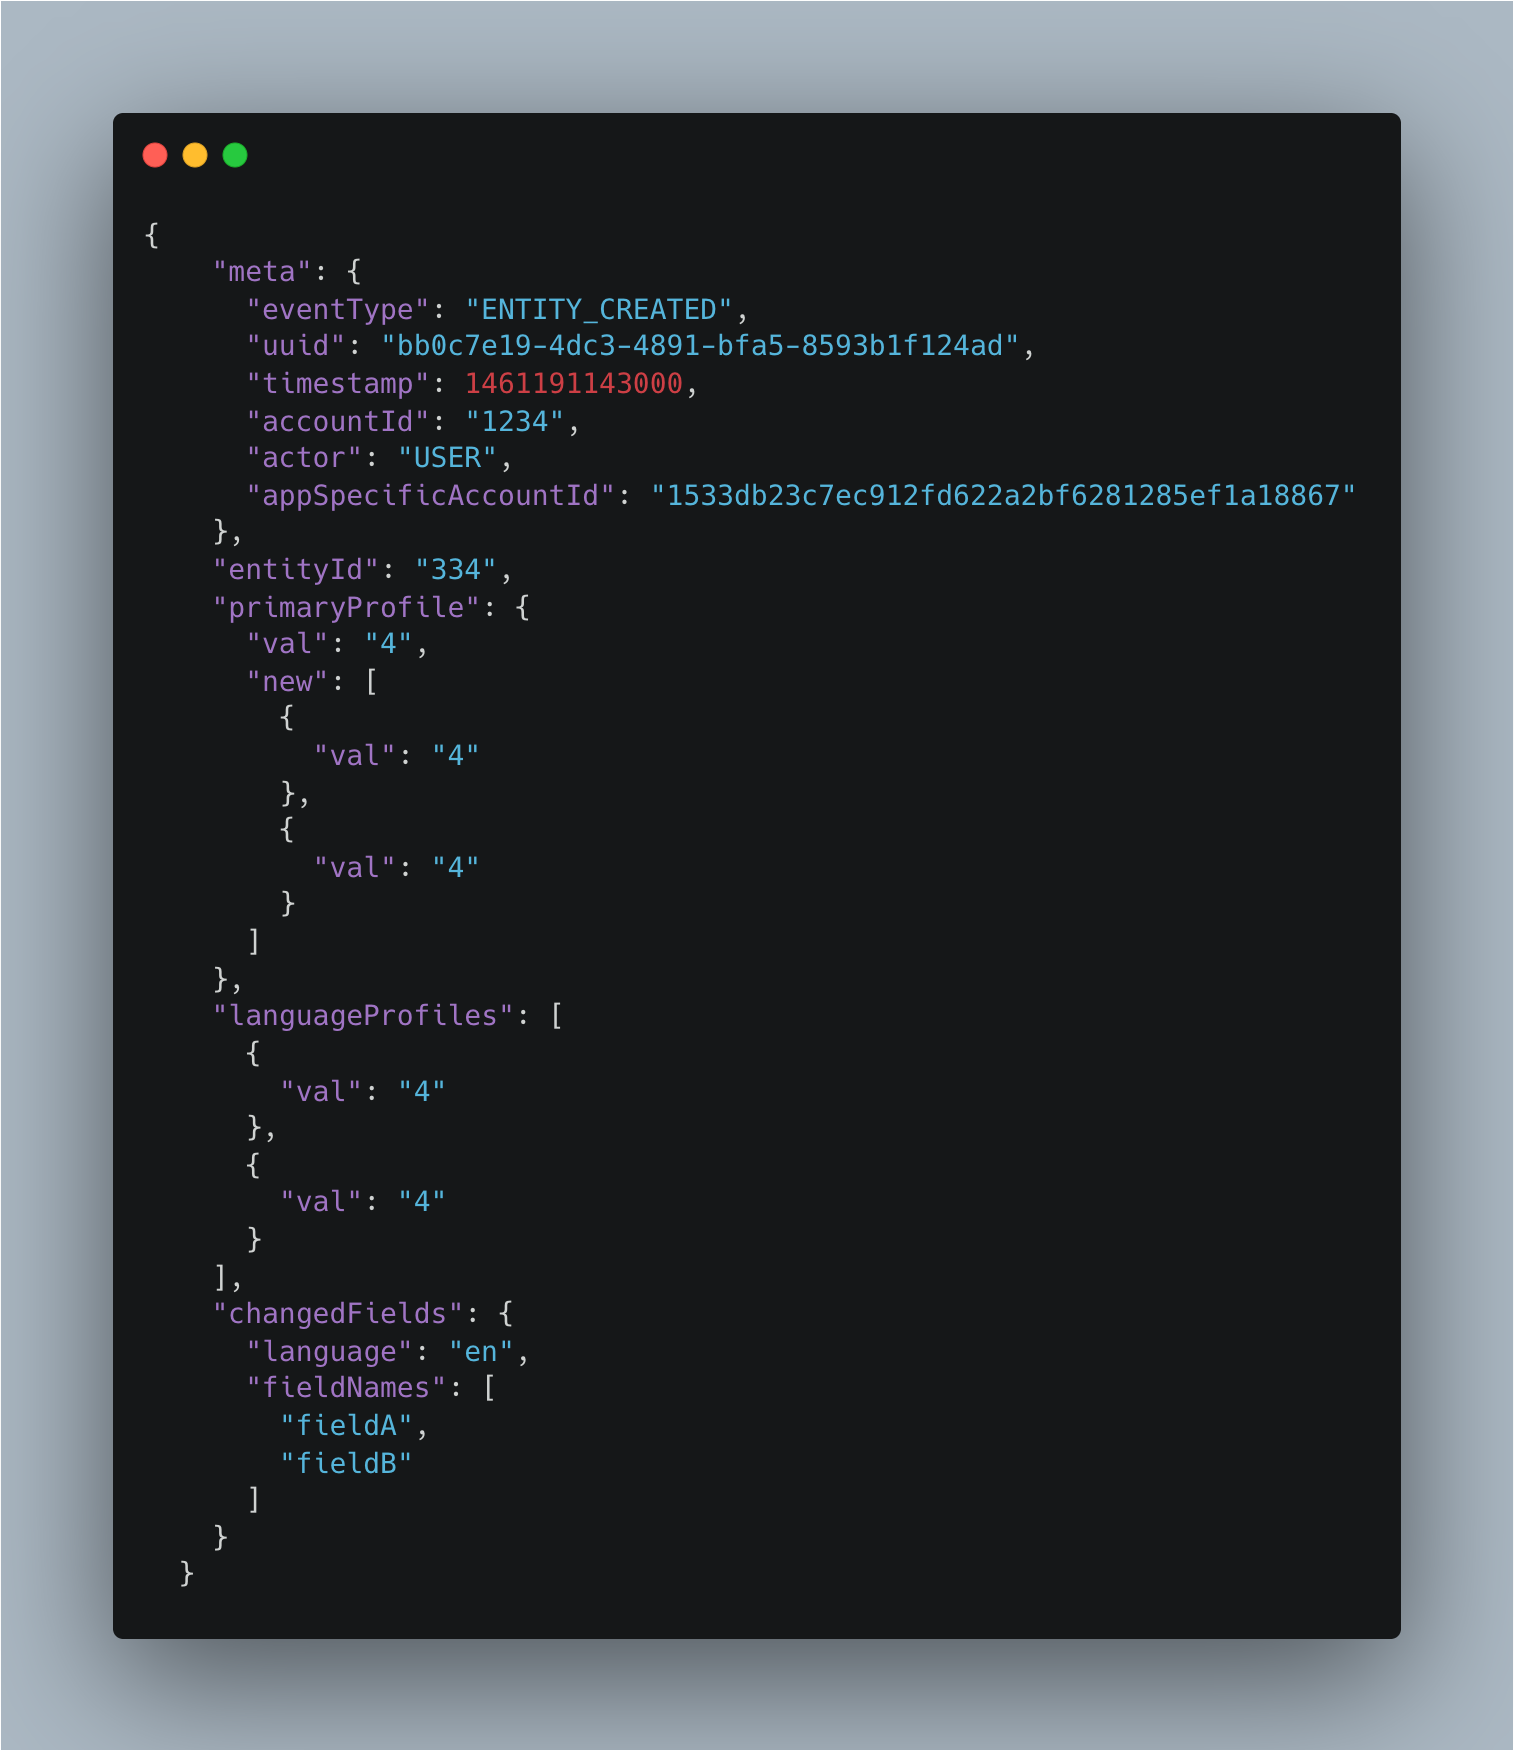
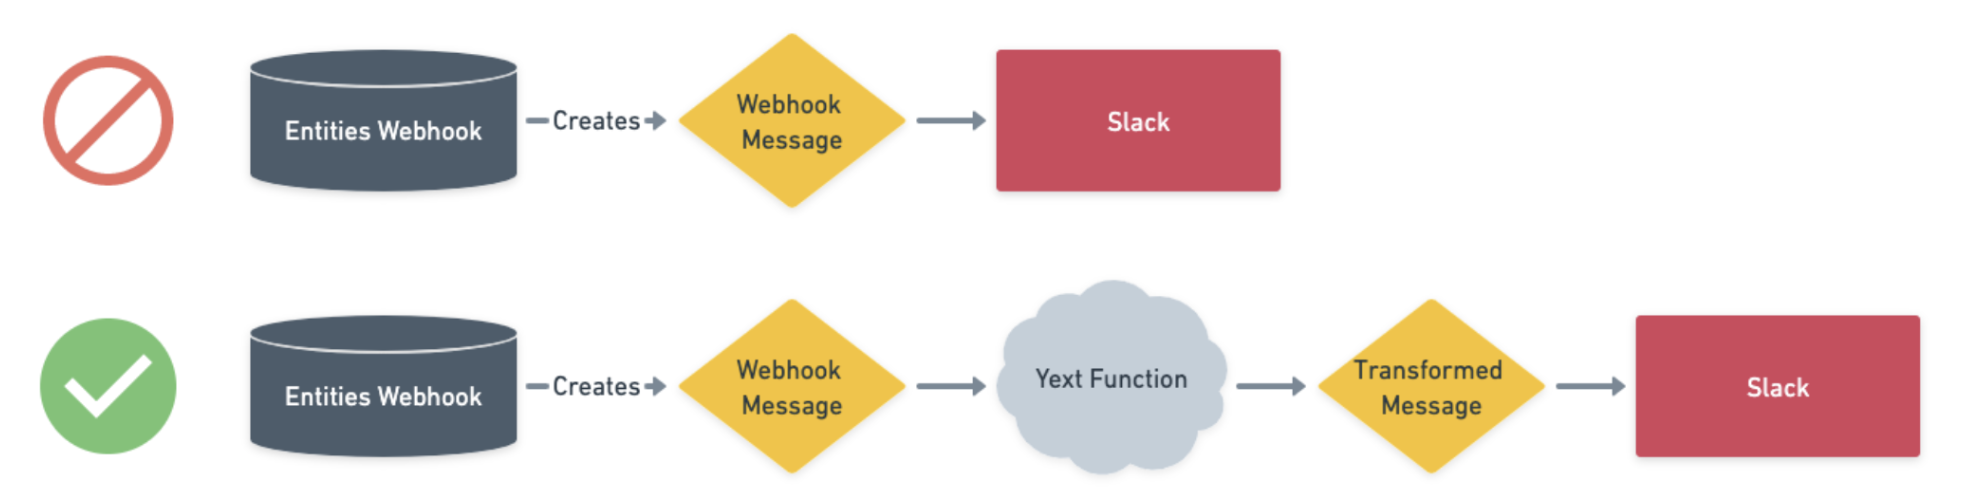
We need to find a way to transform the format of the Entities Webhook message to one that slack expects:
Setting up a Function
In order to transform the format of our Webhook, we can use a Yext Function. Yext Functions allow us to augment existing functionality in Yext with our own custom typescript code without the need to implement any external server management or runtime environments. Rather than point our webhook directly towards Slack, we can point it towards a Function and massage the data into a format that Slack can accept:
I won't do a deep dive into how to set up a Function in this guide. However, I will provide code that can be used to set up a function which delivers a message to a Slack channel in the correct format. To learn more about defining your own Yext Functions, you can reference this Hichhiker Guide.
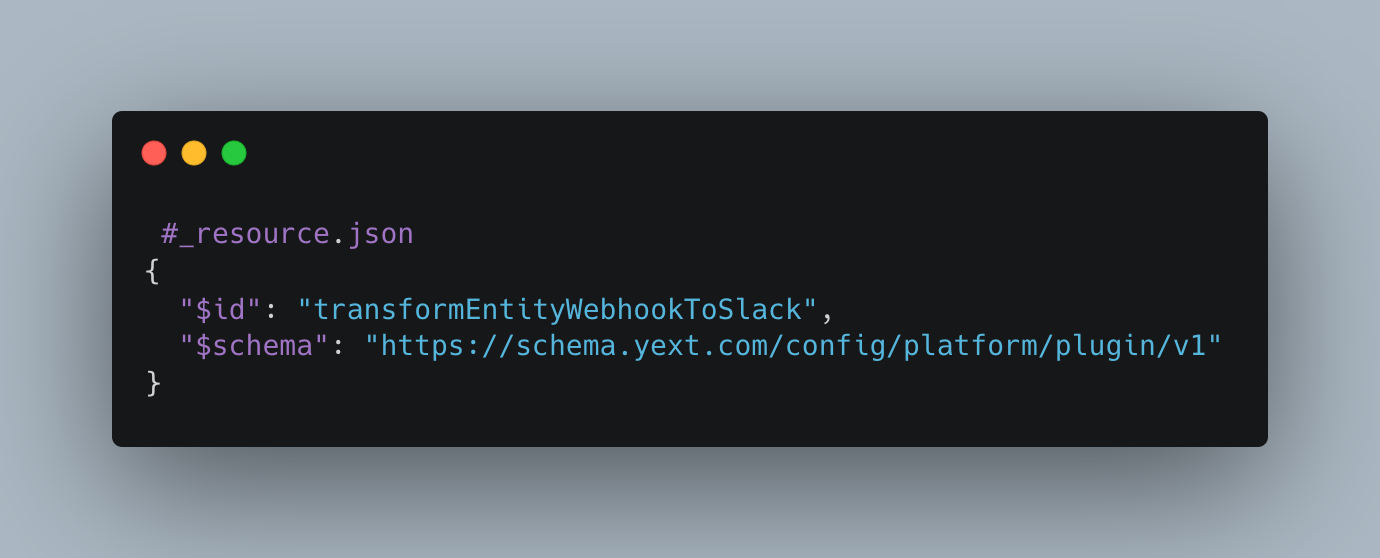
To transform the webhook's message, we need to define three files:
1/ A JSON resource file to define the Function and its name:
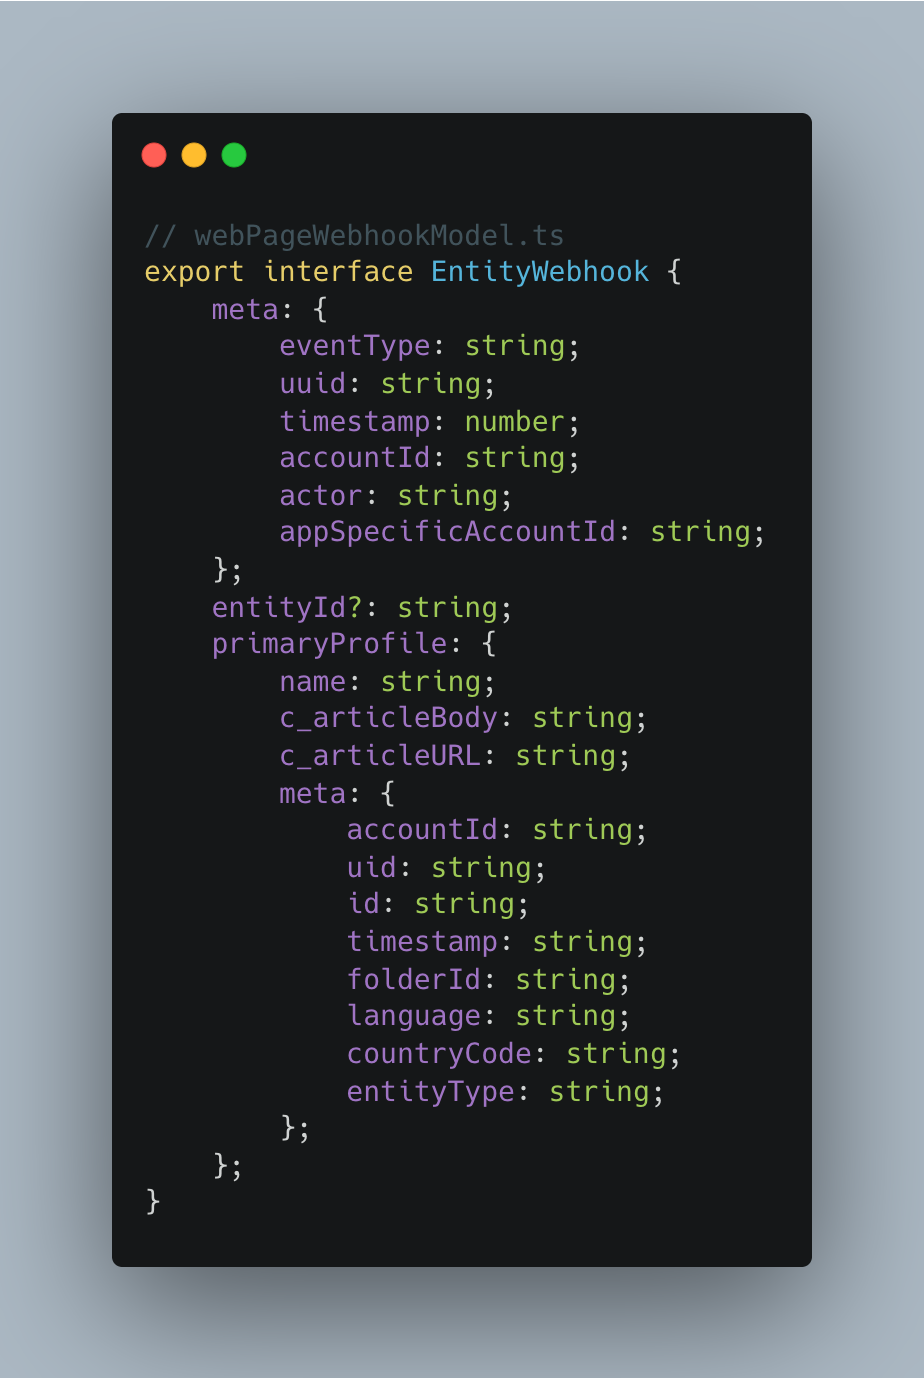
2/ A Typescript file to define the data model of the entity webhooks:
3/ A second Typescript file which can handle an entity webhook and transform it into a Slack message:

These resources are available to download at this Github Repository.
In order to apply the function resources to your account, you'll need to get set up with the Yext CLI. This process takes 5 minutes and allows you to access your account's configuration directly from your command line: https://hitchhikers.yext.com/docs/cli/
Once you've installed the Yext CLI and modified the variables in the resources to make them specific to your Slack URL and Yext Account ID, you can apply them to your account using the yext resources command:
yext resources apply plugin
This will apply the Function to your Yext account, which can be seen in your Admin Console. If you downloaded the template from the GitHub repository, you will also see some files there that can be used for testing any changes to your function locally:
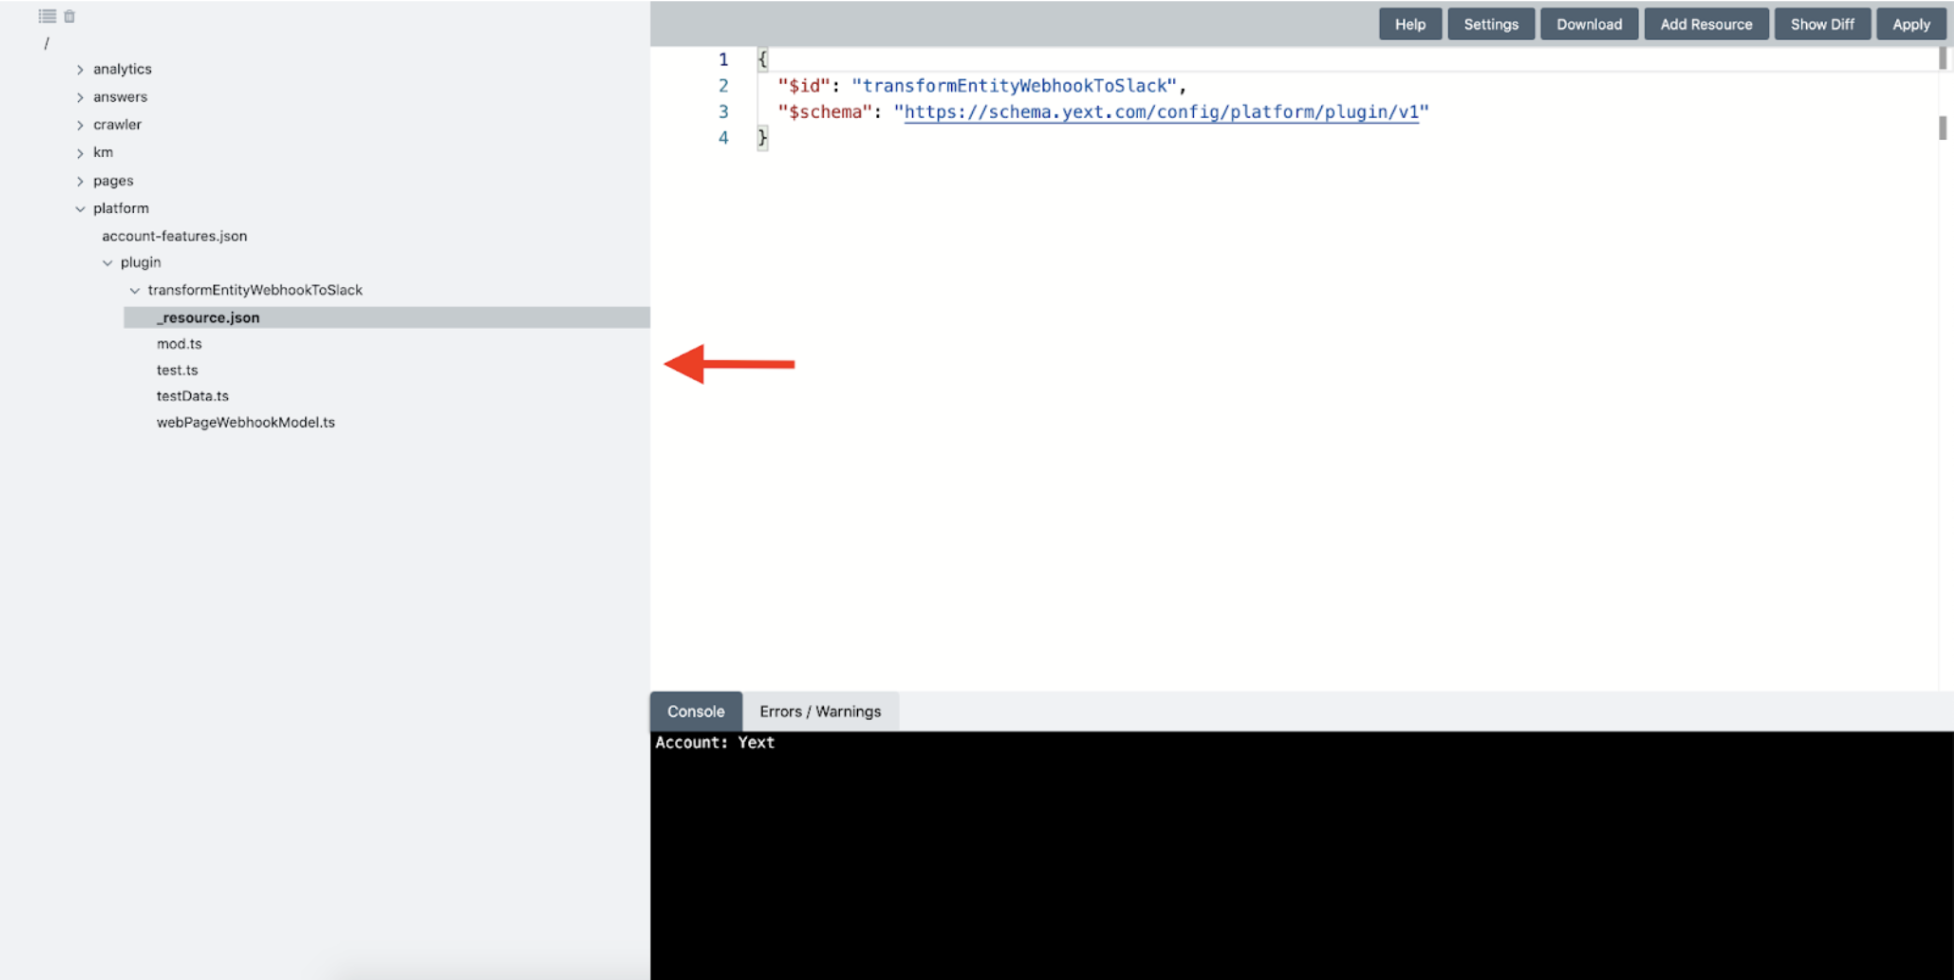
Now that our Function is set up, we can go back to our Webhook app in the Developer Console and click the 'invoke a function' button on the Webhook configuration screen:
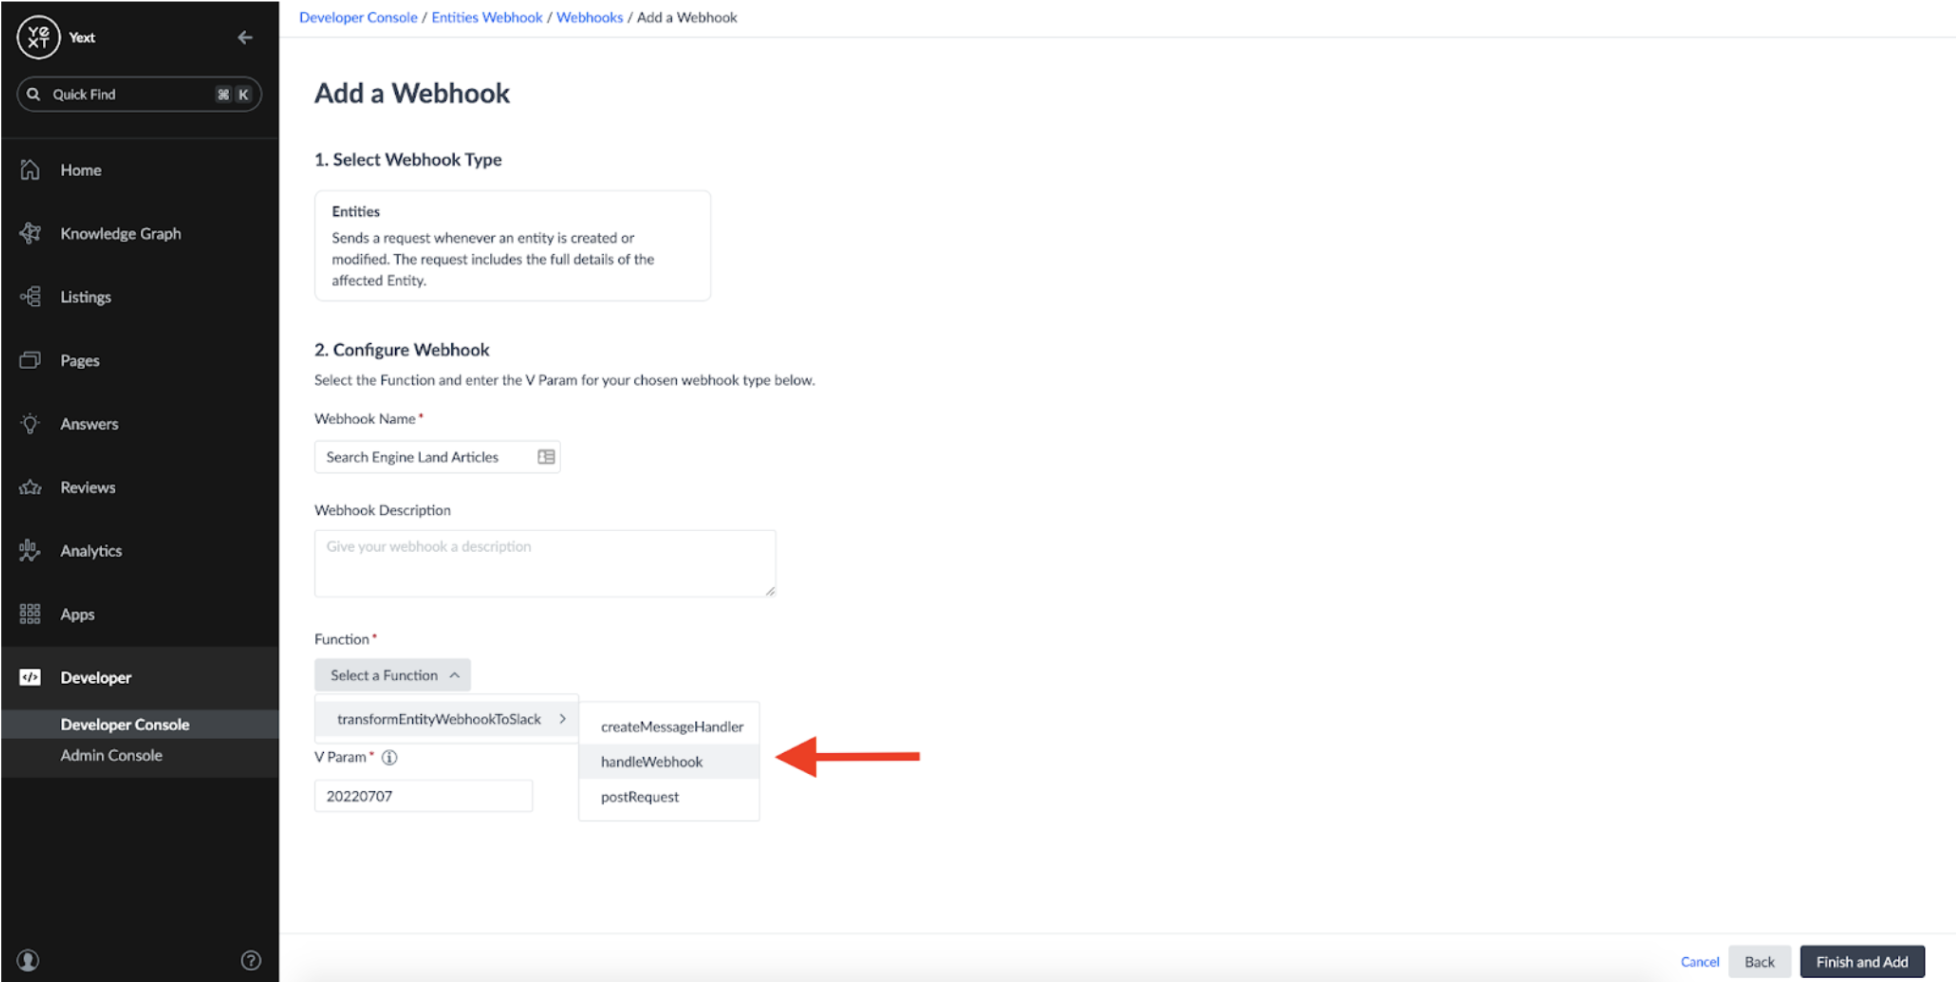
This will allow us to choose which typescript function we'd like the webhook notifications to be sent to. In this case, the handleWebhook function is where we want the original message to be delivered:
If configured correctly, your Webhook should now have a Function as its destination:
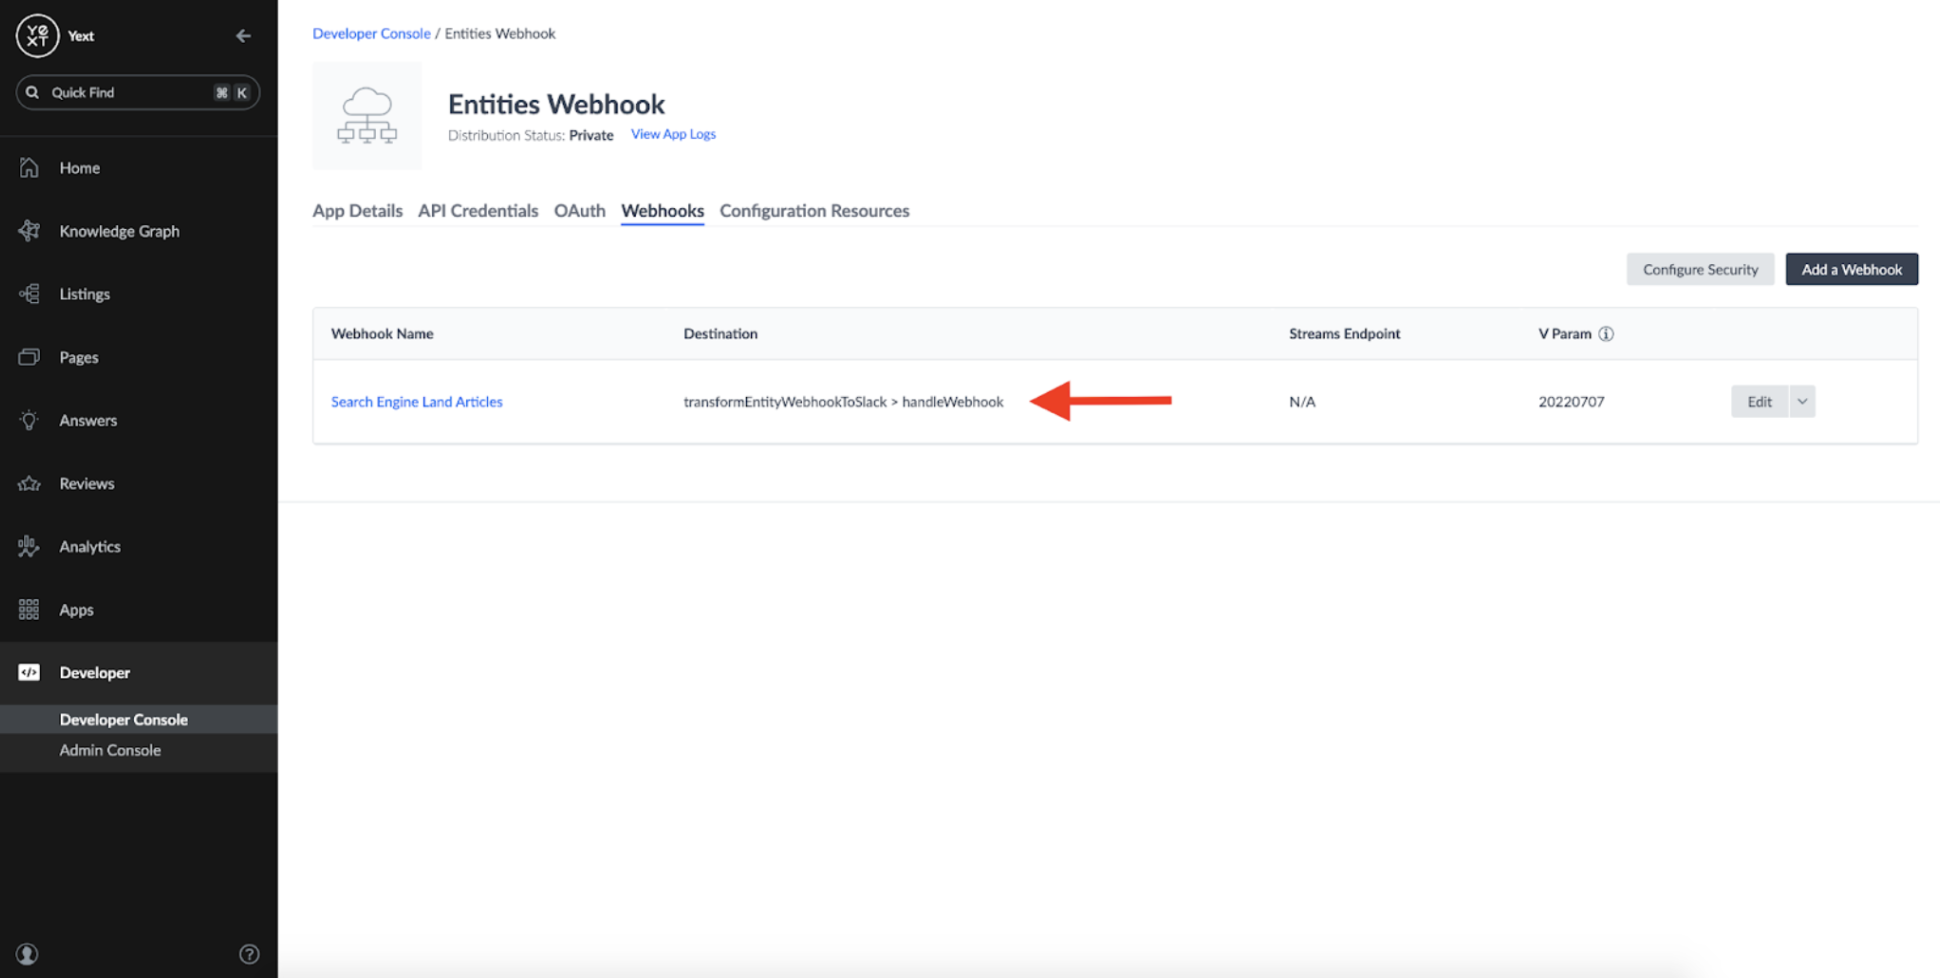
We've successfully configured a Yext Function to intercept and transform our message in a format that Slack will accept!

Here's a screenshot of the message coming through to Slack utilizing our new plugin:

We've successfully gotten our Yext account to send us Slack messages whenever a new article is added!
Wrapping It Up
Throughout this process, we've done the following:
- Configured a Crawler that runs daily to monitor Search Engine Land's 'Local' article section for changes.
- Created a Connector that adds an entity to the Knowledge Graph anytime a new article is identified
- Set up an Entity Webhook which will trigger whenever the Connector created an entity in the Knowledge Graph.
Set up a Function which will deliver an update to a Slack channel whenever an Entity Webhook is triggered. The function I used in this blog is quite simple, but the power of Yext Functions is much greater than just sending Slack messages. For example, we could expand the function to do things like:
- Trigger some other external process, such as creating a ticket in a 3rd party software.
- Call a Selenium function which can perform some other scrape action on the page.
- Highlighting any notable keywords mentioned within the article This sort of flexibility brings us leaps and bounds beyond the out-of-the-box functionality that a typical Web Change Detection Tool can offer. And best of all, it can all be built for free using a Yext free trial account. Thanks for reading!