
Deploy an Experience | Yext Hitchhikers Platform
What You’ll Learn
By the end of this unit, you will be able to:
- Explain key aspects of the Pages deployment process
- Understand the differences between Pages and Classic Pages (Legacy) screens
- Execute the steps to publish a site to staging and production
Overview
Before we delve into the depths of page generation, it’s important to understand how the deployment process works. Deployments are fully rendered versions of your site that can be published to staging or production in seconds.
As is standard in web development, with Yext your sites come with two environments:
- Staging - where you preview and QA your changes as you’re developing new features or building the site
- Production - your site is live or ready to launch
You always want to test your changes in staging before you push to production to make sure you catch any errors before your users do.
Pages Deployment Process
As you become more familiar with web development, deploying and publishing your site are critical steps in creating your web experience.
In Yext Search, it’s important to know a few of things about the Deploy process:
- When you commit your code or when you are creating your live preview, you are kicking off a Deploy via the Yext CI System
- The deploy takes the information in your repository, injects additional data points like your business ID and your API key, and makes your site ready for publishing to a public directory by running through a post-processing toolchain.
- Deploys can take anywhere from 30 seconds to several minutes (or more!) depending on the complexity of the toolchain it’s running.
- The deployment process is broken out into three discrete phases: Initial Build, Initial Page Generation, Ongoing Data Updates
To learn more about the deployment process, see the Overview of Deployment Process unit in the Pages track.
Managing Your Search Deploys
When you make a commit to Search, it is then deployed. Therefore you will notice a new deploy section is created with every commit made that maintains the commit message that you inputted. How you manage your deploys will depend on which version of Pages you are building Search on.
Pages
In addition to the Live Preview links you can get from the Code Editor, you will have three different types of links from your deploys: deploy previews, staging links, and a production link.
Deploy Preview Links
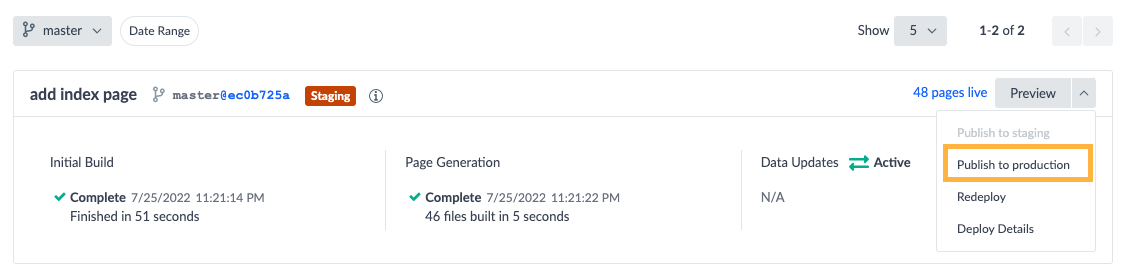
Each deploy has a deploy-specific preview link. Clicking the Preview button next to a deploy will open a new tab with that version of your site.
When you are working on your site you can easily preview multiple deploys to compare your work or send different versions of the site to the relevant stakeholders for feedback.
Note that each site may have up to five active preview links at a time across all branches. If you want to share a preview link for a commit that no longer has one, click on the dropdown for the relevant deploy and click Redeploy to generate a preview link.
Staging and Production Links
At the top of the Deploys screen, you will see a Production and Staging link. These are permalinks (a url that remains unchanged) that will always display the version of the site that is pushed to either staging or production. These can be easily shared with coworkers to reflect your latest work at any time.
The current staged deploy will be marked with an orange “Staging” indicator and the one pinned to production will have a green “Production” indicator.
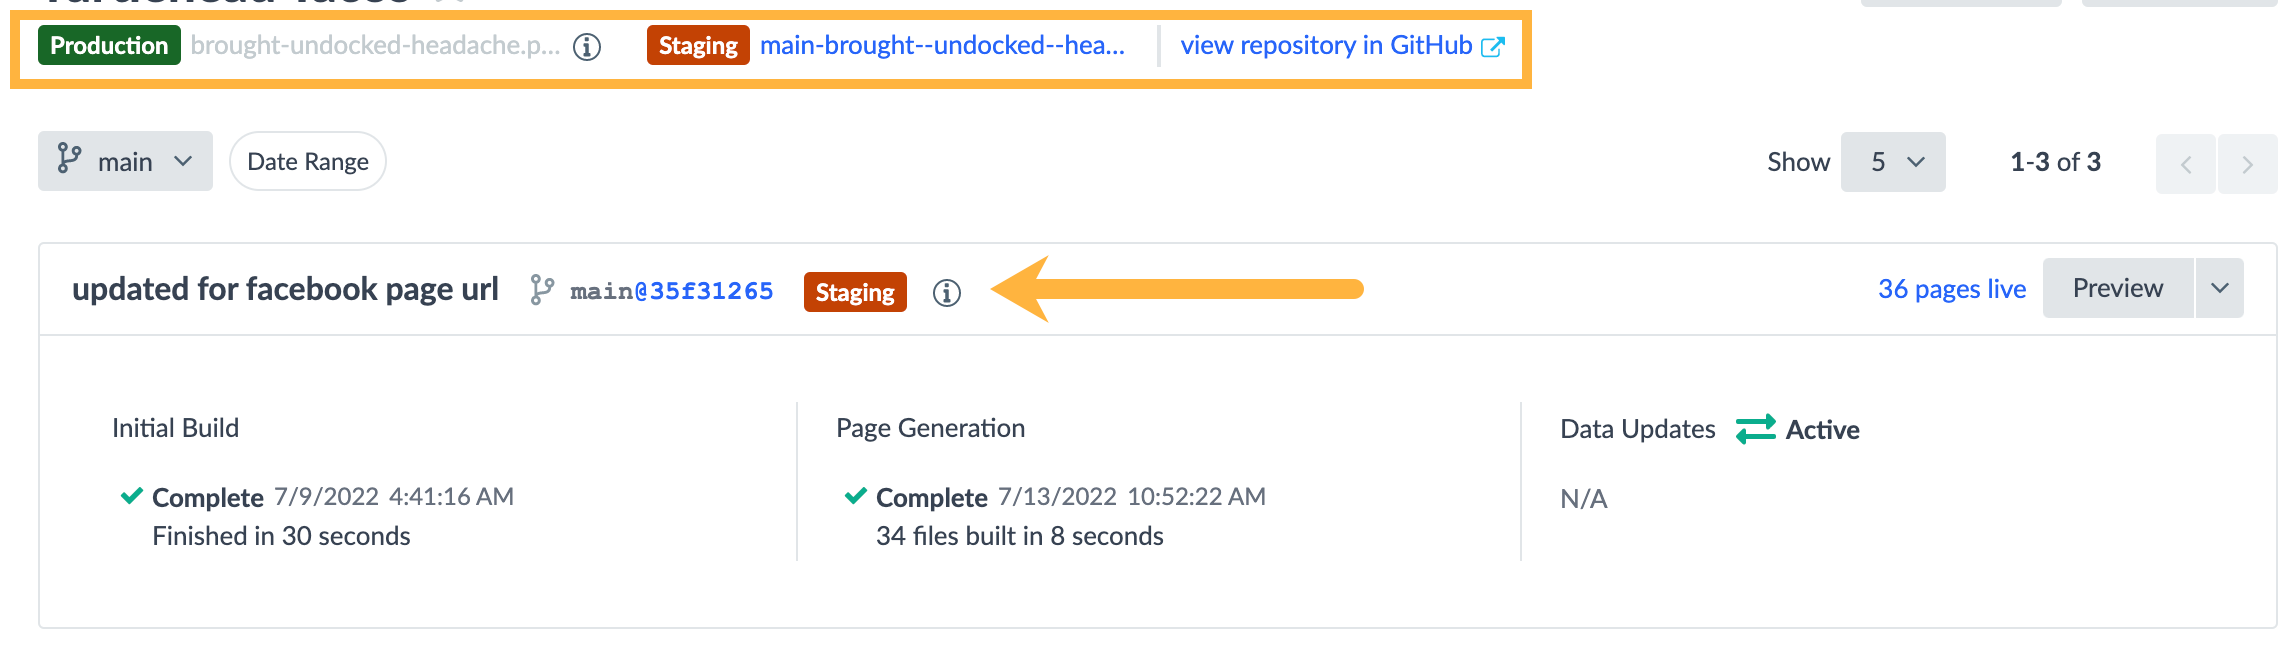
Note that you can have a staging link for each branch (the branch name is prepended to the staging domain), but only one production link across the site that must be from the production branch. If a commit is not currently deployed, you’ll have to redeploy it before you can publish it to staging or production.
Best Practices
By default, your most recent deploy is pinned to staging. This allows anyone with the staging link to see the most up-to-date version of a recently added change.
On the other hand, production is not automatically updated and you must manually publish a deploy to production. You should thoroughly QA your experience in staging before publishing it to production. You can change this in the Settings for your site.
Classic Pages (Legacy)
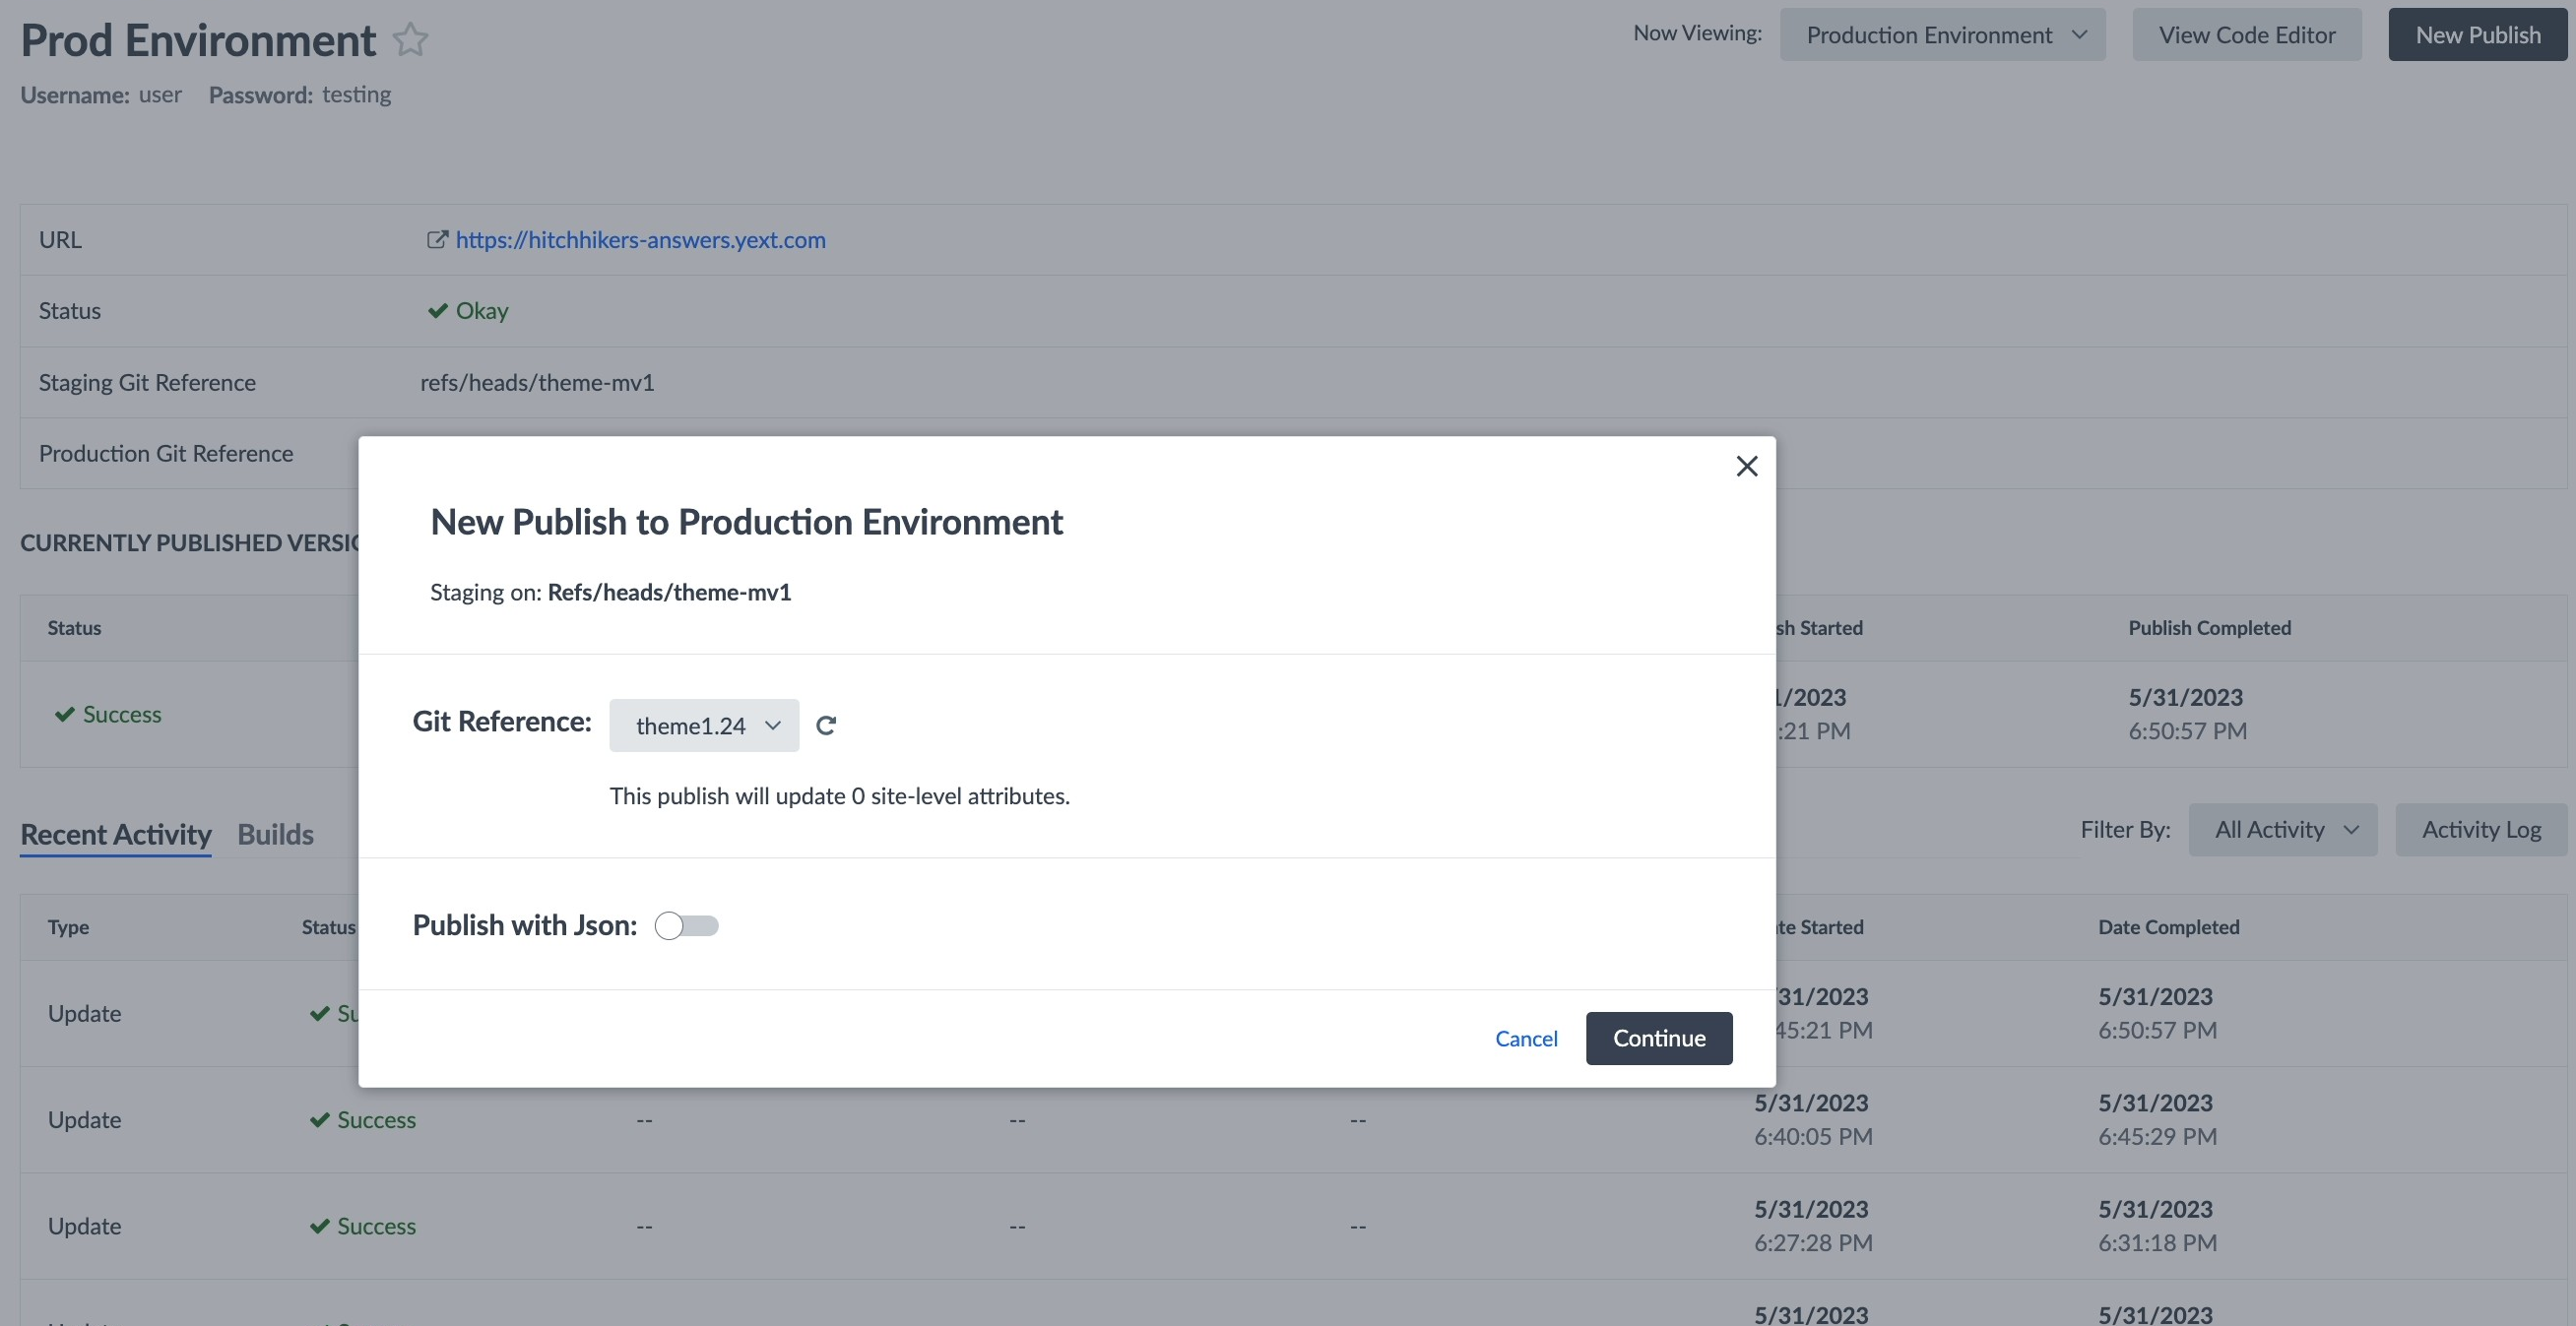
When you open up a site on Classic Pages, you will see the Staging Environment and Production Environment toward the bottom of the screen.

Staging and Production Links
In each environment, you will see a Production and Staging link next to the URL section. These are permalinks that will always display the version of the site that is pushed to either staging or production.
Best Practices
For staging links, you can set the Git Reference to the master branch in order to reflect any changes that are happening in real time (you will learn more about this in the next section of this unit!). This environment is meant to test and QA before an experience goes live.
On the other hand, you should NEVER set the Git reference to master in the production environment. Production environments are typically live for users to see and you don’t know how immediate changes to master will affect your experience. When publishing to production, you will want to use a commit tag (that has been reviewed first!) as explained in the
Navigating the Code Editor
unit.
How to Publish Your Page to Production or Staging
To see steps on how to publish to staging and production in Pages and Classic Pages (Legacy), read this help article .
Pages
To publish your Search experience to either staging or production, navigate to the Deploys screen. Find the commit you’d like to publish, then click the dropdown on the right and select Publish to staging or Publish to production.
For more information about the Pages deployment process, how to navigate the deploy screens, and how to manage your deploys, check out the Deploy Pages module in the Pages track.
Classic Pages (Legacy)
In order to publish to staging or production, you will need to click the View Environment button and click New Publish. A modal will appear to allow you to set the branch or commit tag you would like to publish from.
How should you pin your publishes?
If you are trying to test and QA a commit, which environment should you publish it to?
Which type of Pages allows you to publish a site within the Deploys screen?
High five! ✋
