

Step 2: Create a Connector
You have the ability to use our Adobe Experience Manager native source to create your connector with flexibility.
Build a Connector using the Adobe Experience Manager Native Source
Once you have completed all of the previous steps to prepare your Adobe environment you are ready to use our native source. Our native source allows you to designate the operation you would like to perform. See our source reference documentation for more information on the operation. Then, you can use selectors to identify exactly which pieces of data from your pages that you’d like to pull into your different entities, as well as apply any transforms to your data.
- Log in to your Yext account and navigate to the Connectors framework by going to Knowledge Graph > Connectors in the navigation bar.
- Click Add Connector.
- Click Adobe Experience Manager from the native sources section.
- Select the Fetch Pages - Basic Auth operation and enter the necessary information. You will need to include your:
- Adobe environment URL. Do not include https://, just include the name of your environment, e.g., author-stage.yextsites.com
- AEM Username
- AEM Password
Copy and paste the file path from AEM. This should be the path of the folder that contains all of the entities for this connector. You can find the proper path by navigating to the folder in your AEM site and copy the end of the URL, e.g.,
/content/YOUR_FILE_PATH.In this example, we are creating Adventures entities. All US-English Adventures are stored in the Adventures folder. You can see the proper file path in the URL,
wknd/us/en/adventures. This file path would create entities from all of the files contained in that folder, Ski Touring Mont Blanc, Riverside Camping, etc.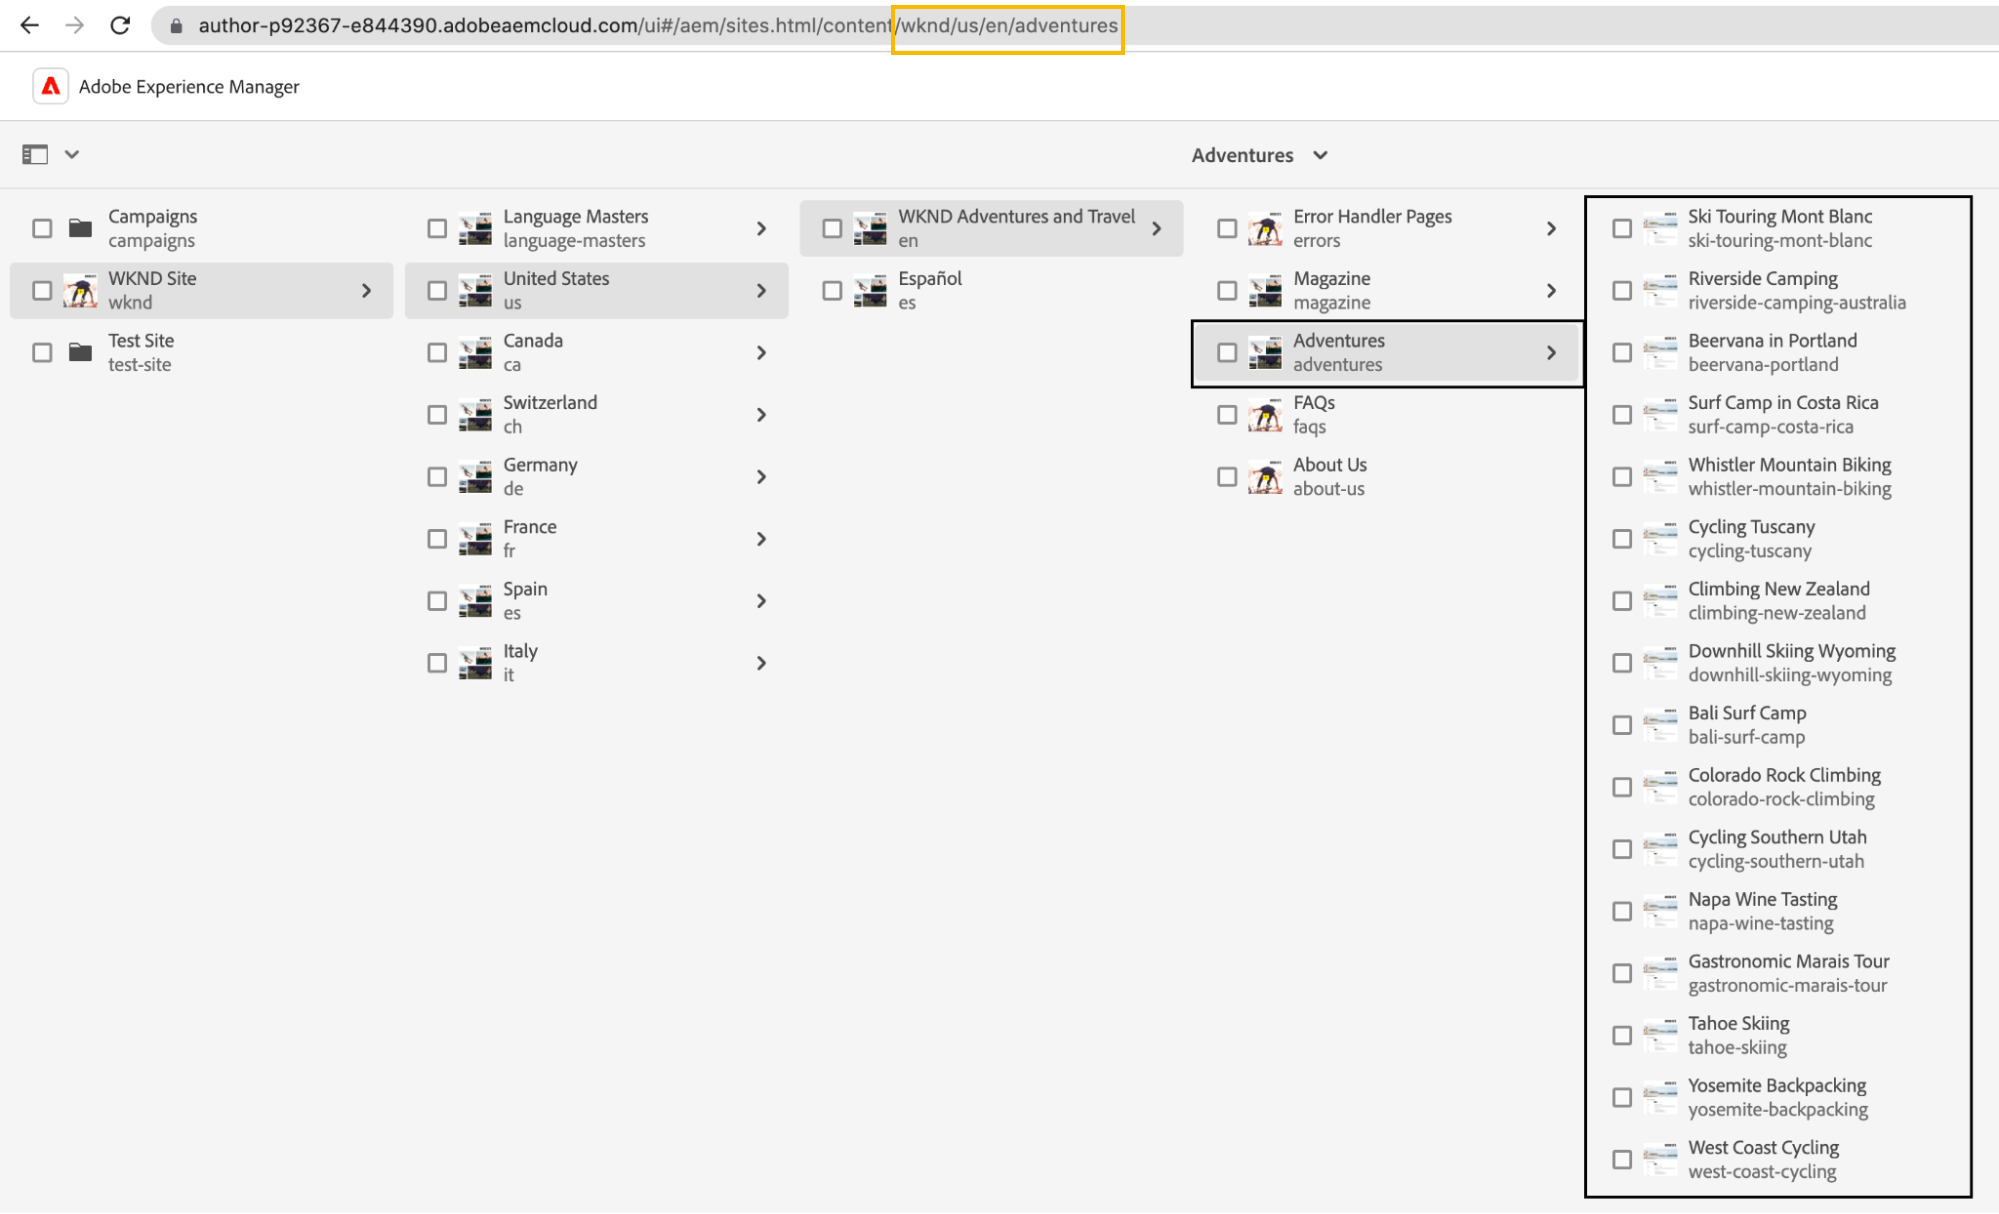
Once all of the inputs have been filled out, you will be able to see the raw response of the data from the custom exporter. Click Pull, and once a successful request has been made, click View Raw Response in the top right corner.
Then, click Continue and Add Default Selectors. From here you will be able to see all of the fields that you have overridden with the custom exporter.
Add any necessary transforms to the data and click Continue.
Finally, map all of your selectors to fields on the appropriate entity type! Remember that the entity type and all fields must exist before mapping data to them.
You can Save & Run your connector and configure the frequency with which it will retrieve data from your AEM environment. Note that if you are using a Cloud SDK copy the data pulled in via Connector will only be as recent as the content deployed to your Cloud copy.