Step 3: Endpoint Settings
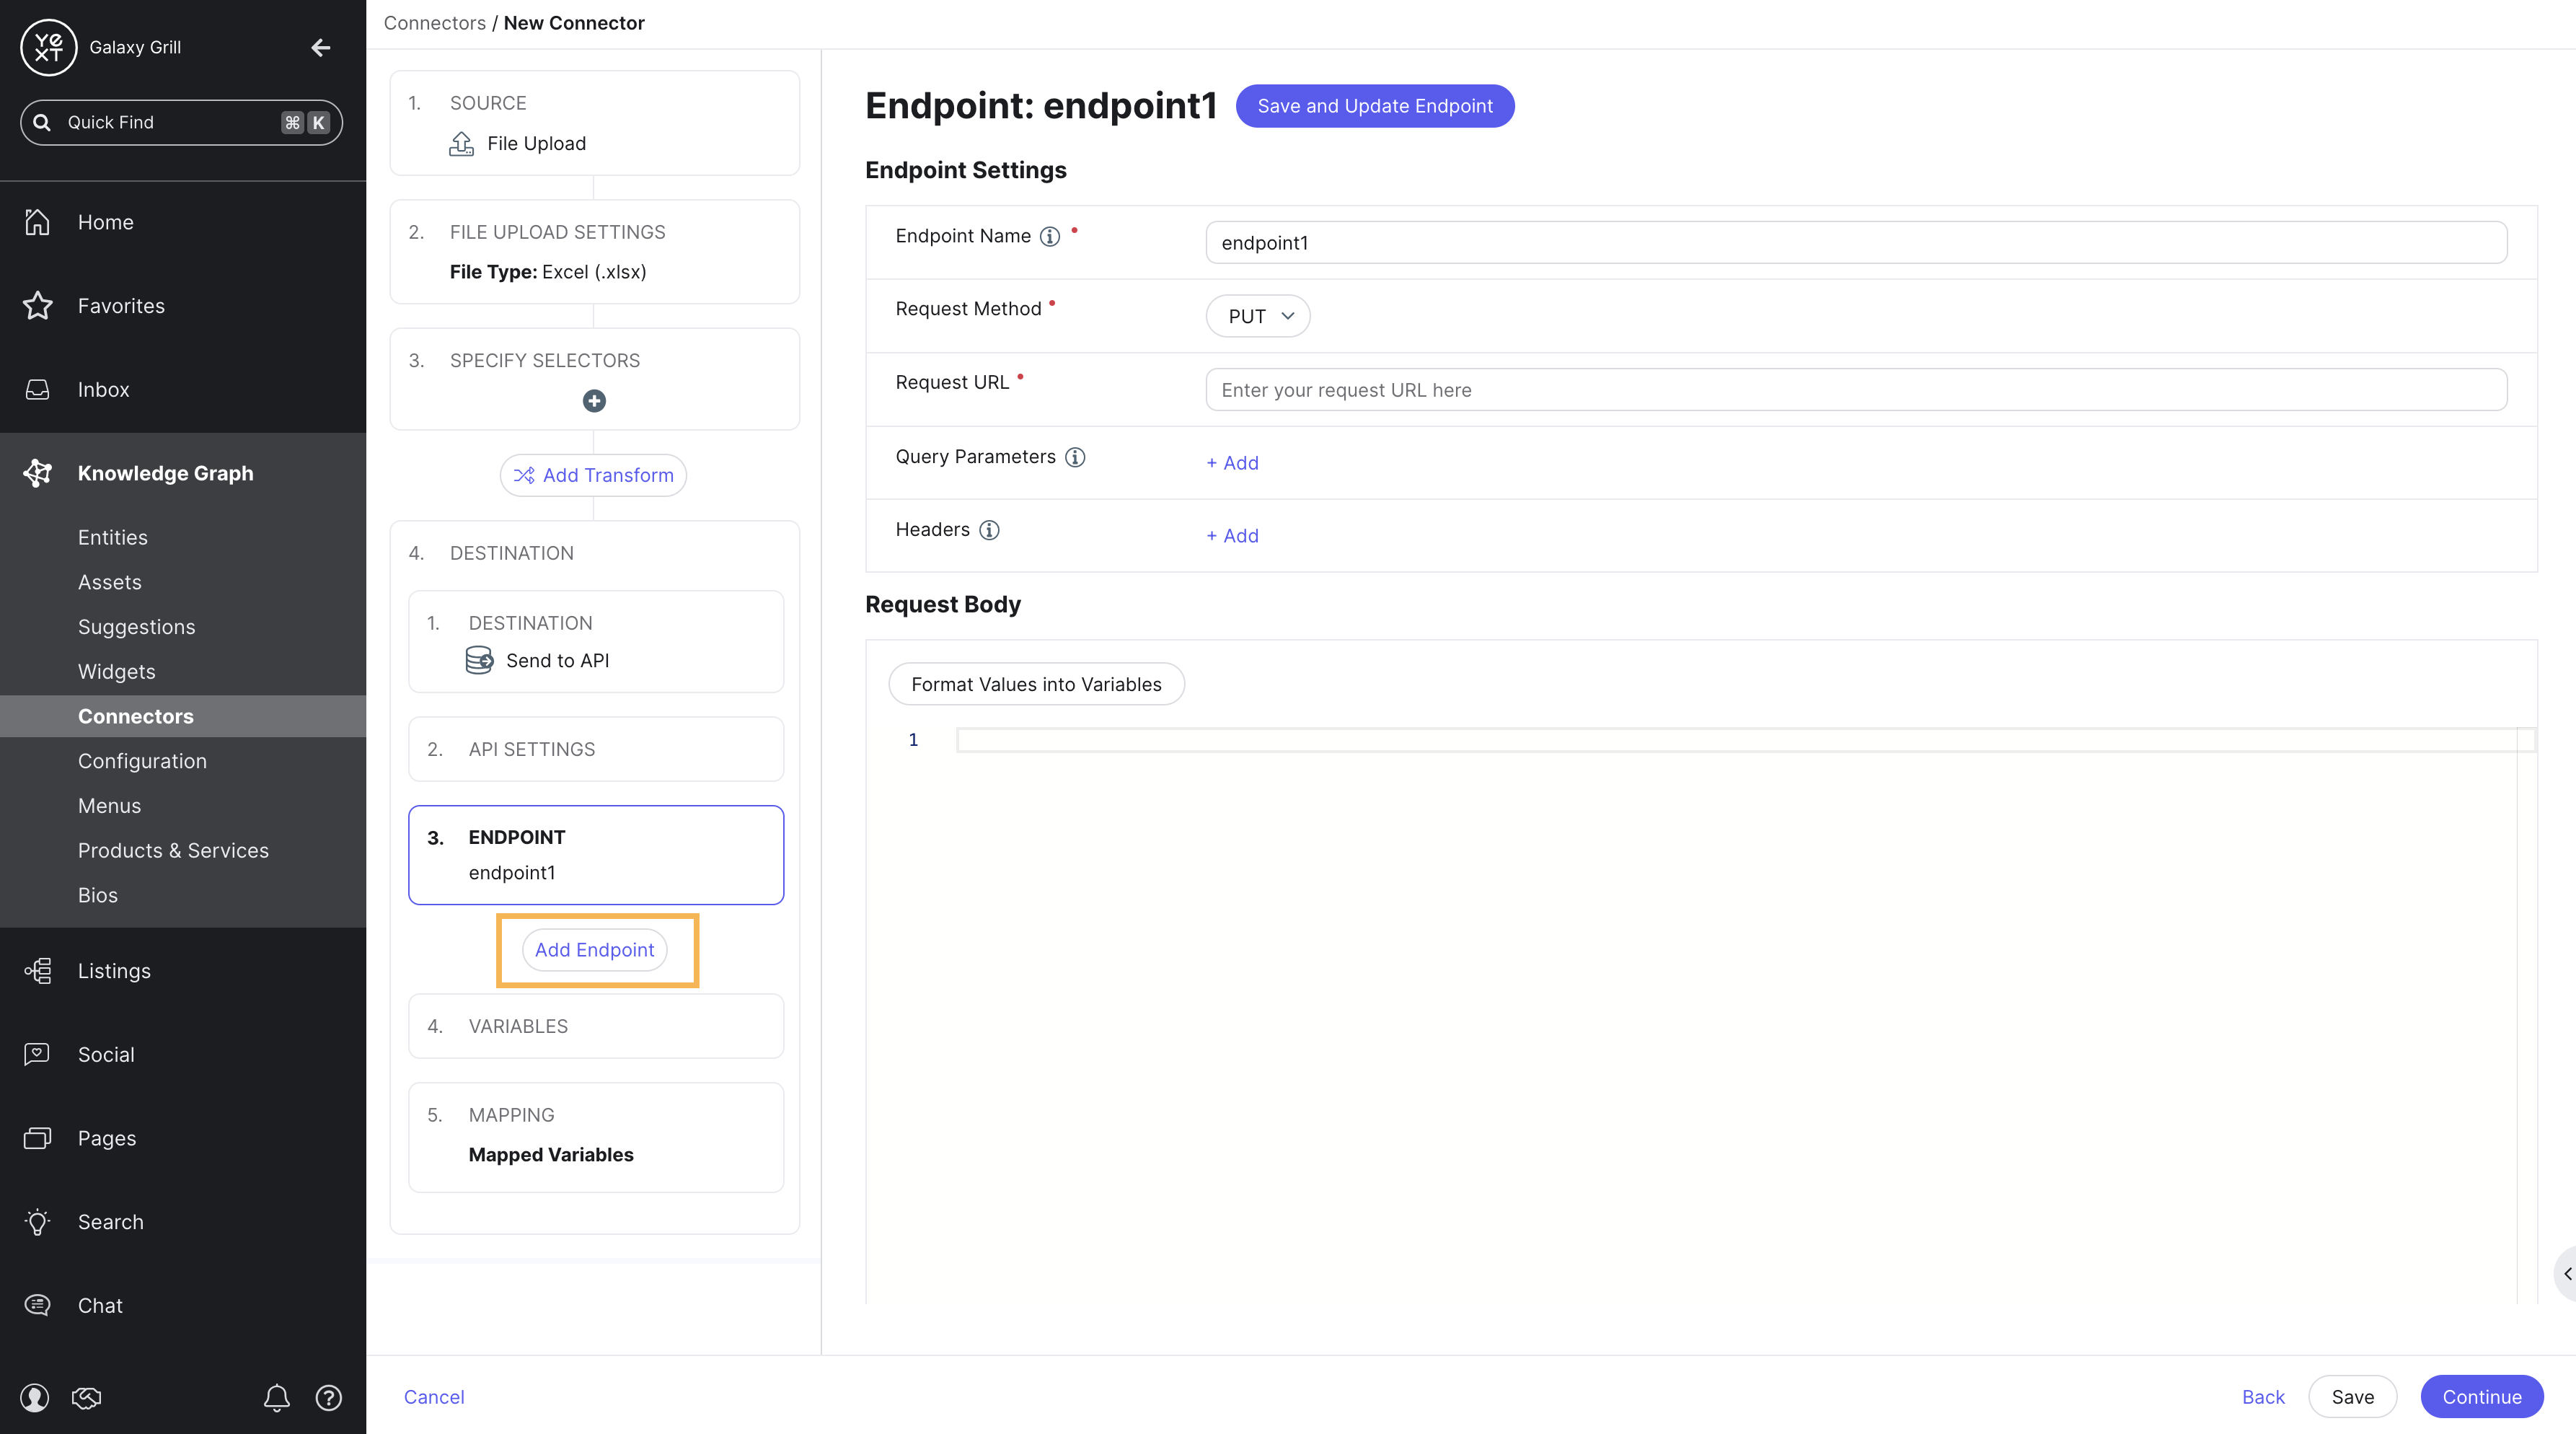
Next, configure the settings for the API endpoint that the data will be sent to.

Set Endpoint Parameters
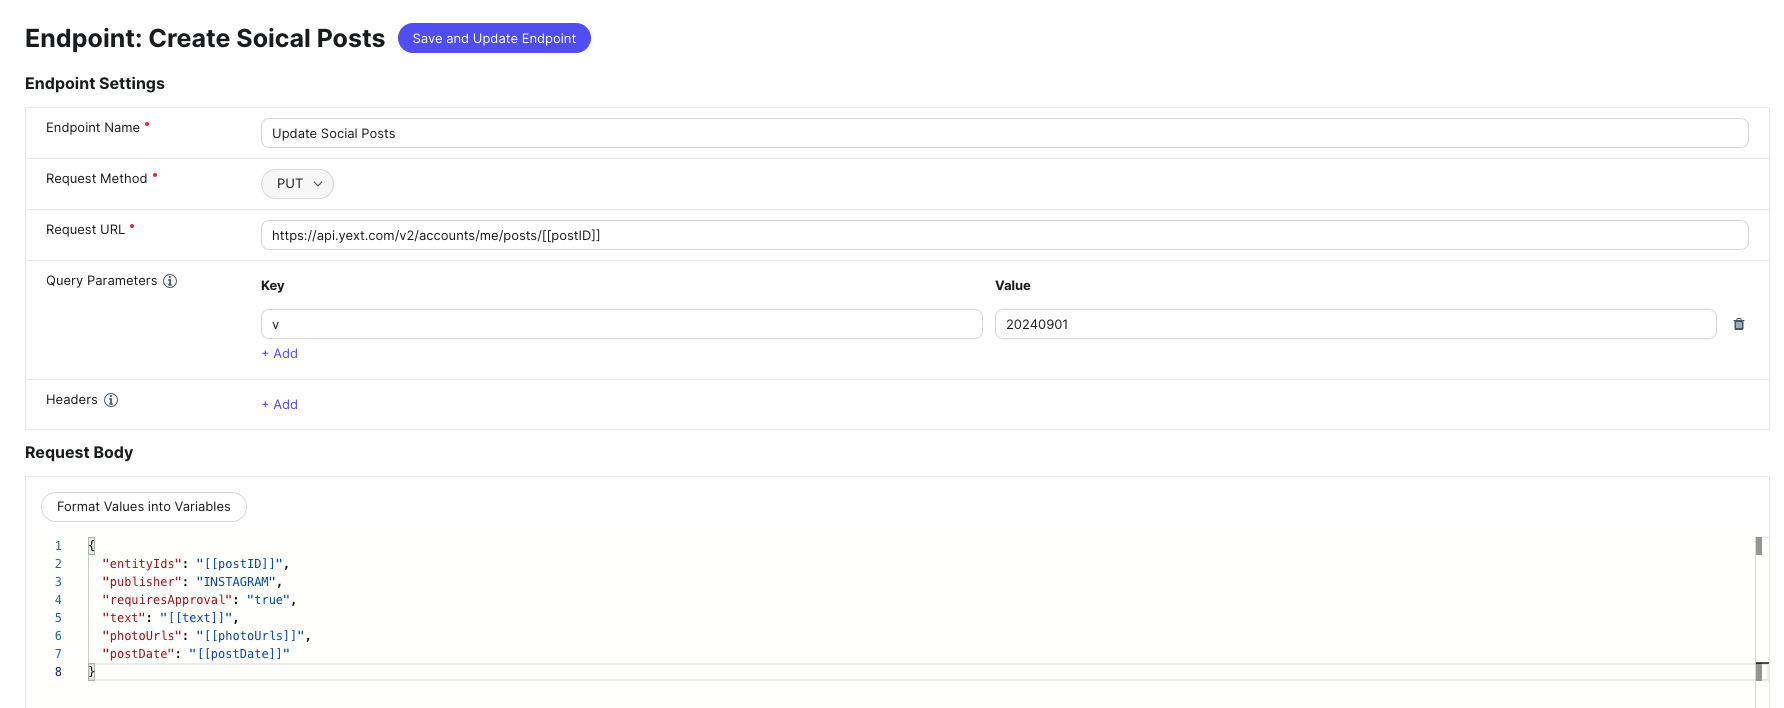
- Endpoint Name: Provide a unique name for your endpoint. This can be anything you want; it’s just meant as an identifier.
- Request Method: Select PUT, POST, or PATCH
- Request URL: The base URL of the API to send data to
- Query Parameters: Add any number of key-value pairs to append to your request as query parameters
- Headers: Add any number of key-value pairs to set as HTTP headers in your request
- Request Body: Provide valid JSON to send as the request body
- To populate the request body with variables (see the next section for more details) it’s recommended to copy & paste a sample API request, and then click Format Values into Variables to auto-generate variables according to the sample request provided.
The Request URL, Query Parameters, Headers, and/or Request Body may contain variables. To define a variable, place a string (alphanumeric characters) within double brackets. For example, in the screenshot above, the Request URL field contains a variable for [[postID]].
For an explanation of variables, continue with this step. If you don’t need information on variables, click Save and Update Endpoint and continue to the next step.
Using Variables
A variable is a piece of data that may vary for each row of data to be processed. This can be thought of as a placeholder for a field value that will change for each row of data.
For example, if you are configuring a connector to create social posts by sending data to the Yext Social Posts API , you might upload the following sheet as the data source for the connector:
| Name | ID | Post Text | Image URL | Post Date |
|---|---|---|---|---|
| Galaxy Grill NYC | 123 | Enjoy delicious pizza, pasta, salads, and more at Galaxy Grill! | www.galaxygrill.com/nyc |
2024-11-01 |
| Galaxy Grill LA | 456 | These burgers are out of this world! | www.galaxygrill.com/la |
2024-11-01 |
| Galaxy Grill Chicago | 789 | From waffle to shoestring to curly fries, we have them all. | www.galaxygrill.com/chicago |
2024-11-01 |
And, the resulting API request to create one of those posts might look as follows:
POST: https://api.yextapis.com/v2/accounts/me/posts?v=20241101&api_key=12345{
"entityIds": [
"123"
],
"publisher": "INSTAGRAM",
"requiresApproval": true,
"text": "Enjoy delicious pizza, pasta, salads, and more at Galaxy Grill!",
"photoUrls": [
"www.galaxygrill.com/nyc"
],
"postDate": "2024-11-01",
}Because some data will vary, you will need to make sure the API requests for each social post are properly formatted, and insert the relevant data from each row for each request. Variables can accomplish this.
In this case, there are multiple data points that will need to be represented by a variable:
- Post ID (found in the URL)
- Entity ID (found in the request body)
- Text (found in the request body)
- Photo URLs (found in the request body)
Save Endpoint
Once all endpoint parameters and any variables are in place, click Save and Update Endpoint to continue.
Add Multiple Endpoints
If desired, click Add Endpoint in the flow on the left side of the screen to configure multiple endpoints.


