

Step 3: Create an "Add to Calendar" Button
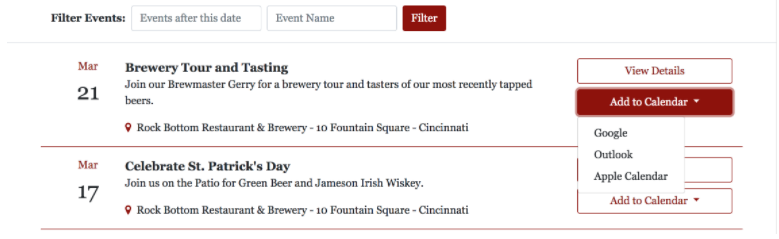
Creating an “Add to Calendar” button for your events allows visitors to add events to their Google, Apple, or Outlook calendars.
To create the button, add the following code to your result-template div:
<script id="result-template" type="text/template">

// The rest of your template

    <div class="btn-group mt-2">
        <button type="button"
                class="btn btn-outline-primary btn-block dropdown-toggle"
                data-toggle="dropdown"
                aria-haspopup="true"
                aria-expanded="false"
                style="min-width: 230px;">
          Add to Calendar
        </button>
        <div class="dropdown-menu">
          <a class="dropdown-item" href="{{GoogleCalendarLink}}" target="_blank">
            Google
          </a>
          <a class="dropdown-item"
             href="{{IcsLink}}"
             download="{{Event.name}}-{{formatDate Event.startDateTime}}.ics">
            Outlook
          </a>
          <a class="dropdown-item"
             href="{{IcsLink}}"
             download="{{Event.name}}-{{formatDate Event.startDateTime}}.ics">
            Apple Calendar
          </a>
        </div>
    </div>
</script>
We recommend that you import Popper.js in your page’s head for a smooth UI:
<script src="https://cdnjs.cloudflare.com/ajax/libs/popper.js/1.12.9/umd/popper.min.js" integrity="sha384-ApNbgh9B+Y1QKtv3Rn7W3mgPxhU9K/ScQsAP7hUibX39j7fakFPskvXusvfa0b4Q" crossorigin="anonymous"></script>
<% elem.innerText %>