Step 2: Set Up Sub-Accounts
Now that you have tested site deployment in your parent account, this section will teach you how to create sub-accounts and deploy a website to each one.
The video below walks through the instructions for this step.
Set Up a Developer Console App
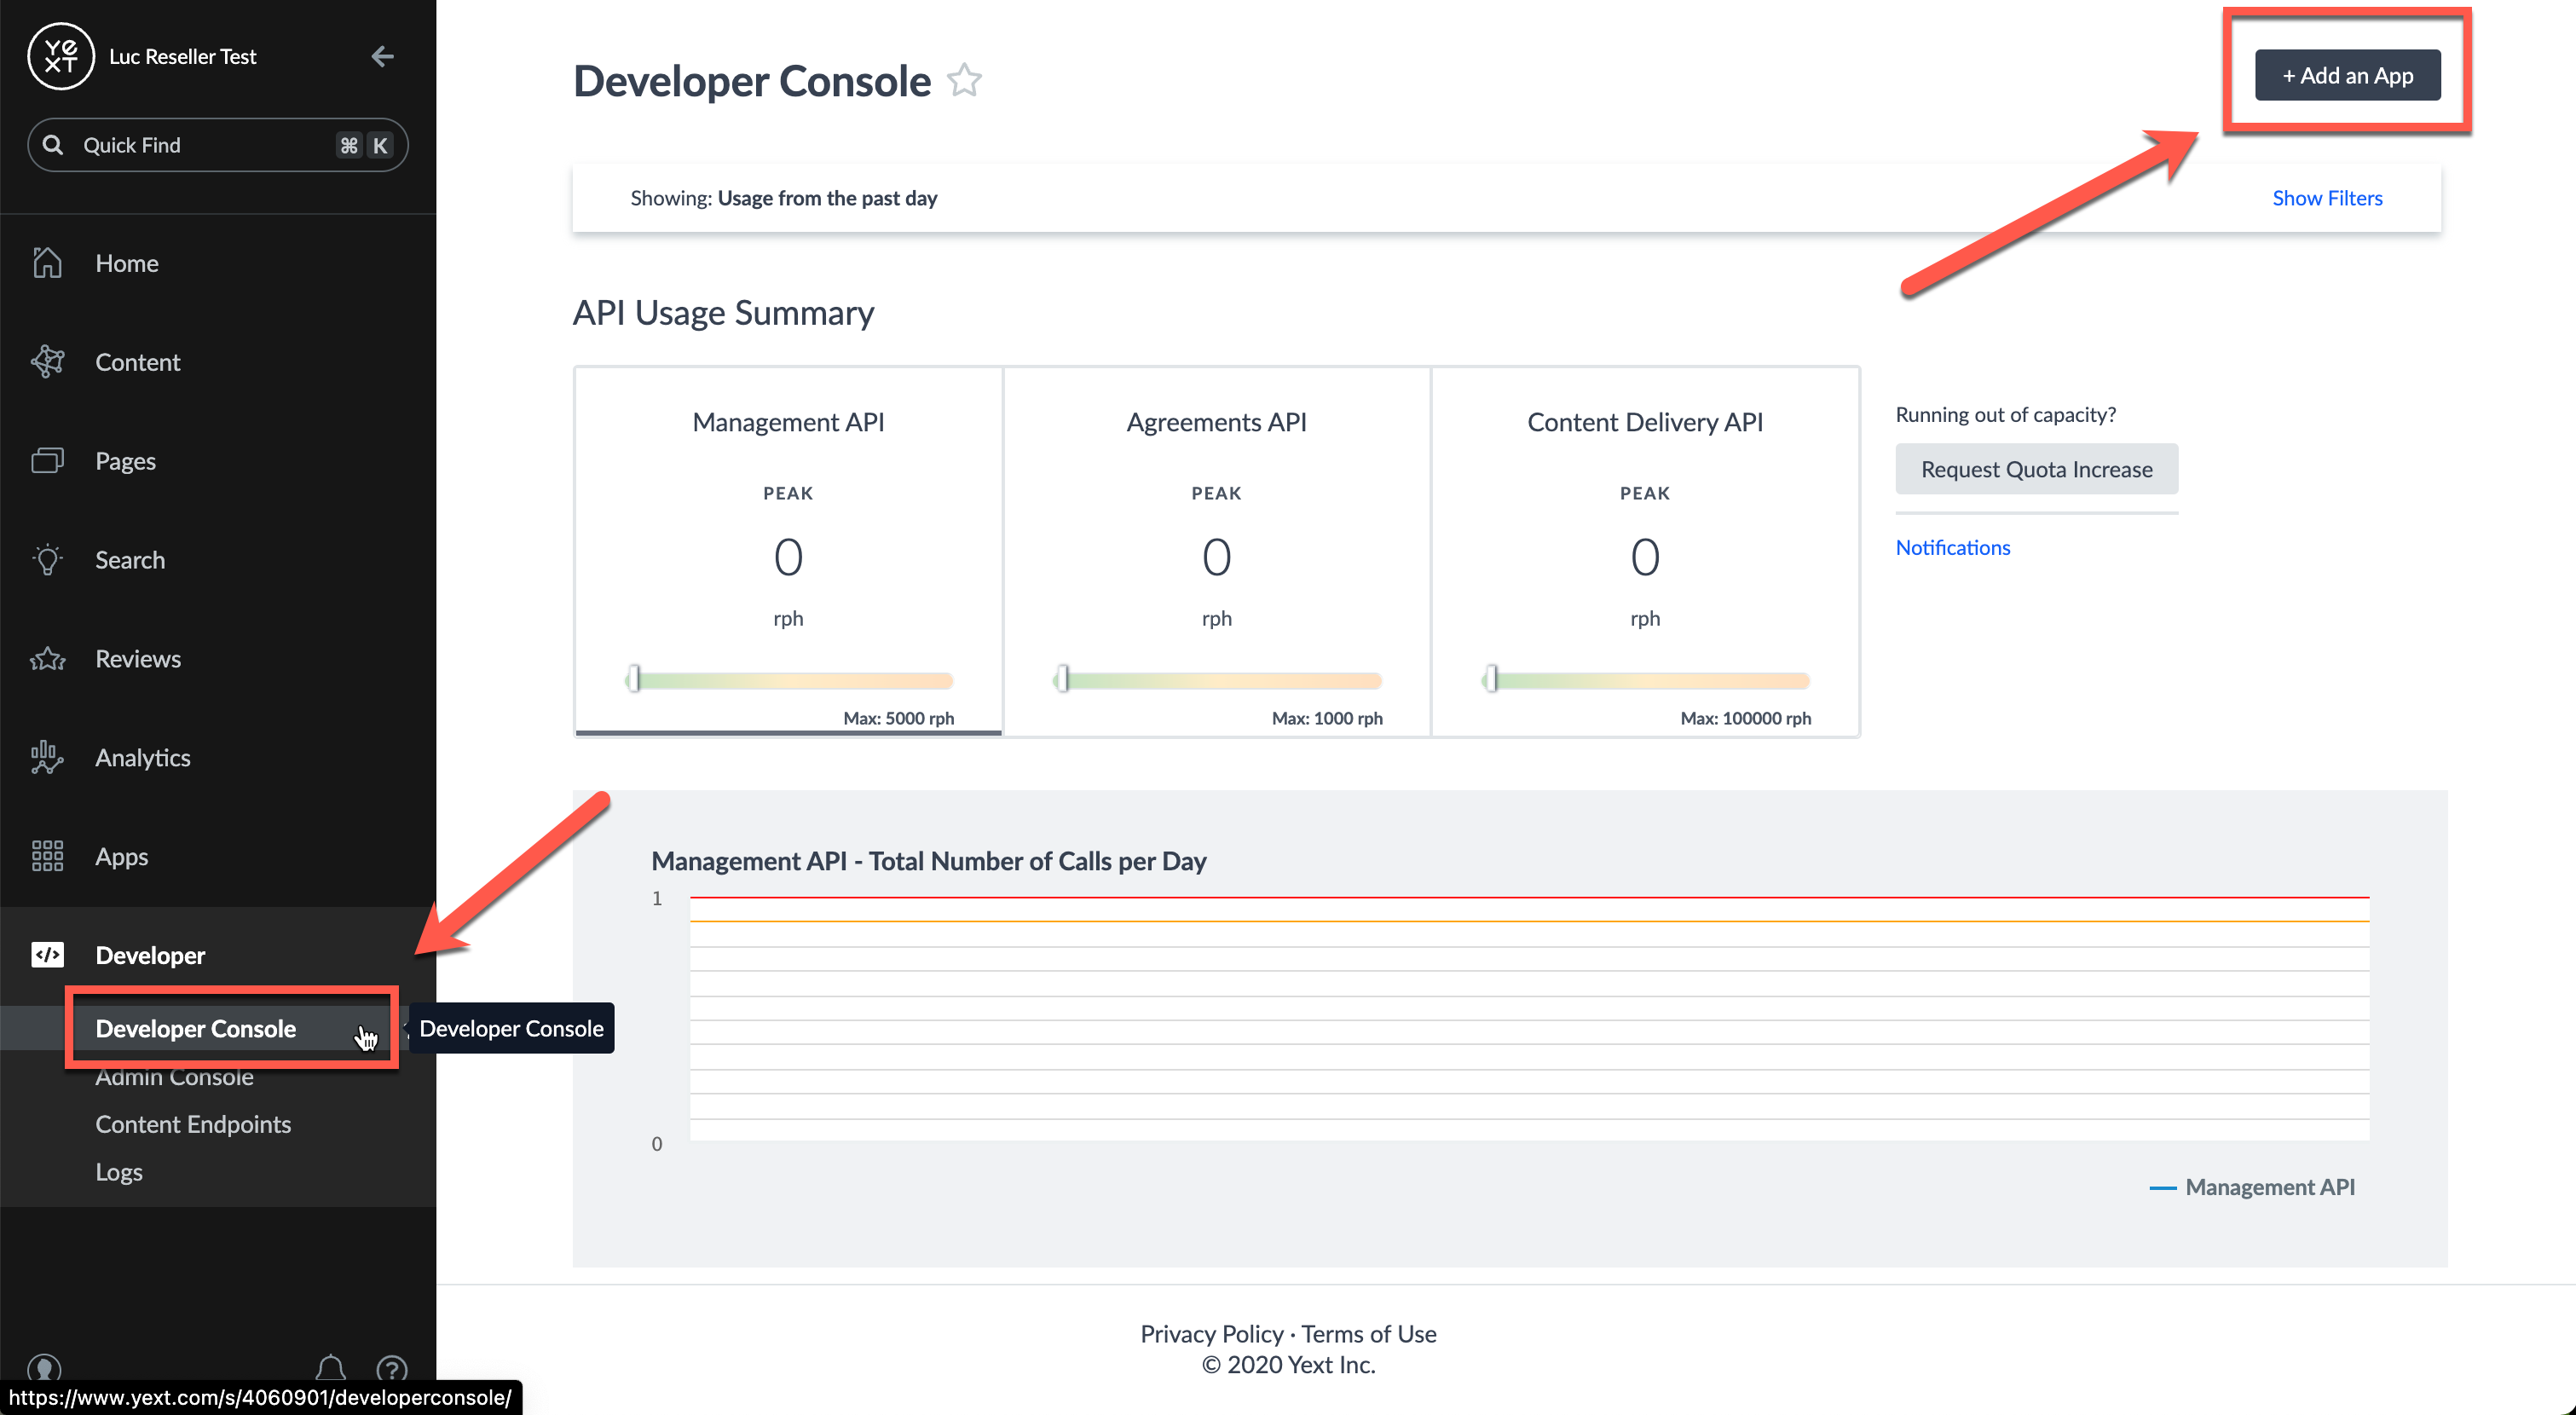
First, let’s create an app in the Developer Console in your parent account. You will use this to obtain an API key that allows you to programmatically create and manage sub-accounts.
In the left-hand navigation menu of your screen, click on Developer > Developer Console and click Add an App. Name your app whatever you’d like.
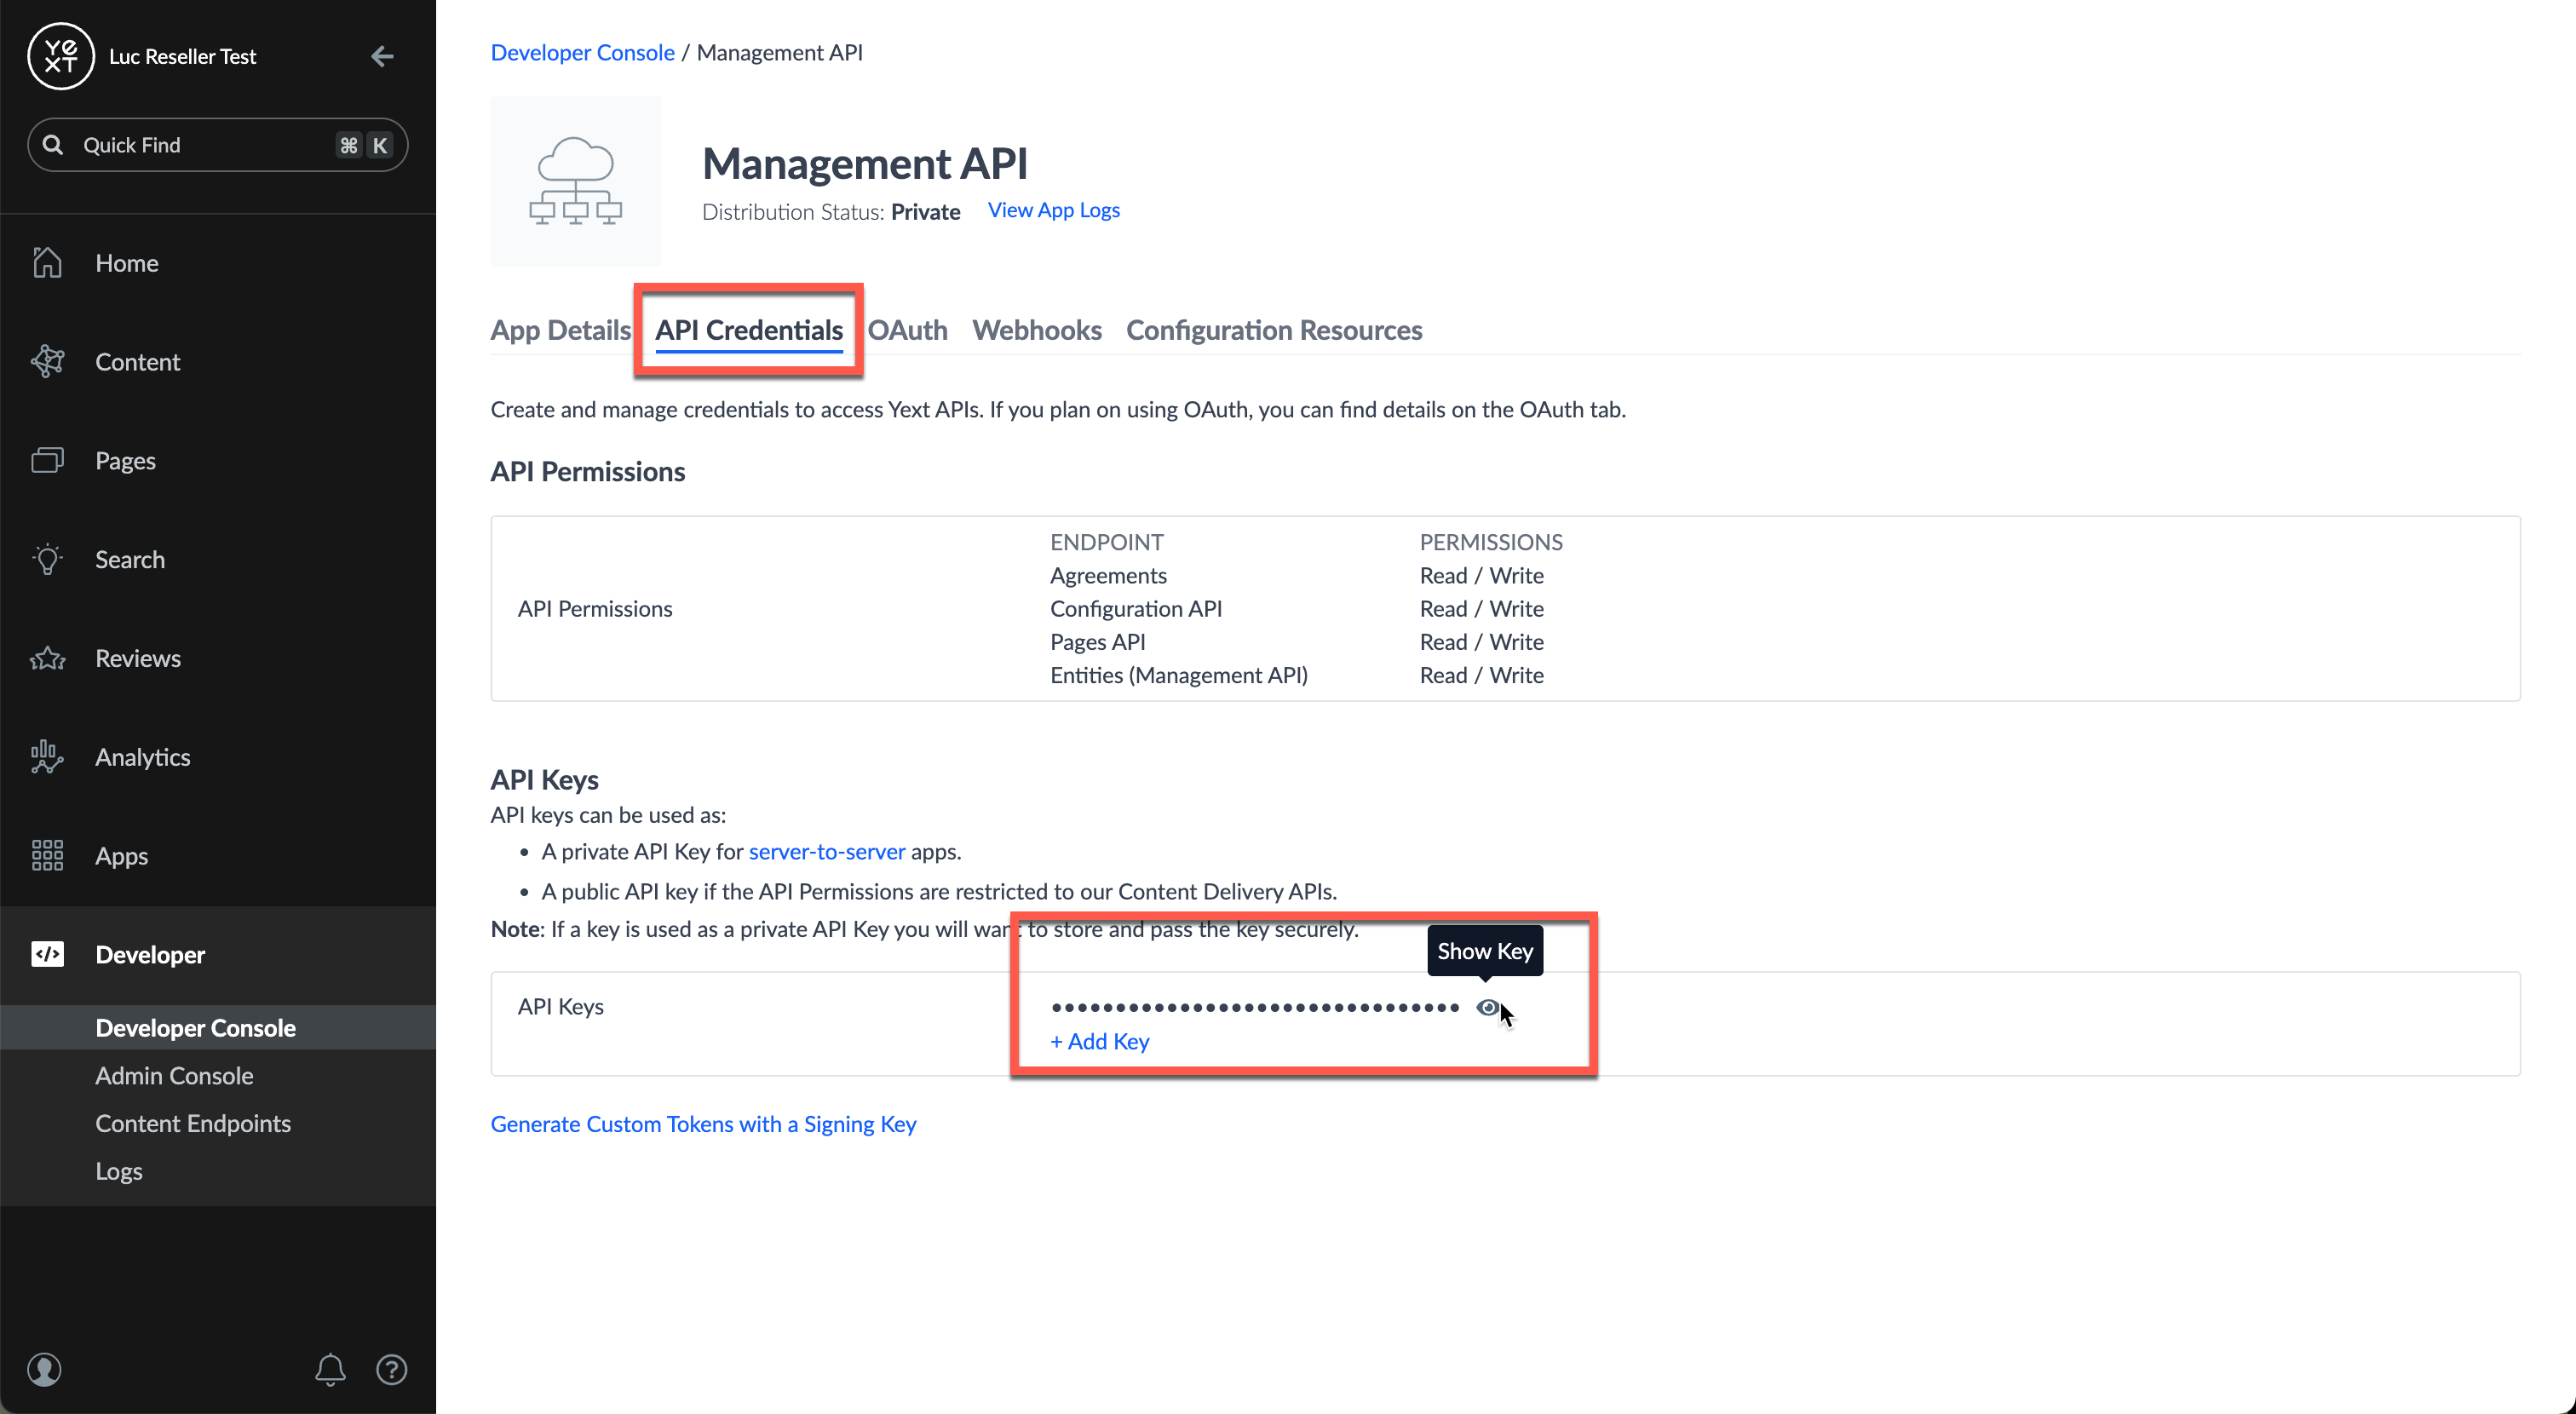
On the next screen, navigate to the
API Credentialstab, and provision read/write access to the following endpoints:- Management API > Agreements
- Management API > Configuration API
- Management API > Pages API
- Management API > Entities
You can obtain your API key by clicking on the eye icon below. Copy this, as you will need it for the next step.
Prepare the Postman API Client
Now that you’ve created an app and obtained an API key, we can interact with Yext’s APIs. To get started, complete the following steps to set-up Postman on your computer:
- Download Postman API client .
- Download the following Postman collection and environment .
- Follow these
instructions
to import both the collection and environment into your Postman workspace. This will set up a Postman environment for your account structure. You can import by clicking File > Import.
Populate the following Reseller Environment Template variables with the following values (which should go under the “current value” column):
api_key- API key from the previous stepaccount_id- The ID of your parent account. By default, this will be the 7-digit number in the URL of your account.
Create Sub-Account
In your Fleet Management Demo collection, open up the Agreements API > Create Sub Account API request. You will use this request to create your first sub-account.
If you navigate to the Body tab, you’ll see a few variables that you’ll need to provide values for. Open up your Reseller Environment Template and populate the following:
sub_account_id- Account ID of the sub-account you will be creating/deploying your site to. For now, set this as “sub-account-1”.sub_account_name- Name of the sub-account you will be creating/deploying your site to. For now, set this as “Sub Account 1”.sub_account_country_code- The abbreviation for the country in which the account is primarily established. For now, set this asUS, as you will be creating a location entity in the next step with a US-formatted address.
Once you have saved your template variables, navigate back to the request and click send. After a few seconds, your new account should exist!
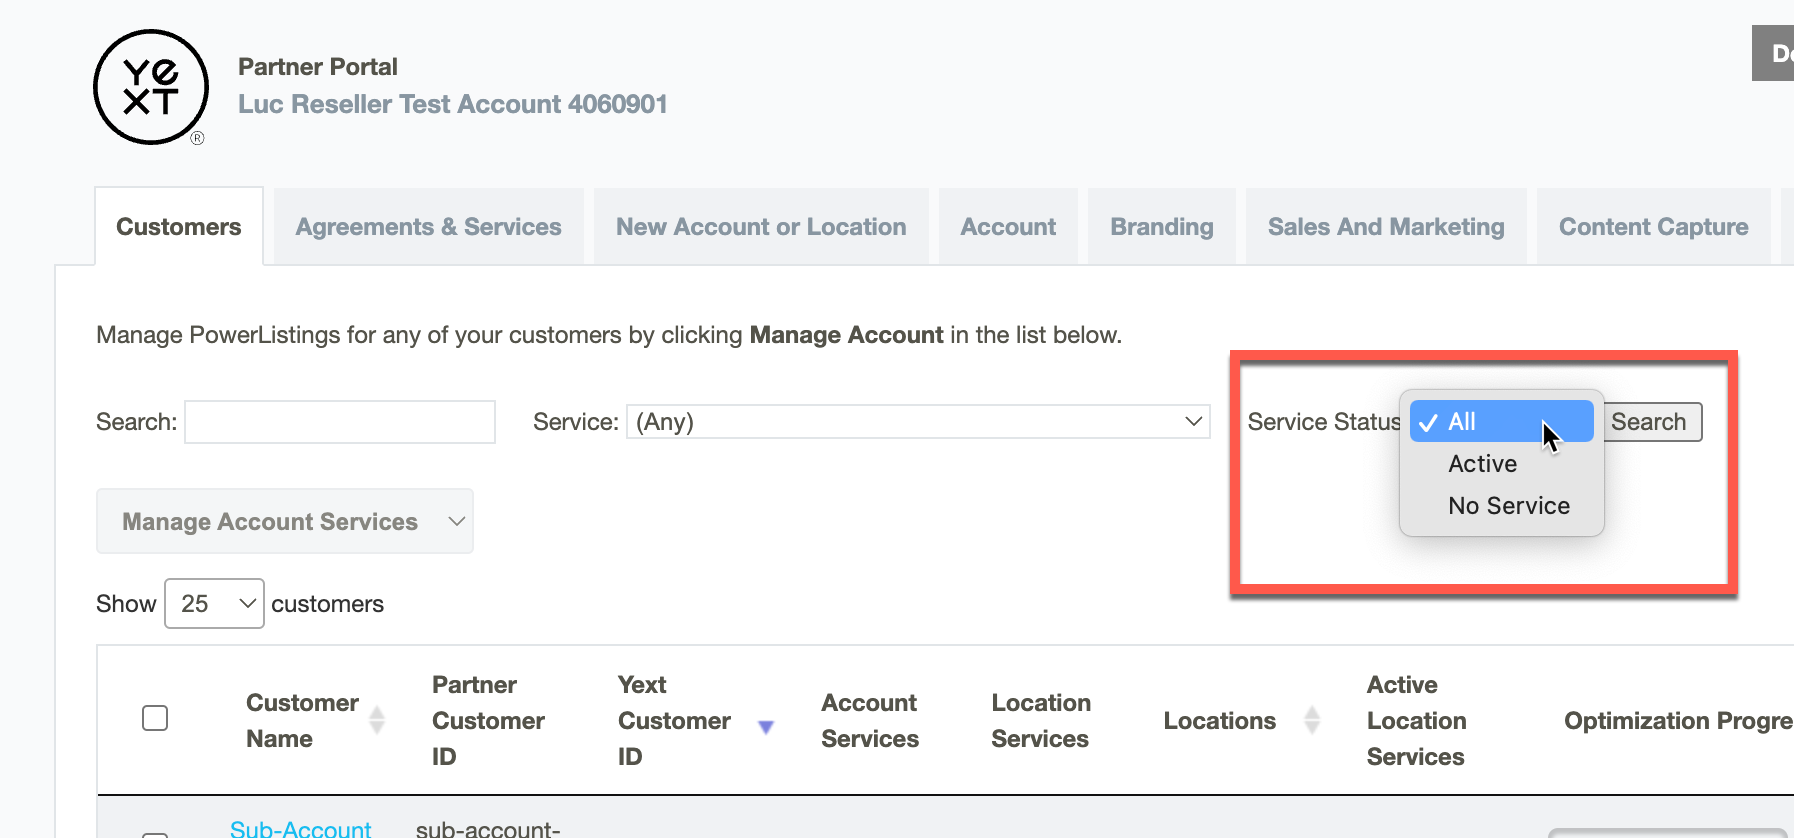
If you navigate back to your Partner Portal and select Service Status = “All”, you will see your new sub-account in the table!