

Step 3: Configure the Kyruus Connector
After installing the app(s), the associated Kyruus connectors will automatically be installed. But first — what’s a connector?
A connector is anything that takes data from a source and transforms it into entities in the Knowledge Graph. A source can be things like the Yext Site Crawler, an app like Google Business Profile or Kyruus, or an API. Data pulled in from these sources can be used to create new entities, as well as update existing entities in Yext.
To set up your connector:
Navigate to Knowledge Graph > Connectors.
Select View on the Provider or Location connector created by the app (depending on which app you chose in the last step of the guide). If you installed both apps, choose one connector to start with and then repeat the steps in this section for the other connector.
Once you’re on the details screen for your connector, click Edit Configuration in the top right. The other items on this screen will be explained more in later steps.
All the necessary configuration options for the connector will already be set up by the app. At a high level, the items already configured will include:
- Source: Where the data is being pulled from (a spreadsheet, an API, an app, etc.); in this case, that’s Kyruus
- Settings: The account details provided by the linked account
- Specify Selectors: Identifies which data elements from the source (i.e., the Kyruus Search API) that will be used by the Connector
- Transforms: Additional logic for updating the data from the Kyruus API feed into a format that’s usable by Yext
- Destination: Where the connector will be sending the data; in this case, that’s the Knowledge Graph, and specifically, the Healthcare Facility and/or Healthcare Professional entity types
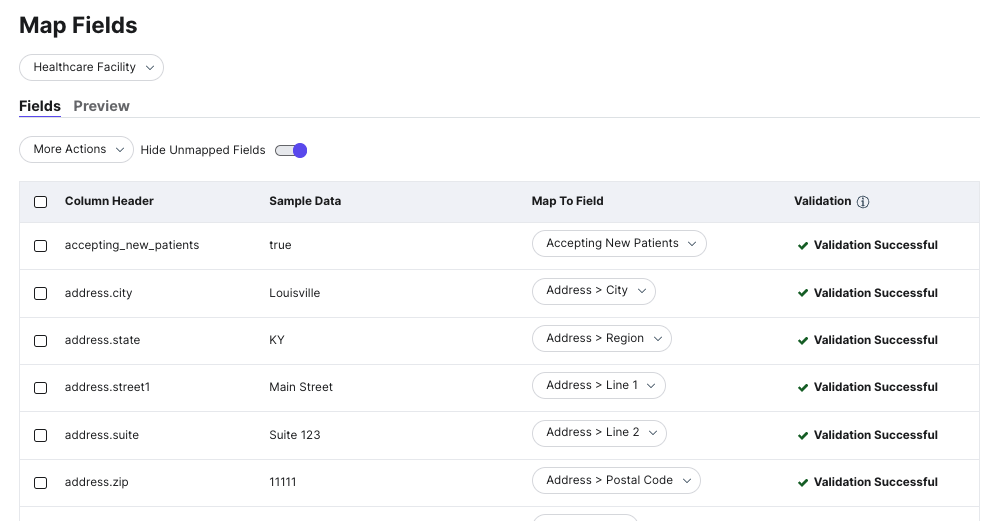
In the Map Data section under Destination, review the table to ensure that the fields from Kyruus are mapping to the appropriate fields in Yext. These field mappings should happen automatically based on the standard Kyruus to Yext field alignments.
Save your connector. We recommend holding off on running the connector for now, as the next steps in this guide will go through other configurations you may want to set up.
- If you do decide to run it now, click Save and Run Connector and select the option to run as a Dry Run so you can see what additions or changes will be made prior to updating your entities.

- If you do decide to run it now, click Save and Run Connector and select the option to run as a Dry Run so you can see what additions or changes will be made prior to updating your entities.