Step 3: Set up Webhooks in Shopify Account
In order to keep your Shopify product catalog up to date in near-real time we have created three connectors that handle webhooks. These connectors are enabled to run whenever a webhook is triggered in Shopify.
Create App in Yext
First, you’ll need to create a developer app within Yext to retrieve an API key with proper permissions for your webhook endpoints. Follow our guides for in depth instructions, Introduction to Developer Console & Apps and How to Create an App .
- Navigate to the Developer Console within Yext.
- Select +Add an App and give it a name.
- Once created, select the API Credentials tab and add API permissions for the Management API Connectors endpoint.
- Click Save.
Set up Webhooks in Shopify
Next, for the updates to work properly, you will need to set up your own custom webhooks in your Shopify account.
- Navigate back to your Shopify admin page.
- Click settings at the bottom left.
- Scroll to the bottom of the settings page to the webhooks section. Click the Create Webhook button. You can see detailed instructions in Shopify’s Webhooks help article .
You will create 5 webhooks, when setting up your webhooks you will need to include a URL in order to receive these notifications. This URL will be provided for you in the Yext platform, those steps are outlined below. Additionally, each webhook should be set up with the format equal to JSON and select the Webhook API Version 2022-10 (latest).
First, create webhooks to update your parent products.
- Navigate to your Connectors page in Yext and select the *Shopify Parent Product Updates connector.
- Click Edit Configuration.
- Then, in the connector settings tab, copy the URL. This is the URL that you will paste for both your product creation and product updates webhooks.
Next, create webhooks to update your variant products.
- Follow the same steps as above. Navigate to your Connectors page in Yext and select the Shopify Variant Product Updates connector.
- Click Edit Configuration.
- Then, in the connector settings tab, copy the URL. This is the URL that you will paste for both your product creation and product updates webhooks.
Finally, create the webhook to subscribe to the Product Deletion event.
- Navigate back to your Connectors page in Yext and select the Shopify Product Deletions connector.
- Click Edit Configuration.
- Then, in the connector settings tab, copy the URL. This is the URL that you will paste for your product deletions webhook.
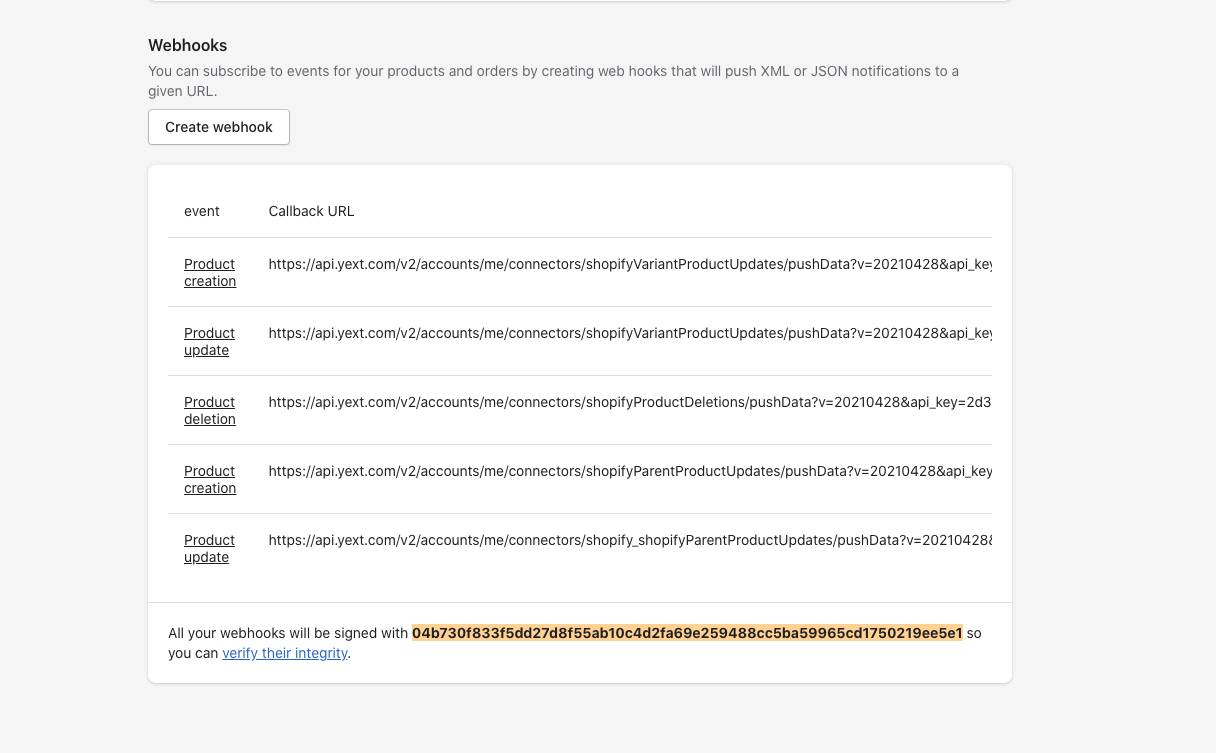
Once all of your webhooks are set up you should see them all saved. Now, you’re all set to keep your entire Shopify product catalog in sync with Yext!