Step 9: View and Manage Your Listings
After the Listings Launch flow is complete, you can view your listings and ensure that your data is syncing successfully. In this section, you will learn how to:
- View all your listings
- Review listings that are in a “Confirm Sync” state
- Review listings that are not synced with publishers
- See and manage your Listings Configuration settings
- See your linked accounts
View Your Listings
In the left navigation bar, go to Listings > All Listings.
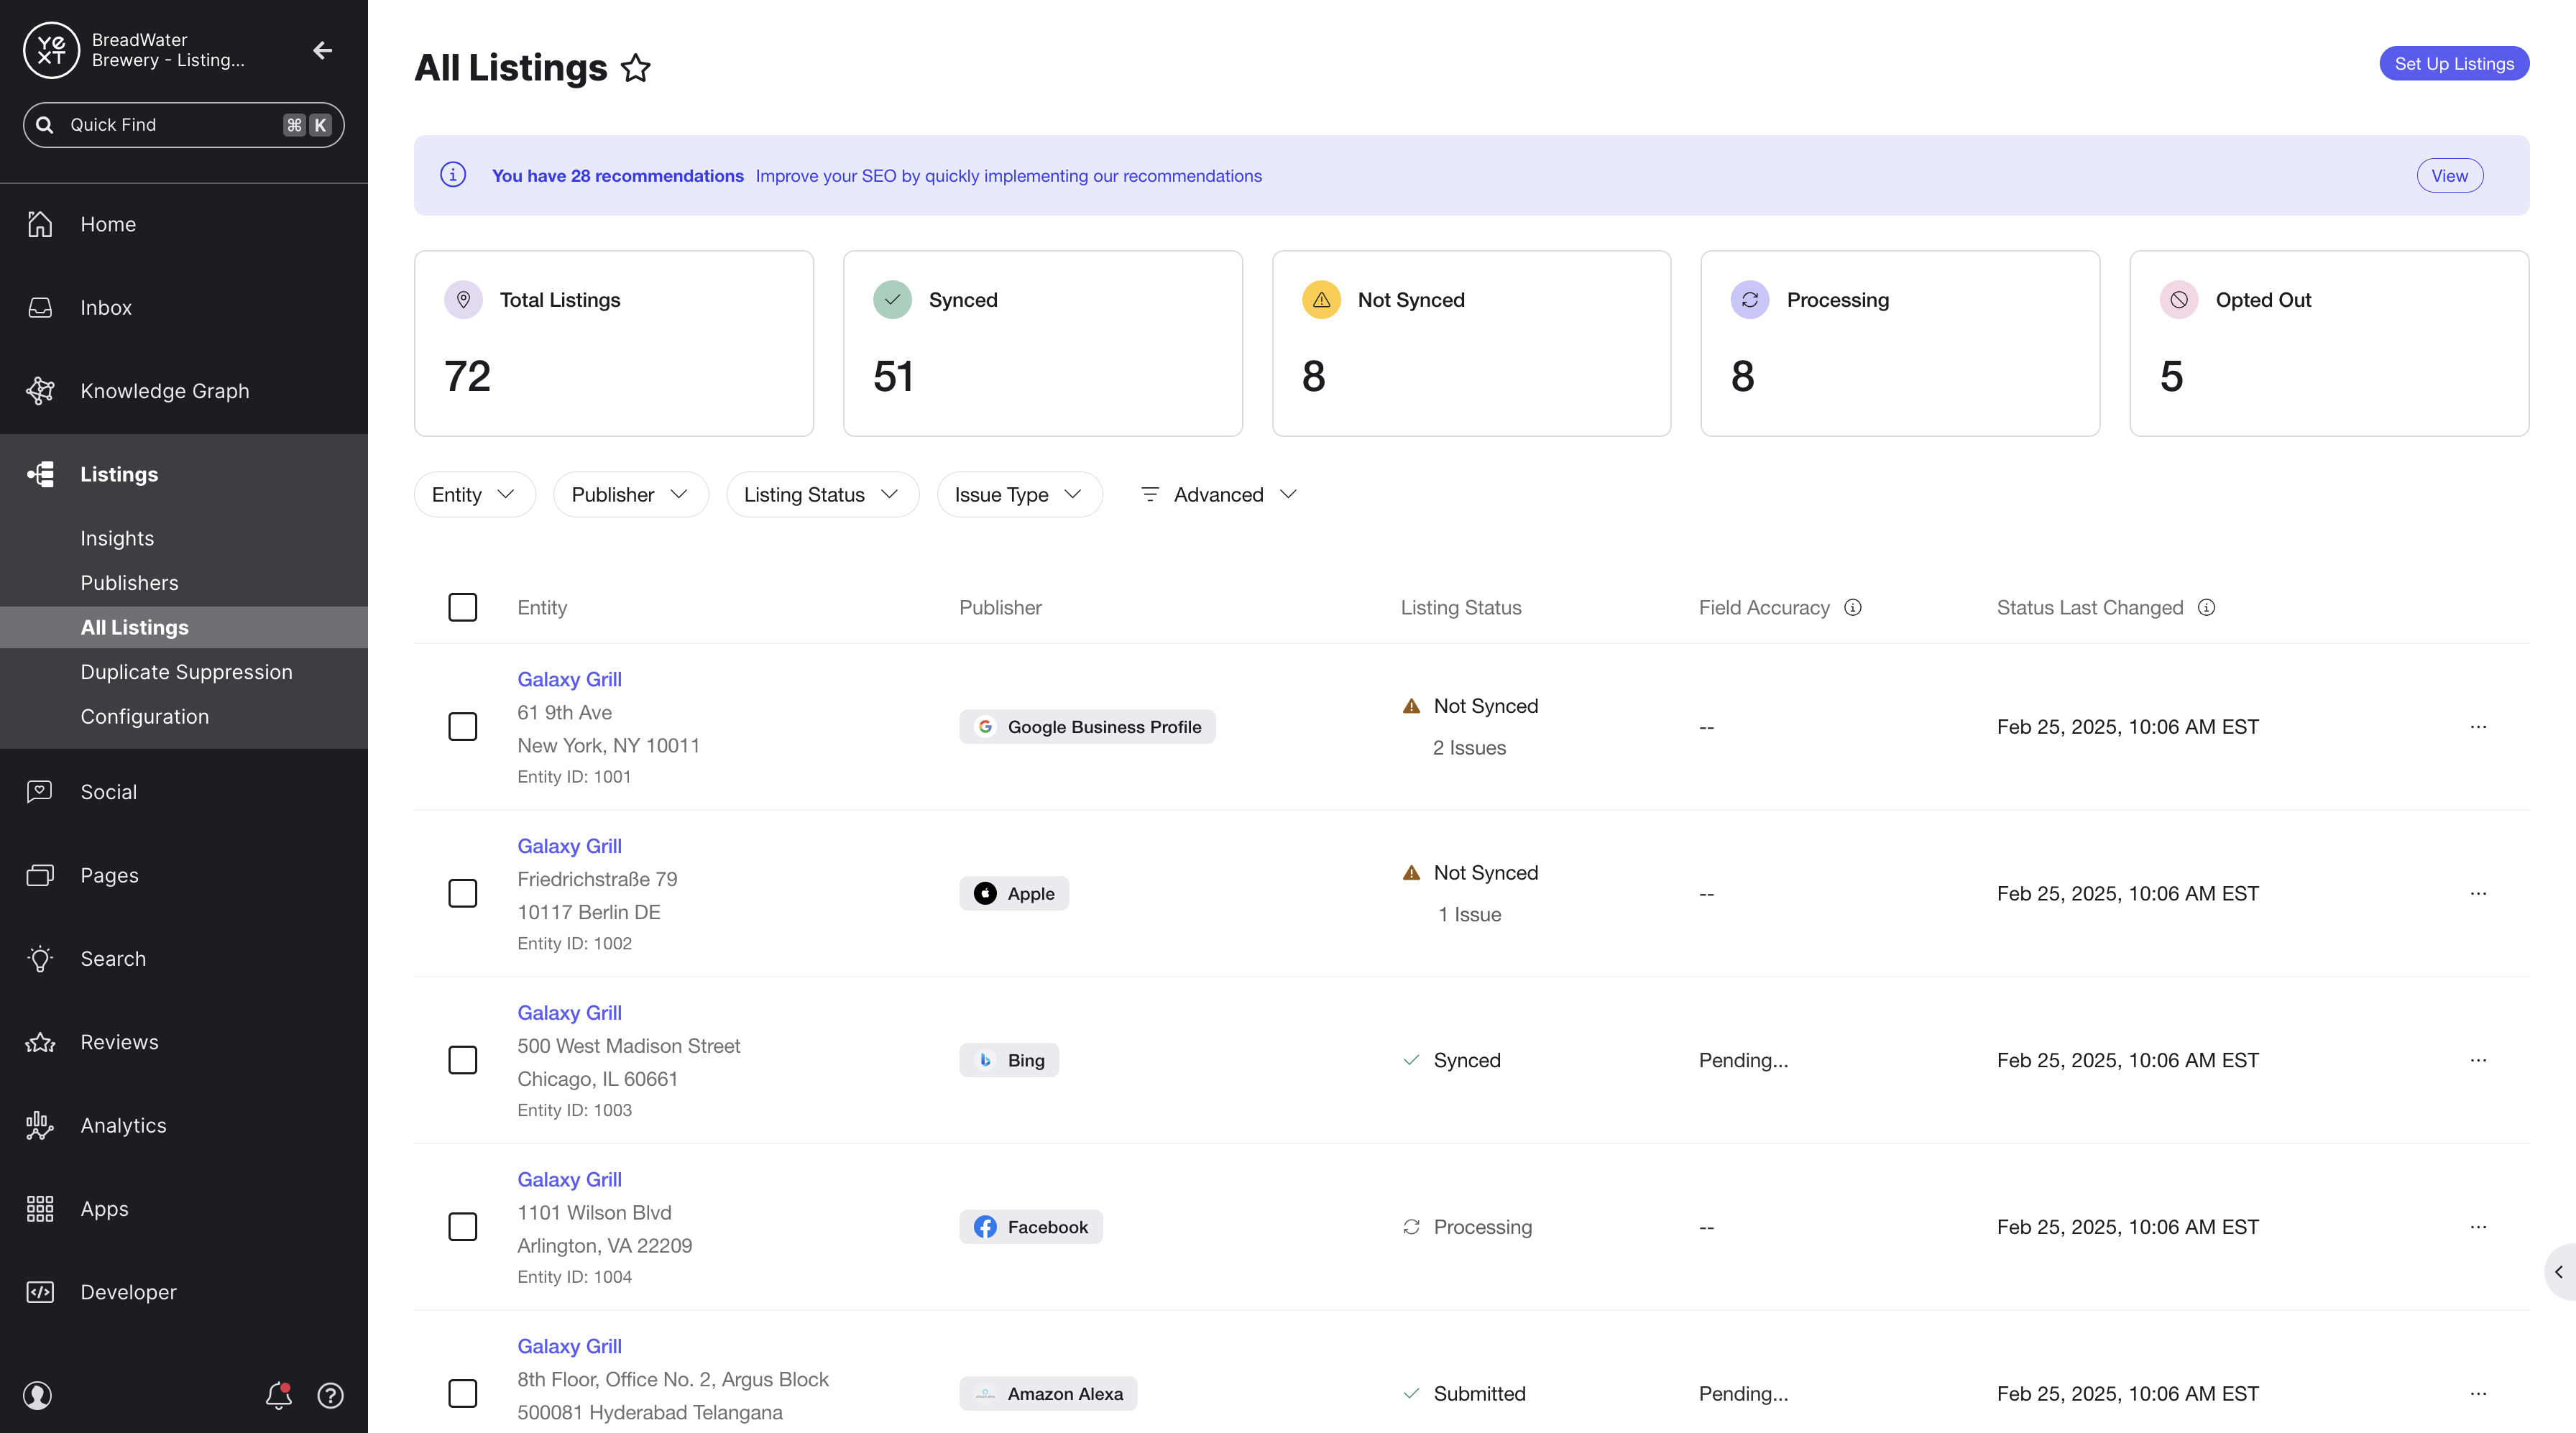
Here, you can view your listings and filter them by publisher, status, and other criteria.
See the Publishers and All Listings training units for a refresher of all the ways you can view information about your listings.
Review “Confirm Sync” Listings
From the All Listings page, click the Issue filter pill and select Confirm Sync.

This will show you any listings that are in a “Confirm Sync” state, which means they require manual approval to sync to publishers.
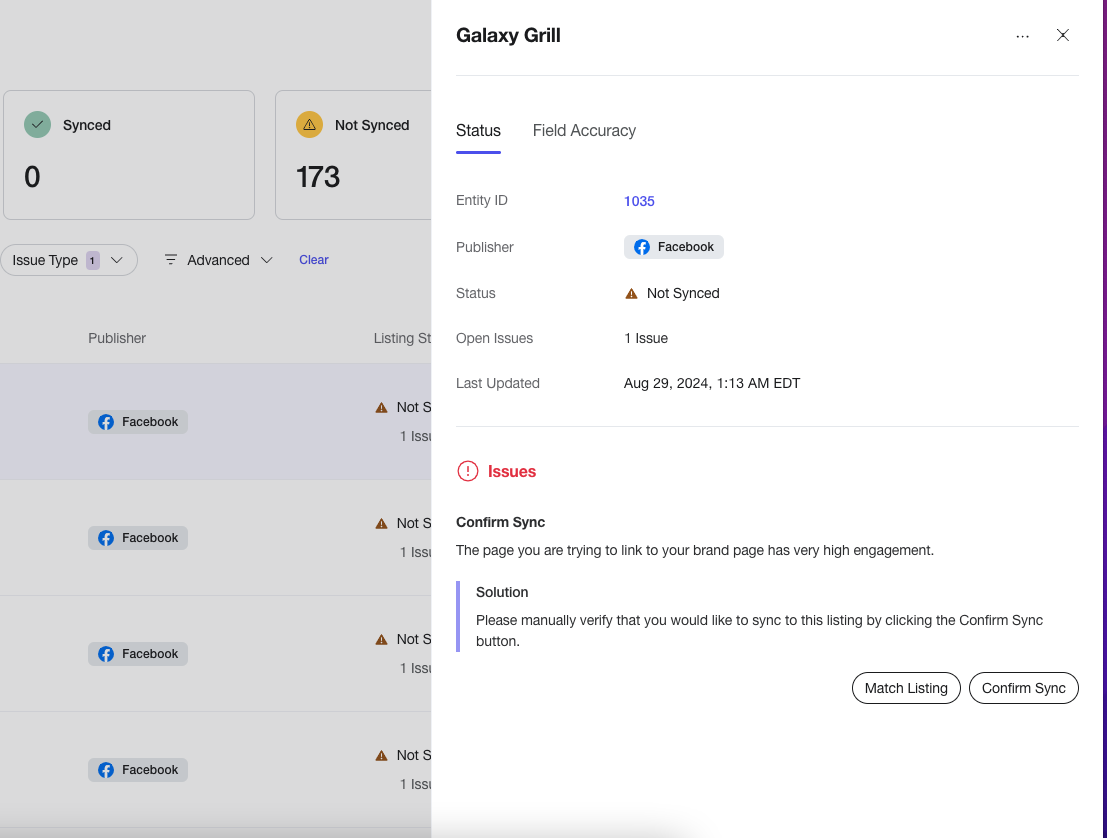
This can happen for a couple of reasons:
- You may have the automatic “Update Listings” and/or “Create Listings” options disabled in your Listings Configuration settings. This means listings will need to be manually reviewed before being created and/or updated. Check your configuration settings to confirm.
- Your listing may have a field mismatch (such as Name, Address, etc.)
For more information and steps to resolve these listings, see the Confirm Sync reference.
Review Not Synced Listings
If a listing has a status of Not Synced, this means information for that listing is not being sent between the publisher and Yext.
To review these:
Filter to all your listings that are Not Synced.
- You can also use this with the Issue Types filter to see listings with a specific issue.
- To export your Not Synced listings, select all the listings in your filter by clicking the checkbox at the top of the table. Then, click the Download icon that appears at the bottom of the screen to export a file of your listings.

Look through the Status Details column to see the reason.
Follow the steps in order to fix the issues so the listings can be synced.
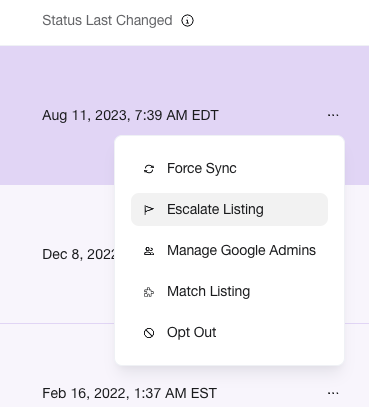
If there is an issue on a listing, or the Status Details tell you to reach out to Yext Support, click the three dots on the right side of the listing and select Escalate Listing option to escalate your listing to the Support team.
In some cases, your data may not be able to sync with a certain publisher at all. For example, if your business is not a restaurant, we won’t be able to sync to OpenTable. In these cases, there are no other steps to take.
Review Your Listings Configuration Settings
In the left navigation bar, go to Listings > Configuration. This will bring you to your Listings Configuration settings, which you set up during the Listings Launch flow.
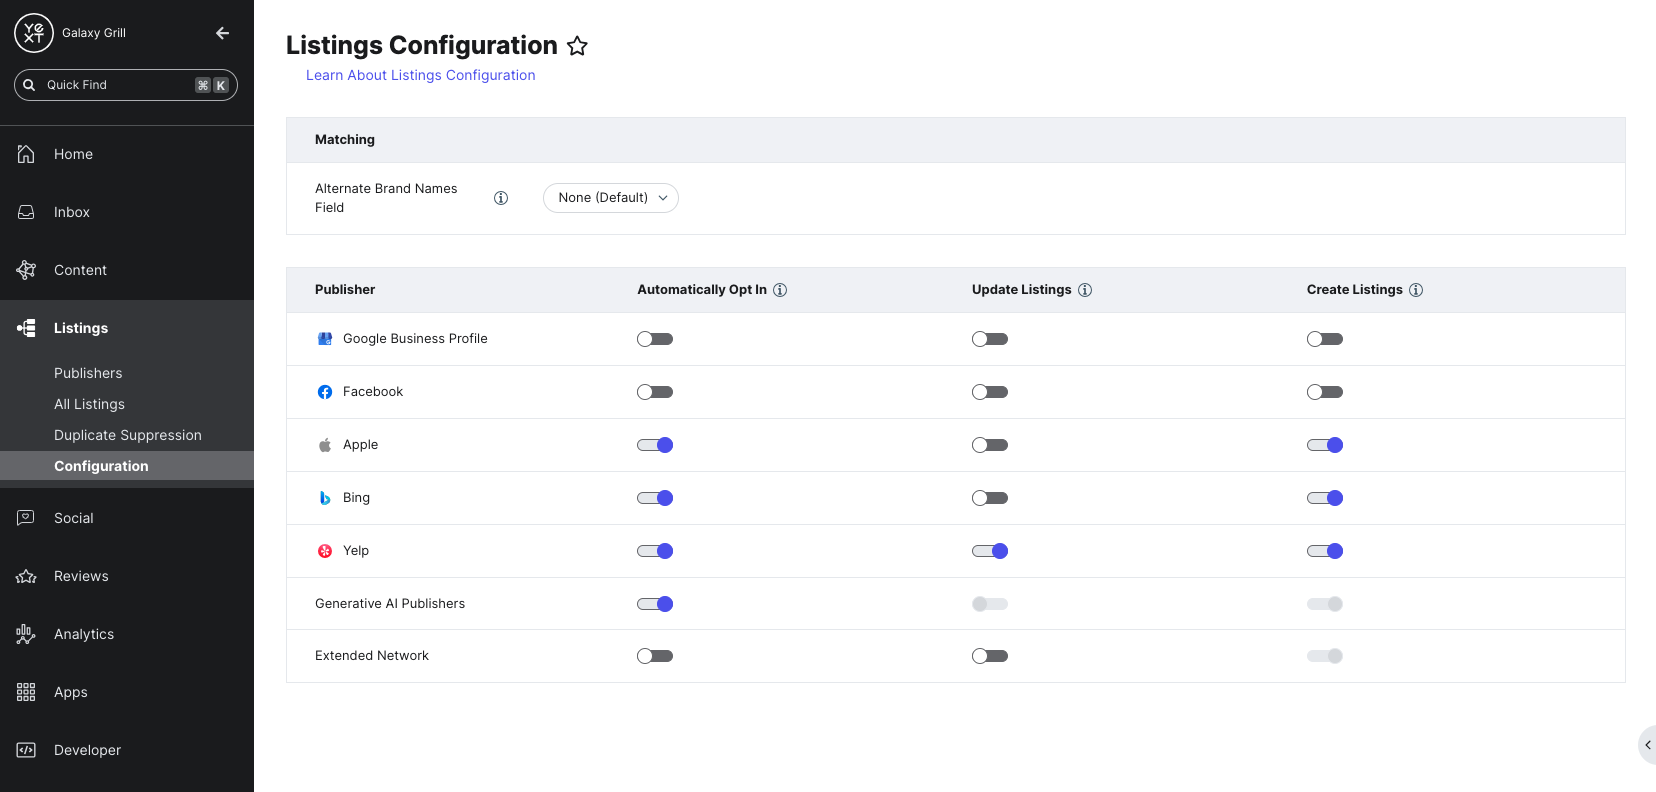
You can change any of your settings for automatically Opting in, Updating, and Creating listings here. Use caution when editing these, as they will apply to all listings on your account.
For more information on Listing Configuration and how changing settings will affect your listings, see the Listings Configuration reference.
View Your Linked Accounts
To see all the third-party accounts you have linked to Yext, click the Account Details icon in the lower left corner of the navigation bar. Then, select Linked Accounts. This will bring you to your Linked Accounts settings.
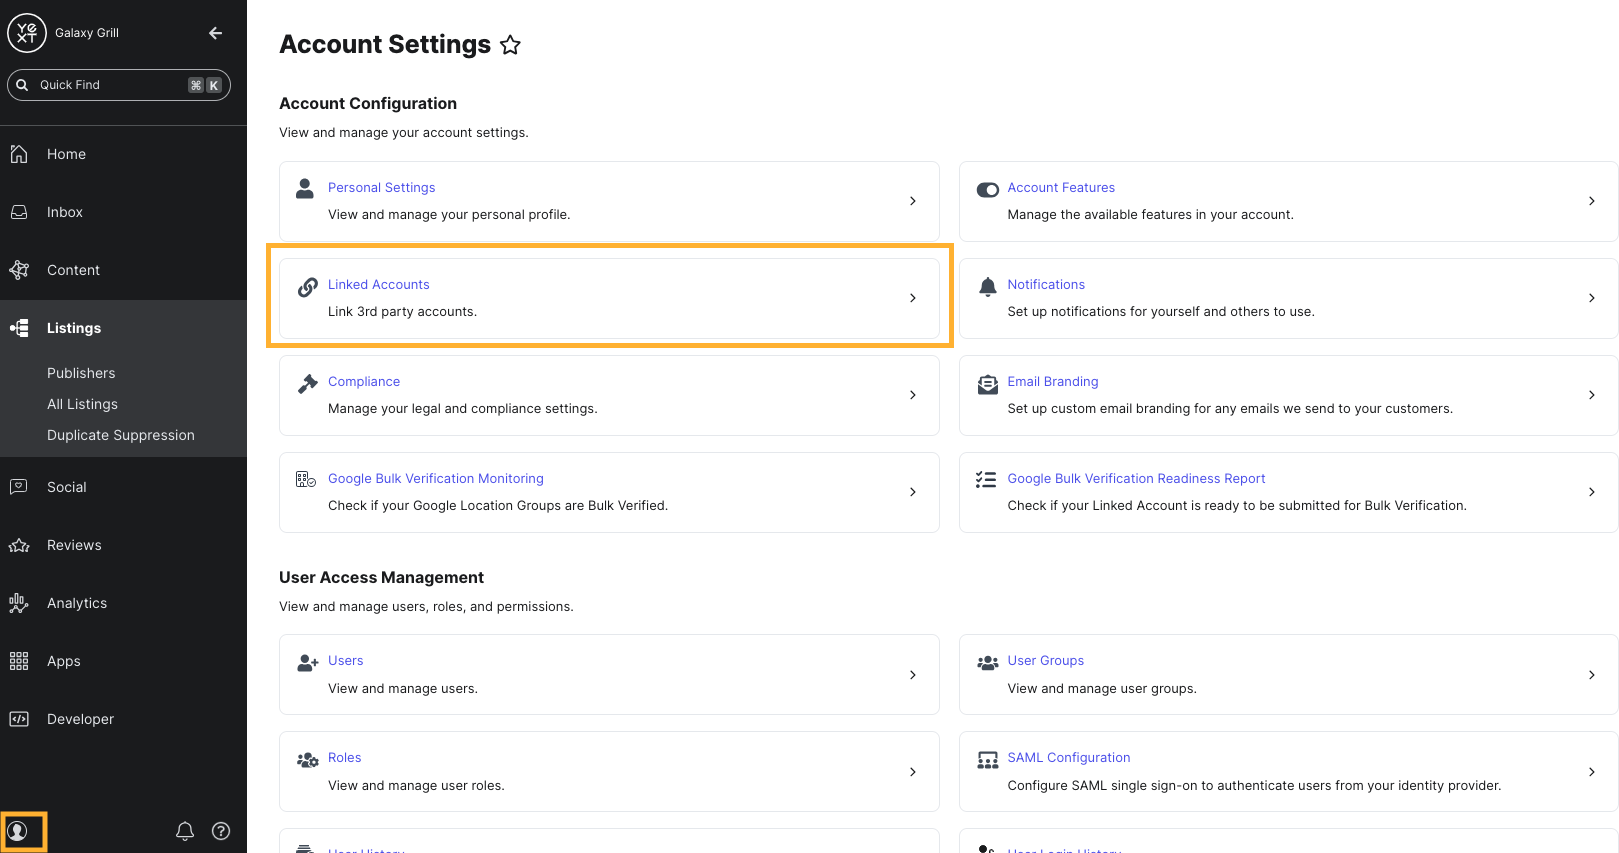
You can add, remove, or change linked accounts from this screen. Use caution when doing this, since unlinking an account will affect your settings across Yext.

