

Step 4: Forking Fields
Now that you have created new field types compatible with your field types using Legacy Rich Text, you’re ready to fork each of your fields using Legacy Rich Text to one of the new field types.
At the end of this step, you will have created a new field largely identical to your existing custom field. We will convert the data from your existing Legacy Rich Text field to the newly selected format.
1: Select Fields to Fork
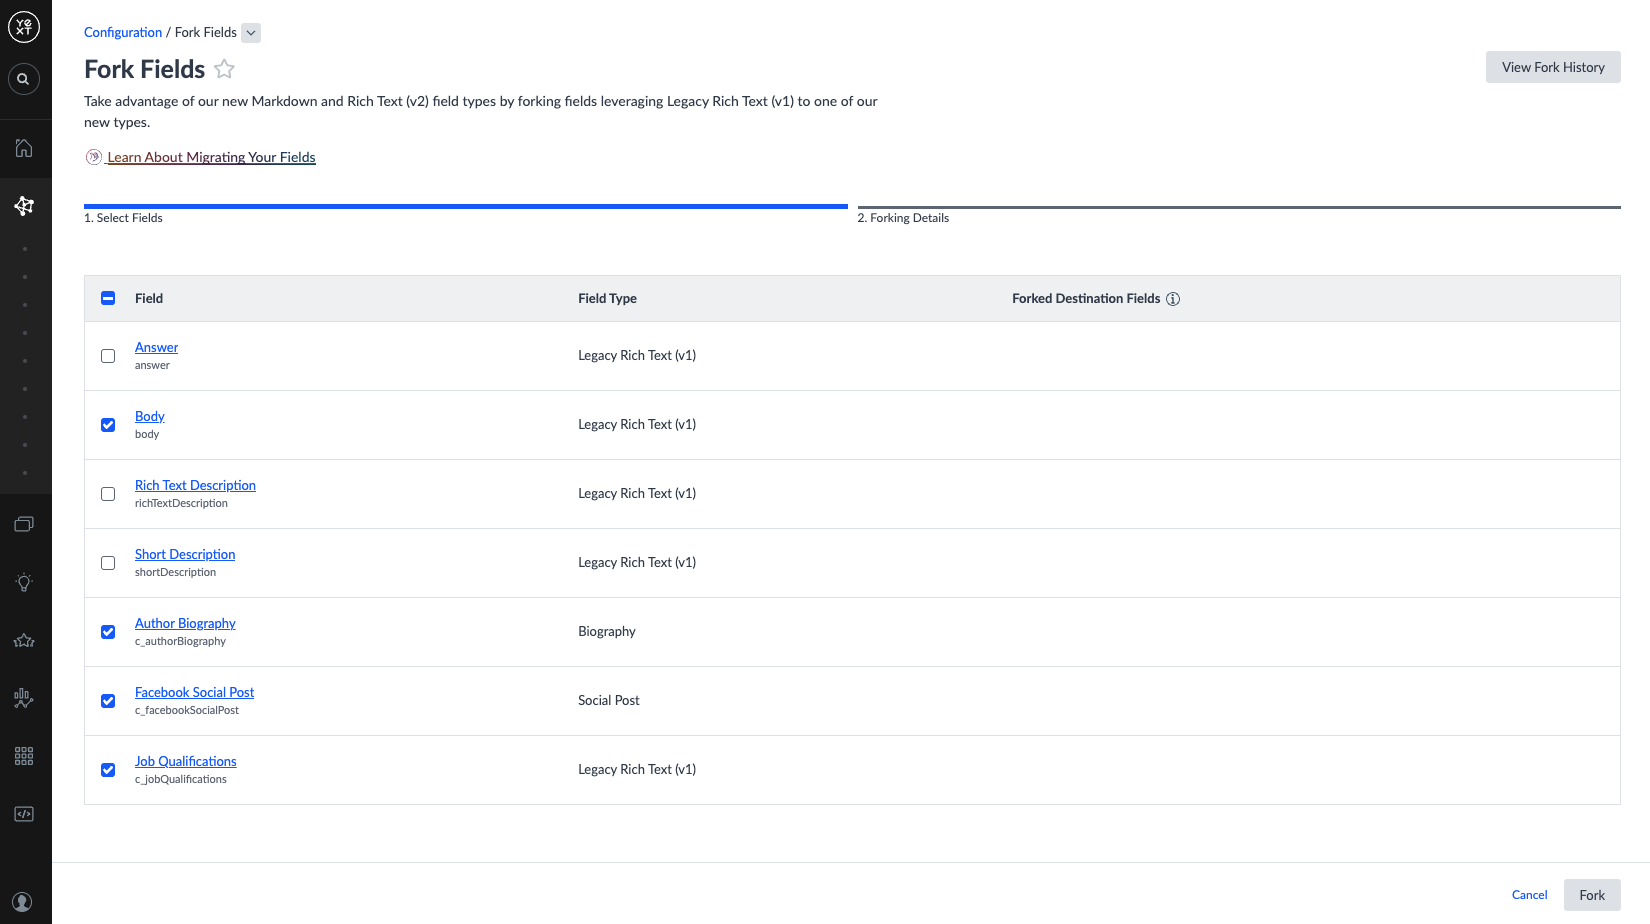
This step is very similar to the Fork Field Types process in the previous section. Navigate to Knowledge Graph > Configuration > Fork Fields. Here, you’ll see an overview of which fields need to be forked.
Select the checkbox next to the fields you wish to fork at this time, and click the Fork button in the bottom right.
2: Configure Your Forked Fields
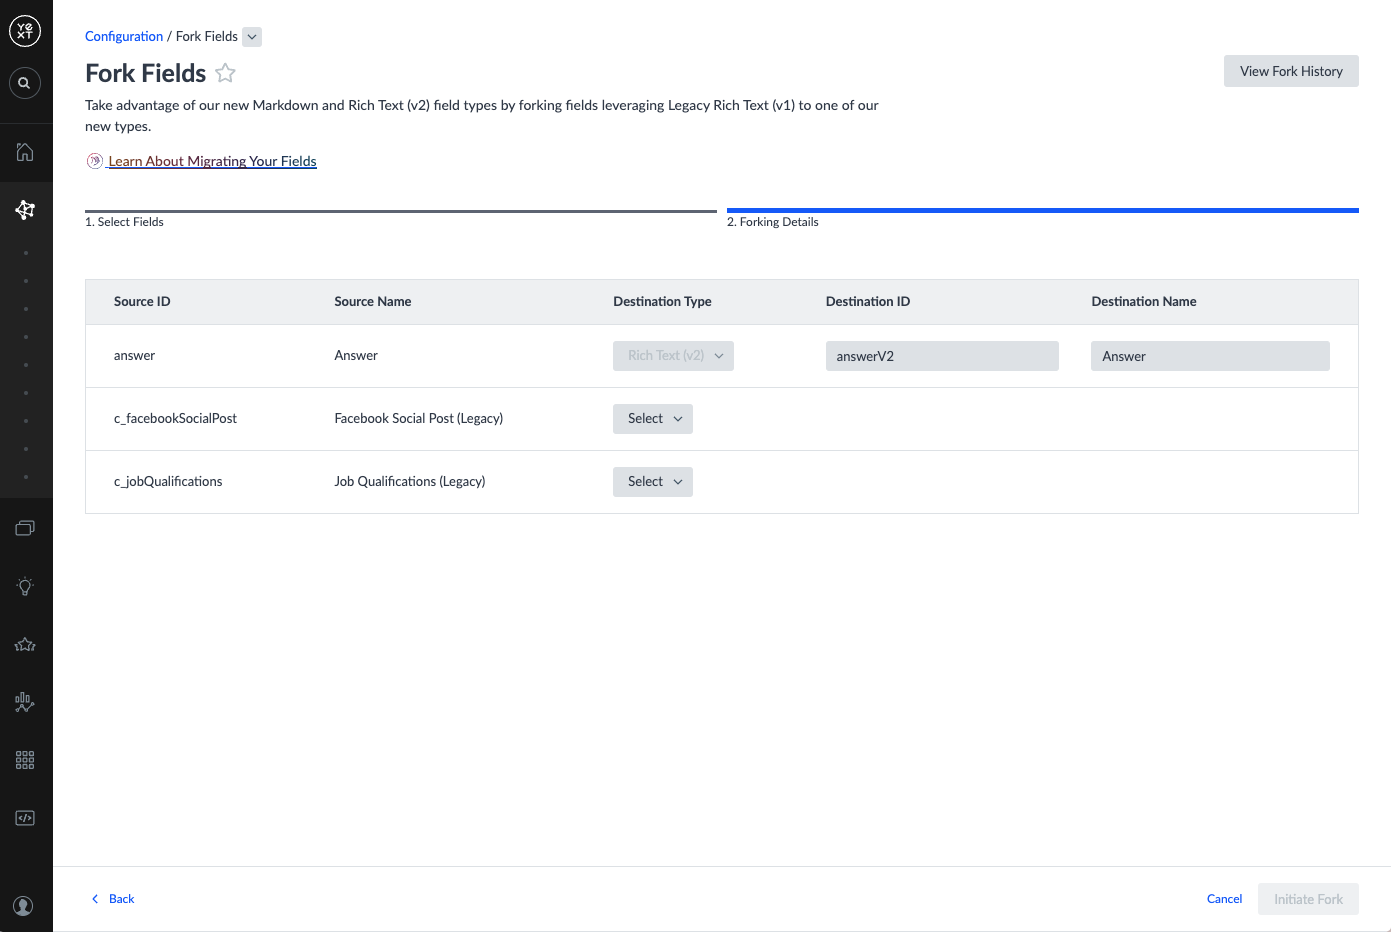
You’ll now be brought to the Forking Details step.
Similar to the steps in the Fork Field Types section, “Source” refers to your custom fields that are currently using Legacy Rich Text. “Destination” refers to the custom fields that will be created to replace the legacy fields.
In this step, you’ll populate the Destination columns.
You will need to populate all of the following for each field in the table:
| Column | Definition | Additional Information |
|---|---|---|
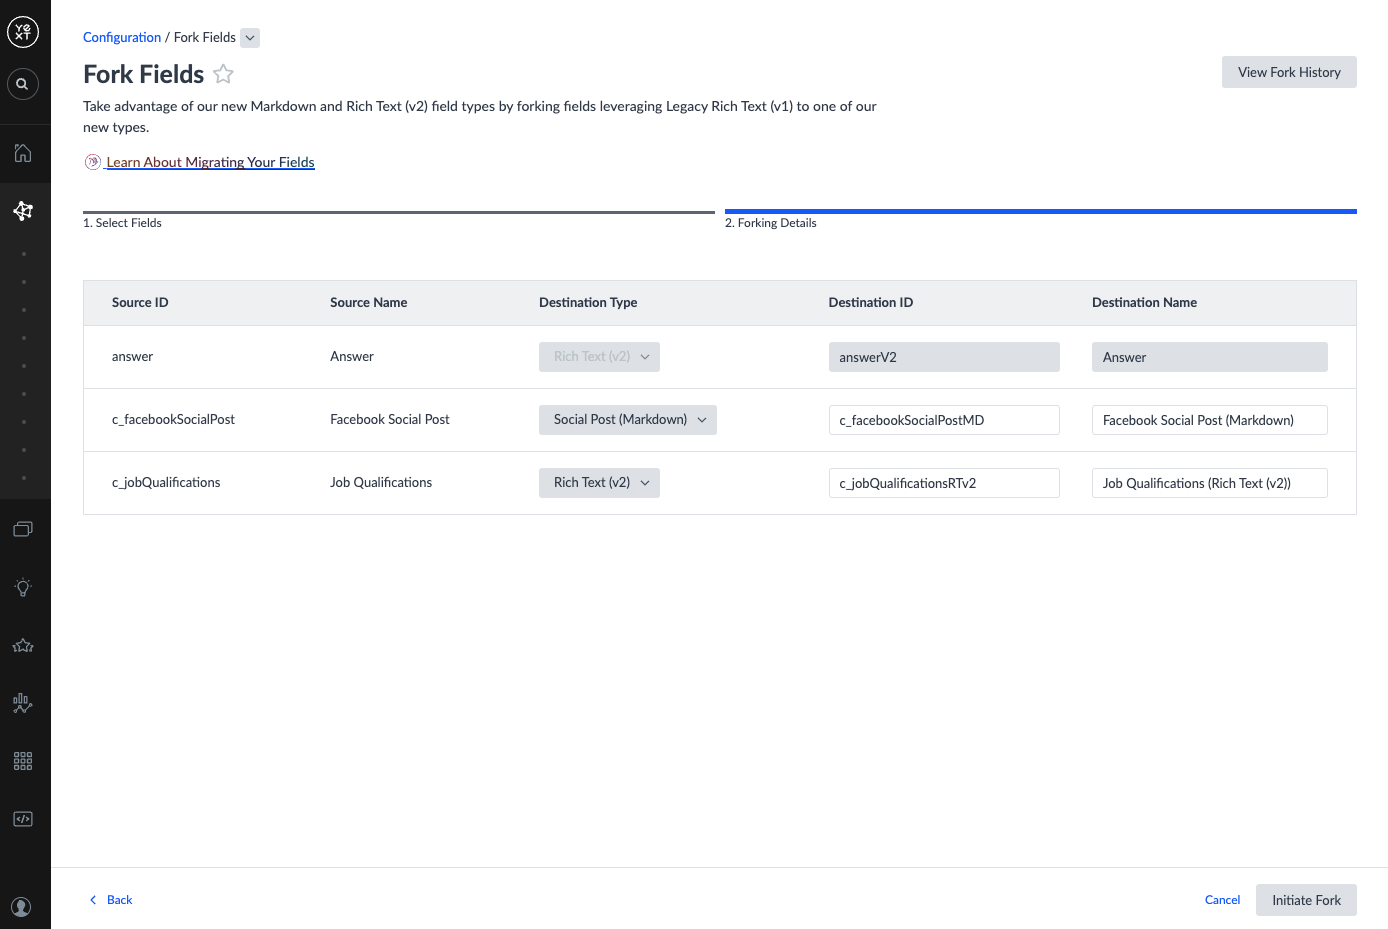
| Destination Type | The field type your Legacy Rich Text fields should be forked to | If the field is of the Legacy Rich Text (v1) type, the options presented in this column will be Markdown or Rich Text (v2). If the field is of a custom field type, the options presented in the Destination Type column will be the compatible types (which you created in the previous section). If you have not forked that custom field type yet, you will see the Select button grayed out. Go back to the Forking Custom Field Types section to create a compatible field type. Once you’ve chosen a Destination Type for your field, you’ll see the inputs for Destination ID and Destination Name expand. |
| Destination ID | The ID of the new field you’re going to create | We’ll pre-populate these inputs based on your designated destination type and source ID. Feel free to edit these as you like. Field IDs must not be duplicates of any other IDs in the account, and cannot have special characters. |
| Destination Name | The name of the new field you’re going to create | We’ll pre-populate these inputs based on your designated destination type and source name. Feel free to edit these as you like. Field names must be less than 50 characters, and contain only alphanumeric characters, _,-, (,), and spaces. |
Built-In Fields
We have already created new built-in fields to replace built-in Legacy Rich Text fields:
| Existing Built-In Field Name and ID | Corresponding Entity Type | New Built-In Field Name and ID |
|---|---|---|
Answer (answer) |
FAQ | Answer (answerV2) |
Rich Text Description (richTextDescription) |
Product | Description (richTextDescriptionV2) |
Short Description (shortDescription) |
Help Article | Short Description (shortDescriptionV2) |
Body (body) |
Help Article | Body (bodyV2) |
To migrate content from the existing built-in field to the new built-in field, simply select them from the list as you did with your custom fields in Step 1. We will populate the ID and name of the new built-in fields for you.
Unlike with your custom fields, you cannot edit the new built-in fields’ ID or name.
3: Initiate Fork
Once you are happy with the IDs and Names of your Source and Destination fields, click Initiate Fork in the bottom right.
This will create your new field and convert the content in that field to your chosen destination field type.