

Step 1: Create a Service Area-Only Entity Type
In order to configure entities with service areas but no physical address, you need to create an entity type in the Knowledge Graph that uses the built-in Service Area Places field, and does not use the built-in Address field.
You can create a new entity type and specify its field schema in the Knowledge Graph. If you already have an entity type with schema that you want to use for your new service area-only entity type, you can copy your existing entity type and modify it via Config-as-Code in the Admin Console.
Create an Entity Type in the Knowledge Graph
- In the Yext platform, navigate to Knowledge Graph > Configuration and select the Entity Types tile.
- Click Add Custom Entity Type in the upper right corner. Specify a name for your entity type (e.g., “Virtual Agent”). If desired, set the plural version of the name and add a description.
- In the field schema, make sure you include the Service Area Places field. Do not include the Address field. Configure any other fields and field sections you want to appear on the entity type.
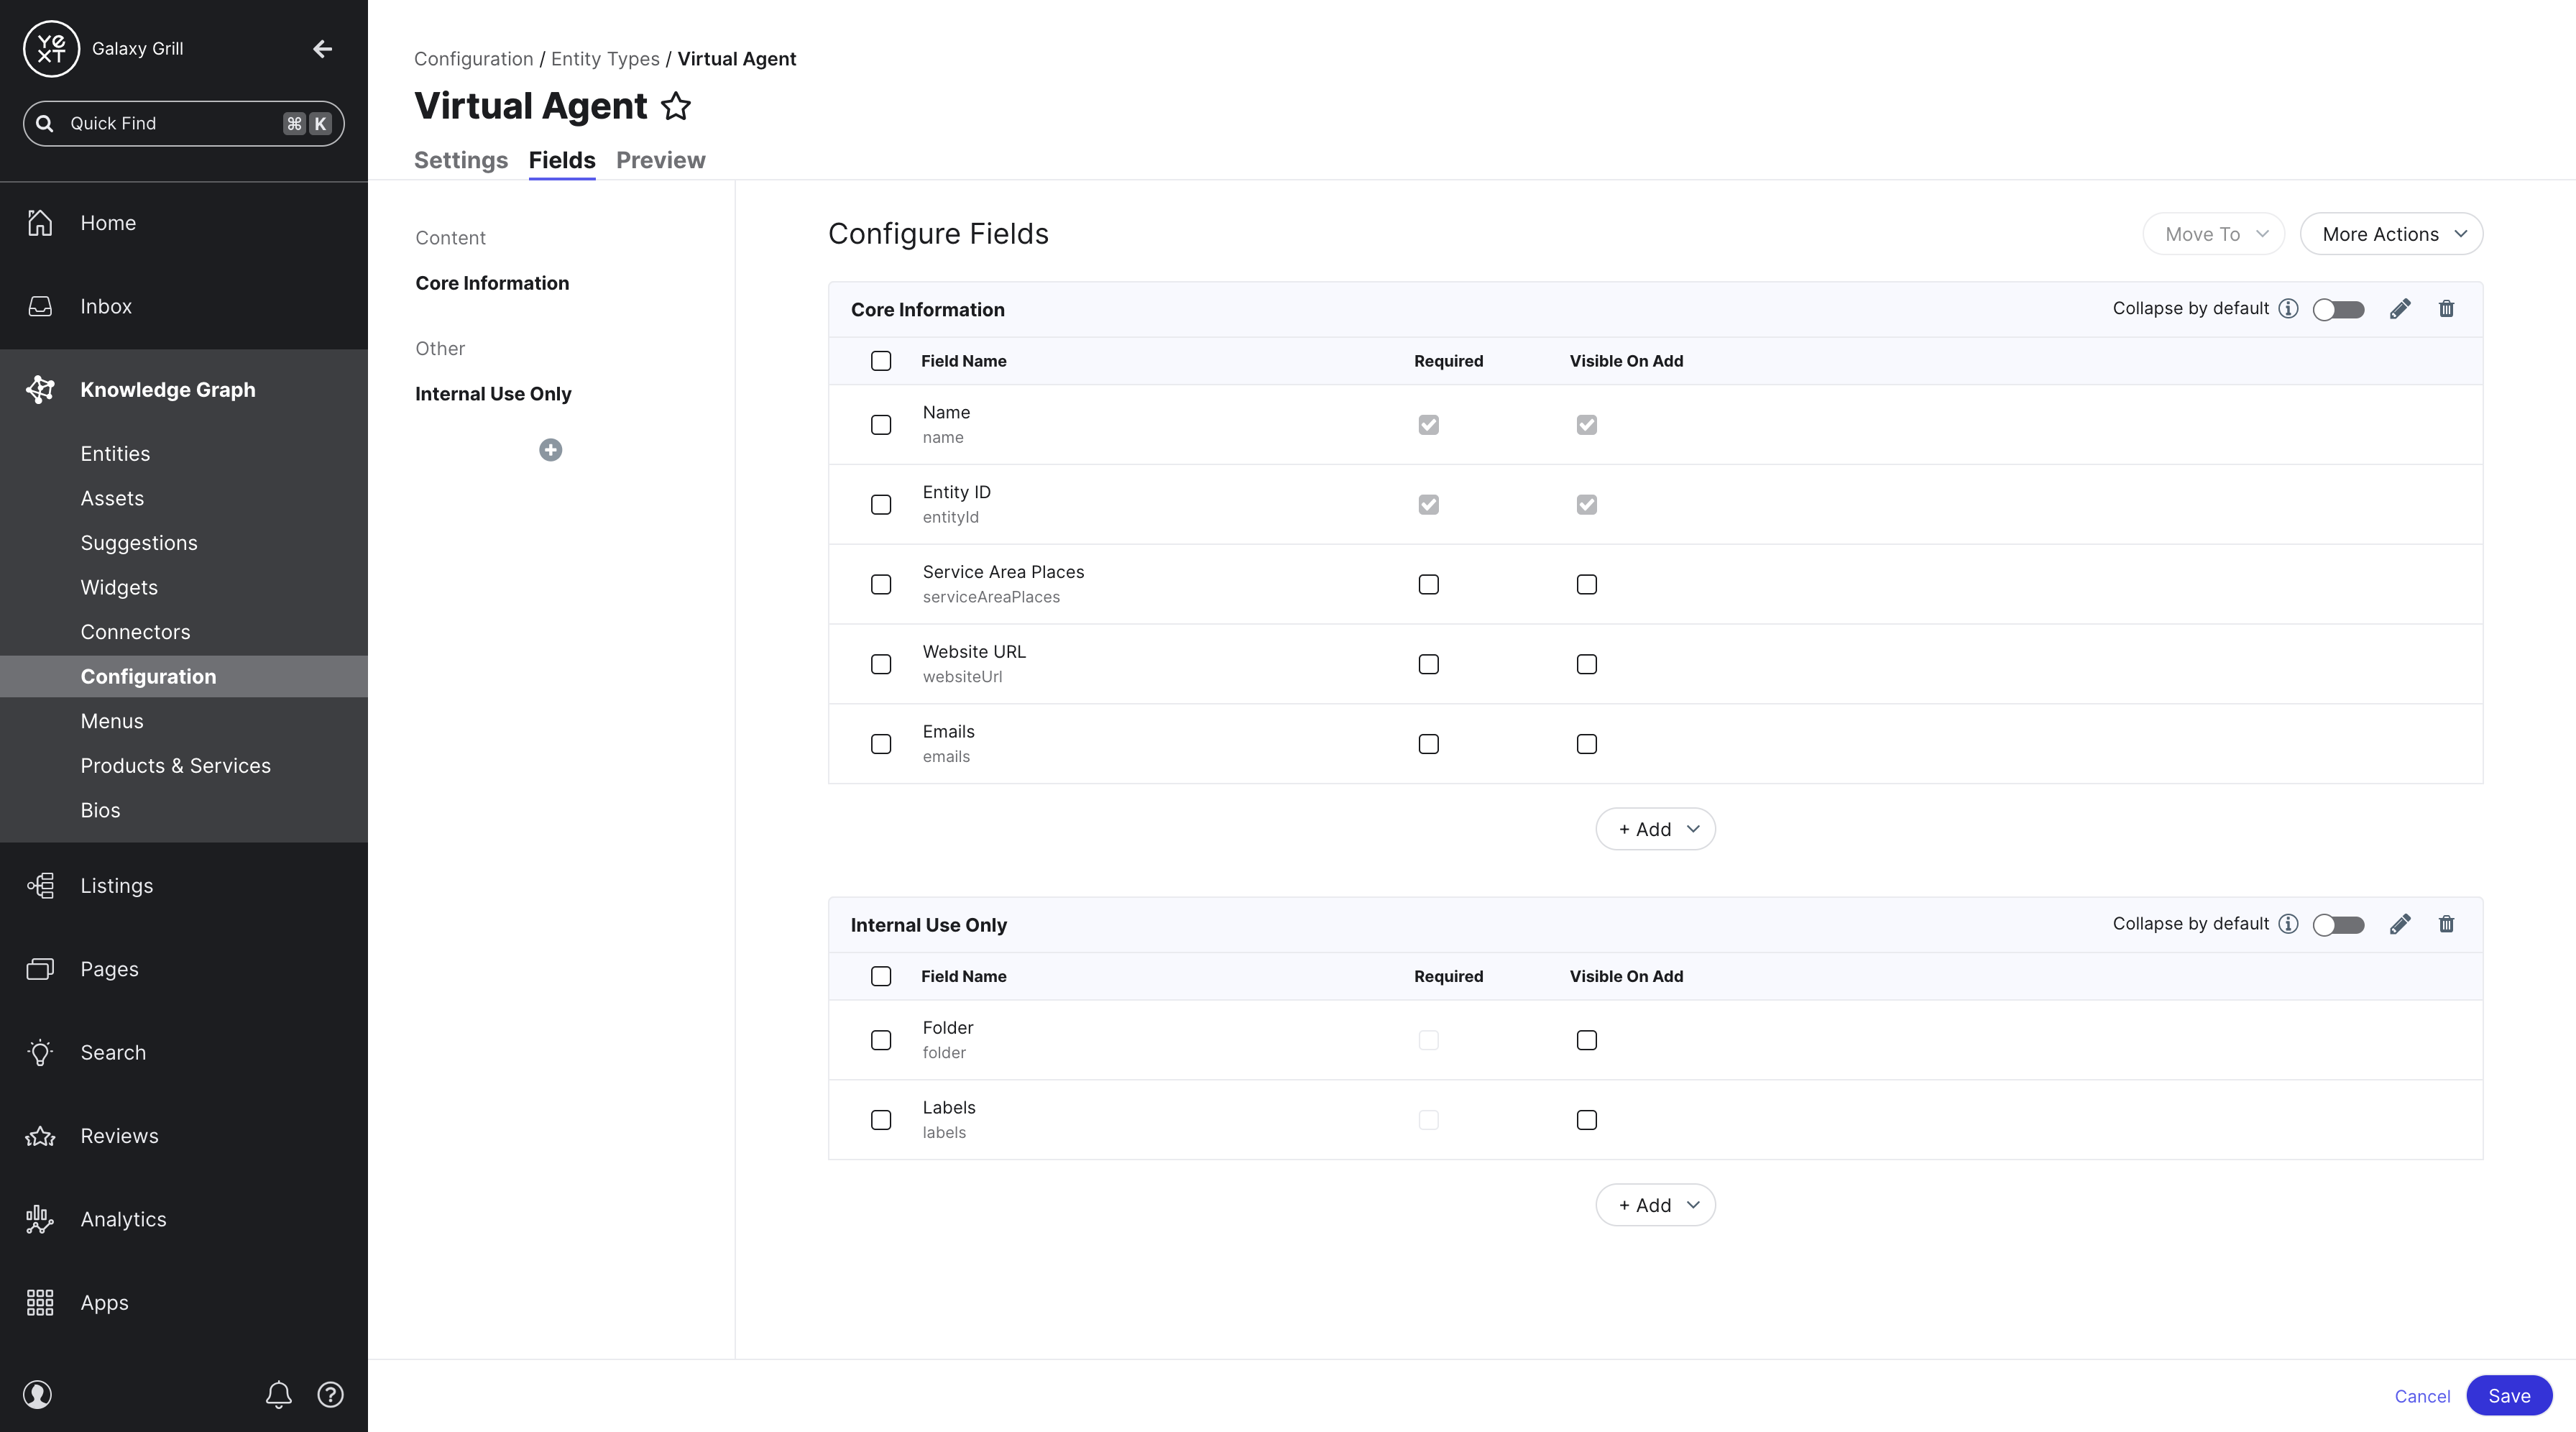
- When finished, click Save in the lower right.
For full instructions on creating an entity type and editing field schema, see these resources on the Help Center:
Copy and Modify an Entity Type in the Admin Console
- In the Yext platform, navigate to Developer > Admin Console.
- You will need to add a new resource to represent your new entity type in three folders:
ce/km/entity-type.jsonce/km/field-presentation.jsonce/km/field-eligibilty-group.json
- In each of the above folders, click the plus icon to add a new resource. Ensure that each new resource follows the same naming convention that you want to use for the internal ID of your entity type. For example, if your entity type’s name is going to be “Virtual Agent”, your resources should be named as follows:
ce/km/entity-type/virtualAgent.jsonce/km/field-presentation/virtualAgent.jsonce/km/field-eligibility-group/virtualAgent.default.json
- Open the resource in the
entity-typefolder for the entity type that you want to duplicate. Copy the entire contents of this resource and paste it into the newentity-typeresource you just created. Edit the following field values:"$id": "ce_entityType"(e.g., if you want your entity type’s name to be Virtual Agent, enterce_virtualAgent)"description": "description",(enter a description if desired, or leave blank)"displayName": "Entity Type",(enter the name of the entity type as you want it to appear to users in the Knowledge Graph)"pluralDisplayName": "Entity Types"(if desired, enter a plural version of your entity type name, e.g., “Virtual Agents”)
Repeat Step 4 in the
field-presentationfolder to copy the entire contents of the resource you are duplicating and paste it into your newfield-presentationresource. Make the following changes:In the
presentationEntriesarray, remove theaddressandaddressHiddenfields:{ "id": "address", "visibleOnAdd": true }, { "id": "addressHidden" },Then, add the
serviceAreaPlacesfield. Including thevisibleOnAddparameter is optional, depending on whether you want the Service Area field to be visible in the Add Entity modal when users are adding new entities of this type in the Knowledge Graph.{ "id": "serviceAreaPlaces", "visibleOnAdd": true },
Repeat Step 4 in the
field-eligibilityfolder to copy the entire contents of the resource you are duplicating and paste it into your newfield-presentationresource. Note that if you are copying from a built-in entity type, you’ll need to find the content to copy indefault/km/field-eligibility-groupfolder.Once you have copied the content into your new
field-eligibilityresource, make the following changes as shown in the example below.- Replace
entityTypeNameandEntity Typewith the internal ID and display name for your new entity type. Include
serviceAreaPlacesin thefieldsarray. No other field changes are necessary.{ "$id": "ce_entityTypeName.default", "name": "Entity Type Name-default", "entityType": "ce_entityTypeName", "fields": [ "serviceAreaPlaces" ], }
- Replace
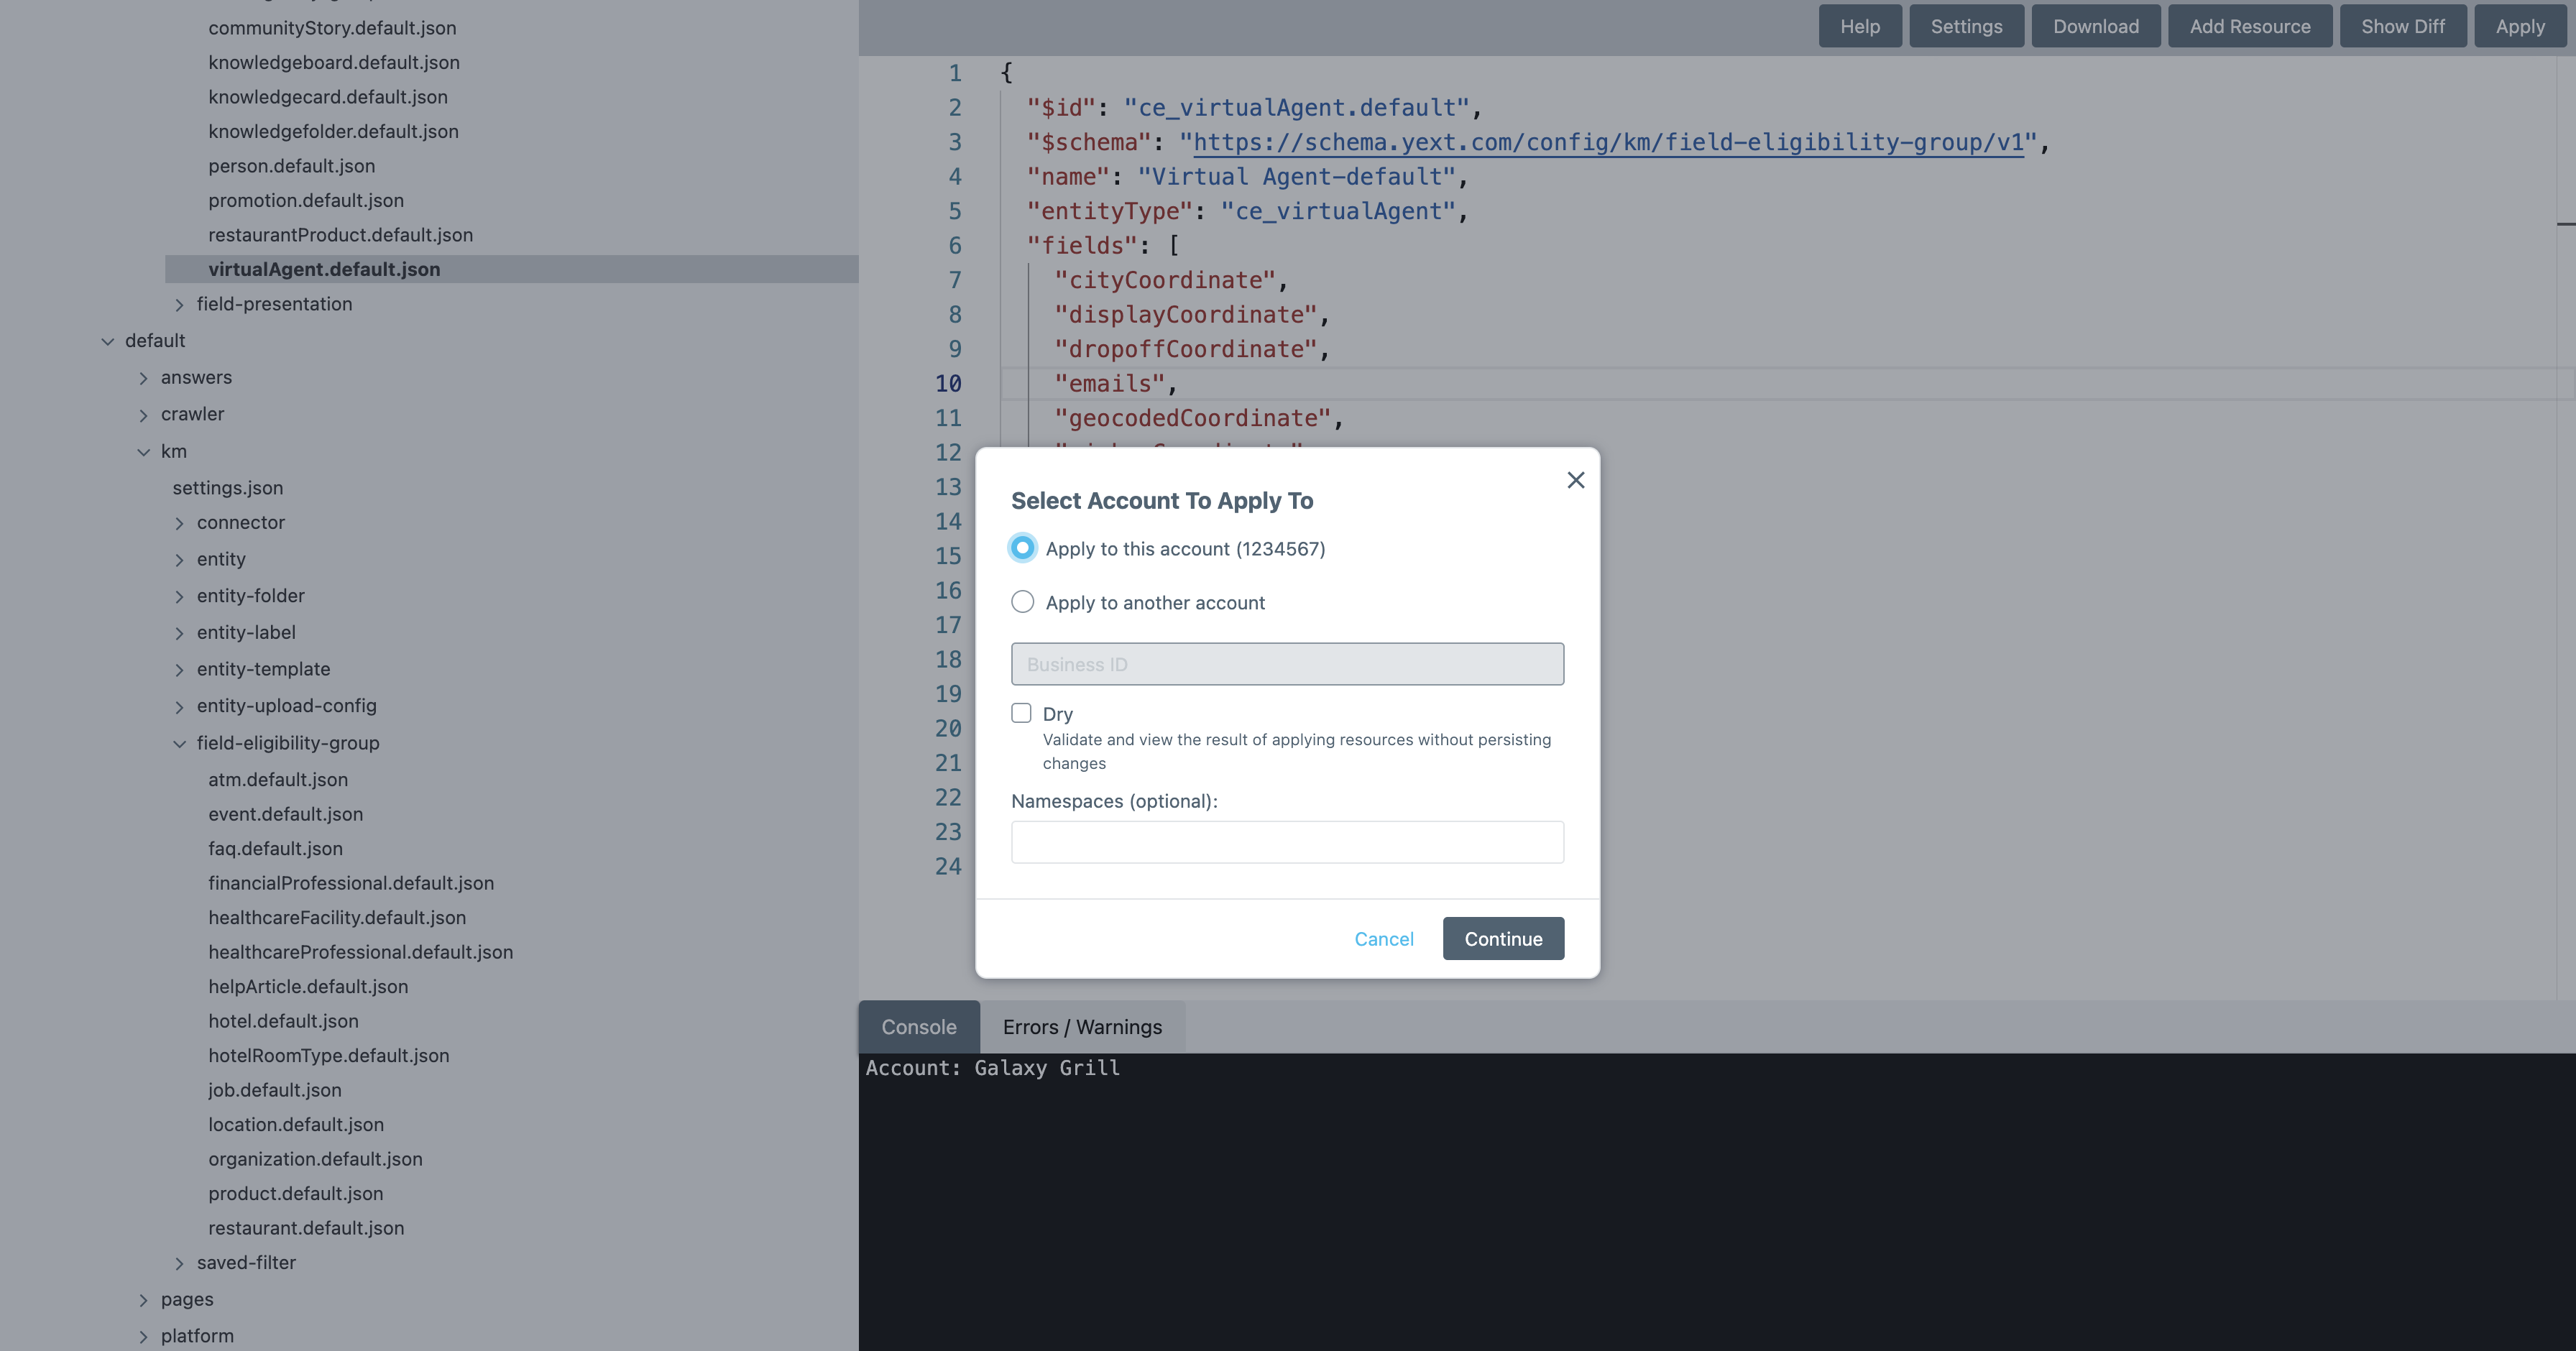
After making all changes, click Apply in the upper right of the Admin Console. In the modal that appears, click Continue to apply the changes to the account you are currently working in.
- When the Variables modal appears, click Save to skip entering values.
- Compare changes in the View Diff modal, then click Continue.
- In the last modal (Are you sure you want to apply resources?), click Confirm.