

Step 1: Set Up Workflow Rules
Note
If you are currently using the Automatic Review Response app in your account, skip this step and follow step 2 of this guide to walk through how to migrate from the app to the new, in-platform version of Automatic Review Response.
To set up automatic review response:
- Navigate to Inbox > Configuration.
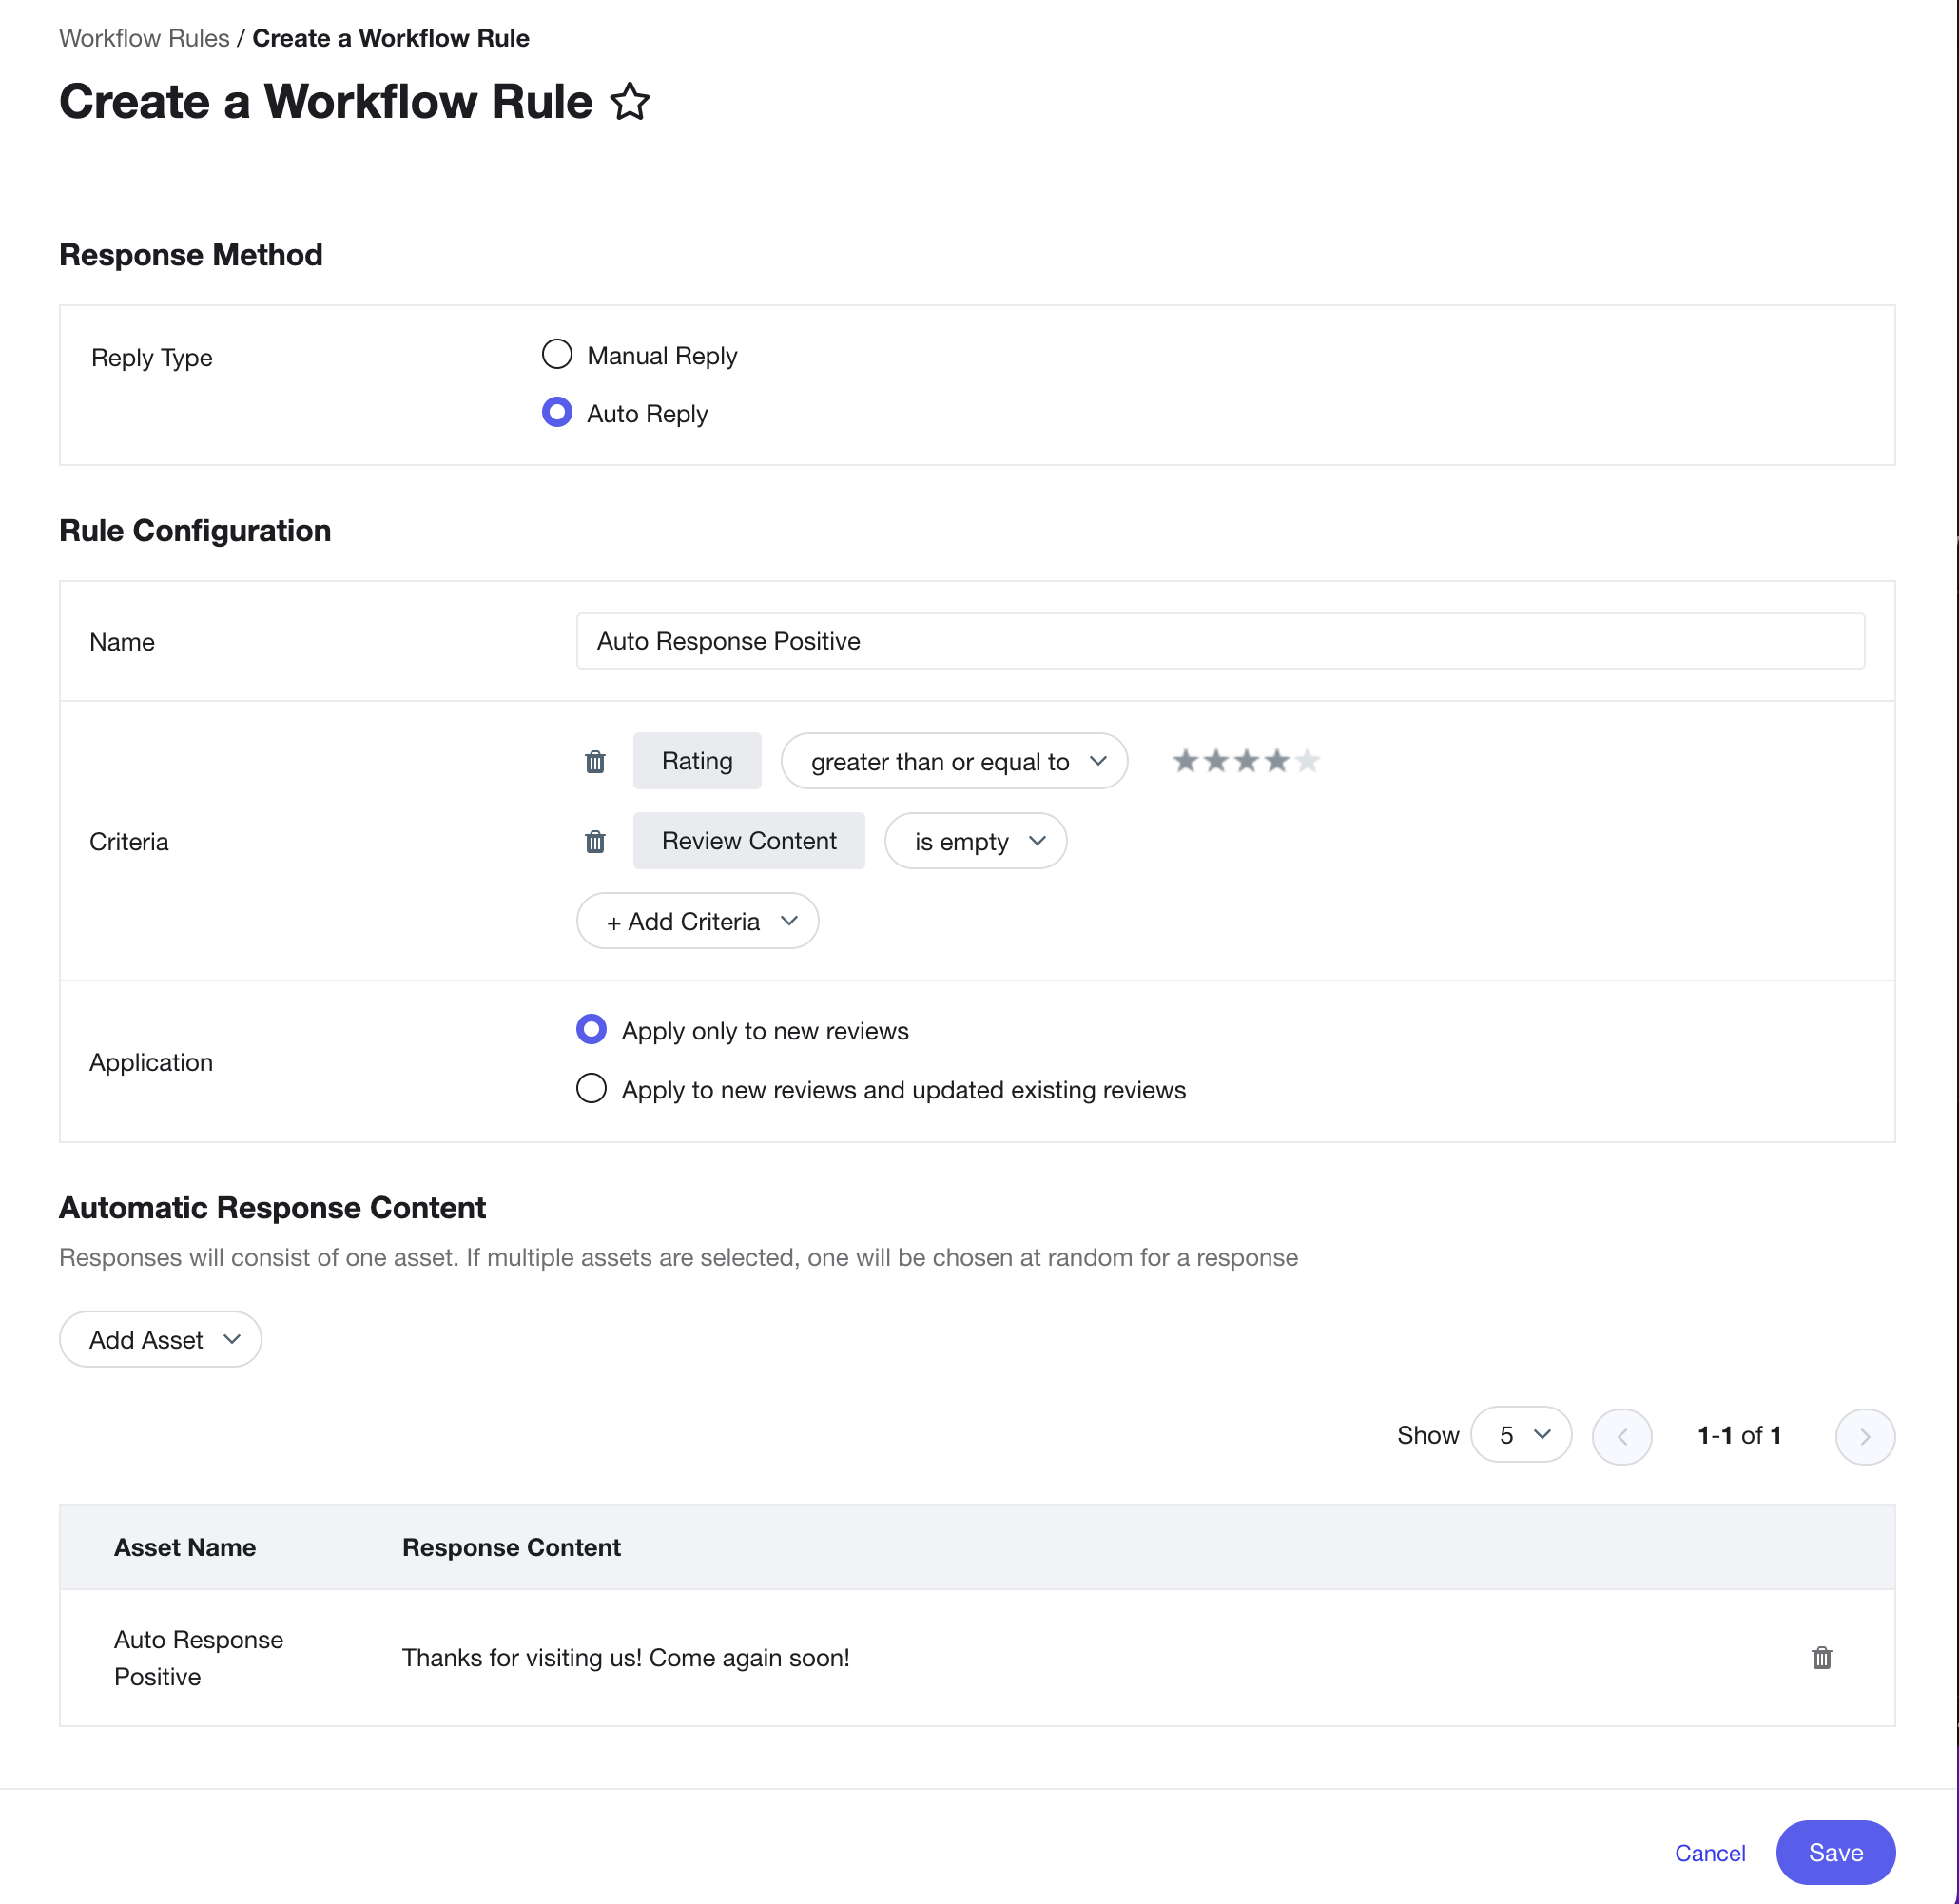
- Click “Create Rule” on the top right of the page and fill in the rule fields.
- Select “Auto Reply” for the Reply Type.
- Give the rule a descriptive name to help you identify it in the future.
- Set up your desired criteria.
- For example, to auto-respond to all reviews without content and a minimum rating of 4-stars, you would create a review label where: ‘Rating’ is greater than or equal to “4” and ‘Review Content’ is empty.
- You can add any available filters to further specify which reviews you want to automatically respond to. For example, you may limit automatic response to certain entities, entity folders, or the site where the review was pulled from.
- Select “Apply only to new reviews”.
- Click “Add Asset”. Here you can create new assets or select from existing assets.
- Note that each rule can only have up to 25 associated review response assets.
- When selecting from existing assets, you’ll only see text assets with usage Reviews > Review Response selected.
- When creating new assets from this page, give it a descriptive name and then enter the text you wish to use in review responses. You can add embedded fields by clicking the plus icon in the bottom right.
- View all assets under Knowledge Graph > Assets. Adding review response assets from this page allows you to add some optional fields, such as which entities to associate the asset with. See the Add a Text Asset help article for step-by-step instructions.
- Click Save.
You’re ready to respond automatically to reviews.
<% elem.innerText %>