

Step 1: Testing Webhooks
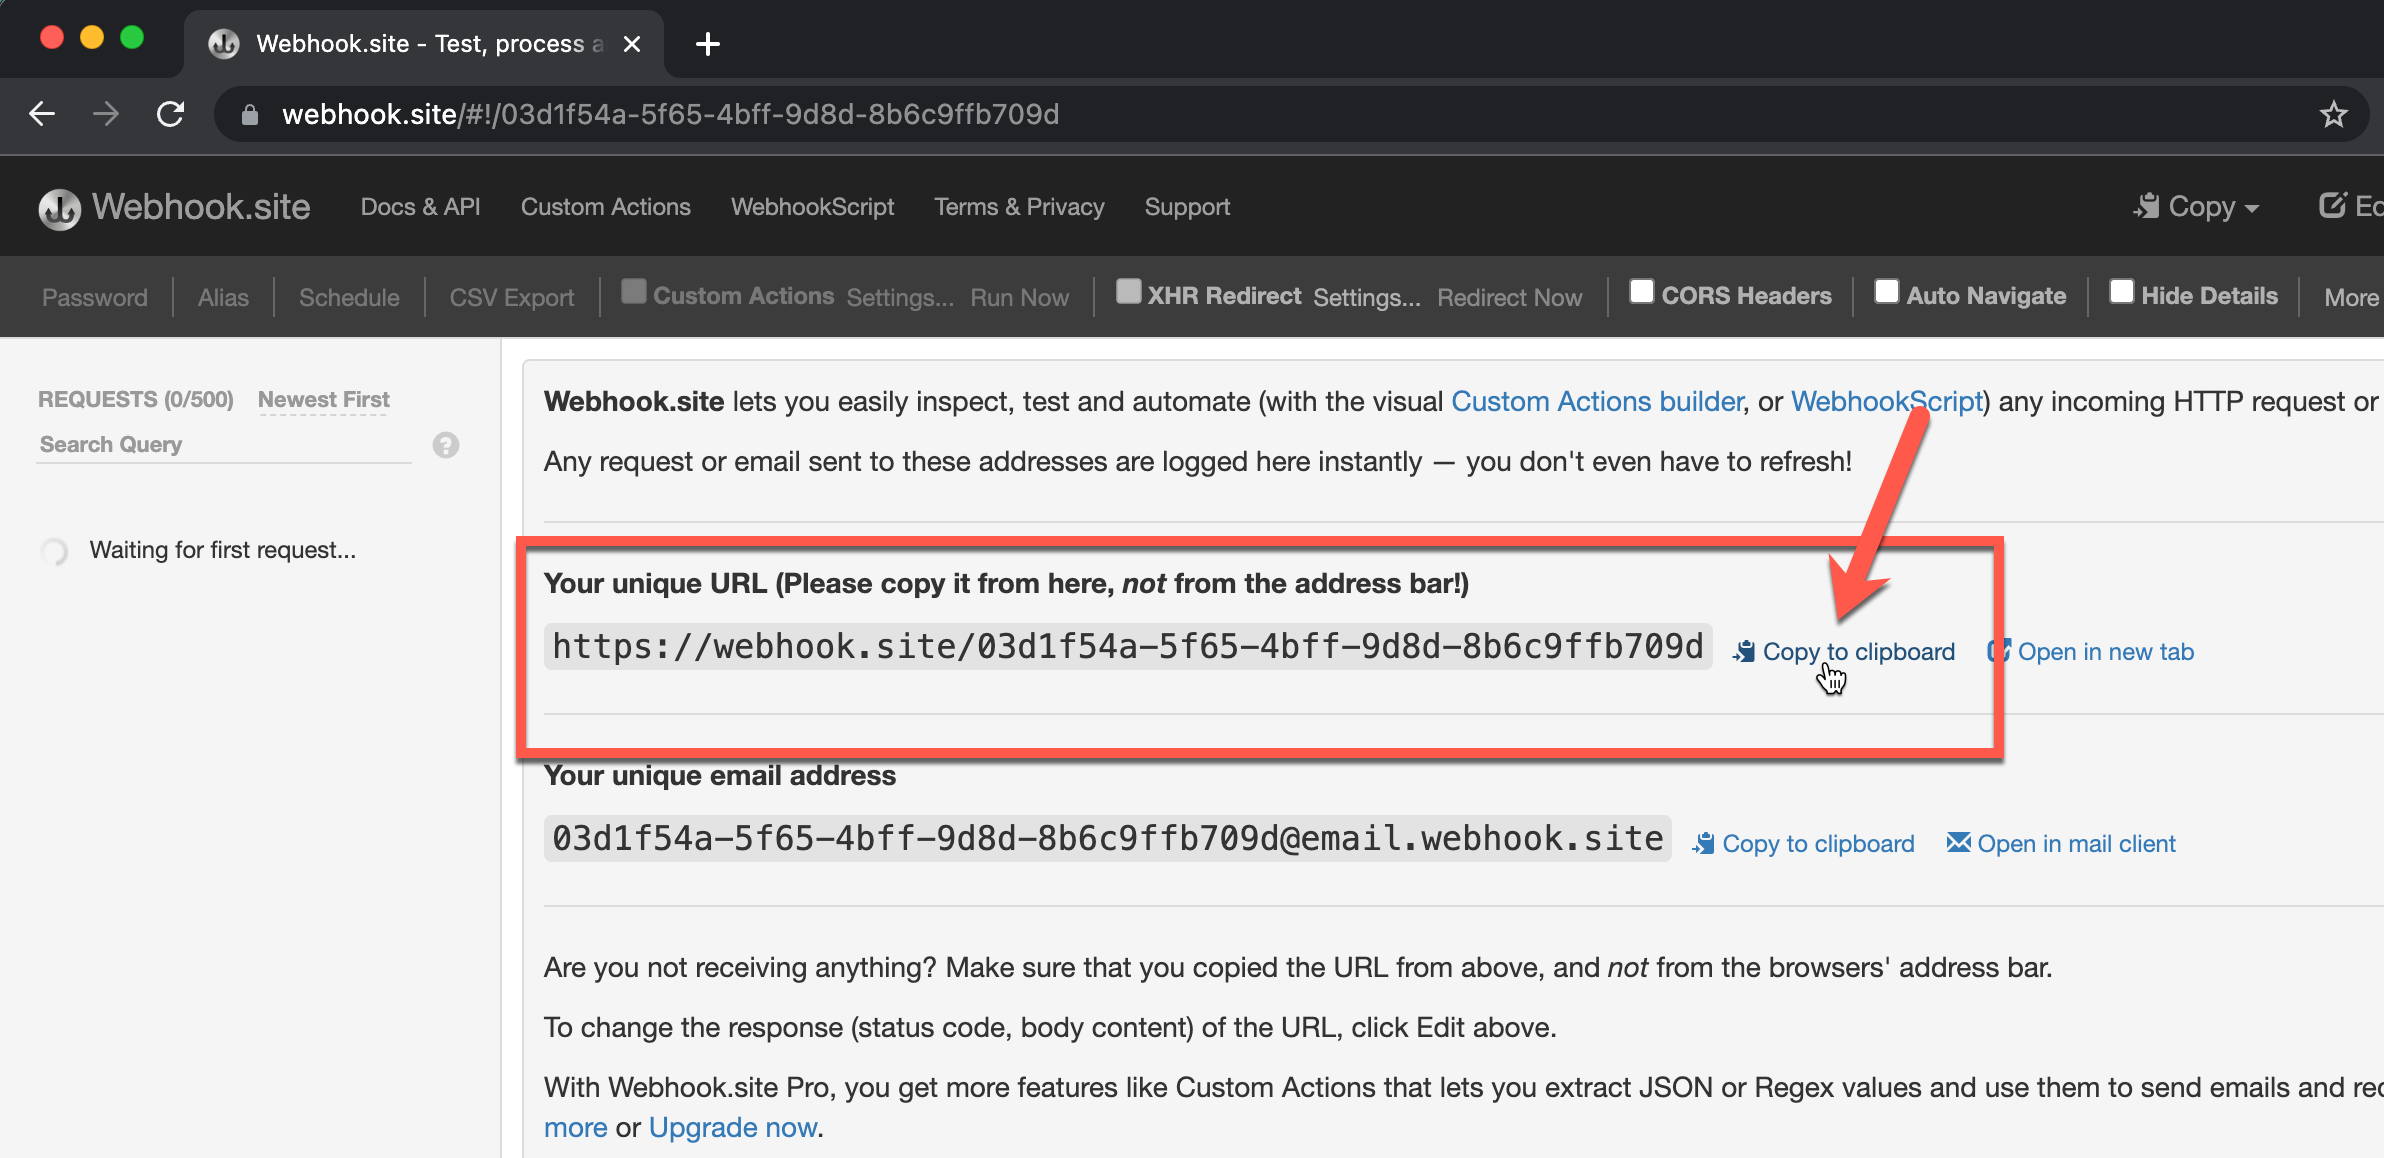
To test this, open webhook.site . This website provides you with a unique webhook URL that you can immediately test with. Copy your unique URL, as you will enter this into the platform later.
In your account, navigate to your Developer Console > Management API App. Go to the Webhooks Tab and click + Add a Webhook.
 NoteIf you are a reseller using a partner portal parent/sub-account structure, navigate here from your parent account.
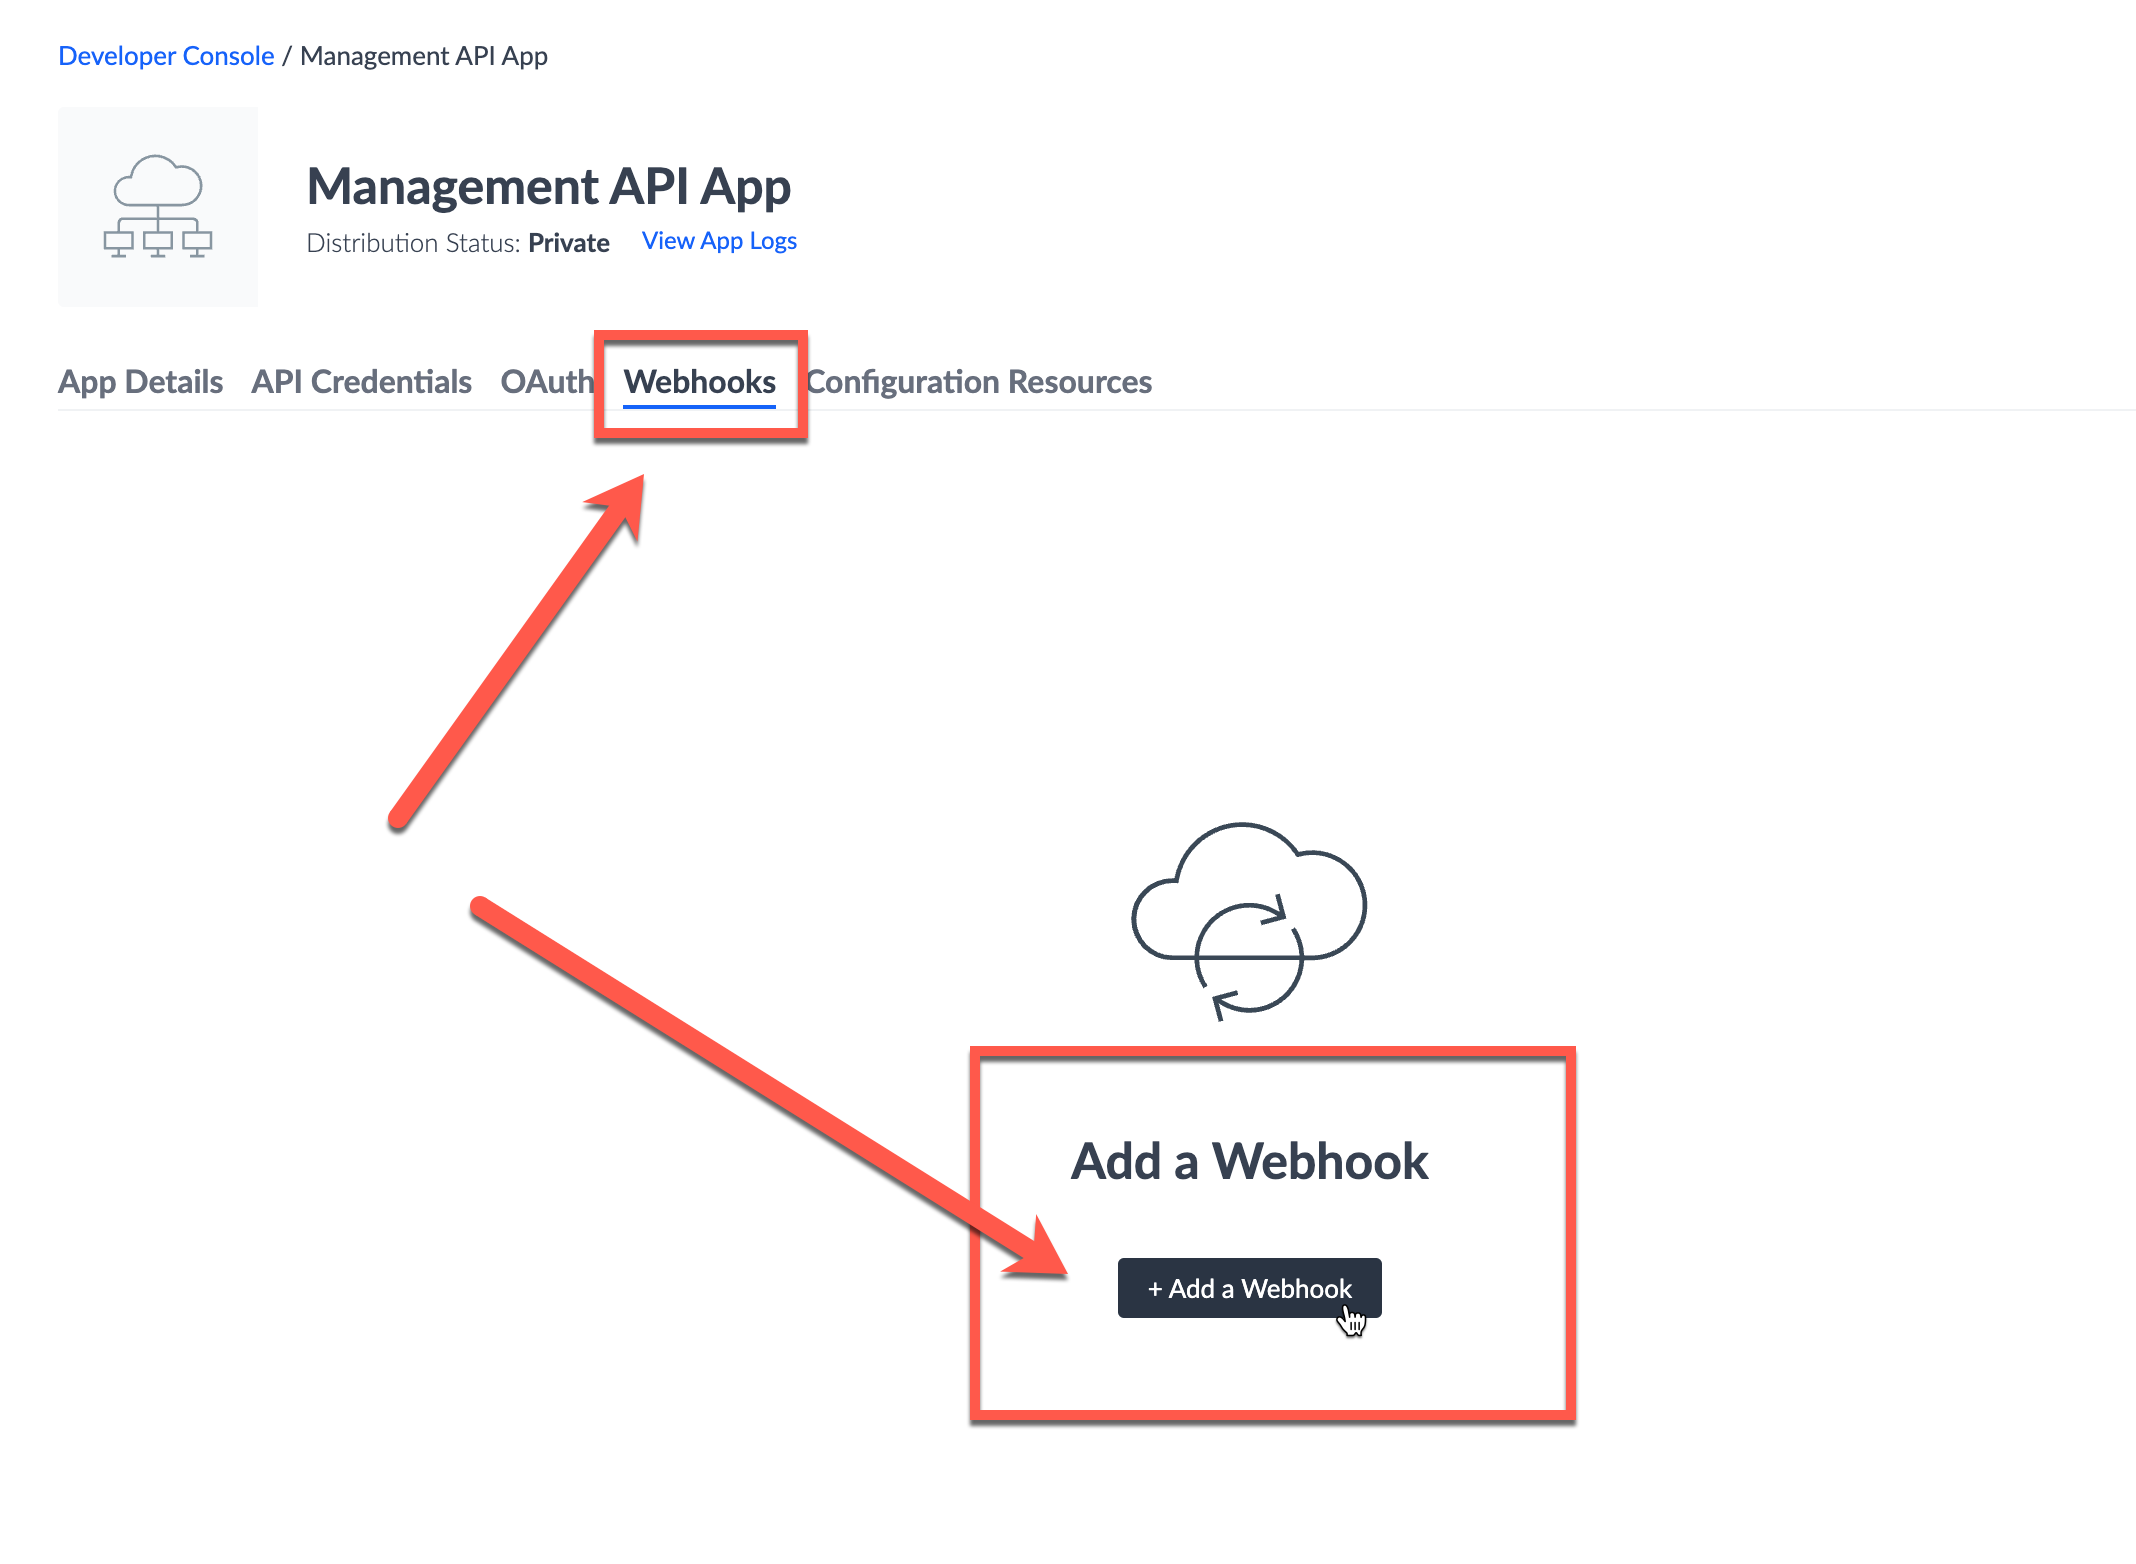
On the next page, select the Deploy Published event, and paste your unique webhook.site URL into the URL textbook. Feel free to click the “Send Test Message” button to send a test webhook! Click Save.

If you are a reseller using a partner portal parent/sub-account structure, you also have the option to set the “Receive Webhooks for Subaccounts” feature. Set this to Yes. With this setting on, Yext will fire a webhook to the URL provided when any deployment across your sub-accounts is successfully published to the web.
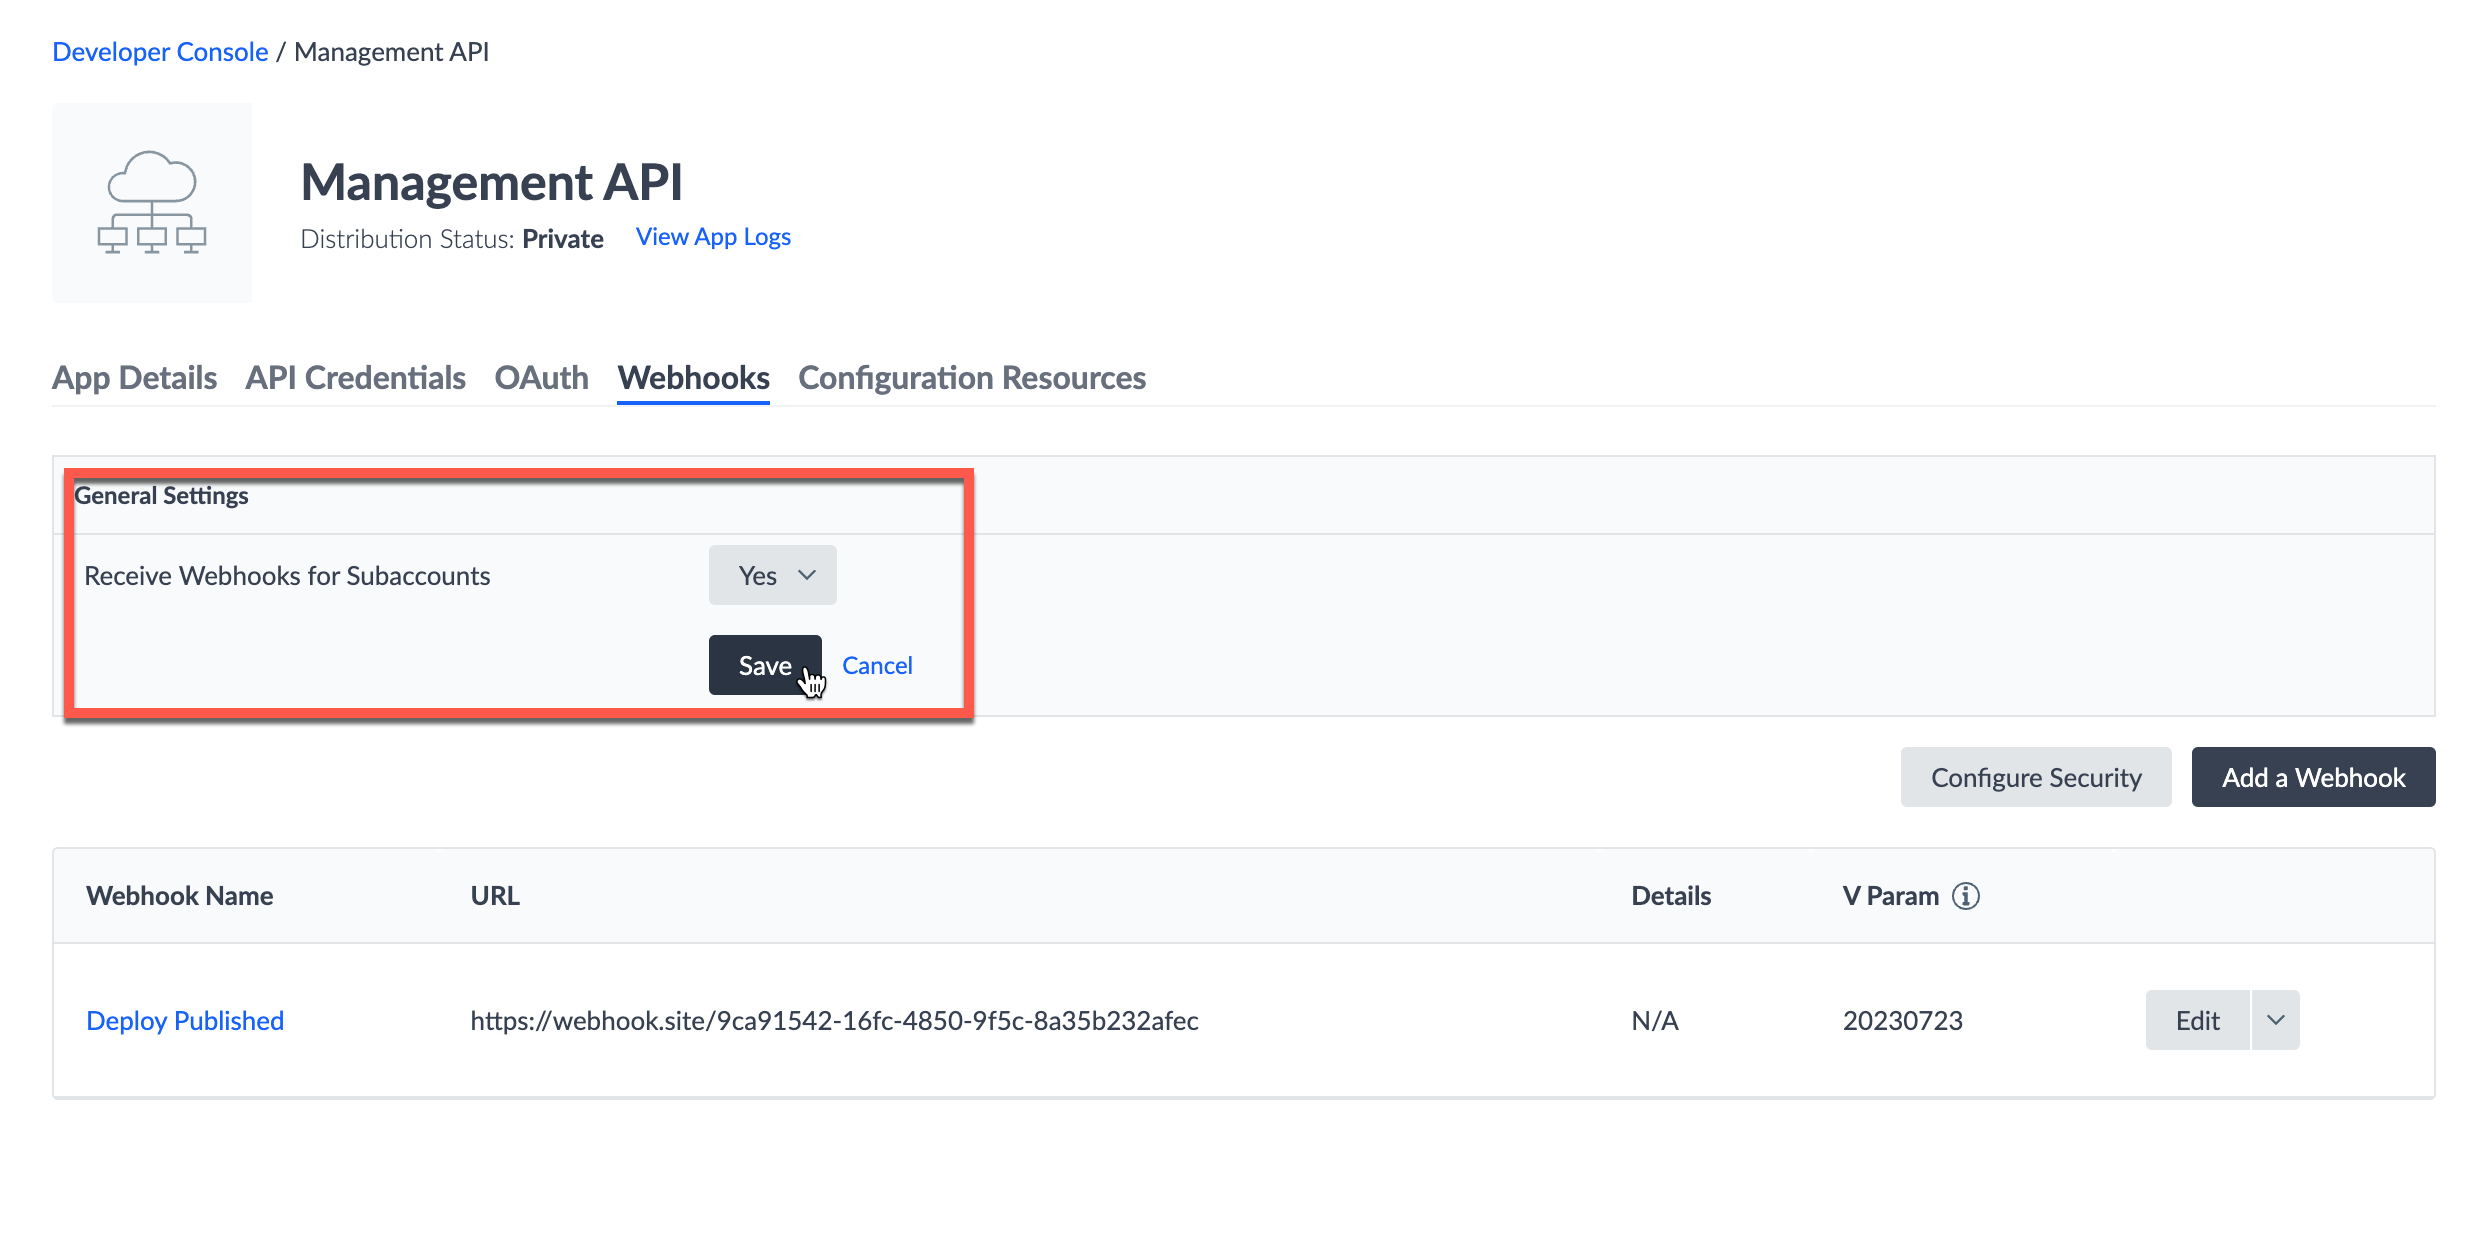
(Optional) You can configure an additional layer of security for your webhooks by clicking the “Configure Security” button. This will provide you with a Yext-guaranteed HMAC SHA256 Signing Key. You can use this to create a signature based on the webhook request, and compare that to the value returned in the X-Yext-Signature header. If your signature and header value match, this guarantees the webhook request came from Yext (refer to the Configure Webhooks for more information).
Congrats, you’ve now set up your first webhook! Feel free to add webhooks for other events you wish to track, such as Deployment Failure.