
Intro to the Search Frontend Theme | Yext Hitchhikers Platform
What You’ll Learn
By the end of this unit, you will be able to:
- List and define the two main components of the Search frontend
- Explain the importance of Jambo and locate additional Jambo resources
- Recall the six steps of the Jambo build process
Overview
As a refresher from the What is a Search Experience unit, the frontend of Search controls what the user sees when they ask a question, including how the results page is structured, what each results card looks like, and other optional components you can use like facets or Q&A.
You can build a Search Frontend in multiple ways and the Search Frontend Theme is our low-code option that allows you to quickly build an out-of-the-box frontend using JSON, HTML, CSS, and Javascript. The frontend option must be connected to a Search backend in order to populate search results so we recommend that you complete that track prior to starting this one.
Before we go into the process of creating a Search experience, it’s important to have a conceptual understanding of what the frontend pieces of the Theme are and how they work together.
Components of the Frontend
There are three components of the Search Frontend Theme: the Search UI SDK, the Theme, and Jambo.
The Search UI SDK Javascript Library
As you may recall from Ways to Build Search , the Search UI SDK is our JavaScript library of components that define the frontend Search experience, such as the Search Bar, Universal Search Results, and Direct Answers.
The Theme
The Theme is a bundled package of files and code templates that sets up the basic structure and functionality for an entire Search experience!
In order to access the Theme, you must use a solution template called the “Search Jambo Template”. A solution template is a pre-built configuration that you can apply to your account. These configurations can include things like entity types, files, or code that can be used as-is or provide a starting point for you to build off of.
In this case, the Search Jambo Template contains the Answers Hitchhiker Theme, all of the files and code structure for things like results pages and result cards that you can use in your search experience. The Theme files translate the configuration files in your code repository to be able to use the Search UI SDK components, so that you don’t have to manually add or create your own components from scratch. From there, you can add any wanted customizations, such as changing branding or adding custom cards.
Jambo
Finally, Jambo is a static site generator that takes all of the files in your repository, including theme files, templates, and customizations, and creates the static HTML pages that an end-user actually sees. Jambo also provides commands that enable you to easily interact with the theme, such as by adding verticals, adding cards, and overriding the theme. The theme itself is complex and fragile, so we don’t want to directly manipulate the theme itself - we let Jambo do it for us, by creating copies of the theme template files. To learn more about how Jambo works, see the Jambo Overview and Theme File Structure reference docs.
Overview of Build Process Using Jambo
If you’re building a Search experience with the Theme and Jambo, then congratulations – you’re writing code! You’ll go through many of the same steps that developers take when they’re building websites, applications, or other software:
- Create a repository that houses your code.
- Update files in that repository.
- Preview those changes locally.
- Commit your changes.
- The system attempts to “build”.
- The system “deploys” or “publishes”.
Sure, that’s simplifying things, but you’re going to be doing these exact same steps as you build your Search frontend. You will learn more about each of these steps in the following units.
Create a Pages Site with Jambo Repository
We house Search frontends in the Pages architecture. Out of the box, we use Git (a widely accepted version control system) to manage your Search code. When you’re ready to build a search experience, you will be prompted to create a Git repository (this all happens in the Yext platform but the repository is stored externally in GitHub ). A repository, or “repo”, is a common term in software; it is a group of code files with version history.
In Yext, you can set up a search experience by creating a site in Pages and then adding a repository with the Search Jambo Template, which will generate a GitHub repository with all of the pre-built files you need to create an experience. In many cases, this step will be done for you if you are starting with a Hitchhikers Challenge or a Solution Template.
To create a site, go to the Pages > All Sites screen and click the Add New Site button.
The setup wizard will walk you through the steps to create a Site (check out the Create a Pages Site with Jambo help article for details). You will need the following information for the setup process:
- Site Name
- Where to store your repo = Use an Internal Yext org
- Repo Name
- Repo Template = Search Jambo Template
When you make it through all of the steps, you will have a site and repository to start building your frontend.

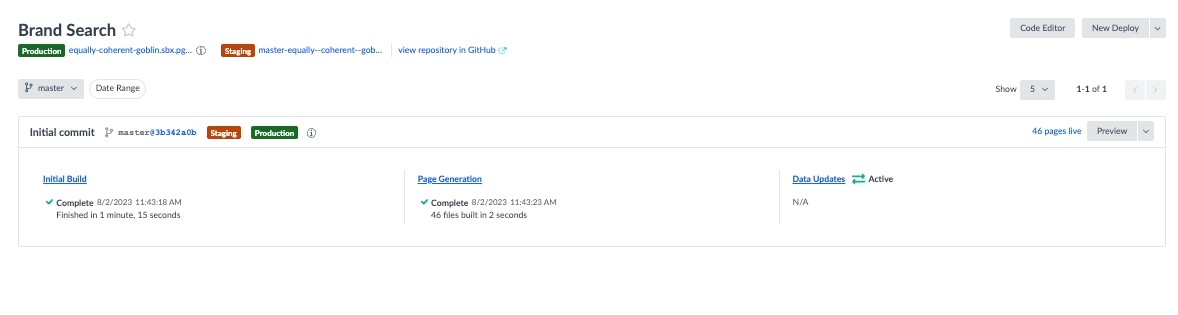
The Pages Deploy Screen
Once you create your site, you’ll see a build in progress. Once this completes successfully, you’ll have your first deploy with links for preview, staging, and production. You can read more about navigating these deploy screens and managing these links in the Deploy Pages module in the Pages track - we are using Pages architecture after all!
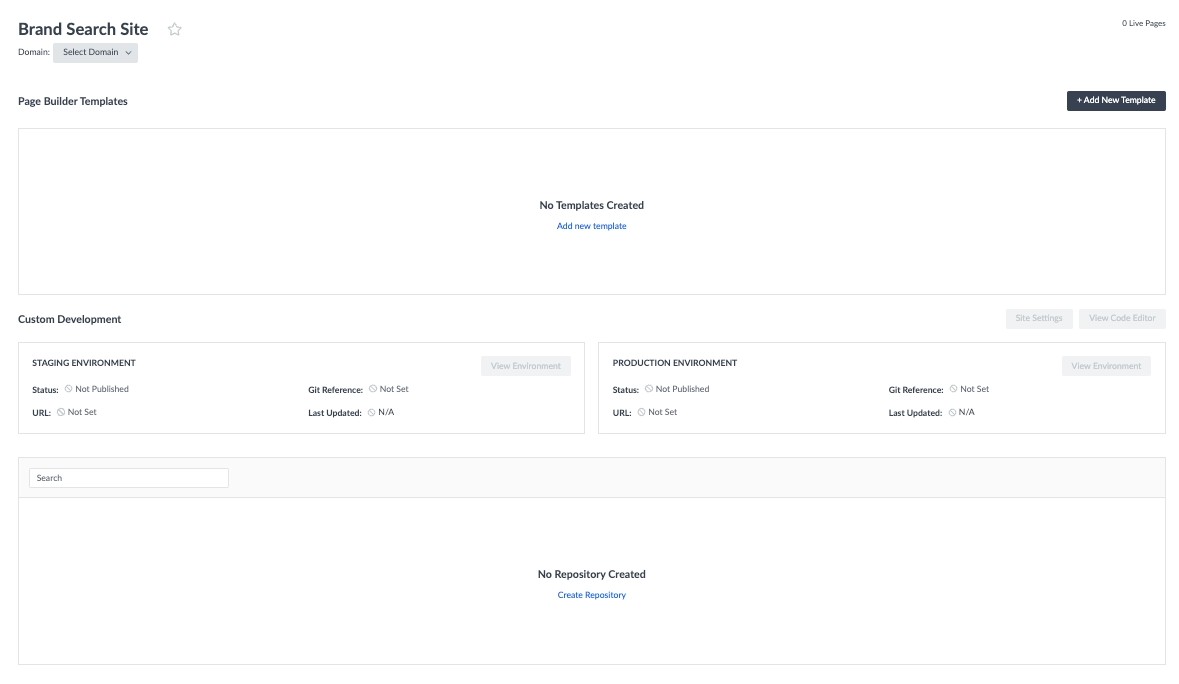
Classic Pages Screen (Legacy)
If you opt to build a site using classic pages (not recommended), you will see the following screen that gives you the option to view the Code Editor, staging environment, and production environment. No links will be deployed until you manually publish in either the staging or production environment.
Which of these are components of the Search Frontend?
Why is the Search UI SDK library important when using the theme? (Select all that apply)
Which of the following are steps in the build process using Jambo? (Select all that apply)
Which screen do you navigate to in order to add a new site for Search?
High five! ✋
