
Navigate the Code Editor | Yext Hitchhikers Platform
What You’ll Learn
By the end of this unit, you will be able to:
- Create and share a new code editor session
- Define what Live Preview, the console, and Jambo commands are and when to use them
- Complete the code commit process with properly formatted commit messages and tags
Overview
In the Code Editor, we pull in all of the files from your Github repository so that you can commit changes just like a developer. The Code Editor is similar to a code repository in Github, except it’s even easier to quickly move around and load multiple files at once.
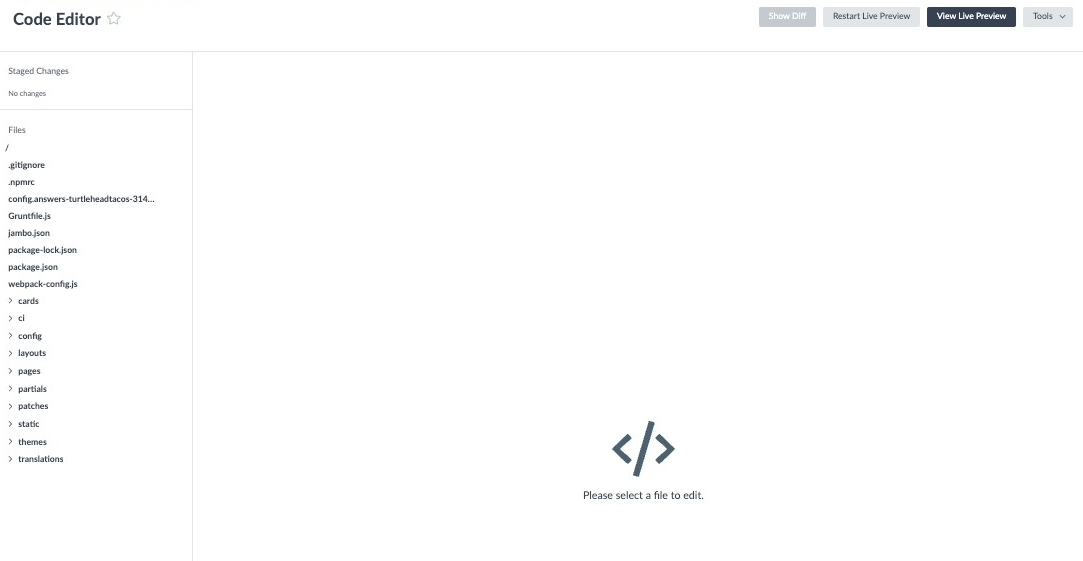
To open the Code Editor in Pages, navigate to Pages > [[Your Site]] > Deploys and then click the Code Editor button in the top right.

To open the Code Editor in Classic Pages, navigate to Pages > [[Your Site]] and then click the View Code Editor button on the right side of the page next to the Custom Development section.

Branches
One of the first things you will see when opening the Code Editor is a list of branches. A branch is a named version of your repository. By default, you start with only the master branch.
To start editing, hover over the branch name and click the pencil icon that appears to the right. This will open the Code Editor view where you can start modifying code. By default, you should make changes on the master branch, unless you’re working with a developer.
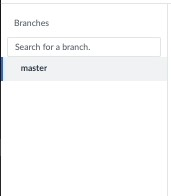
You can create new branches for your work if you are making complex changes that need extra QA and that you don’t want to make on the main branch. Then you can merge those branches together when you’re ready. To create a new branch in the Code Editor, hover over the “master” branch, select … and click Create new branch. In the modal, input a branch name and click Create Branch. In most cases you should be branching off of the master branch.
This is a standard git workflow. If you’re interested in learning more, here’s a great tutorial .
Session Management
When you open up the Code Editor, you are either starting a new session or resuming a session (you’ll see a small toast message if you are resuming a session). If you leave the Code Editor or hard refresh the page, you don’t lose any of your work! You will still be in your session. Your session will remain active for four hours and in “paused mode” for up to two days. After that, you will automatically start a new session.
You can also share your session with a teammate by copying the URL with the session ID in it.
If you want to discard all of your code edits and begin a new session, you’ll want to terminate your session and then navigate back into the code editor. You can go to Tools > Terminate Session to terminate your session. This is recommended if you have made commits outside of the code editor that you need to retrieve.
Live Preview
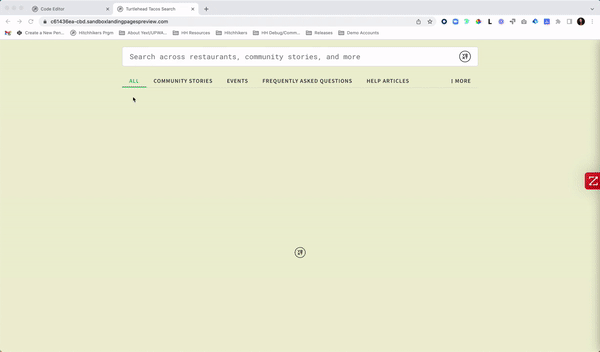
The Live Preview compiles the latest information in your Code Editor to show you what it would look like if you were to commit your code and publish your page in its current state. This allows you to catch issues or experiment as you build.
View Live Preview
By the time you’ve navigated to the code editor, your preview is already there and ready to go! All you need to do is click View Live Preview at the top of the code editor to open your local site in a new tab in your browser.
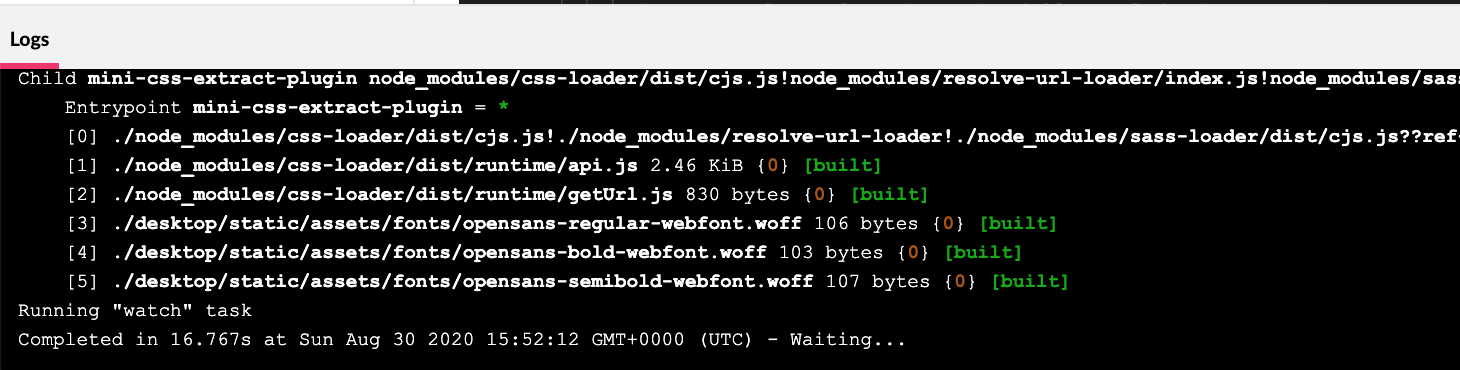
As you’re making changes, click outside of the Code Editor to update your preview. If you refresh your preview tab while an update is in progress, you’ll see an error page – don’t be alarmed! Just wait for your preview update to complete and refresh the page. You will know an update is complete when you open the console (we will talk more about this in the next section of this unit!) and see this “Completed” message:
You can also share your preview link with others or use the link to open up your changes in different browsers. Note that the preview link will expire after a few hours.
Note: If you click “View Live Preview” before an index.html file exists on your site, you will be presented a directory where you can choose which page you want to preview. Keep in mind that if you haven’t actually created any pages yet, you won’t see any HTML files to preview — there’s nothing to preview yet! You need to create at least one page for this to work.
Restarting Live Preview
You’ll need to click “Restart Live Preview” after any time you’ve updated dependencies. A dependency is when one component of software relies on another to work.
For example when you do a theme upgrade , you are updating the library that the Code Editor is pulling from. The files (and therefore the live preview) you are working from in the Code Editor directly rely on the Theme to display the frontend properly so you’ll need to restart preview.
Another example of when you would restart live preview is if you’re updating the experience key in the locale_config.json file since this changes the backend you’re linking to.
The Console
As you’re updating your preview, you can (and should!) view the console in the code editor to see if there are any errors. If you open up the console, you’ll see a preview refresh start building immediately when you have a code change and click out of the code editor. You’ll want to make sure that the console says that the preview is ready before you try to refresh to see your latest changes. As mentioned in the Live Preview section, you will want to keep an eye out for the “Completed” message in the console to indicate you preview is ready.
You can access the console by clicking on Tools > Console. This won’t be selectable unless you’ve started the Live Preview process.

For guidance on troubleshooting common errors, check out the Common Console and Preview Errors doc.
Jambo Commands
To do things like add pages or override the theme, you will use “Jambo Commands”. As mentioned, we use Jambo under the hood in the Code Editor.
Jambo has a number of built-in Commands, such as adding pages and cards. Plus Themes can add on their own custom commands. The Answers Hitchhikers Theme adds a number of commands to make developing Search faster and easier.
You can access Jambo Commands by clicking on Tools > Jambo Commands, which will open a modal with all Jambo command options.
To see the full list of commands, view the Jambo Overview reference doc.
Updating Code
To update a file, it’s as easy as navigating to the file you want to update, typing in what you want to change, and committing the code.
The Files section on the left of the Code Editor lists out the folder structure and all the files included in the repo.
When you click on a file name, the file will appear as a tab in your workspace. You can also do things like add new files or delete files by hovering on a directory or file and clicking the add or trash icons.
Update Global and Locale Configs
In order to get search up and running, you need to update up to three properties in the locale_config.json and the global_config.json files.
Connect the Frontend and the Backend
The
experienceKeyin thelocale_config.jsonfile must be filled out to match what is listed in the backend experience you have created. To find your experience key, go to the Search > [[Your Experience]] > General Settings screen. To learn more, see the Global Settings and Local Configuration reference doc."default": "en", "localeConfig": { "en": { "experienceKey": "brand-search" // the unique key of your search configuration for this locale } }Update Locale for Non-English Experiences
If your search experience is not in English, update the
localeproperty in thelocale_config.jsonfile. This defaults to ‘en’ out of the box. If your search experience is based in Great Britain, you may decide to use the locale ‘en_GB’ even if it is in English. This locale should tie to what is specified in the corresponding backend config, which in turn specifies which language profiles to pull from entities in Knowledge Graph.Update Cloud Region if in the EU
If you are located in the EU and you want your data to be hosted in the EU, update
"cloudRegion"to"eu"within theglobal_config.jsonfile. This defaults to"us". You can also update the cloud provider with"cloudChoice". This defaults to"multi", which uses any of our consumer serving regions powered by AWS or GCP. Update to"gcp"to limit queries to only use the GCP-based regions. This will also direct analytics events to a GCP-only events URL.
Commented Out Code
The code editor will format and color the code to make it easier to read and understand. Any comments or code in green are “commented out”.
Each coding language, and thus each file type (.json, .hbs, .scss), has different syntax for commenting out code. For example, in Handlebars files (.hbs), you encase the code in {{!-- --}}, and in JSON files you’ll see // for single lines or /** **/ for blocks.
When you comment something out or if something is already commented out, the code will be ignored and the component will not render in your experience.
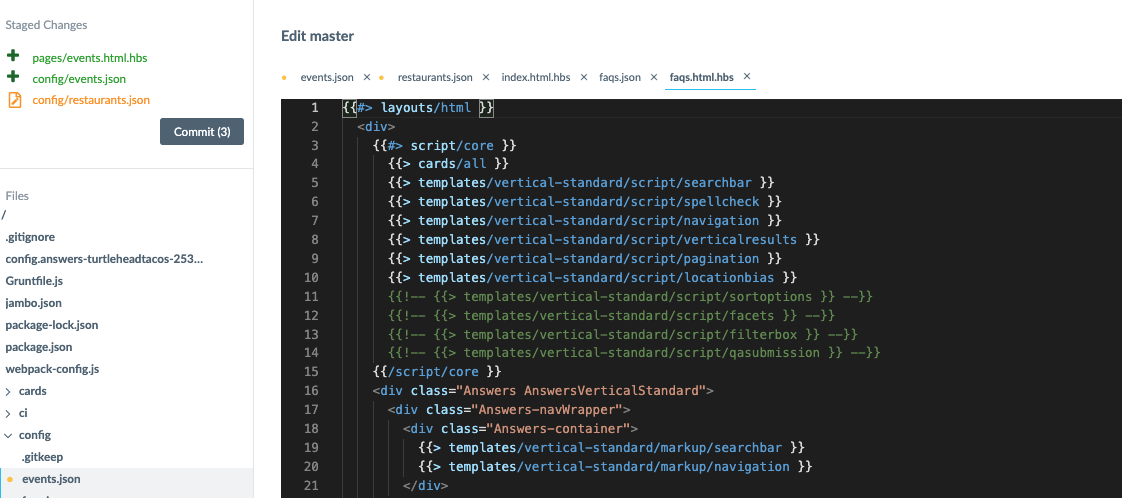
Example of comments in a Handlebars file:
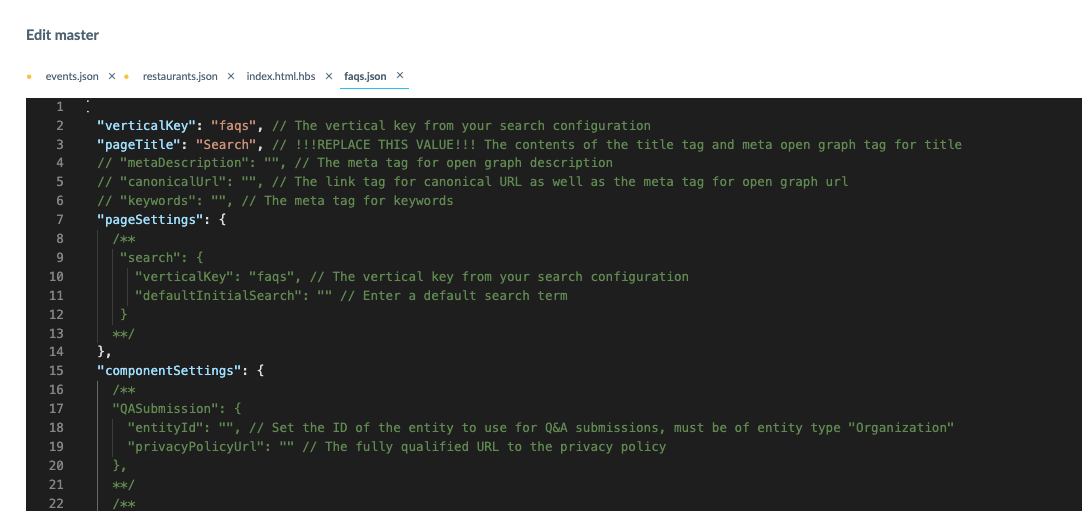
Example of comments in a JSON file:
The comments are there to provide you with more information OR to provide you with sample code that you can easily use. If you want to use the code, simply remove the characters that are creating the comment. Be careful that you remove the whole syntax, otherwise, you’ll run into errors. For example, in a Handlebars file, you need to make sure you remove the characters on both sides of the code:
With comments:
{{!– {{> templates/vertical-standard/script/sortoptions }} –}}
Correctly removed:
{{> templates/vertical-standard/script/sortoptions }}
Incorrectly removed:
{{!– {{> templates/vertical-standard/script/sortoptions }}
or
{{> templates/vertical-standard/script/sortoptions }} –}}
cmd + / on a Mac or ctrl + / on a PC.
Reset Changes
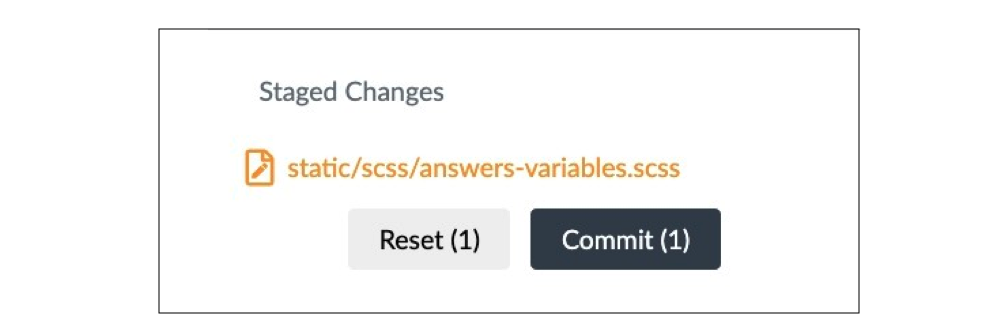
You can see a list of all of the files that you’ve updated in the “Staged Changes” section in the top left, including any updated files (yellow), added files (green), or deleted (red) files. If you want to undo changes to any file, you can hover on the file name and click the “X” icon next to the update. To undo all changes, you can click “Reset”.
Troubleshooting Errors
The Code Editor will help you find errors before you commit the code!
Within a file, you’ll notice there is an error in two ways:
- Red underlining, typical of an error in any text editing program
- A red indicator on the right side

If you hover over the underlined text, you’ll see a message that might be able to help you identify the issue:

Here, it says “Expected comma” – that’s because there is a missing comma on line 11, directly before the underlined text in line 12.
If you’re not sure which file is causing an error, open the Code Editor console and look for error messages that point you to the right file.
Apply Diffs
You can collaborate with coworkers or share commits between repos easily using “Apply Diffs”. All you need is the diff file and you can view and preview the changes or edits made to your repo.
To use this, navigate to Tools > Apply Diffs, enter a URL, click View to see what the diffs contain, and click Apply to add to your staged changes. All you need is a .diff or .patch file stored in a publicly accessible URL.
Committing your Code
Once you are done making changes to your code, you can click Commit under the “Staged Changes” section. This will start the process of saving your updates by opening the “Commit Changes” modal.
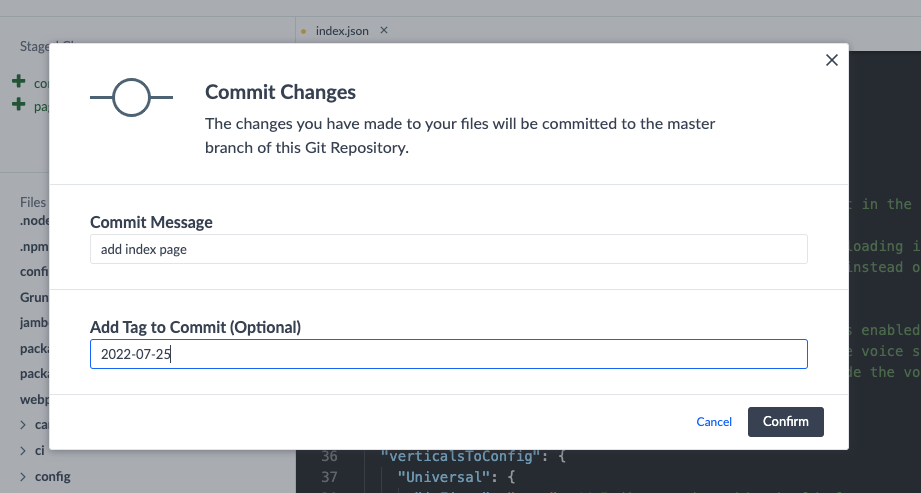
Commit Message
The Commit Message lets other users know what the commit was for (i.e., what kind of changes were made) and is a standard practice in development. Keep your commit message succinct but descriptive.
Tag (Optional)
If you add a Tag to a commit, it will be easier to publish these specific changes. You will read more about publishing and deploying experiences in the next unit.
We recommend using something like a date system or a semantic versioning system to keep track of your commit tags, such as these Git conventions . Something like “2020-05-02” is valid but a short phrase such as “starting point” is not a proper name for a tag.
You can always go back to a commit and add the tag later on by clicking into a “recent commit” on a branch (we’ll cover this in the Deploy an Experience unit).
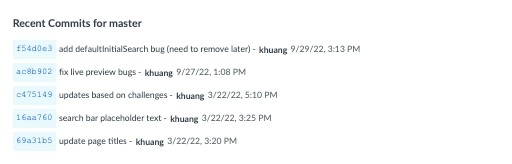
Managing Commits
If you want to view recent commits you can navigate to that first screen of the Code Editor where the list of branches are.
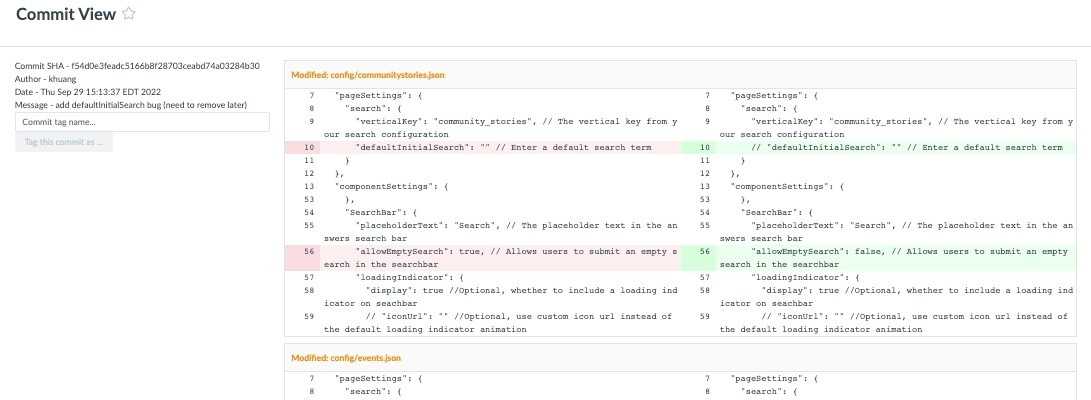
Here, you can click into a commit and see the files and lines of code that were changed. You are also able to assign a tag to the commit if you didn’t do it during the original commit process.
How do you know if there might be errors in your code?
How often should you use Live Preview?
Can you share your preview link with others?
Which is an example of proper commit tag formatting?
Climbing that leaderboard! 📈
