Entity Templates | Yext Hitchhikers Platform
What You’ll Learn
In this section, you will learn:
- What entity templates are and why they’re useful
- How to create an entity template and configure the content
- How to apply an entity template to new and existing entities
Overview
Entity templates allow you to apply a set of standardized field values to entities in the Knowledge Graph. Templates can be used to apply necessary field values in bulk — for internal organization or downstream uses like syncing to Listings.
You can use entity templates to apply standardized content to new entities when they are created, or you can bulk edit existing entities to apply template content.
Some common use cases for entity templates include:
- New entities: Create templates to add standard data to any new entities in the Knowledge Graph as soon as they’re created. For example, a “New Location” template can be used to set the logo, category, a few basic photos, hours, and other fields.
- Closed locations: Apply a template to update certain fields when a location is closed. Include fields like a “Closed” label, an updated featured message, or a redirected URL.
- Seasonal updates: Update content that changes seasonally, like business hours or promotions.
In this unit, you’ll learn where to go to create and manage entity templates, and how to configure the fields and field values on a template. You’ll also go over how to apply a template to new entities and existing entities.
See the Keep Learning section at the end of this unit for detailed steps on using entity templates.
Create an Entity Template
To start, navigate to Knowledge Graph > Configuration and click the Entity Types tile.
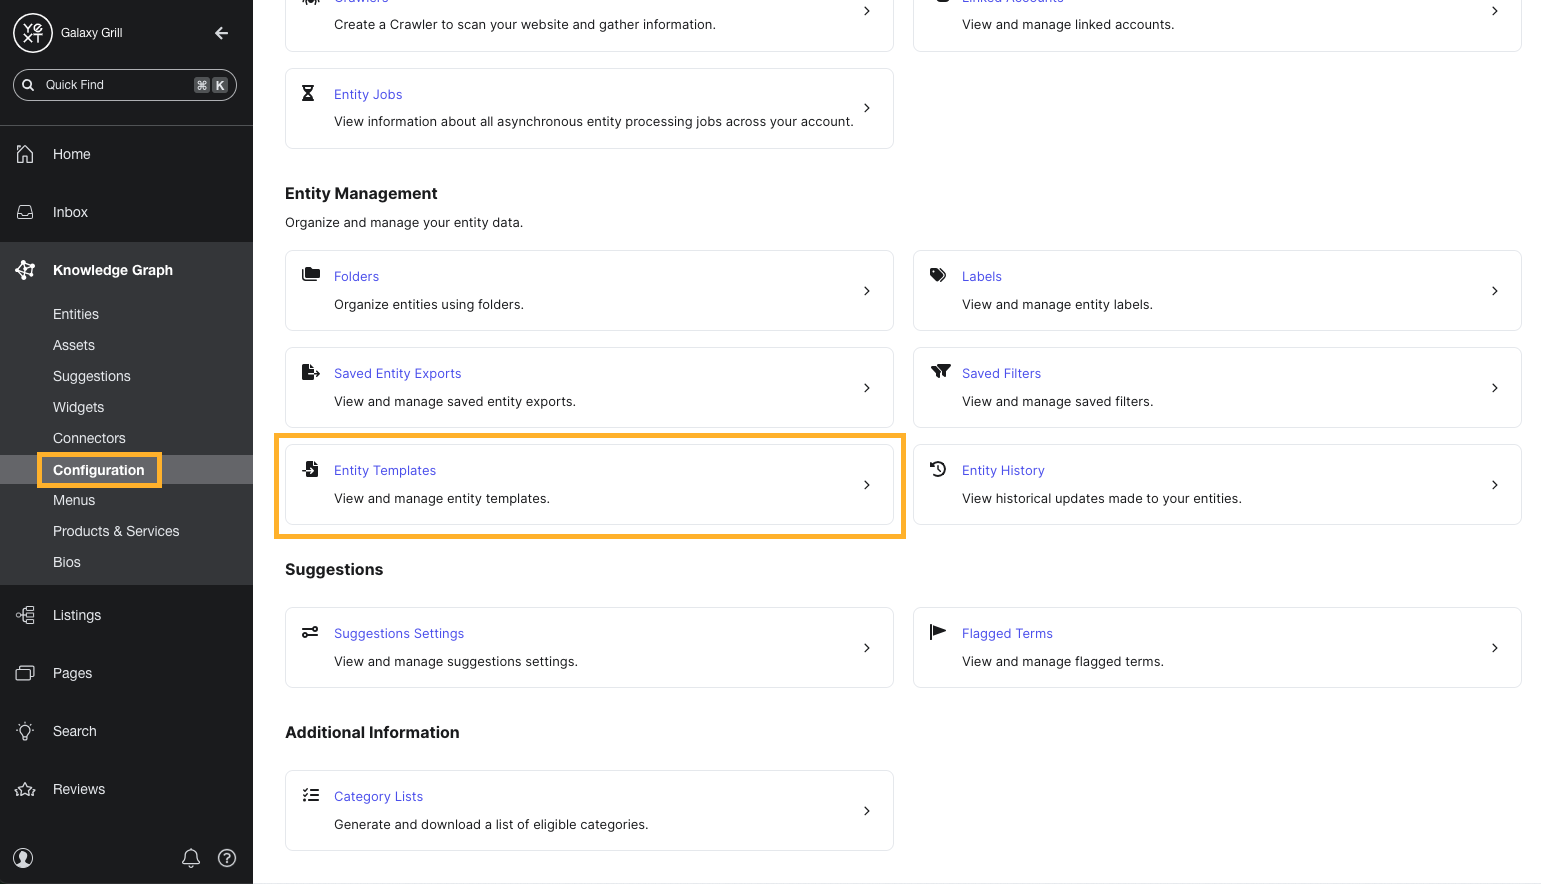
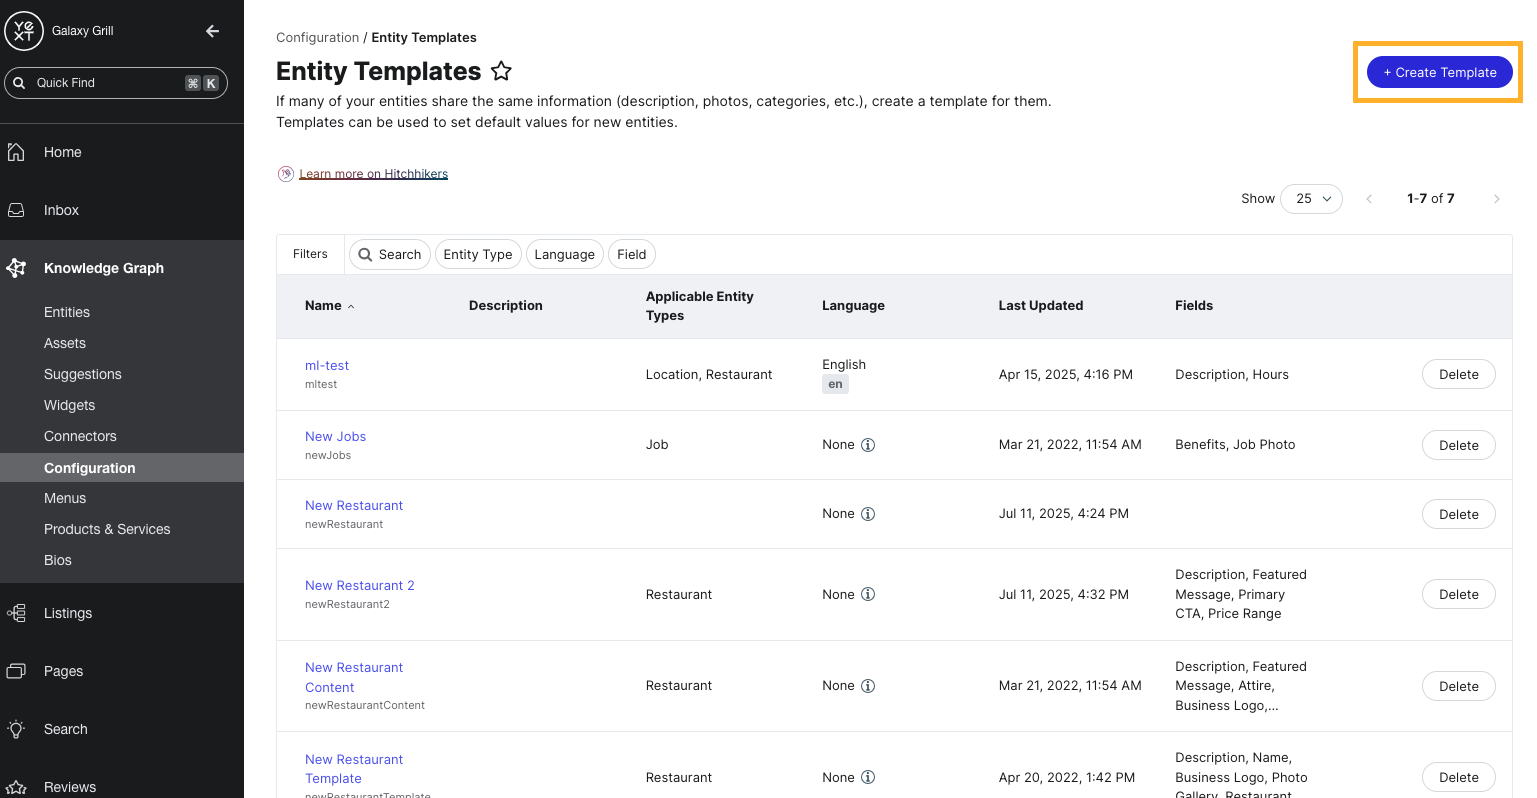
Click Create Template to start a new entity template.
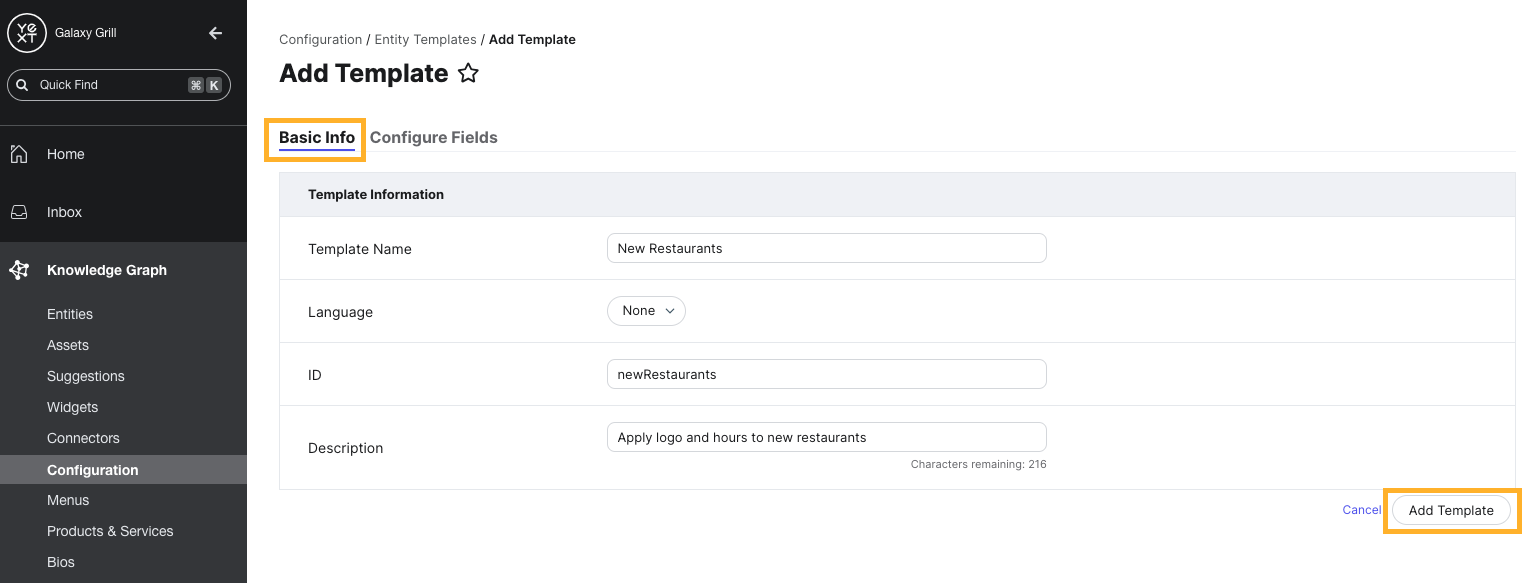
In the Basic Info section, enter the template name. The language, ID, and description fields are optional.
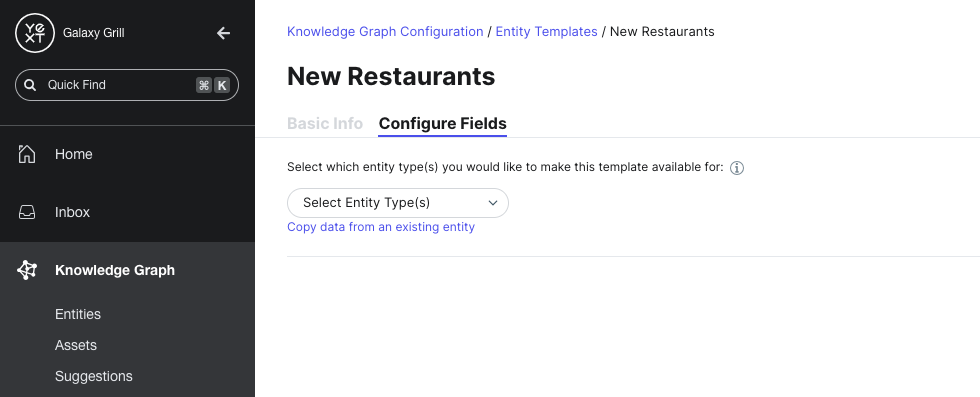
When you’re done, click Add Template to start populating the fields on the template.
Populate Fields on a Template
You can add fields to your template in one of two ways:
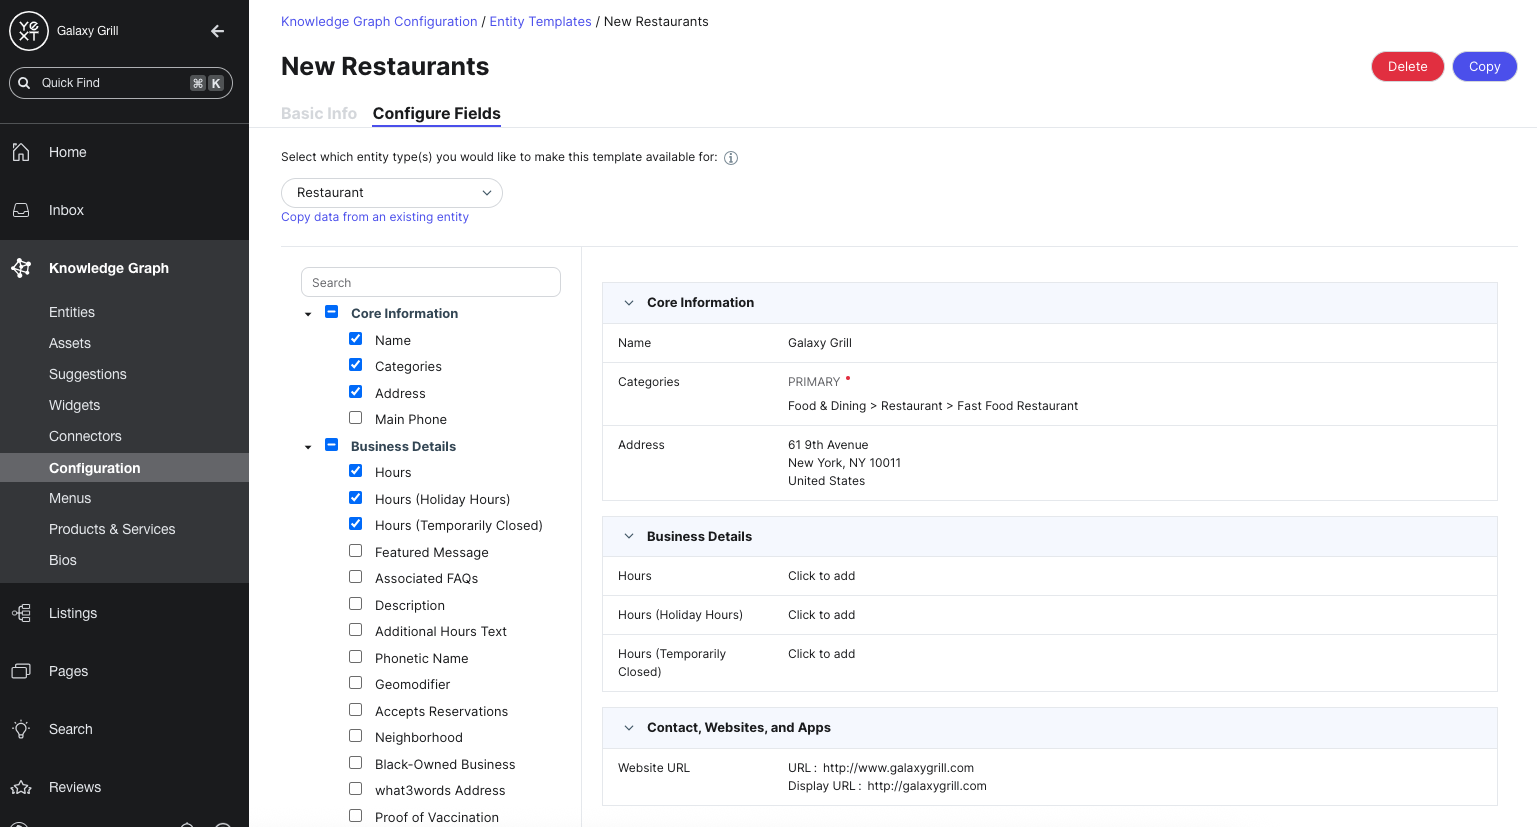
- To add fields to your entity template from scratch, click the Select Entity Type(s) dropdown menu and choose the type or types of entities you want your template to apply to.
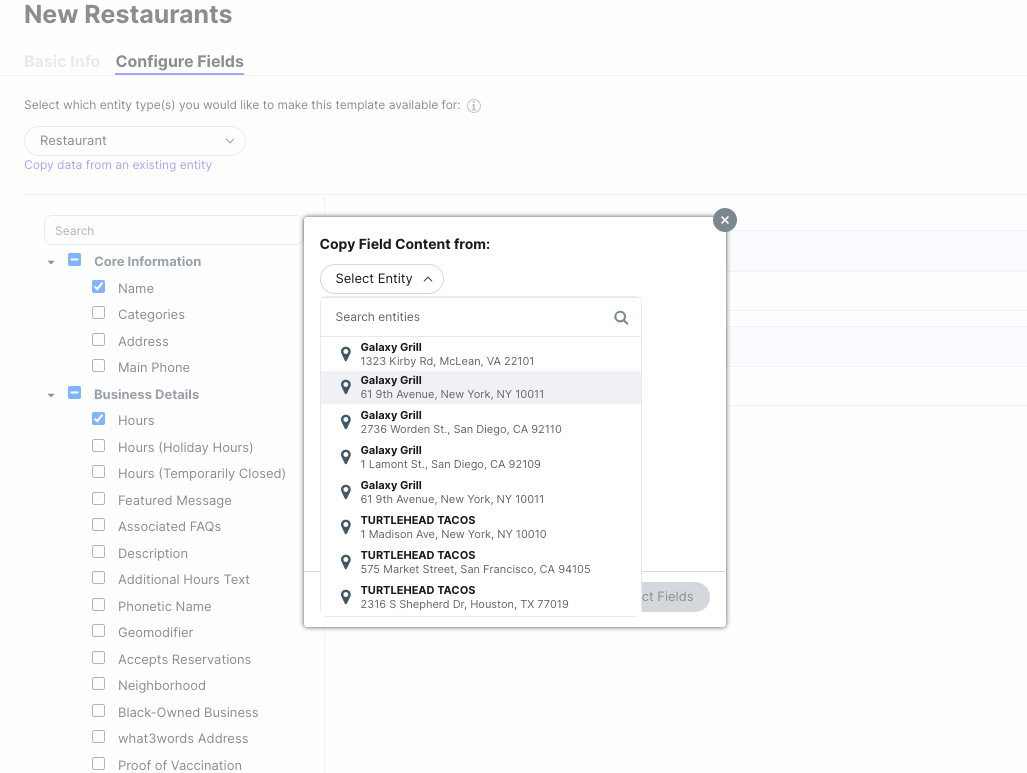
- To copy field values from an existing entity that already has the field values you want to use, click Copy data from an existing entity.
Add fields from scratch
After selecting your entity type(s), add fields to your template by clicking the checkboxes in the left sidebar.
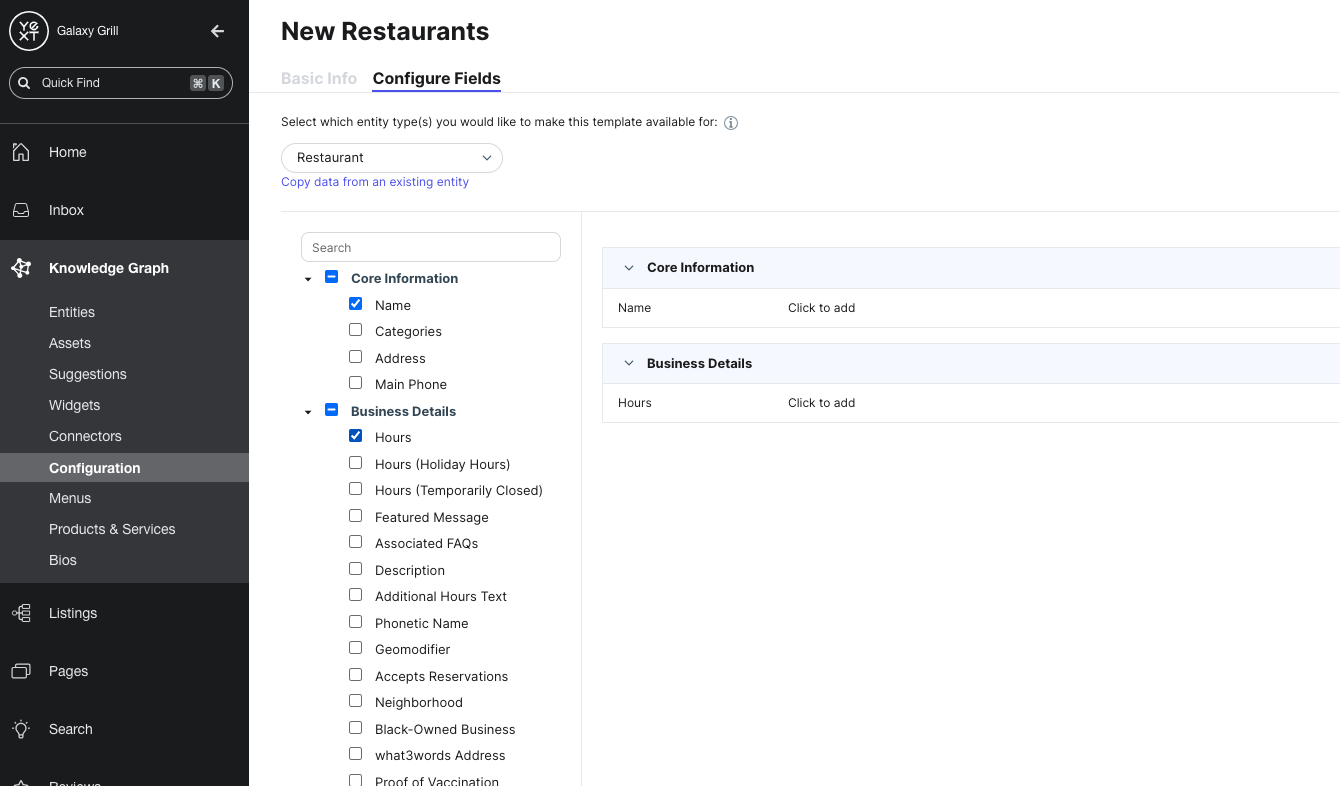
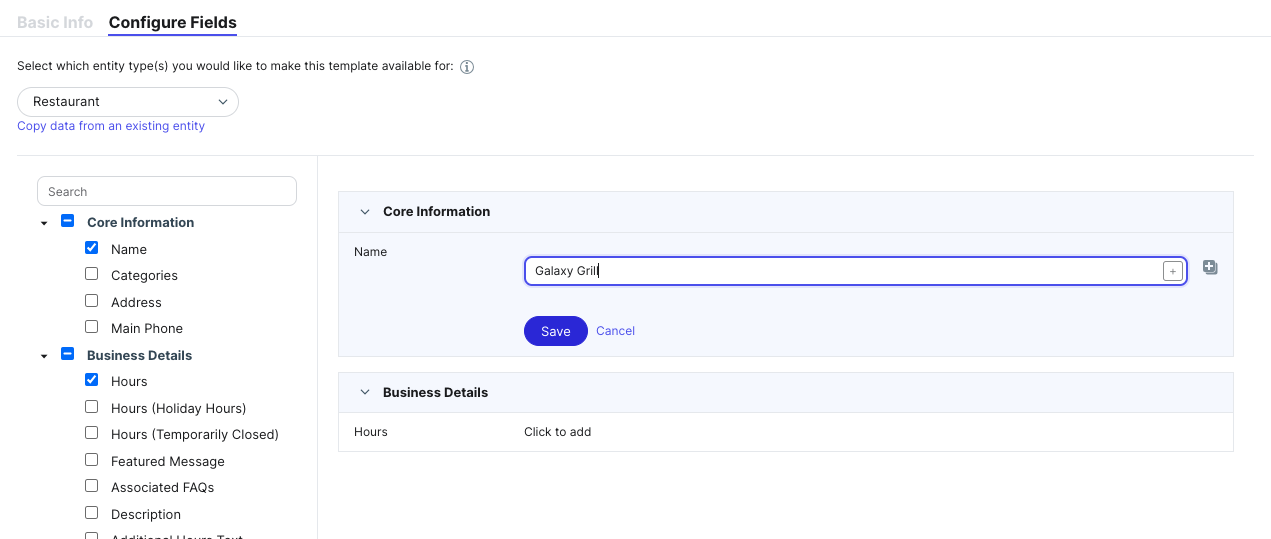
Click into each field and enter the field value that you want your template to apply to entities. Click Save to save each field value. The template saves automatically when you add or edit field values.
Copy data from an existing entity
After clicking Copy data from an existing entity, select the entity whose fields you want to copy.
Select the fields whose values you want to copy to your template.
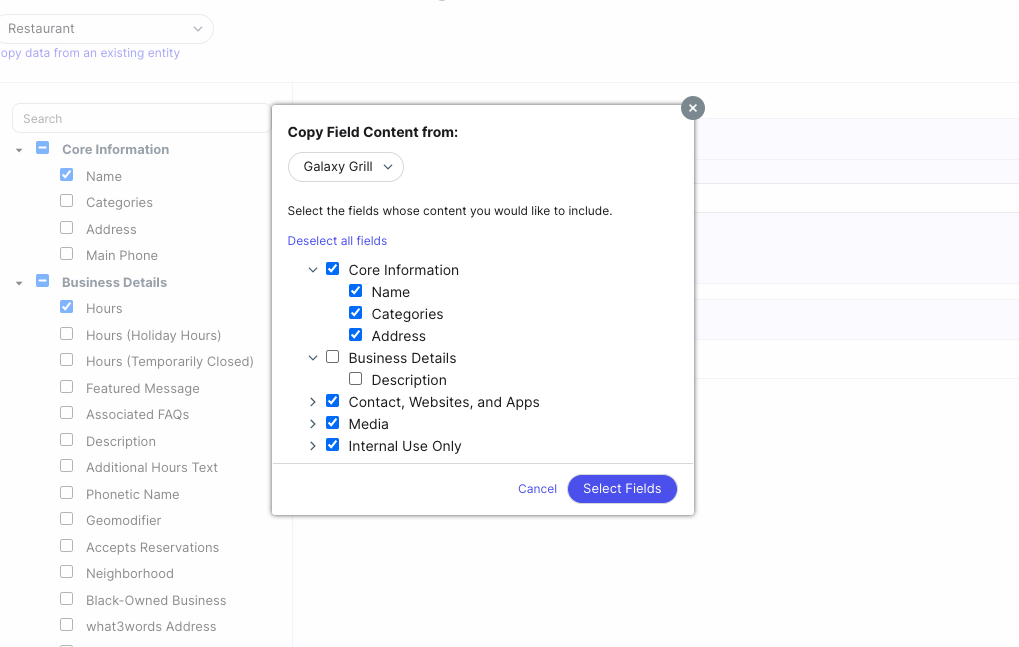
When you’re finished, click the x icon to close the modal. You’ll see the selected fields added to your template, populated with the current field values of the entity you chose to copy.
If you want to change any of the field values, click into any field, modify the value, and click Save on the field. Otherwise, your template is saved and ready to use.
Apply an Entity Template
You can apply a template to entities in the Knowledge Graph a few different ways — learn more about each option below.
- Apply templates to single new entities
- Apply templates to existing entities
- Apply templates during Entity Upload and using saved upload configurations
Developers can also apply entity templates when updating or creating entities using the Entities API.
Apply to new entities
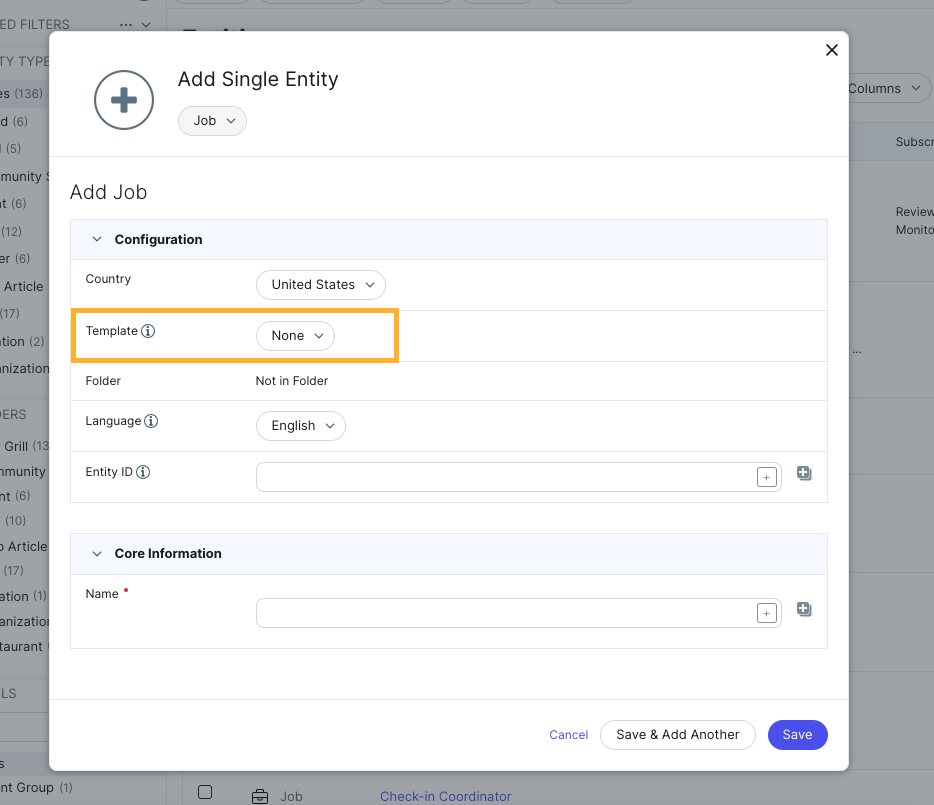
You can apply a template when creating a single new entity.
After clicking Add Data on Entity Search and selecting your entity type, find the Templates field in the Configuration section of the Add Data modal. Select your template from the dropdown menu.
Apply to existing entities
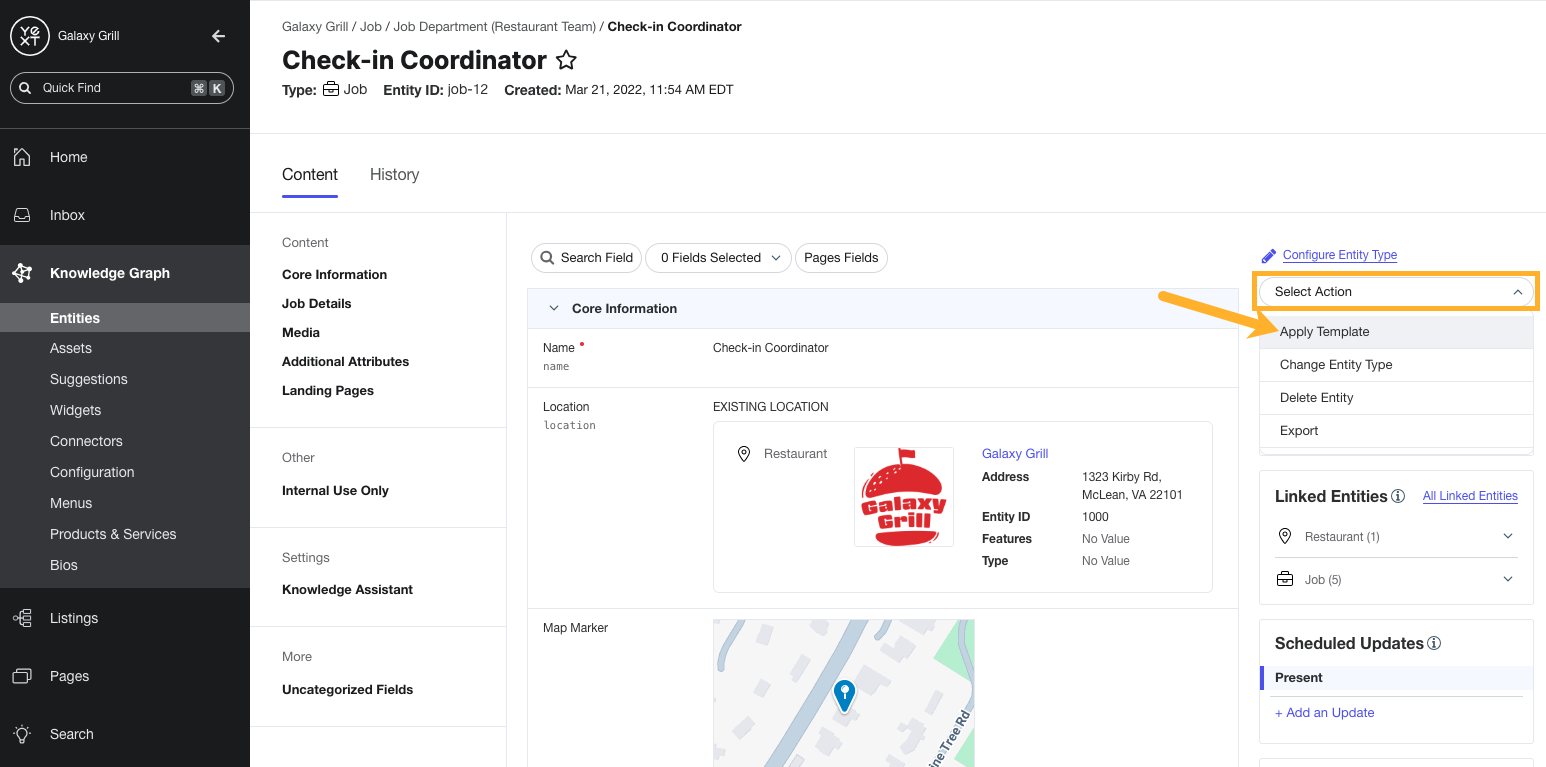
To apply a template to entities already in the Knowledge Graph, click on a single entity entity or bulk-edit a group of entities.
From the Entity Edit view, click the Select Actions dropdown on the right. Then, choose Apply Template and select the template you want to apply.
Apply in Entity Upload
You can also apply templates in bulk from Entity Upload.
On the Configure File step of the upload flow, scroll to the Additional Actions section. Next to Apply a template to these entities, click Add Action. Then, choose your desired entity type and entity template from the dropdown menus.

Keep Learning
For detailed steps to create, apply, and manage entity templates, see these help articles:
What does applying a template to an entity do?
What are some of the main ways that entity templates can help to standardize Knowledge Graph data?
How can you add a template to entities in Yext? (Select all that apply)
High five! ✋

