Module Assessment | Yext Hitchhikers Platform

Background
The Turtlehead Tacos franchise keeps growing — a new location is opening next week! You have a few ideas to standardize entity content so that new Restaurant entities have all the information they need, and so that data is consistent across existing locations.
First, you can think of a few ways to use embedded fields to make managing restaurant data easier:
- Embedding city and state information in the Description field so it’s automatically tailored to each location
- Embedding the value of the Landing Page URL field (the field used by Yext Pages when new pages go live) in the Website field (which syncs to Listings)
- Embedding the Landing Page URL in the Restaurant Promotions field, so each promotion links to the correct location page
Then, before the new location opens next week, you need to make sure it has the correct information set up in scheduled updates and ready to go.
Next, the Turtlehead team has told you they want to get on top of seasonal content. To do this, you’ll create an entity template for seasonal content and schedule it ahead of time, so the changes go live when they’re needed.
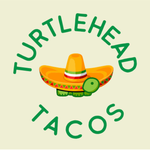
Lastly, you’re tired of digging for the Turtlehead Tacos logo and uploading the file each time you need to use it! Create an asset to store and update the logo wherever it’s needed.
Use these resources if you need help completing the challenge tasks:
Your Challenge
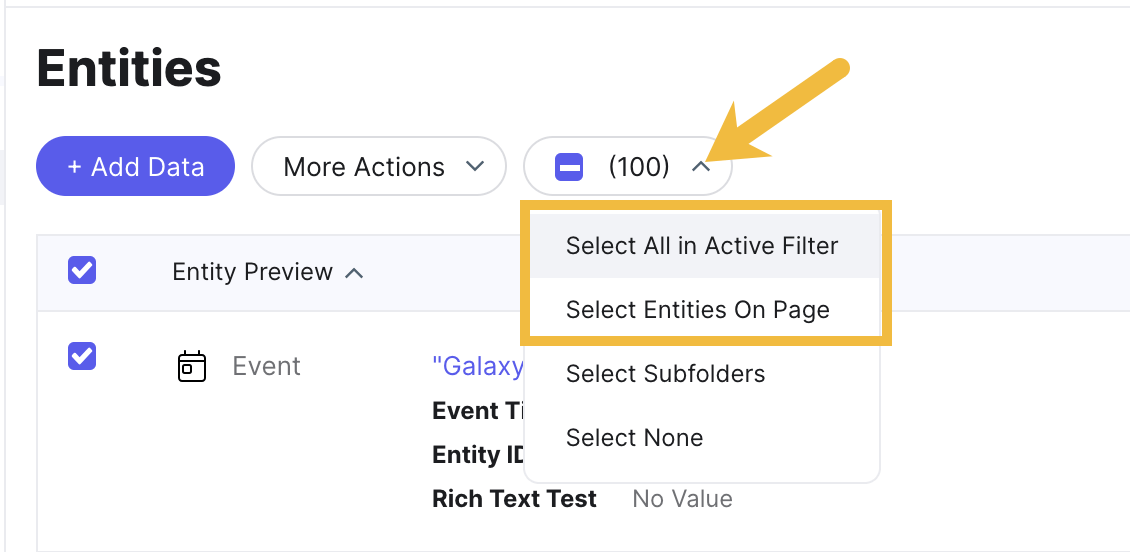
Bulk edit all restaurants to make the following changes. (Hint: when selecting Restaurant entities, make sure you are selecting all entities under the Restaurant type, not just the first 25!)
- Add this text to the end of the Description field: “Visit us in
[[address.city]],[[address.region]]today!” - Embed the value for the Landing Page URL field in the URL and Display URL fields. Add this embedded value:
[[landingPageUrl]] - Add these three promotions to the Restaurant Promotions field:
Promotion 1
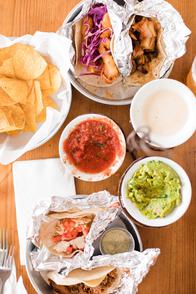
* Title: Tacos & Tots Tuesdays
* Photo: https://a.mktgcdn.com/p-sandbox/-OGscdtgL2FHqupGLj0pIDSoJqLHAtzy5ER0W48rTVI/196x294.jpg
* Description: Order two tacos and get free tots on Tuesdays.
* URL: `[[landingPageUrl]]`
Promotion 2
- Title: 2-for-1 Champagne Margaritas
- Photo: https://a.mktgcdn.com/p-sandbox/2gHieyTIXQg0xUsExIhqBauGAcfJ0HFNm9ZOTkW-_nk/196x294.jpg
- Description: Buy one Champagne Margarita and get your second on the house. Cheers!
- URL:
[[landingPageUrl]]
Promotion 3
- Title: Fiesta Package
- Photo: https://a.mktgcdn.com/p-sandbox/Bu4qxytV6lkBVLLJd5CK39Ox9hHkR-kw9NeybAignXU/196x294.jpg
- Description: Having a party? Let Turtlehead Tacos help! Call today to inquire about our Fiesta Package.
- URL:
[[landingPageUrl]]
- Add this text to the end of the Description field: “Visit us in
Save your bulk edit.
The new location needs its hours and phone number filled in, but you don’t want these changes to apply until the location opens next week. The new location has Entity ID 1000. Create a scheduled update for the Hours and Main Phone fields on this location.
- Navigate to Knowledge Graph > Entities, find the correct Restaurant entity, and click to open Entity Edit.
- In the Scheduled Updates modal on the right, click Add an Update. Set the update to one week from today (keep the default values for the scheduled time and time zone).
- Edit the Hours field to 11am-11pm for all days of the week.
- Edit the Main Phone field to contain this phone number:
703-555-8070 - Click Schedule Update on both fields. Do not choose to revert the content.
Create a template called “Seasonal Content” for Restaurant entities. Include the following fields:
- Featured Message: “Taco about the holidays with us!”
- Featured Message URL:
[[website.url]]
Bulk-edit all Restaurant entities and schedule an update to apply the Seasonal Content template. Choose any date in the future for the scheduled update. Then, click the Select Action dropdown in the bulk-edit view and click Apply Template. Choose the Seasonal Content template and save your changes.
Create an asset for the Turtlehead Tacos logo. Navigate to Knowledge Graph > Assets and create a new photo asset with the following information:
- Name: Logo
- Content: Click Enter URL. Copy and paste this URL: https://a.mktgcdn.com/p/V2PQKsmULPElaif2wYeQ7Qb9rtlAuSsOmjcrNkDXuC4/150x150.png
- Usage: This should only be used for the Business Logo field. Click the Entity Fields checkbox to deselect all fields. Then, click to expand Entity Fields > Photo > Complex Photo and select the Business Logo checkbox.
- For entities: All Entities
- Save the asset.
Bulk-edit all Restaurant entities and add the new Logo asset in the Business Logo field.
Add the Logo asset to the New Restaurant Content entity template. Navigate to Knowledge Graph > Configuration > Entity Templates and click into the New Restaurant Content template. Add the Logo asset to the Business Logo field.
Make sure that you are selecting all of the right entities when you bulk edit. By default, clicking the checkbox to select all entities will only select the entities shown on the first page. To select more entities, click the dropdown menu displaying the number of entities selected. Then, choose to select all in active filter.