
Connectors Overview | Yext Hitchhikers Platform
What You’ll Learn
In this section, you will learn:
- What connectors do
- What the ETL process is and how it works in Connectors
- Where to go in Yext to start building a connector
- The basic steps of building a connector
Overview
As you learned in the Navigating the Knowledge Graph unit, Connectors enable you to pass data between Yext and other systems.
You can build connectors to transfer data from a variety of different data sources, such as third-party apps, API, and other data sources. Then, the connector will use that data to create or update entities in the Knowledge Graph, or send to another API.
In this module
This module will go over the basics of connectors: how they work, what data sources are, and where to manage them in Yext. See the Keep Learning section at the end of each unit for more detailed resources.
At the end of this module, your challenge will be to build a connector to create new entities in the Knowledge Graph. You’ll also learn where to start building connectors in Yext, and an overview of what the process looks like.
In this unit
In this unit, you’ll learn about how connectors extract, transform, and load entity data. You’ll also get an overview of the steps to build a connector in Yext.
Connectors and the ETL Process
Connectors use the process of an ETL to create and update entities in the Knowledge Graph. This stands for extract, transform, load.
ETL is a computing process used by many different systems. Here’s a general overview of how it works:
- First, data is extracted from a source (such as an app, a spreadsheet, an API, etc.)
- Then it is transformed into the appropriate format — in this case, entity data.
- Finally, the data is loaded into its destination. You can build connectors that load data into the Knowledge Graph or into another API. Most connectors will load data into the Knowledge Graph as entities.
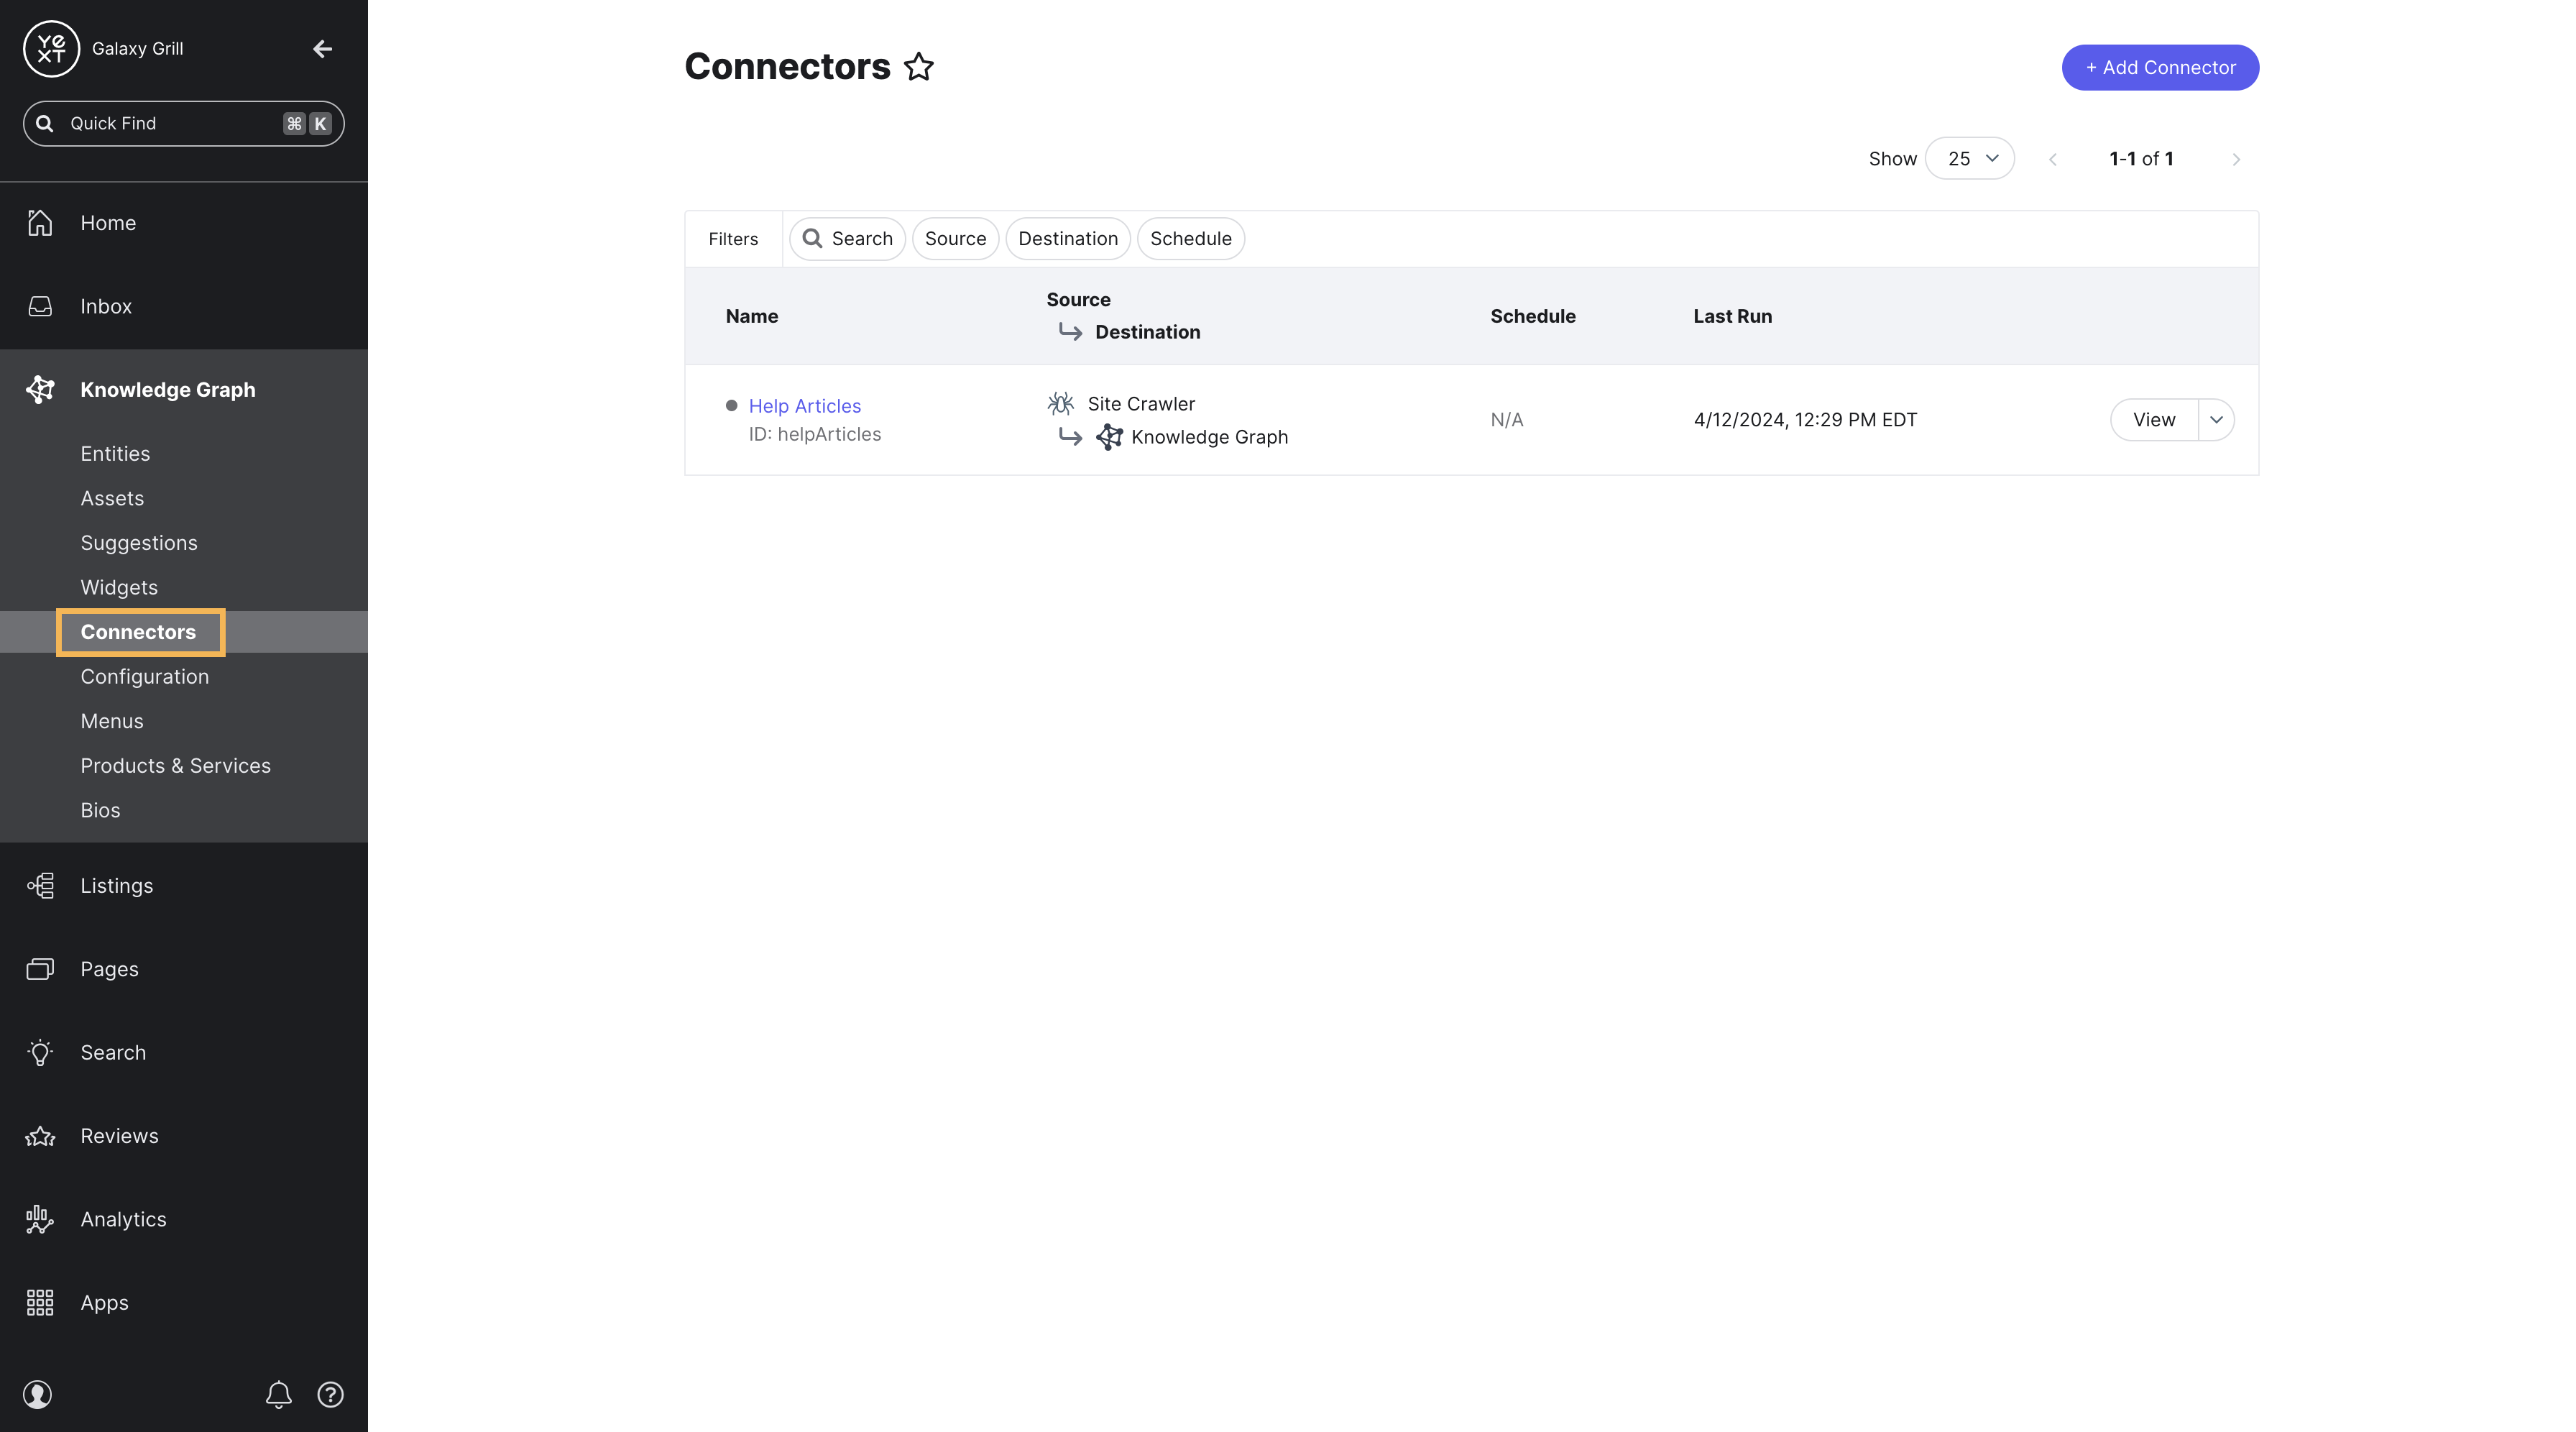
Building a Connector
To build and manage connectors in Yext, go to Knowledge Graph > Connectors.
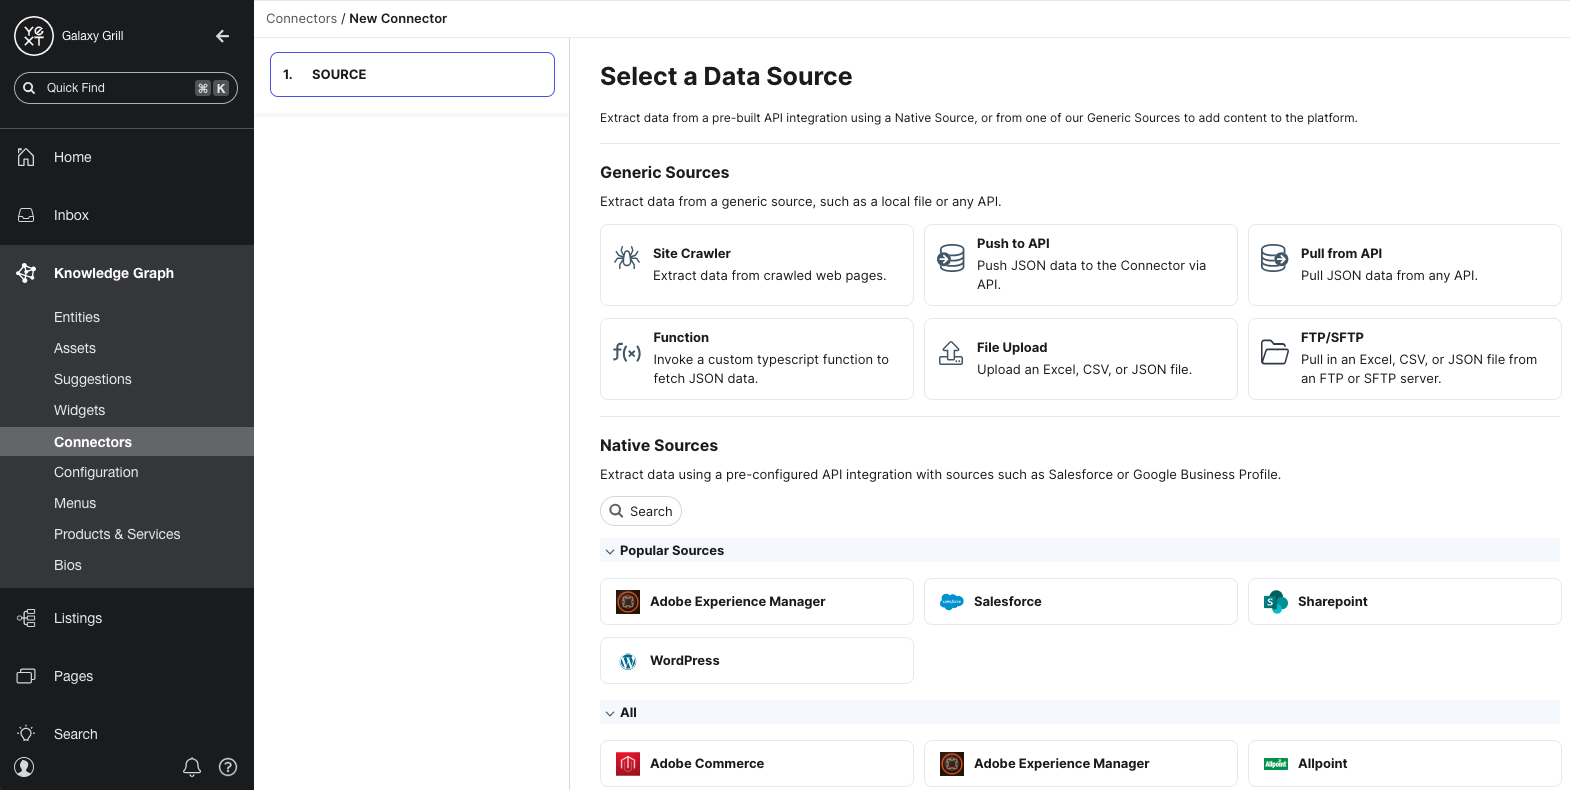
Choose a data source
The first step in building a connector is choosing a data source to extract data from. You’ll learn more about the different types of data sources in the Data Sources unit.
Depending on the source you choose, you’ll have different steps to configure the data you want to pull in.
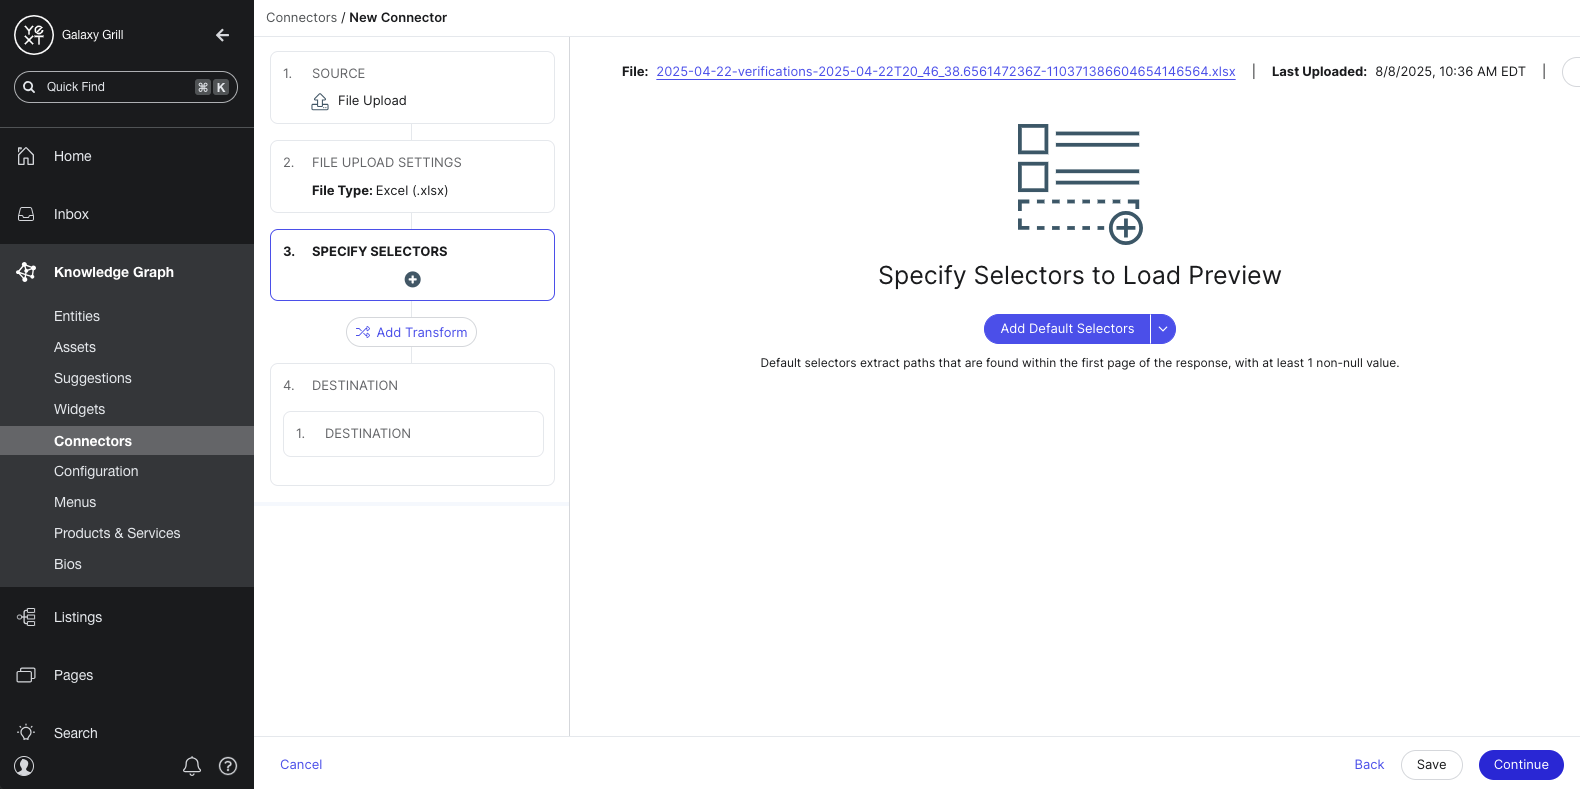
Add selectors
After configuring your data source, you will add selectors. Selectors identify the parts of your data source that you want to pull in, and how the data should be parsed by your destination.
For example, let’s say you’re building a connector to pull in HTML data from a website. You’ll use selectors to identify which parts of each webpage should be used to create or update entity data. You could specify selectors to pull in the title of the webpage as the name of the entity, map the URL of the webpage to the Website entity field, etc.
Each data source has a set of default selectors that you can add automatically. You can also write your own custom selectors if you choose.
After you add selectors, you’ll start to see a preview table of what your data will look like.
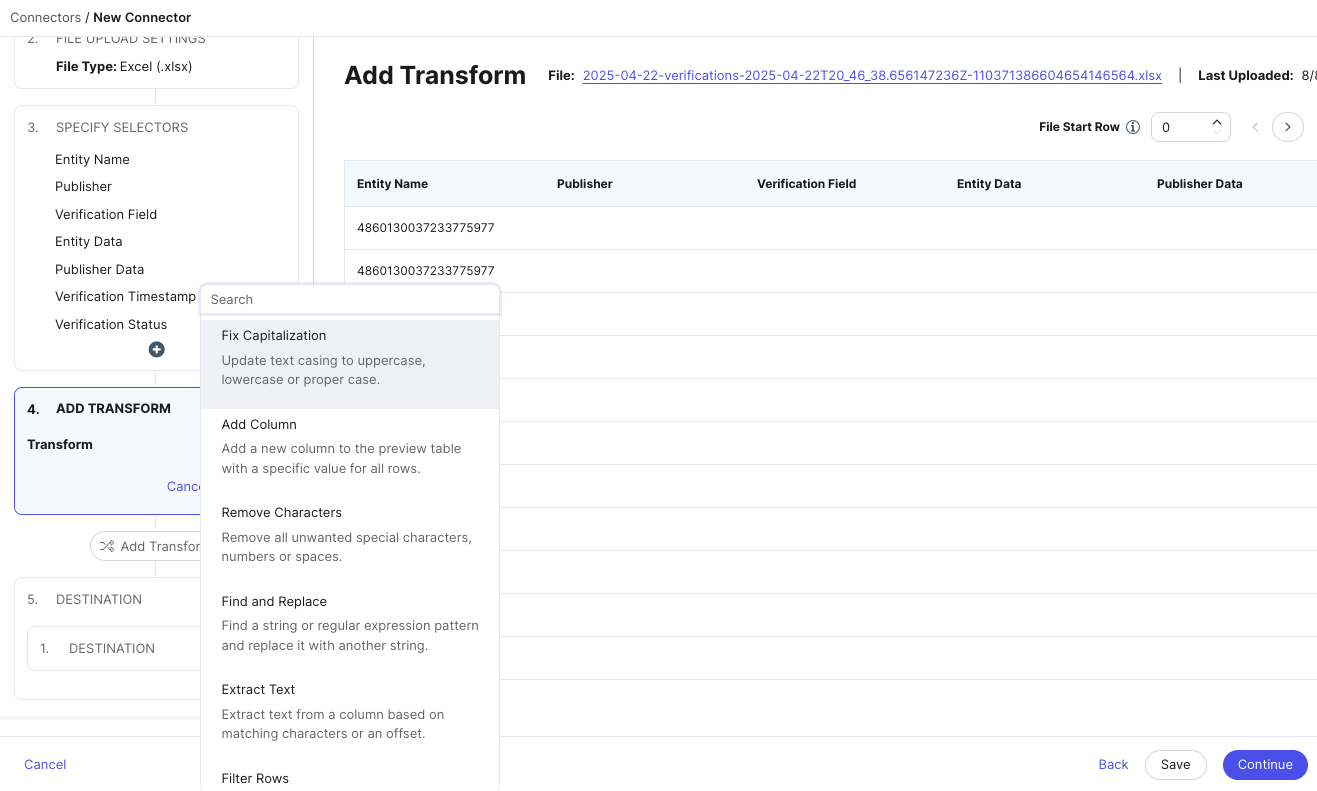
Add transforms
Next, you can choose to add transforms to the data identified by your selectors. Transforms can apply formatting to your data like fixing capitalization, splitting columns, standardizing phone numbers, and other changes.
Choose destination
After transforming your data, you’ll choose your destination: where your data should end up when your connector runs.
You can choose to send your data to the Knowledge Graph (as entities), or to send it to another API. Most connectors will send data to the Knowledge Graph.

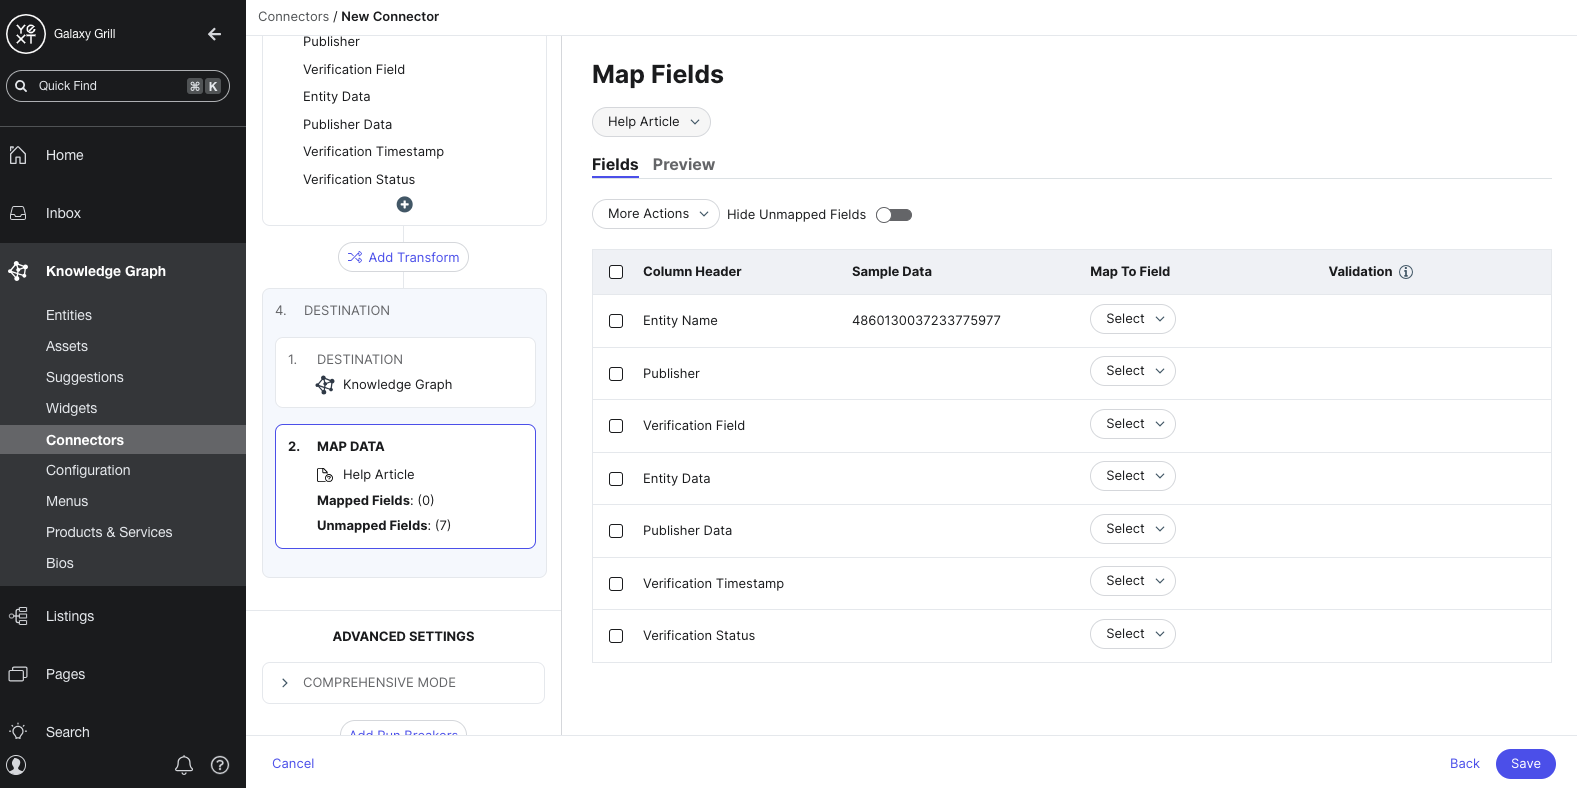
Map fields
If you chose the Knowledge Graph as your destination, you’ll map the columns in your data set to entity fields in the Knowledge Graph. This is similar to the Configure File step, as you learned in the Entity Upload unit.
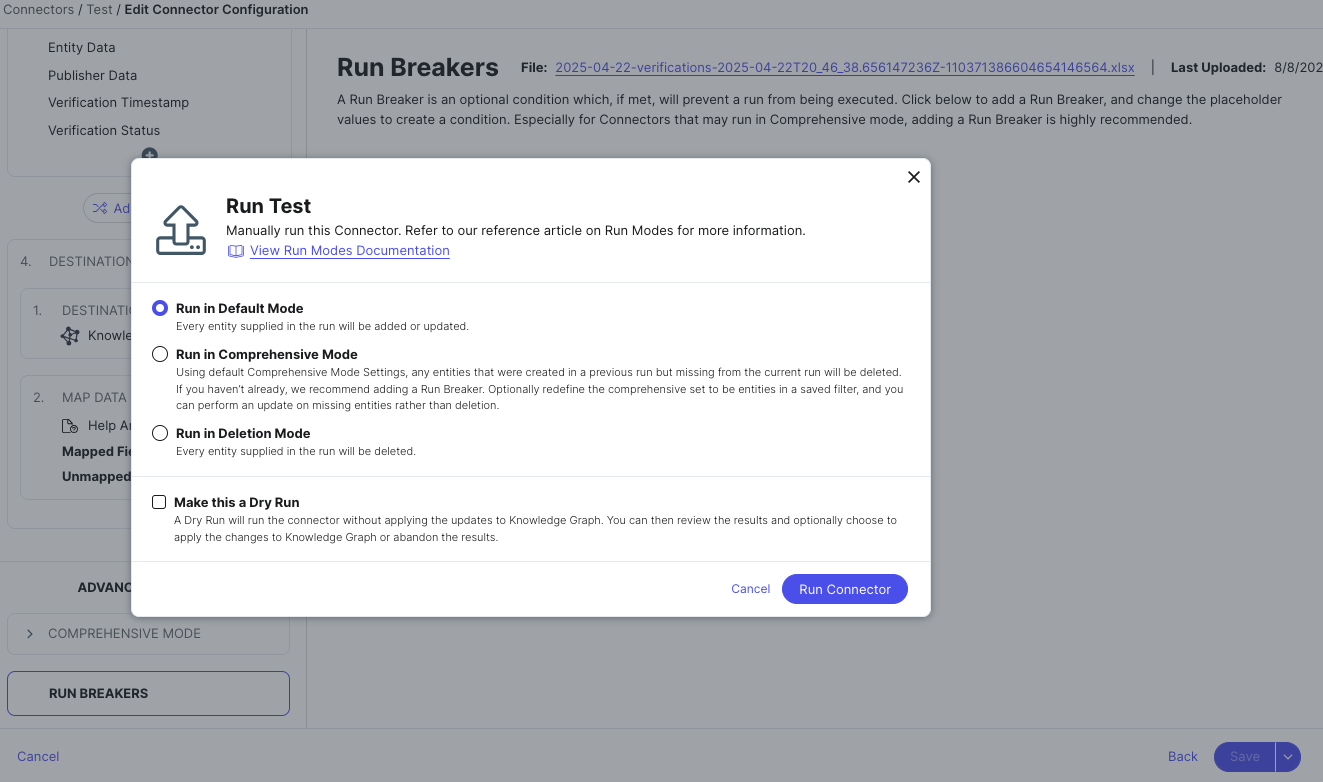
Save and run
After your fields are mapped, you’ll save your connector. You can run it immediately or run it later.
When you run your connector, you can configure different options like:
- The run schedule (how frequently this connector should run)
- The run mode (how it should handle creating new entities, and if it should delete existing entities)
- If you want to do a dry run (to test how it would update your data without actually making changes)
Keep Learning
Continue to the next unit to learn about the different data sources in Connectors.
For more general info on ETL processes, see this resource from Amazon Web Services: What is ETL?
See the Connectors reference documentation for a collection of technical resources on using Connectors in Yext.
What do connectors do?
What does ETL refer to?
True or false: You can build connectors to send data to the Knowledge Graph as entities, or to another API.
Soon you'll be your brand's hero! 🎓
