Managing Language Profiles | Yext Hitchhikers Platform
What You’ll Learn
In this section, you will learn:
- Why consistency in language profiles is important
- How to create, update and delete alternate language profiles via Entity Edit
- What happens when you change the primary profile of an entity
- Other methods to manage language profiles
Overview
Before you can start adding field content in other languages, you need to create alternate language profiles for your entities.
This can be done in Entity Edit from the “Languages” module on an entity. You can use the Languages module to add, remove, or change language profiles while editing a single entity, or in bulk edit.

You can also do this in bulk for a large number of entities via file upload or API.
Consistent Language Profiles and Downstream Content
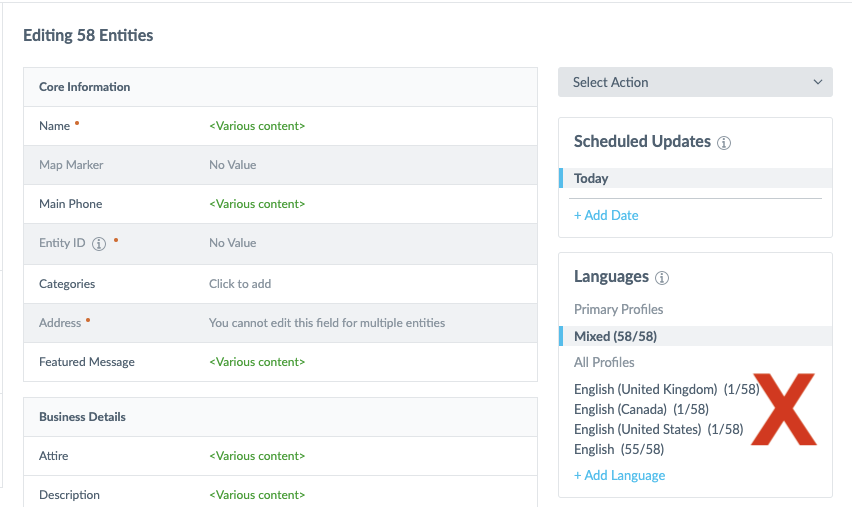
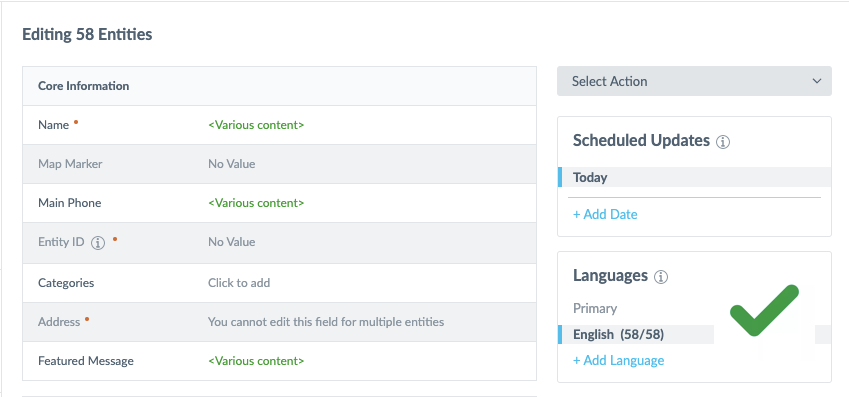
When creating language profiles for entities, your language profiles should be consistent across all your entities that you want to use in a downstream use case (e.g, a search experience or set of pages).
For example, if your entity profiles are spread out across different English variants like in the image below, you won’t be able to use all of those profiles in one search experience. Instead, you would end up with separate search experiences for each locale:

If you want just one English experience, it should look like this:

If you don’t need all the entities in your account to be used in the same downstream content, then you don’t need all your entities to have the same exact language profiles. For example, you can have some FAQ entities that have English, Spanish and French profiles and other FAQs that just have English profiles. In this case, your search experience containing those FAQ entities would simply result in a different number of results in each language.
Manage Language Profiles on Entity Edit
Choose a single entity or select multiple entities to bulk edit. From there, you can use the Languages module to manage language profiles.
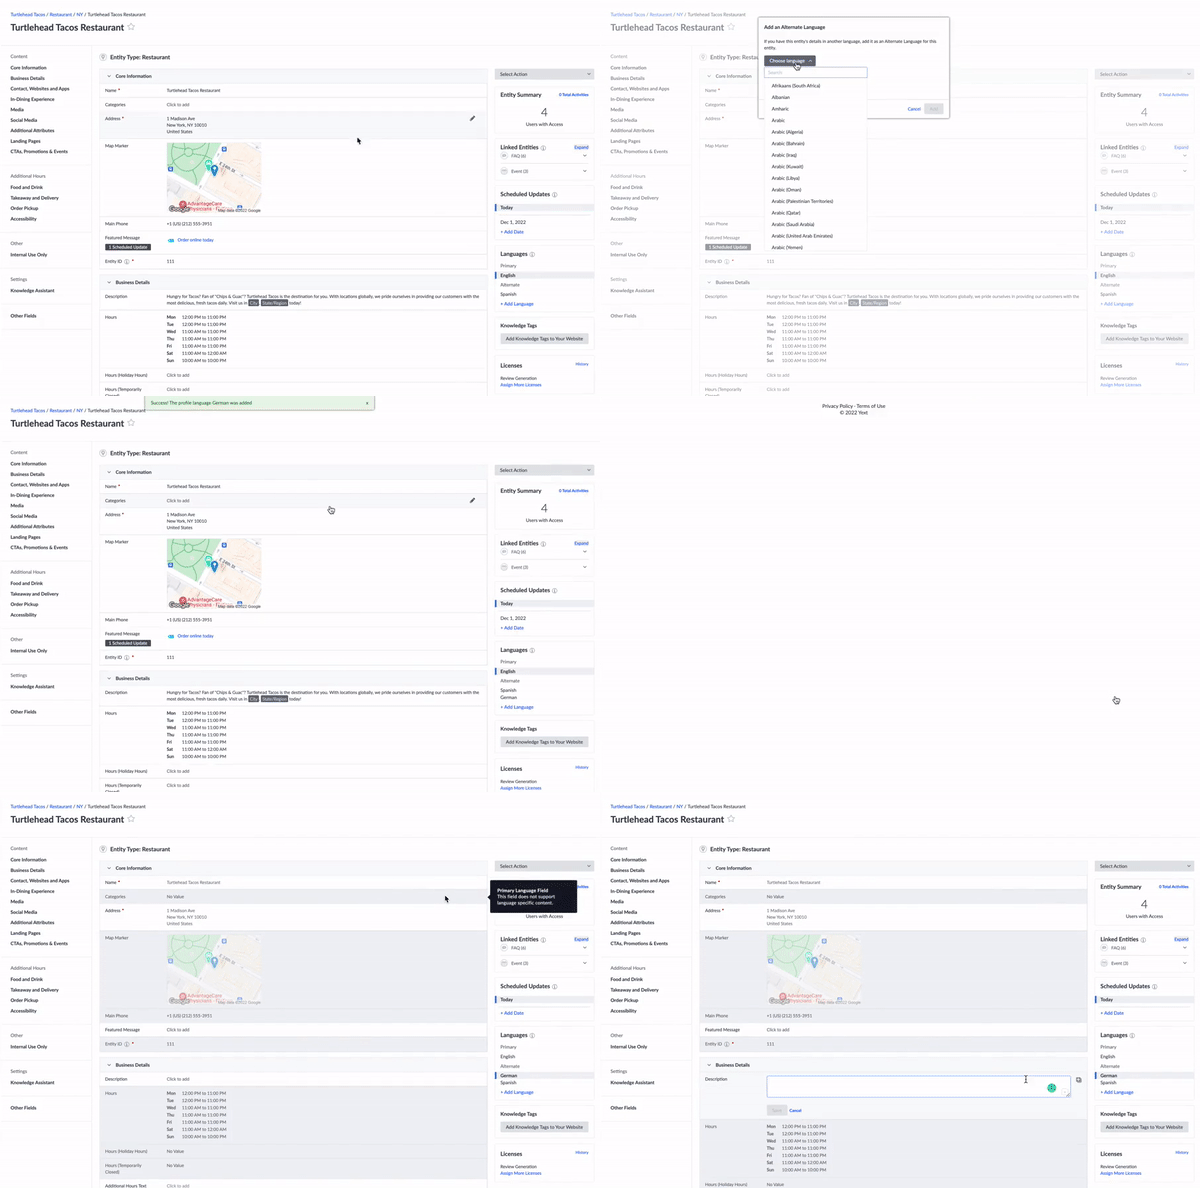
Here’s an example of what it looks like to add an alternate language profile, view that profile and see the different field behaviors from Entity Edit.

Add a Language Profile
Click +Add Language. You’ll then see a modal where you can search for and select the language profile you want to add.
View Another Language Profile
Click on the language you want to see in the Languages module. This will take you to the alternate language profile for the entity, including any data that is inherited from the primary profile.
Change a Language Profile to Another Locale
This should not be used to change the entire language of the profile (e.g, from en to fr). This should only be done to switch the language between country variants for the same language (e.g., en to en_gb or vice versa).
Doing this allows you to add or change a locale associated with an existing alternate language profile, while keeping any content you have already added to that profile.
Remove a Language Profiles
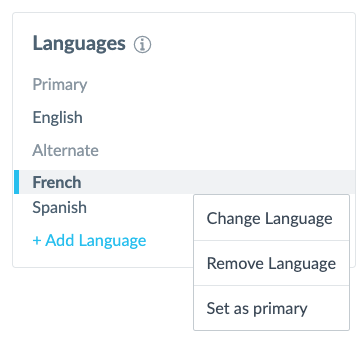
Click on the three-dot icon (…) that appears when you hover on a language profile and select Remove Language. This will delete the profile and all of its content, so use caution!
Set the Primary Profile
You can change which language profile is the primary profile for an entity. Use caution, as this has implications in terms of defaults sent to downstream systems like Pages, Search, or Listings.
For any overridable fields, if you have overridden the field content on the alternate profile before making it the primary profile, that profile’s content will carry over to all other profiles after it becomes primary. For example, let’s say Galaxy Grill has two language profiles:
en_us: primary profilefr_caes
On the French Canadian (fr_ca) profile, the Name has been overridden to “Galaxy Grill Canada,” but the Name is “Galaxy Grill” on the Spanish (es) and primary English profiles. If you switch the primary profile from en_us to fr_ca, the English and Spanish profiles will now also have “Galaxy Grill Canada” on the Name field. Make sure the right field overrides are in place before switching the primary profile.
Manage Language Profiles via File Upload
Use a file upload connector to manage your alternate language profiles.
Create Alternate Language Profiles
Create language profiles for existing entities by including a “Language Profile” column in your upload file with the language or locale code you want to add (e.g., fr or fr_ca).
Create Entities with a Specified Primary Language Profile
Add new entities with a different primary language profile than your account default.
Update Content on Existing Language Profiles
Ensure that the upload file contains both the Entity ID and the language or locale code for the profile content you want to edit.
Limitations
You cannot perform these actions on language profiles via file upload:
- Delete language profiles
- Change the primary profile of an entity
- Create new entities and add alternate profiles in the same upload
Manage Language Profiles via API
Language profiles can also be created, read, updated, and deleted via API. You can read more about that in the API documentation.
You want to add French language profiles to all of your Restaurant entities. How can you do this? (Select all that apply)
If you change the primary profile of an entity, what happens to overrideable fields on the entity?
Wahoo - you did it! 🙌

