
Deployment Screens | Yext Hitchhikers Platform
What you’ll learn:
In this section, you will:
- Learn how to manage deploy preview, staging, and production links
- Navigate the details of individual deploys
Overview
Deployments are fully rendered versions of your site that can be published to staging or production in seconds.
- Staging — rough drafts or work in progress. These can be shared, but are not live sites that end users or your customers can see.
- Production — the live version of your site. This is what users see when they navigate to your website currently if your Pages site has been integrated with your website.
In this unit, we’ll walk you through the details of both the deploy screen, where you can see all your deploys, as well the details of each individual deploy.
Deploys Screen
To view deploys on your site, navigate to Pages, click on the relevant site, and click Deploys. This screen shows all the important links for your site at the top and a history of deploys for each branch.
Deploy Preview Links
Each deploy has a deploy-specific preview link. Clicking the Preview button next to a deploy will open a new tab with that version of your site.
When you are working on your site you can easily preview multiple deploys to compare your work or send different versions of the site to the relevant stakeholders for feedback.
Staging and Production Deploys
At the top of the Deploys screen, you will see a Production and Staging link. These are permalinks that will always display the version of the site that is pushed to either staging or production. These can be easily shared with coworkers to reflect your latest work at any time.
The current staged deploy will be marked with an orange “Staging” indicator and the one pinned to production will have a green “Production” indicator.
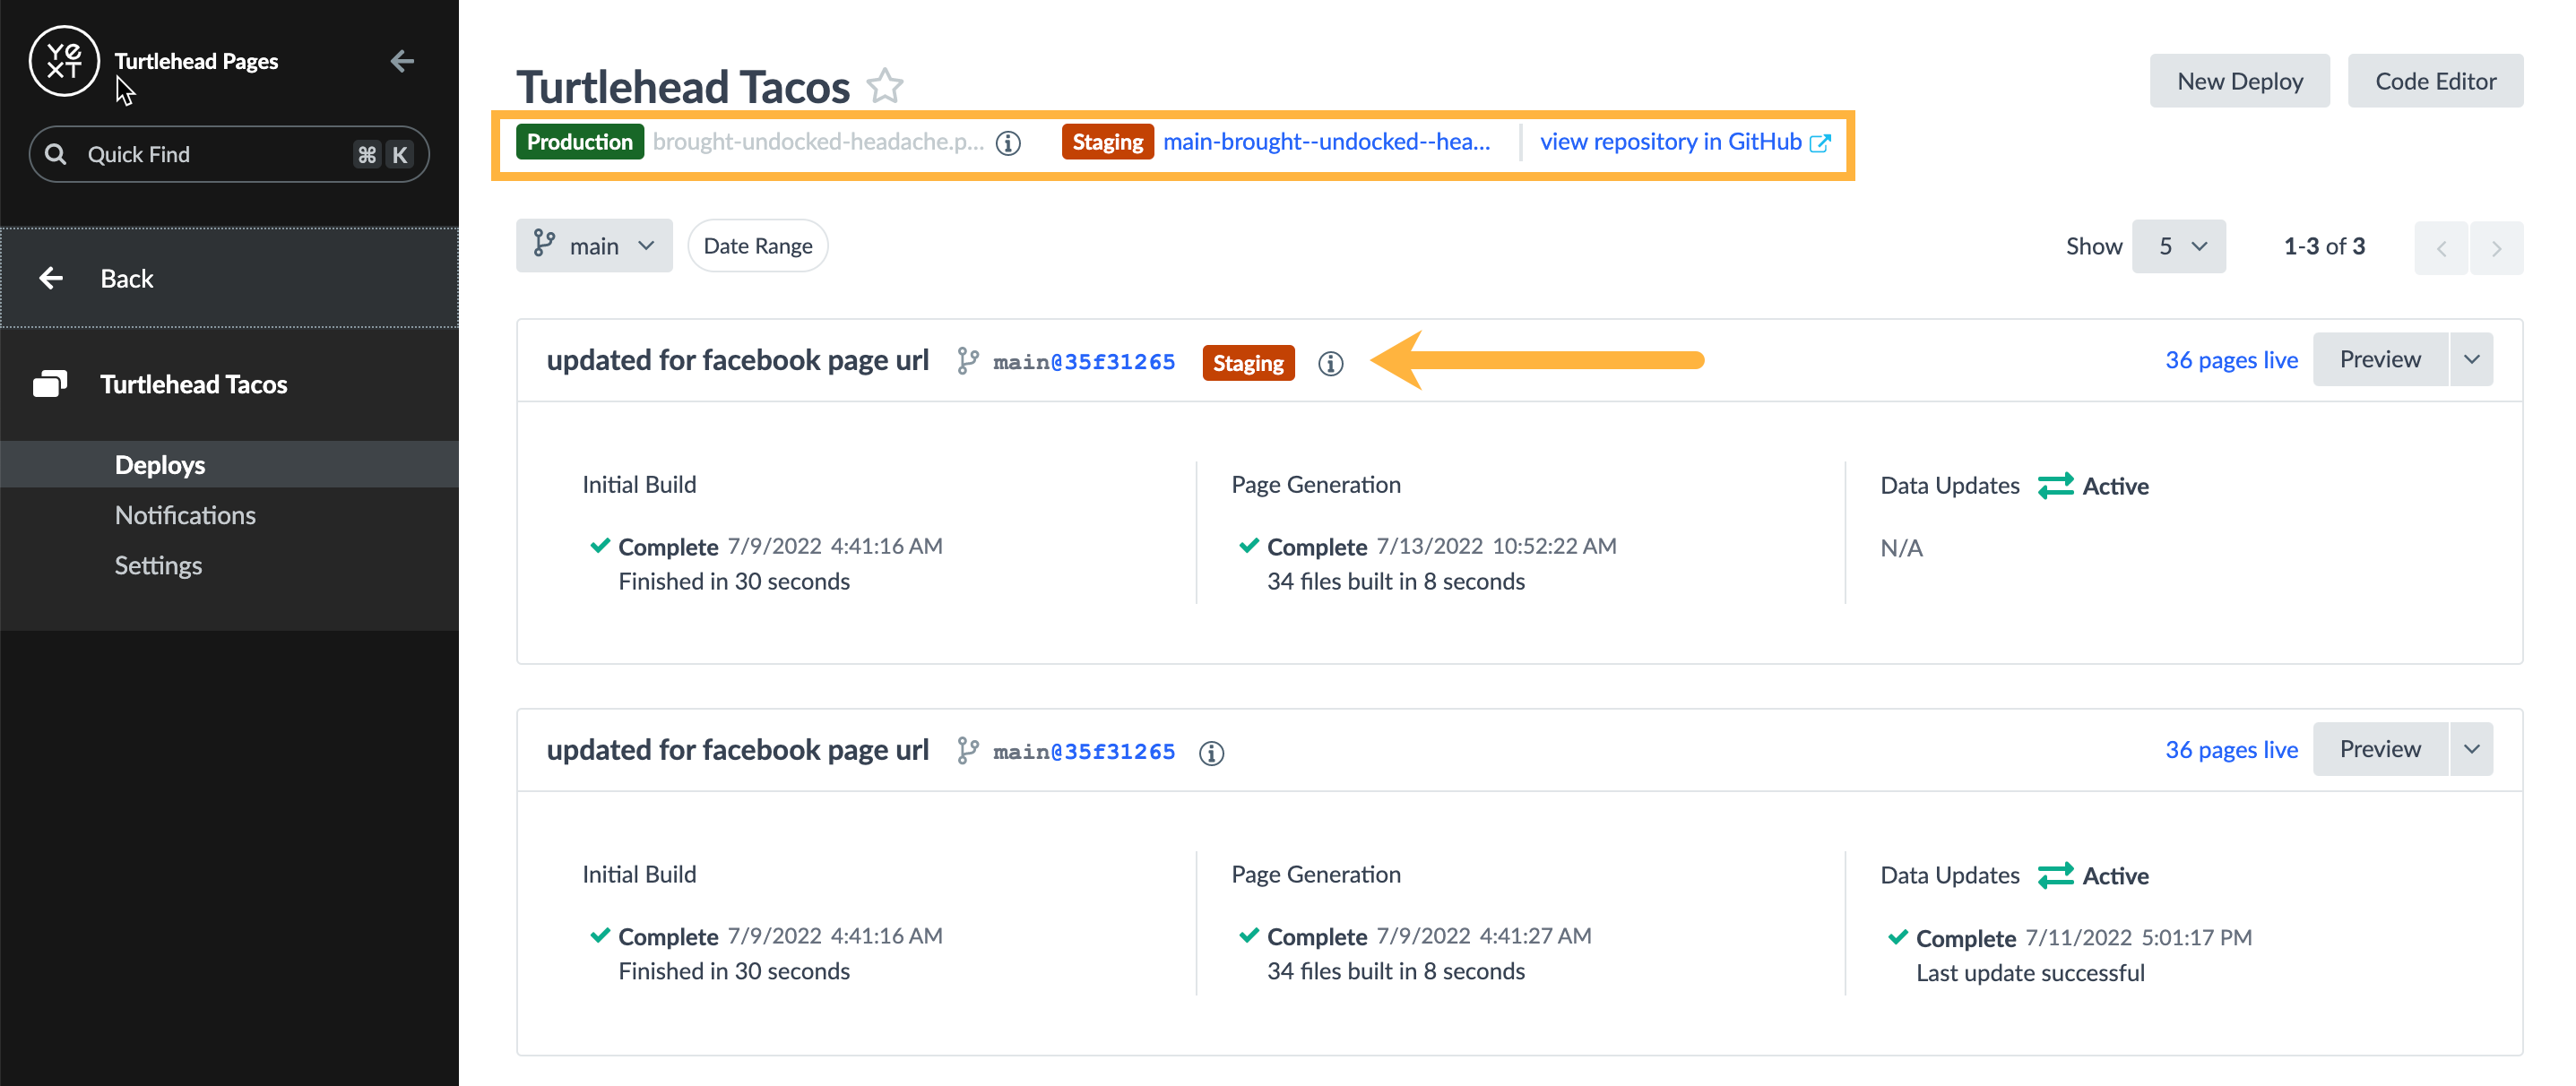
Note you can have a staging link for each branch (the branch name is prepended to the staging domain), but only one production link across the site that must be from the production branch. If a commit is not currently deployed, you’ll have to redeploy it before you can publish it to staging or production.
Stage or Publish a Previous Deploy
You can always stage or publish a previous deploy. To do this, navigate to the relevant deploy and click on the dropdown next to Preview and click Publish to staging or Publish to production depending on your preferred action. Because each deploy is fully rendered you can publish a deployment in seconds.

This capability allows you to quickly deploy an update. For example, publishing to staging shows stakeholders with the staging link the most up-to-date version of a recently added change. Once that update has been QA’d and approved, publishing to production will push the new version to your live site in seconds.
Alternatively, it allows you to quickly roll back your staging and production environments nearly instantly. If you ever push a bug to production, you can roll back to a previous deploy in seconds - crisis averted!
Deploy Details
For each individual deploy, you will see information about the three phases of the deployment process that we covered in the first unit:
- Initial Build
- Page Generation
- Data Updates
Click into any of these sections to see more details about that phase of that specific deploy.
Every deploy you click into will have a View Deploy URLs button in the top right corner of the page. If you click this you can see the full list of live URLs in your deploy. In the top-left-hand corner, click on the “Any Type” pill and filter this list down to “HTML only”. These URLs should look familiar!
Initial Build
The initial build phase is responsible for generating all the static assets that make up the front end of the website.
Clicking on this section of the deployment screen will show you build details and a console log.
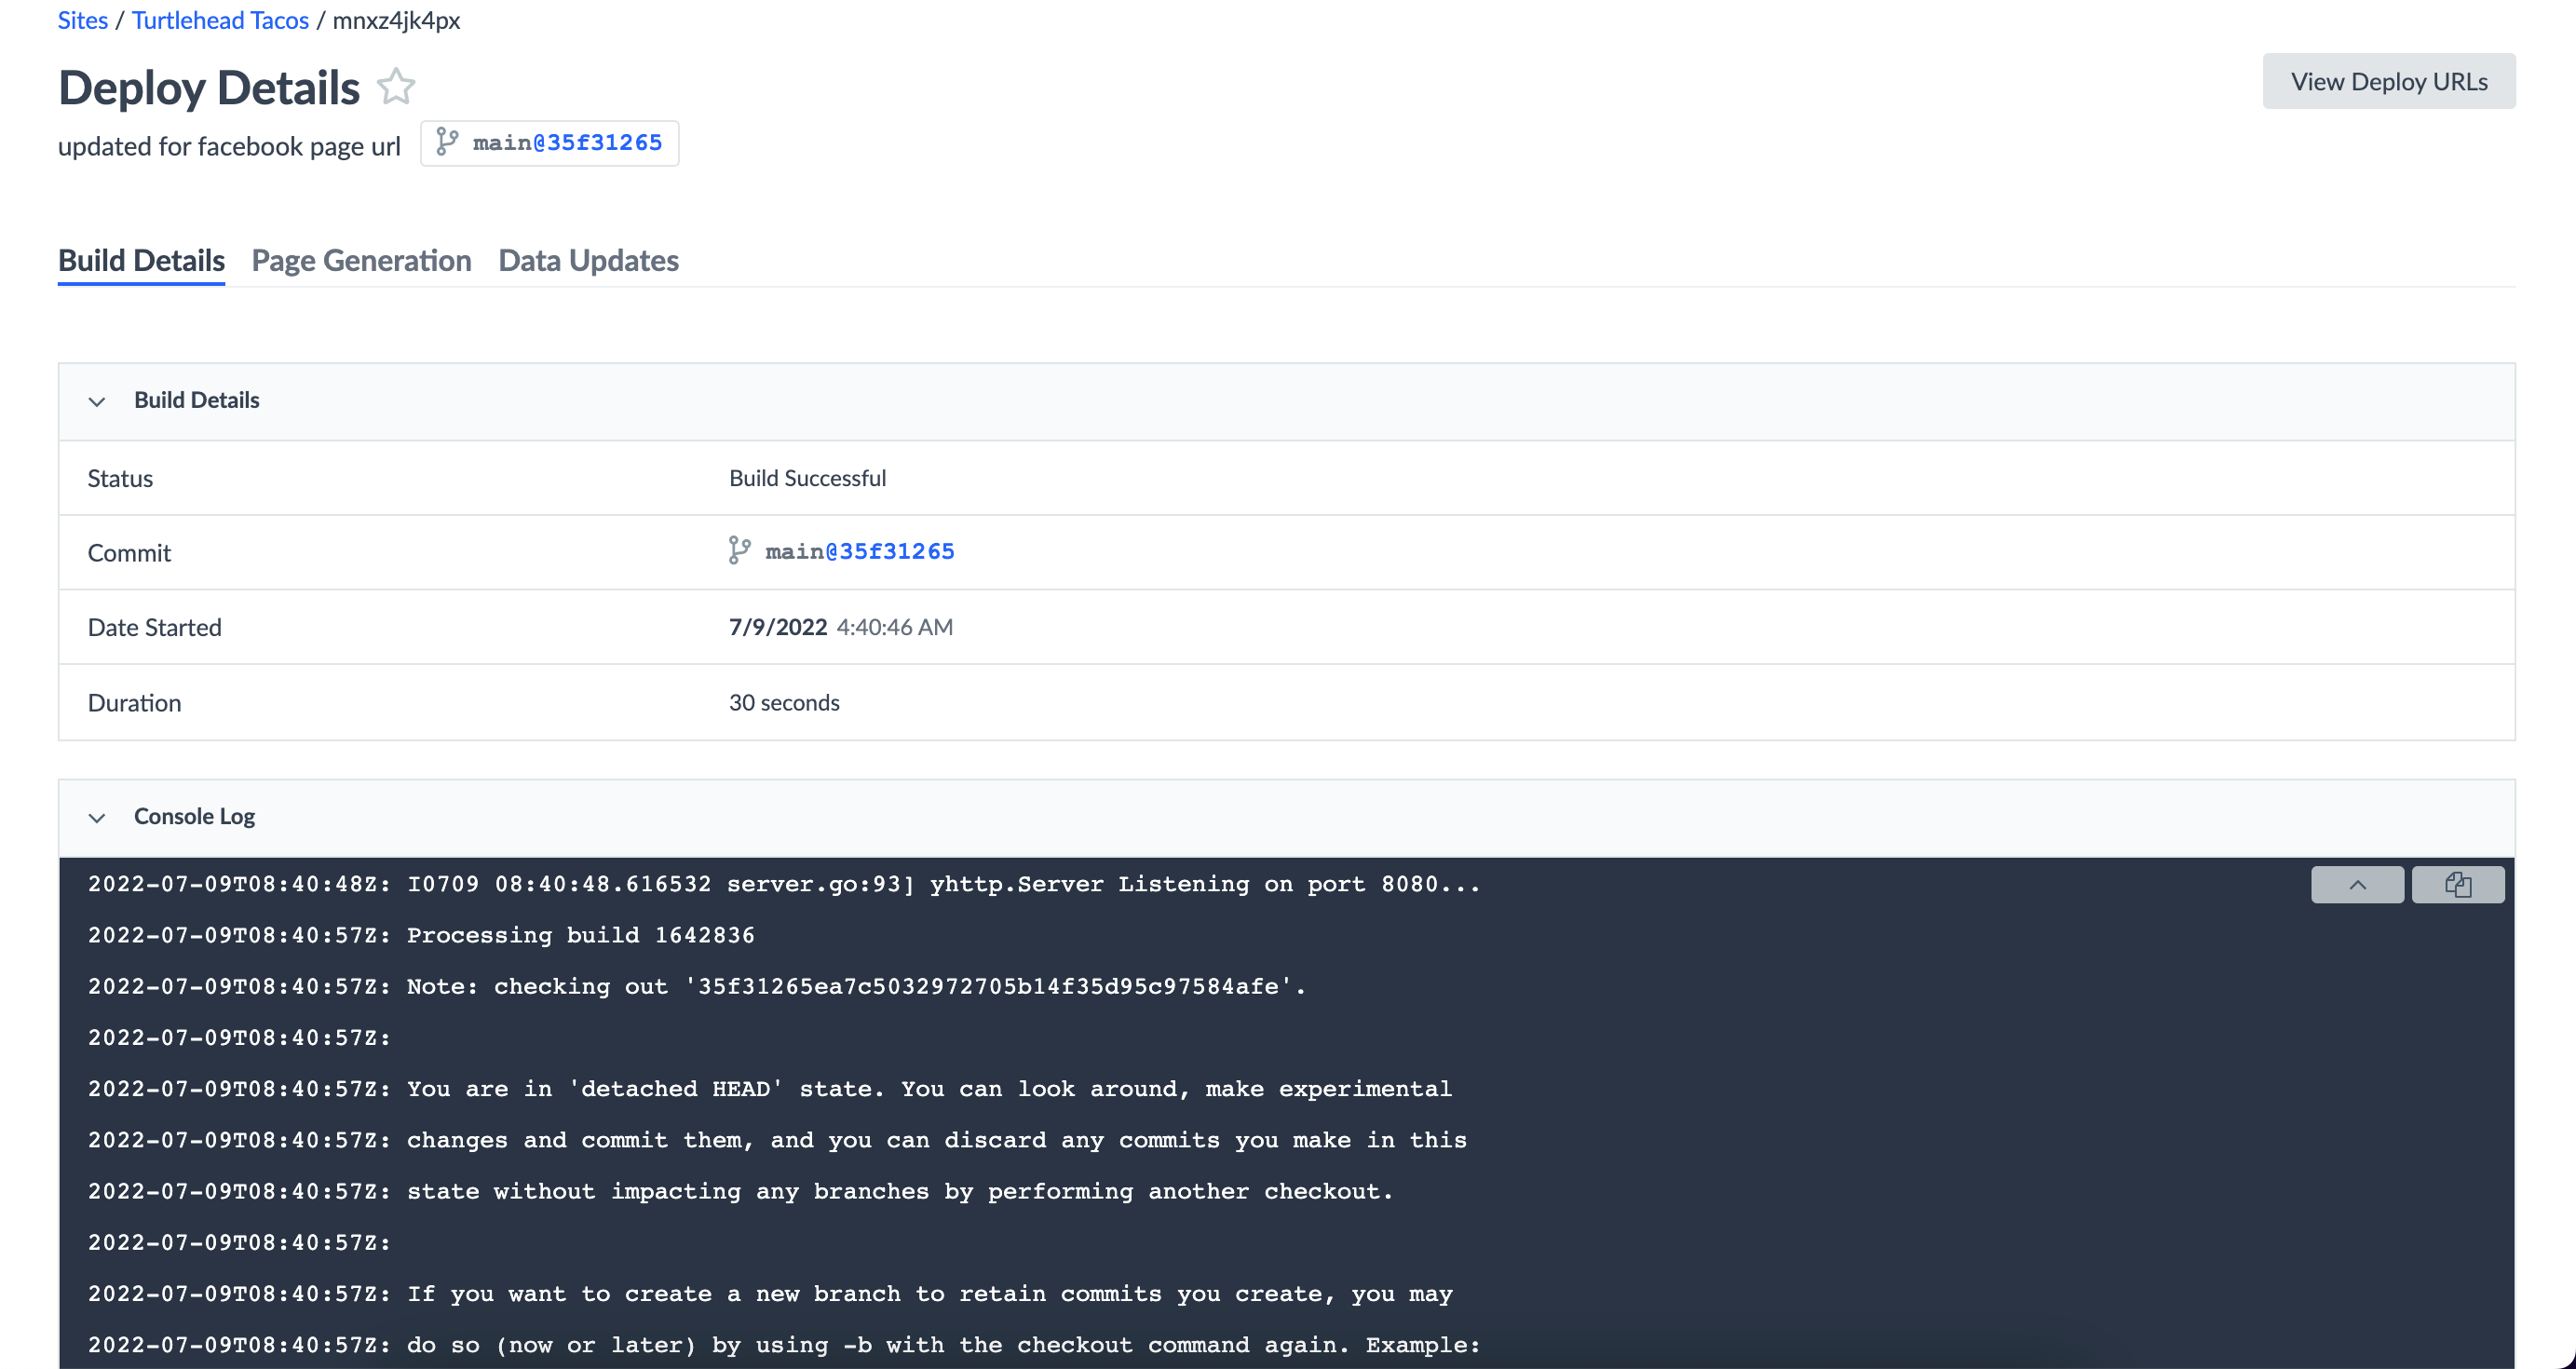
If a build fails, check the console log in the deploy details for any error messages that may point you in the right direction to debug.
Page Generation
The Page Generation phase is responsible for generating all the HTML web pages that make up the site. These web pages are generated based on data records from the Yext Knowledge Graph.
Clicking on the Page Generation section will display a log of all the pages that were built.
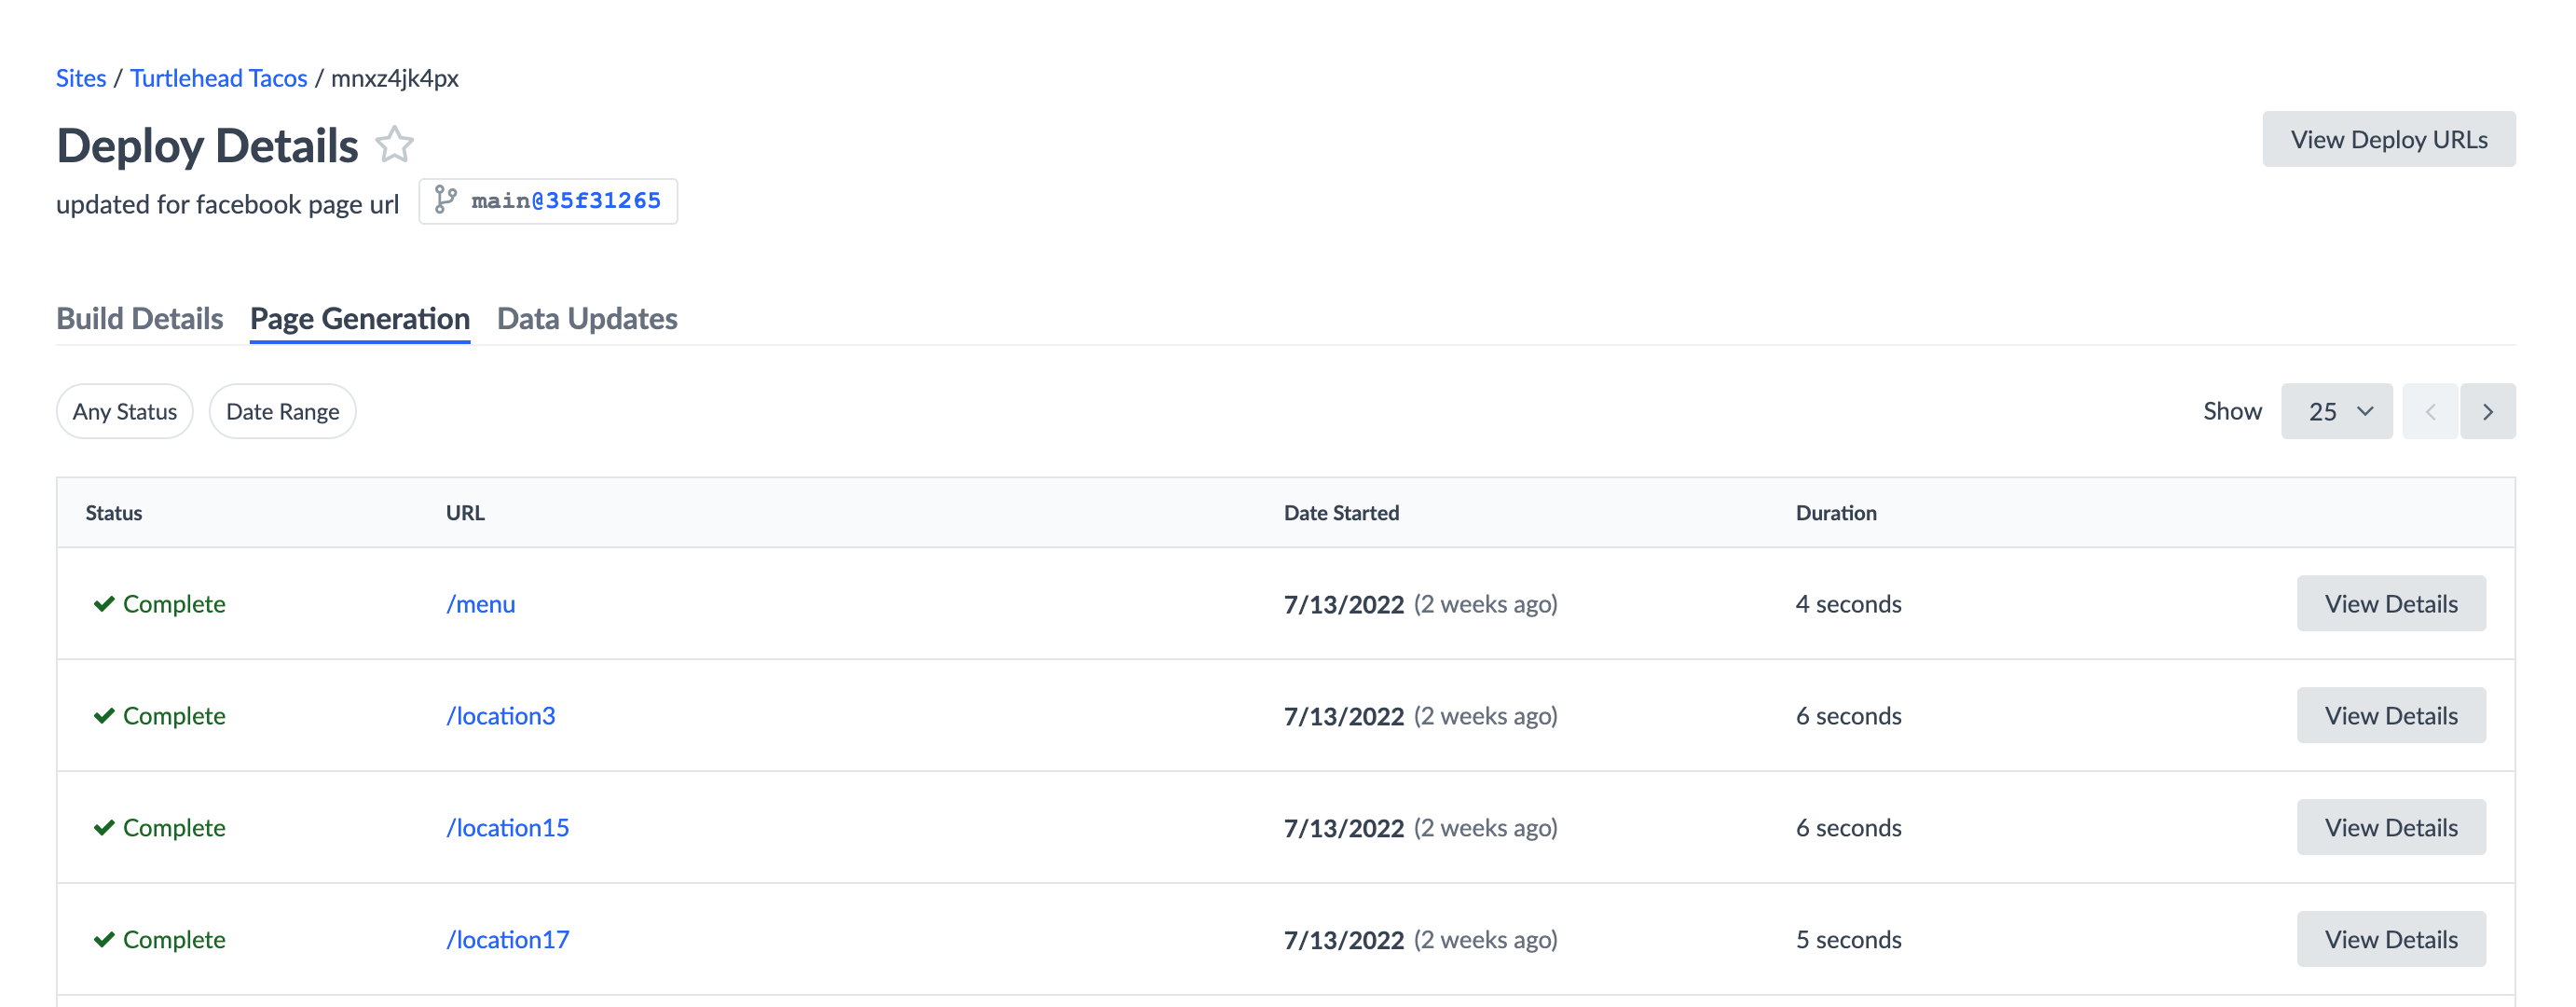
For example, each Turtlehead Tacos restaurant entity from the Yext Knowledge Graph will have a page that is created with the location template and the relevant data per restaurant location.
If data in the Knowledge Graph changes after this page is created, those updates are processed incrementally in the next step of the build process.
Data Updates
This tab captures pages in your deploy that were re-rendered as a result of data updates from your Knowledge Graph. We’ll go into this in more detail in the next unit!
Which environments do you have the ability to manually push deploys to in the UI?
Where can you find URLs of all web pages generated by your site in a deploy? (Select all that apply)
Which statement is FALSE about preview, staging, and production links?
Wahoo - you did it! 🙌
