Module Assessment | Yext Hitchhikers Platform

Background
The brand is really happy with their Search experience so far, but is noticing that they’re getting a lot of calls to locations about where to find their menu. They want to add a clear call to action on their Restaurants cards to direct users to the menu.
They are also heavily pushing their events, and want to encourage people to sign up to be notified via email for any new events that are added. To do this, they’d like to add a large banner at the top of the Events vertical page to encourage sign-ups.
Your Challenge
Step 1: Add a Third CTA on Restaurants Card
Navigate to Pages > Brand Search > Deploys, go to the Code Editor, and click into the master branch. You should expect this to take a couple minutes to load – in the background, it’s starting up a container for your development.
Click “View Live Preview” to open your preview in a new tab.
Run a search for “restaurants” – this is what it looks like now with the default two CTAs.
Navigate to your
restaurantcustom card - we’re going to add a third CTA: “View Menu”. First, open thecomponent.jsfile to update the content mappings. You’ll want to define a third CTA with:- A label of
View Menu - An icon of
info - A URL of
https://www.turtleheadtacos.com/menu - The event type
CTA_CLICK
Copy one of the existing CTA objects in the card, paste it below the existing CTA objects, and make changes. It’ll look something like the below:
CTA3: { // The tertiary call to action for the card label: '<REPLACE_ME>', iconName: '<REPLACE_ME>', url: '<REPLACE_ME>', target: linkTarget, eventType: '<REPLACE_ME>', eventOptions: this.addDefaultEventOptions(), }- A label of
Now that we are supplying the data, we need to define where this appears in the template. Go to the
template.hbsfile for the restaurant card. Find thectaspartial and add a reference to the third CTA there. You need to do two things:- Add to the
ifstatement to see if the new CTA3 field has the data populated - Add a partial for CTA3 within the
ctasWrapperdiv
It should look like the below:
{{#*inline 'ctas'}} {{#if (any (all card.CTA1 card.CTA1.url) (all card.CTA2 card.CTA2.url) (all card.CTA3 card.CTA3.url))}} <div class="HitchhikerLocationStandard-ctasWrapper HitchhikerLocationCard-ctasWrapper"> {{> CTA card.CTA1 ctaName="primaryCTA" }} {{> CTA card.CTA2 ctaName="secondaryCTA" }} {{> CTA card.CTA3 ctaName="tertiaryCTA" }} </div> {{/if}} {{/inline}}- Add to the
Make sure you are referencing this custom card in your
config/restaurants.json.Update your preview and take a look at the location cards. We’re almost there, but it looks like we need to add a bit of spacing between the CTAs. Copy the following CSS and place it in the
static > scss > answers.scssfile, within the.Answersclass..HitchhikerLocationStandard-primaryCTA, .HitchhikerLocationStandard-secondaryCTA, .HitchhikerLocationStandard-tertiaryCTA { display: flex; margin-top: calc(var(--hh-location-standard-base-spacing) / 2); }
Your card should now look like this!

Step 2: Add a Banner to Events Page
Now we’ll focus on adding a hardcoded banner to the Events vertical page. Navigate to your
pages/events.html.hbsfile and add the following HTML. We want this to appear below the navigation bar, but above the results. For context, this is where the HTML should be placed.<div class="Answers-banner"> To be notified of upcoming events, <a href="https://www.turtleheadtacos.com/signup">sign up here</a>. </div>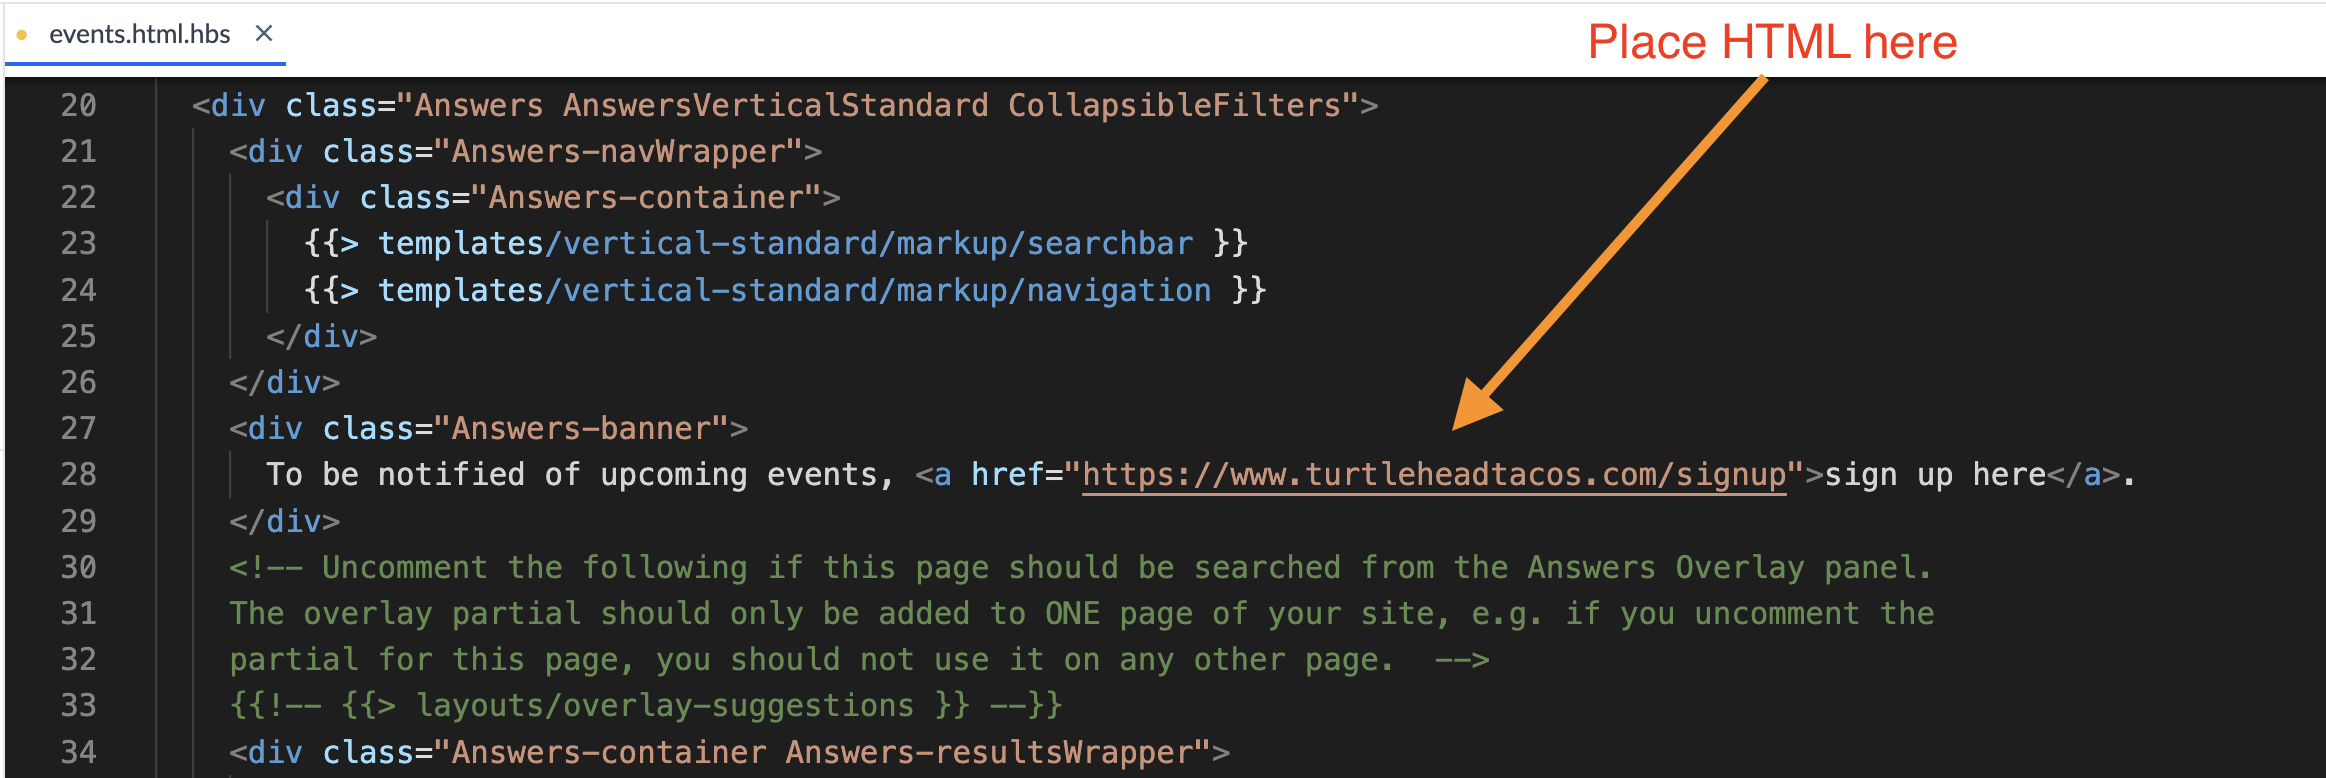
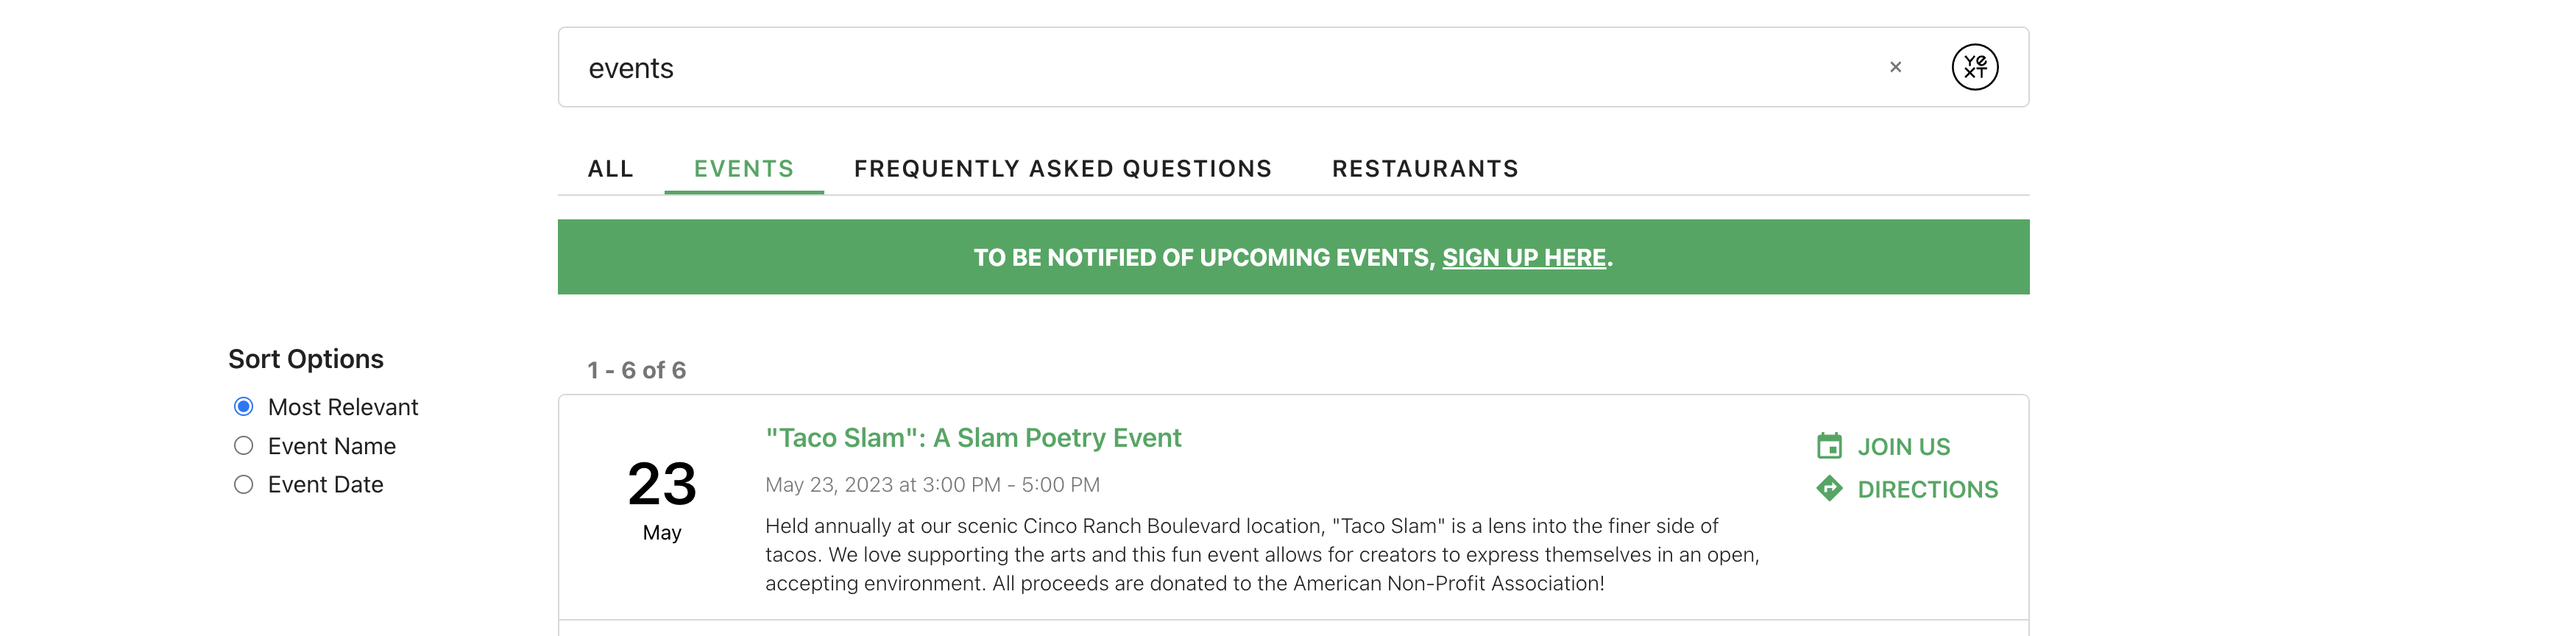
Update your preview and look at the Events vertical. This looks pretty bad since there’s no styling - let’s fix that. Paste the below CSS in your
static > scss > answers.scssfile, within the.Answersclass. You’ll now have this banner appear on your Events vertical search.&-banner { text-align: center; width: var(--hh-answers-container-width); max-width: 100%; margin: 0 auto; padding: 1rem; background-color: var(--yxt-color-brand-primary); color: white; font-weight: bold; text-transform: uppercase; margin-top: 1rem; a { text-decoration: underline; &:hover { text-decoration: none; } } }Update your preview and look at your changes. Looking much better!
Commit your changes. Monitor the deploy and publish your staging experience.
