
Entity Schema Overview | Yext Hitchhikers Platform
What You’ll Learn
In this section, you will learn:
- A review of entities and entity types
- What an entity schema is and why it matters in Yext
- The benefits of using built-in entity types
- How fields and field types work on entities
Overview
Before you add data to the Knowledge Graph, you need to set up your data model so that the Knowledge Graph is ready to accept your business data.
As we covered in the Intro to Knowledge Graph unit, there are different entity types that represent different types of business data, like locations, restaurants, professionals, help articles, and more.
The entity types enabled in your Knowledge Graph, and the data fields that are available on them, are collectively called your entity schema.
In this unit, you’ll learn about how entities and fields work together to make up your entity schema.
Entity Types
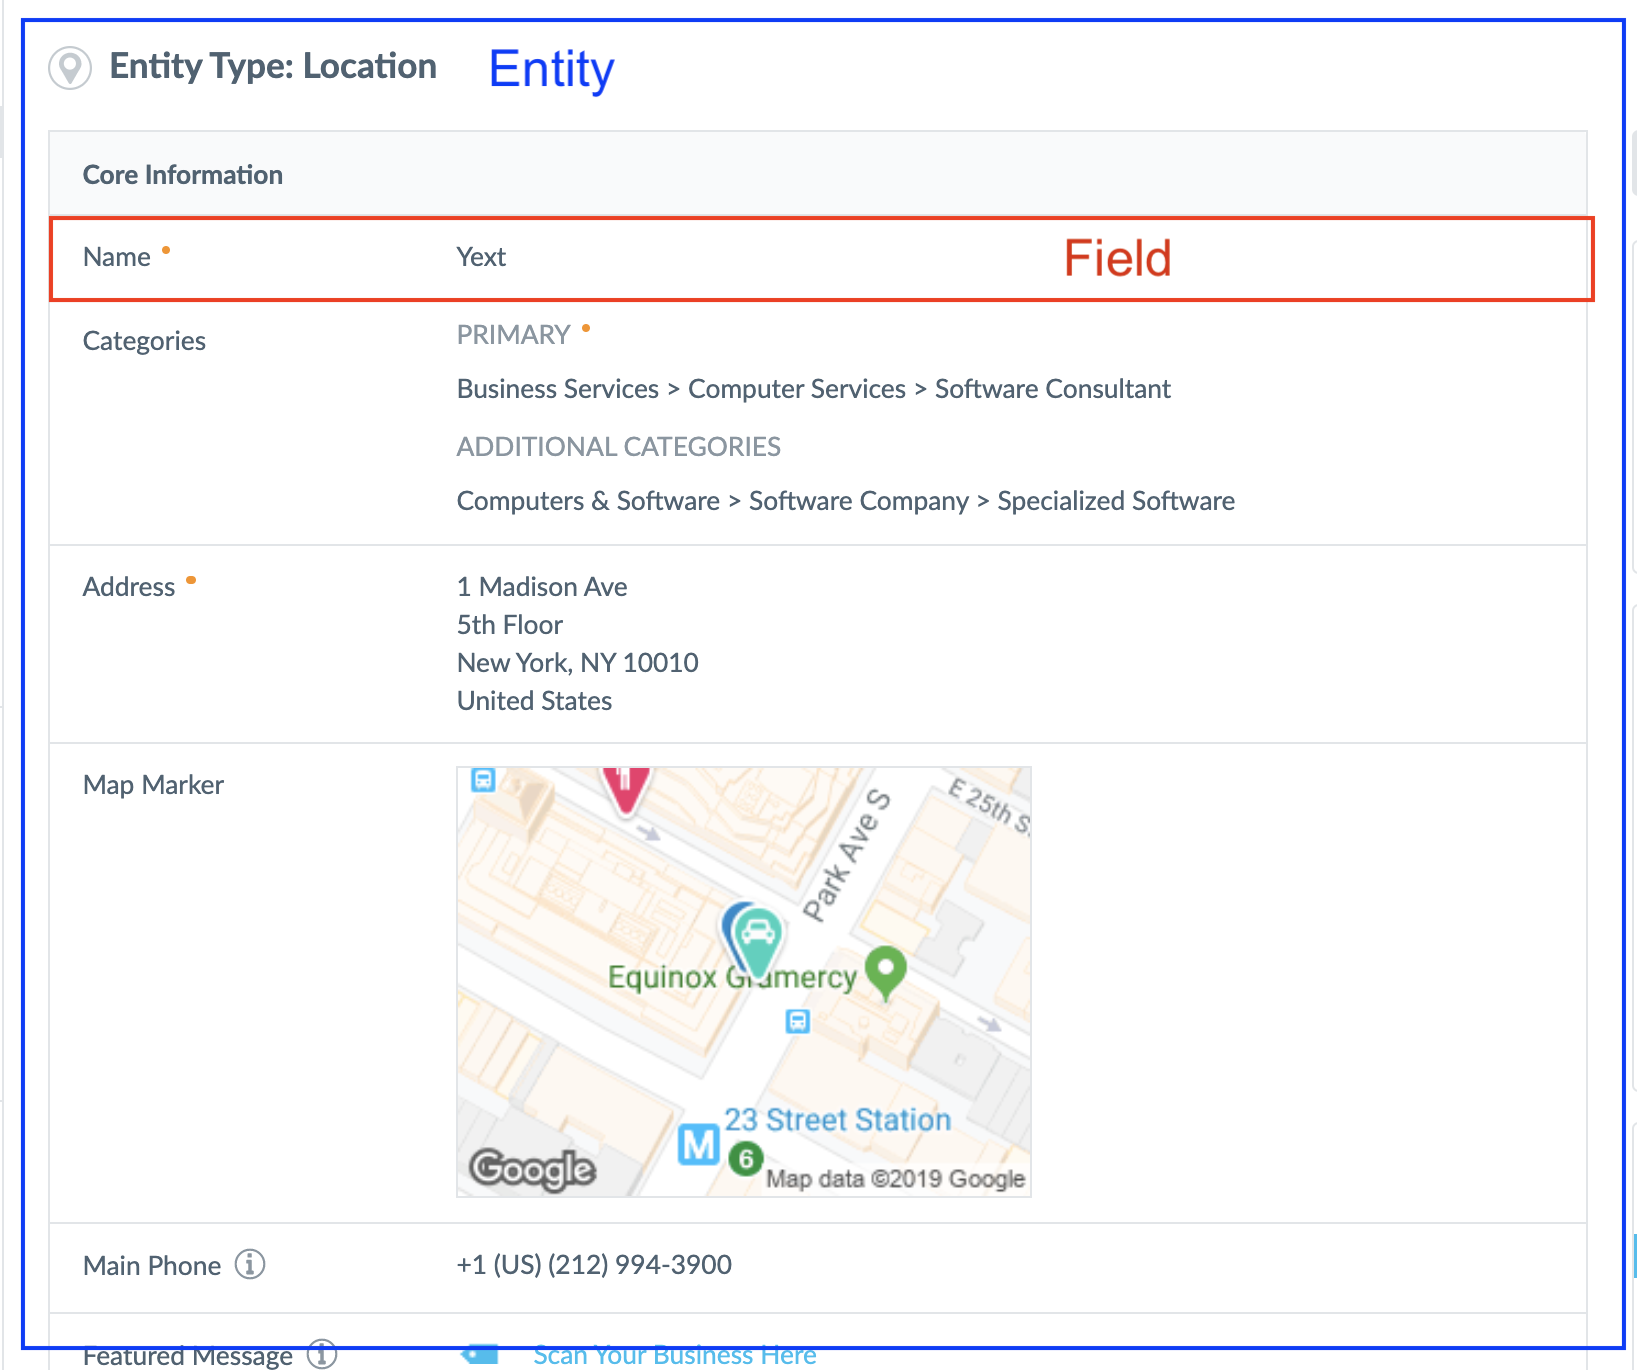
As you learned in the Intro to Knowledge Graph unit, entities are the primary object stored in the Knowledge Graph.
Each entity has a type, which determines the available information on the entity and how the entity is structured.
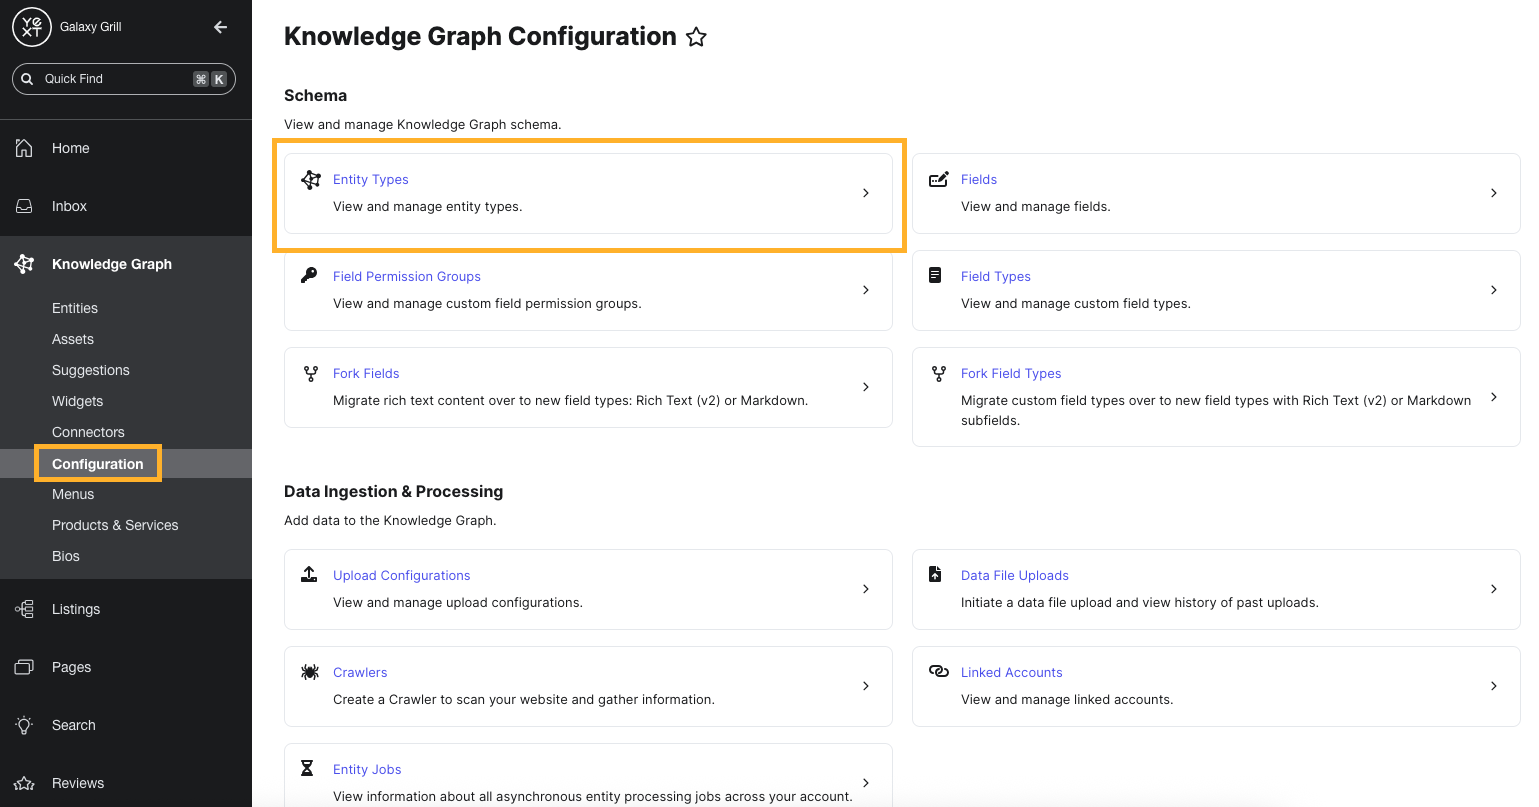
To view and manage the entity types in your account, navigate to Knowledge Graph > Configuration and click the Entity Types tile.
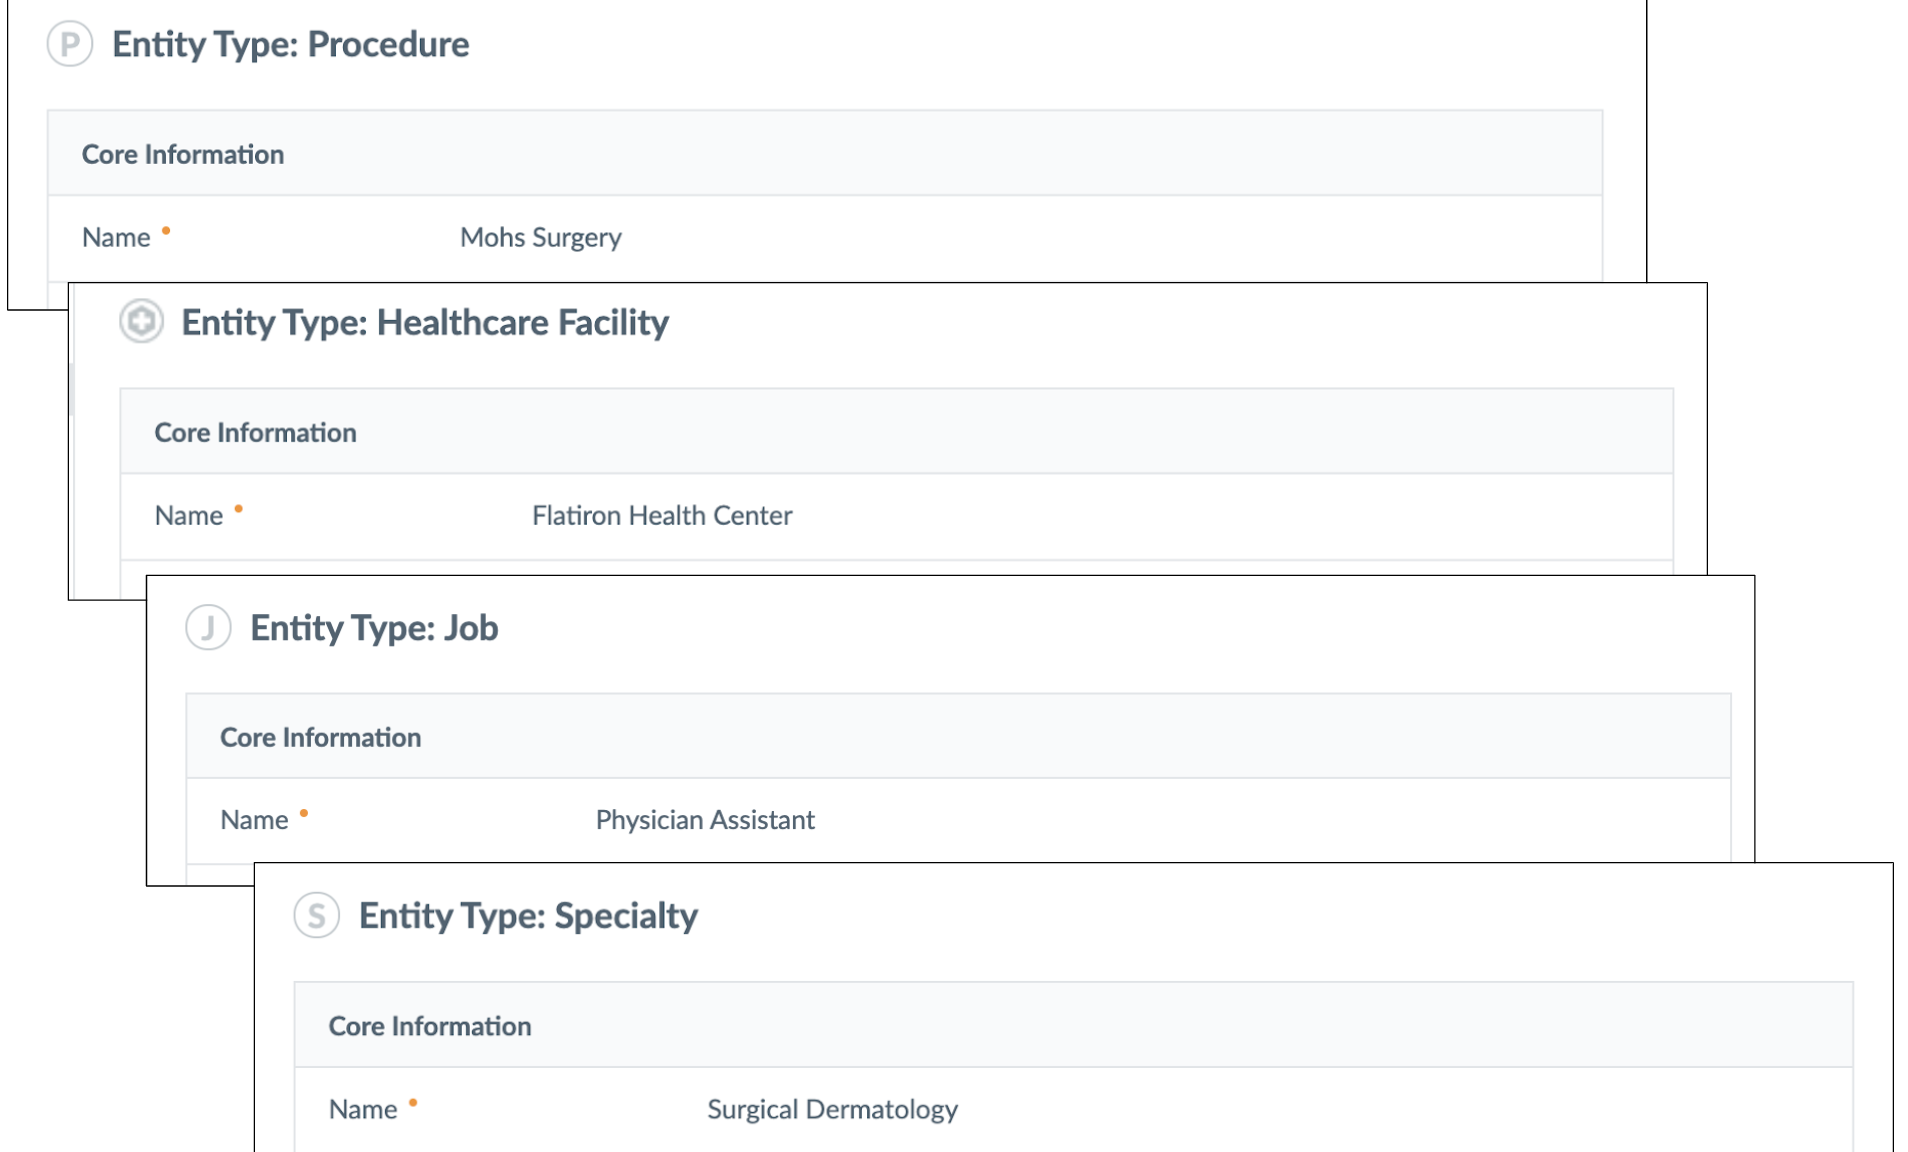
Built-in and custom entity types
Most businesses will use the standard built-in entity types. Some examples of built-in entity types include:
- Locations
- Healthcare Professionals
- Healthcare Facilities
- ATMs
- Restaurants
- Hotels
If you have a specific use case, you can create custom entity types. While this allows for more flexibility when customizing your entity schema, custom entity types are not always compatible with other systems, like Listings or third-party integrations.
For this reason, we recommend using built-in entity types whenever possible.
Below is an overview of how built-in and custom entity types work throughout Yext:
| Built-in Entity Types | Custom Entity Types | |
|---|---|---|
| Yext defines the core schema, users can add additional fields | User defines the schema from scratch | |
| Compatible with Listings |  |
 |
| Compatible with Pages | |
|
| Compatible with Search | |
|
Fields
As we covered in the intro unit, a field represents a piece of data that is stored on an individual entity.
A single field can be used across multiple different entity types.
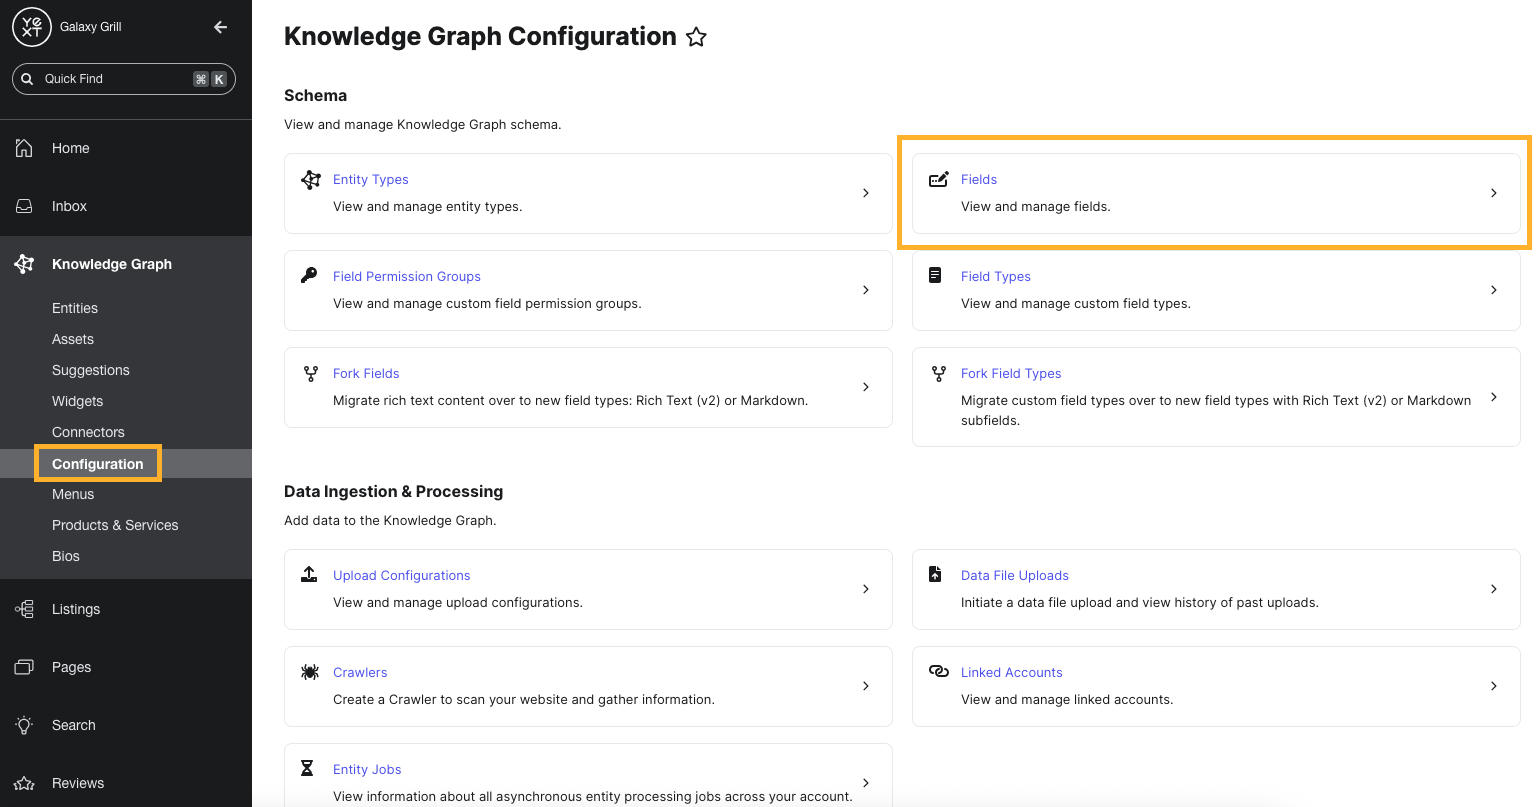
To view and manage the fields in your account, navigate to Knowledge Graph > Configuration and click the Fields tile.
Built-in and custom fields
Yext has a number of built-in fields, and you can create additional custom fields as needed.
All fields on entities, whether built-in or custom, have these properties:
- A type (the format of data the field accepts — more on field types below)
- A Display Name
- An API name
- Validation (e.g., a maximum character count for text fields, or an aspect ratio for photos)
- Multi-language behavior (how the field behaves when translated, if you are using multi-language experiences )
Field Types
There are many different field types available in Yext to store data in different formats. Some examples of built-in field types include:
- Text
- Number
- Date
- Photo
- URL
You’ll usually use the built-in field types in Yext. If necessary for your use case, you can also create custom field types.
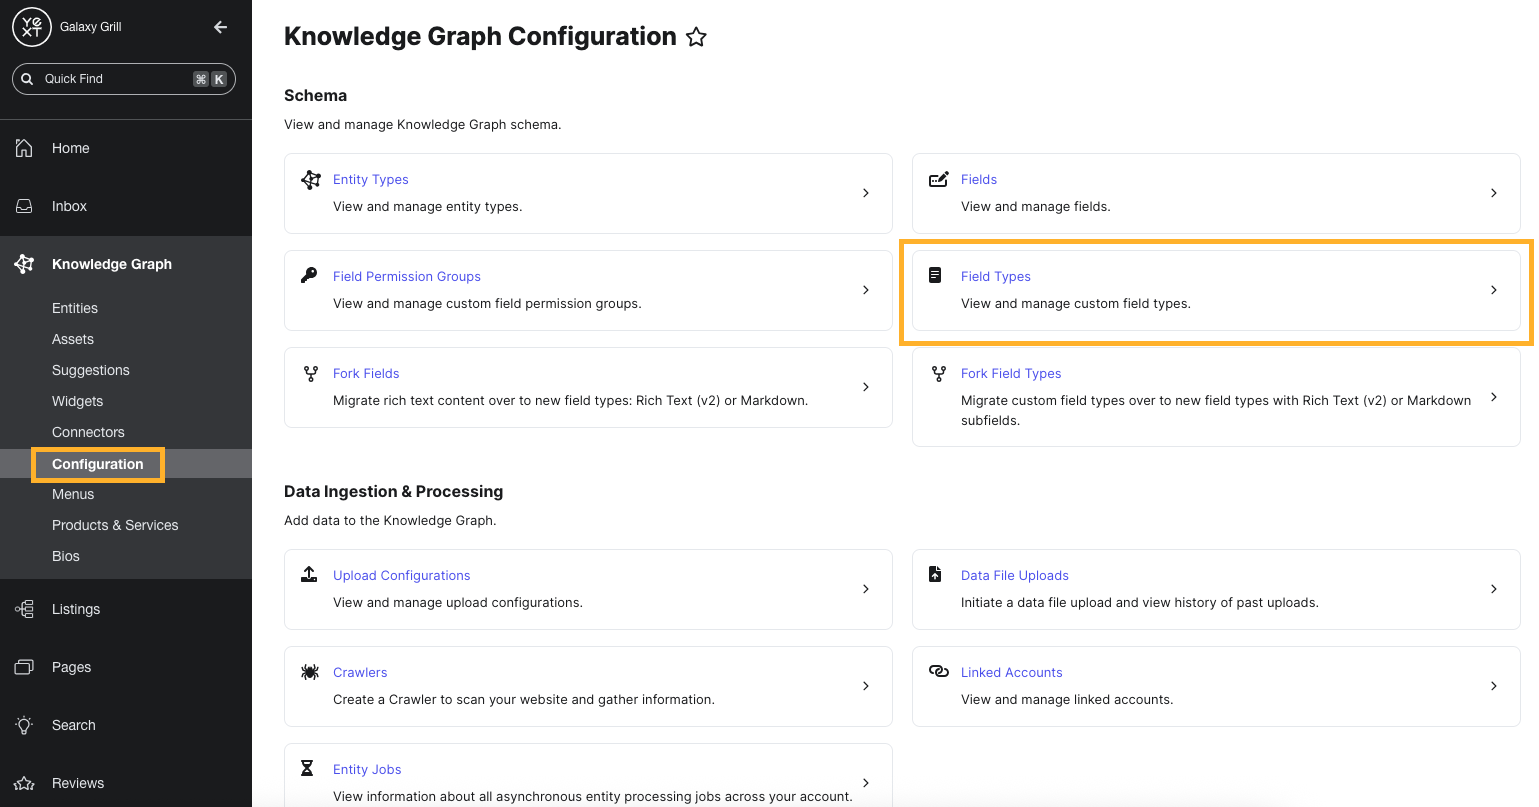
To view and manage the custom field types in your account, navigate to Knowledge Graph > Configuration and click the Field Types tile.
Keep Learning
Keep going in this module to learn how to enable entity types in your Knowledge Graph and customize the fields on each type.
Entities
For steps on how to create a custom entity type, see the Create a Custom Entity Type help article.
Fields
For a full list of available field types, see the Standard Field Types reference.
To learn more about creating custom field types, see the Create a Custom Field Type help article.
To learn how to create a custom field, see the Create a Custom Field help article.
Why is it a good idea to use built-in entity types in Yext whenever possible? (Select all that apply)
True or false: You need to enable the entity types you want to use before they're available in the Knowledge Graph.
What is the entity schema in the Knowledge Graph?
Soon you'll be your brand's hero! 🎓
