
Entity Export Overview | Yext Hitchhikers Platform
What You’ll Learn
In this section, you will learn:
- How to export entity data using the Export Entities flow
- Main components of an entity export
- What a saved entity export configuration is
Overview
You can export entity data from the Knowledge Graph at any time. Exports can be performed on a one-off basis, or they can be saved and scheduled for automated delivery on a regular cadence.
You can extract data from Yext in many ways, including via API, using Connectors. In this module, we’ll cover how you can export data using the Export Entities tool in the Knowledge Graph.
Export Entities
You can use the Export Entities tool in the Knowledge Graph to select entities to export to a .csv or .xlsx file.
There are a few main components of an entity export:
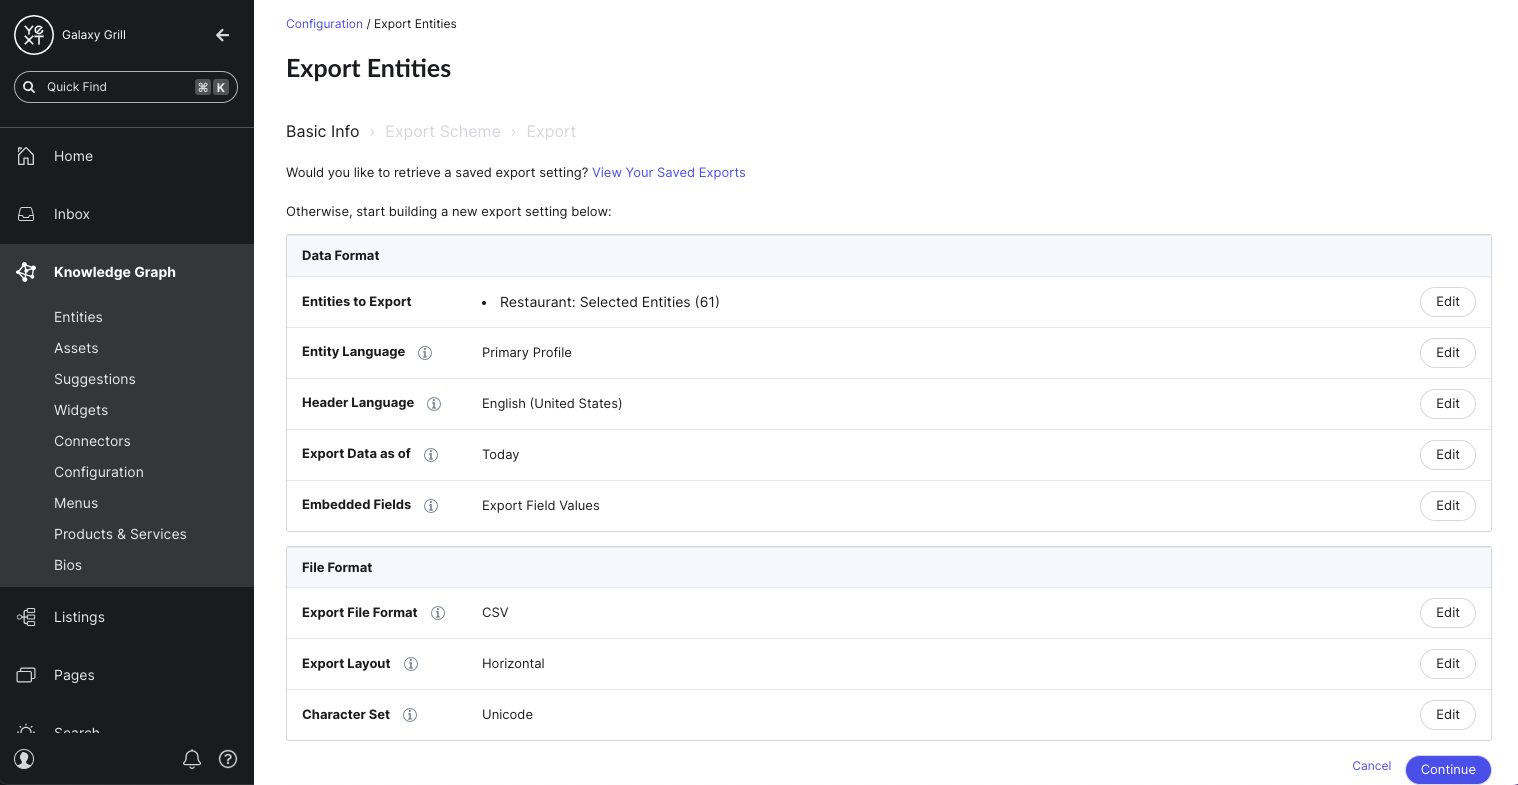
- Data Format: this includes which entities to export, the language (you can override this in the export scheme step), the date from which you want to export data, and how to handle embedded fields.
- File Format: this includes the file type and the layout of the file
- Export Scheme: this includes which fields you want to export and how you want to format them.
To begin an entity export, navigate to Knowledge Graph > Entities. Select the entities you want to export, either by using the checkboxes to select individual entities, or applying a filter.
Then, click on the More Actions dropdown at the top of the screen and select Export Entities.
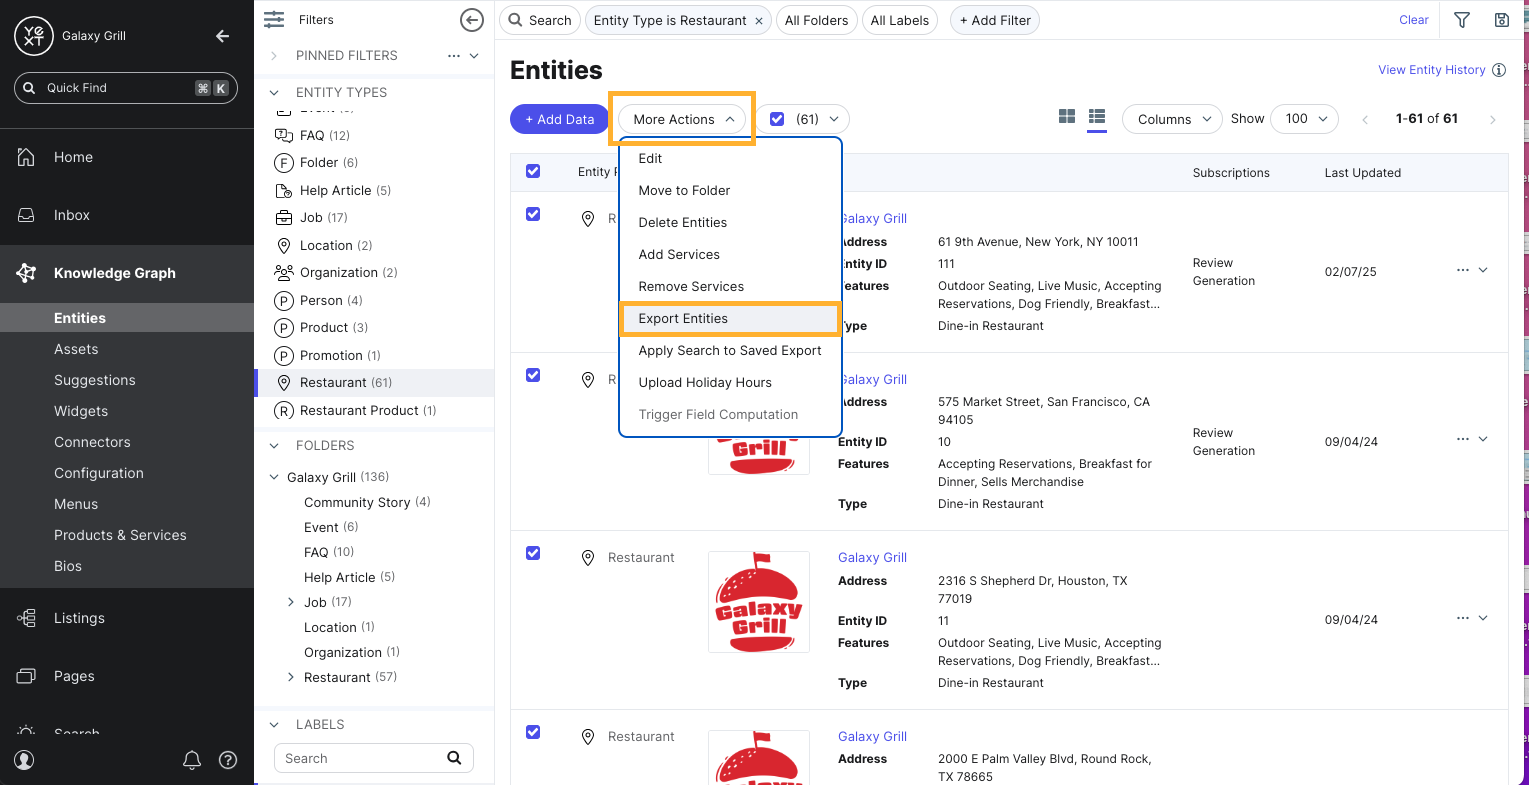
From here, you’ll be prompted through the Export Entities flow.
Basic Info
On the Basic Info step of the Export Entities flow, review the Data and File format of your export. Click the Edit button next to any of the sections to make changes.
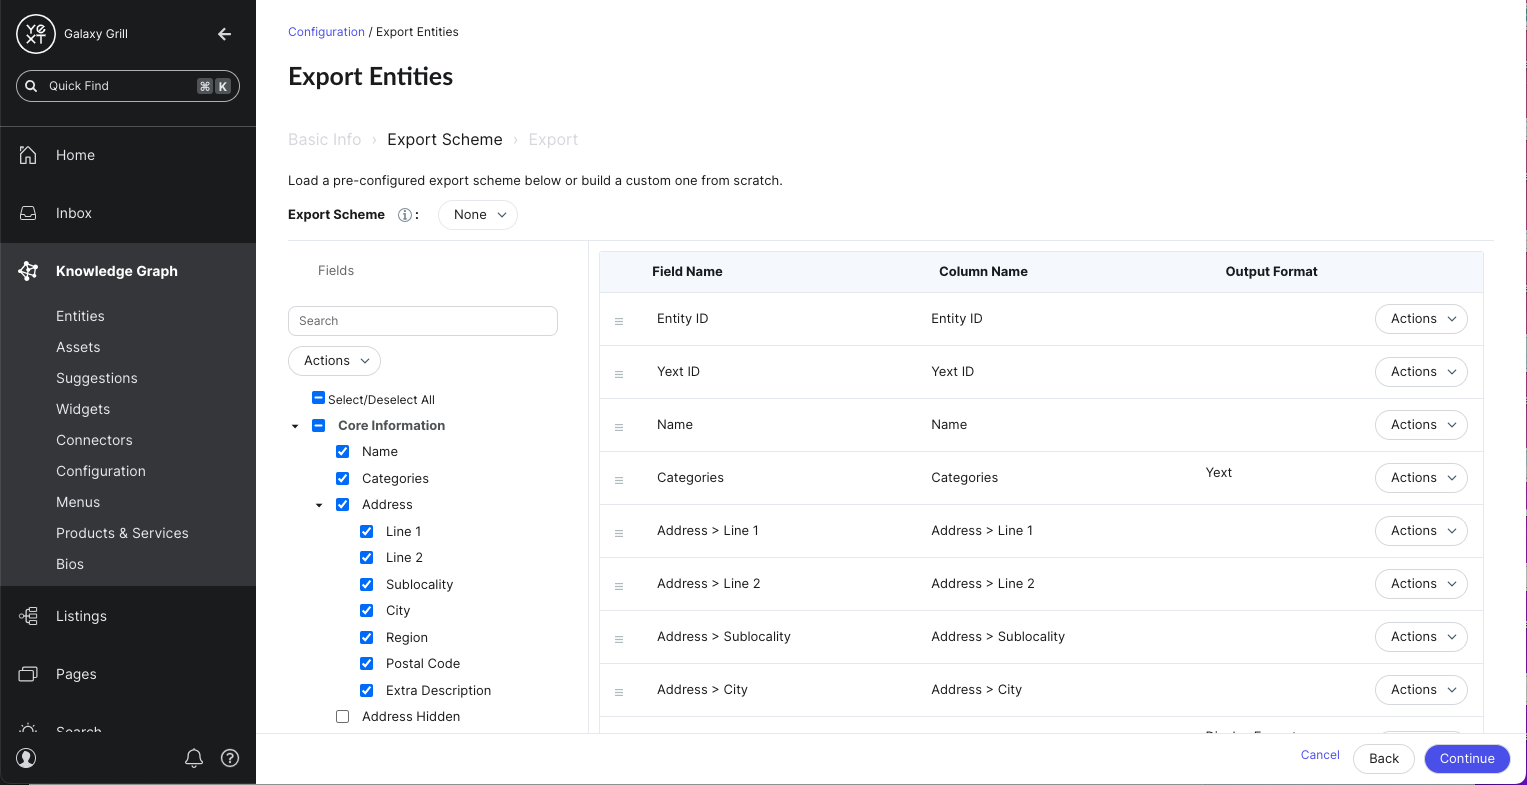
Export Scheme
On the Export Scheme, select the fields you want to include in your export from the panel on the left.
Any selected fields will appear in the table to the right. Click the Actions dropdown on any field to re-order the field in the table, remove it, or configure how it should be formatted in your spreadsheet.
Save an Entity Export
After you complete the Basic Info and Export Scheme tabs, your export file will download automatically. You have the option to save your export configuration if you want to export this same data later on, or if you want to set up an automated export of this data.
To save your export configuration, enter a name for your export and click Save Export. Otherwise, click Done.
In the next unit, we’ll cover how to view and edit your saved exports, and how to set up automated delivery for a saved export.
Keep Learning
For full steps on how to export entities, see the Export Entities help article.
Where do you go in Yext to start an entity export?
What file types can you export from the Knowledge Graph? (Select all that apply)
What does the Export Scheme component of an entity export include?
Climbing that leaderboard! 📈
