Module Assessment | Yext Hitchhikers Platform
Background
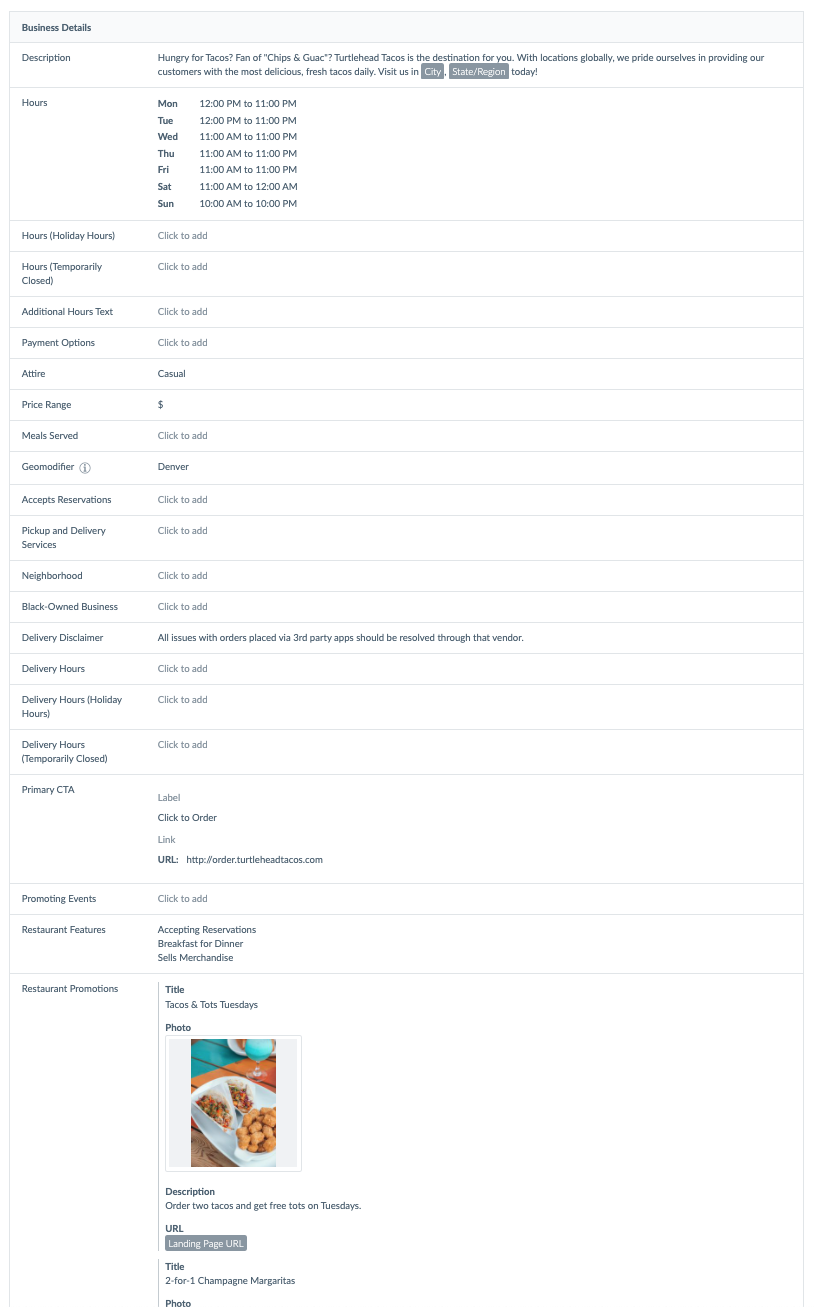
Now that you’ve added so many fields to your entity types, especially the Restaurant and Community Story types, it’s time to start organizing them!
For the Restaurant type, you want to organize the fields that are currently in the Business Details section – it’s getting way too big!

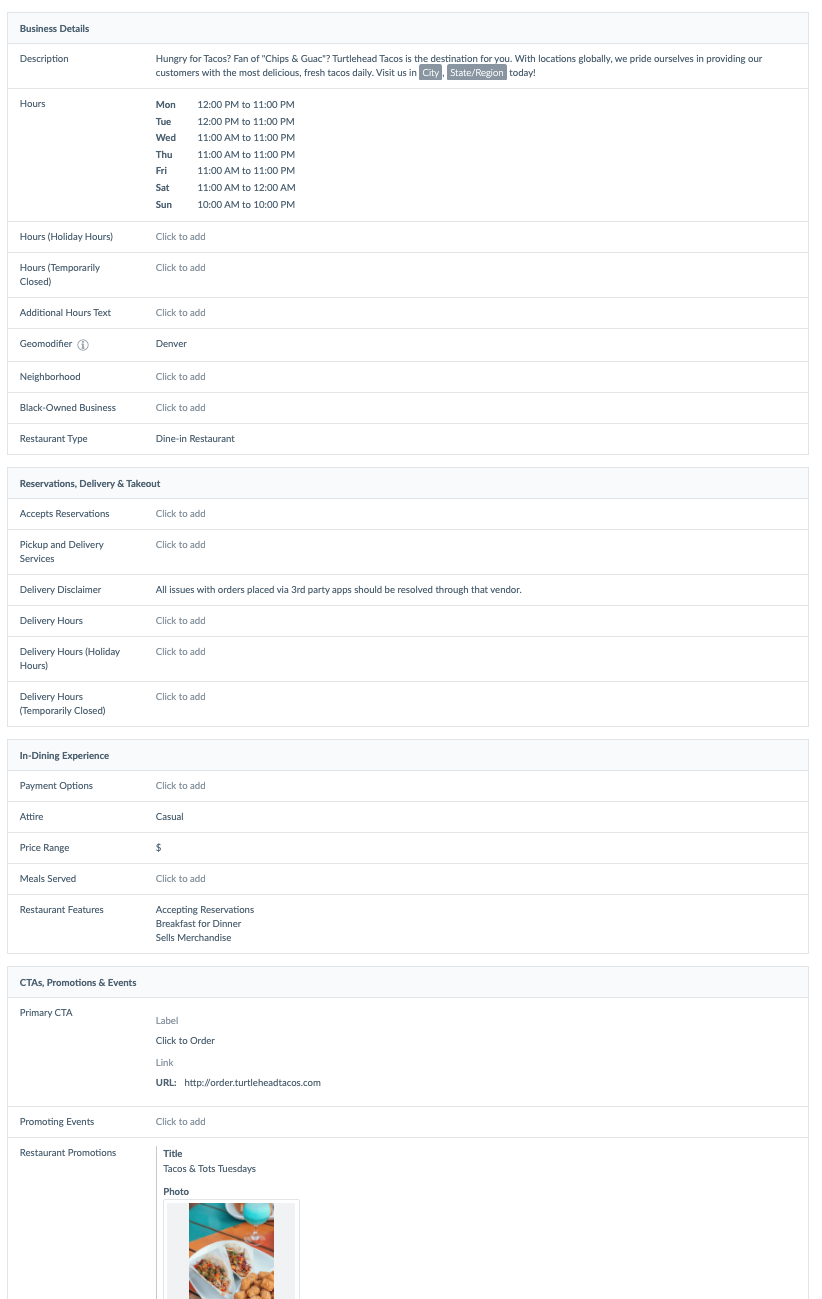
You want to organize the fields (both built-in and custom ones) into 4 sections:
- Business Details
- Reservations, Delivery & Takeout
- In-Dining Experience
- CTAs, Promotions & Events
In the end, it should look like this:

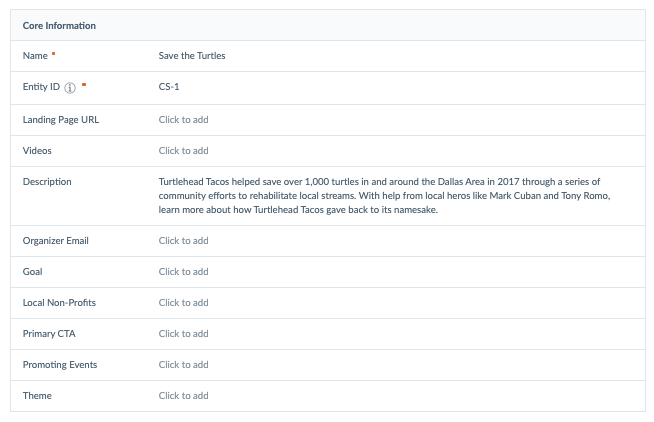
For the Community Story type, you’ve added all of the new fields (except Territory) to the Core Information section.

Before you have local managers adding Community Stories that are happening in their area, you want to make sure the fields are organized in a way that makes it easy for them for data entry.
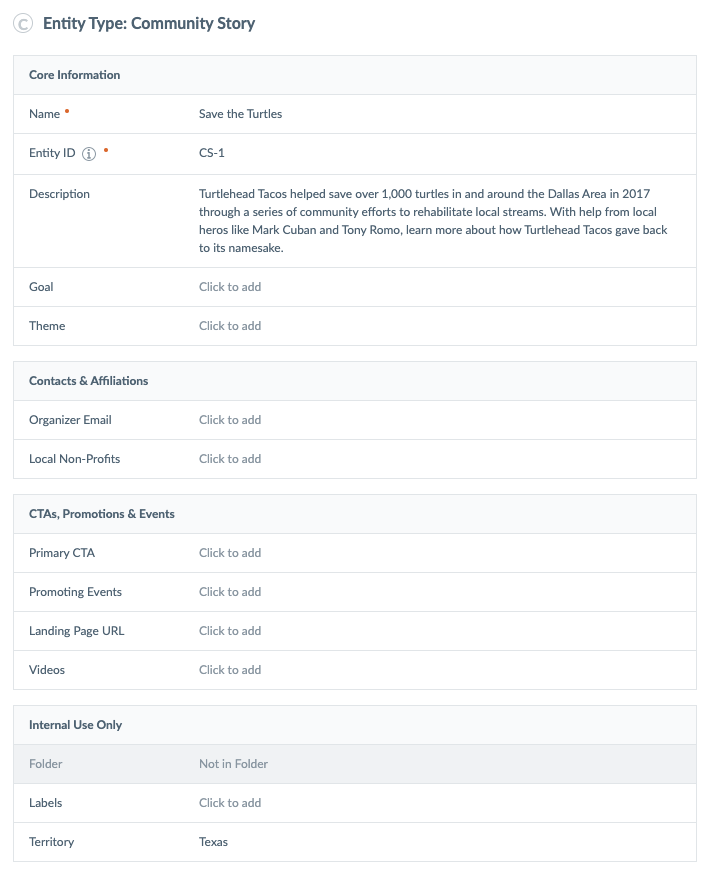
You want to organize the fields (both built-in and custom ones) into 3 sections:
- Core Information
- Contacts & Affiliations
- CTAs, Promotions & Events
In the end, it should look like this:

You also want to update the entity preview for the Restaurant entity so you can make some of the most important fields visible right from the entity search screen.
In the end, it should look like this:

Your Challenge
You’ll update the Restaurant entity type first. Navigate to Knowledge Graph > Entities and click into any Restaurant entity. Notice how many fields are in the “Business Details” section! Keep this page up, you’ll refresh it when you’re done.
In a different tab, navigate to Knowledge Graph > Configuration > Entity Types. For the Restaurant type, click on the dropdown and select Edit Fields (or, select the entity type and click on the Fields tab).
Create three new field sections:
- Reservations, Delivery & Takeout
- In-Dining Experience
- CTAs, Promotions & Events
Make sure to name the sections exactly as listed above.
Move the fields into the appropriate sections as listed below:
- Business Details
- Description
- Hours
- Additional Hours Text
- Geomodifier
- Neighborhood
- Black-Owned Business
- Impressum
Restaurant Type
Reservations, Delivery & Takeout
Accepts Reservations
Pickup & Delivery Services
Delivery Disclaimer
Delivery Hours
In-Dining Experience
Payment Options
Attire
Price Range
Meals Served
Restaurant Features
CTAs, Promotions & Events
Primary CTA
Promoting Events
Restaurant Promotions
Reorder the sections so that they are in the following order:
- Core Information
- Business Details
- Reservations, Delivery & Takeout
- In-Dining Experience
- CTAs, Promotions & Events
Click Save to save the field presentation.
Refresh the Restaurant entity in your other tab to see the updated Entity Edit screen.
Now, open up a Community Story entity. Note that almost all the fields are in the “Core Information” section!
Return to Manage Entity Types and click into the Community Story entity type. Click on the Fields tab to edit the configuration.
Create two new sections, making sure to name them exactly:
- Contacts & Affiliations
- CTAs, Promotions & Events
Move the fields into the appropriate sections as listed below:
- Core Information
- Name
- Entity ID
- Theme
- Goal
Description
Contacts & Affiliations
Organizer Email
Local Non-Profits
CTAs, Promotions & Events
Landing Page URL
Primary CTA
Promoting Events
Videos
Reorder the sections as follows:
- Contacts & Affiliations
- CTAs, Promotions & Events
- Internal Use Only
Click Save to save the field presentation.
Refresh your Community Story entity. This looks much better!
Now let’s get to work on the entity preview for the Restaurant entity type. From the Restaurant field configuration page, click on the Preview tab.
Add the Business Logo field to the entity preview.
Next, add the Restaurant Features field to the entity preview so you can easily see each restaurant’s offerings.
- Adjust the display settings to hide the list count by toggling Show List Count off.
- Adjust the line height to 2 to accommodate the restaurants that have a lot of features.
- Shorten the field name. Toggle Use a Field Alias on, and enter “Features” as the alias.
- Click Apply to add these changes for the Restaurant Features field.
Add the Restaurant Type field so you can easily identify the brick and mortar locations from the food trucks.
- You also want to shorten this field name. Set “Type” as the field name alias.
- Click Apply.
Click Save to save the Restaurant entity preview. Then check out the new entity preview on the entity search page!

