Create and Manage Home Screens | Yext Hitchhikers Platform
What You’ll Learn
In this section, you will learn:
- How to use the built-in Home Screen
- How to create a custom Home Screen
- How to customize and manage Home Screens
Overview
The Home Screen will be the first page you see when you log into Yext. You can always access it by clicking Home at the top of the navigation bar.
Users with Full Control or Account Manager user roles (or any custom user role with the Manage Home Screen permission) can create and customize Home Screens, and decide which users will see certain Home Screens. You can have up to 10 active Home Screens in your account at a time.
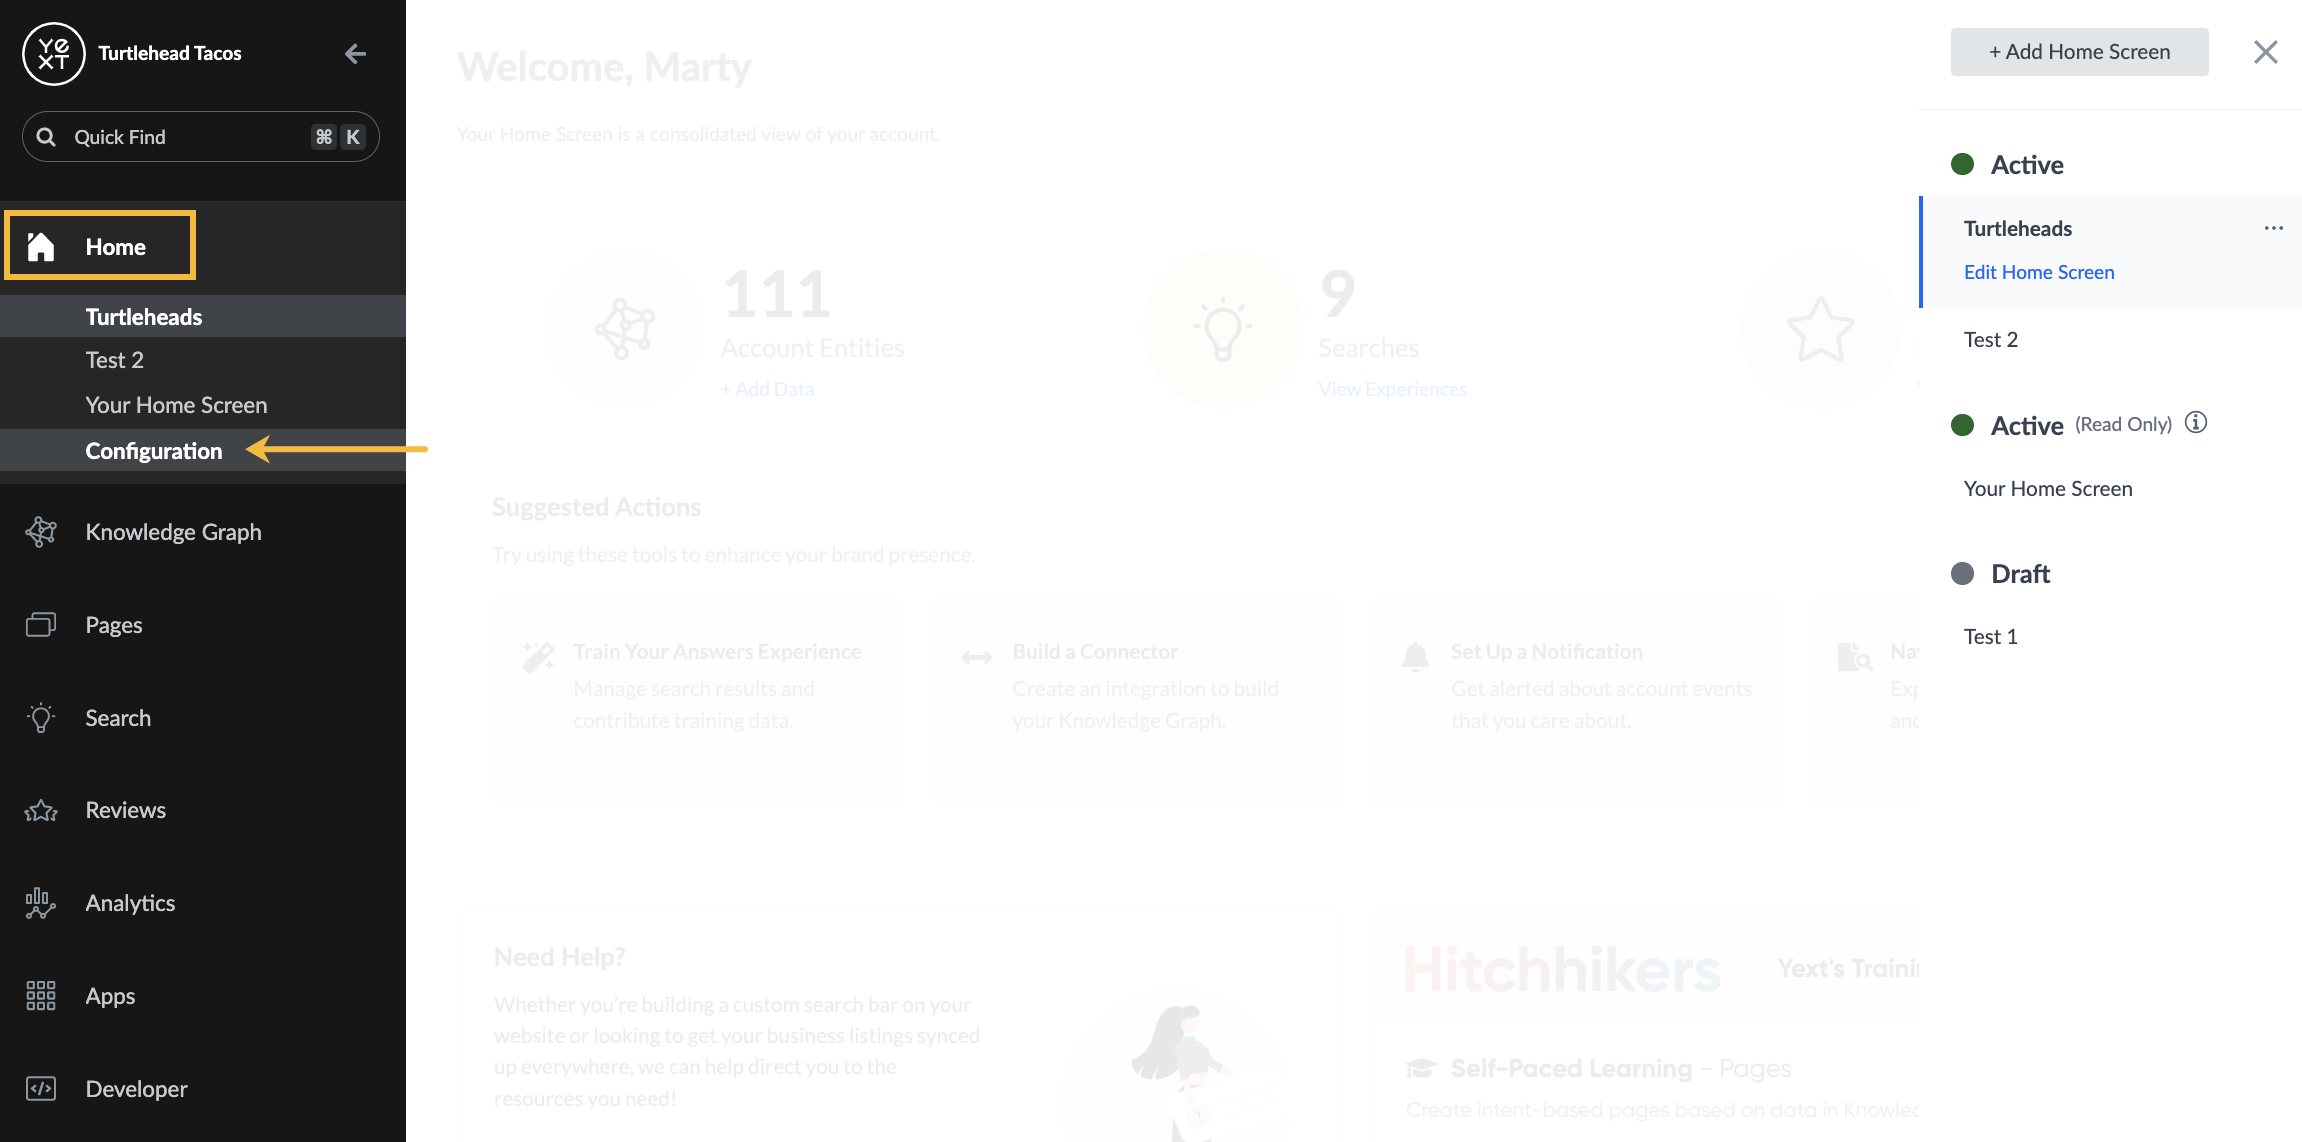
To create, manage, or edit Home Screens, click Home in the navigation bar, and then Configuration.
Using the Built-In Home Screen
Each account comes with one built-in Home Screen, which will be the default for all users unless it is replaced by a custom Home Screen. The built-in Home Screen is called “Your Home Screen.” You can find it in the Configuration panel (under Home > Configuration), where it will be in the Active (Read-Only) status section.
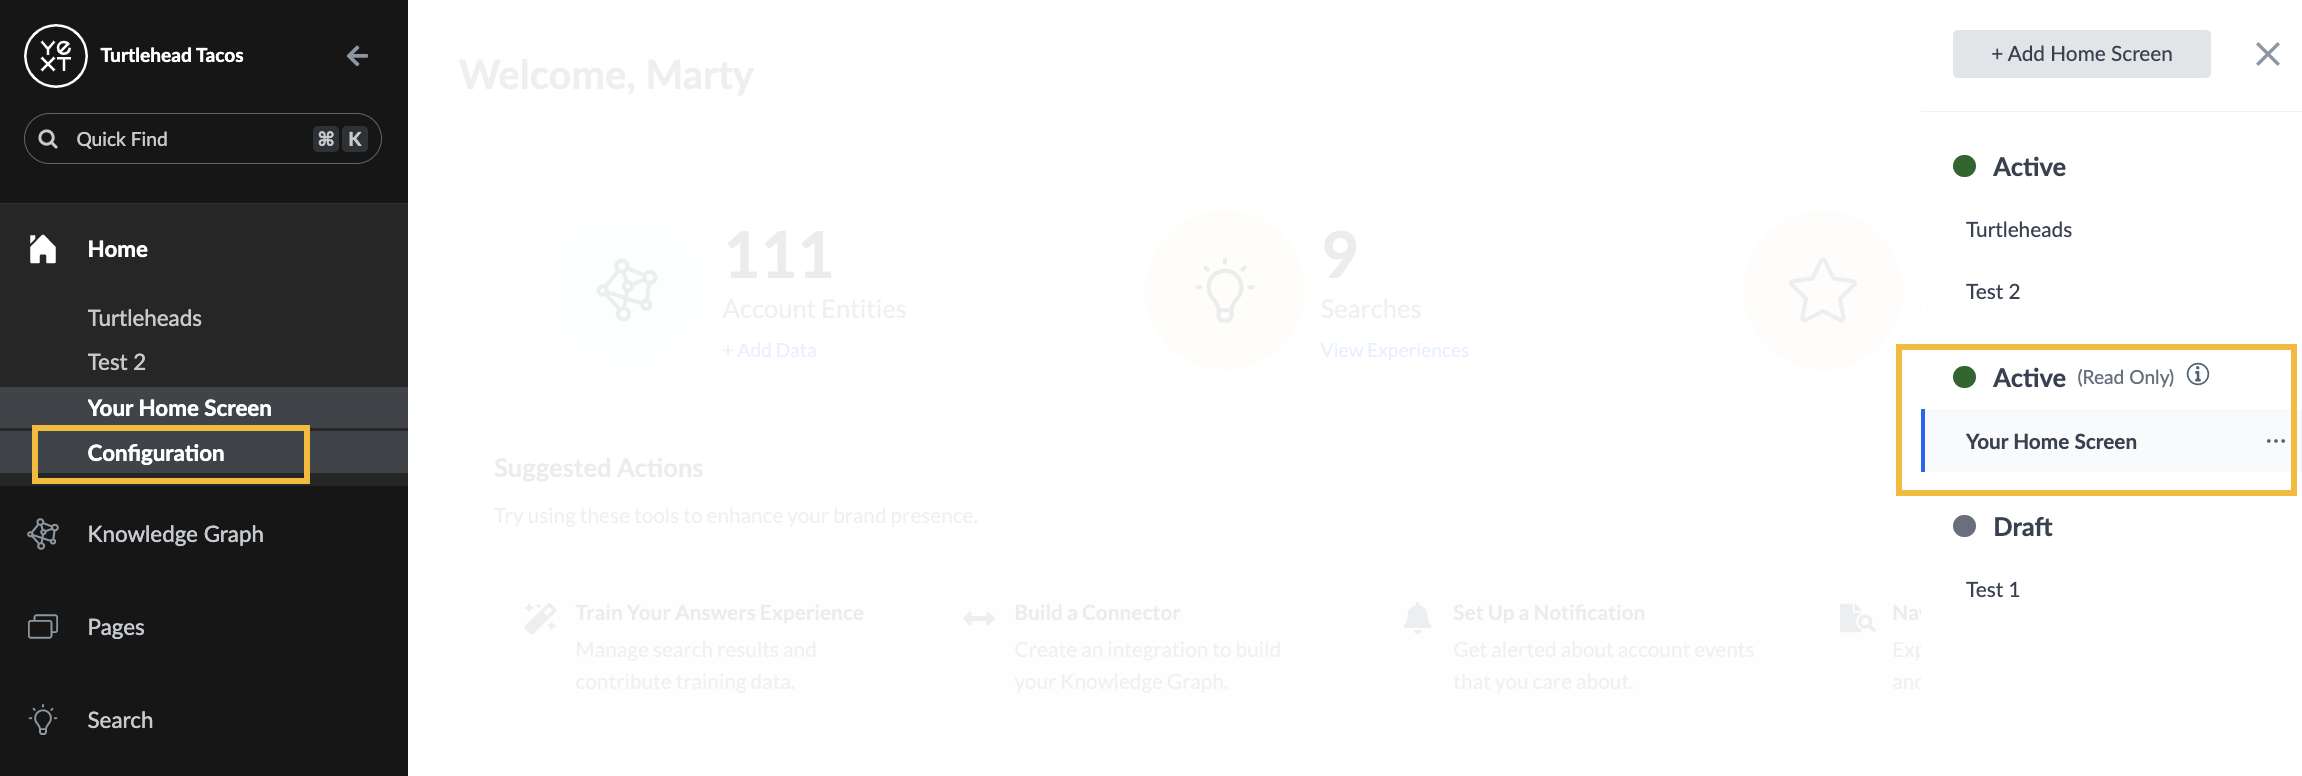
If you have multiple Home Screens active in your account, the built-in Home Screen will always appear at the bottom of the list in the navigation bar.
Click the three dots next to the built-in Home Screen to see your available actions:
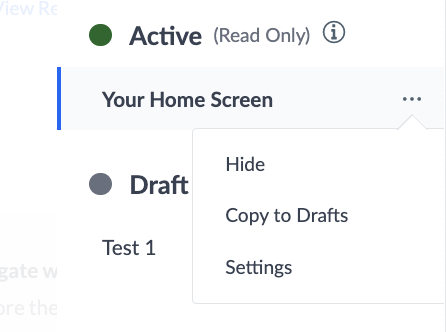
- Hide / Unhide: Remove the built-in Home Screen from the list of Home Screens that appear in the navigation bar, or add it back to the navigation bar.
- Copy to Drafts: Create a copy of the built-in Home Screen to use as a template to customize.
- Settings: (Read-only) View the audience and display name.
Create a Custom Home Screen
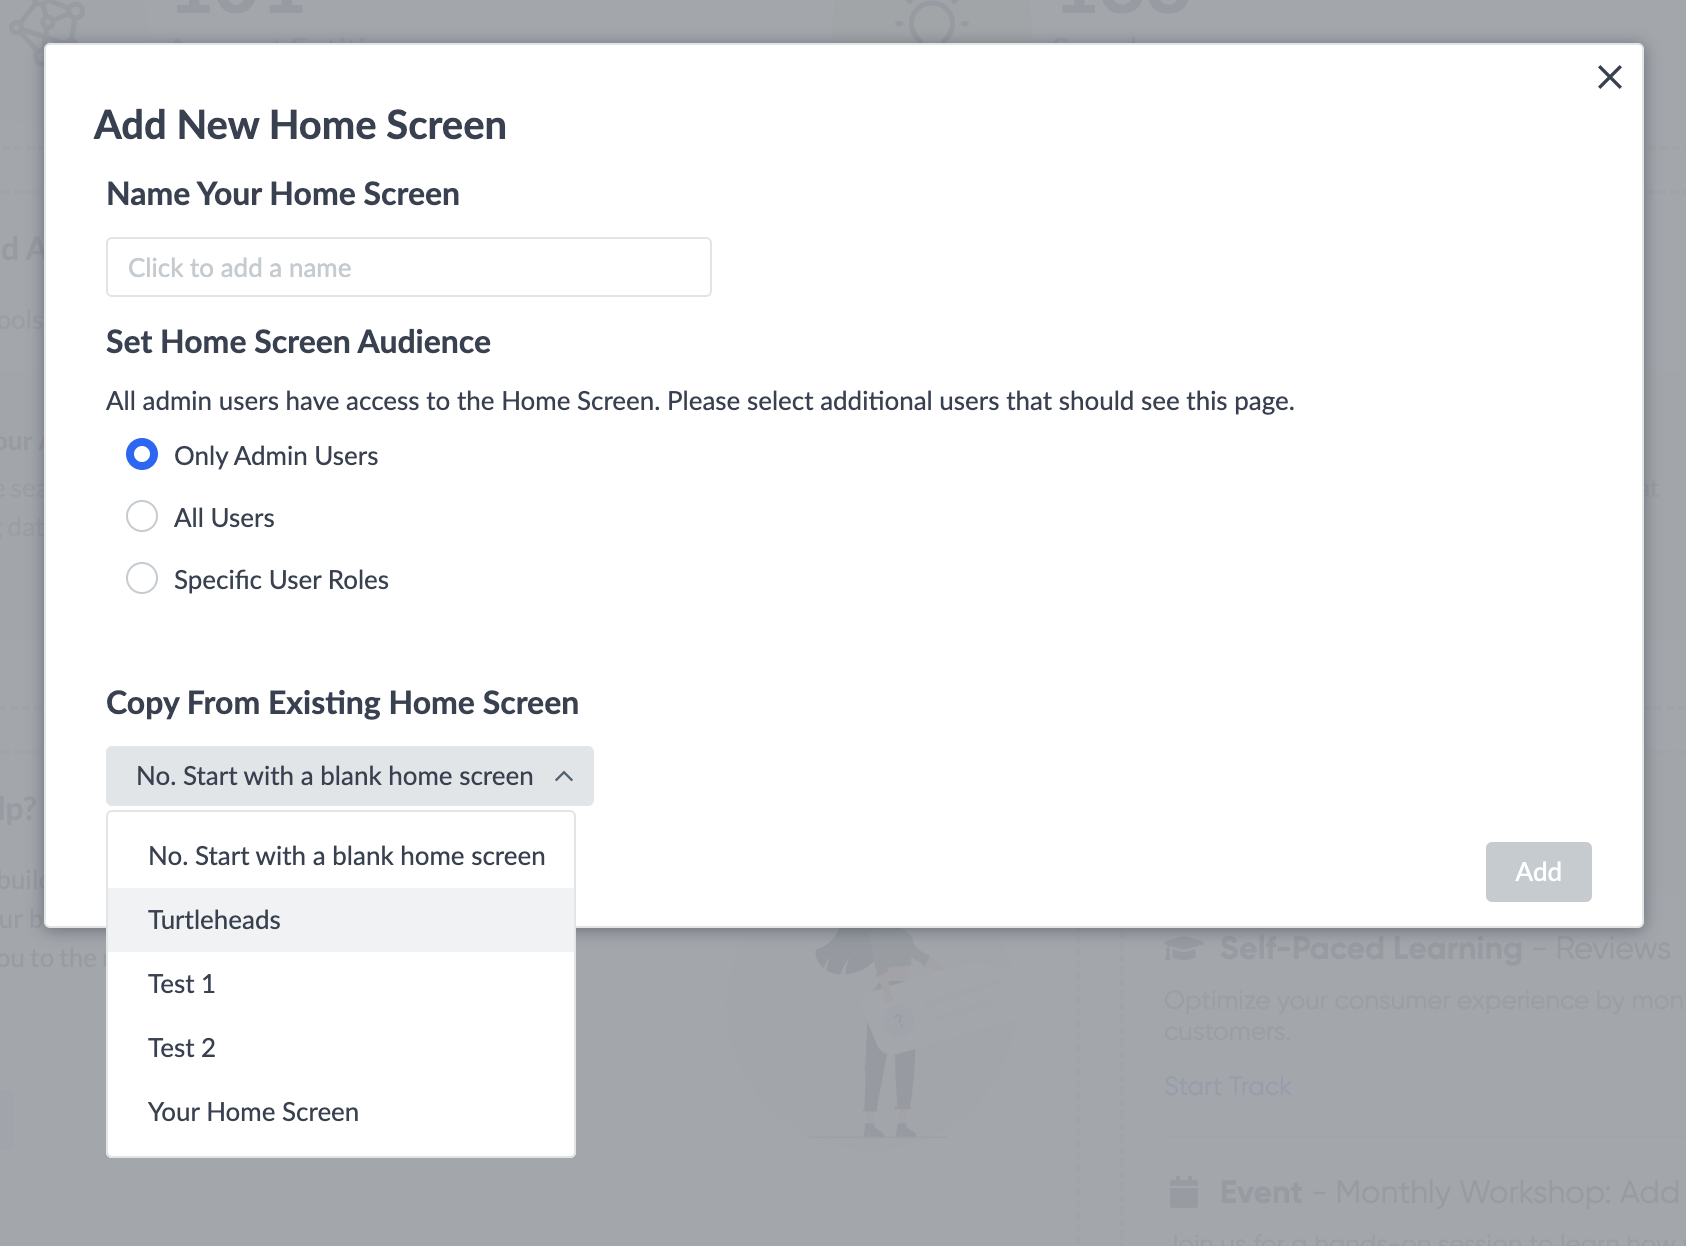
To create a Home Screen, click on the + Add Home Screen button in the top-left and enter a name for your Home Screen.
Next, you will need to determine the audience of your Home Screen. You can make a Home Screen visible to:
- Only Admin Users: This will only display the Home Screen to Admin-level users.
- All Users: This will make the Home Screen visible to all users in the account.
- Specific User Roles:: This will only make the Home Screen visible to certain user roles. To select which users this Home Screen should be visible for, click into the text box and enter the first few letters of the user role and select from the list that appears.
If you decide to make your Home Screen visible to All Users or Specific User Roles, you also have the ability to exclude certain users. To do this, check the Exclude Users or User Roles and enter the name of the user or role you would like to exclude.
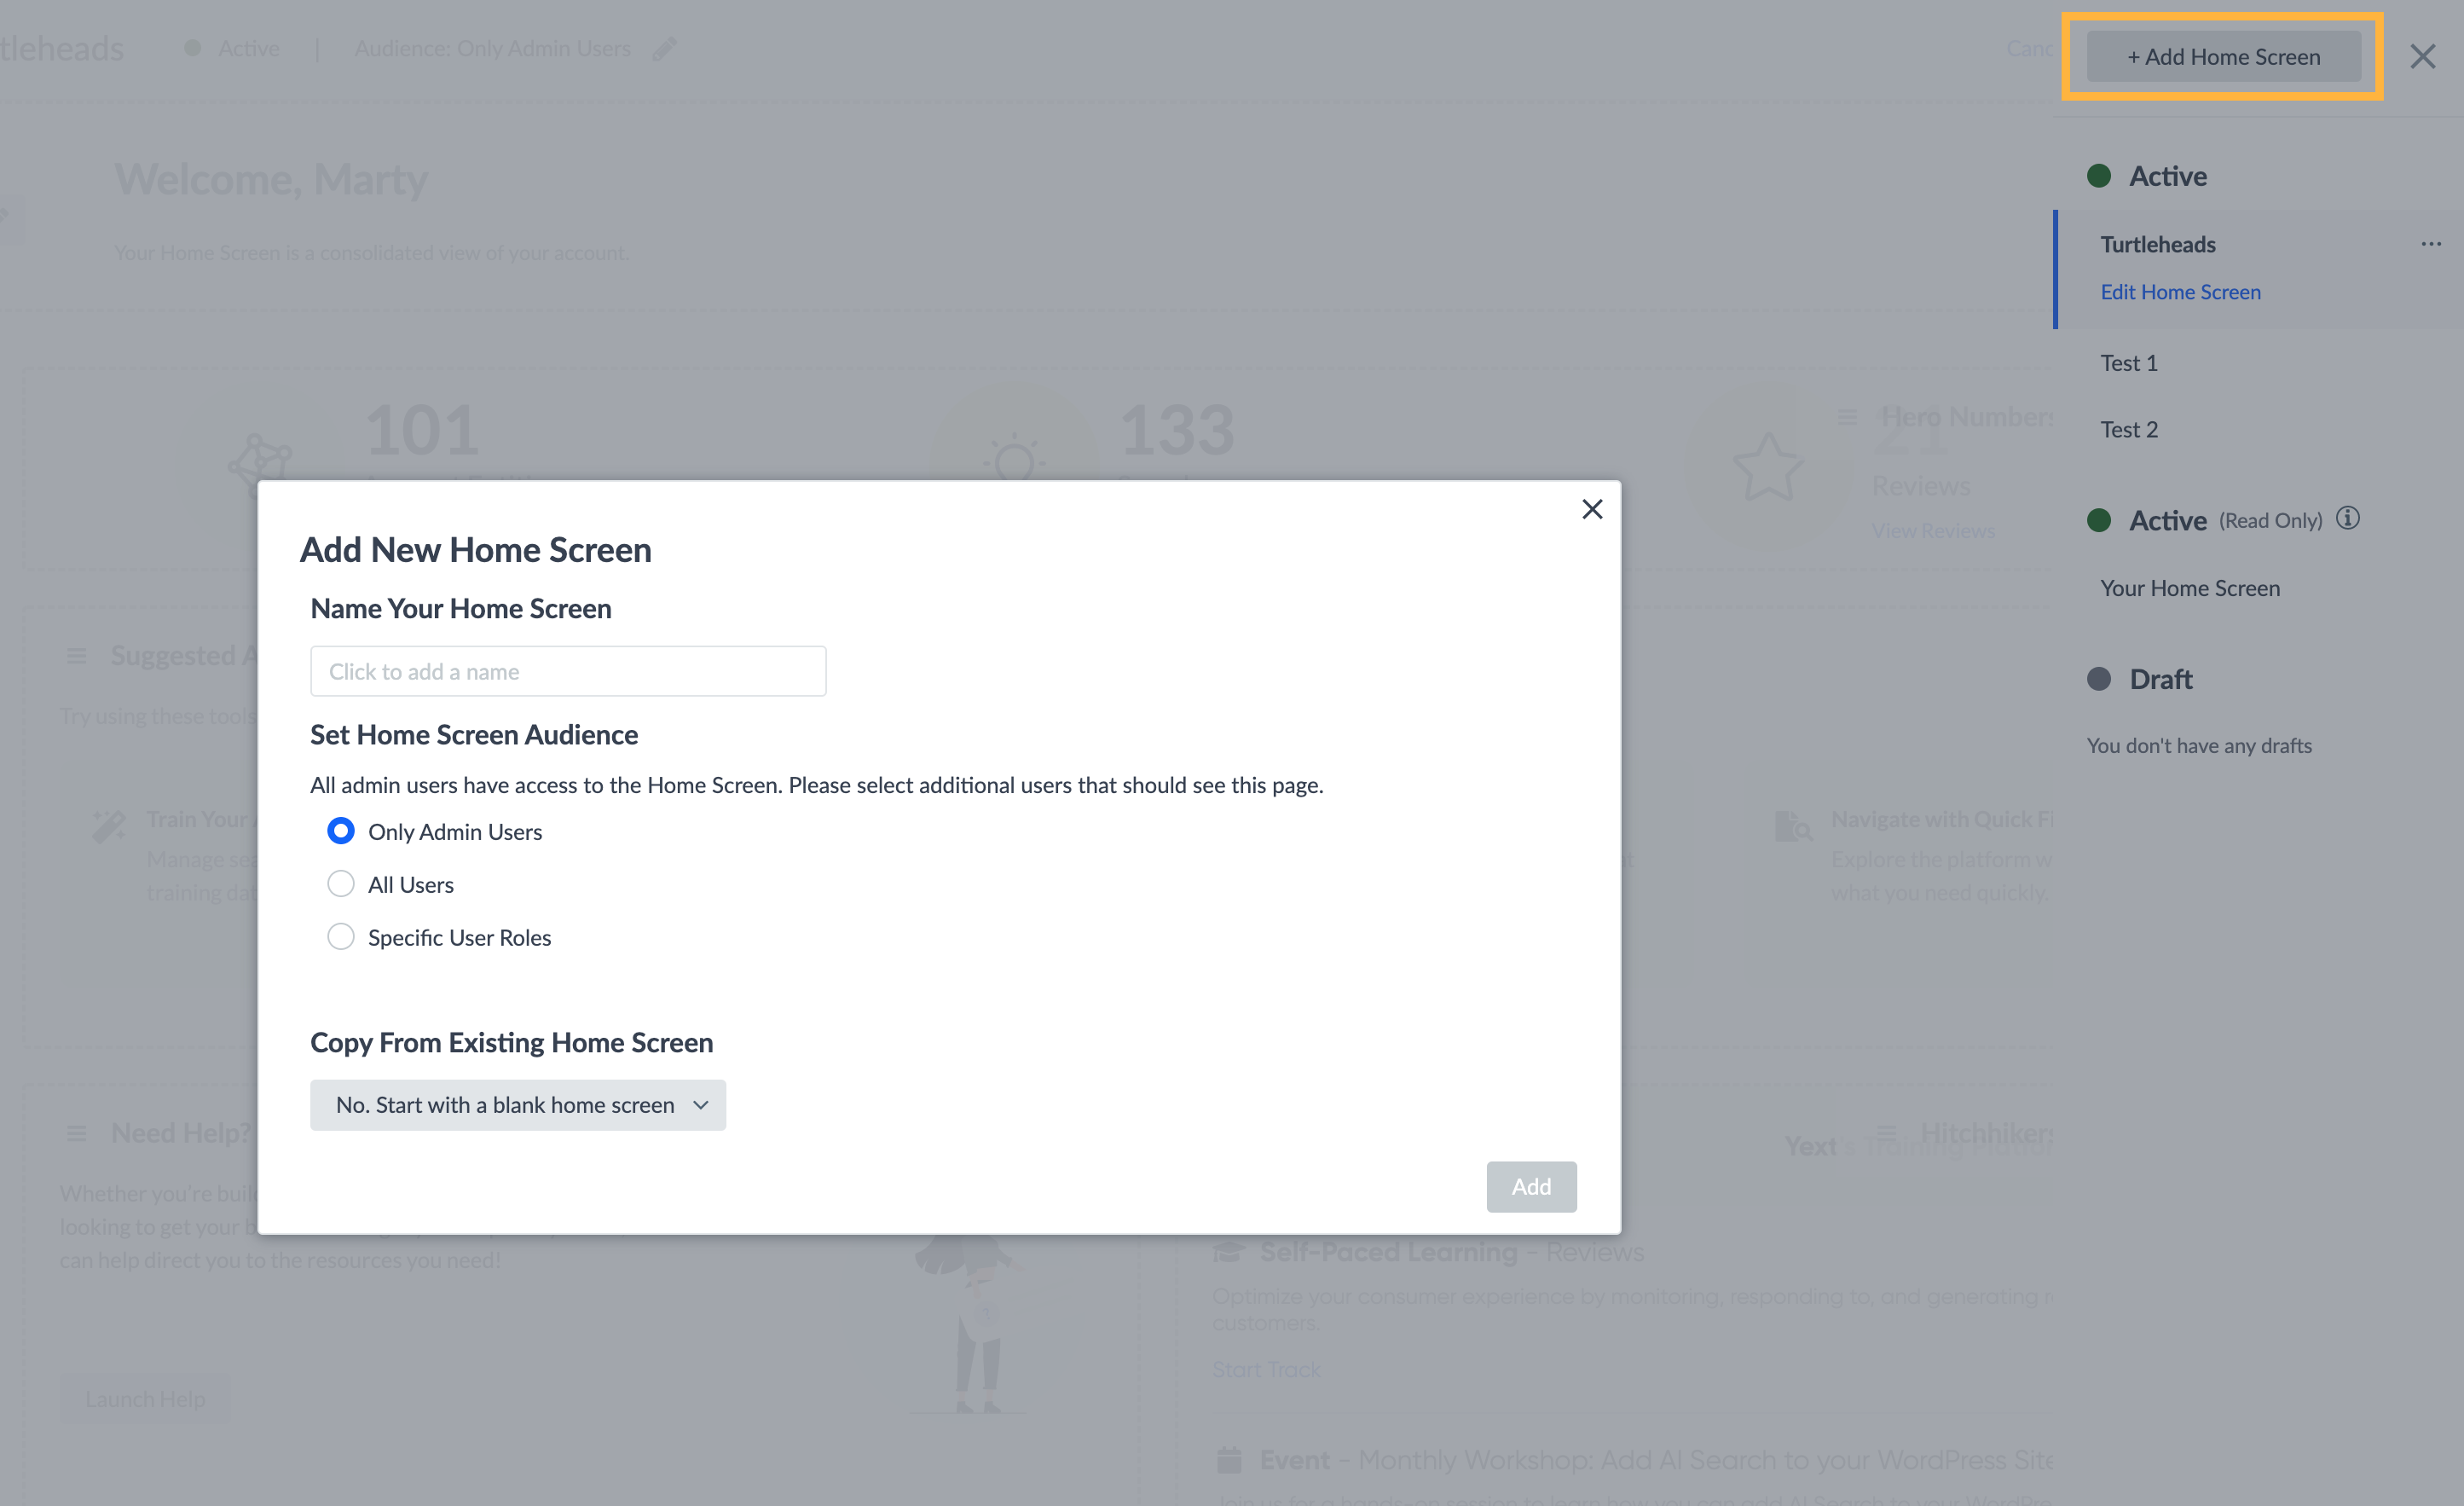
When creating a new Home Screen, you have the ability to copy from an existing Home Screen or start with a blank Home Screen and build from scratch.
Customize your Home Screen
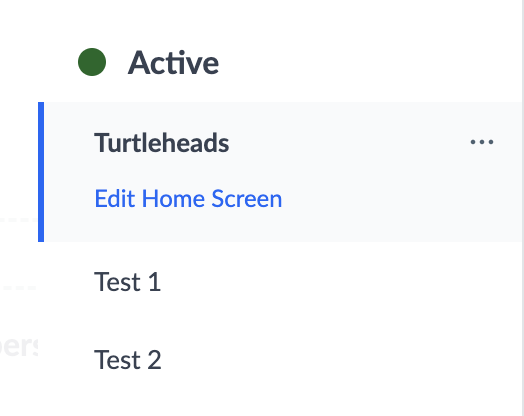
To edit a Home Screen, click on Home > Configuration. From your list of Home Screens on the right, hover over the one you’d like to edit, click the three dots that appear, and then Edit.

You’ll also see an Edit Home Screen link under the top-most Home Screen on the list.
You can also edit an active Home Screen by going straight to that Home Screen in your navigation bar and clicking the pencil icon in the upper right.
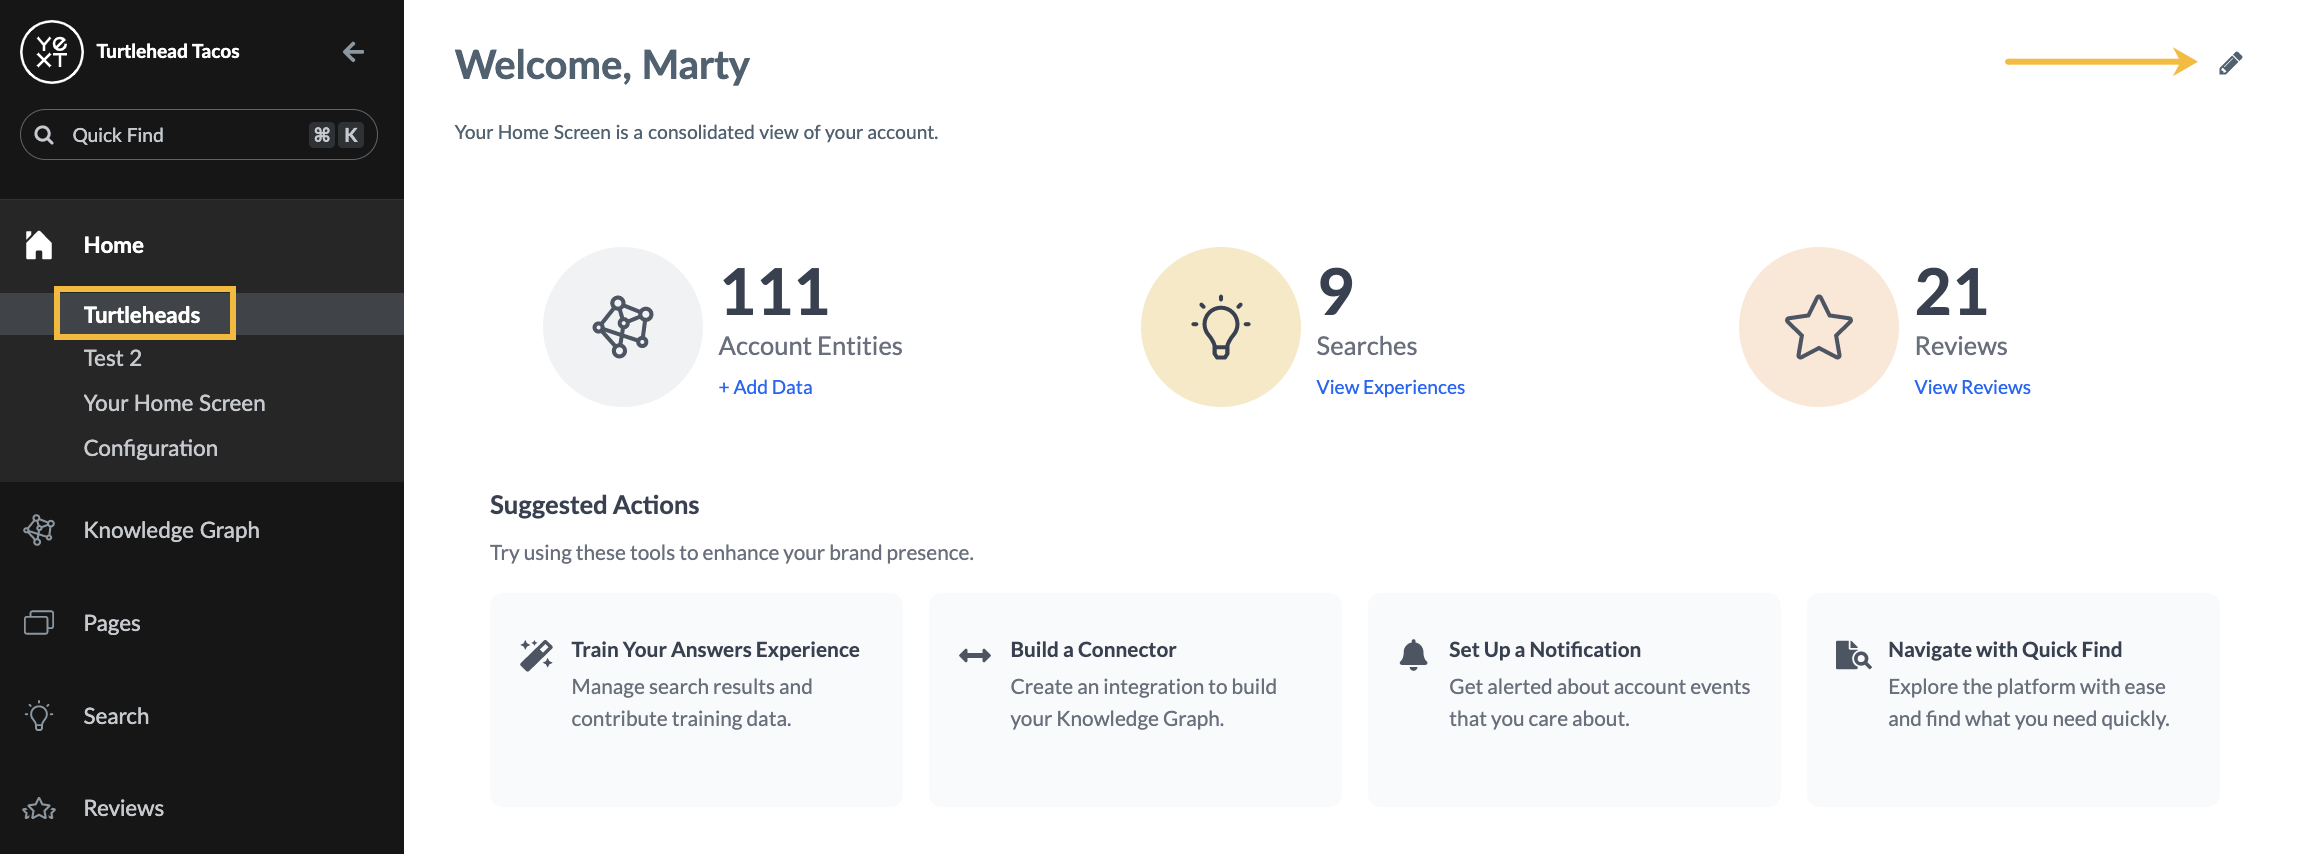
Once you’re in Edit mode, you can begin making changes!
Edit the Banner
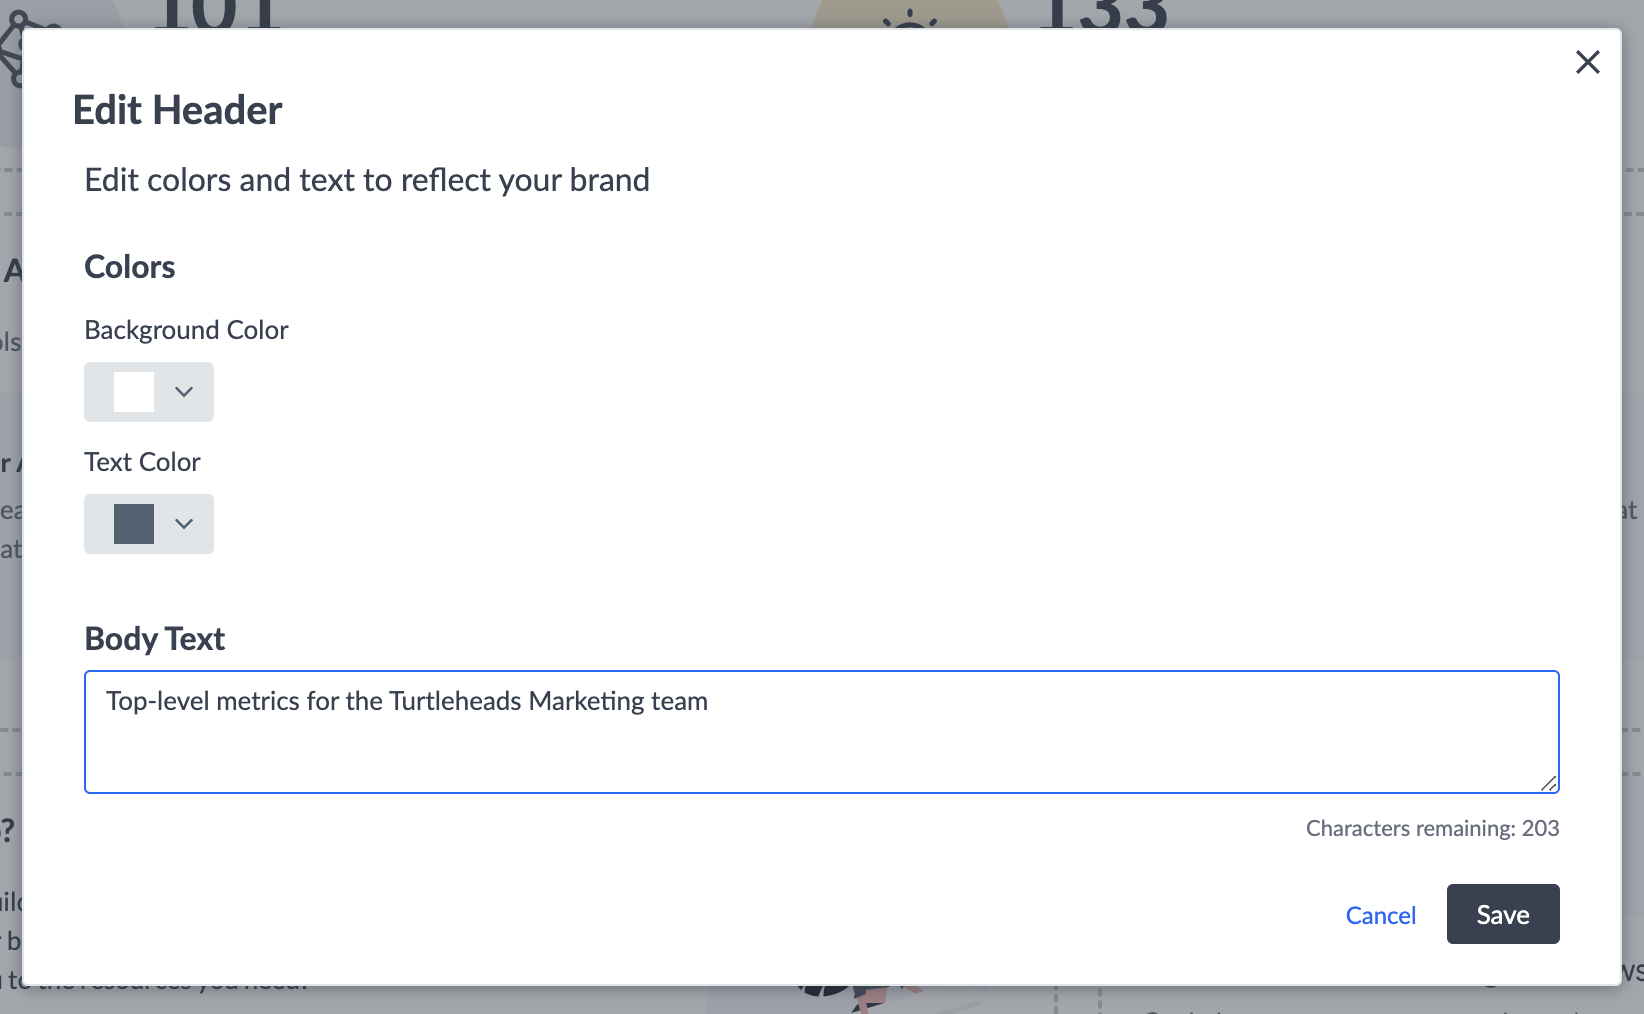
To customize the banner, click on the pencil icon in the top right corner of the banner module.

From here, you can edit the background and text color of the banner, and add a description in the body text field.
Add, Edit, or Remove Modules
To add modules, click on the Add Module button at the top of the screen. From here, you can choose from a series of built-in modules to display relevant data.
The modules are broken down by Yext product area, and you can use the search bar to find specific modules.
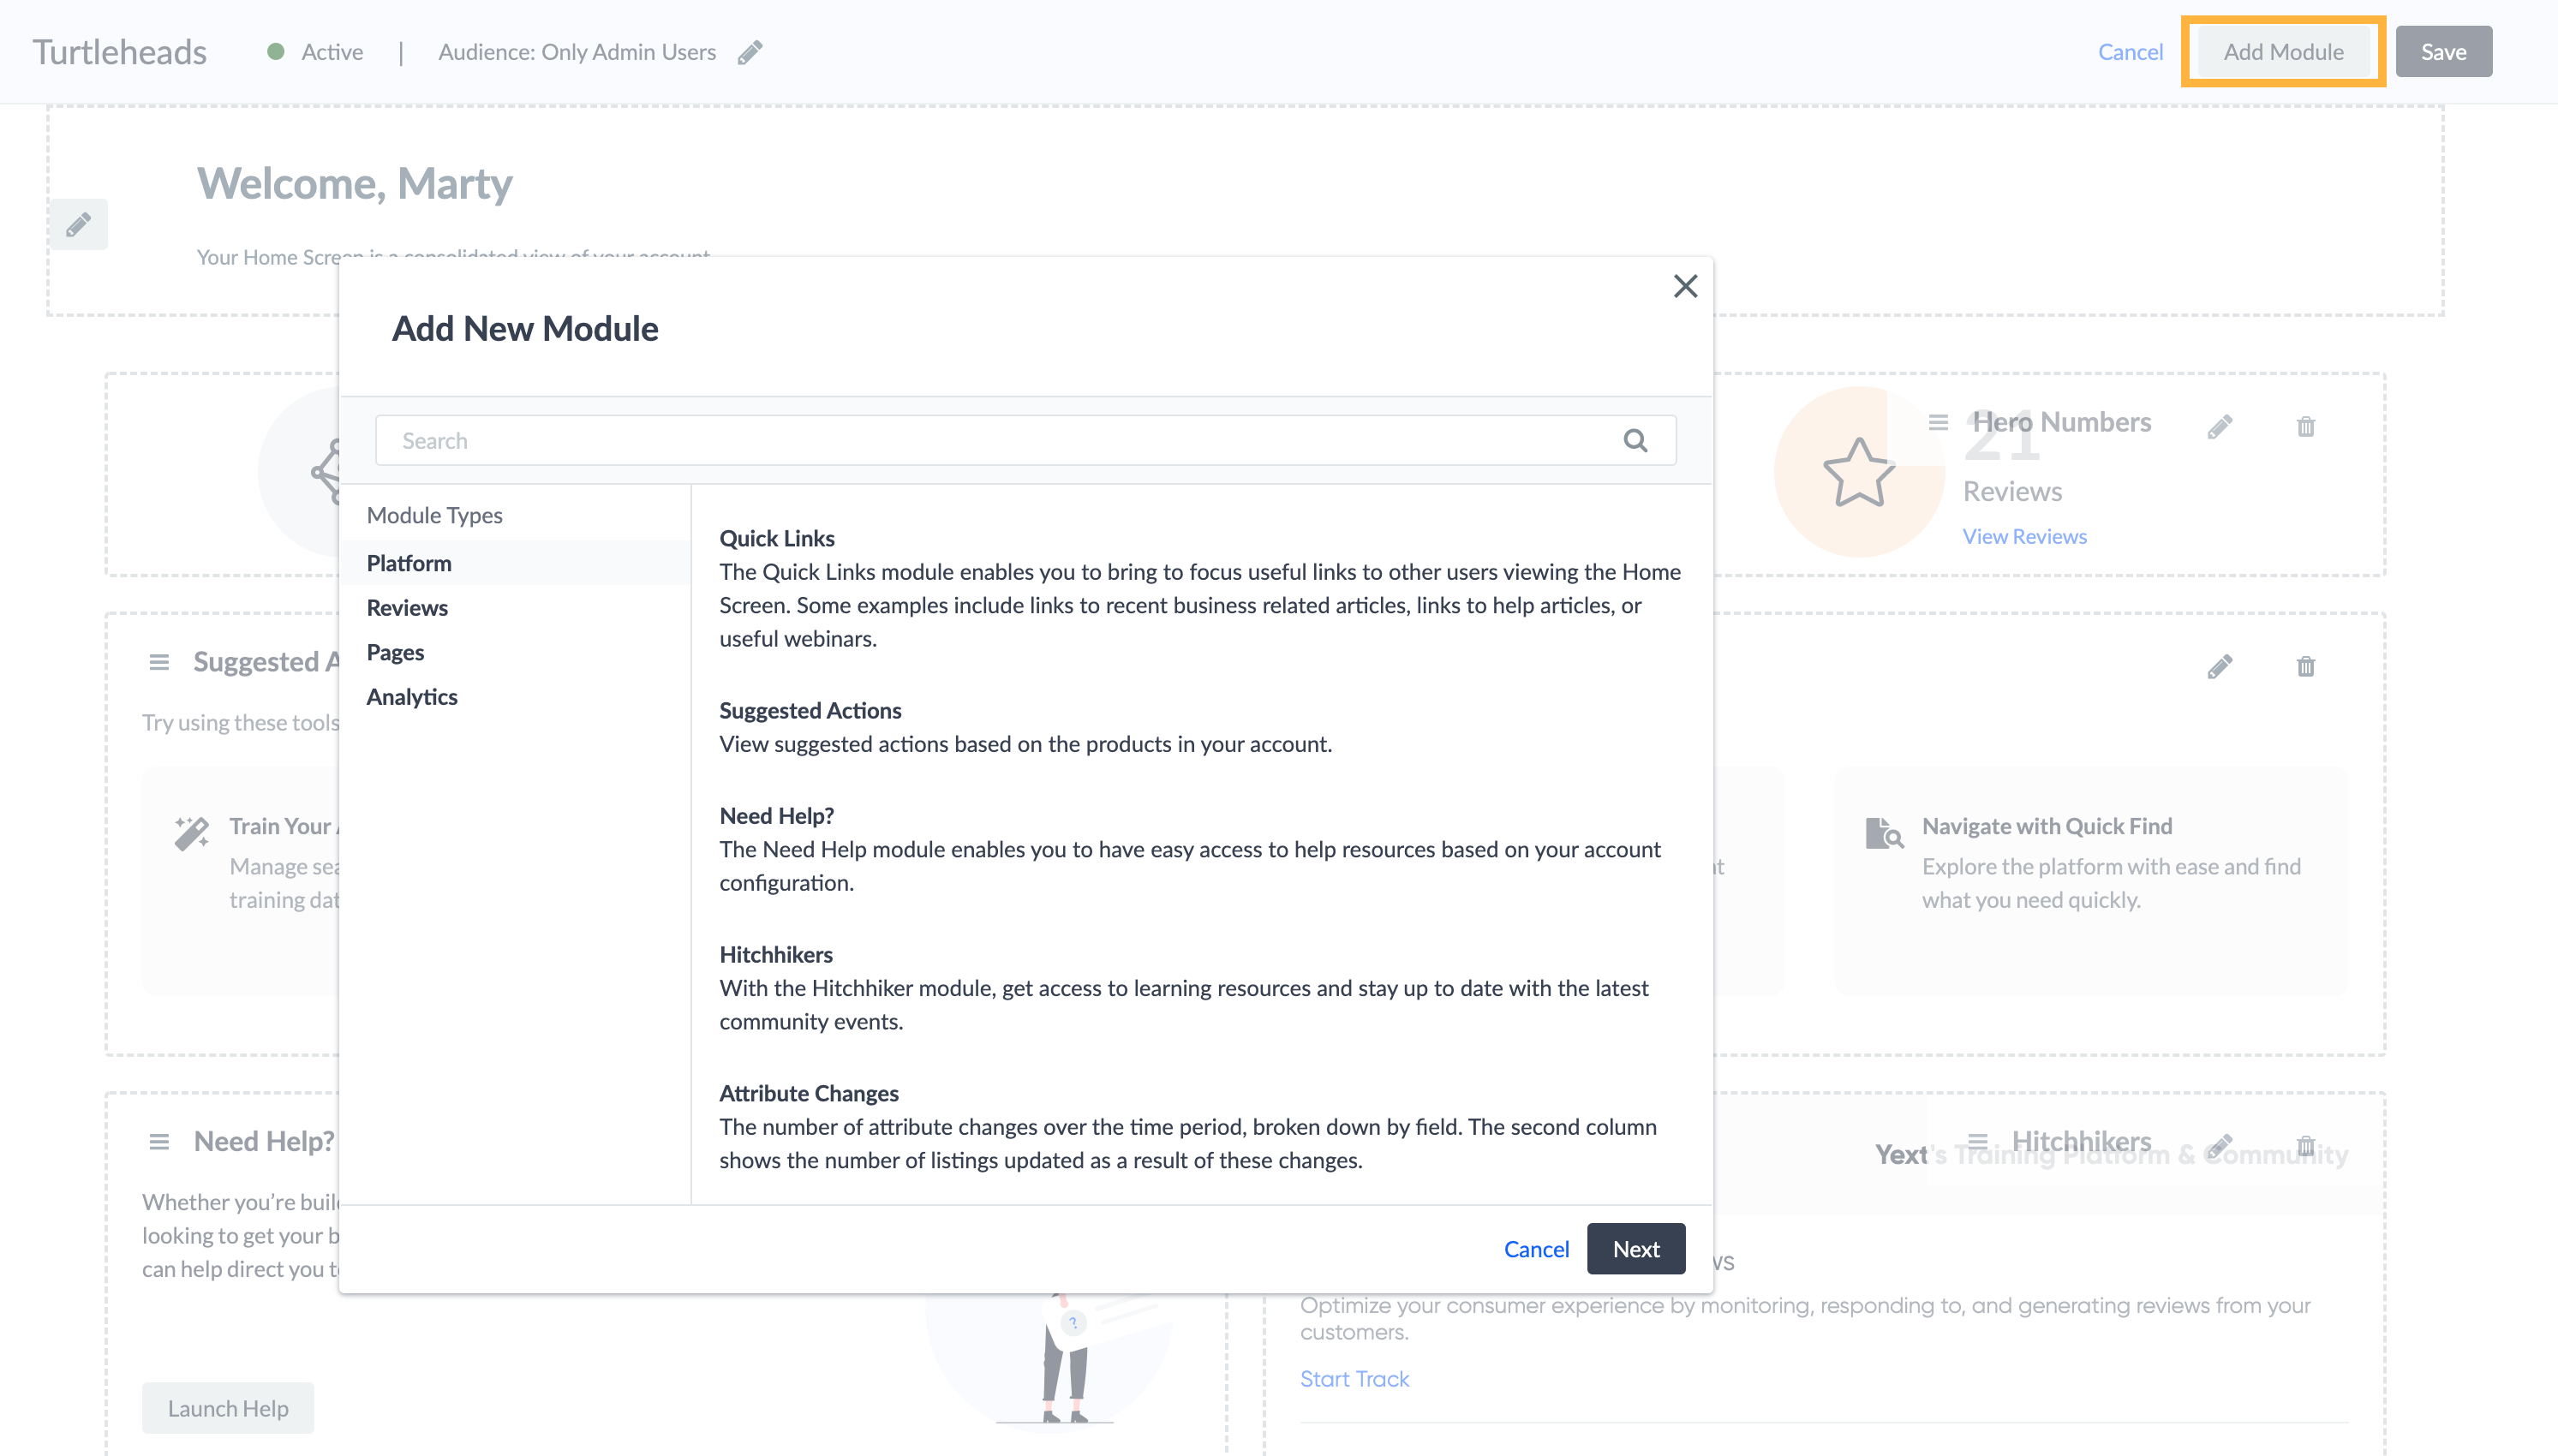
To add a module, click on its name from the list and then click Next.
Then, you have the option to customize the display name that will appear above the module on your Home Screen, apply a date range, and any other filters.
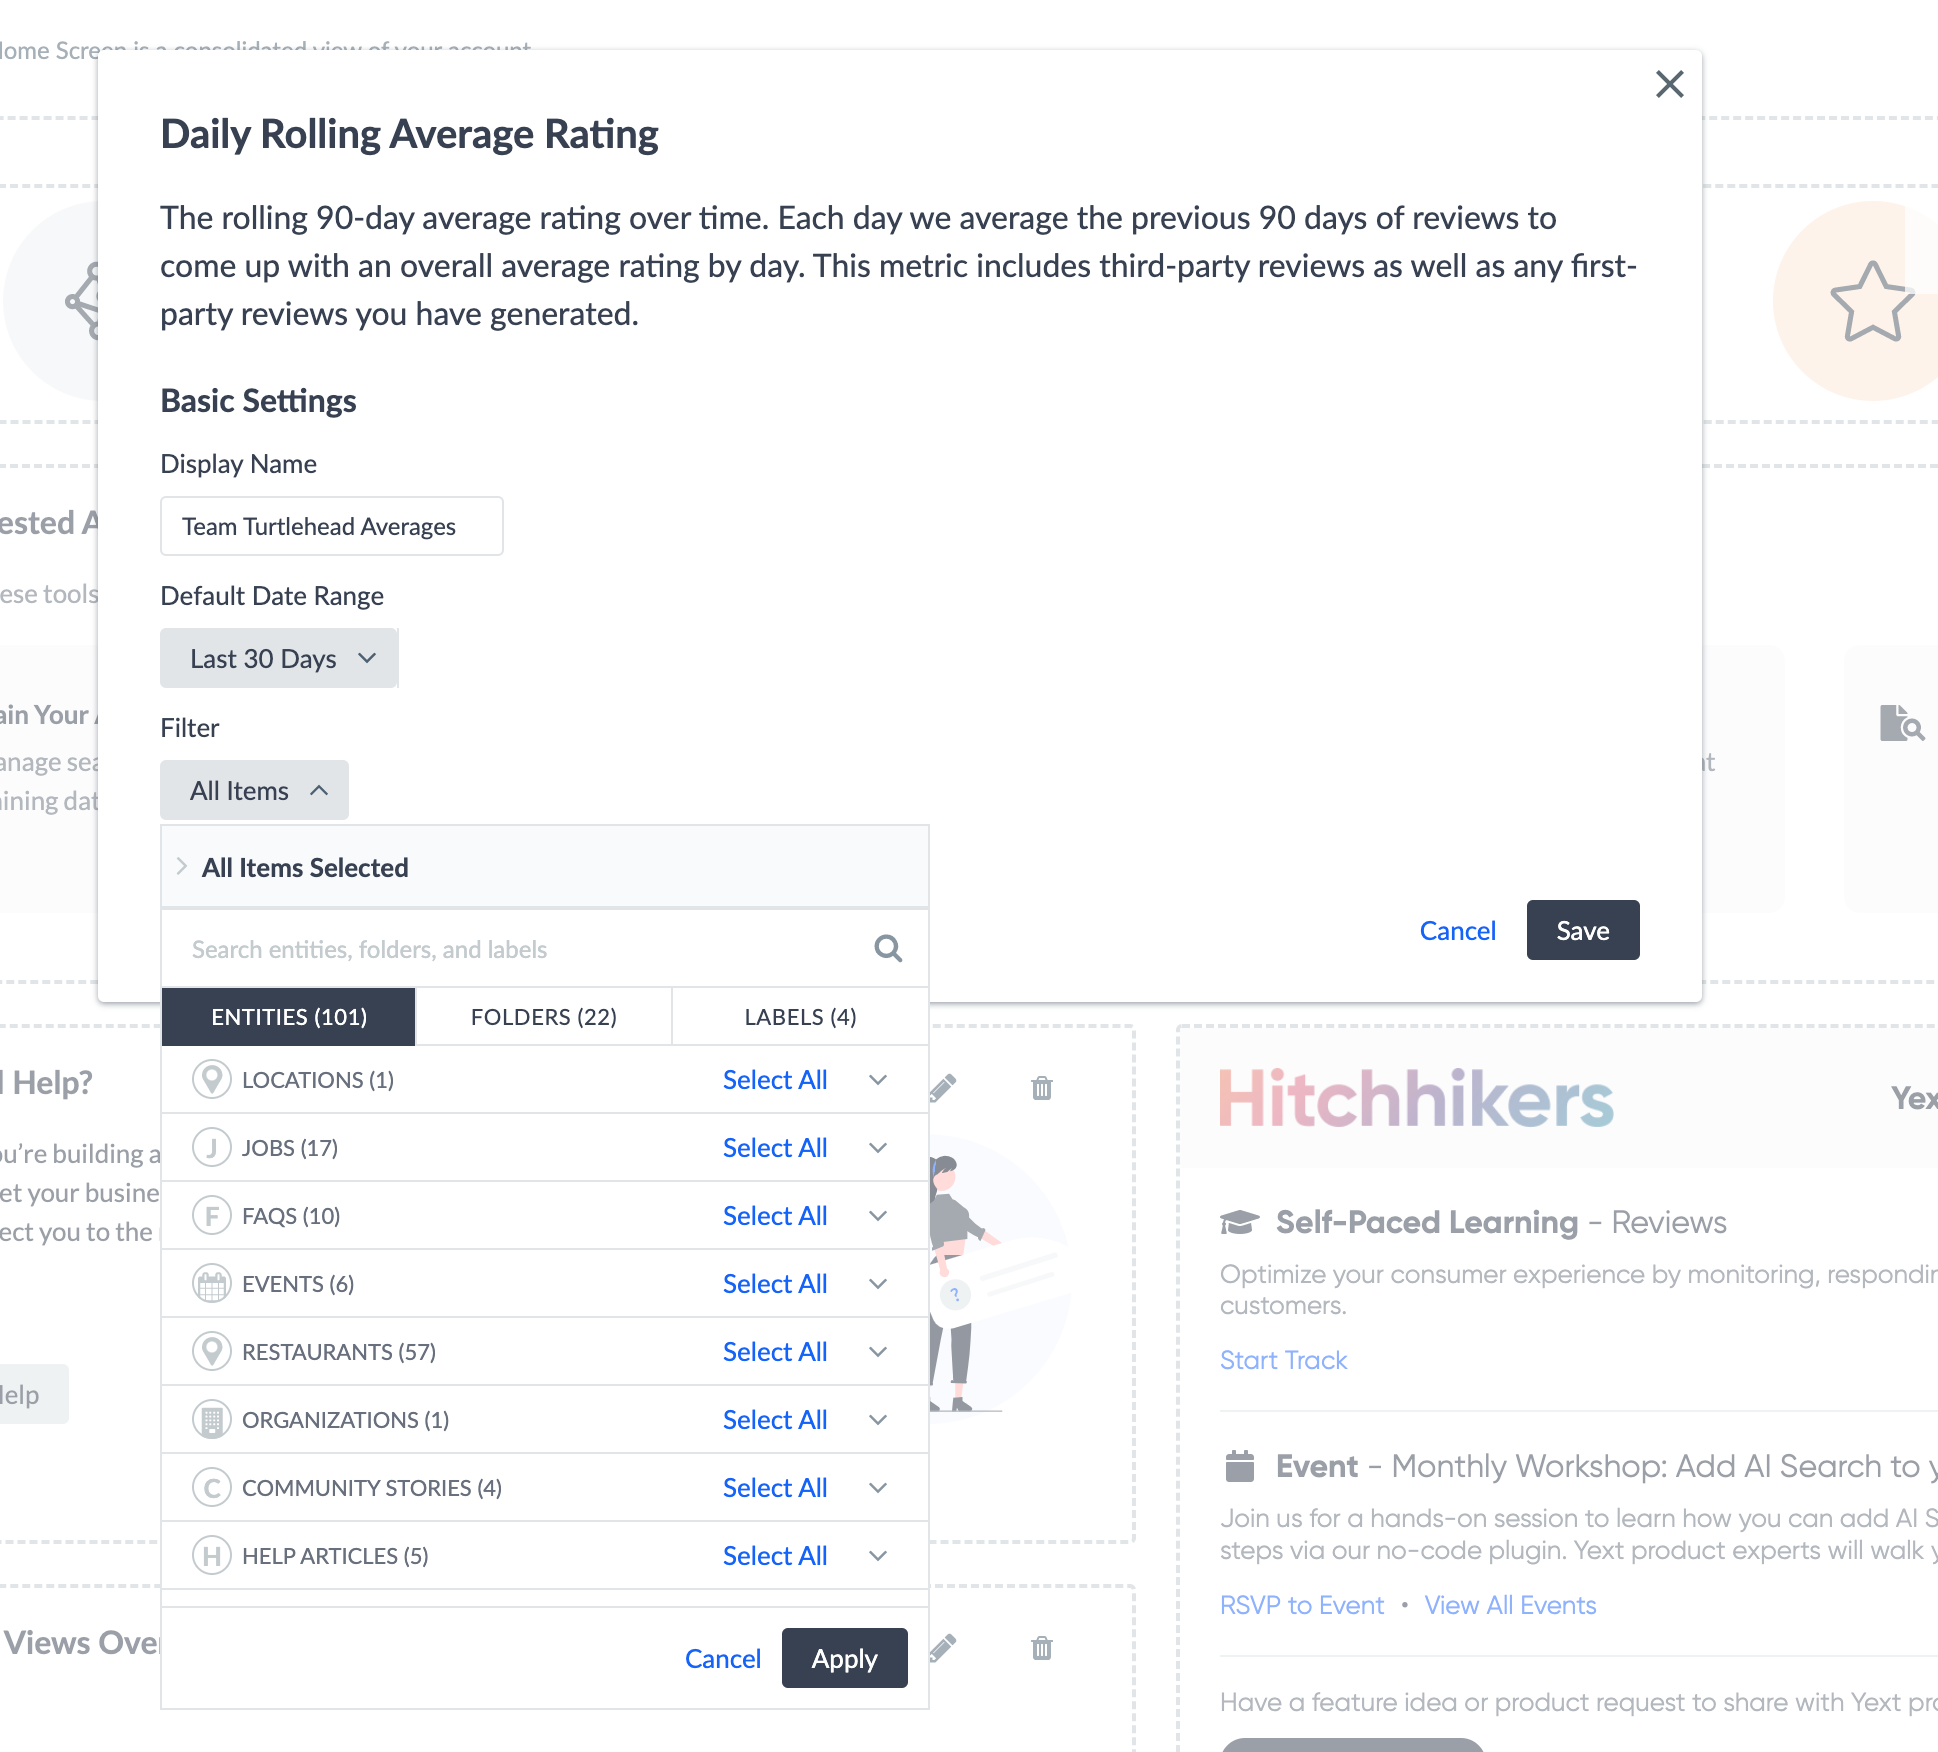
Once you have added the maximum number of modules per Home Screen, the Add Module button will be grayed out.
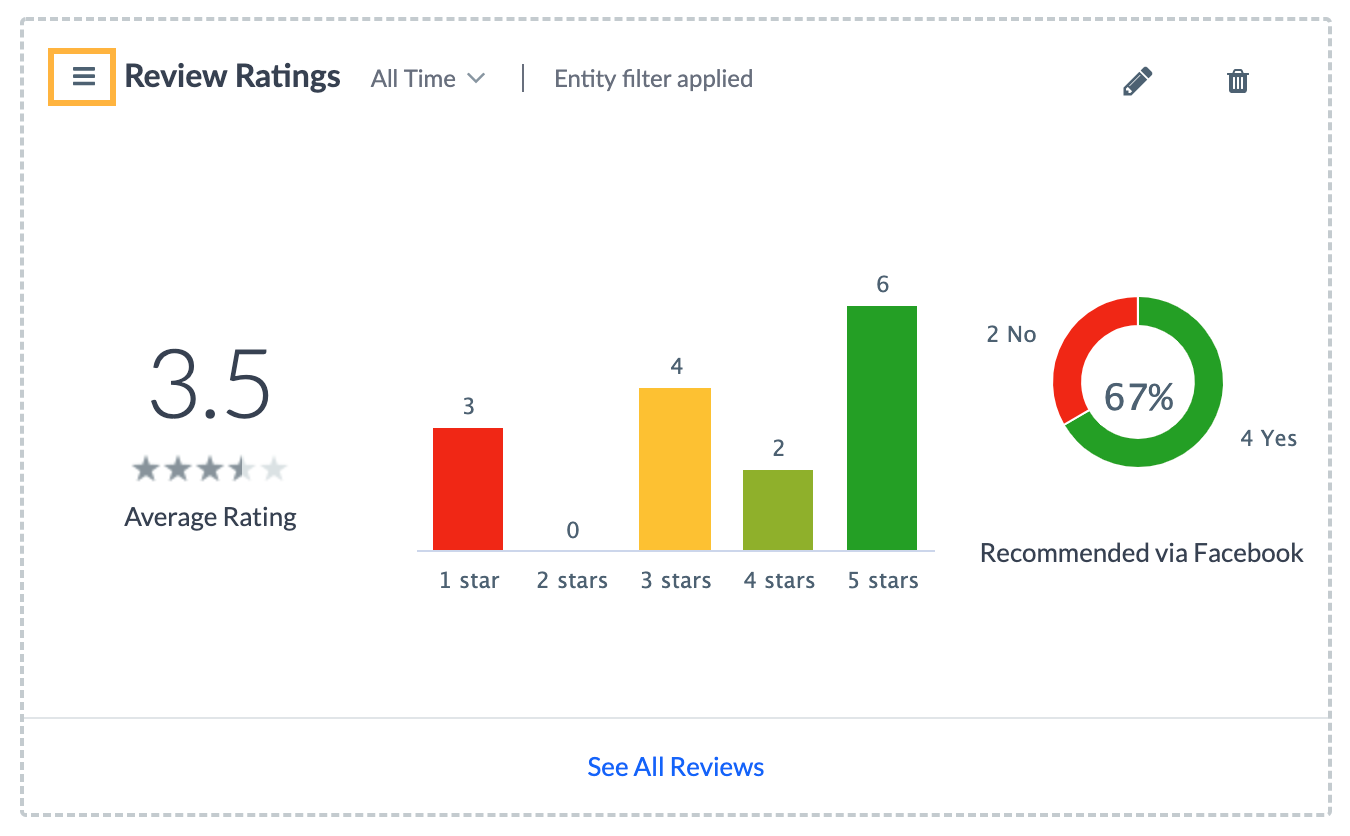
To move a module to a different position on the Home Screen, click and drag the hamburger icon (three horizontal lines) on the module.
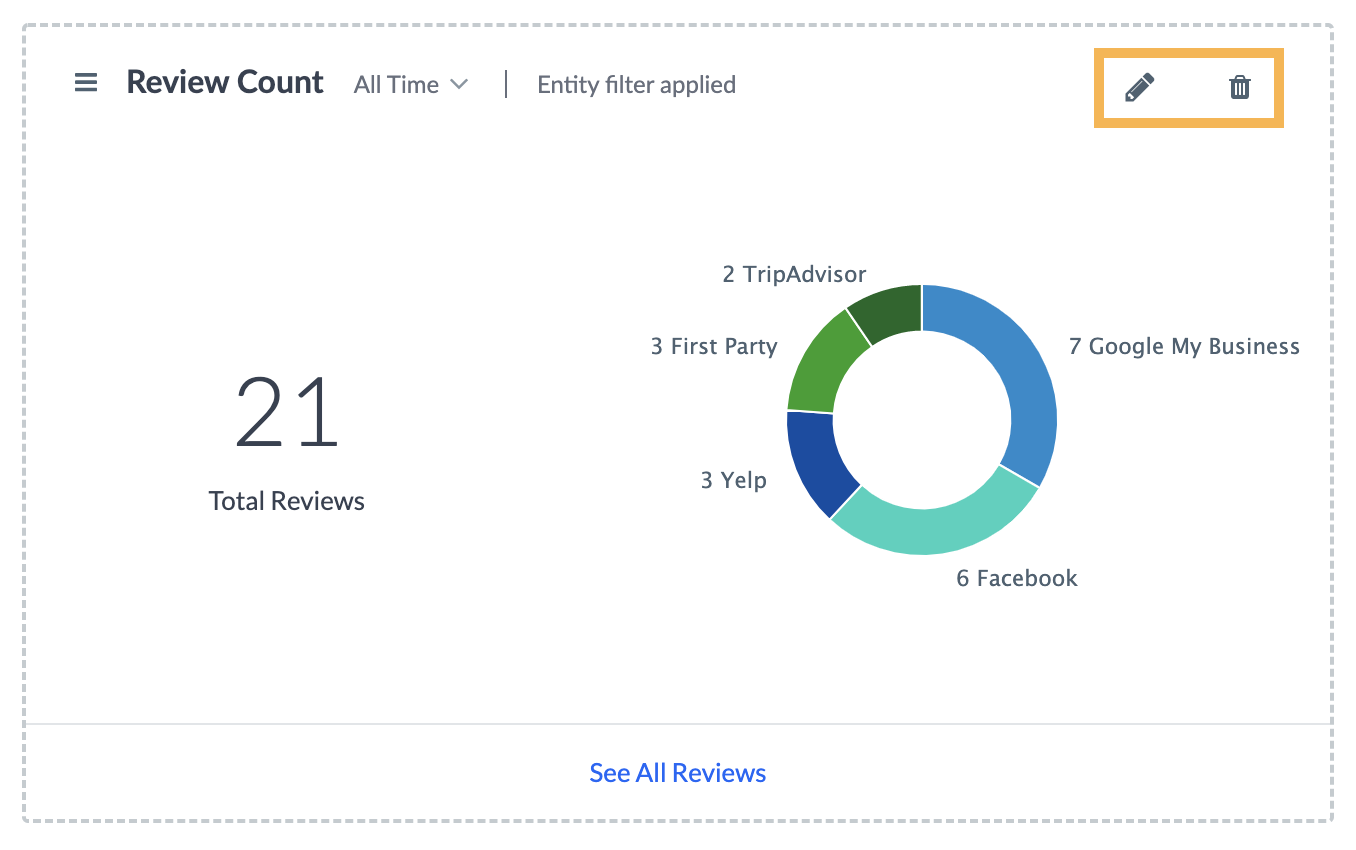
To edit a module that’s already on your Home Screen, click the pencil icon in the top right corner of the module.
You can remove a module from the Home Screen by clicking on the trash can icon in the top right corner of the module.
Adjust the Audience
To adjust the audience of an existing Home Screen click on the pencil icon next to Audience: at the top of the Home Screen.
 This will drop you into the settings you saw when you created the Home Screen initially, and allows you to adjust the name of the Home Screen, as well as adjust the audience.
Home Screen Modules
Most of the Home Screen modules are versions of the modules in Analytics dashboards or on the Overview screens for each product area. However, these modules can only be found on the Home Screen:
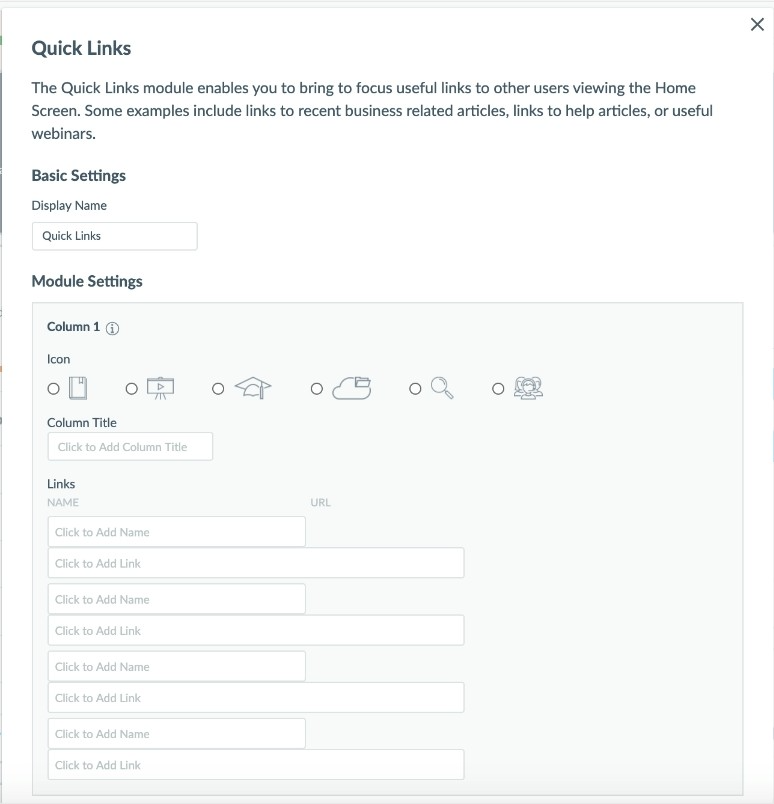
- Quick Links: Display useful links of your choosing on the Home Screen. This can include frequently-used resources or documentation, relevant business articles, or anything else your team should be able to quickly access.
- Suggested Actions: View suggested next steps in Yext based on the products available in your account.
- Need Help?: A quick link to the help resources available in your account (including the Yext Help Center and Support contacts, depending on your account’s options).
- Hitchhikers: Easy access to suggested training modules.
- Task List: This is only available to Partner and Small Business customers. Task List surfaces a list of tasks that need to be completed in the account to boost the quality of your data (such as adding your logo or updating business hours).
Using the Quick Links Module
The Quick Links module has some additional configuration steps. This module is a two column list, with up to four links to each column. For each column you will be able to select an icon that you would like to display alongside the column header. You’ll also enter the display text and URL for each link. If you only want to display one column of links, simply leave Column 2 blank.
Save and Activate your Home Screen
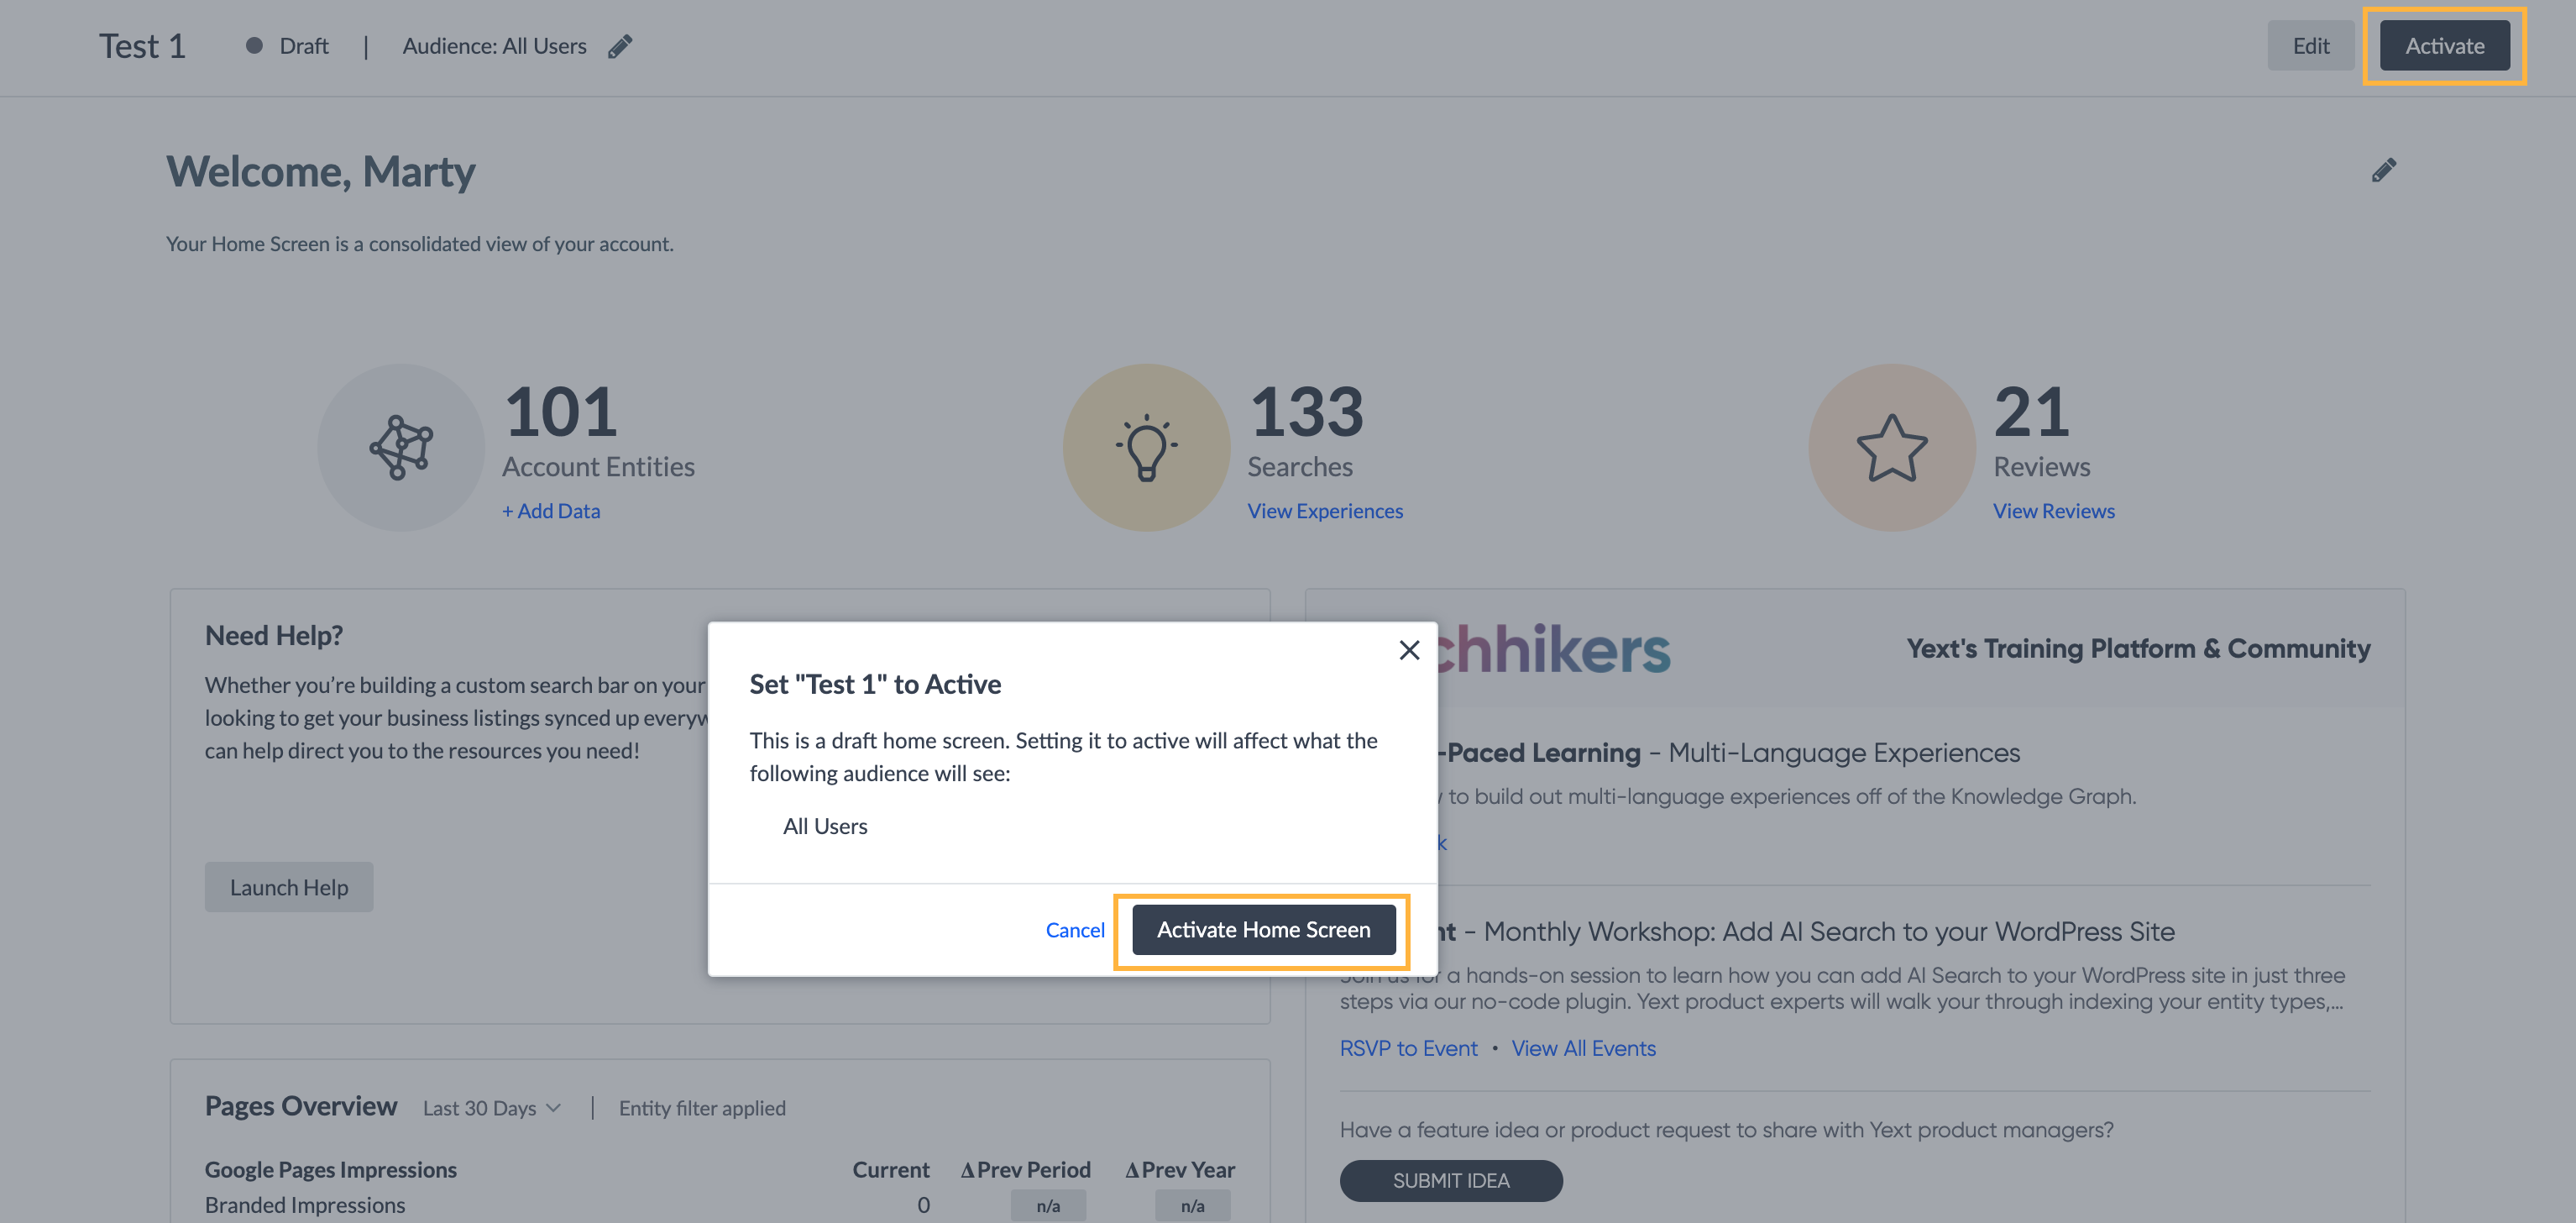
Once you have made adjustments to your Home Screen, click the Save button in the upper right to save the Home Screen as a draft. When you’re ready to publish it to your designated audience, click Activate in the upper right and confirm your changes.
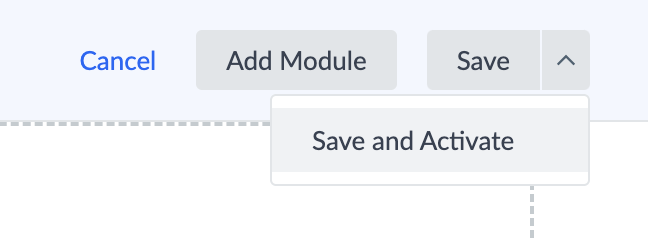
You can also click the dropdown arrow next to Save and select Save and Activate to save your changes and make those changes visible to the designated audience in a single step.
Manage Your Home Screens
There are three sections in the side panel when you navigate to Home > Configuration:
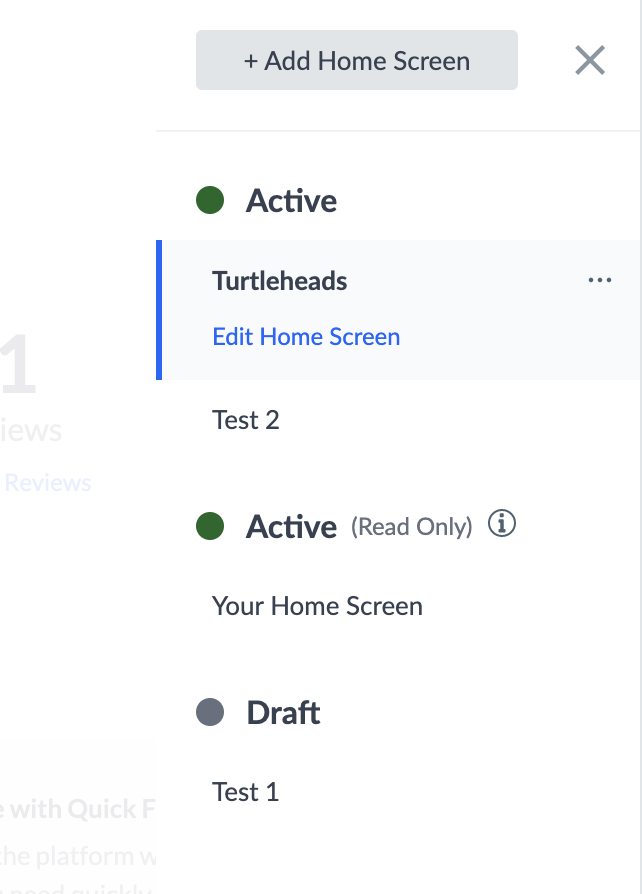
- Active: Custom Home Screens that are currently active and visible, that you have access to edit.
- Active (Read-Only): These include the built-in Home Screen (which is read-only to all users), as well as custom Home Screens that have been created by other users and shared with your account (which you do not have access to edit).
- Drafts: Home Screens that are not yet active or visible to other users on the account.
Arranging Home Screens
Home Screens will display to users in the order in which they are listed in the Configuration panel. The Home Screen at the top of the list will be the default Home Screen that users will see when they first log in, or when they click Home in the navigation bar. Additional Home Screens can then be accessed from the list in the navigation bar.
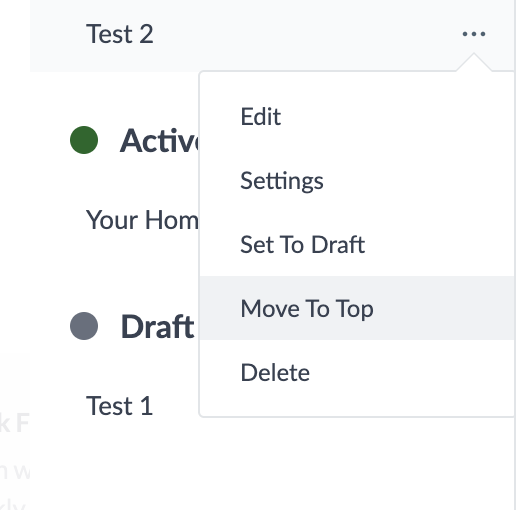
To set a Home Screen as the default (by moving it to the top of the list), click on the three dots next to the name of one of your active Home Screens and click Move to Top.
Changing the Status of a Home Screen
You may want to change which Home Screens users can see, or keep a Home Screen in draft mode while you’re editing.
This scenario is particularly common as you create multiple Home Screens. Since you can only have 10 active Home Screens at one time, if you have reached the maximum number, you will need to set one to Draft in order to activate a new one.
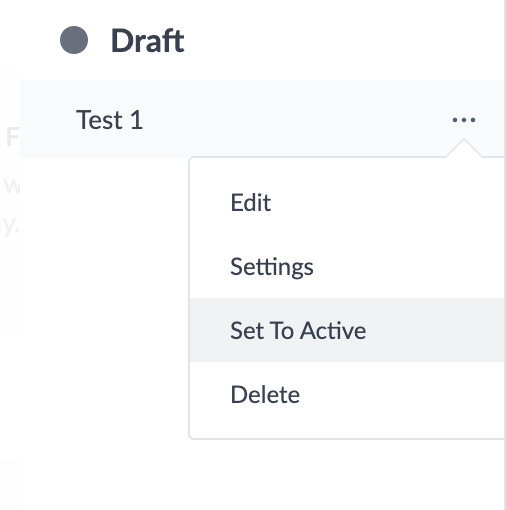
To update the status of a Home Screen, open the Configuration panel under Home > Configuration. Click on the three dots next to the name of the desired Home Screen, and click Set to Draft or Set to Active.
Delete a Home Screen
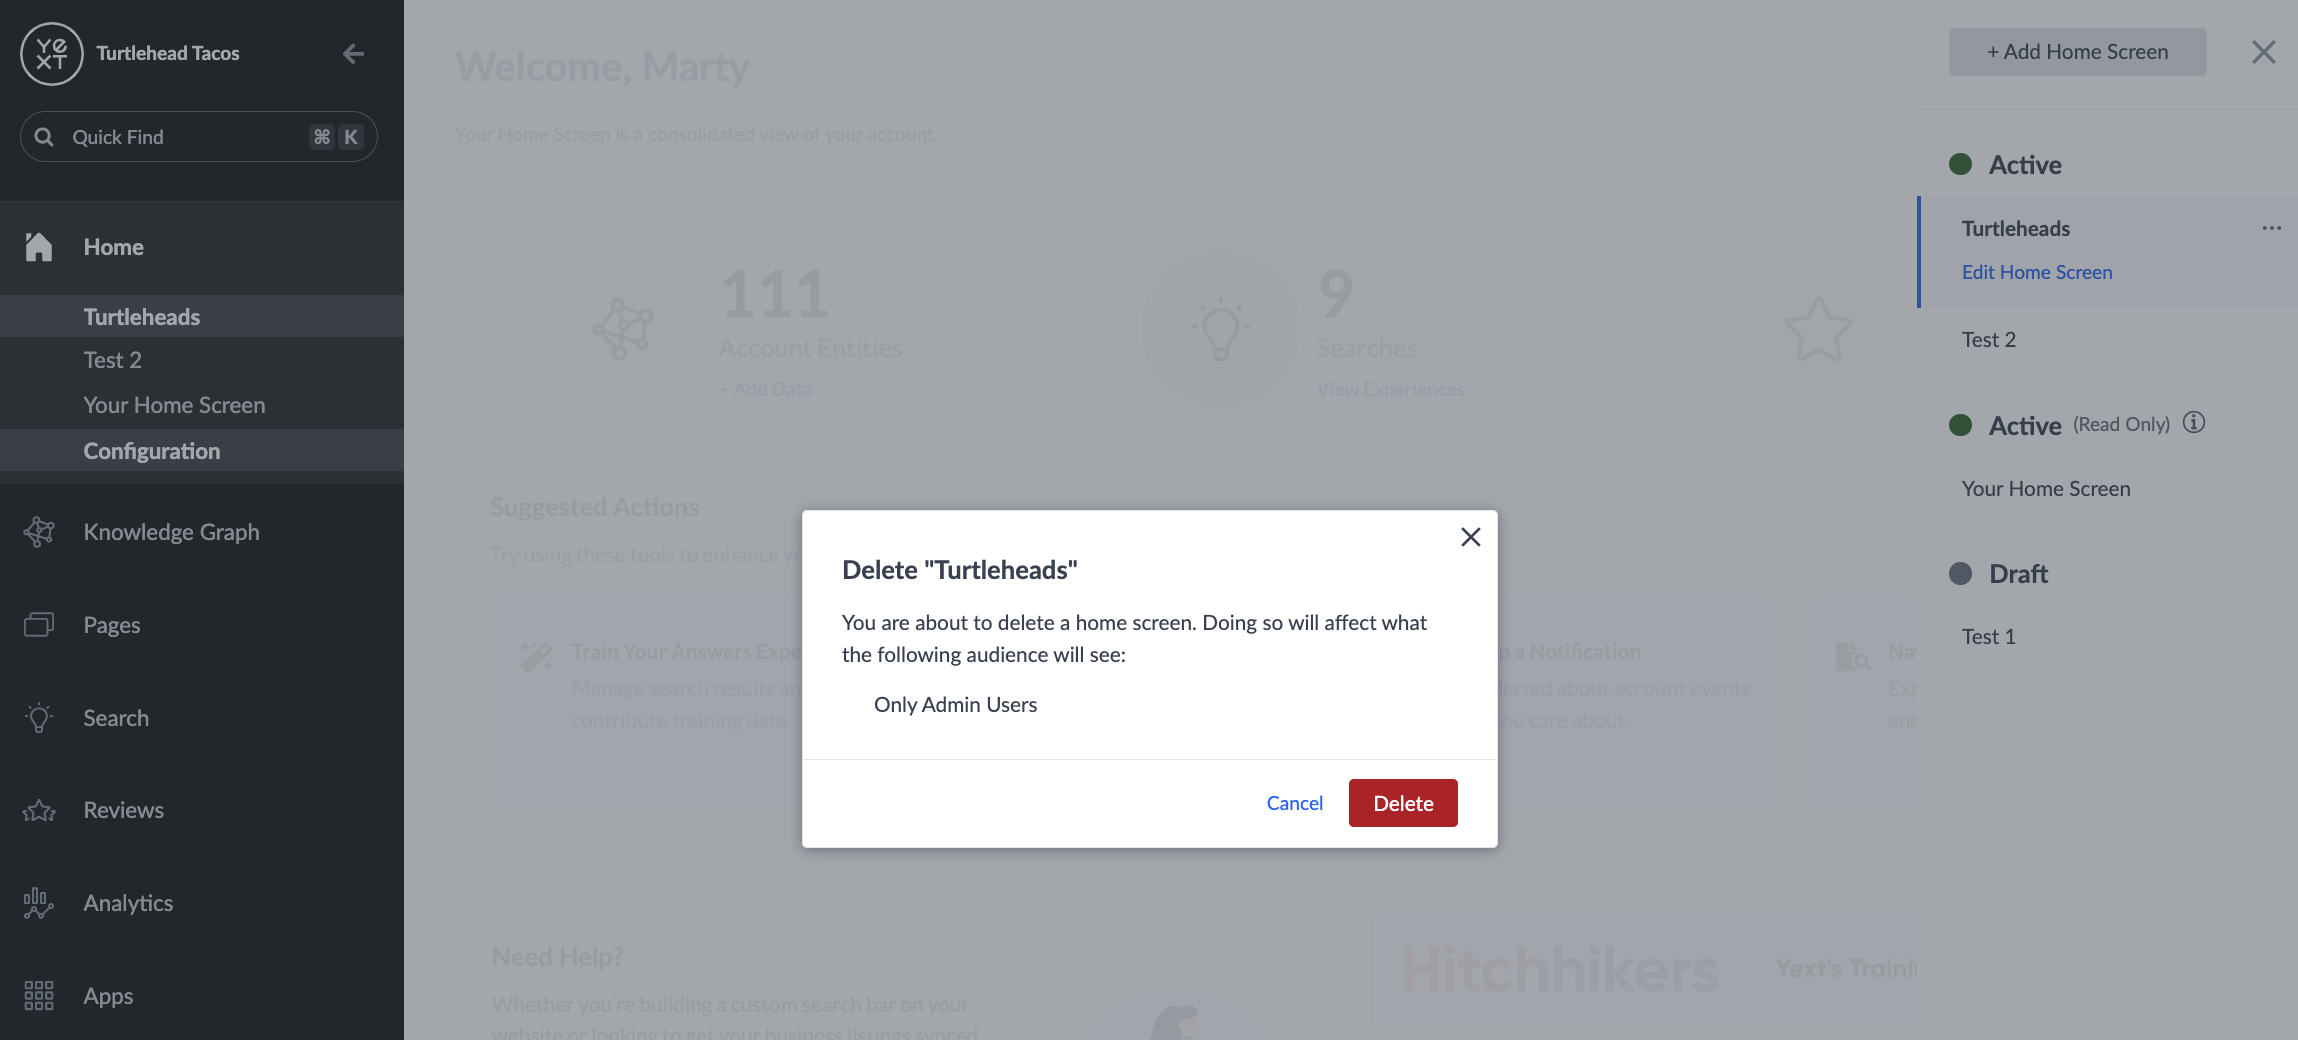
To delete a Home Screen, click on the three dots next to the desired Home Screen, click Delete, and confirm.
Which of the following options are available when selecting the audience for a Home Screen? (Select all that apply)
In order to make your Home Screen visible to users, what do you need to do?
Which of the following can you customize for your Home Screen? (Select all that apply)
True or False: The built-in Home Screen is read-only and not customizable.
High five! ✋

