Module Assessment | Yext Hitchhikers Platform
Background
Well, first things first, the basic setup you have right now is not using the primary color according to brand guidelines. You don’t know a lot about how to make changes to the search experience styling (yet), but you recognized the $color-brand-primary variable when you saw it. Time to make a quick change!
Challenge
Navigate to Pages > All Sites. Click the “Edit” button in the row for “Brand Search”. (You can also navigate here by clicking Pages > Brand Search > Deploys in the navigation bar.)
Click “Code Editor” in the top right.
Hover over the “master” Branch on the left and click on the pencil icon. You are now viewing the Github repository for your site! You should expect this to take a couple minutes to load – in the background, it’s starting up a container for your development.
Click on “View Live Preview” to open up a preview of your site in a new tab.
NoteAs you click around and run searches, you might notice a few verticals appear without cards. Don’t be alarmed - this is because we’ve configured the backend already, but haven’t set up the results in the frontend yet!Navigate to
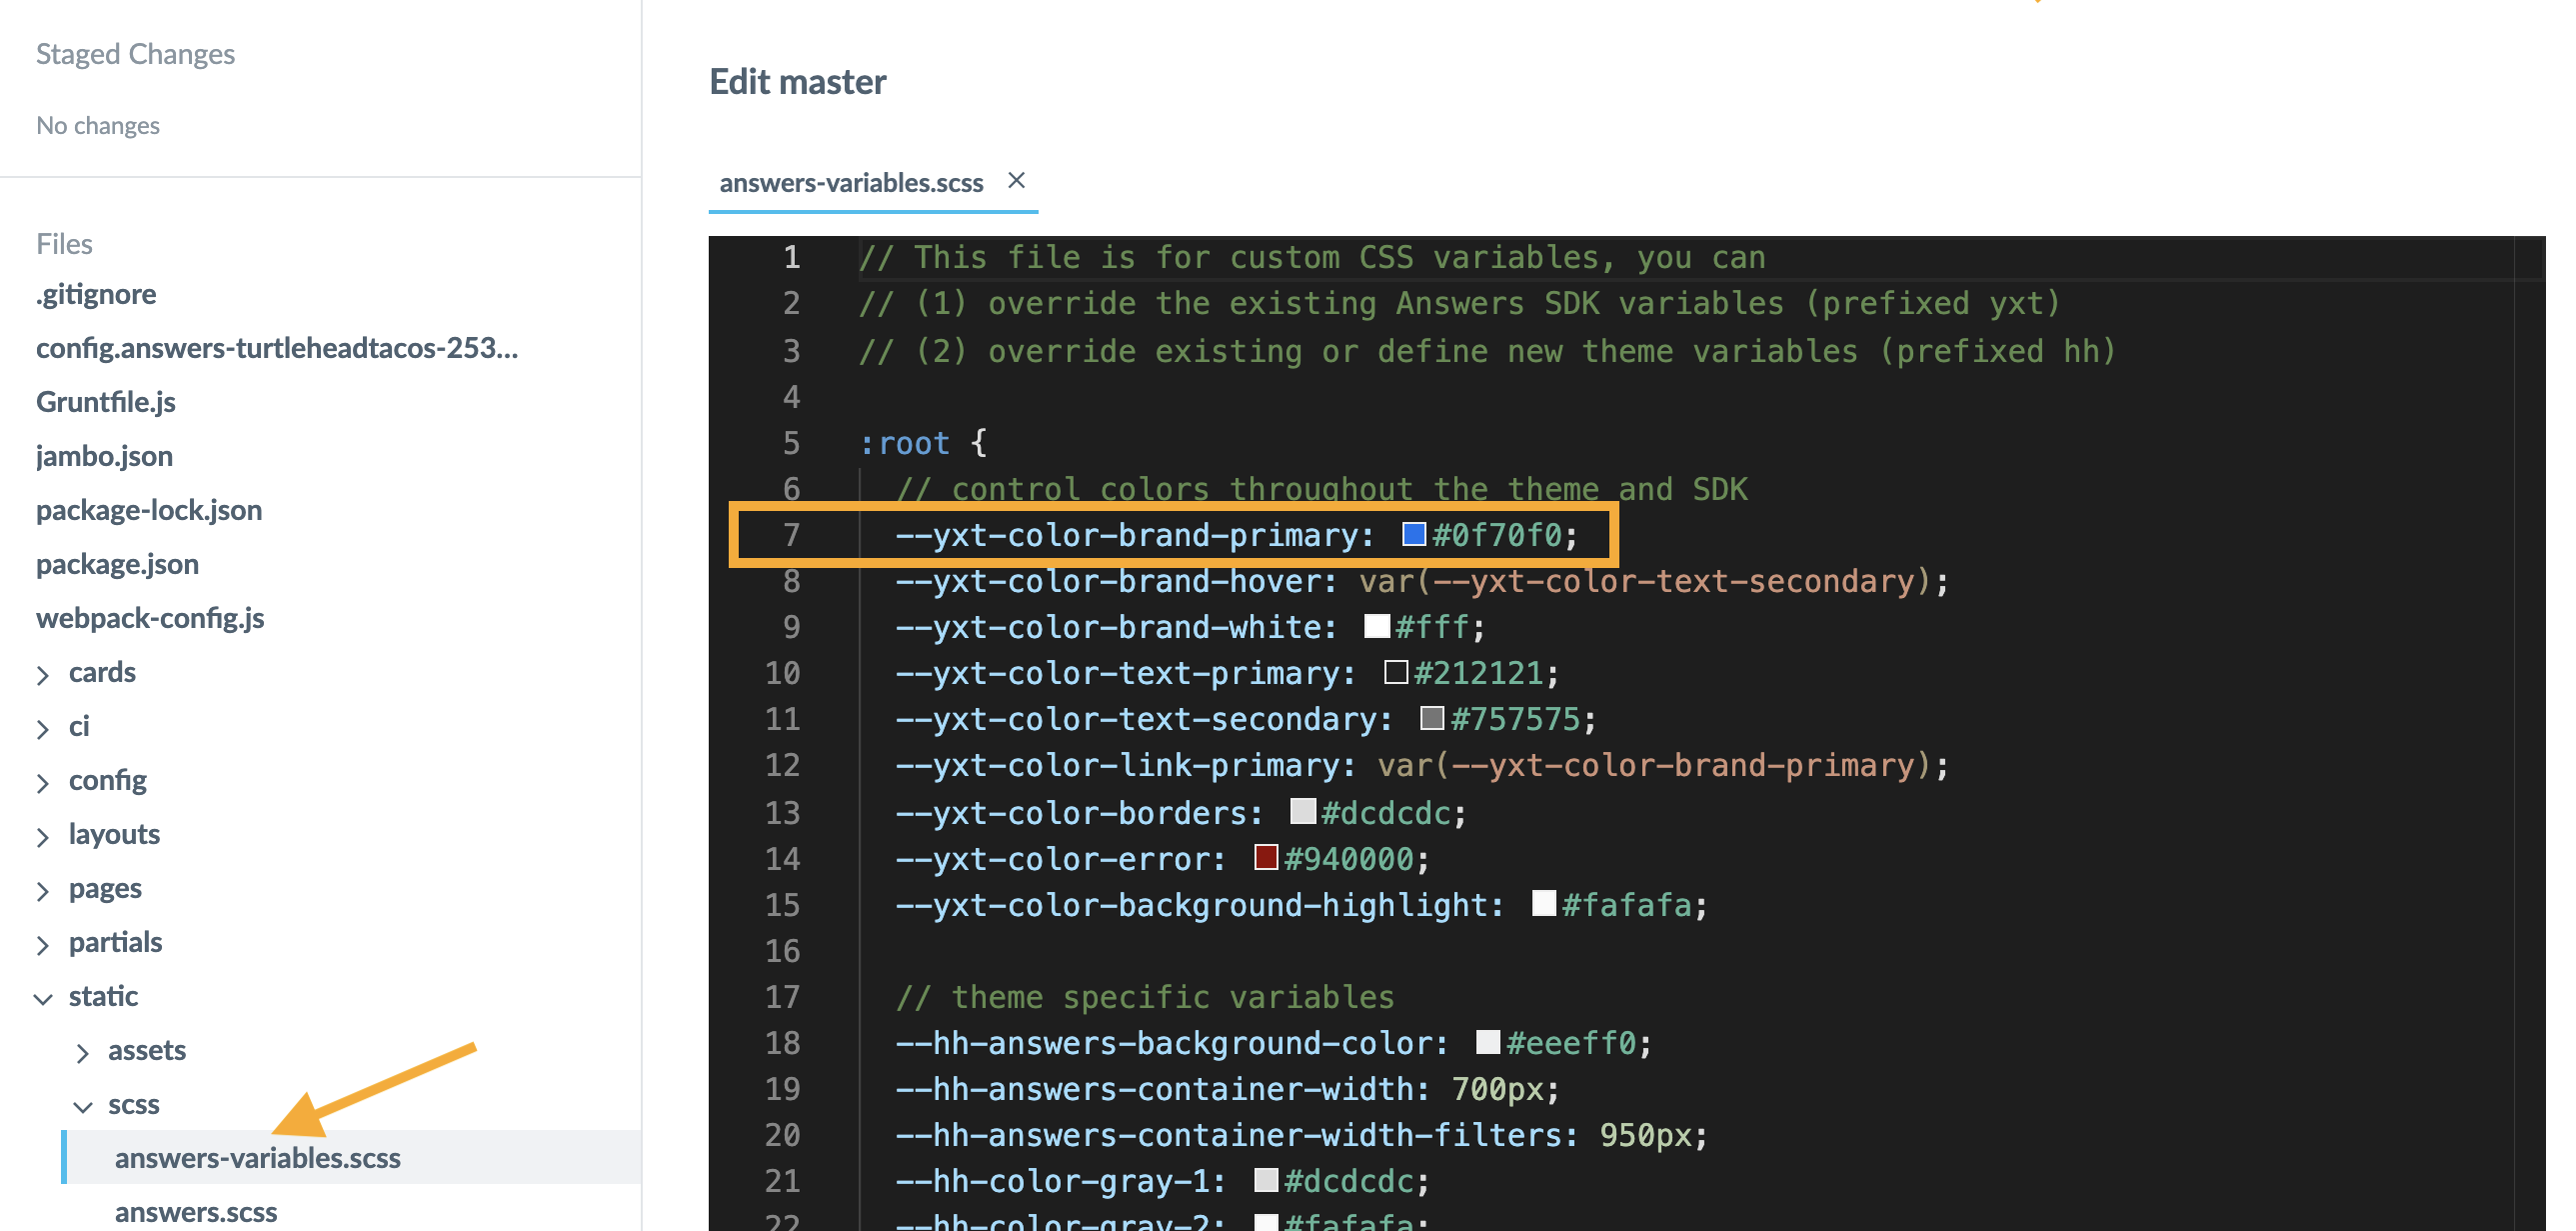
static > scss > answers-variables.scss. This is the file where you can update styling variables referenced throughout the layout files. You’ll learn more about this later and what all of these variables mean.Find the
-yxt-color-brand-primaryand update it to#32a85e. Leave everything else as-is.
Your Live Preview should be ready. As you learned, the initial preview is generated based on your repository before you staged any changes like you did in step 6. Whenever you click out of the code editor, we will automatically initiate a fresh build of your site so you can preview your changes. Click out of the code editor.
If you did step 7, the update should be in progress. Open the console by going to Tools > Console and you should see logs updating you as it builds. Wait for your preview to be ready – the console should look like this when it is. Once it is, hard refresh the preview tab (
cmd-shift-Rin Mac orctrl-shift-Ron Windows). Marvel at your updates! If you don’t see the color change to green, then go back to step 6 and make sure you are updating the right variable.
You can’t forget to commit your changes. Click the “Commit” button at the top left of your code editor and enter a commit message saying “update color-brand-primary” and add a tag to the commit with today’s date, (e.g., “YYYY-MM-DD”). When prompted, click on the link to the Deploys screen in the modal.
Once you’re on the Deploys screen, wait for the build to finish. If unsuccessful, click on the build to see if you can figure out what’s not working. In many cases it could be a missing colon or an invalid input.
Once the deploy completes, you’ll see that the staging pill automatically moved to the most recent commit. Production is not automatic, so you’ll need to trigger a publish. To publish, click the dropdown on the right of the commit and select “Publish to production”.
Click on the staging link at the top of the screen. Enter “test” for your username and for your password, and rerun your search.
Congratulations! You’ve just committed your first Search code!
Don’t worry- you’ll learn more about how to update branding in detail soon – but you’ve successfully made your first change to your frontend!

