Social Approvals | Yext Hitchhikers Platform
If social posts or comments need to be reviewed prior to being published, they can go through the social approvals workflow.
A user’s ability to submit posts and comments for approval, view tasks, and approve posts and comments depends on their user and role permissions .
You can review the permissions required based on use case in the Approval Permissions doc .
Reviewing Social Tasks
Any posts submitted for approval will be listed in the table on the Tasks screen. You can get there by navigating to Inbox > My Tasks.

In order for “My Tasks” to appear in the platform, the account will need to have the Social Approvals account feature set to “On” (Account Settings > Account Features > Approvals > Social Approvals > On).

Both submitters and approvers will be able to see tasks from the Tasks screen. Users will only see tasks in this view that are associated with location entities they have access to, and that they have the approval role/permissions scoped for.
From this screen you will be able to see:
- A preview of the post title or caption
- The task’s due date
- Note: If a task is not approved prior to the due date, the post will be rejected and will not publish. If a user wants to edit and publish the contents of that post, they will need to duplicate it and resubmit it for review.
- The task’s approval status
- The assignee for the task.
- For Social tasks, the assignee is listed as “Unassigned” by default and an assignee can be specified.
The table can also be filtered by entity, assignee, creator, status (open, closed), approval status, and due date. Upon opening the page, the table will be filtered down to posts that the current user is collaborating on that have an “Open” approval status.
When you click into a task, a panel appears on the right side of the screen outlining the details of the post and approval workflow. There are 4 tabs to utilize when reviewing a post: Task Details, Workflow Details, Conversations, and Activity Log.
Task Details
From the Task Details tab of a Task, you can review the content of a post and what is being submitted for approval whether it is post content or a comment. There is a preview at the top where you can see what the post and comments will look like.
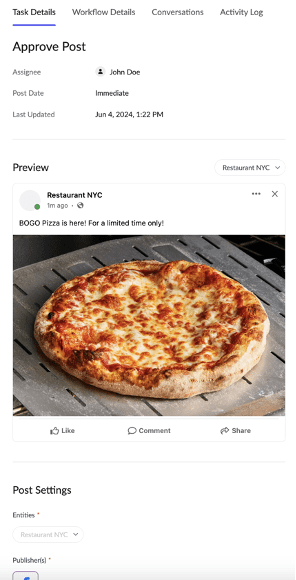
Depending on how an approver feels the post or comment looks, they can:
- Approve or Reject the task (using the buttons at the bottom of this tab)
- Archive the task. This will delete the task and post.
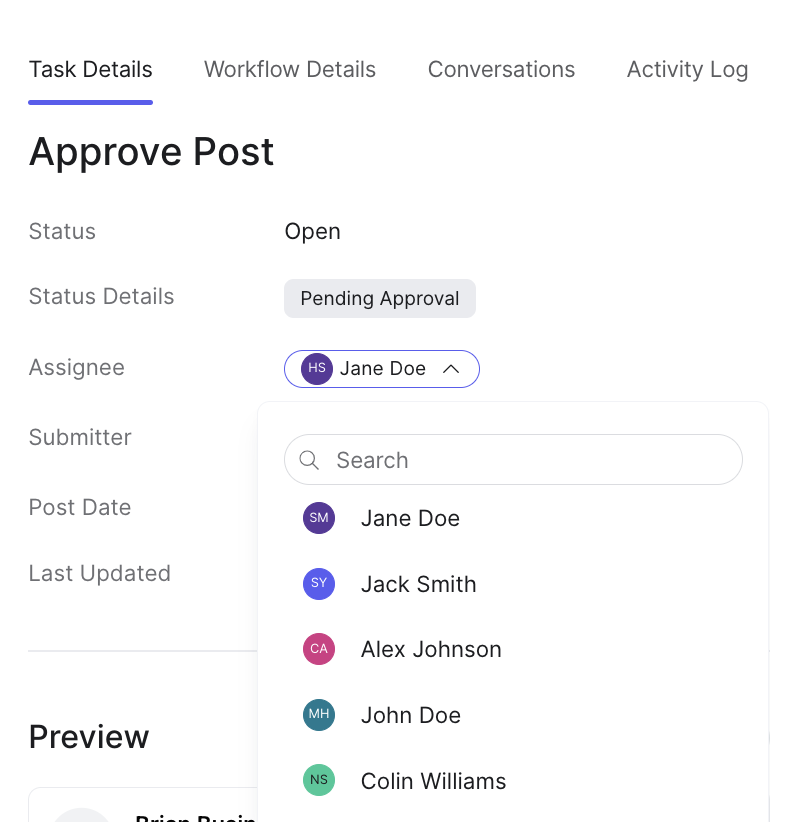
From the Task Details tab you can also set an assignee. Any social task will default to be unassigned until an assignee is selected using the dropdown. Setting an assignee ensures that the right and relevant person is accountable for approvals, reviews, or edits. These users will also be the individual who receives task notifications.
Conversations
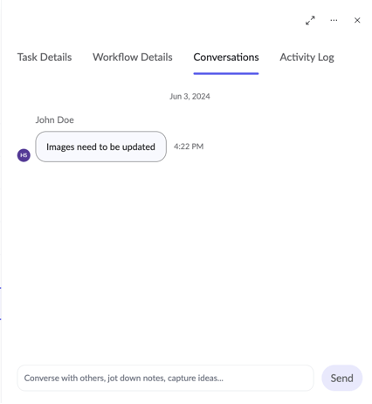
Collaborators can give their input in this tab. Users can input messages with their ideas or feedback for a task for the creator to see and interact with. The creator can then respond directly in the chat.
Activity Log
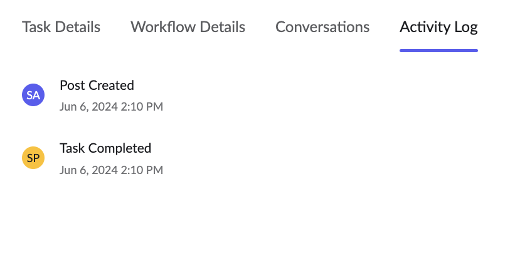
Whenever a post is updated, the details are captured in the activity log along with the user who took the action. Hover over the initials bubble to see the user’s full name.
Post Approvals
Submitting a Post for Review
When creating a post for approval, the process remains the same as described in the Add a Social Post section above.
However, when you finish creating the post, the post preview in the Calendar view will have the status listed as “Pending Approval”.
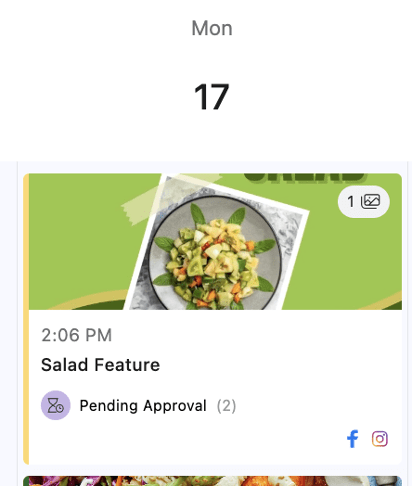
You can easily view this task from the calendar by selecting the post and clicking the … icon in the top right corner. More on this next!
![]()
Reviewing a Post
From the Task Details tab, you can review the content of a post. There is a preview at the top where you can see what the post will look like. Similar to viewing posts in the calendar, you will also be able to toggle between entities and publishers to see how the posts may vary visually.
Below the previews, all of the post settings that were filled out in the Create a Post modal will be viewable.

Approving or Rejecting a Post
Posts that are meant to be published to multiple entities must be approved by users who have scope to action on all of the entities. If a user has permission to approve posts for only one entity, but a post that they are a collaborator on has multiple entities, the user will not be able to approve it.
Currently, any user with “Approve” permissions scoped to the location applied in the post will be added as a “Collaborator”, or “Approver”, for the Social Post Approval task. There is currently a maximum of 30 collaborators that can be added to a single task. We first assign users that have “Approve” access at the individual location level, since we assume these are the target approvers for any post where location is specified. We then assign the rest of the users with “Approve” access.
Note: The users with the built-in roles that grant “Approve” access by default (e.g., Account Manager, Full Control) will automatically be added as collaborators on a task if their entity scoping aligns to the entities the post is created for.
Once a post is approved or rejected, the task is marked as “Complete”. When you click on a completed post in the table, you will also see “Approved” or “Rejected” in the “Status Details” field at the top of the panel.
Approved Posts
If the approved post was created and scheduled to be posted immediately, it will automatically be published. If it was scheduled for a later date, the post will be marked as scheduled in the Calendar.
Rejected Posts
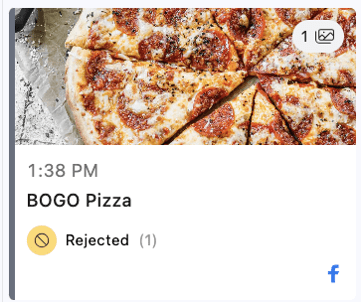
In the Calendar, rejected posts are given a “Rejected” status.
Editing a Post Approval Task
If a post that is submitted for review needs to be updated or changed, you can edit it directly from the Tasks screen. In the Task Details tab for a task, there is an Edit Post option after selecting the ... icon in the top right corner.
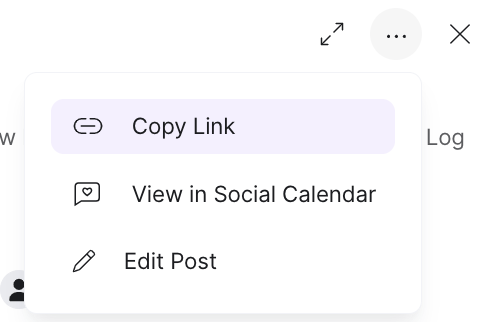
You can also scroll down to the Post Content section of the tab and click on the Edit button if you want to edit a task.
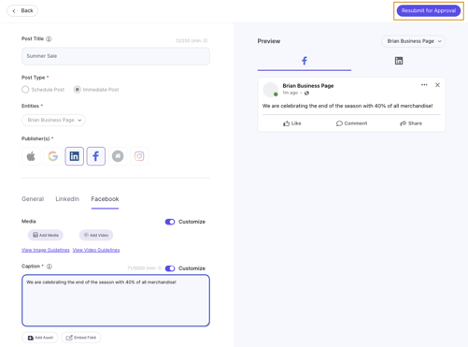
These actions direct you to a page where you can edit the post. From here you can edit fields like:
- Post title
- Post type and post date/time
- General and publisher-specific content
- Media
- Captions
Once changes are made, you can Resubmit for Approval using the button in the top right corner.
Comment Approvals
Submitting a Comment for Review
When submitting a comment for approval, a user with “Create with Approval” permissions will still create a comment within the comment inbox as mentioned in the comments inbox section here.
However, the “Send” button will say “Send for Approval”, and when the user clicks this, the comment within the thread of the post will have “Pending Approval” next to it and a task will be created within the Tasks inbox.

Reviewing a Comment

From the Task Details tab, you can review the content of a post. There is a preview at the top where you can see what the post will look like. Below the post, there will be a preview of the comments and comment threads on the post. You will see the comments that have the open approval task highlighted with the option to approve or reject them.
The Workflow Details, Conversations, and Activity Log are similar to when you go through the post approvals flow. The only difference is that the workflow details page has different steps listed that are relevant to the comment approval process.
Approving or Rejecting a Comment
You can approve or reject a comment by selecting one of the buttons at the bottom of the task details tab within a task.
If an approver chooses to reject a task, there is the option to leave feedback in the Rejection Feedback modal. Rejection feedback will be added to the top of the Task Details section when the submitter opens the task, and will also be added as a comment in the Conversations tab.
Once a comment is approved or rejected, the task is marked as “Complete”. When you click on a completed post in the table, you will also see “Approved” or “Rejected” in the “Status Details” field at the top of the panel.
Approved Comments
Approved comments will automatically be posted on the publisher. The Pending Approval status next to the comment will no longer appear in either the task details tab or the comments inbox.
Rejected Comments
Rejected comments are given a “Rejected” status within the task details preview as well as in the comment inbox.

At the top of the rejected task, the rejection feedback will also be displayed.
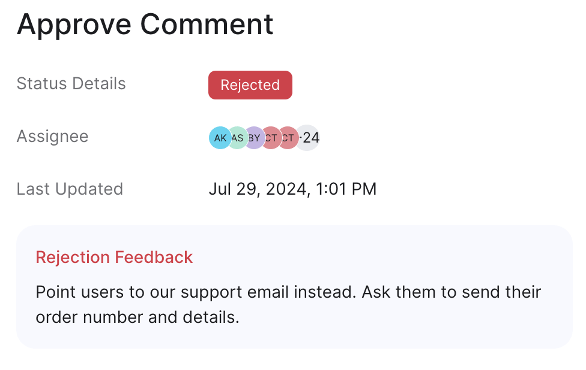
Note: Editing comments from the approvals page is not yet supported. Users will have to create a new comment and resubmit it if they want to apply any feedback.
Task Notifications
By default, users will receive in-platform and email notifications for updates to tasks they are assigned to. This means the any selected assignees will be notified of a new task that has been assigned to them, any comments left on the task, and when a task is approved or rejected.
You can always toggle on or off notification settings from Account Settings > Notifications.


