Step 5: Build Your Connector
After setting up your crawler, you can configure your connector. The connector will ingest the raw HTML that the crawler pulls in from your site and use it to create or update entities in the Knowledge Graph.
To start, navigate to Knowledge Graph > Connectors. Click Add Connector in the upper right.

Connector Settings
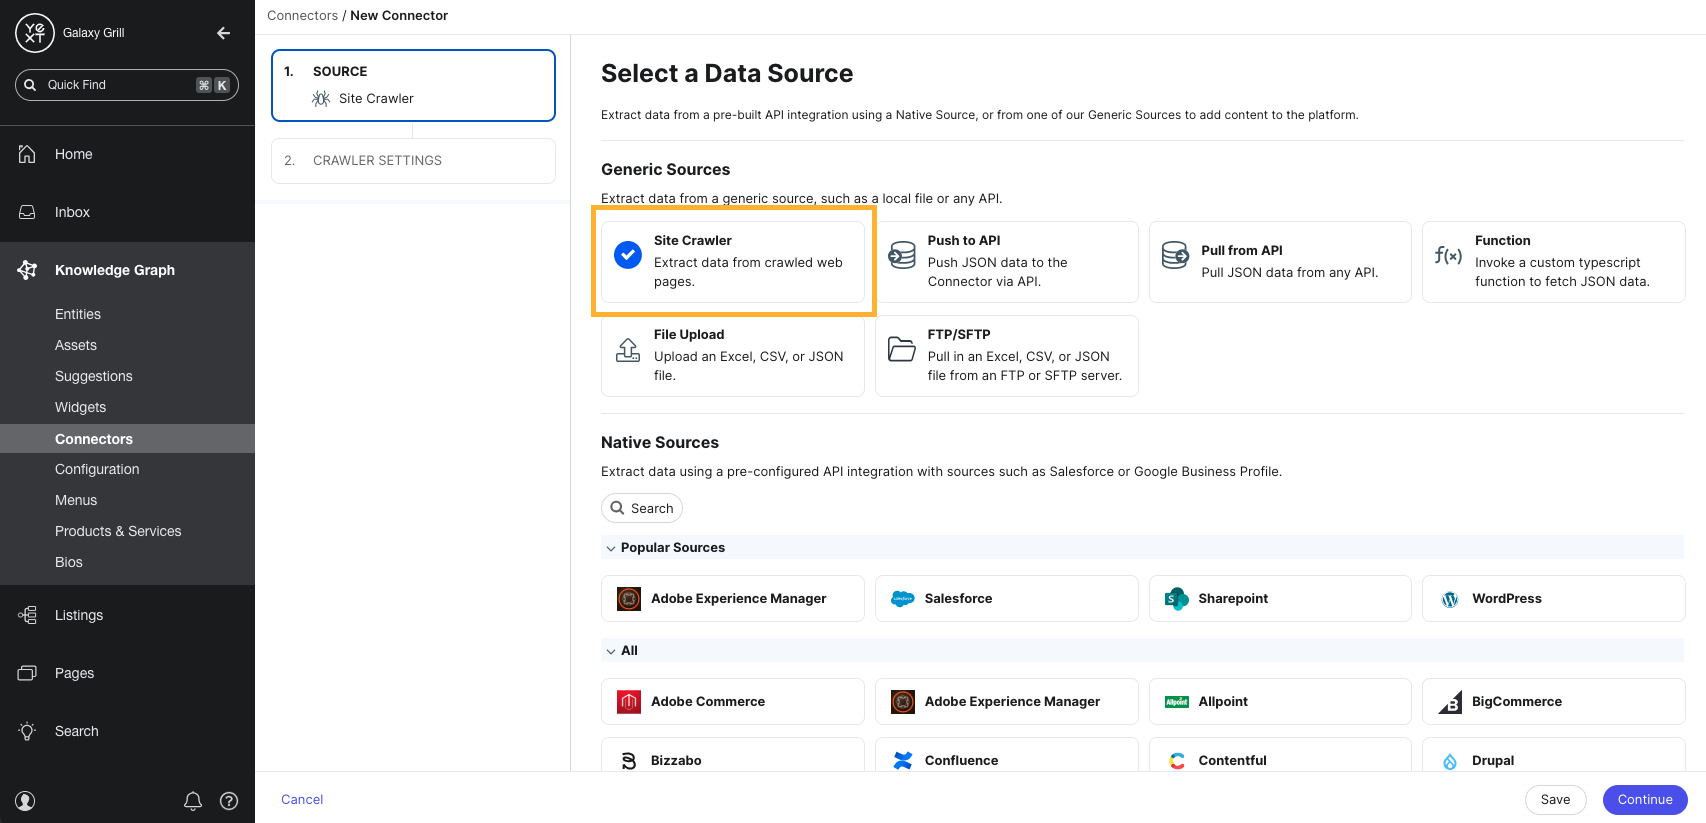
- The first step in the Connector Settings flow is to Select a Data Source. Choose the Site Crawler option.
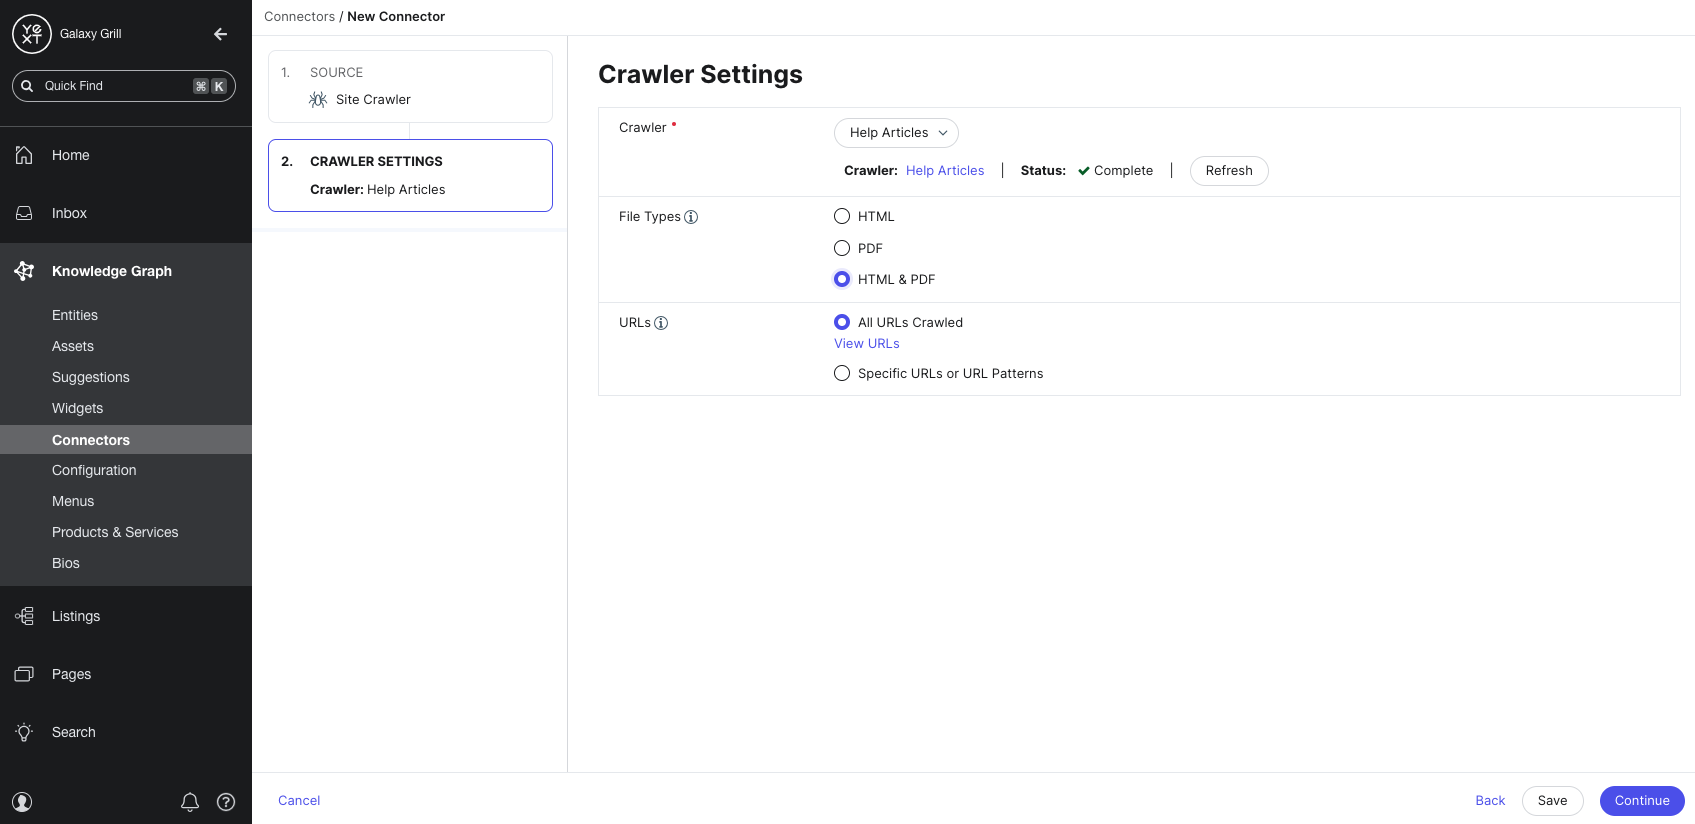
- On the Crawler Settings step, select the crawler you created from the Crawler dropdown menu. Then, select the file types and URLs present in your crawl that you want to use to bring data into the Knowledge Graph. (Note that these settings don’t have to match your crawler settings — these options allow you to further narrow the data brought in by your crawler.) When finished, click Continue.
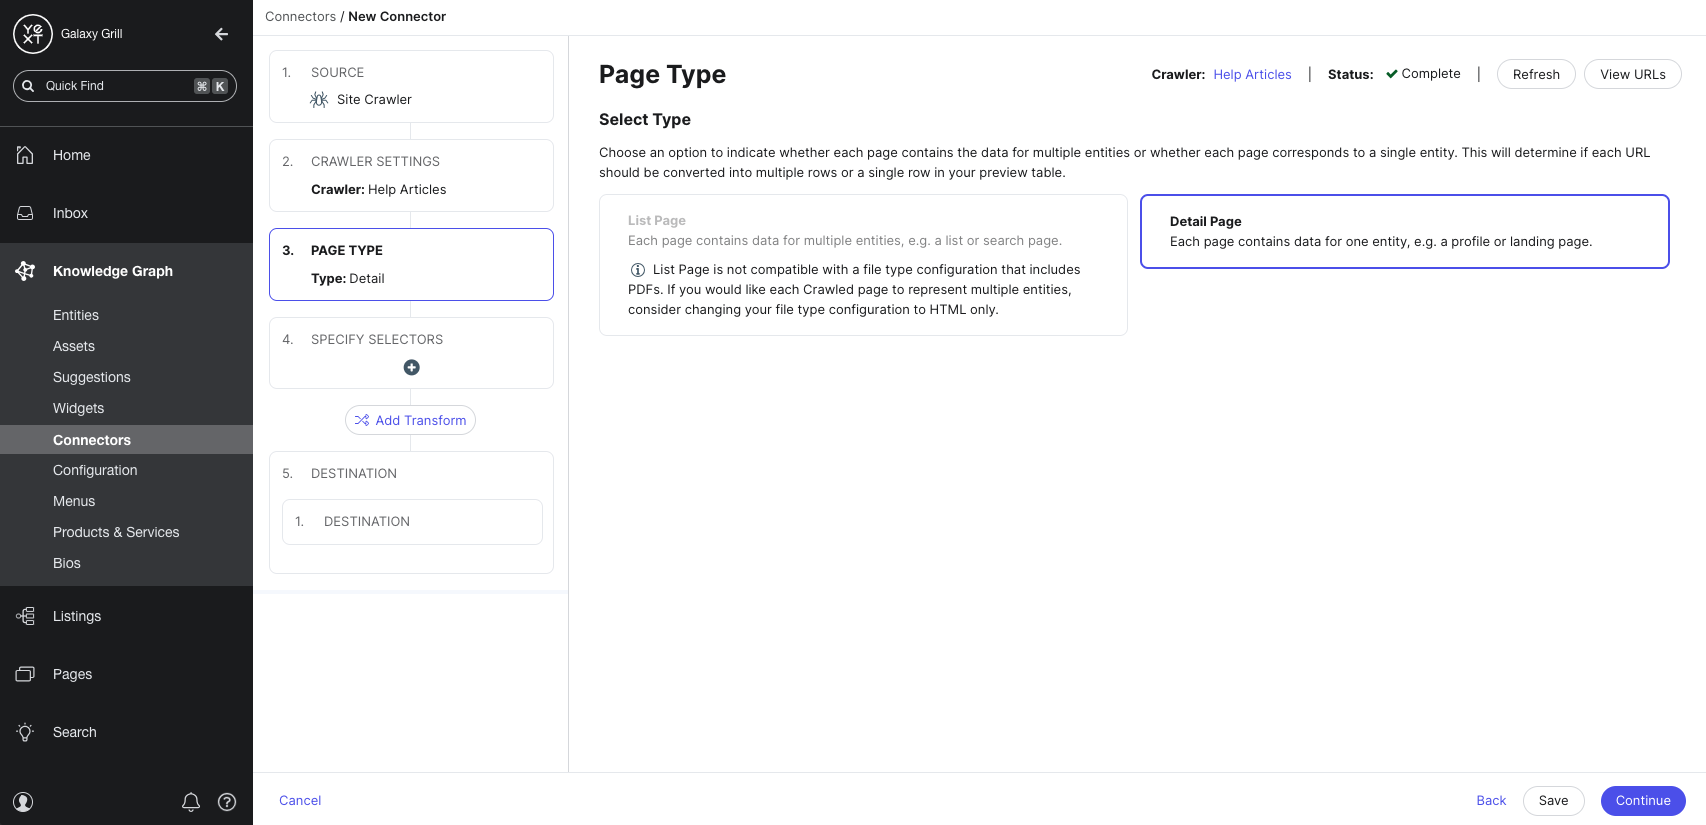
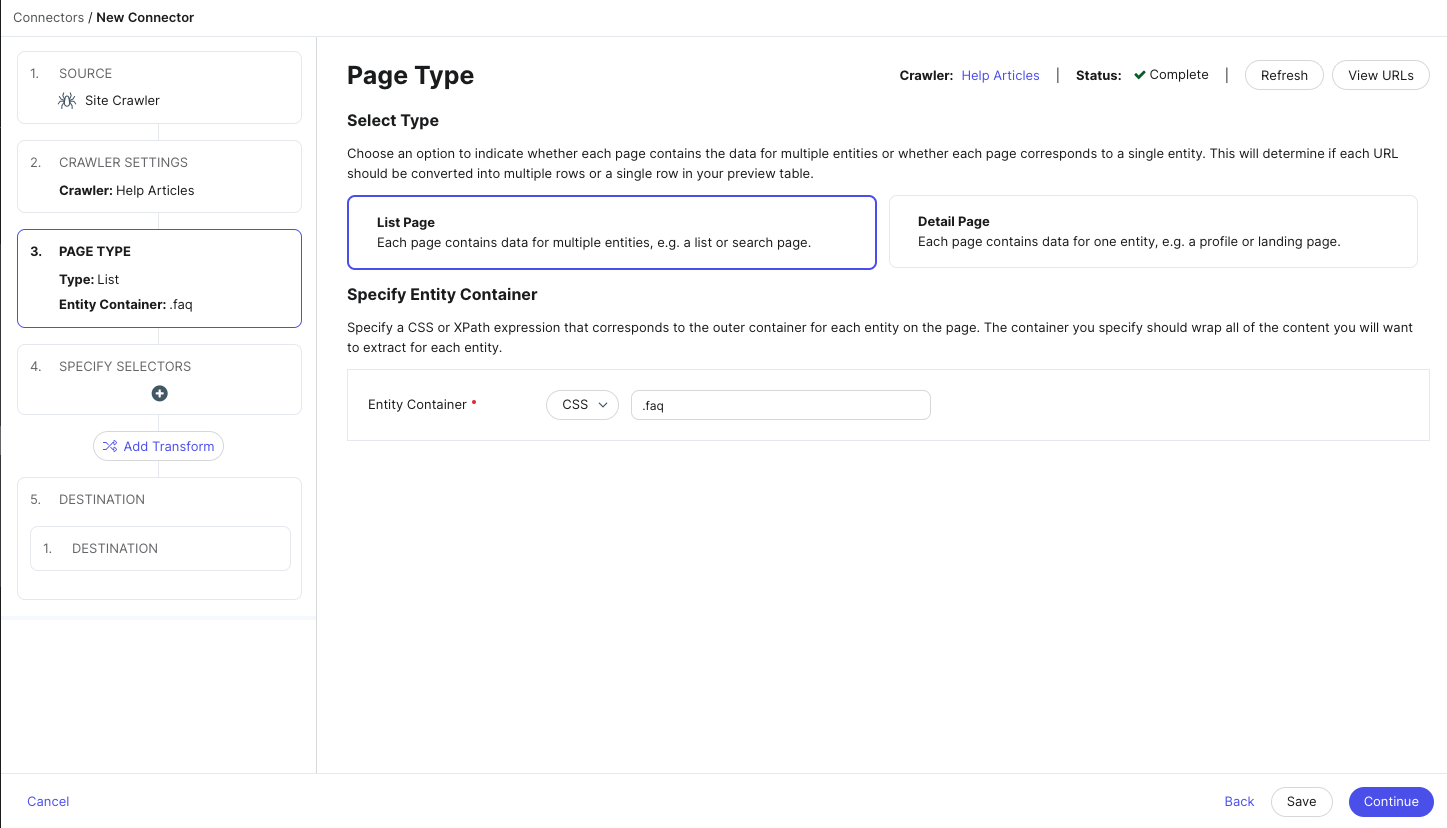
- Next, choose the Page Type for each of your URLs that will be crawled. This setting indicates whether each URL should correspond to one entity in the Knowledge Graph, or whether each URL contains the data for multiple entities.
Choose Detail Page if each URL contains data for one entity. An example of a detail page would be a location page for a single restaurant or business location.
Choose List Page if each URL contains data for multiple entities. Examples of a list page would be an FAQ page (where each question should be its own entity), or an employee directory (where each employee should be its own entity).
Note that list pages are not compatible with a file type configuration that includes PDFs. If you would like each crawled page to represent multiple entities, consider changing your file type configuration to HTML only.
- If you selected List Page as the page type, you will need to provide a CSS or XPath entity container that points to the container for each entity on the page.
Each object extracted from your page based on that entity container will be treated as a separate entity.
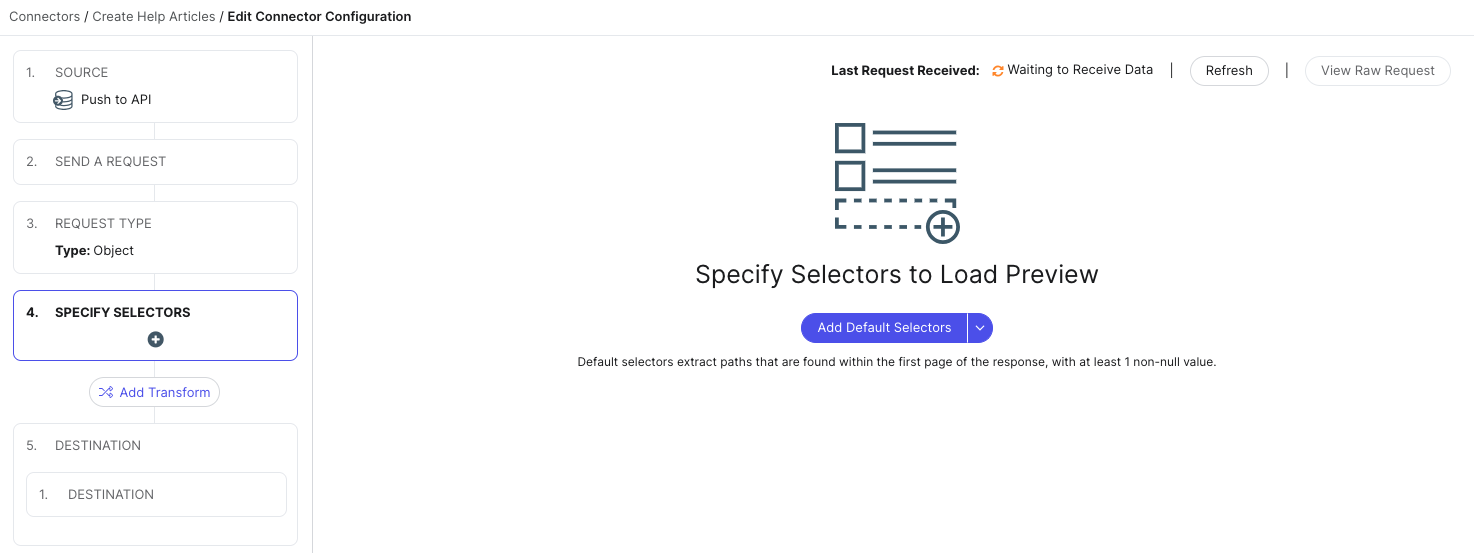
- Next, add selectors to specify which data to extract from your crawled pages. These will ultimately correspond to the fields on any entities you create or update with your crawled page data.
Click the Add Default Selectors button to add a set of default selectors, or click the dropdown arrow and click Add Selector to add your own selectors manually.
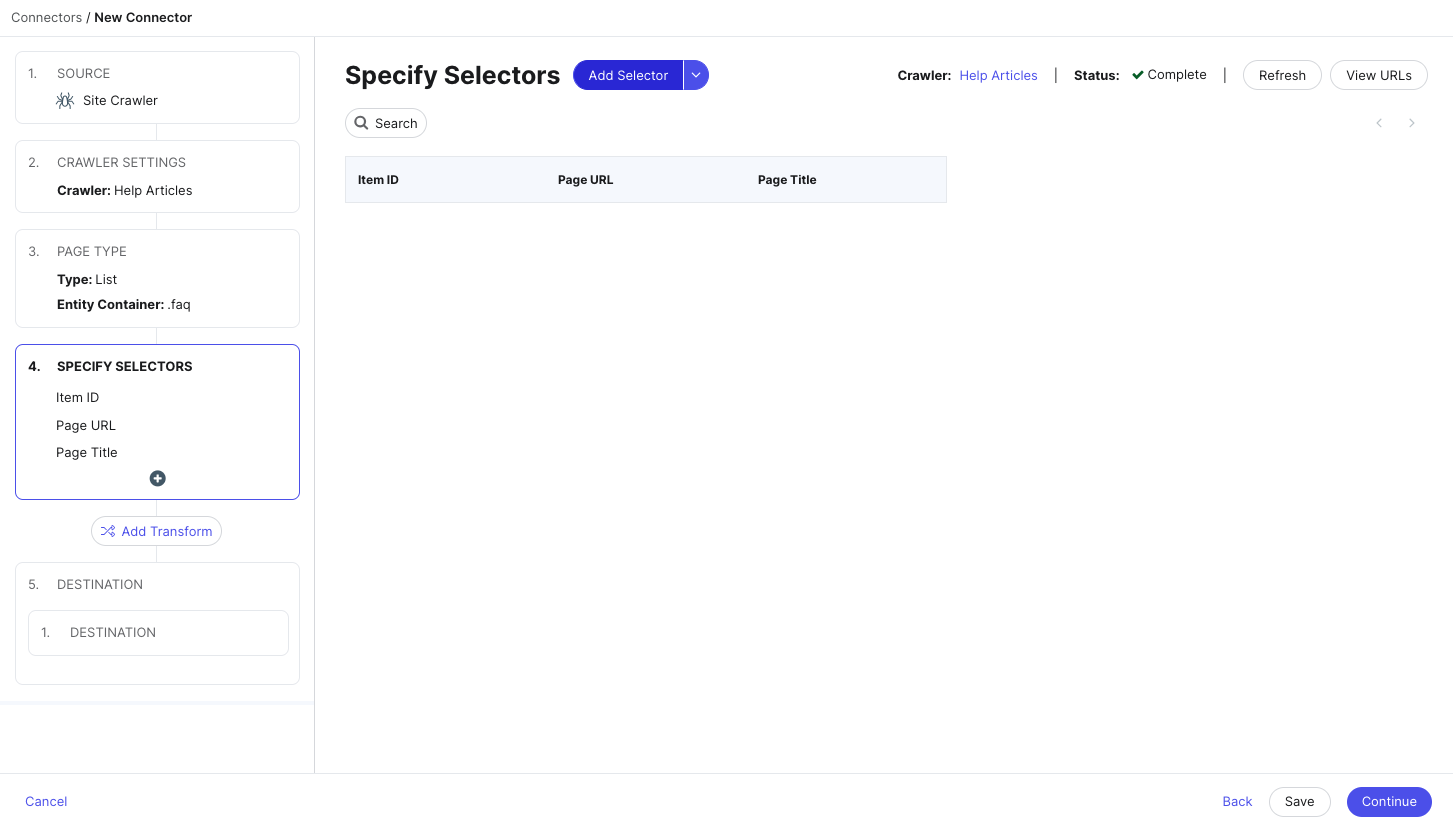
If you’ve chosen to add default selectors, these are the selectors you may see, depending on the data crawled from your pages:
- Page ID: A unique identifier for each URL. If your Page Type setting is set to Detail Page, where each page equals one entity, the Page ID will be automatically selected and mapped to the Entity ID field.
- Item ID: A unique identifier for each item on a List Page. If your Page Type setting is set to List Page, where each page contains data for multiple entities, the Item ID will be automatically selected and mapped to the Entity ID field.
- Page URL: The URL of the page that was crawled.
- Page Title: The title of the crawled page as defined by the
<title>HTML element. - Cleaned Body Content: All of the text from the page. This is commonly used for the body of a blog post, help article, or document.
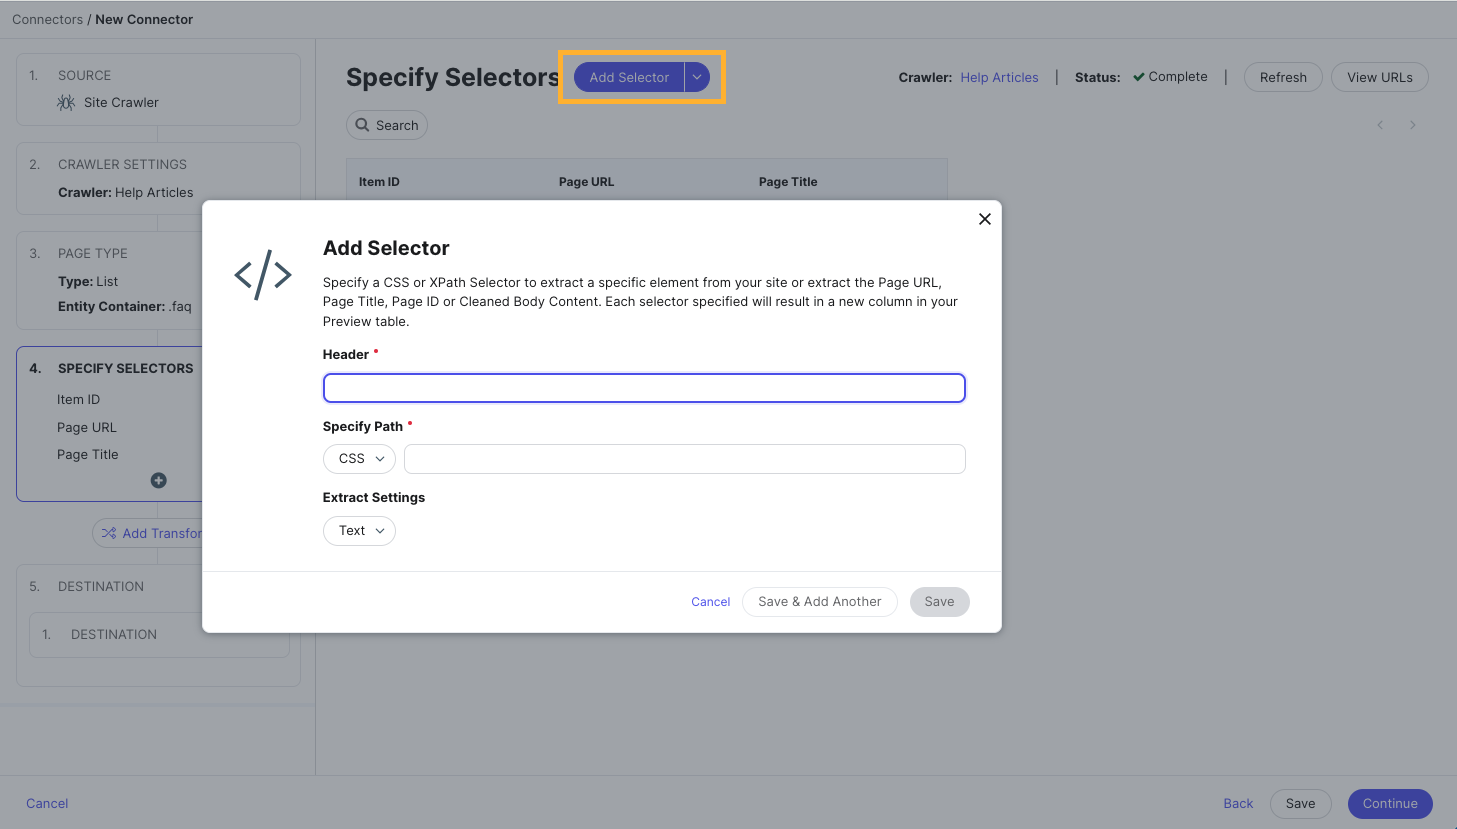
- To add other selectors manually, click the Add Selector button at the top of the page. You can also modify any of the default selectors by clicking on them.
Each selector needs a header (for the column or field name it should map to), and a path. You can choose whether to specify a CSS or XPath selector, and then enter the relevant selector from the source data of your crawled pages.
Then, choose how the content under your specified selector should be ingested: text, HTML, image URL, URL, or another type of HTML attribute.
To learn more about CSS Selectors, check out the following resources:
- https://www.w3schools.com/cssref/css_selectors.asp
- https://devhints.io/css
- https://try.jsoup.org/
- This is a great tool to test with, as you can enter the URL of your site to pull in the HTML, and then you can see a list of all of the CSS tags for the various elements.
To learn more about XPath Selectors, check out the following resources:
- Next, you can add transforms by clicking the Add Transform button in the Connector Settings flow on the left.
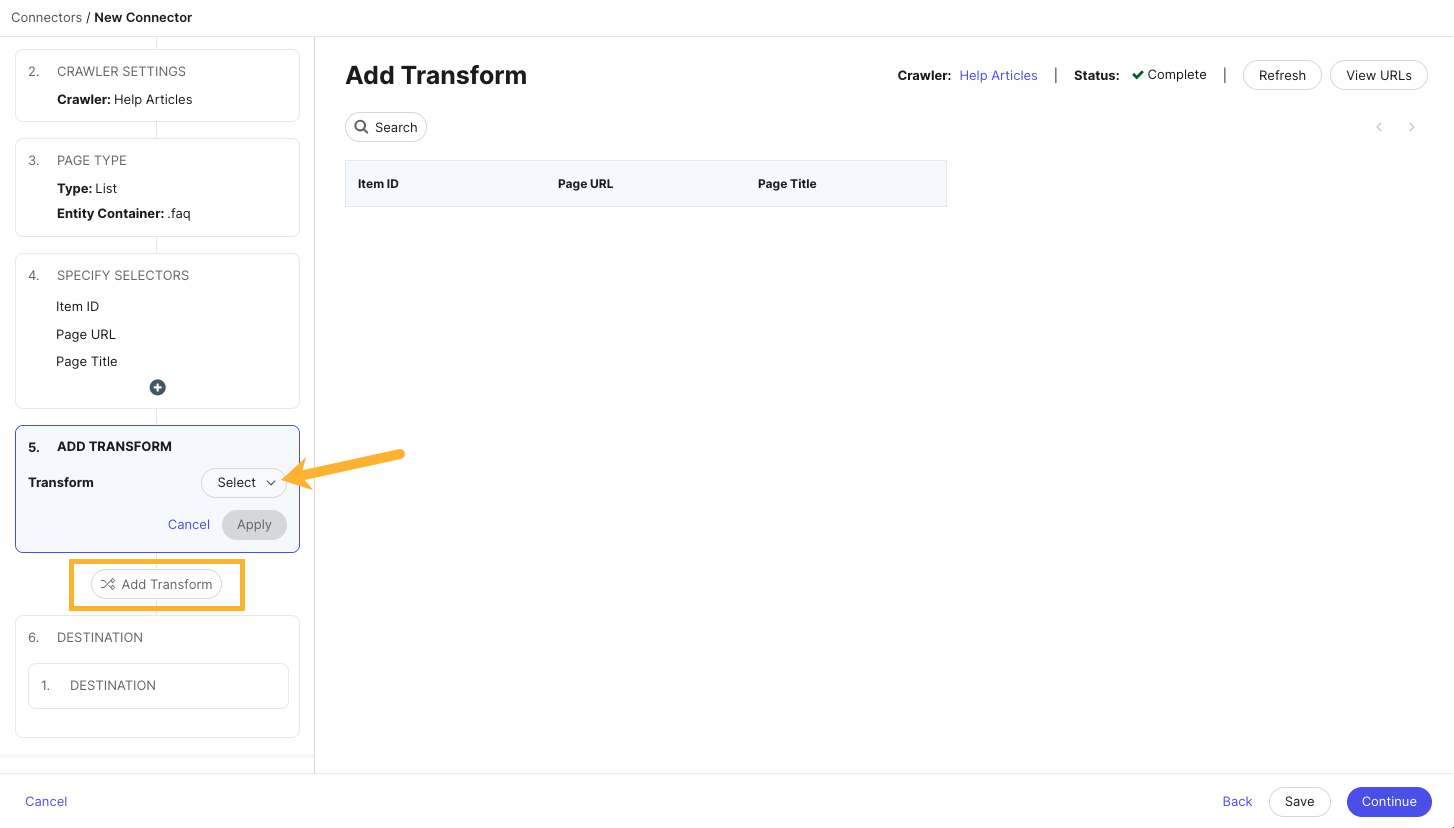
Transforms allow you to manipulate and format data ingested by your connector. From the dropdown menu, choose the transform you’d like to add, and which column you’d like to apply it to.
For more details on transforms, visit the Transforms unit in the Data Connectors module, or see the Transform Options reference.
- Next, choose the Destination for the data ingested by the connector. To create and update entities in the Knowledge Graph, select Knowledge Graph as your destination.

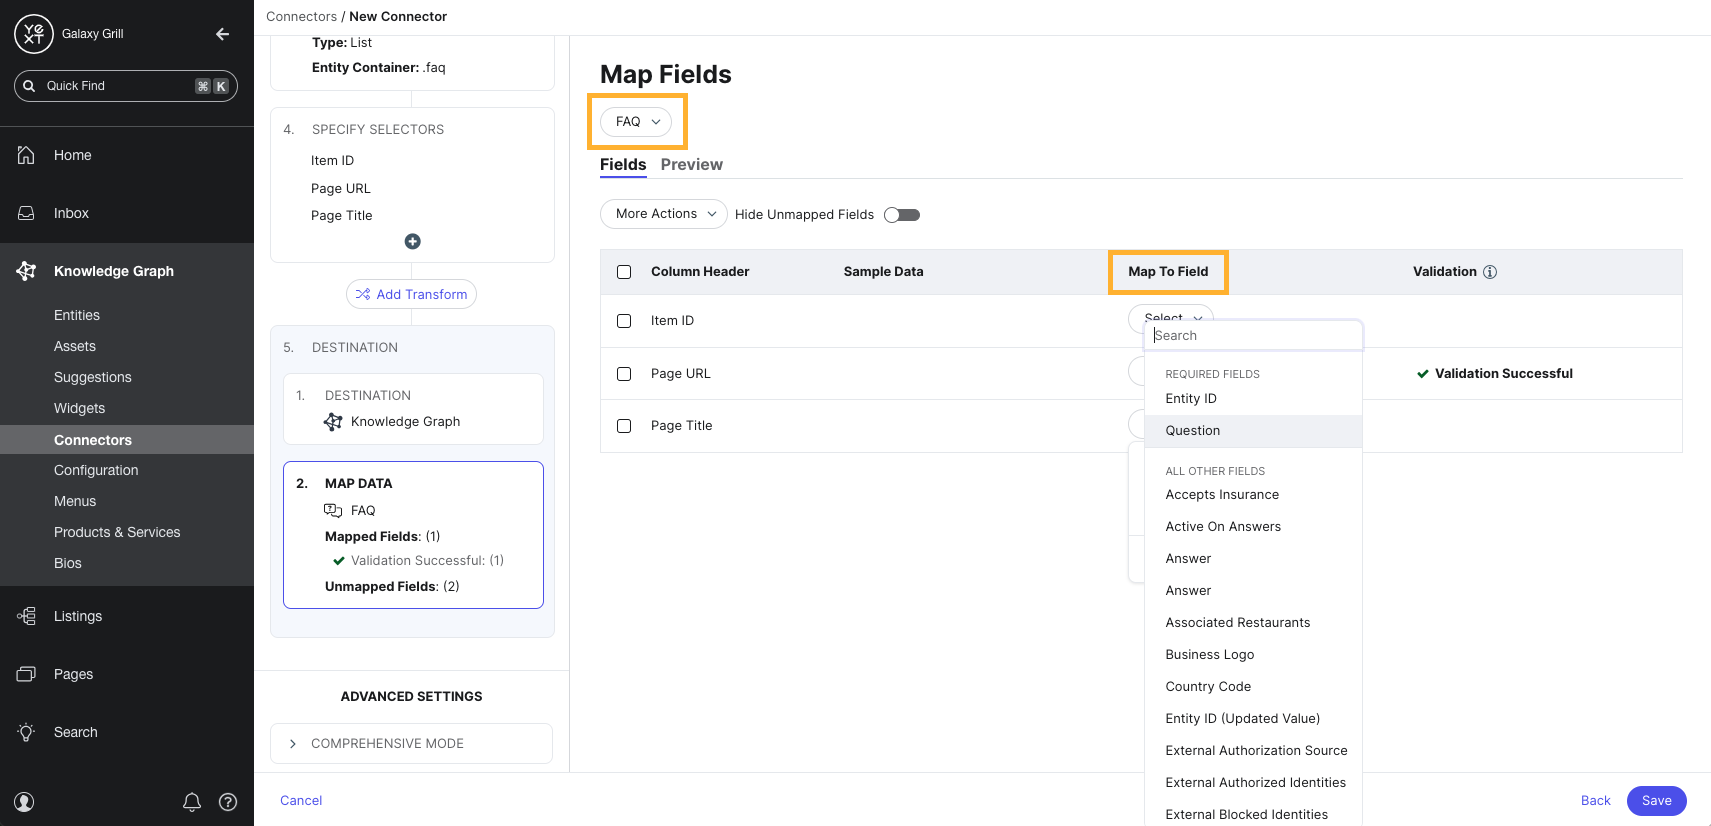
- On the Map Fields step, map the columns in the data set ingested by the connector to fields on your entities in the Knowledge Graph.
In the dropdown menu at the top of the page, select the proper entity type for the ingested data. You should create one connector per entity type.
Then, in the Map to Field column, select the entity field that the data should be mapped to. Some columns may be mapped by default.
- When all data columns are mapped to fields, click Save in the lower right. You’ll then be prompted to enter a name for your connector (the connector ID will populate automatically from the chosen name).
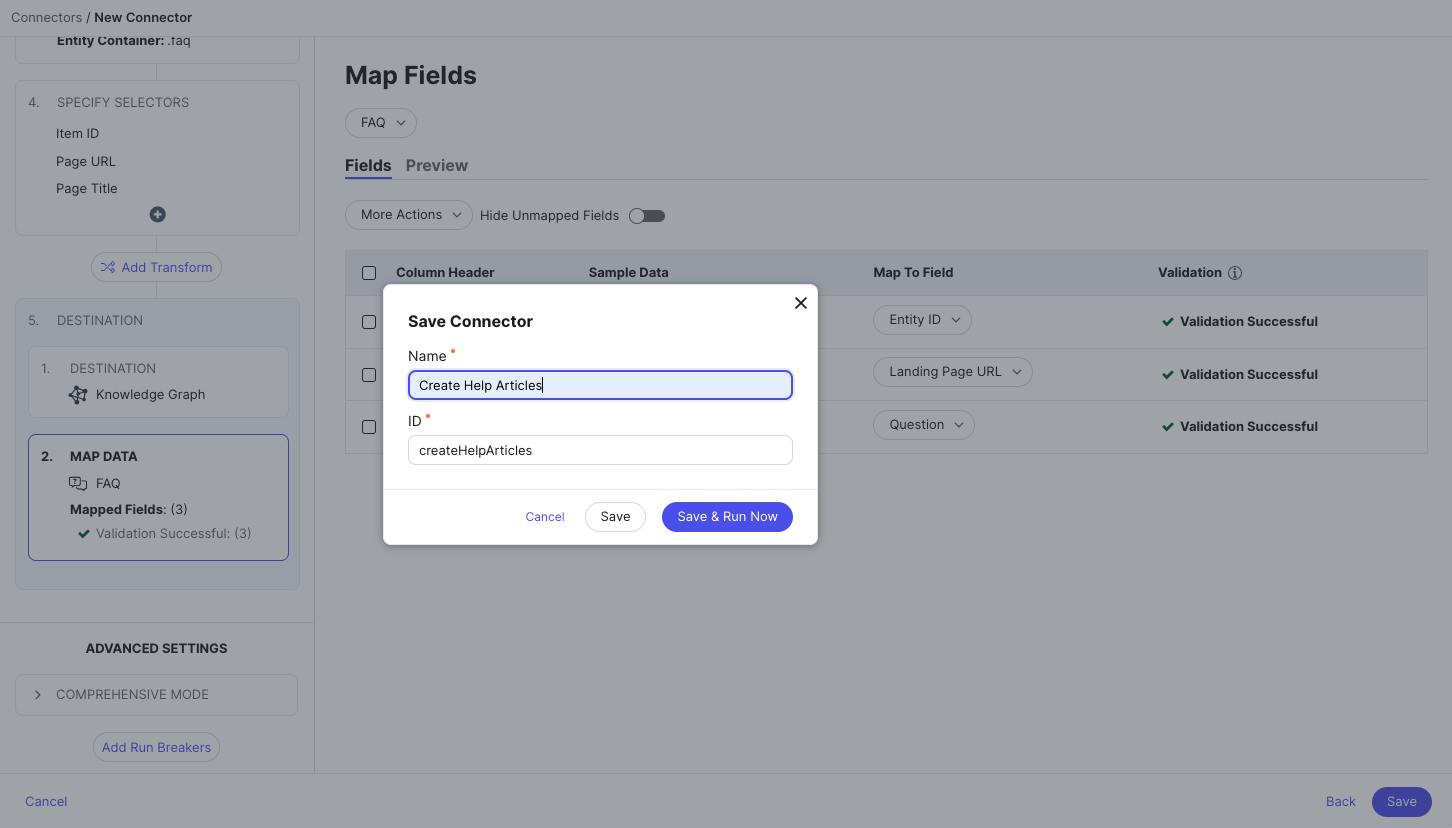
If you want to run your connector now and pull data into the Knowledge Graph, click Save and Run Now. Otherwise, click Save.
When you run your connector for the first time, you’ll be prompted to choose the run mode.

- Default mode: The connector will create new entities for all data ingested, and will update data on any existing entities.
- Comprehensive mode: This functions like default mode, except that any entities already in your Knowledge Graph that are not reflected in the data ingested by the connector will be deleted from the Knowledge Graph.
- Deletion mode: All entities already in the Knowledge Graph that are reflected by the data ingested by the connector will be deleted from the Knowledge Graph.
- Dry run: Check this box to test your connector. No data in your Knowledge Graph will be changed, added, or removed, but you will be able to see the changes that would have been made by the connector.
For more information on connector run modes, see the Run Modes reference.
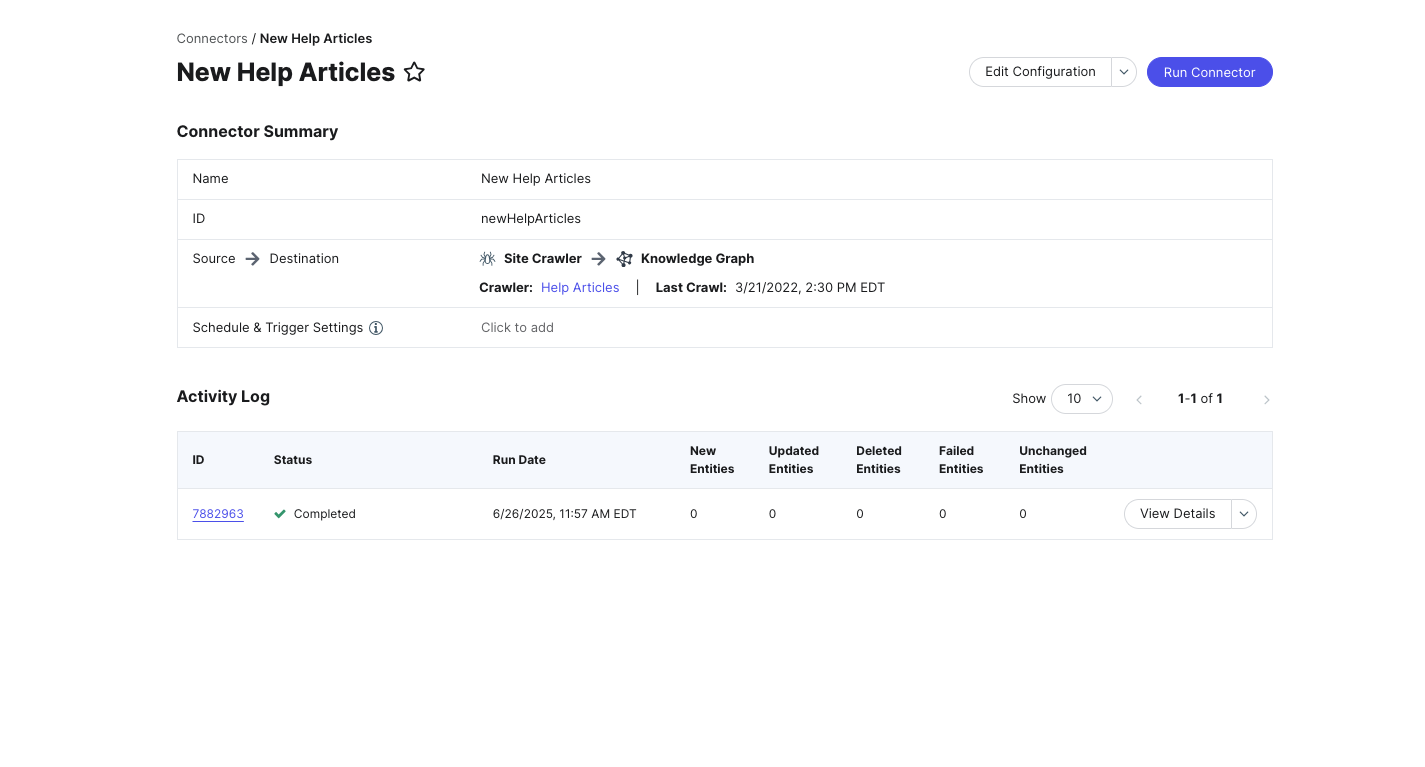
- When you run your connector, you’ll be brought to the connector Summary. Here, you can monitor the progress of the run, and see any entities that were created or updated.