

Step 3: Set Up Templates
When you send a review invitation using Yext Review Generation, the invite will be formatted according to a template. This template is essentially the design of the email or text message, and it will be populated with relevant information from your brand and the entity for which a review is being requested.
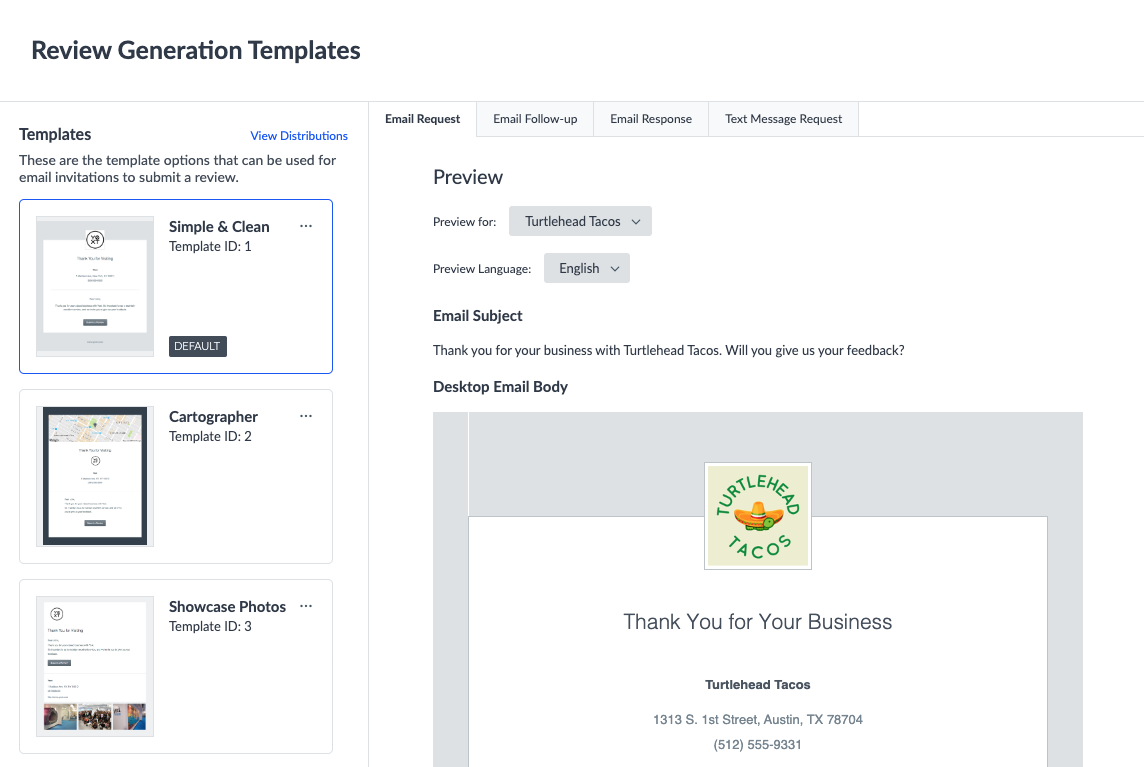
We offer a handful of built-in templates to get you set up quickly. The Simple & Clean template shown below is set as the default automatically. You can also choose a different default template or customize your own template using HTML.
Additionally, if you are collecting first-party reviews, you have the option of using a built-in review collection page or customizing your own.
Overview of Templates
To view and edit your invitation templates, navigate to Reviews > Generation > Templates. Here, you will see your existing invitation templates and previews for each template. As you can see by the tabs across the top, there are four different types of invitations associated with each template:
- Email Request
- Email Follow-up (you can decide whether to enable follow-up emails and configure additional settings)
- Email Response
- Text Message Request
Browse each template and view a preview for each associated invitation type.
Configure Templates
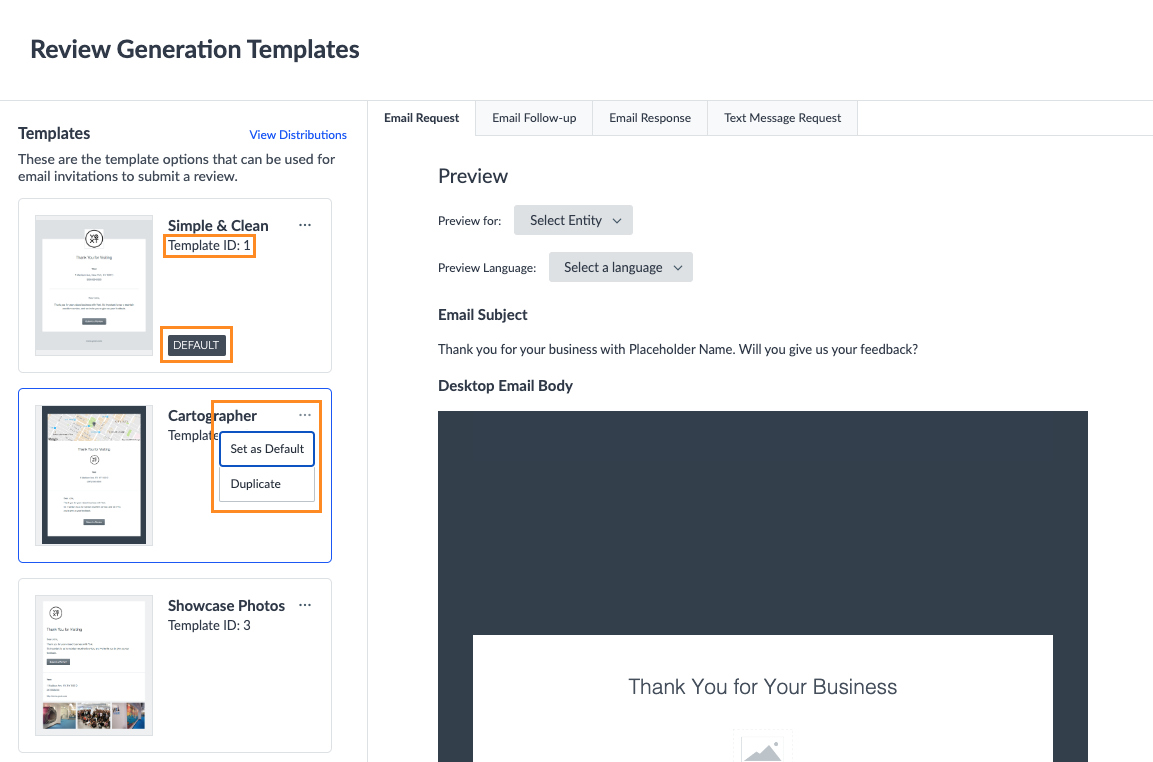
You have flexible options when configuring your review generation templates. There will always be a designated default template, which will be used if a template is not specified on invitations. You can also configure multiple templates and choose between them for different invitations. If you would like to automatically use multiple templates for your invitiations, you can create a review distribution to specify the percentage of invites you’d like to send with each template.
To set a template as your default, click the three dots in the top right corner of a template in the left sidebar and click Set as Default.
Customize Templates
To customize templates, you can either add a new template or duplicate and edit an existing one. To create a new template, scroll to the bottom of the template list and click Add Custom Template. To duplicate a template, click the three dots in the top right corner of a template and click the Duplicate button.
Once you have a template to edit, you can customize it by selecting it and clicking the Edit Template button in the bottom right corner. The HTML of the template will be revealed, and you can edit this HTML to customize the template in any way you would like. All fields that can be embedded in the template will be visible in the Template Glossary in the right sidebar.
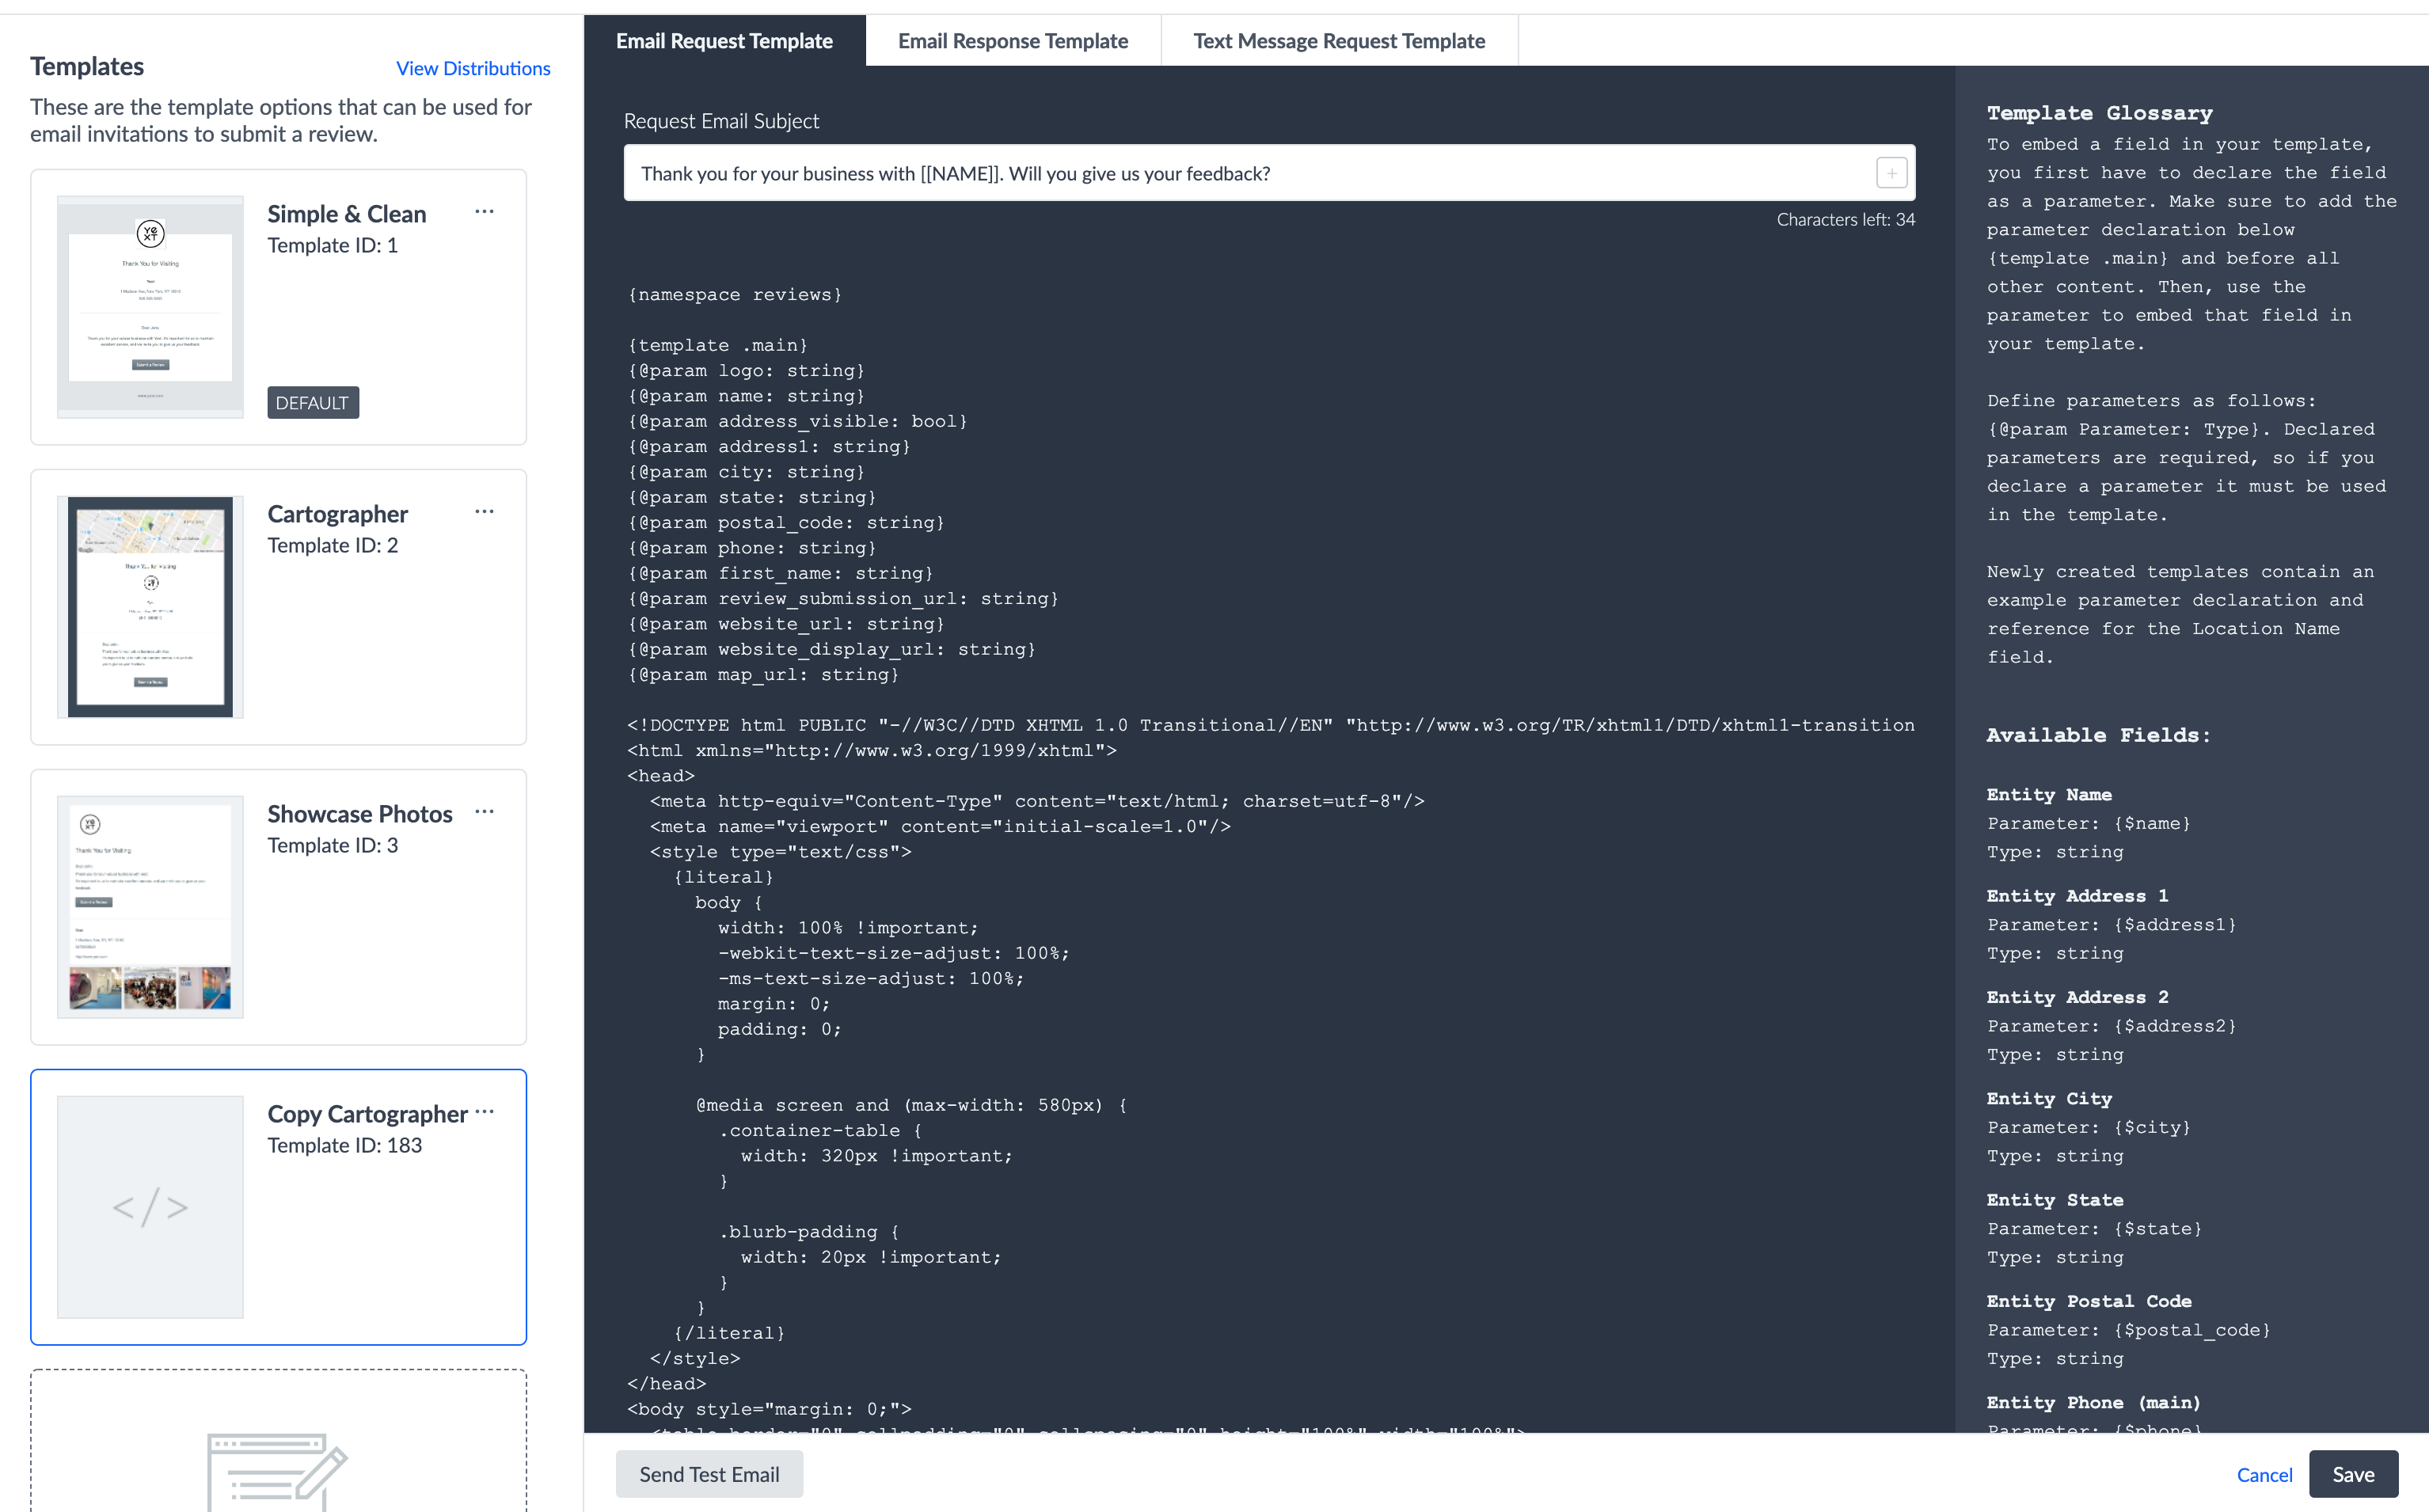
When using embedded fields in your customized templates, you’ll need to reference them using the format {{tag.[[field ID]]}}. This will look like {{tag.review_submission_url}} for built-in fields and {{tag.c_customField}} for custom fields where you use the API name to identify it.
Use CTRL+F to search the Template Glossary for the field name and then copy the parameter listed.
You can link users to a review submission page in the template using either the review balancing URL or a link to a specific publisher:
- To use the Review Balancing URL that is used in our built-in templates (which distributes users based on the review balancing algorithm), use the built-in Review Submission Page field with parameter
{{tag.review_submission_url}}. - To link users to a review submission page for a specific publisher, you’ll see this in the list of available fields: Publisher Review Submission Page:
{{tag.review_submission_url_PUBLISHER}}. Replace ‘PUBLISHER’ in the parameter with the publisher’s API name (e.g.,{{tag.review_submission_url_googlemybusiness}}for Google).
Customize First-Party Reviews Collection Page
Each publisher has its own review collection page for users to write reviews on that site. When you generate first-party reviews, Yext provides a standard review collection page for each entity. You also have the option of creating custom collection pages for your brand to change the look and feel of the pages or to collect additional attributes.
If you’d like to create custom first-party review collection pages, follow the steps in the Build Custom Review Collection Pages guide.