

Step 2: Option 2: Google Tag Manager
To integrate Yext Analytics using Google Tag Manager, you can do so using the Yext Analytics Browser SDK tag in the Community Template Gallery.
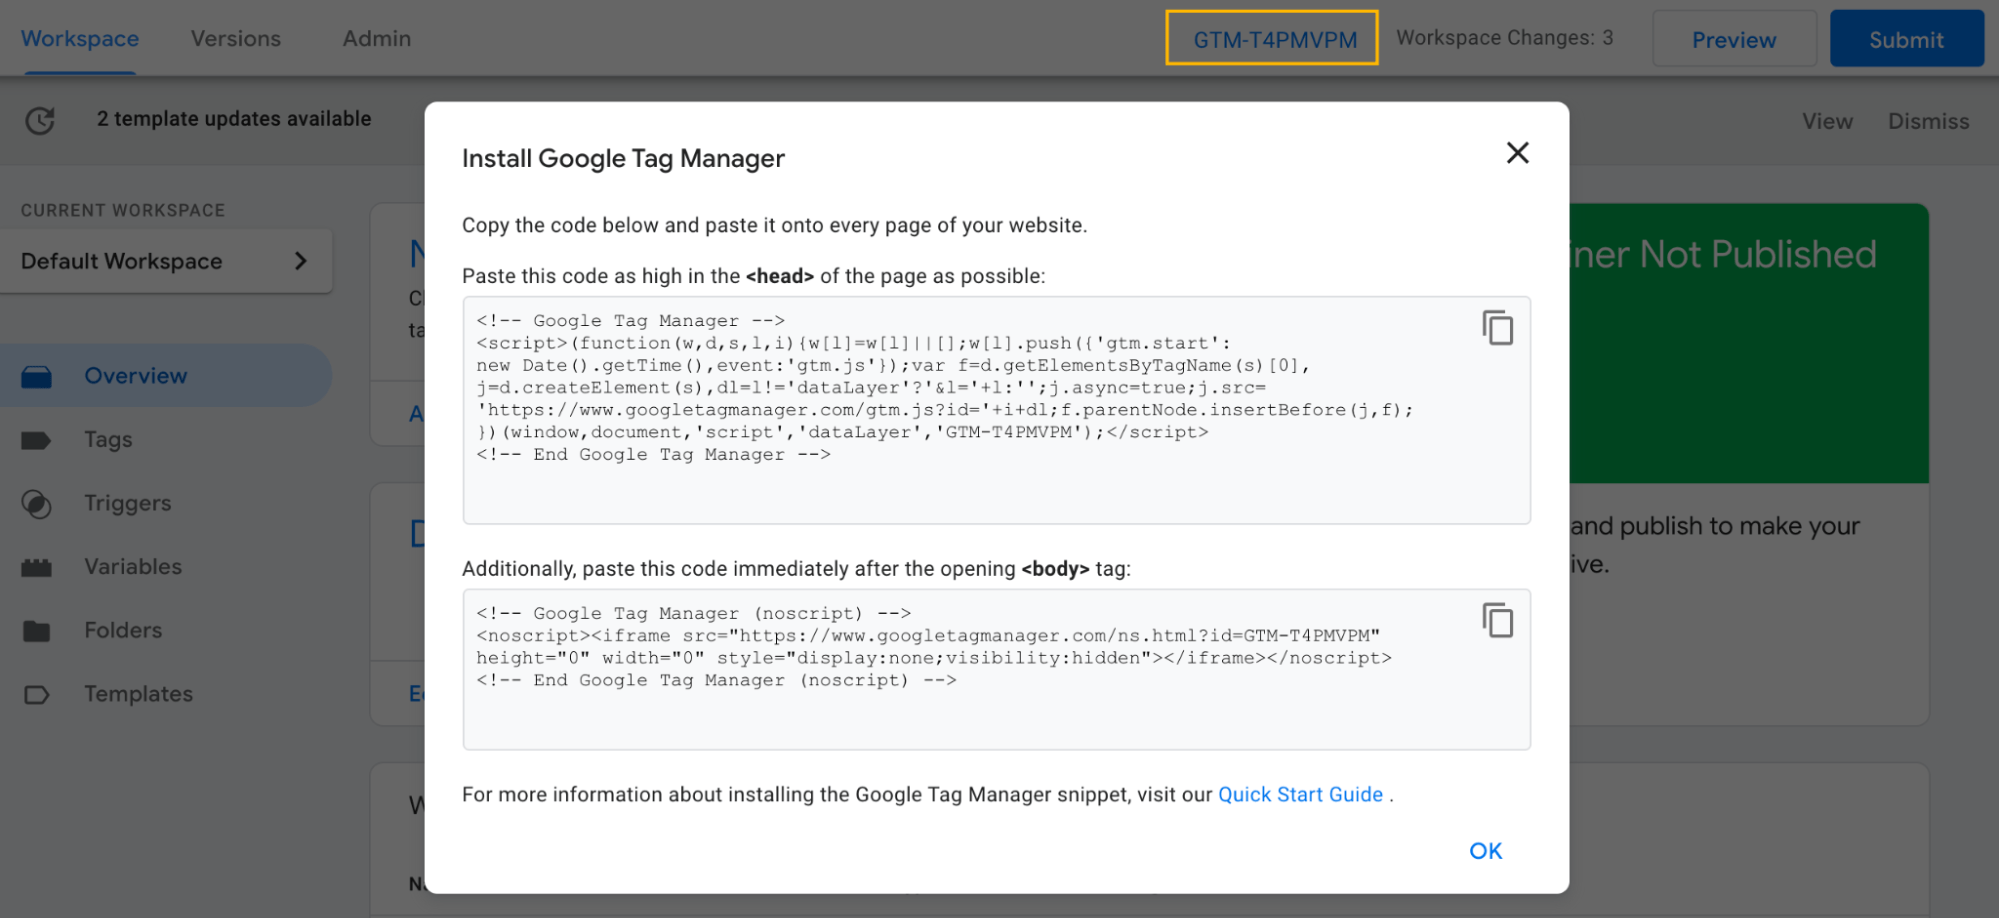
Step 1: Install Google Tag Manager on your website
If you’re already using Google Tag Manager to manage tags for your website then this step should already be complete. However, if you are a new Google Tag Manager user or you are installing these tags on a new website or domain, it is important to follow the steps below.
- Log into your Google Tag Manager account.
- Copy the installation code snippets by clicking the GTM-XXXX link on the top right corner of your home screen:
If you need additional assistance with this step, you can visit Google’s Tag Manager Developer Quick Start Guide
Step 2: Download the Yext Analytics Browser SDK Tag Template
Next, download the Yext Analytics Browser SDK tag template to your local machine from this Github repo by clicking on download icon.
This tag template allows you to configure your analytics event according to the Events API schema using a simple point and click interface.
Step 3: Upload the Yext Analytics Browser SDK Tag Template to Google Tag Manager
Once you’ve downloaded the tag template locally, you’ll create a new tag template using this file in your own Google Tag Manager instance. Follow along with the instructions in the video below.
- Log into your Google Tag Manager account.
- Click Templates in the left navigation bar.
- In the Tag Templates box, click New in the upper right corner. This should open the Template Editor window.
- Click the dot icon next to Save in the upper right corner, and then click Import. Select the tag template file you just downloaded to upload the template. You should now see Yext Analytics Browser SDK appear in the Tag Preview window.
- Click Save to save your tag and exit the window.
Step 4: Create a New Tag
Follow along with the instructions in the video below.
- Click Tags in the left navigation bar.
- Click New to add a new tag.
- Click the pencil icon in the Tag Configuration box to edit your tag. This is where you configure your tag, including the tag type, and what should trigger the tag to fire.
- In the search bar to the right of Choose tag type, search for Yext Analytics Browser SDK, and select it. It should appear as a Custom tag template. The tag should now appear in the Tag Configuration window.
Step 5: Configure the Tag
Once you’ve installed the tag from the template gallery, the next step is to configure the tag, which controls the parameters of the analytics event.
Within the Yext Analytics Browser SDK template, there are two types of events that you can configure depending on your use case: basic events and conversion events.
Basic events allow you to define any user action, either from the list of standard events that Yext Analytics supports, or an arbitrary custom action. Examples of standard events include clicking on a CTA button or recording a page view. To see a full list of the standard events that Yext Analytics supports, see the documentation here .
Conversion events are a specific type of event that allow you to record a conversion associated with a user action. For example, if you wanted to track the total value of your online orders, you could implement a conversion event on the “Order” button.
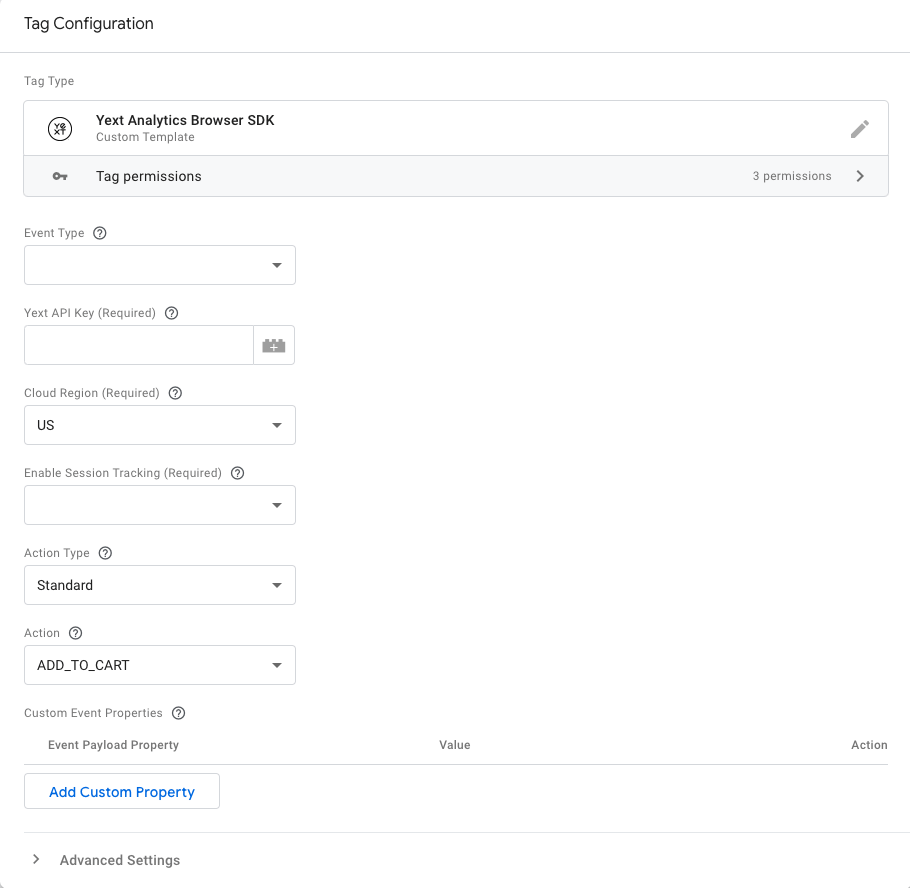
Step 5a: Configure a Basic Event
Follow along with the instructions in the video below.
Fill out the tag configuration based on the below. Note all properties are required unless stated otherwise.
- Event Type: Select the Basic event type from the dropdown.
- Yext API Key: Enter your Yext API key. This API key must have read / write permissions to the Events API. You can find an existing API key or create a new one in the Developer Console tab in the Yext platform.
- Cloud Region: Select a cloud region from the dropdown. This is the cloud region that your Yext account is located in, and is one of US or EU.
- Enable Session Tracking: Select whether you’d like to enable session tracking in the dropdown. Yext uses browser-based session tracking, which allows you to stitch together sequential events triggered by a user in a single browser session.
- Action Type: Select an action type in the dropdown. This can be one of Standard or Custom. A standard action represents a standard user action Yext supports by default. A custom action represents an arbitrary custom action.
- Action: If the action type is standard, select a standard user action in the dropdown. For a list of supported standard actions, see the documentation here .
- Custom Event Type: If the action type is custom, enter a custom action in the field. You can define any custom action, as long as it begins with
C_.
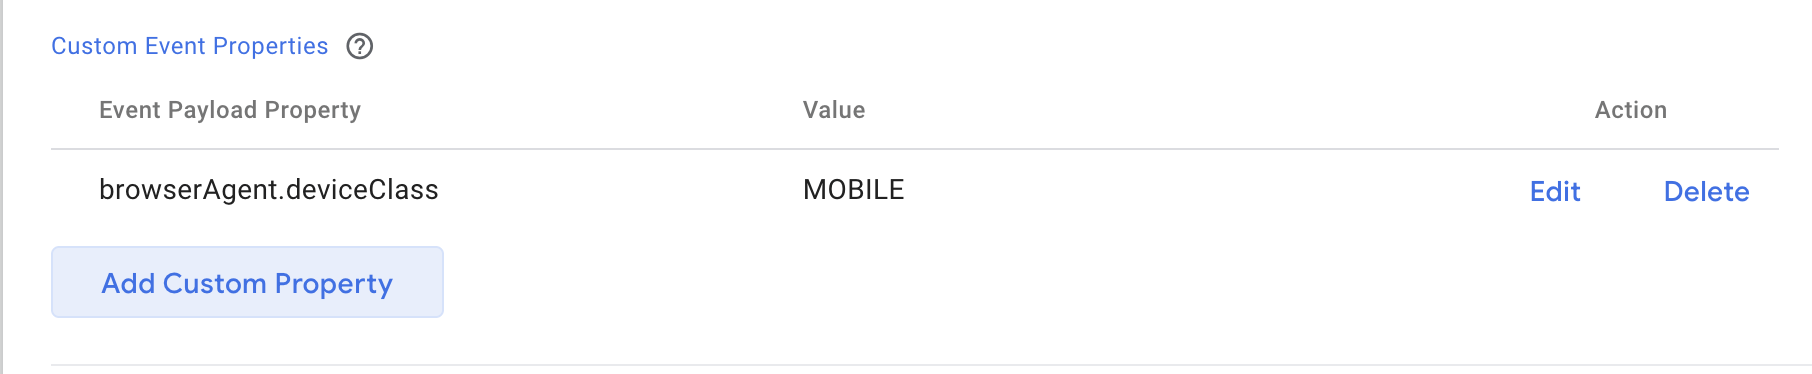
- You may define any optional additional properties that you’d like to associate with the event by adding a Custom Event Property.
- These are properties that are not present in the default configuration. For a full list of properties, see the documentation here .
- Each property is defined as a key-value pair. The property name (key) is set in the first column and its value in the second. For example, the property ‘locale’ would be specified in the first column and the value, ‘en_US’ would be specified in the second.
- Properties with subfields can be denoted using periods. For instance, if you wanted to specify deviceClass, which is a subfield of the browserAgent property, you would enter ‘browserAgent.deviceClass’ in the first column and ‘MOBILE’ in the second.
- Save your tag by pressing the Save button in the top right corner of the modal.
Step 5b: Configure a Conversion Event
Follow along with the instructions in the video below.
Fill out the tag configuration based on the below. Note all properties are required unless stated otherwise.
- Event Type: Select the Conversion event type from the dropdown.
- Yext API Key: Enter your Yext API key. This API key must have read / write permissions to the Events API. You can find an existing API key or create a new one in the Developer Console tab in the Yext platform.
- Cloud Region: Select a cloud region from the dropdown. This is the cloud region that your Yext account is located in, and is one of US or EU.
- Enable Session Tracking: Select whether you’d like to enable session tracking. Yext uses browser-based session tracking, which allows you to stitch together sequential events triggered by a user in a single browser session.
- Conversion Value: Enter a conversion value. This is 0 by default, and it can include decimals.
- To use a dynamic value via a dataLayer variable, click on the icon to the right of the text box, which should open a window titled “Choose a Variable”. You should see any dataLayer variables you have set up in your workspace here.
- To add a new dataLayer variable, click the plus sign in the top right, or follow the “Setting up Dynamic Conversion Values” steps outlined below .
- Conversion Value Currency: Enter an ISO currency for the conversion. This is “USD” by default.
- Action Type: Select an action type from the dropdown. This can be one of Standard or Custom. A standard action represents a standard user action Yext supports by default. A custom action represents an arbitrary custom action.
- Action: If the action type is standard, select a standard user action in the dropdown. For a list of supported standard actions, see the documentation here .
- Custom Event Type: If the action type is custom, enter a custom action in the field. You can define any custom action, as long as it begins with
C_.
- You may define any additional properties that you’d like to associate with the event by adding a Custom Event Property.
- These are properties that are not present in the default configuration. For a full list of properties, see the documentation here .
- Each property is defined as a key-value pair. The property name (key) is set in the first column and its value in the second. For example, the property ‘locale’ would be specified in the first column and the value, ‘en_US’ would be specified in the second.
- Properties with subfields can be denoted using periods. For instance, if you wanted to specify deviceClass, which is a subfield of the browserAgent property, you would enter ‘browserAgent.deviceClass’ in the first column and ‘MOBILE’ in the second.
- Save your tag by pressing the Save button in the top right corner of the modal.
Setting Dynamic Conversion Values
In some cases, you’ll want to dynamically pull in a conversion value based on the user’s interaction with the page, instead of defining a static conversion value like in the steps above.
For instance, on a checkout page, you might want to pull in the conversion value based on what is in the user’s shopping cart – different users may be shopping for different things, thus the value of each conversion will be different!
One way to set up a dynamic value is by using a dataLayer variable. You’ll need to set this up in two places – your website, and in Google Tag Manager. You may need to leverage developer resources to set up the dataLayer in your website.
Creating a DataLayer
The DataLayer is an object in Google Tag Manager that stores information about an event that can be passed into a tag as a variable.
Step 1: Add DataLayer to your Website
To create a dataLayer object on your website add the following code to your site wherever you’re looking to fire a Conversion Tag.
<script>
  dataLayer = [];
  dataLayer.push({'variableName': document.getElementbyId("elementIdName").value});
</script>
dataLayer = []represents an empty array you’re creating to store the variables you’d like to capture, in this case, your Conversion Value.dataLayer.push()will be used to push the variable (in this case we’re calling it ‘variableName’) along with its value (in this case we’re looking it up based on the Element ID) to Google Tag Manager.
Step 2: Configure DataLayer in Google Tag Manager
Once you’ve created the dataLayer object and added it to your website the next step is to go into Google Tag Manager to configure this dataLayer for your Conversion Tag.
- Click the Variables tab.
- Click New in the User-Defined Variables tile.
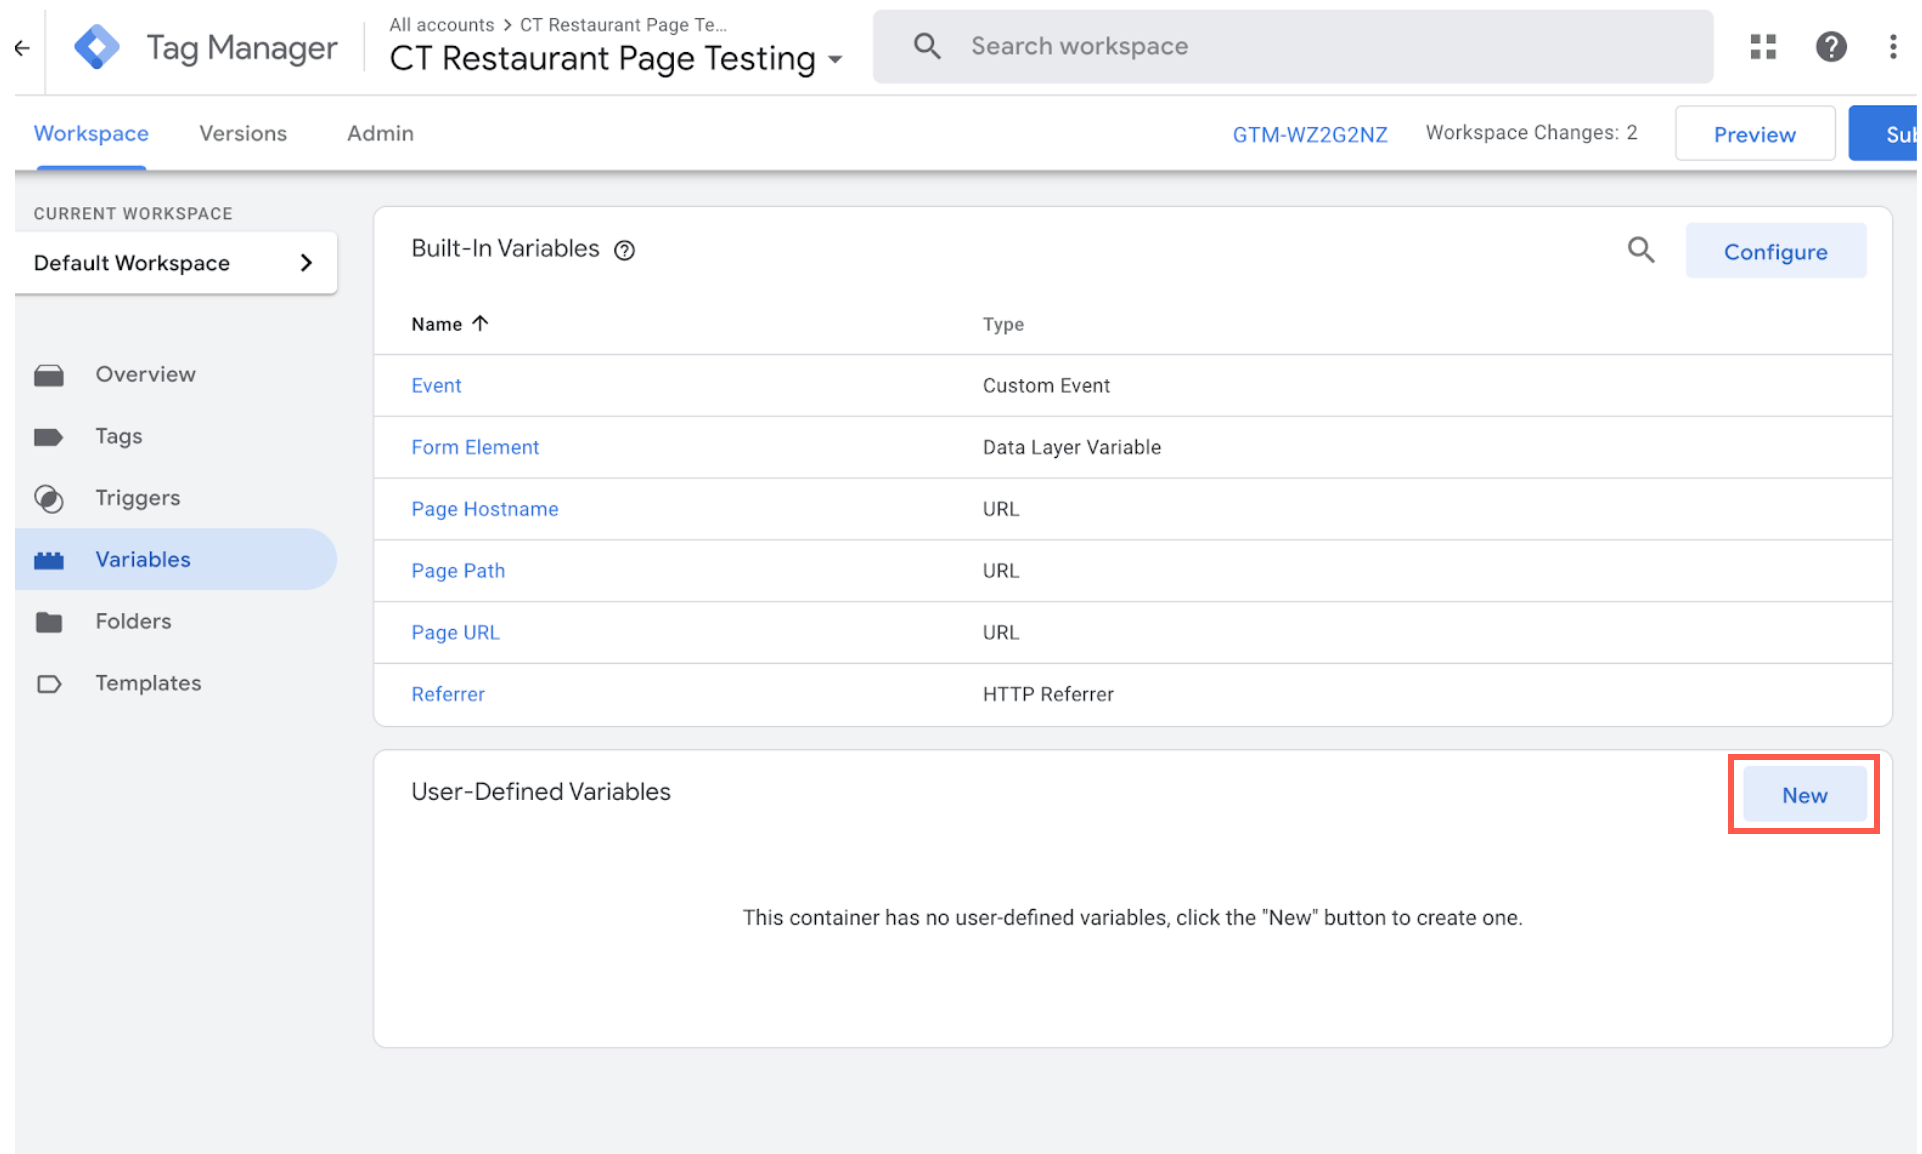
- Click on the Variable Configuration tile and select Data Layer Variable.
- Enter the variable name you have defined in your data layer. In this example, we used
variableName.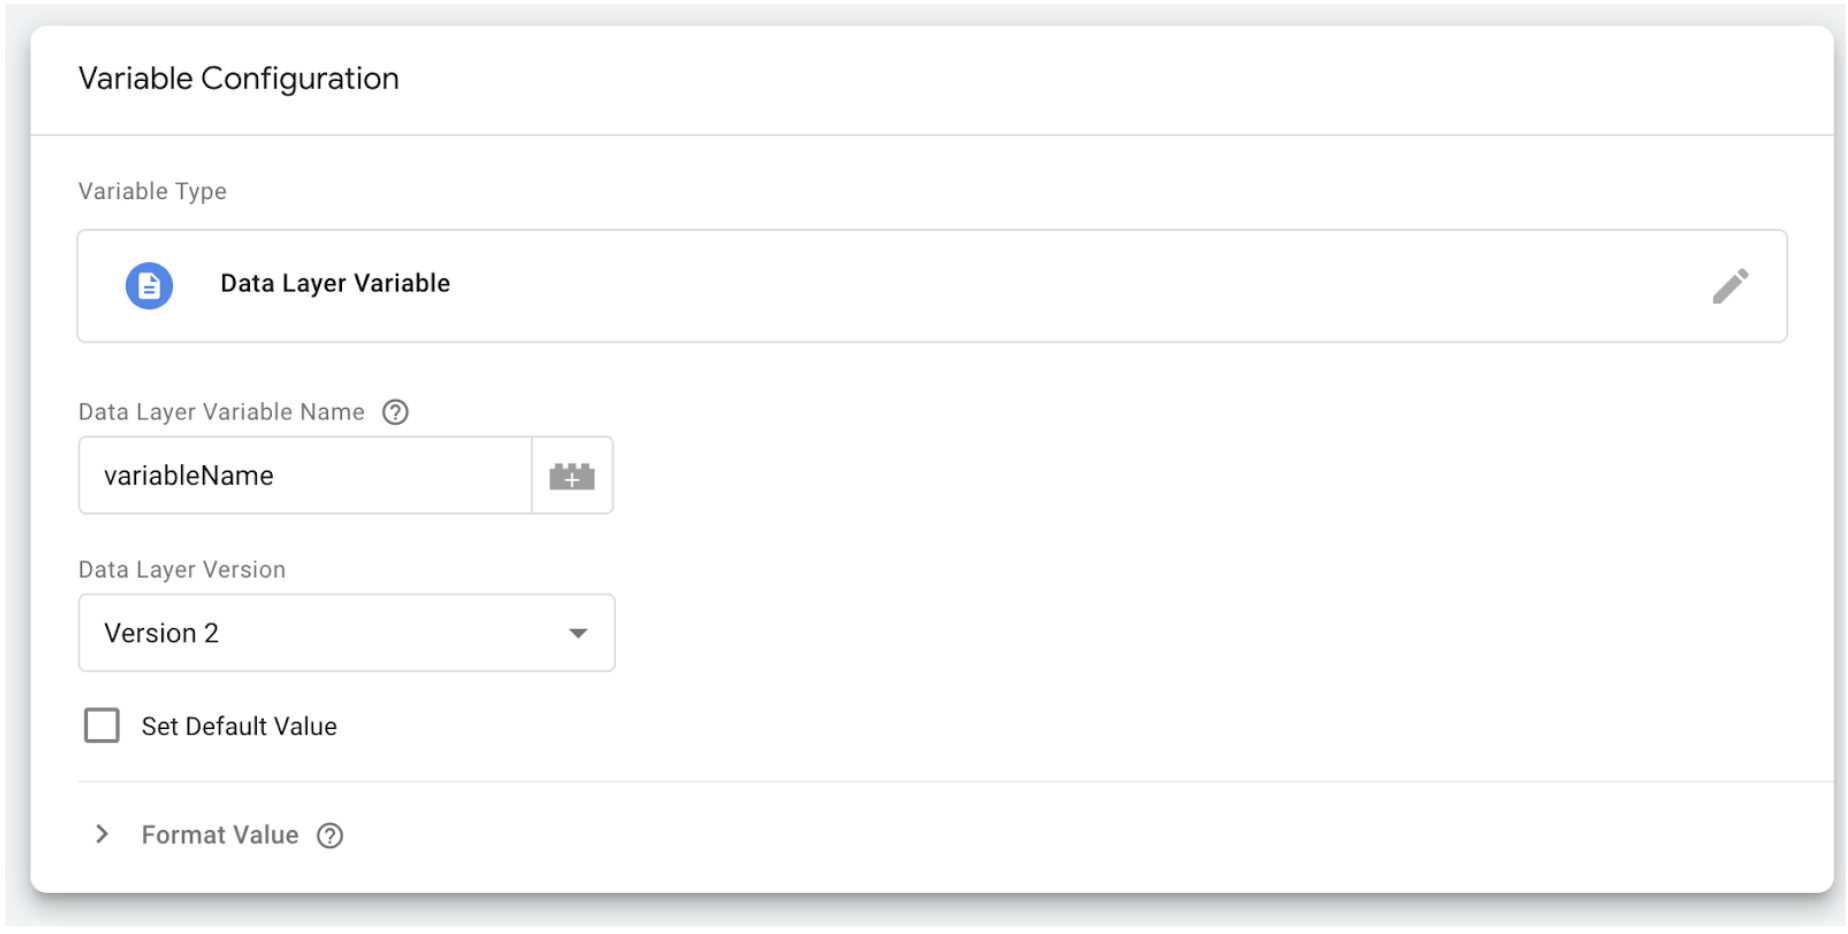
- Navigate back to your Yext Analytics Browser SDK Tag and select your new Data Layer variable for the Conversion Value field.
You can also reference Google Tag Manager’s documentation here .
Step 6: Configure the Trigger
Now that the tag has been configured, the next step is to configure the tag trigger. The trigger is a precondition that must be met for the tag to be fired. All tags require a trigger to indicate when and where they should be loaded. Follow along with the instructions in the video below.
Add a tag trigger. This is the browser event that must be triggered in order for your tag to fire, for example a page view, a user click, etc.
- Click on the Triggering box.
- Click on the plus sign in the upper right corner to add a new trigger, or choose from a trigger that you already have set up.
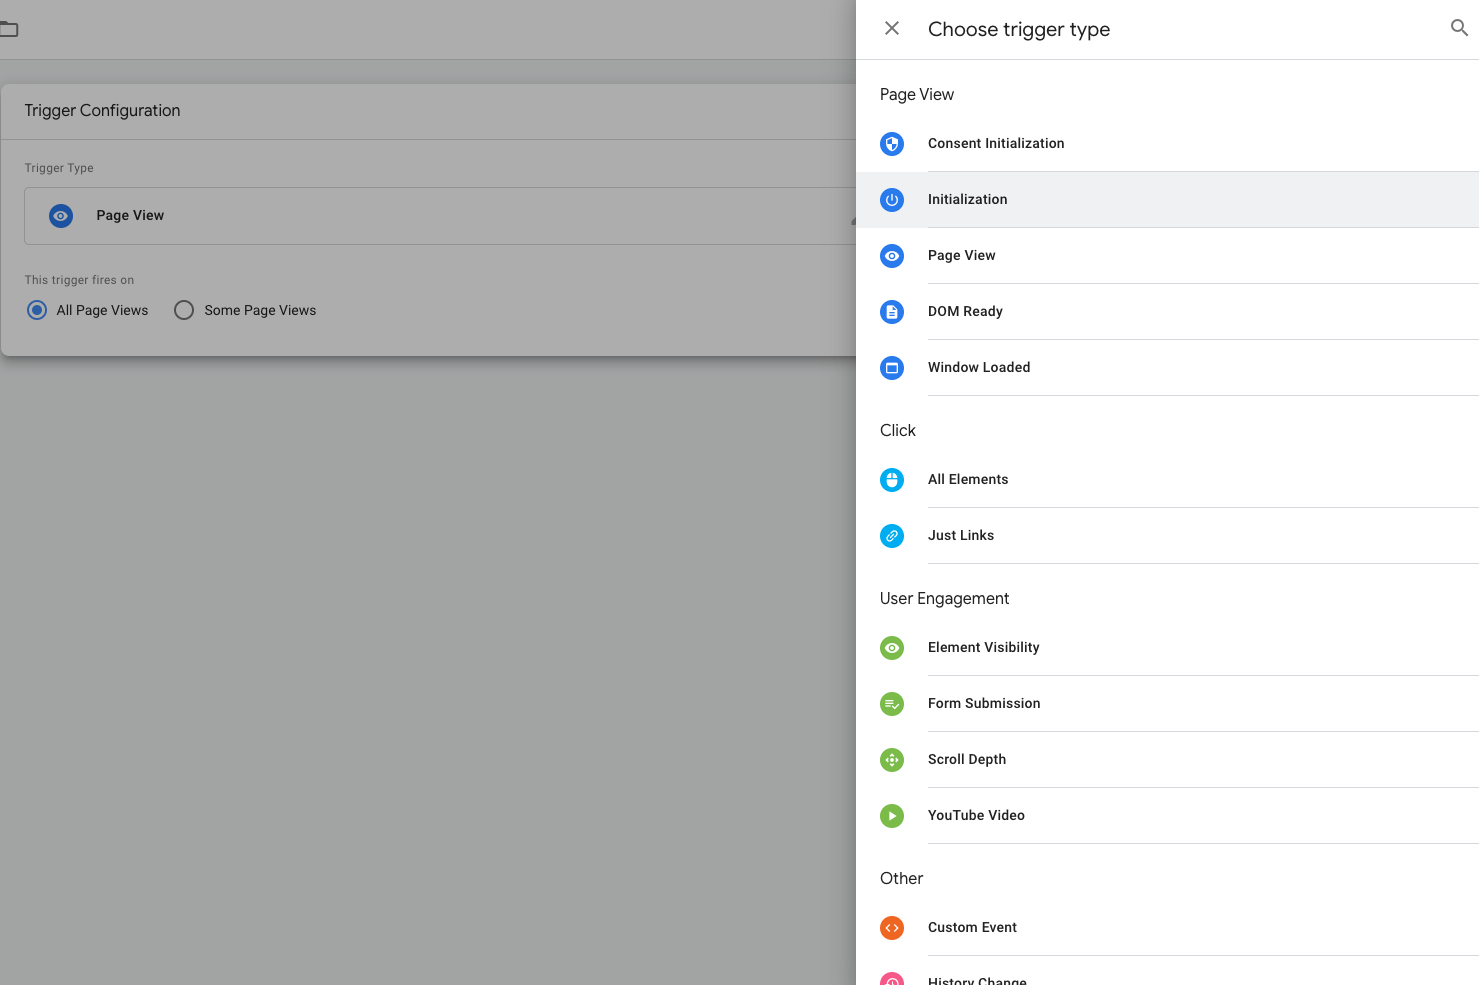
- Click on the Trigger Configuration box. You’ll see several options for tag triggers listed in the right panel grouped by trigger type, such as Page View, Click, and User Engagement. For more information on trigger types and how to select the right one for your use case, view Google’s documentation
here
.
- Click Save to save the tag trigger.
Click Save again and add the tag to your workspace.
Debugging
To debug directly in GTM, you can use the built-in debugger that they provide here .