

Step 3: Verify the Schema.org markup for the Page
Overview
Once you have added the relevant tags to your website, you should verify that the Schema.org markup on your page is correct.
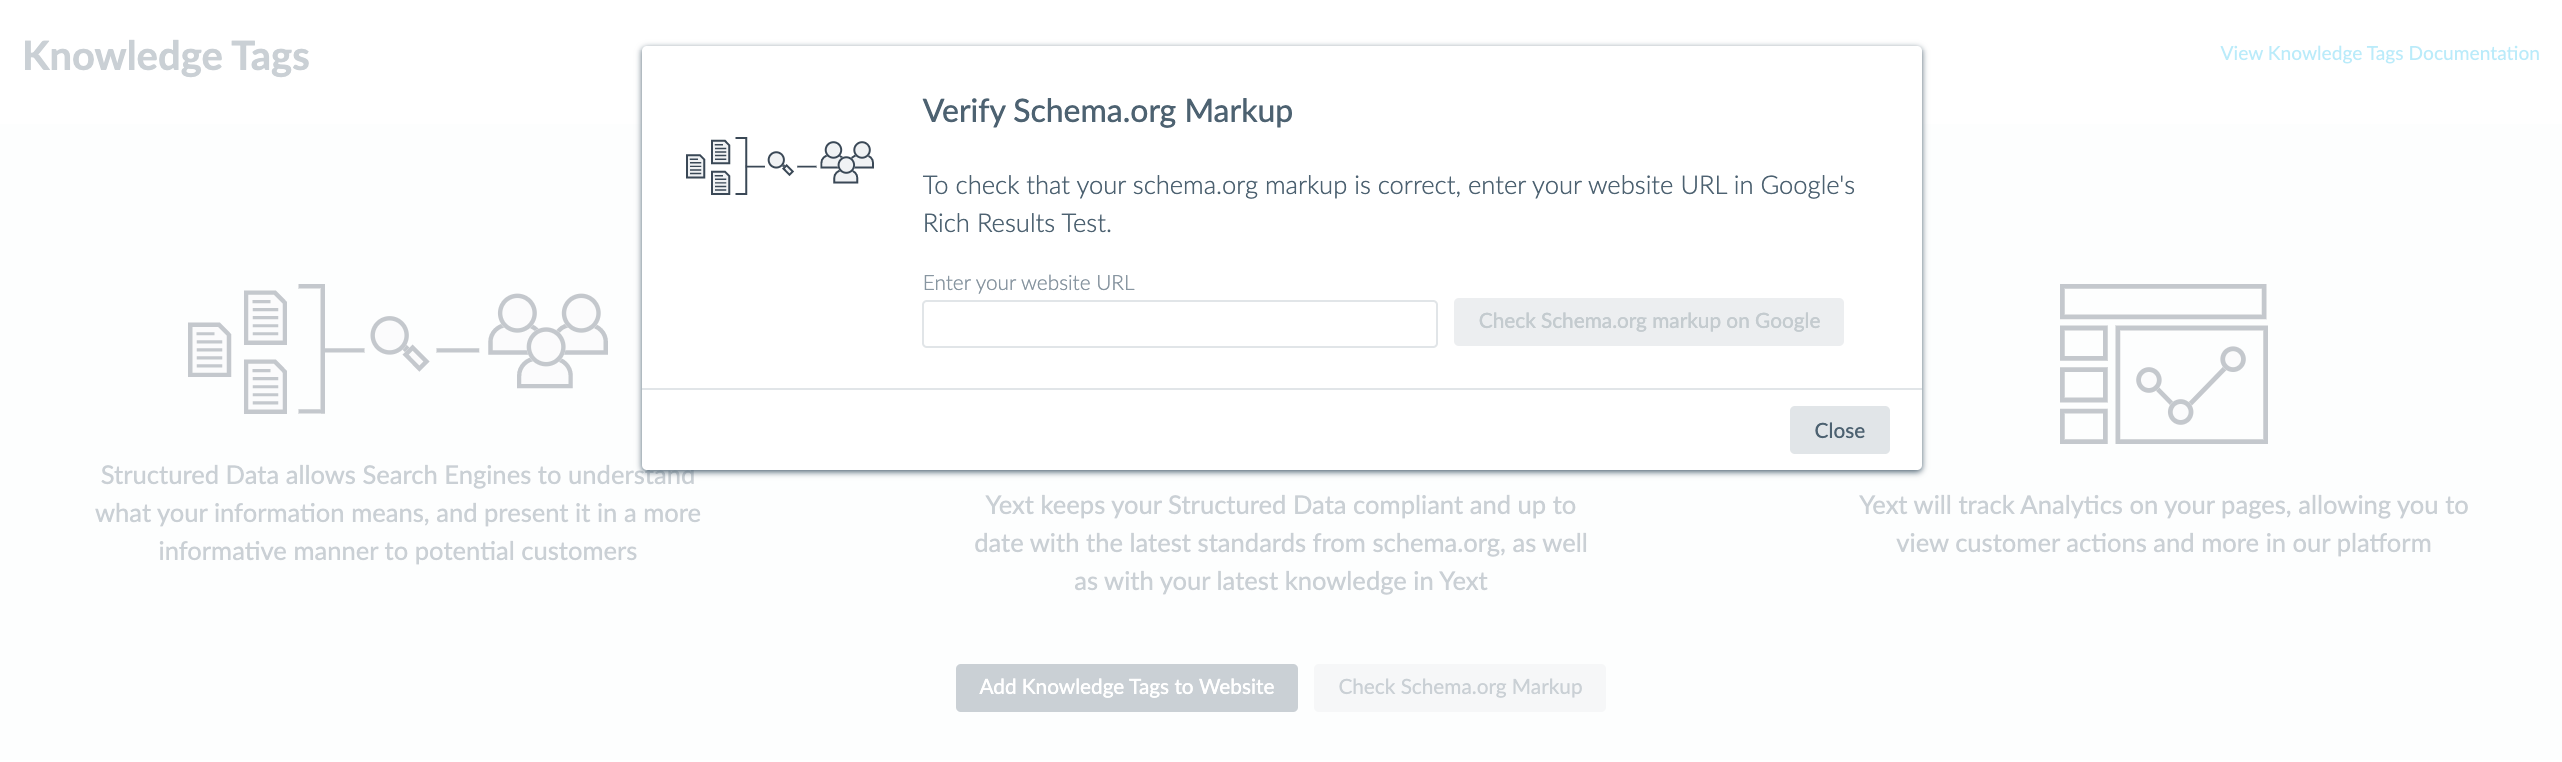
Verify Schema.org Markup
From the Knowledge Tags section of Pages:
- Click on the Check Schema.org Markup button. A dialog box appears.
- Enter the URL of the webpage and click Check Schema.org markup on Google. This will open Google’s Rich Results Test and display the detected Schema.org markup.
Customize the Schema.org Markup
Depending on what is returned when you check the Schema.org markup on a page, you may want to customize your Schema.org markup. To do this:
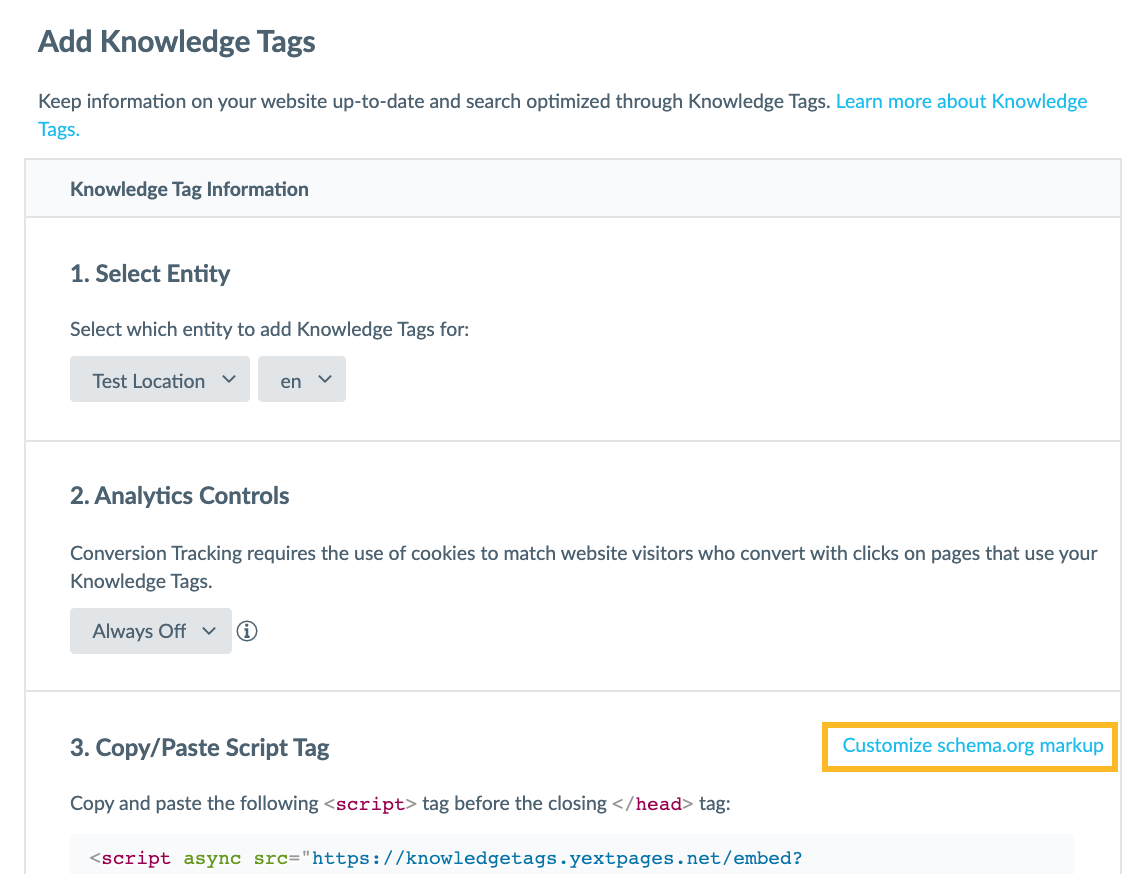
- Click Pages in the navigation bar, then Knowledge Tags.
- Click on the Add Knowledge Tags to Website button.
- Select the entity type you’d like to customize Schema.org markup for.
- Click on the Customize schema.org markup link in Step 3 of the Add Knowledge Tags Modal.
This will open a Code Editor and a Field Reference section. You can make any adjustments to the Schema.org markup for this entity type directly in the Code Editor.
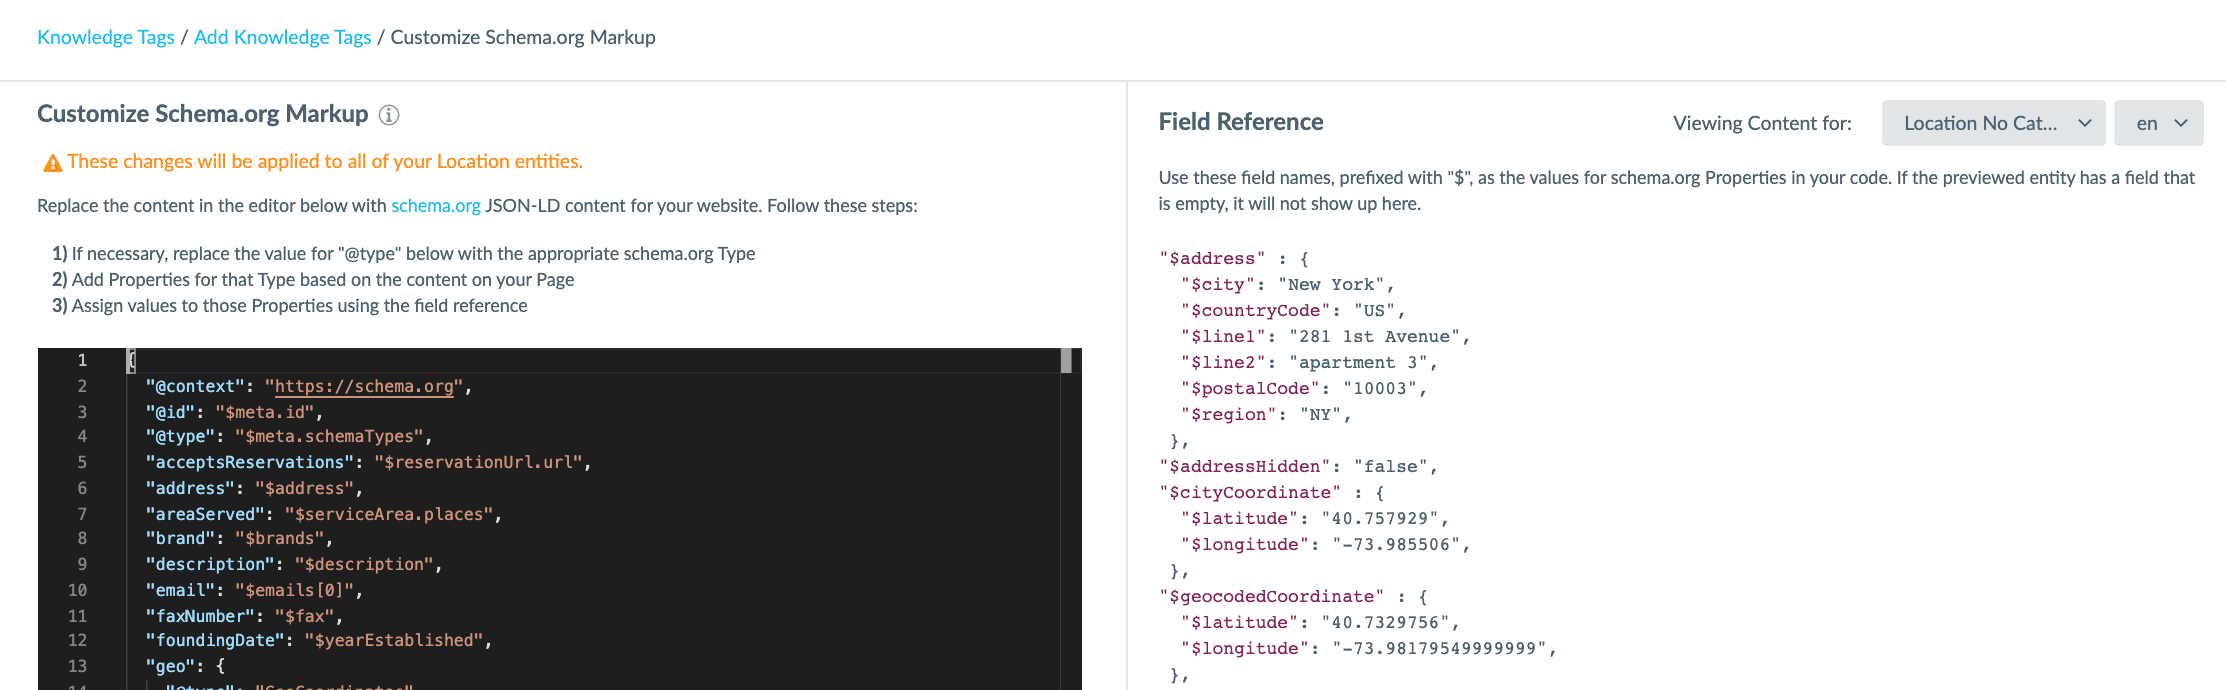
In the top right corner you will see a drop-down where you can select from the different entities of that type. This will update the content in the Field Reference section on the right side of the page with the data from that specific entity to help you identify the relevant fields.
For more information on how to adjust the Schema.org markup, visit Customize Schema.org Markup Using Knowledge Tags or visit the Customize Schema.org Markup Hitchhikers training module.
Once you have made all of the relevant changes, click Save to confirm that you would like to apply these changes to the schema.org markup for all entities of this type.