
Entity Upload | Yext Hitchhikers Platform
What You’ll Learn
In this section, you will learn:
- What you should do before uploading spreadsheets
- The steps of the entity upload process
- What saved upload configurations are and why they’re useful
Overview
You can upload spreadsheets to the Knowledge Graph to add or edit large amounts of entity data at once.
There are two main ways to upload data spreadsheets to Yext:
- The Entity Upload tool — a simple upload flow you’ll learn about in this unit
- A connector using the file upload data source — you’ll learn more about this in the Connectors module
This unit will cover the basics of the Entity Upload process and how to save your entity upload configurations, so you can easily upload more data in the same format later on.
See the Keep Learning section at the end of this unit for detailed steps on preparing your data and going through the Entity Upload flow.
Before Starting Entity Upload
Before you start an entity upload, make sure your file is formatted correctly and your entity schema is ready to accept your data.
- Entity Upload accepts Excel files (.xls, .xlsx) and CSV files (.csv).
- Clean the data as much as possible before uploading. This includes things like removing any excess spaces and ensuring that data is formatted in columns that will correspond to your entity fields.
- Split your data into separate sheets for each entity type. You can also add a column to your spreadsheet to note the type for each entity.
- Make sure you include columns for Entity ID (the unique identifier for each entity) and Country, since these are required for all entity types.
- Enable all necessary entity types in the Knowledge Graph and create any custom fields before uploading.
Entity Upload Process
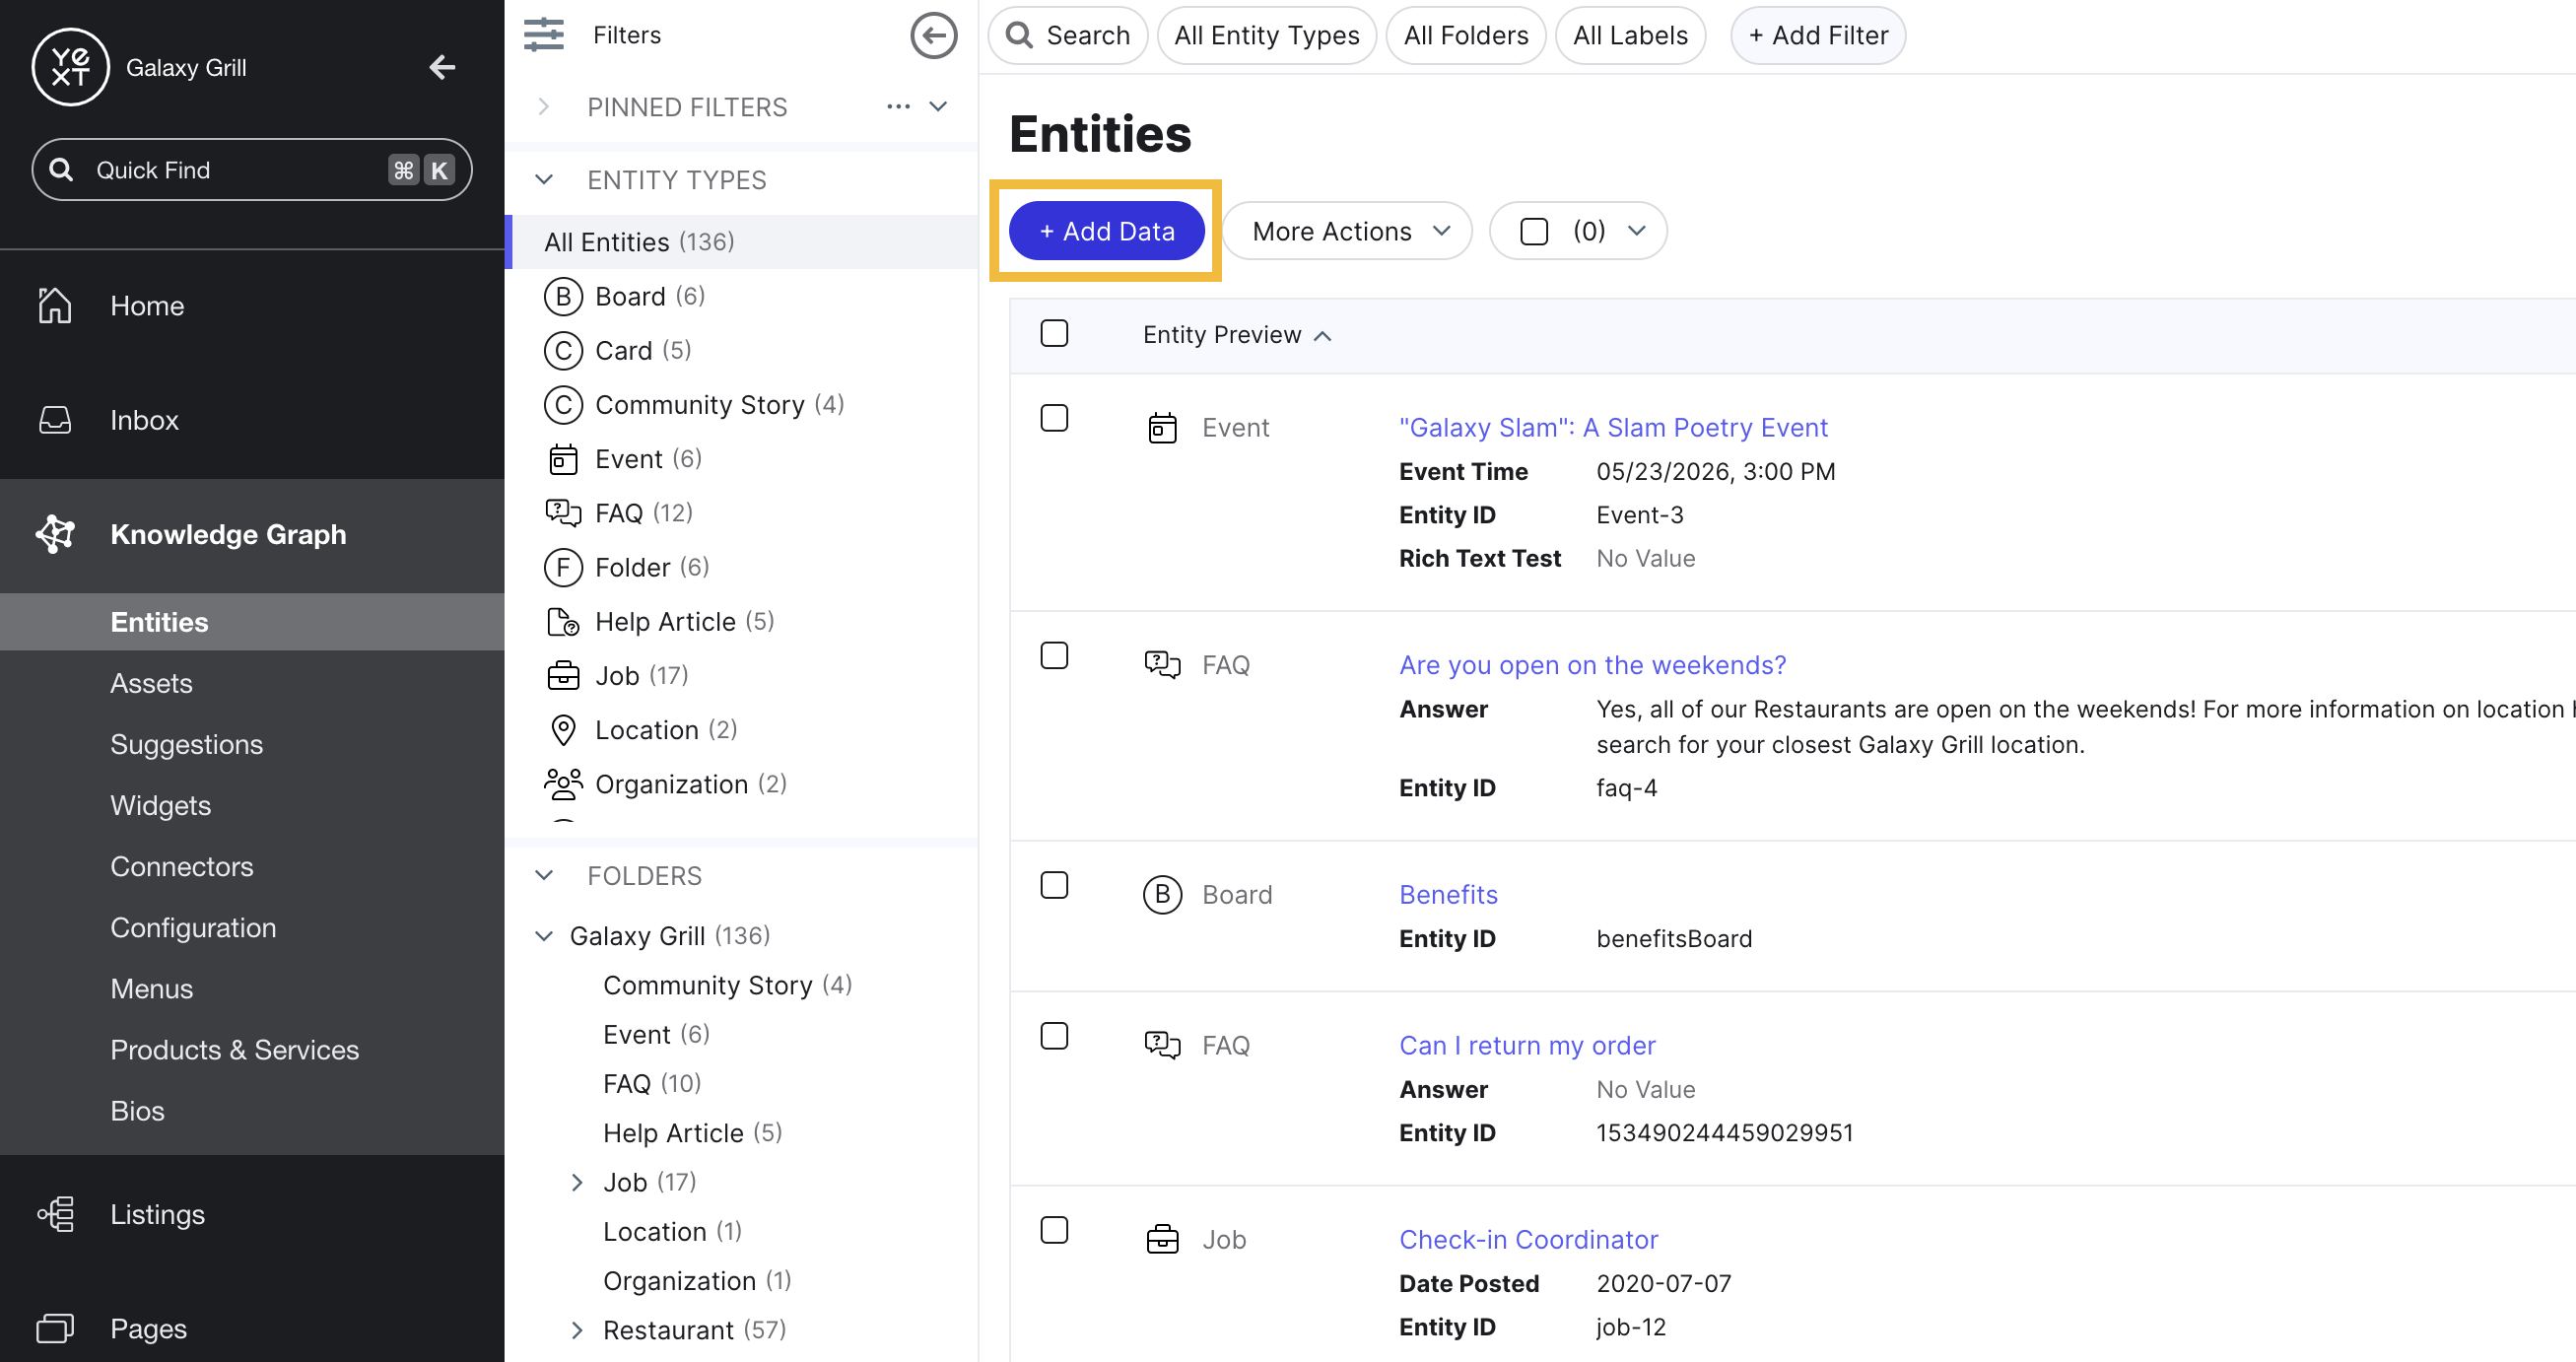
To begin an entity upload, navigate to Entity Search (Knowledge Graph > Entities) and click Add Data.
Then, choose Entity Upload from the the Add Data modal.
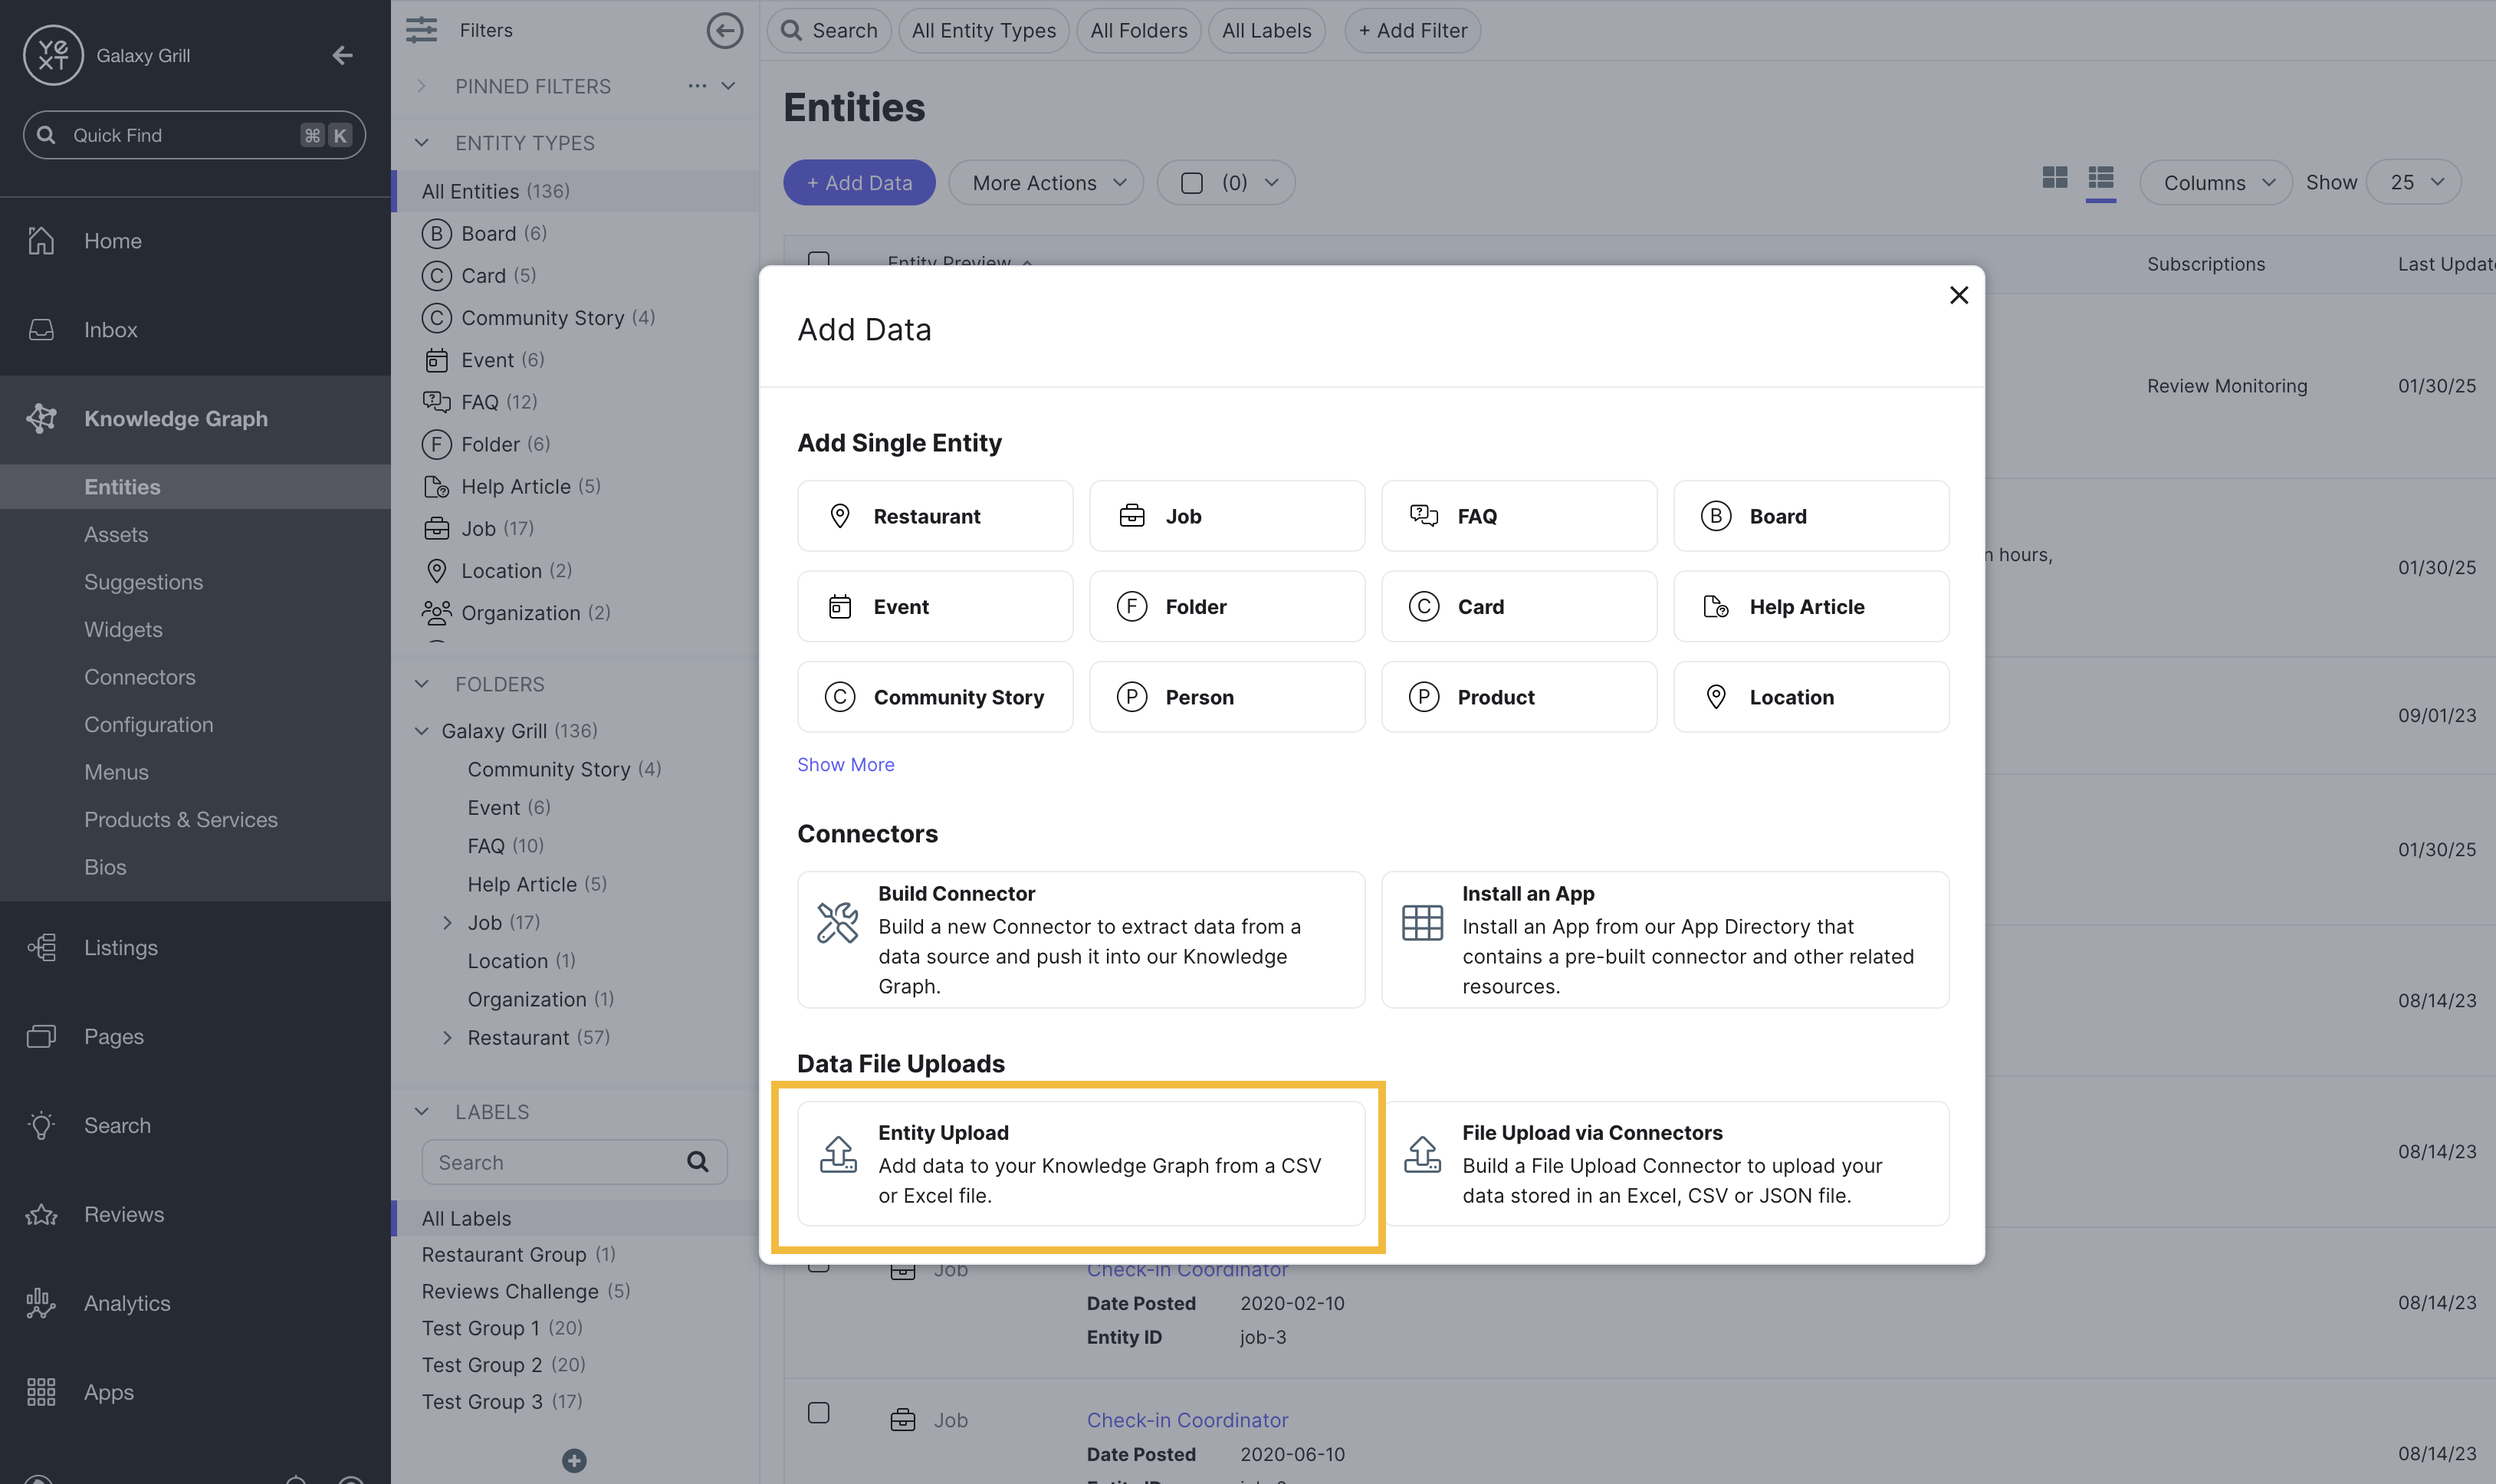
From there, you’ll begin the Entity Upload flow.
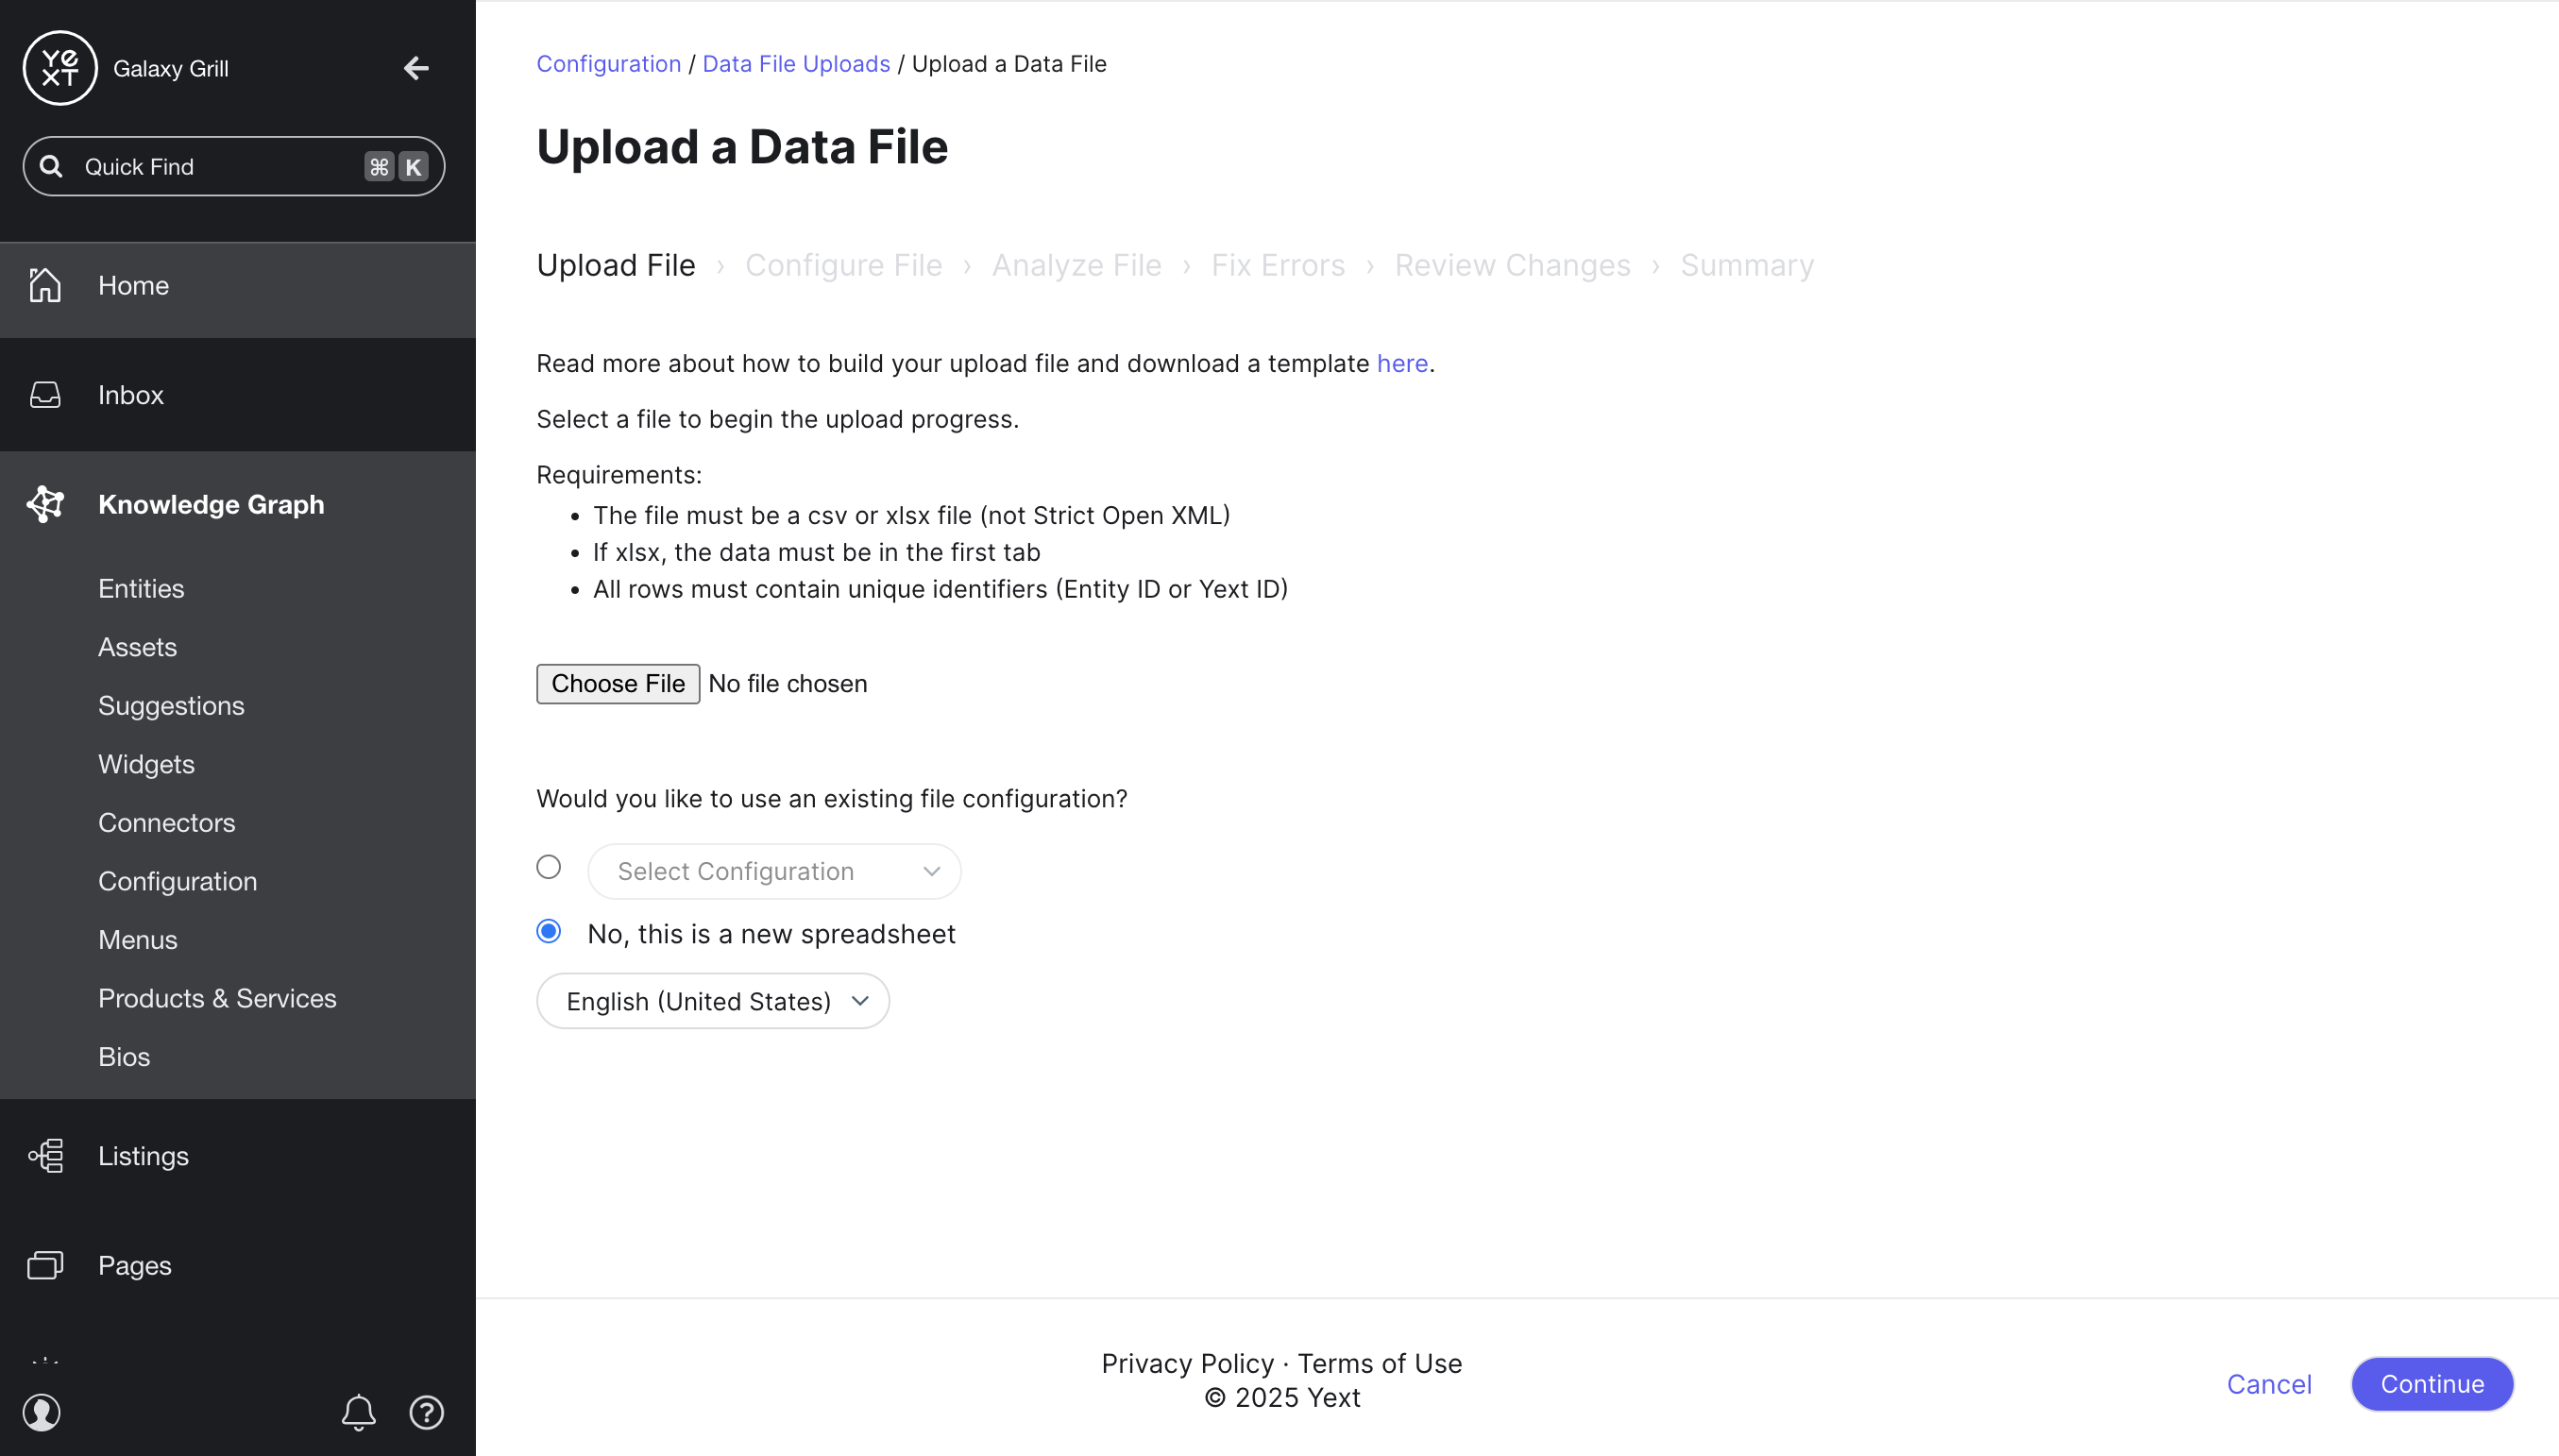
Upload File
Choose the data file you want to upload and click Continue.
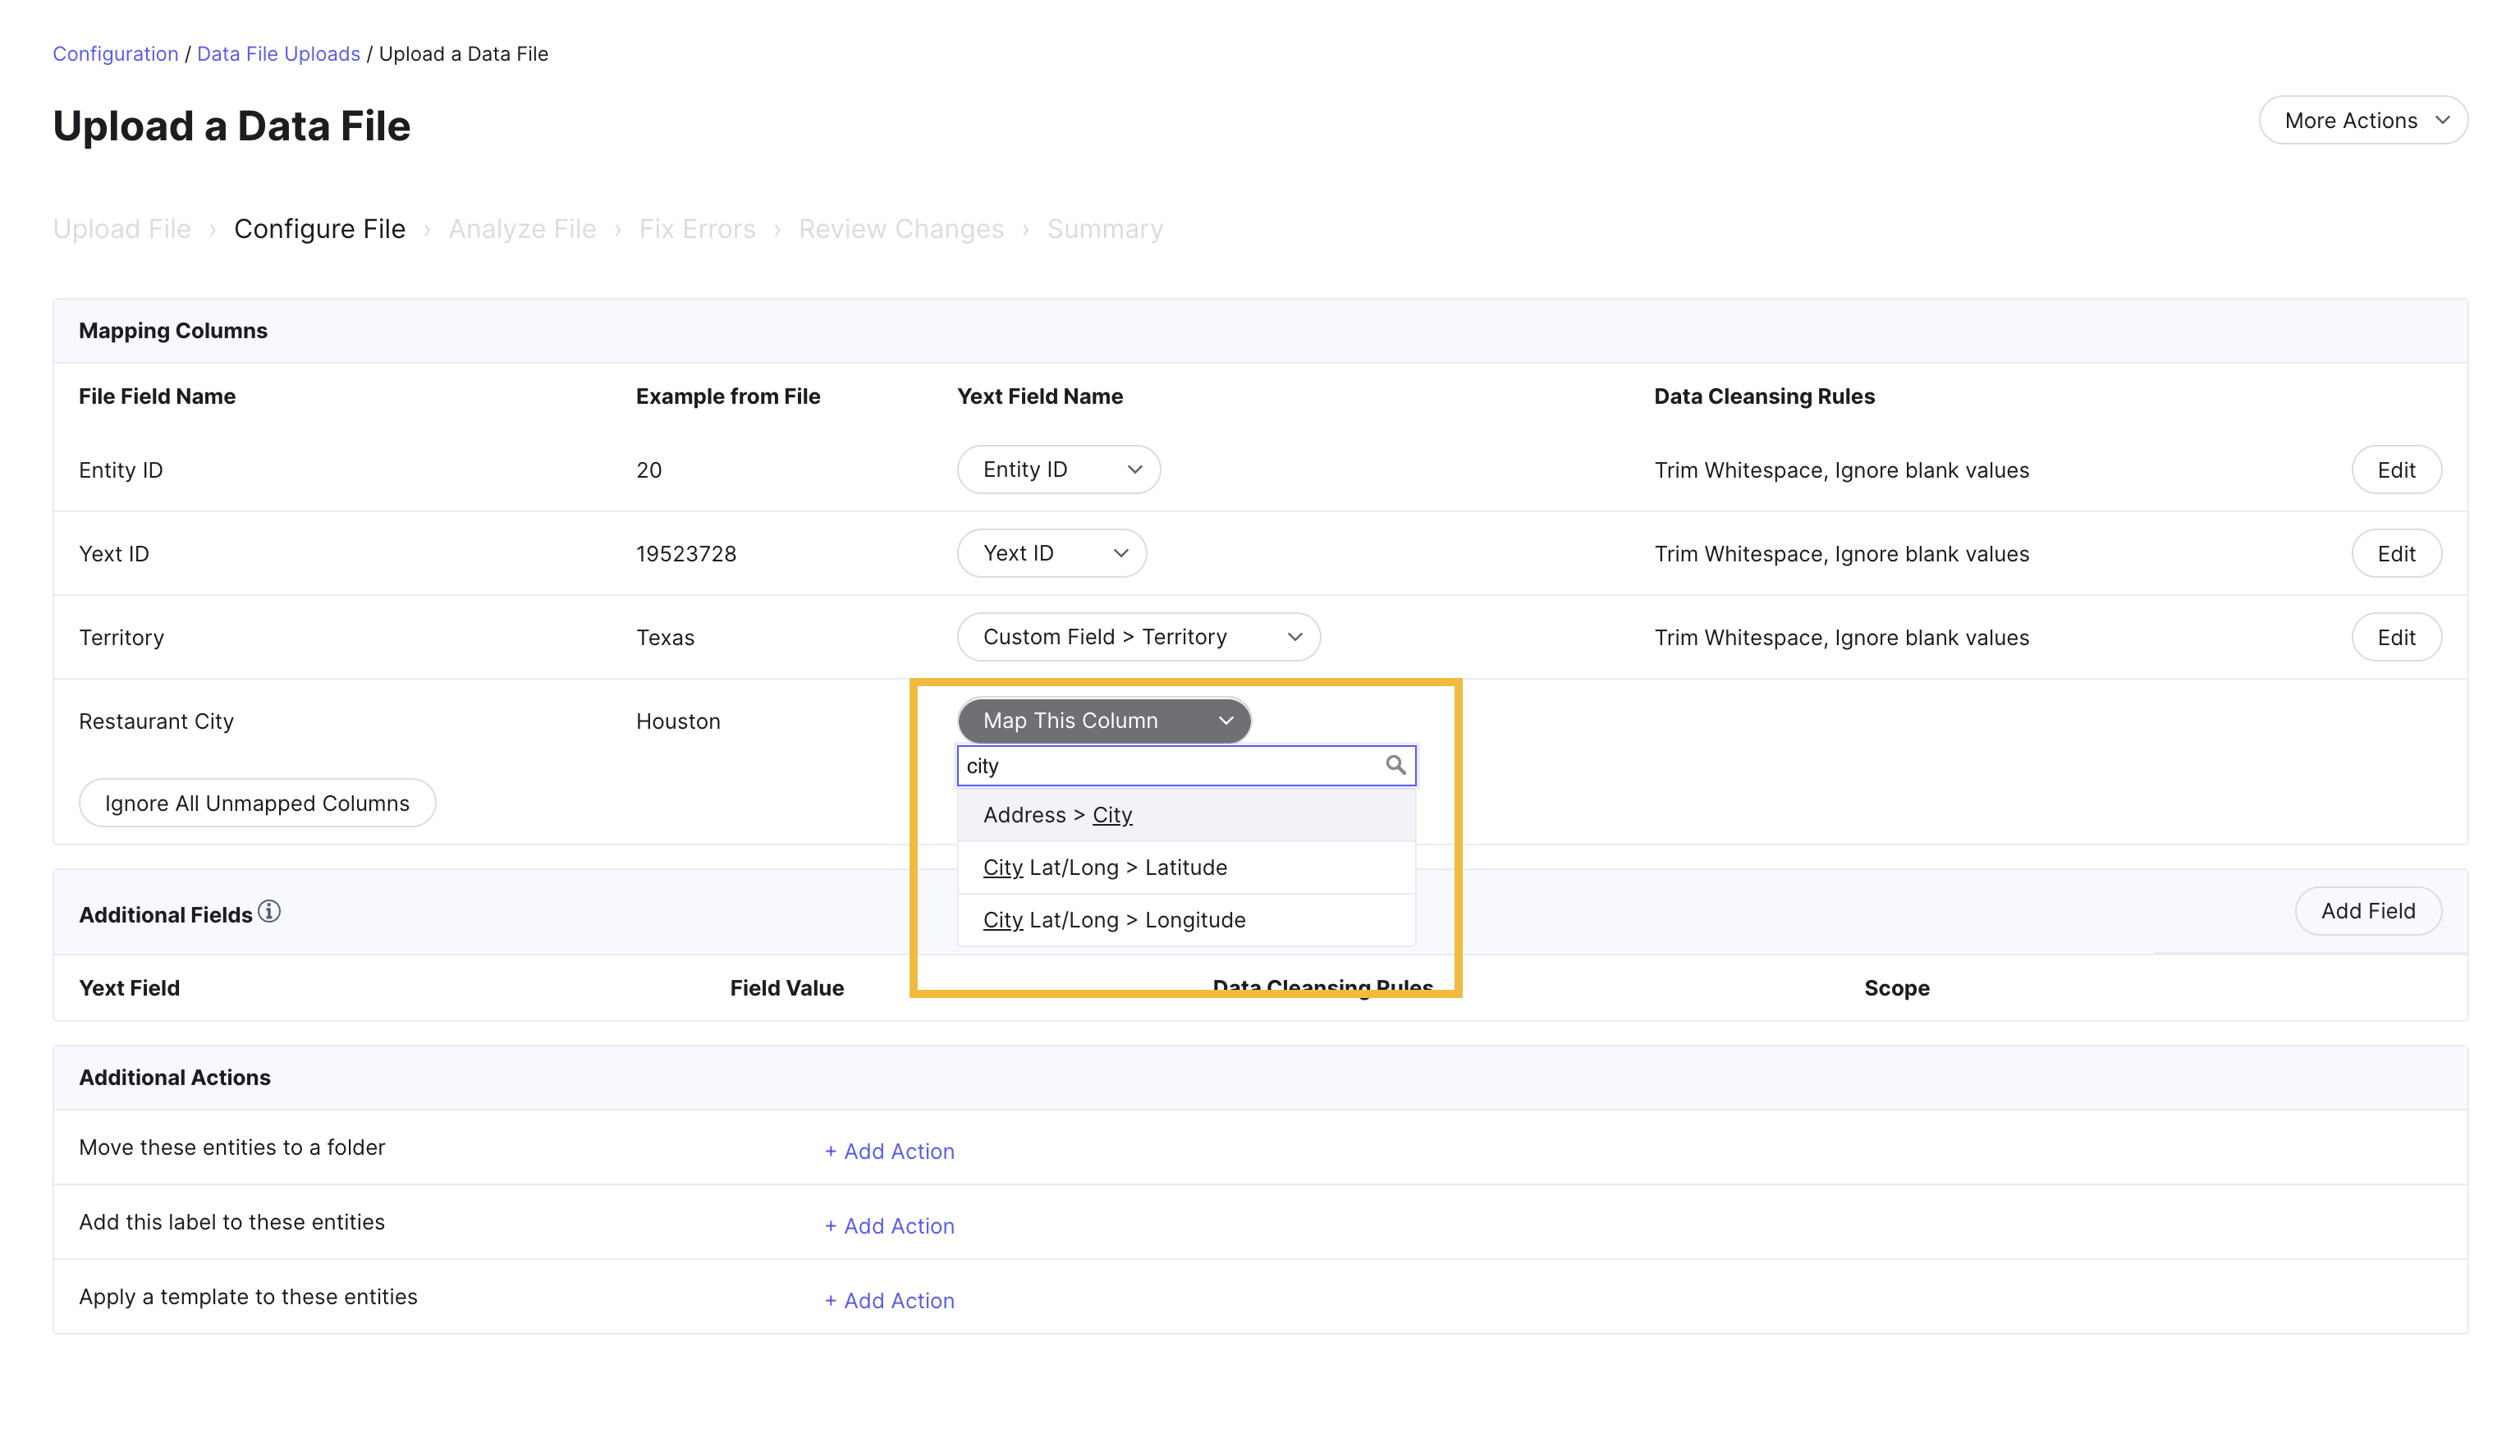
Configure File
In this step, map the columns in your file to entity fields. The system will map columns automatically whenever possible, but you may need to select the appropriate field mapping for some columns.
You can also take these actions to configure your data:
- Apply data cleansing rules (e.g., trimming spaces or ignoring blank cells)
- Set any additional field values that you have not included in your spreadsheet (for example, if you are uploading location entities and you want to set the same business hours for all of them)
- Add the entities in your upload to a folder, apply labels, or apply an entity template. (You’ll learn more about these in the Data Modeling at Scale module.)
To map a column to a field, click the Map this Column dropdown menu, type the name of the field to map to, and select it from the menu.
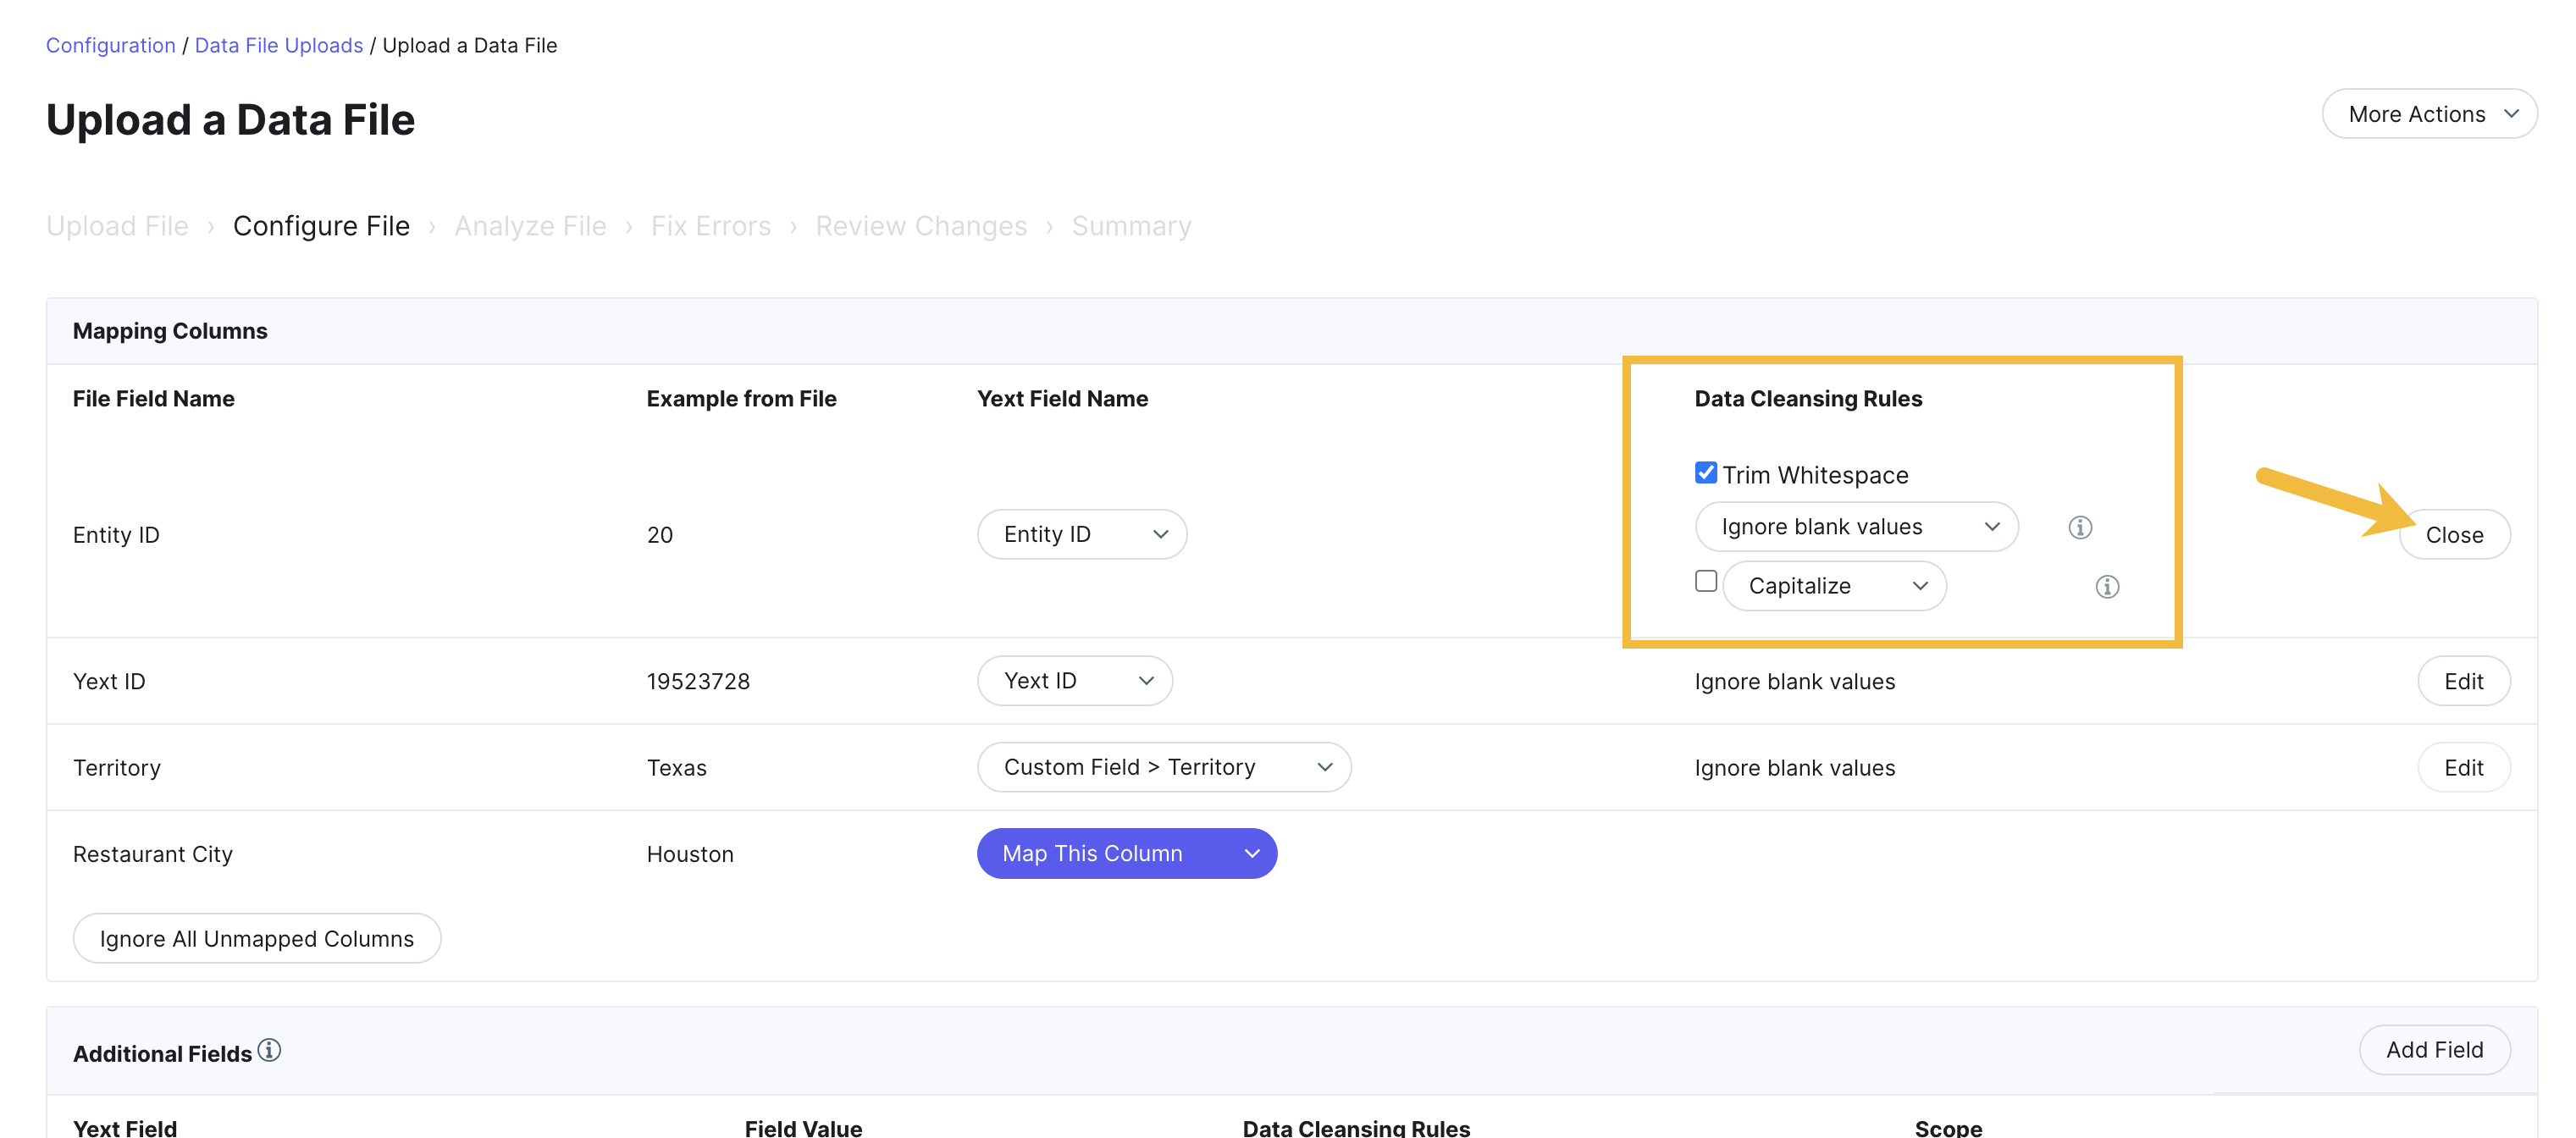
To change any of the data cleansing rules, click Edit next to the column you want to edit.
To set an additional field value, click Add Field in the Additional Fields section.
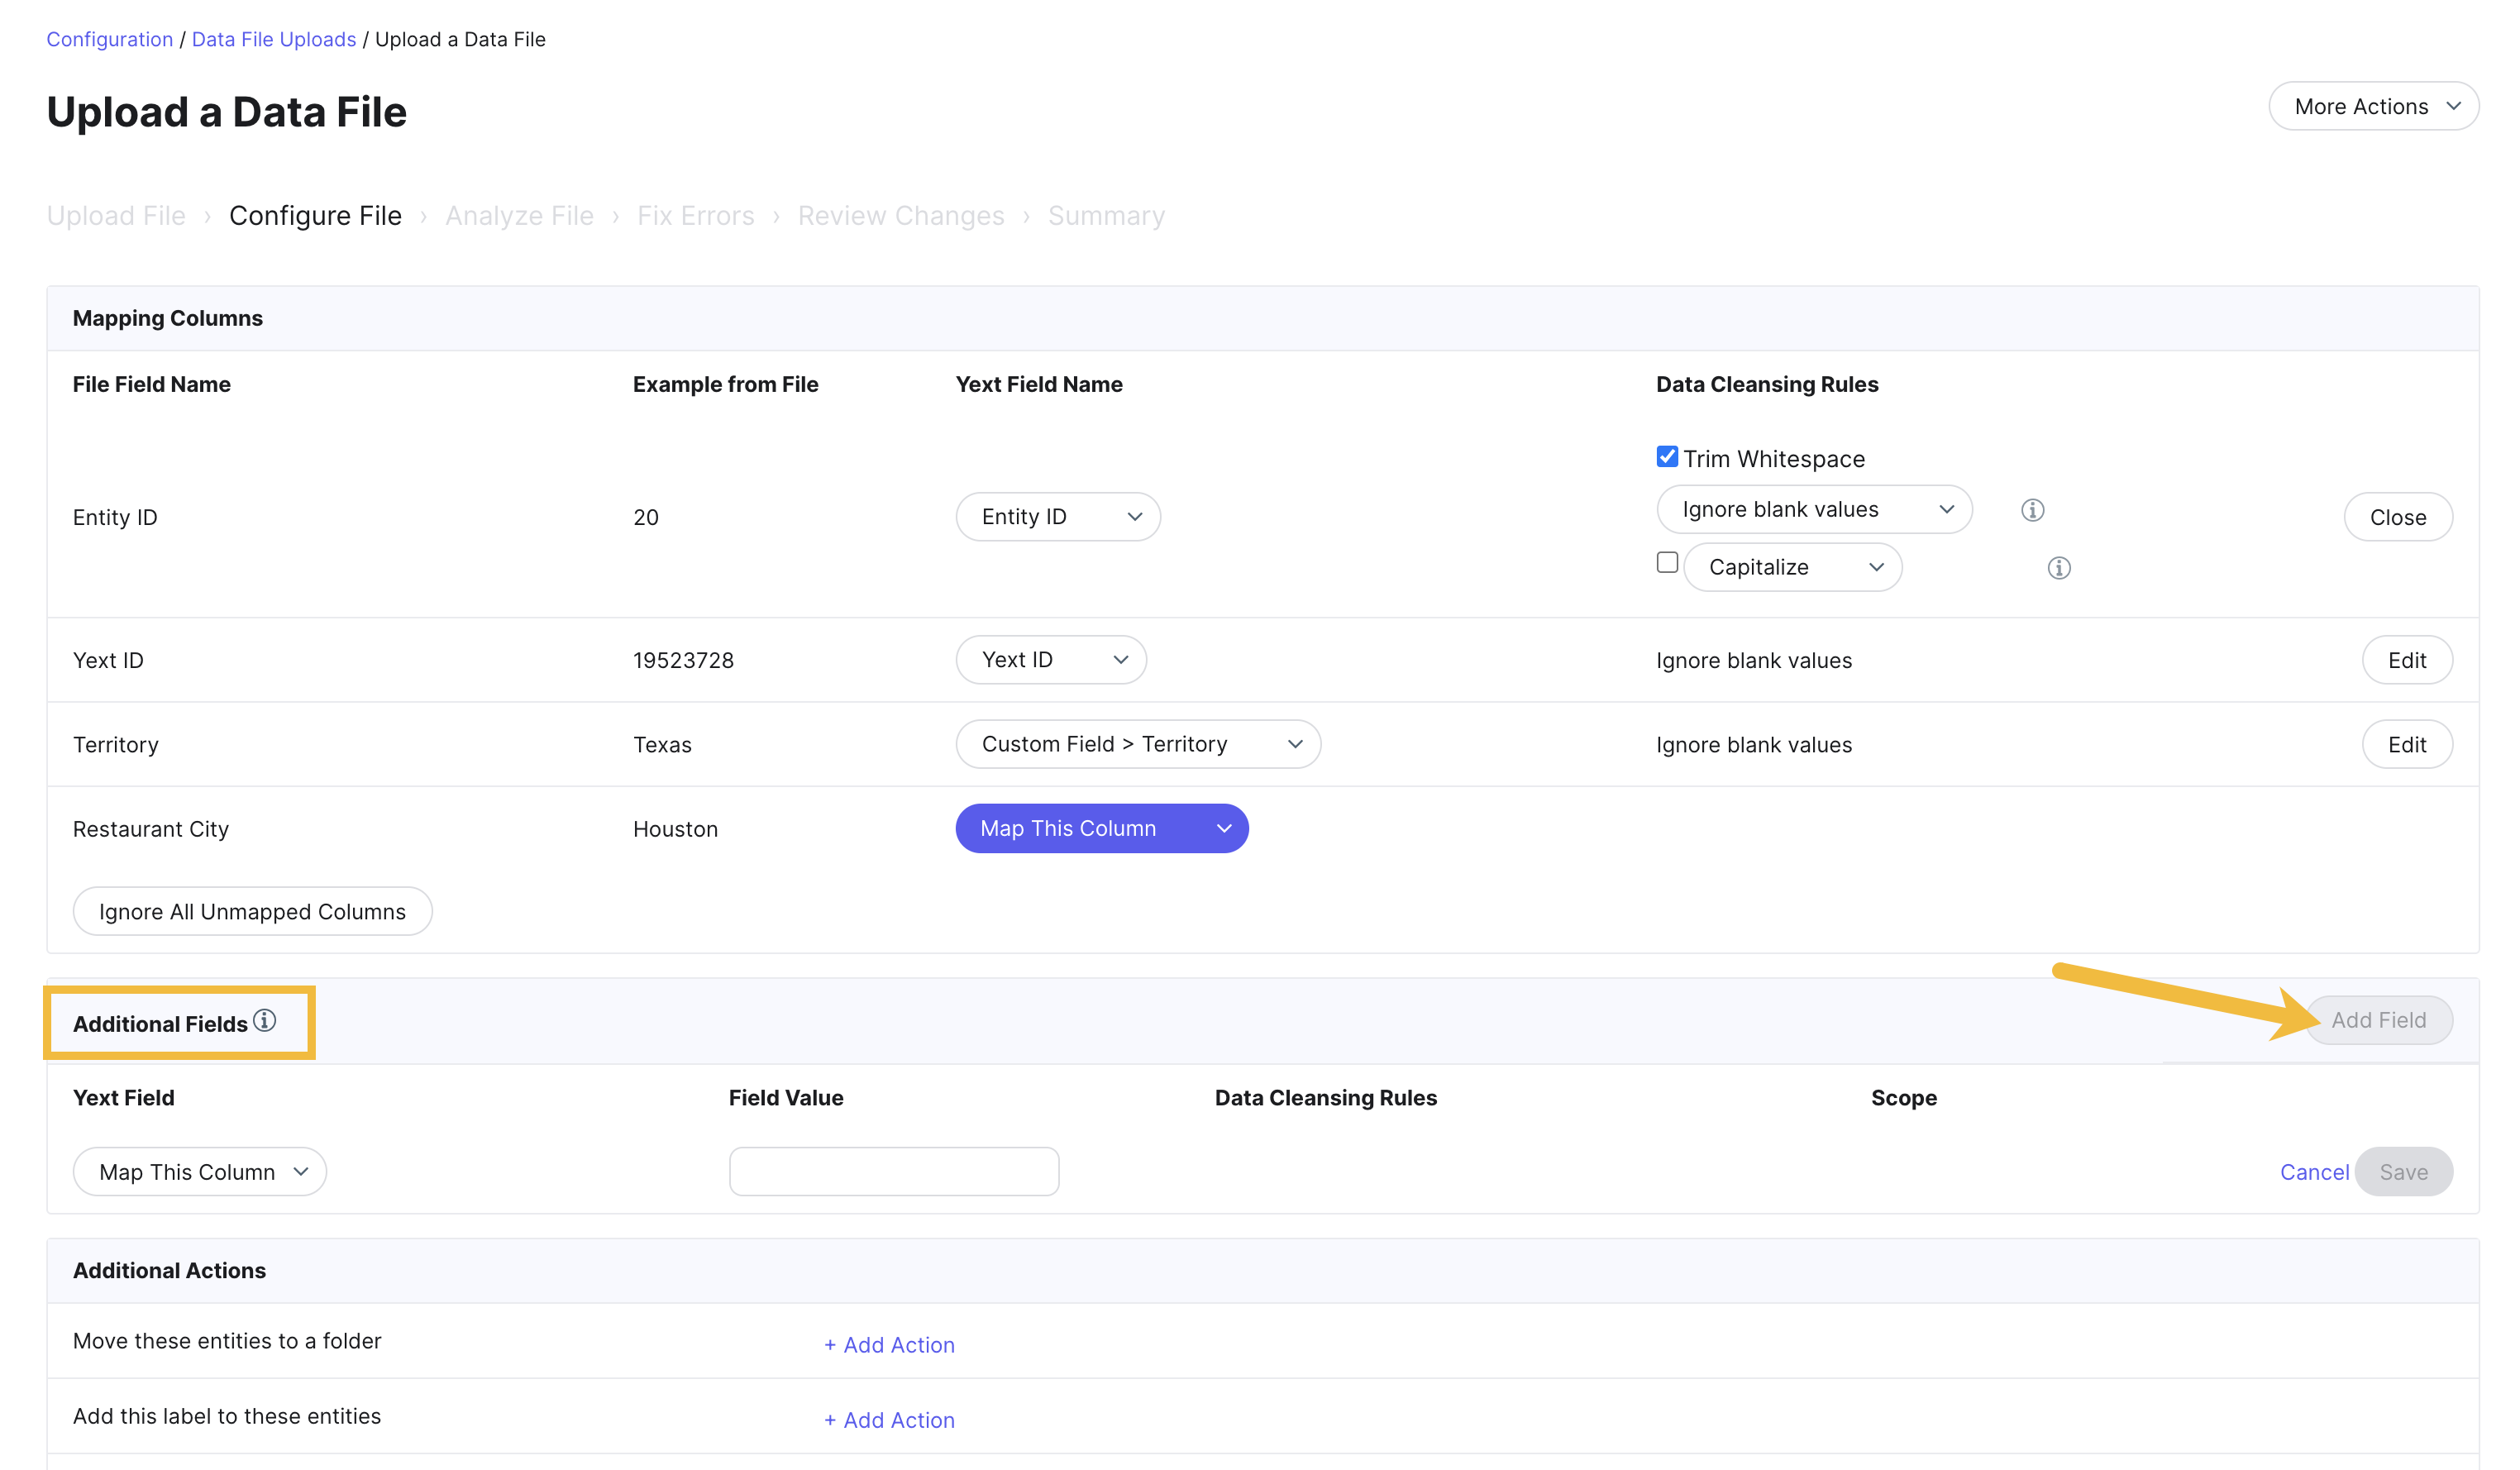
Then, choose the field you want to set from the Map This Column dropdown and specify your settings for that field. Note that this setting will set the same field value for all entities in the upload.

Use the Additional Actions section to add the entities in your upload to a folder, apply labels, or apply an entity template.

Analyze File
On this step, the system will process your upload.
If there were no issues with your upload, you will be brought to the Review Changes step.
If there were issues with your upload, you will be brought to the Fix Errors step.
Fix Errors
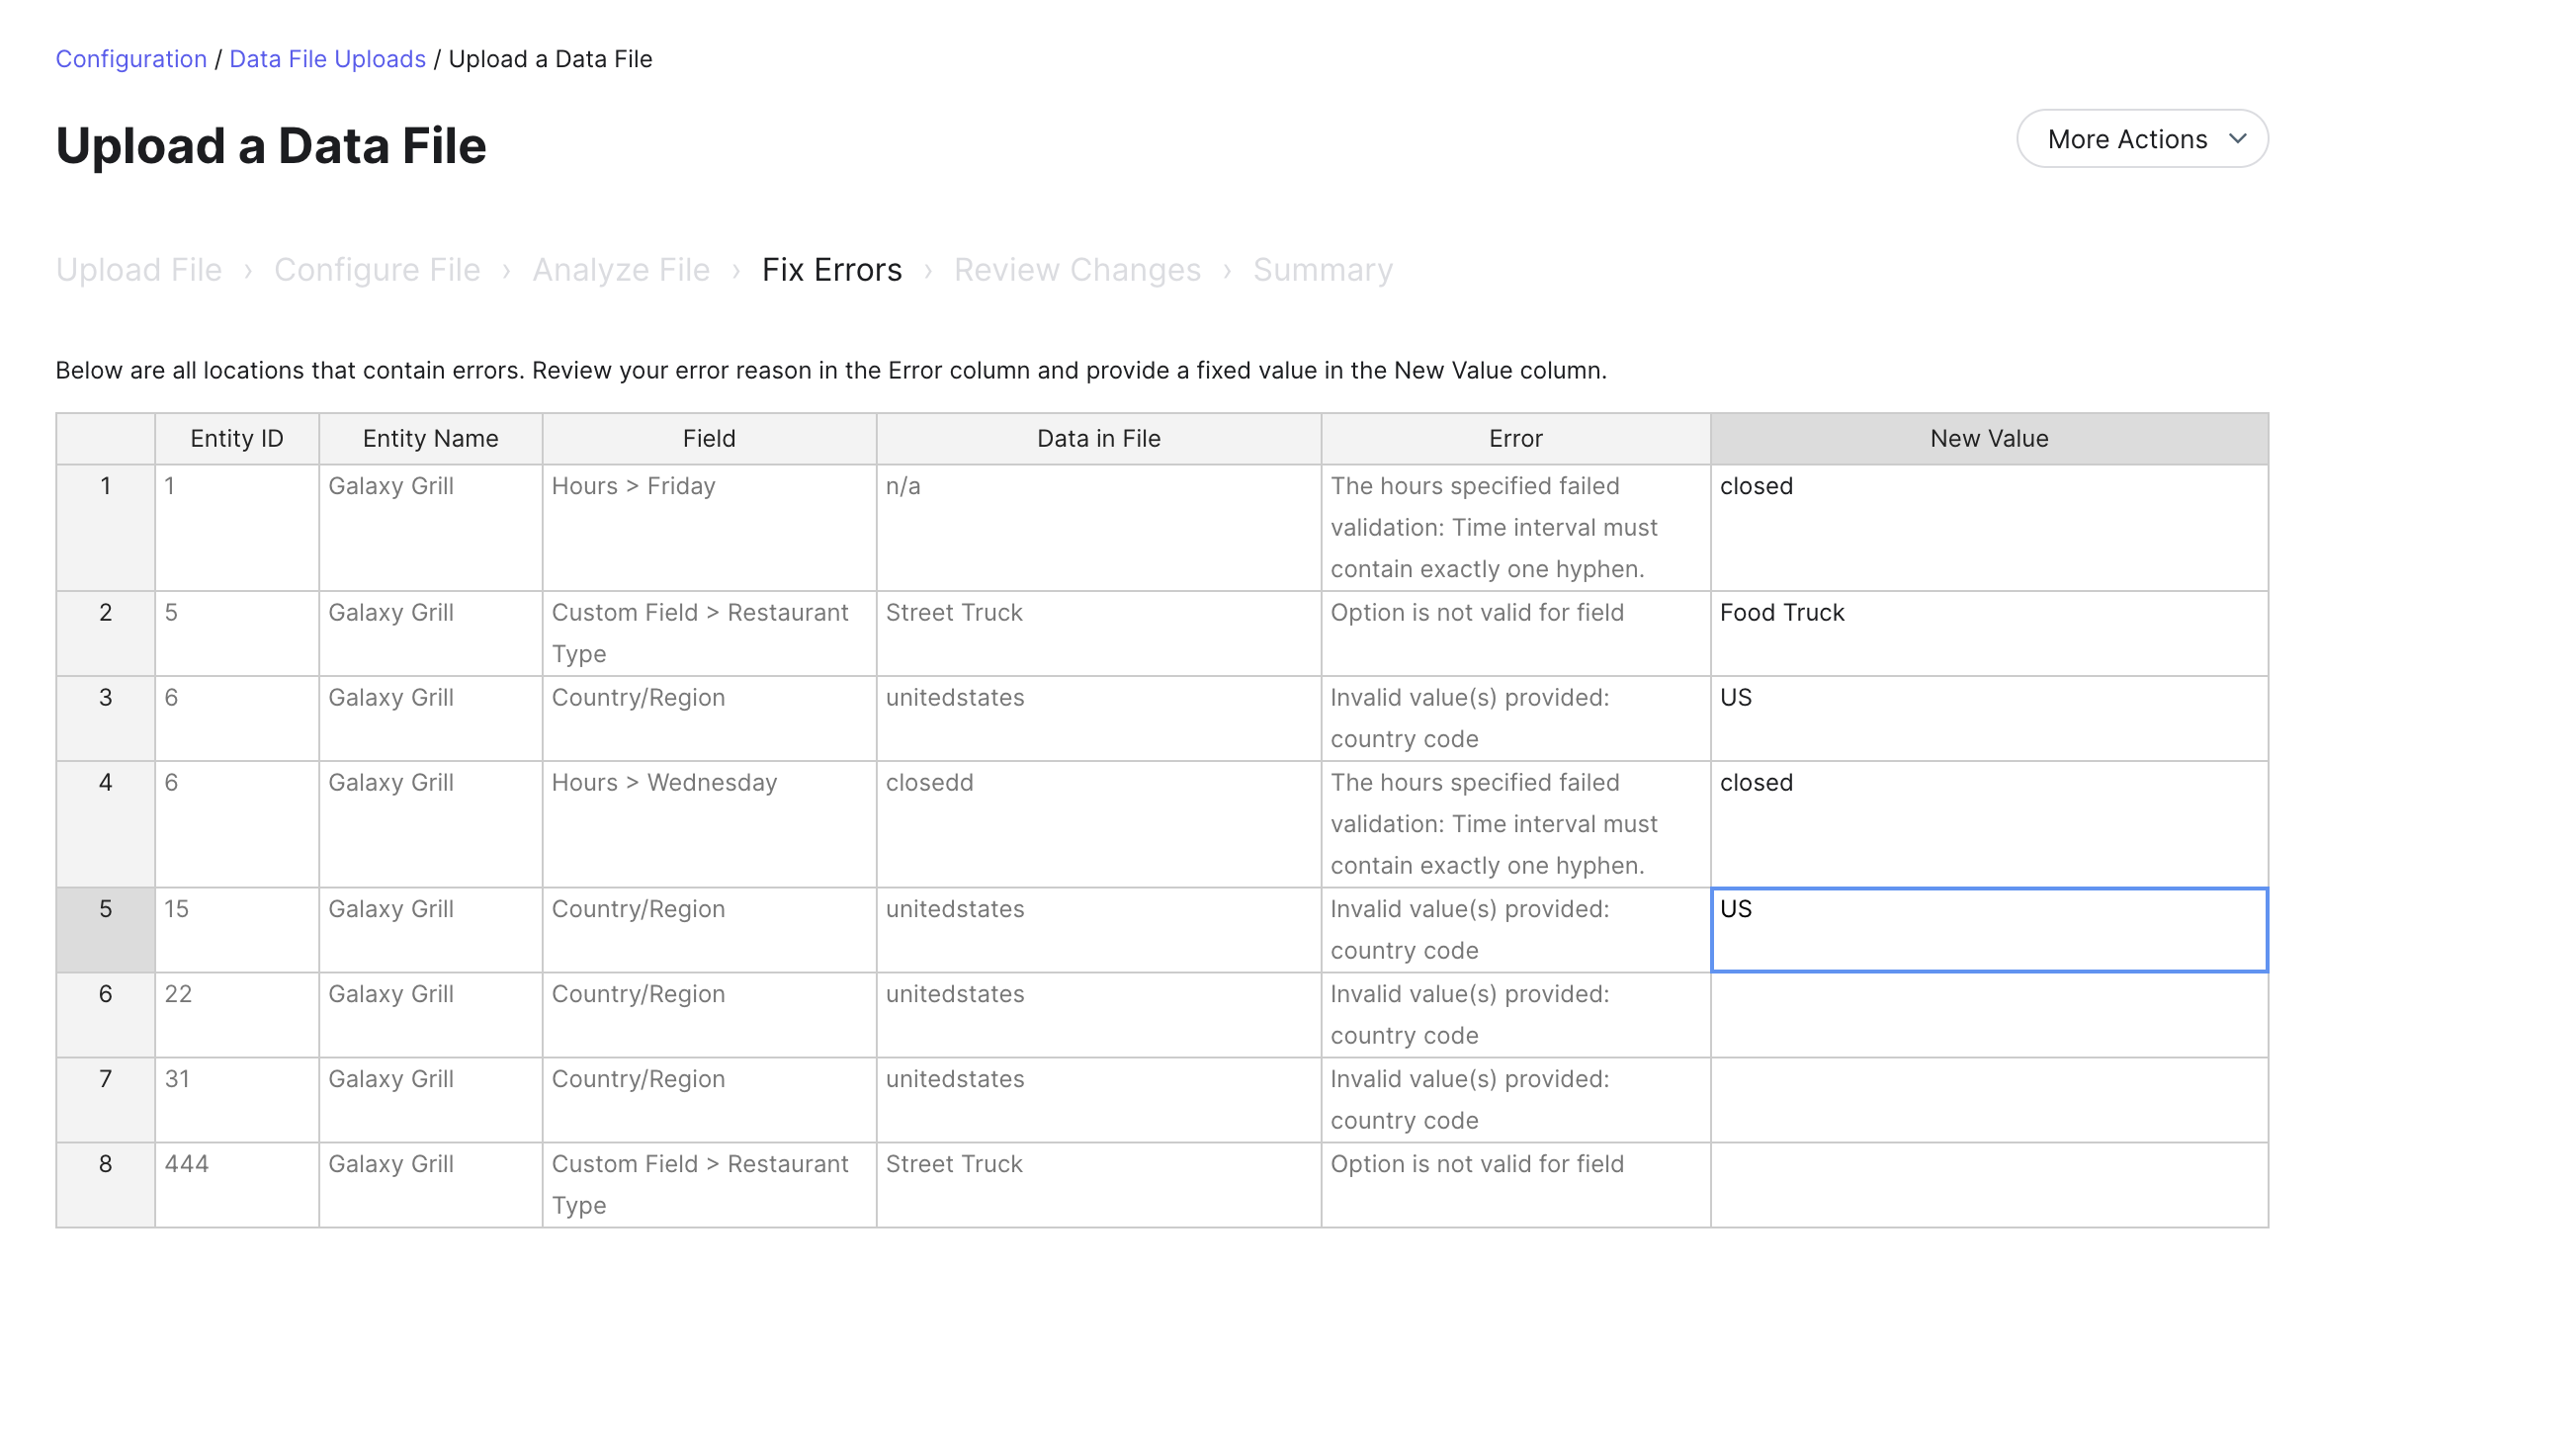
Review and resolve any issues with the data in your spreadsheet. The table shows the columns in your sheet with errors, and the number of rows affected by each error.
- To download a spreadsheet of errors, fix them in your file, and reupload the file, click Download Errors.
- To edit all errors directly from in the Entity Upload flow, click Fix All Errors.
- To fix just one type of error at a time in the Entity Upload flow, click Fix Errors in Spreadsheet View next to the chosen error.
- To skip uploading any field values with errors, click the dropdown arrow on the chosen error and select Ignore These Values.

If you chose to Fix All Errors or to fix a single error in Spreadsheet View, enter the corrected field value for each row in the New Value column.
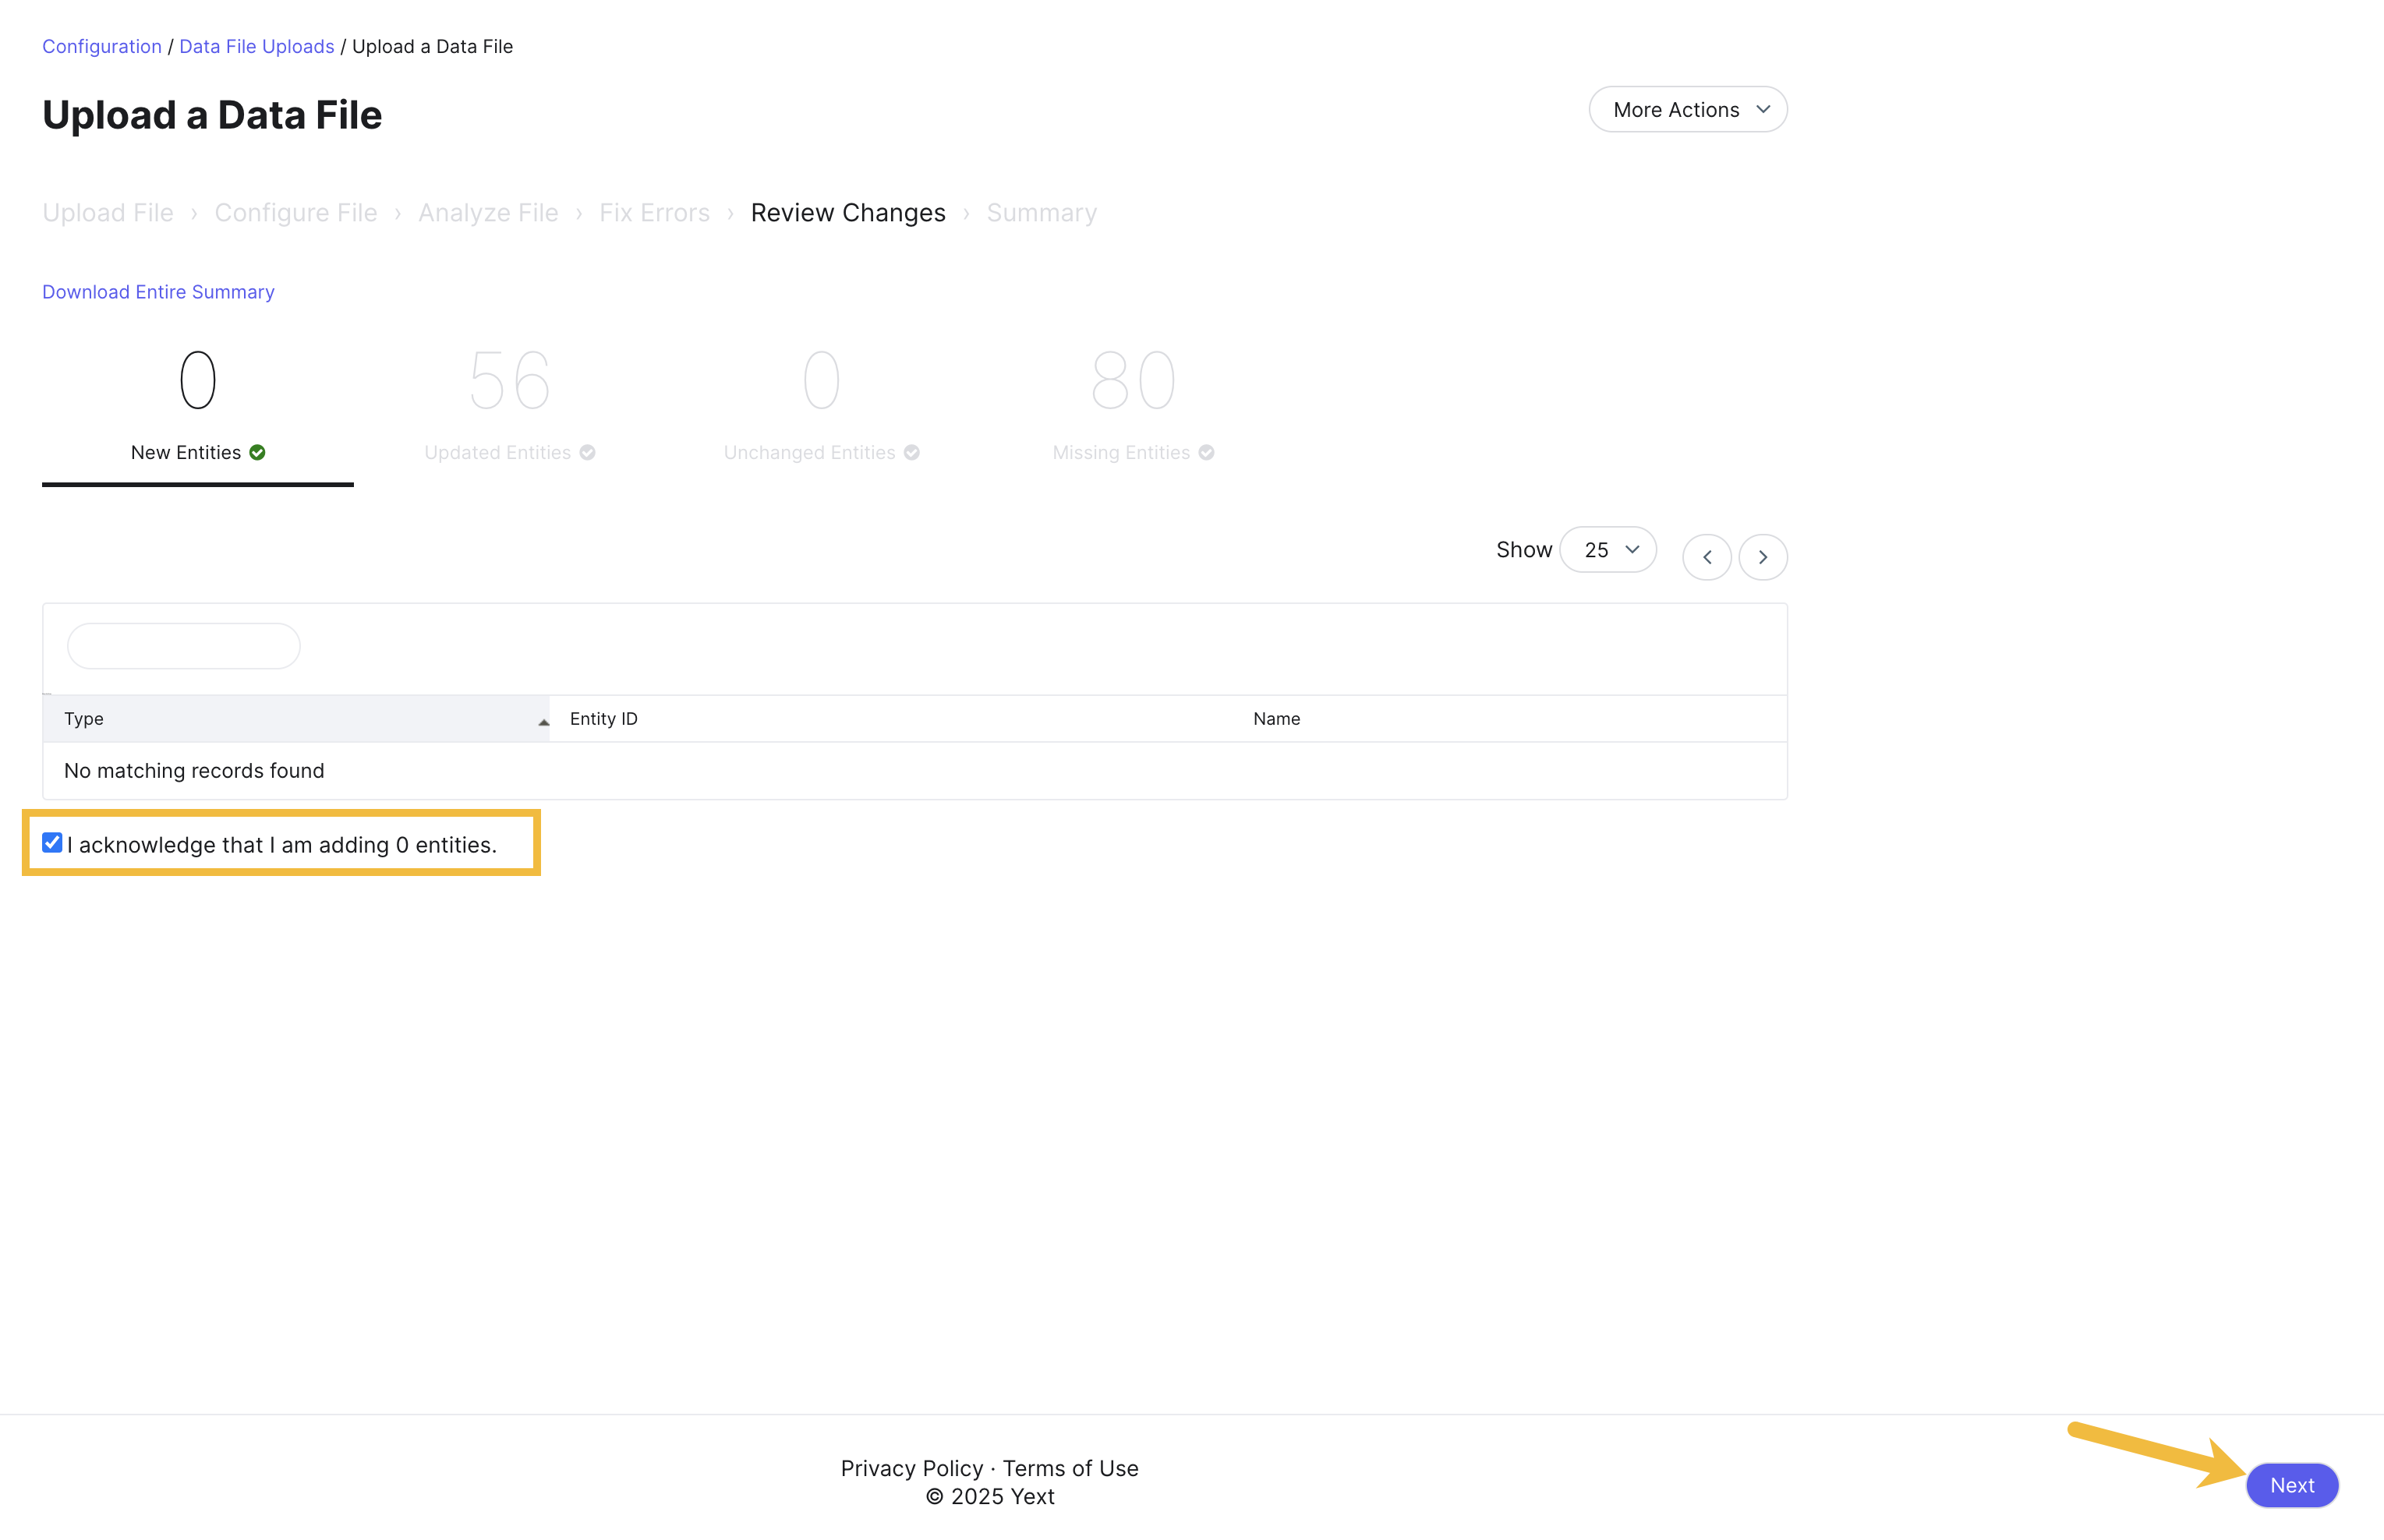
Review Changes
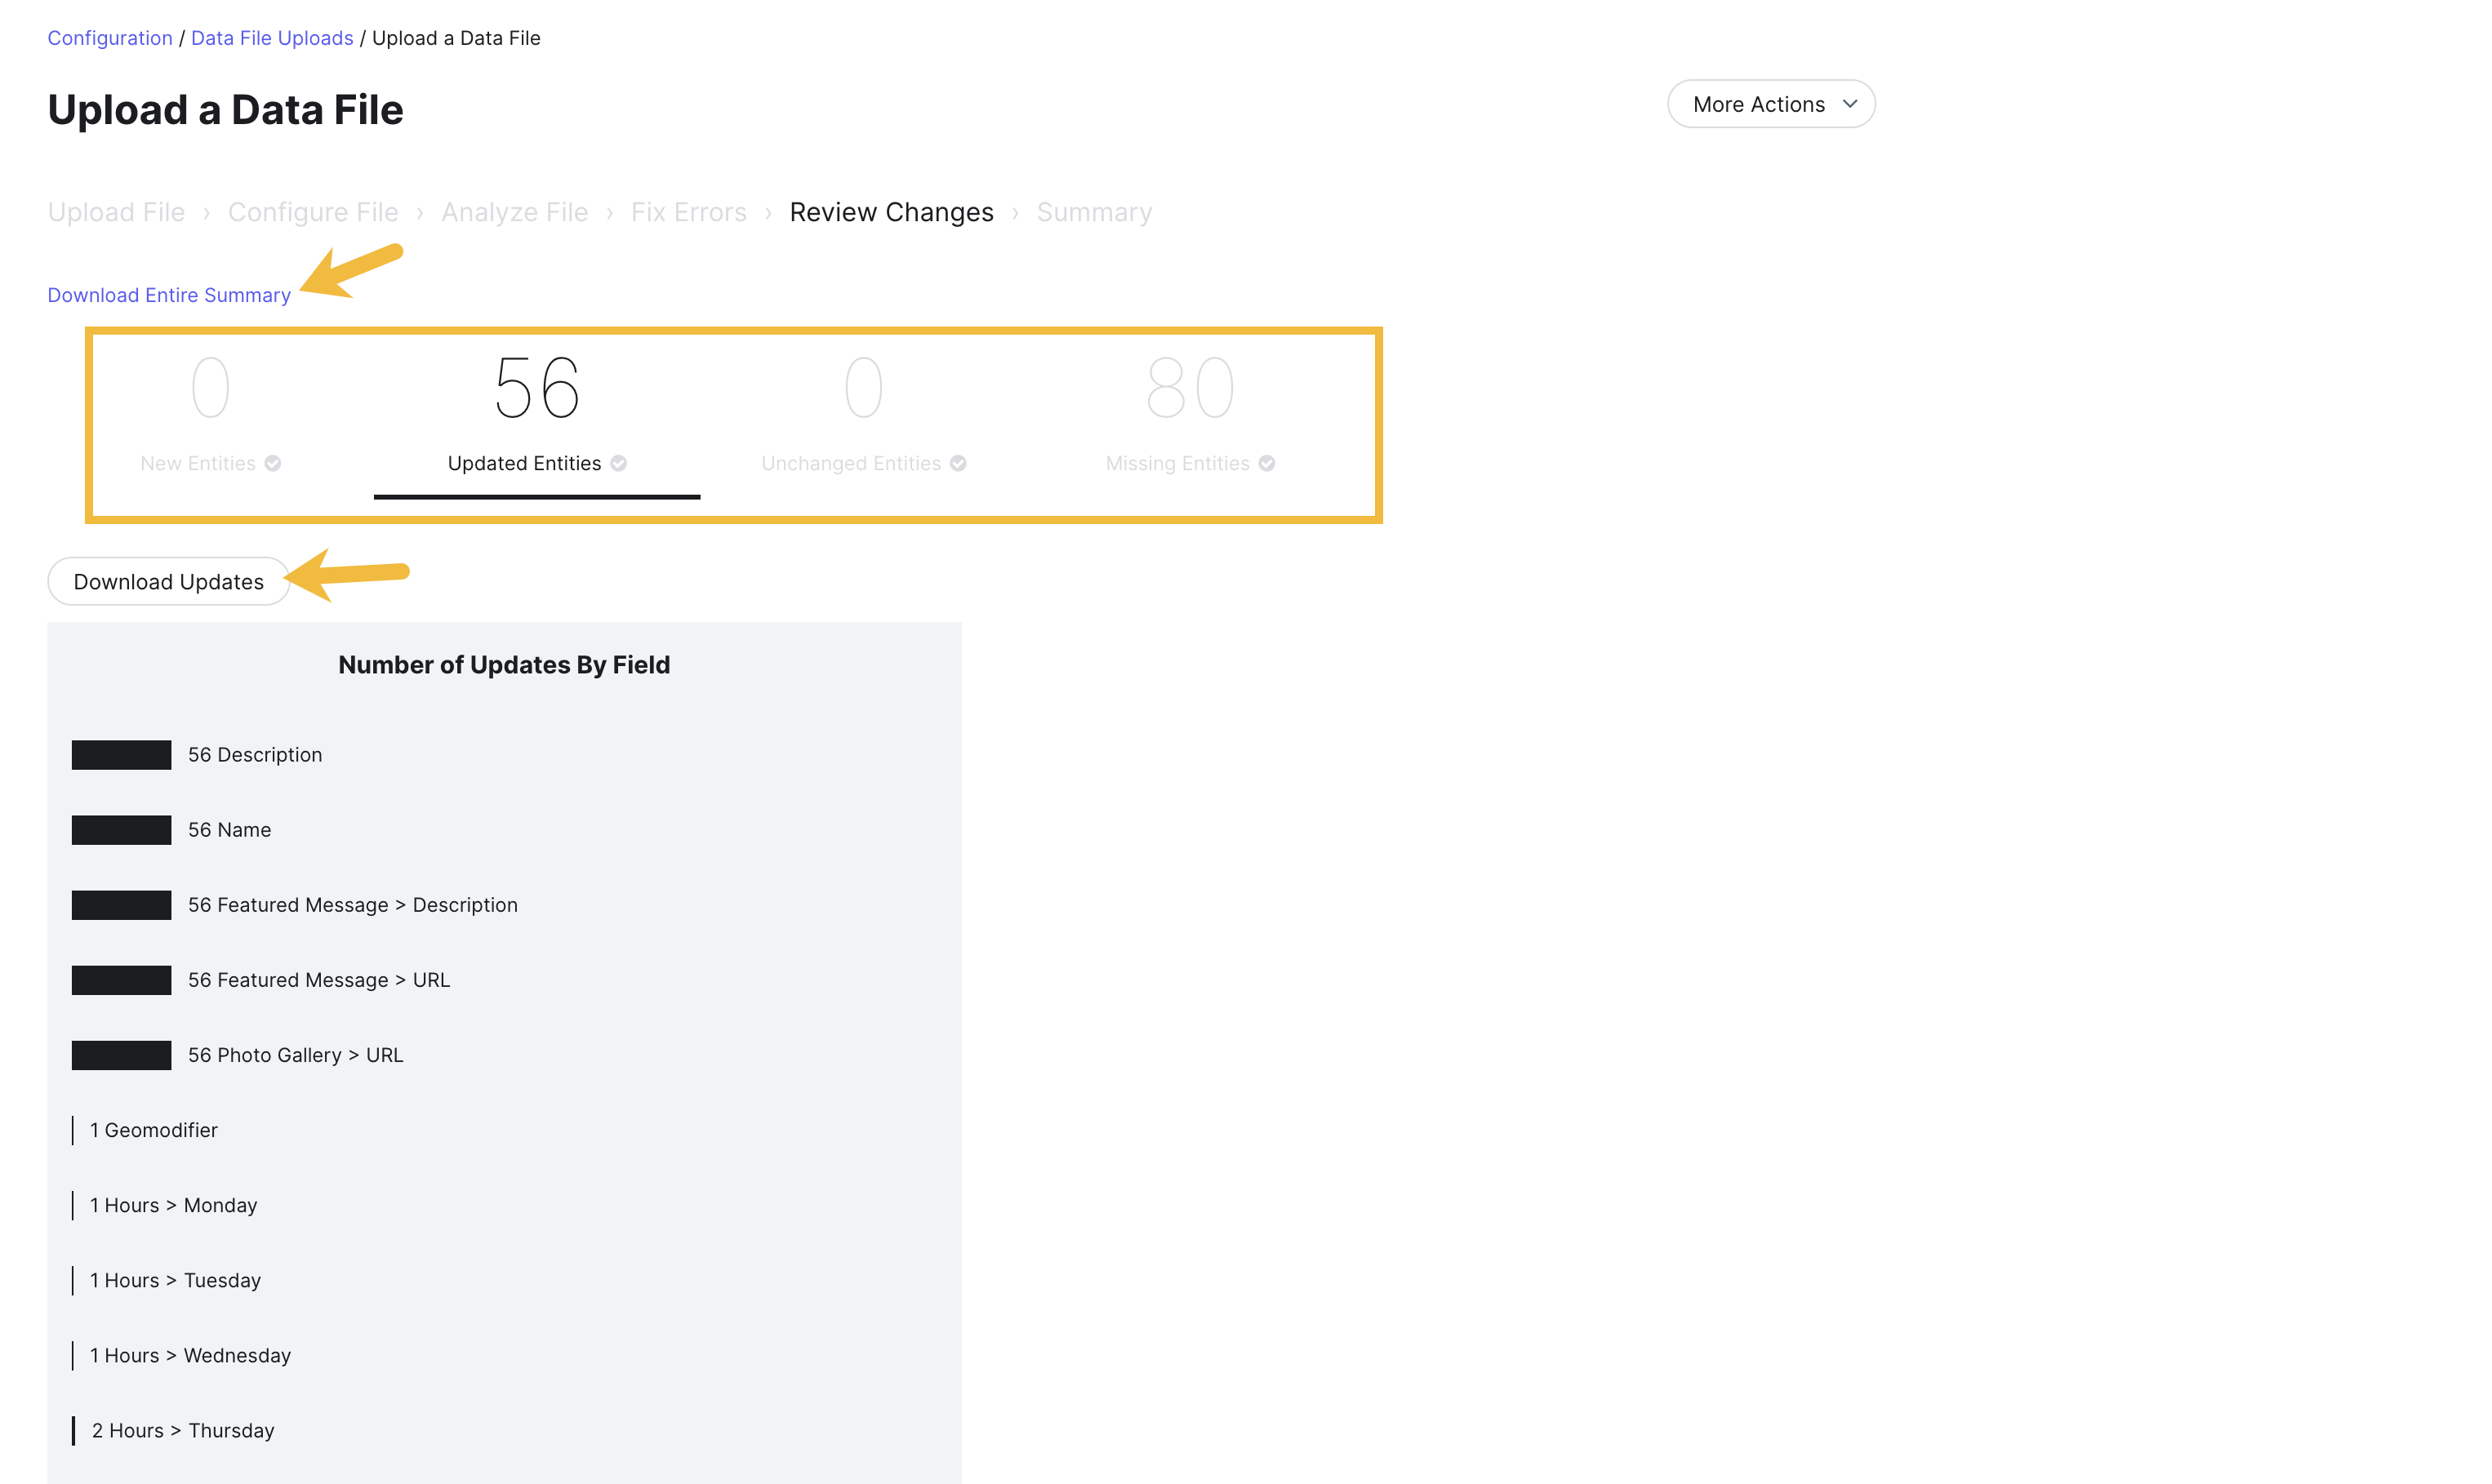
On this step, you will see a breakdown of all the entities in your upload by category:
- New entities
- Updated entities
- Unchanged entities (present in your upload, but no data was added or changed)
- Missing entities (entities in your account that were not present in your upload).
You can click each hero number for more detail on the individual entities in each category, or download a file of the summary.
You’ll then need to confirm the changes in each entity category to complete the upload.
Summary
On this step, the system will process and apply the changes in your upload. You can monitor these changes in the progress bar at the top of the screen.
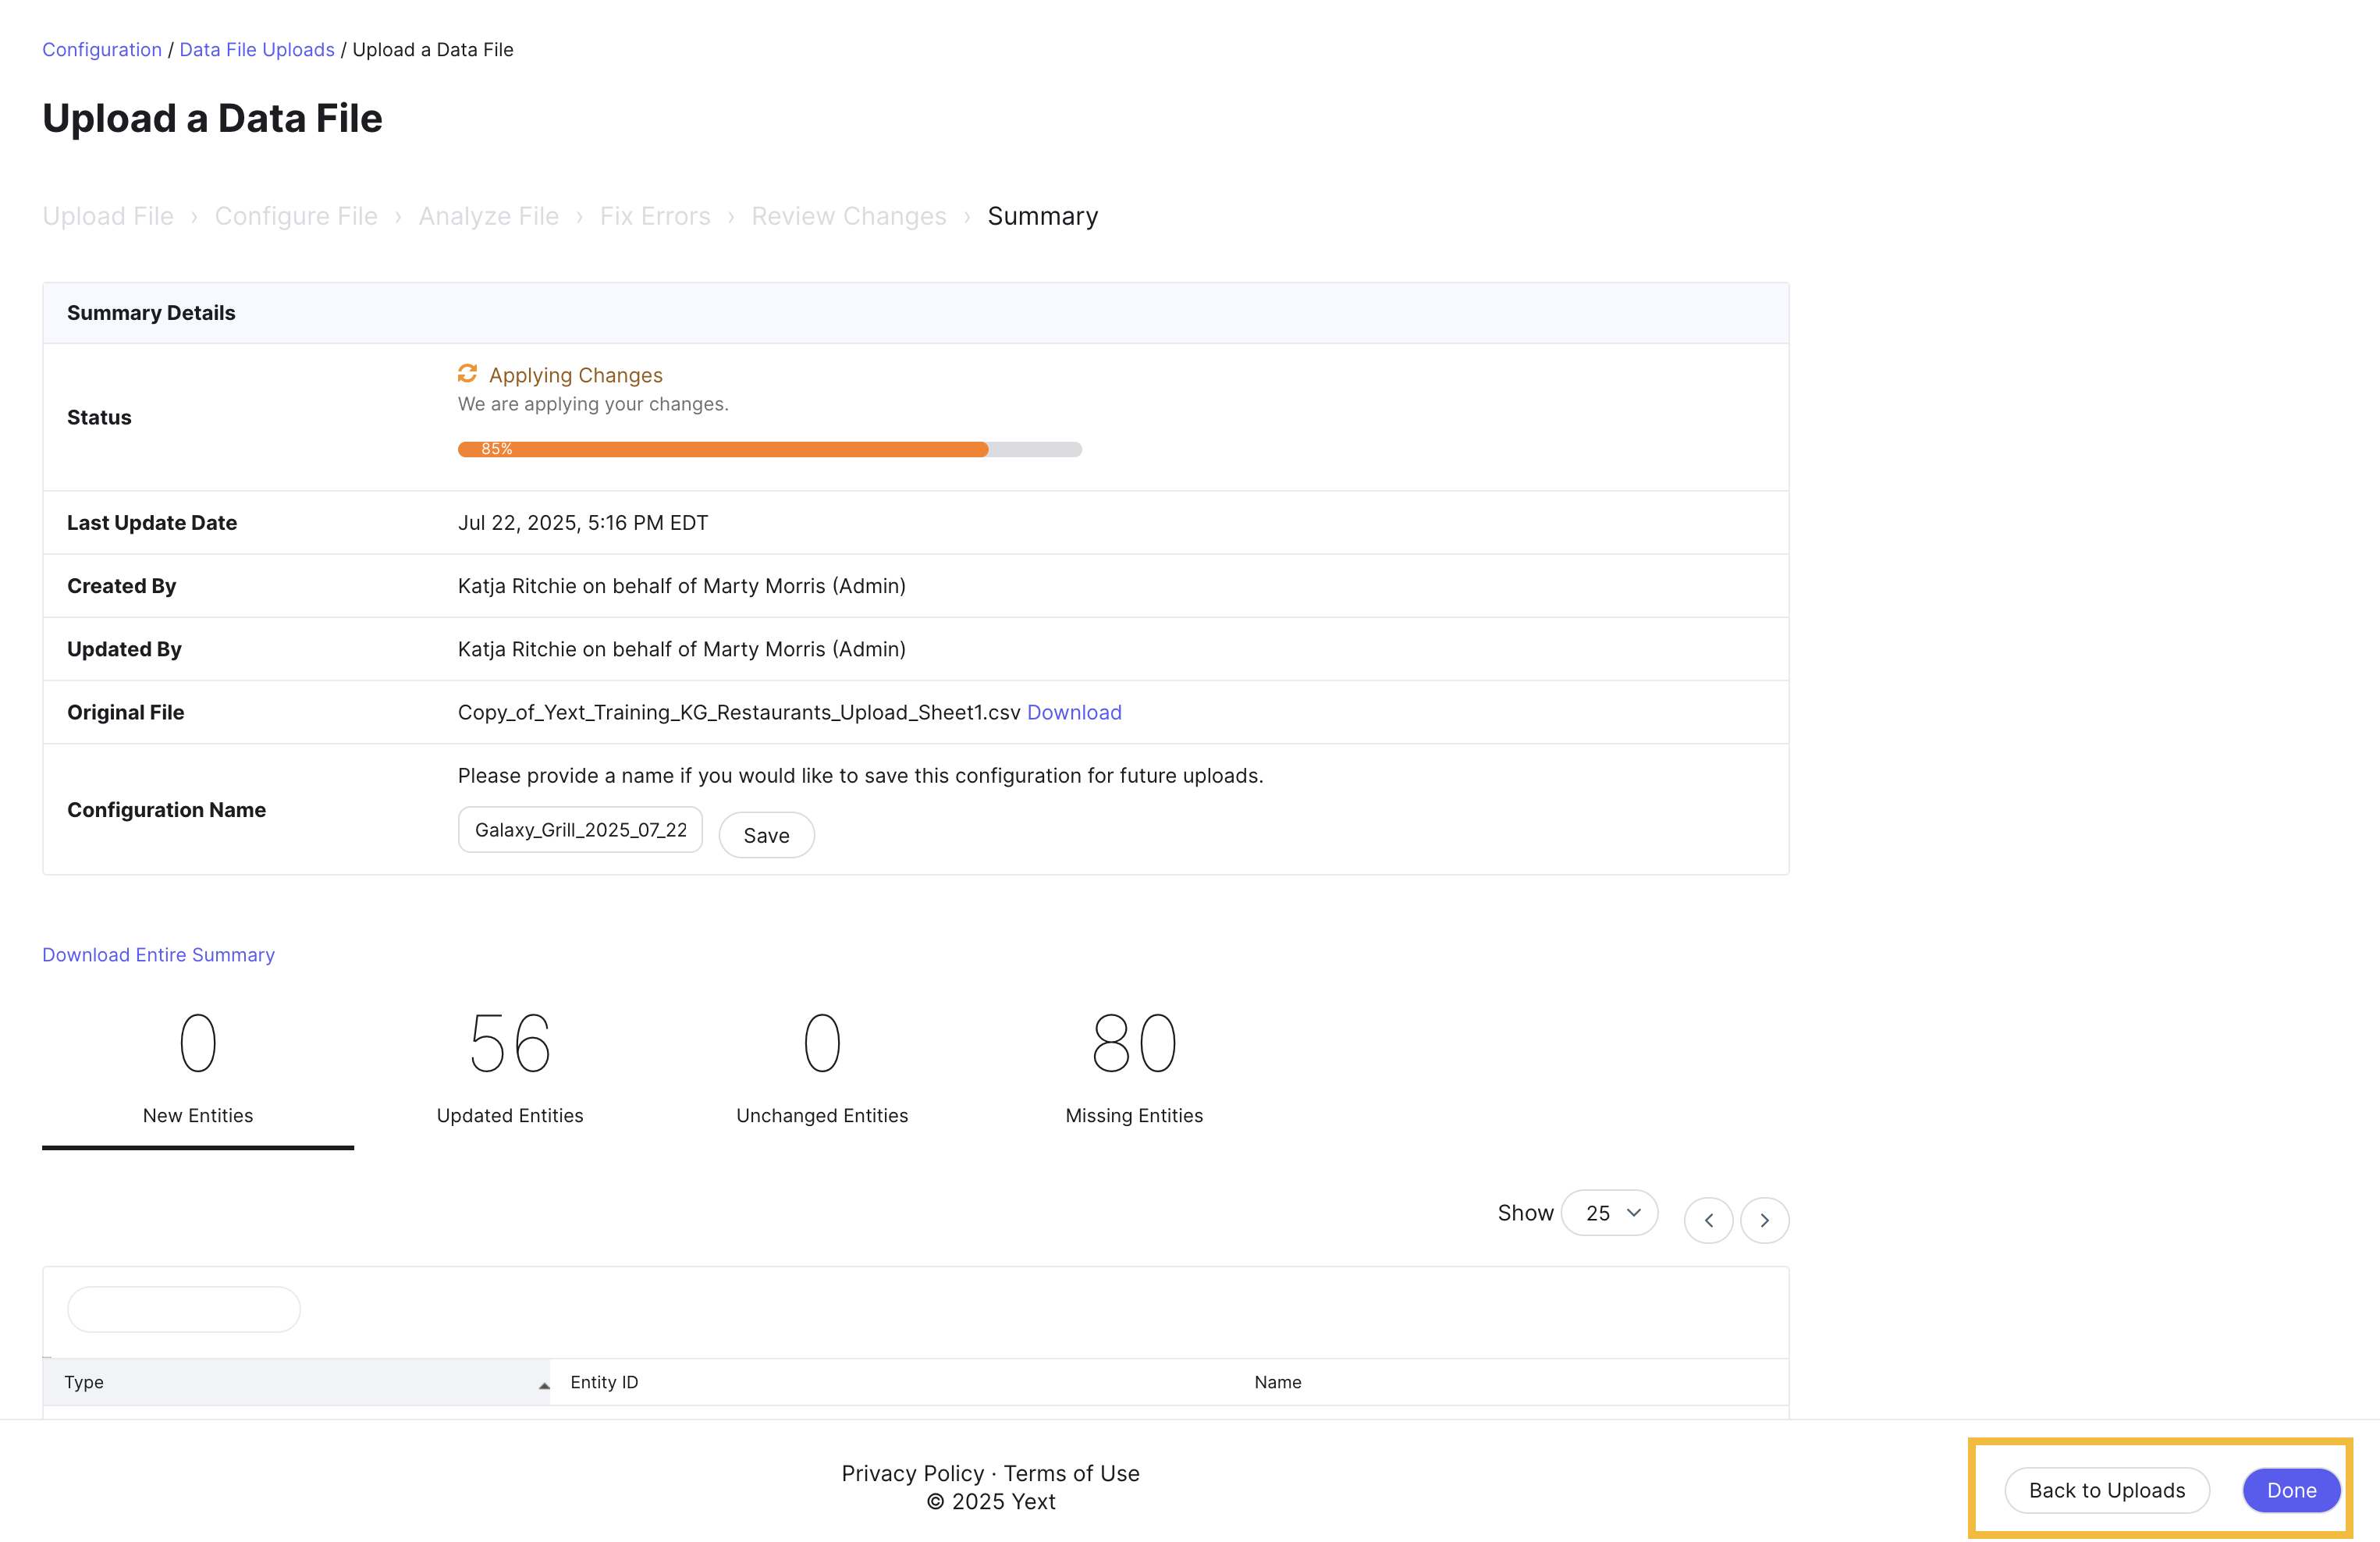
Click Done or Back to Uploads to exit the Entity Upload flow. This screen is also where you can save your entity upload configuration.
After Uploading
After your upload, you can reference past entity uploads by going to Knowledge Graph > Configuration > Data File Uploads.
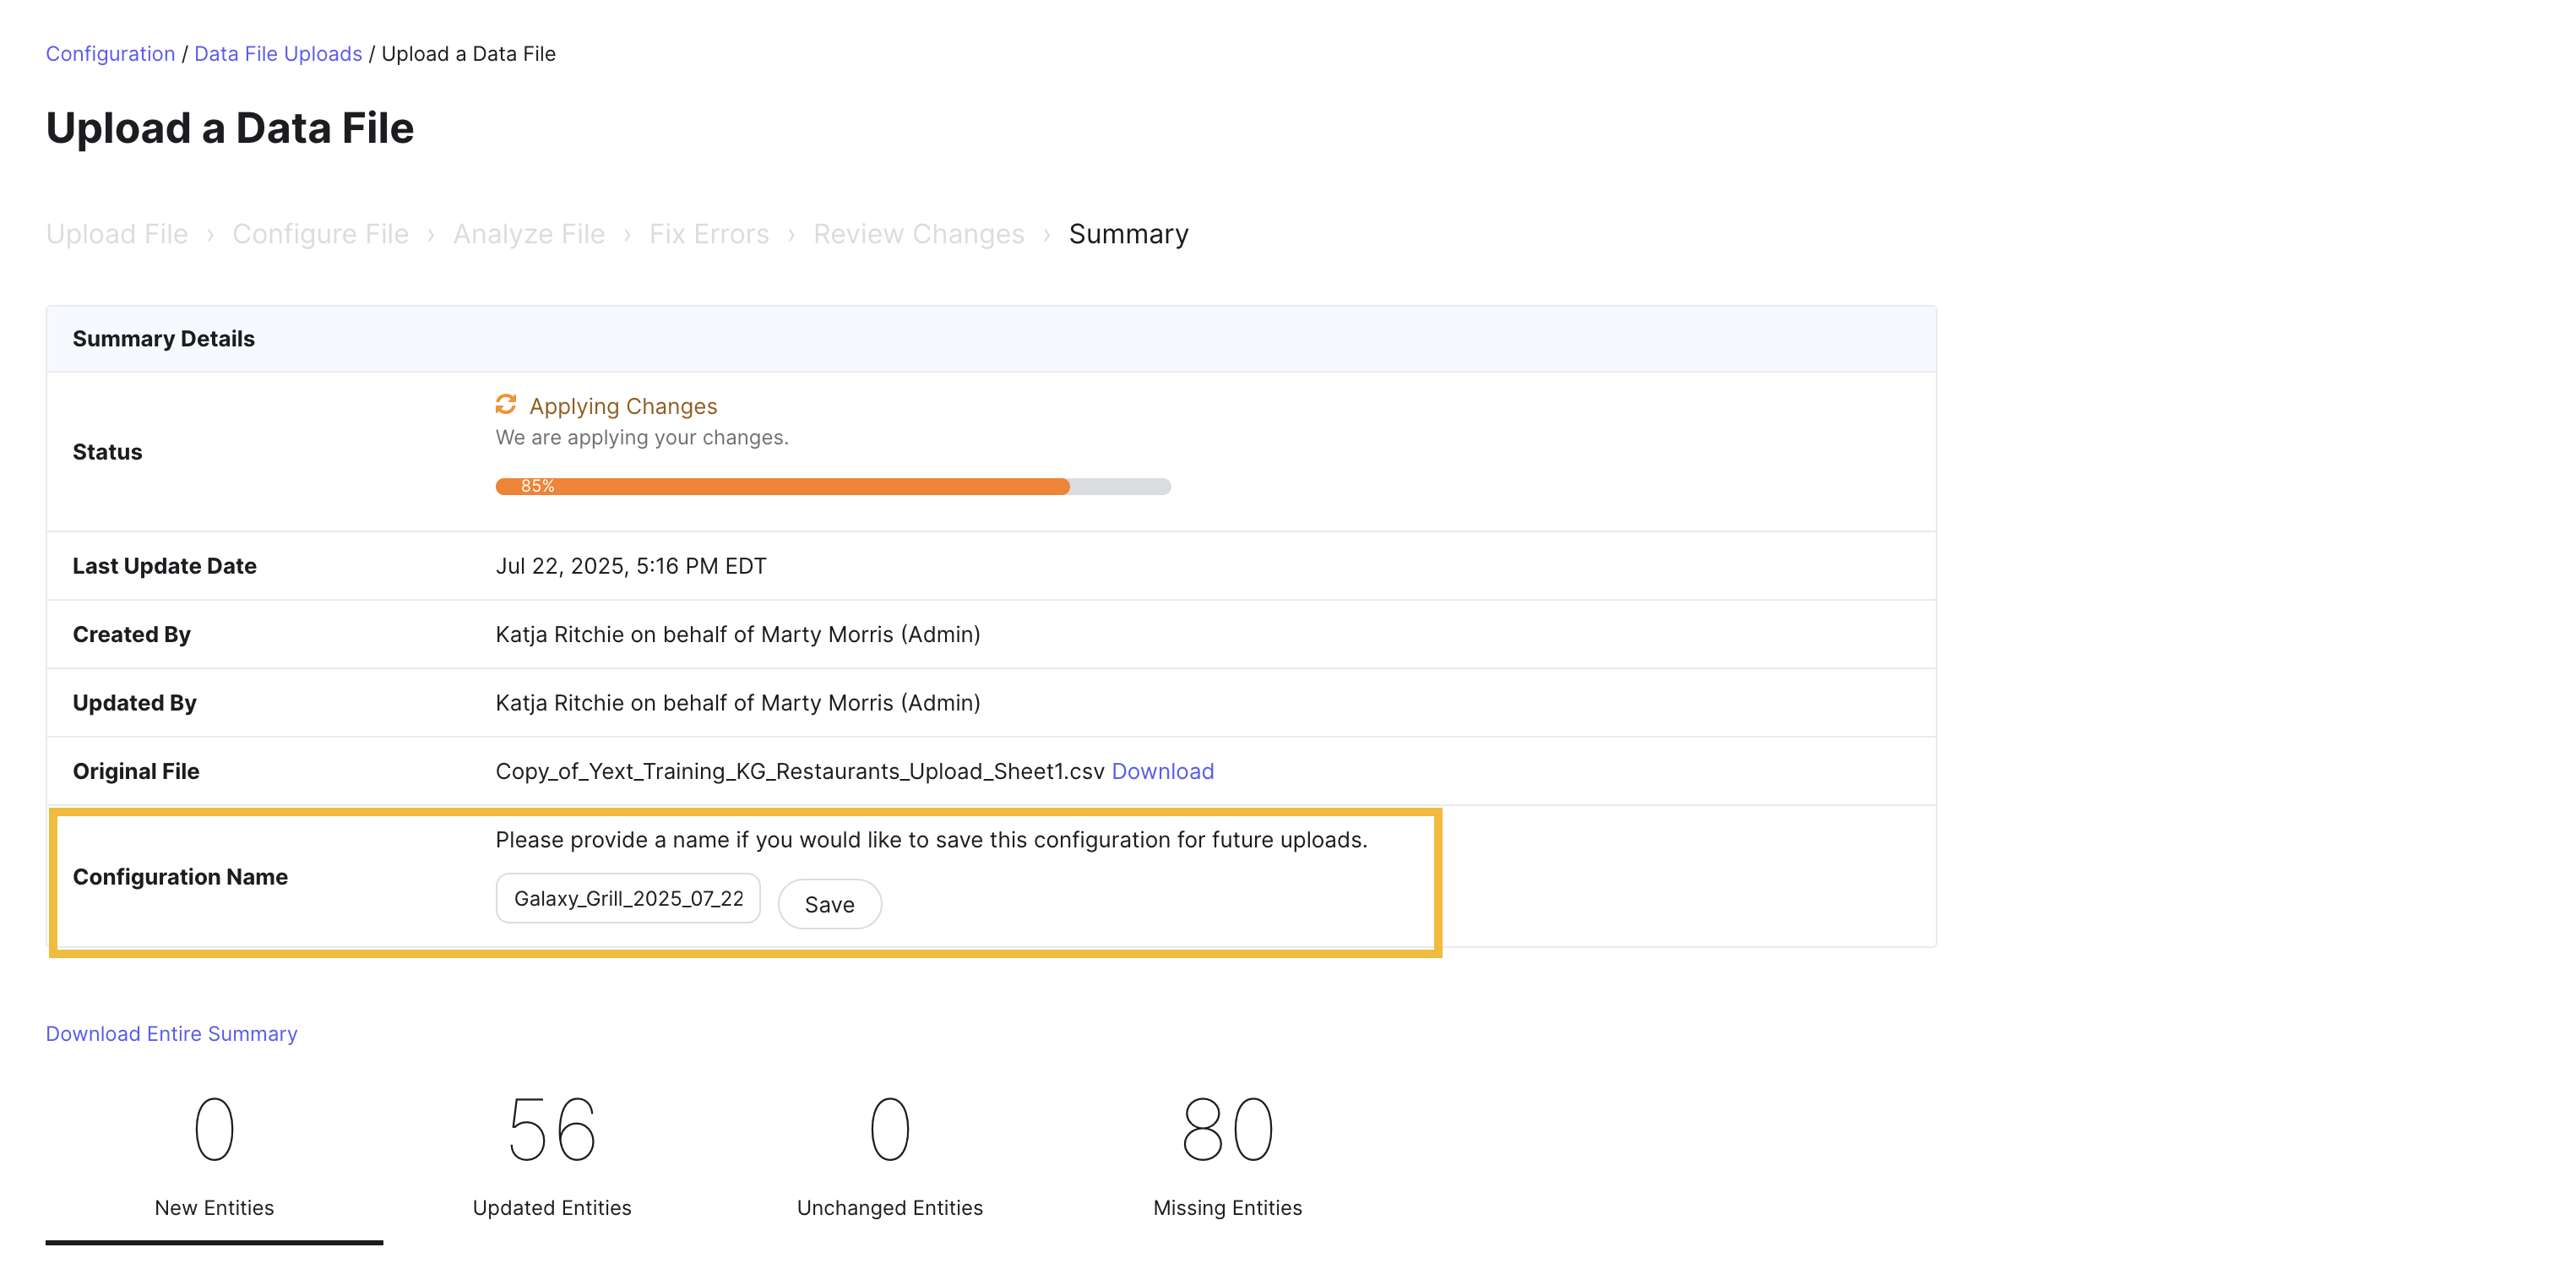
Saved Upload Configurations
Saved upload configurations are like templates for entity uploads that you plan to repeat over time. You can use an upload configuration to save your settings for a certain file upload process (including your field mappings, data cleansing rules, additional fields/actions, etc.) and apply the same settings to future uploads of similar data.
You can save an upload configuration during the Summary step of the Entity Upload flow. Enter a name for your configuration and click Save.
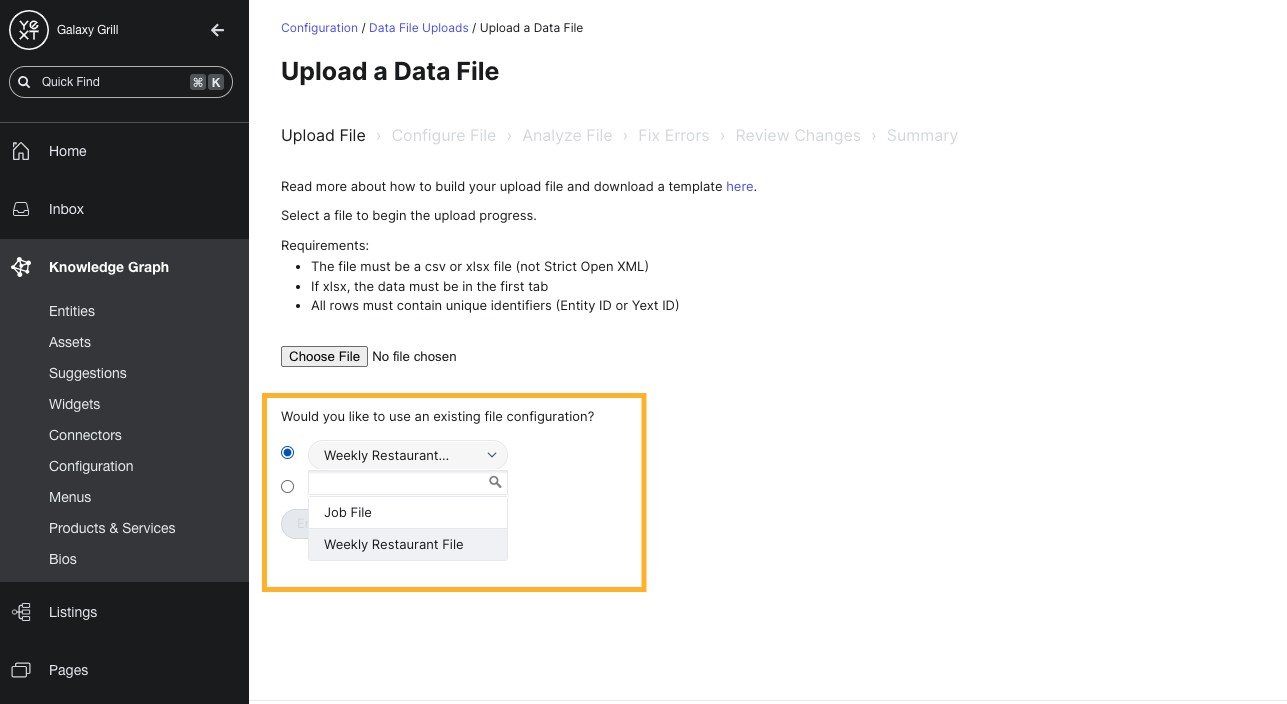
Applying a saved upload configuration
To use a saved upload configuration in a future upload, select it in the Upload File step of the Entity Upload flow.
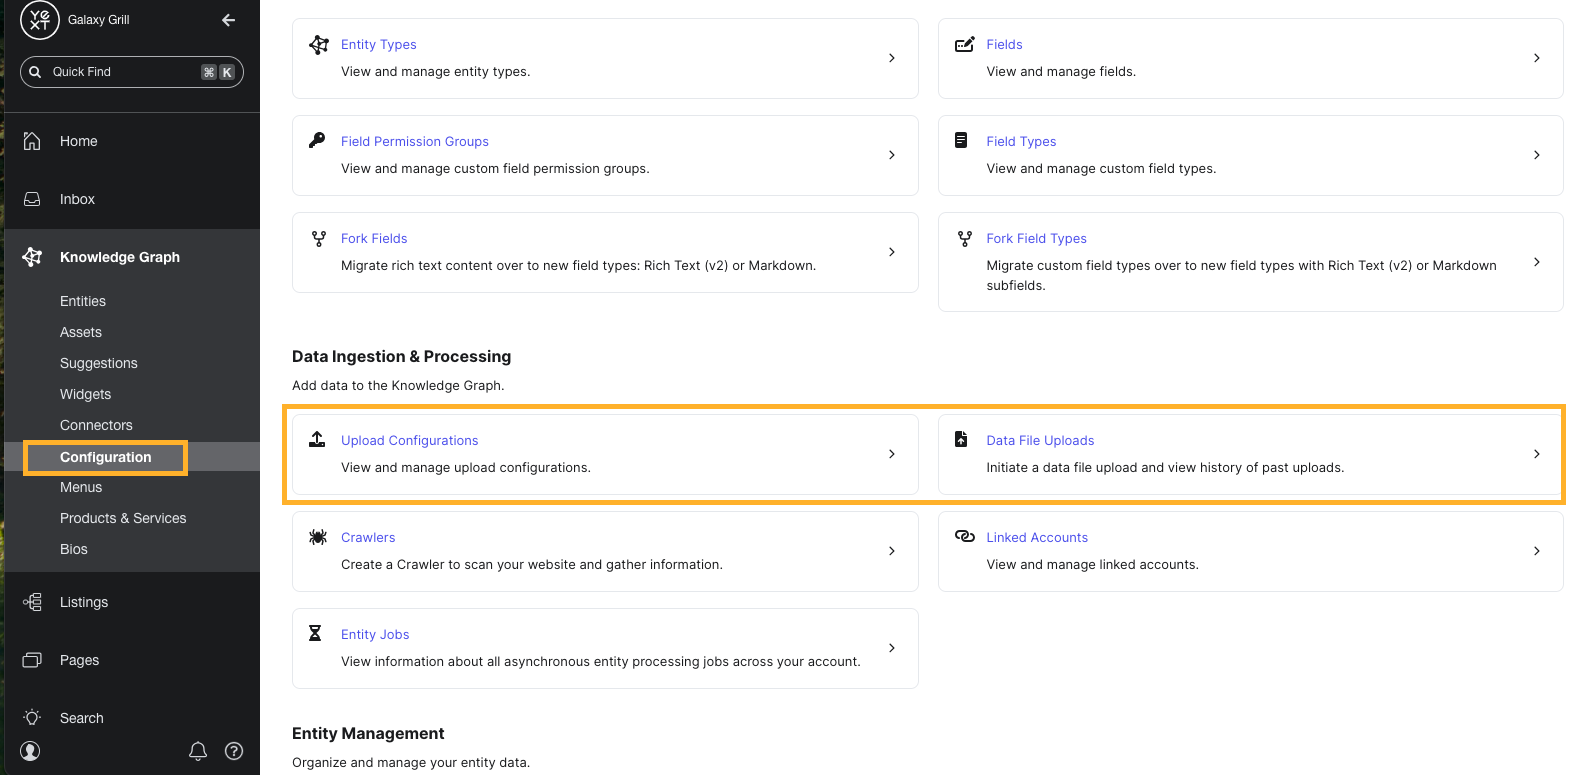
After Uploading
To view past entity uploads and your saved upload configurations, navigate to Knowledge Graph > Configuration. Click the Upload Configurations or Data File Uploads tile.
Keep Learning
For detailed steps on how to use Entity Upload, see the Upload Entities to Yext help article.
For more information on required fields for each entity type, and example file upload templates, see the Entity Upload Templates and Required Fields help article.
What should you do before uploading a spreadsheet to the Knowledge Graph? (Select all that apply)
What is a saved upload configuration?
What should you do if some of your data columns are not automatically mapped to entity fields?
True or false: You can fix upload errors from within the Entity Upload flow.
You're a star! ⭐
