
Create a Crawler | Yext Hitchhikers Platform
What You’ll Learn
In this section, you will learn:
- How to create a Crawler
- An overview of Crawler settings
Overview
The Crawler is one of the Sources in the Data Connectors framework that will help you scrape web pages to extract information to store in the Knowledge Graph. Before you can add a Data Connector using the Crawler, you have to create a Crawler.
Once you create a Crawler in your account, it will try to scrape web pages on the specified domain. You can then proceed to the Add Data flow to parse through the raw HTML and convert the scraped data into entities in the Yext platform.
When to use a Crawler
The Crawler is perfect for pulling in unstructured long-form content like blog posts, help articles, or press releases that are being written and published elsewhere, but you want to surface in your Search experience. This will save you from having to make the update in two places, yet make the content searchable programmatically.
For more structured entity types, like locations or products, the Crawler can still work as long as the pages being crawled are highly structured and don’t change frequently or unpredictably.
When not to use a Crawler
The Crawler might not be the best fit for you if the structure or the CSS of the pages being crawled change frequently and with no notice to you or your team. This could break the data mappings and make it difficult to update.
Also, if the entity type is highly structured, but your pages are not, you won’t be able to reliably create mappings from your webpage to your entity schema. For these, we recommend going straight to the source.
Another consideration is update latency. The Crawler is not going to pull in updates from your website in real-time so if it’s important that the entity type needs to be updated quickly, you should consider another method, like an App or an API integration.
Whitelist the Yext Crawler
Before setting up a crawler for your website, you need to ensure that the Yext Crawler is properly whitelisted to access your web pages. We ask that you both whitelist our Crawler’s user agent and IP addresses.
User Agent:
The Yext Crawler uses the following user agent:
Mozilla/5.0 (X11; Linux x86_64) AppleWebKit/537.36 (KHTML, like Gecko) HeadlessChrome/87.0.4280.88 YextBot/Java Safari/537.36
IPs:
The Yext Crawler uses the following IP addresses:
- 54.204.19.87
- 50.19.160.200
- 34.198.218.97
- 54.221.171.225
Create a Crawler
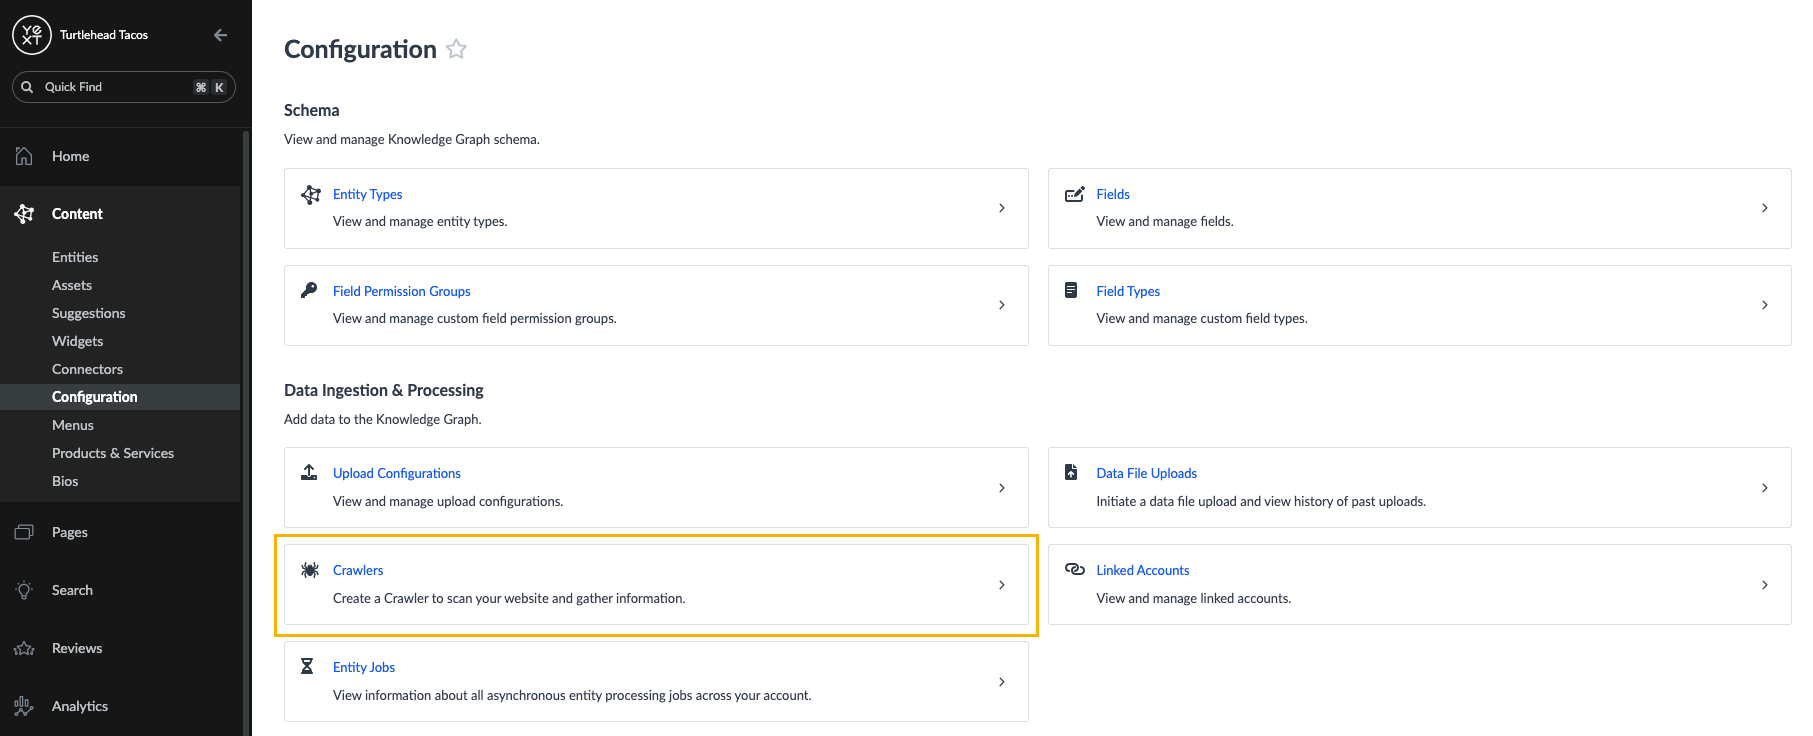
- Click Knowledge Graph in the navigation bar.
- Click Configuration.
- Click Crawlers under the Data Ingestion & Processing section.
- Click on the + New Crawler button.
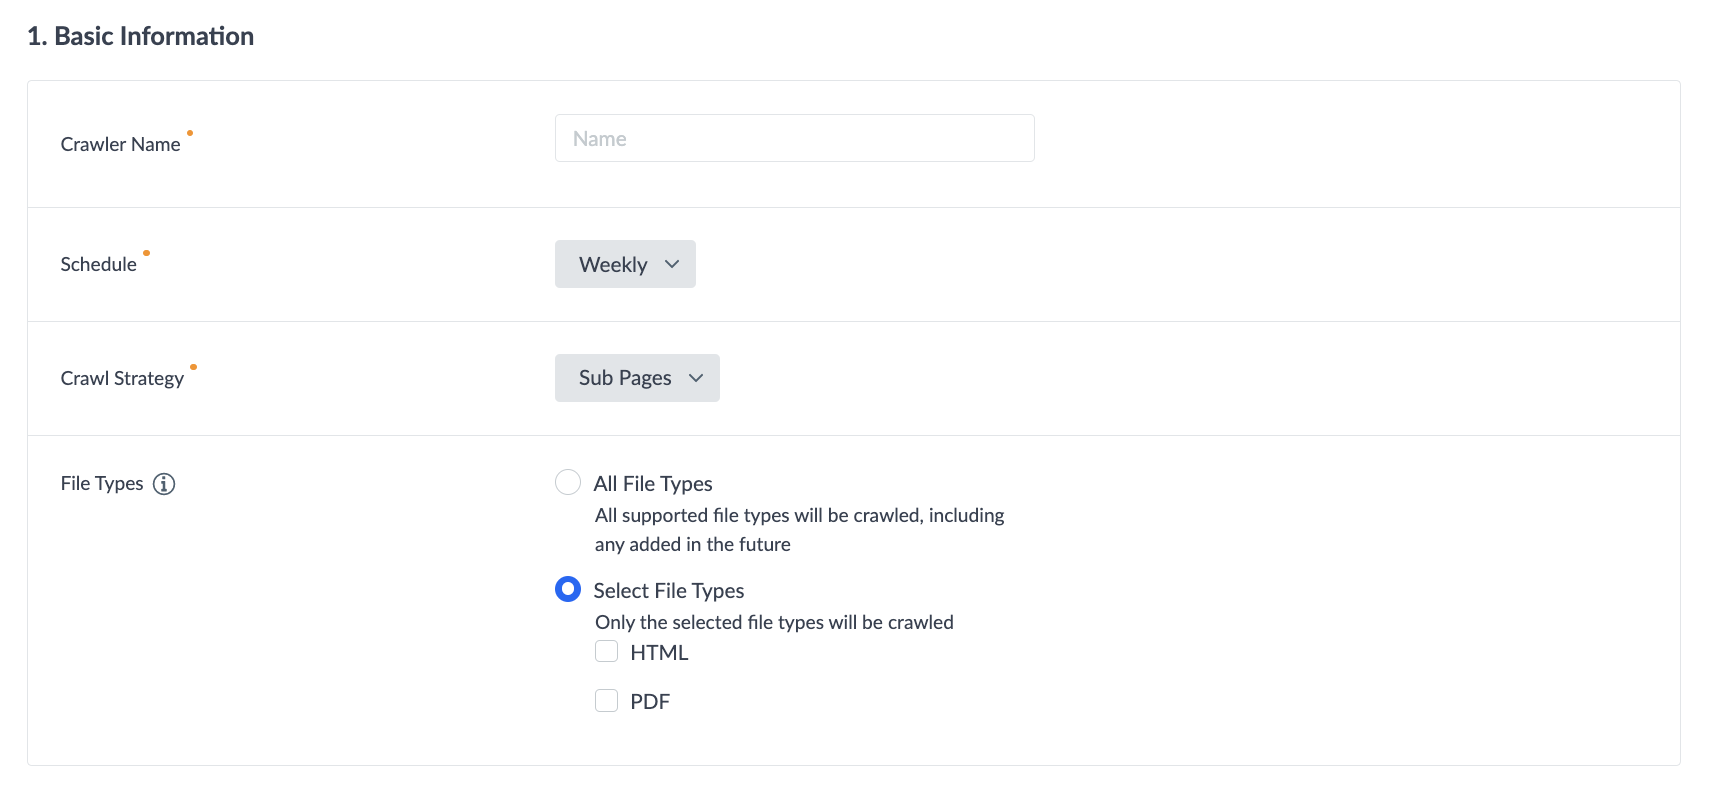
Basic Information
- Enter a name for your Crawler. We recommend something that clearly designates the site you plan to crawl, so you can easily distinguish it from other Crawlers you may set up.
- Select the schedule of how often you would like the crawler to run: Once, Daily, or Weekly.
- Select your Crawl Strategy — whether you want to crawl all pages, sub pages, or specific pages.
- Select your File Type — this is where you specify which files types, if encountered, the crawler should crawl.
- If you select All File Types all supported file types will be crawled, including any added in the future.
- If you select Select File Types you will then see the option to select HTML, PDF, or both as the file types and it will only crawl the select file types.
Pages or Domains to Crawl
Enter the Pages or Domains you would like to crawl. Note that domains and any pages that can be spidered to the same domain will be crawled.

In this section you will also acknowledge that this crawler functionality may only be used on websites or domains that you own and operate, and it may not be used on any third-party websites or domains.
URLs and Query Parameters to Exclude
In the Blacklisted URLs field you have the option to add any domains that you want to exclude from the crawl.
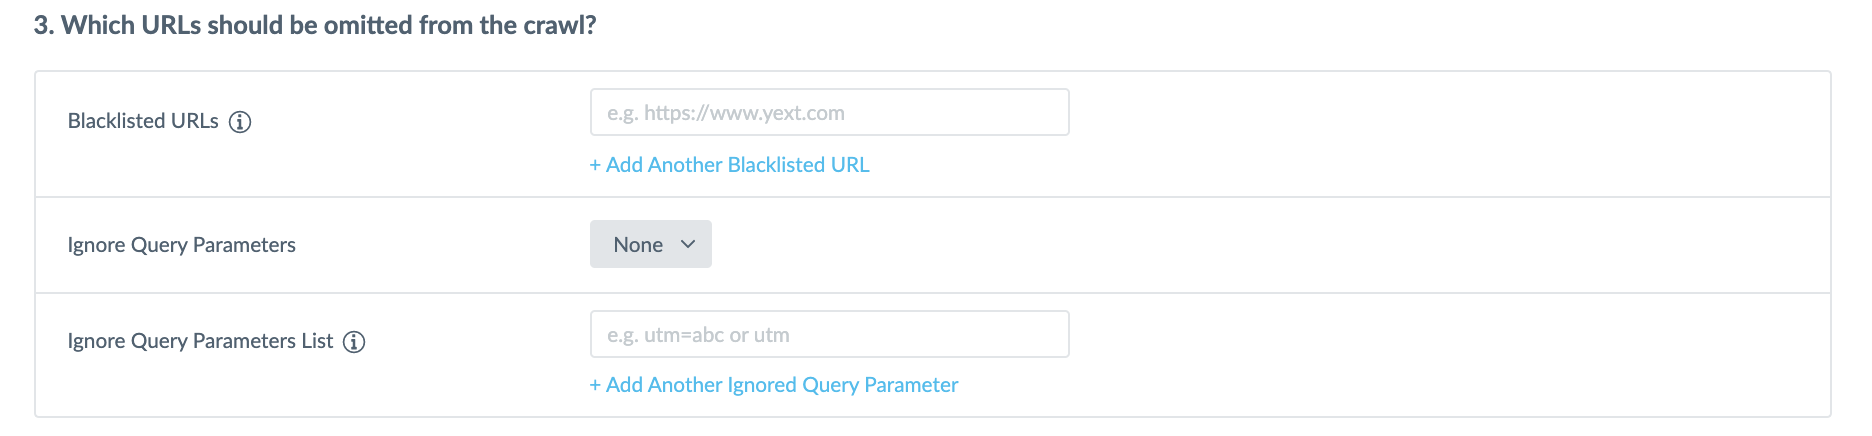
You can also select query parameters to ignore when crawling pages.
By default this will be set to ‘None’, but if you want to exclude parameters click on the Ignore Query Parameters field and select to ignore ‘All’ or ‘Specific Parameters’. Then, in the Ignore Query Parameters List you enter the query parameter you would like to omit from the crawl. You can add additional parameters by clicking on the + Add Another Ignored Query Parameter link.
This is specifically helpful for omitting parameters that would duplicate the data crawled in another parameter.
Advanced Settings
Here you can add a rate limit this allows you to decide the maximum number of concurrent requests that can run on their site. This helps ensure that your site is not crawled too quickly, and is not overwhelmed by requests from crawlers.
Once you have entered all of the relevant details click Save Crawler.
View Crawler Details
Once your crawler has been created, you can click View Details to view the settings, as well as a history of its previous and active crawls.
The Crawls tab provides a list of all crawls completed by this Crawler. This includes the status, start date, end date, and the number of successfully and unsuccessfully crawled pages.
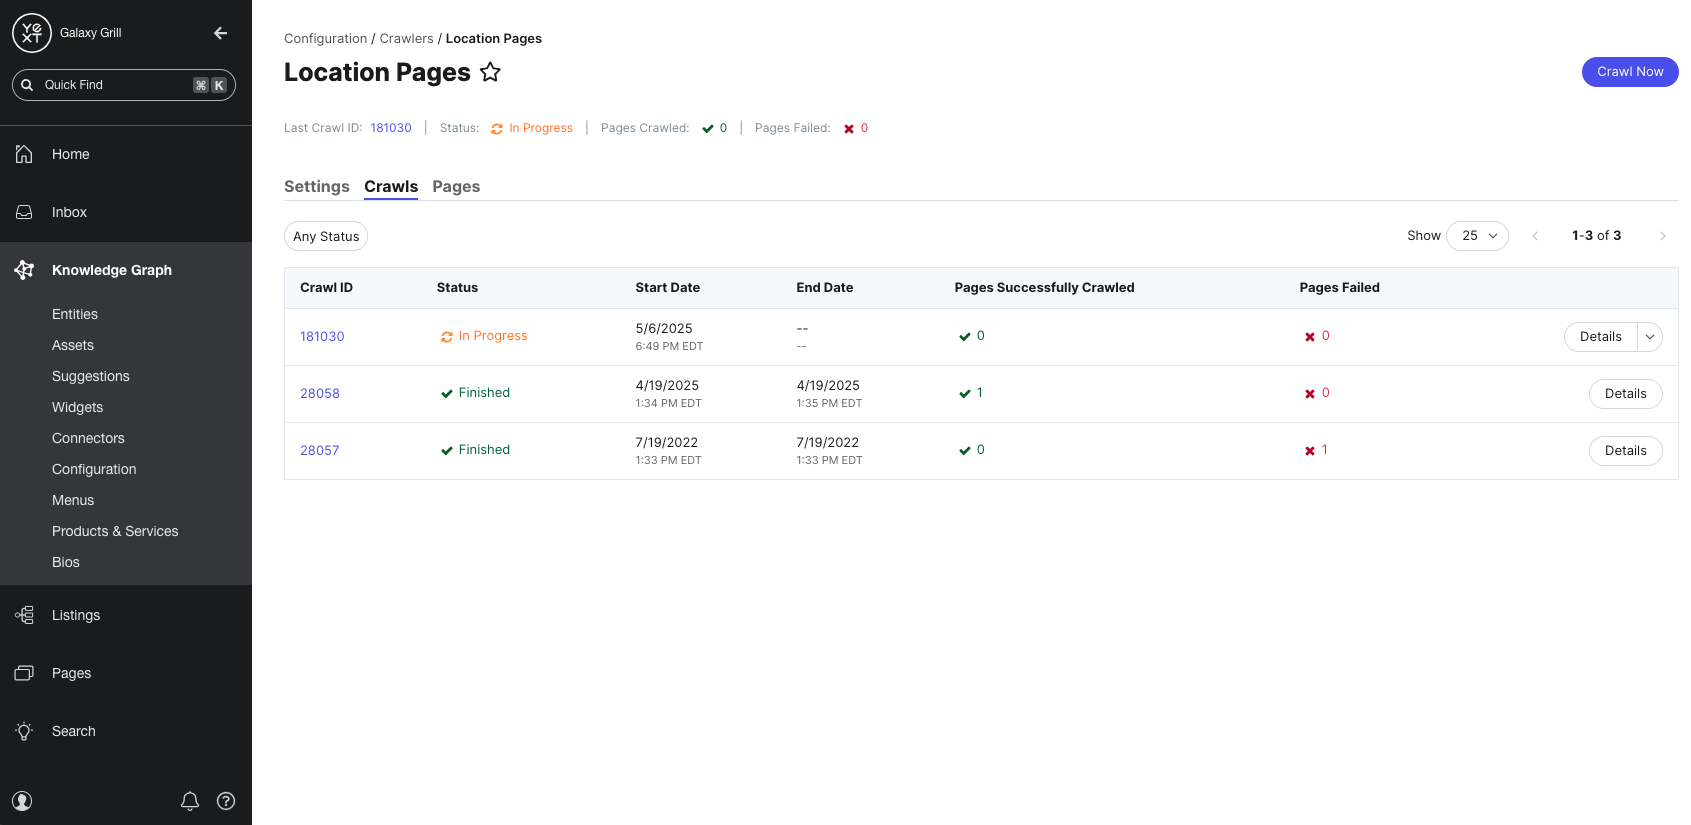
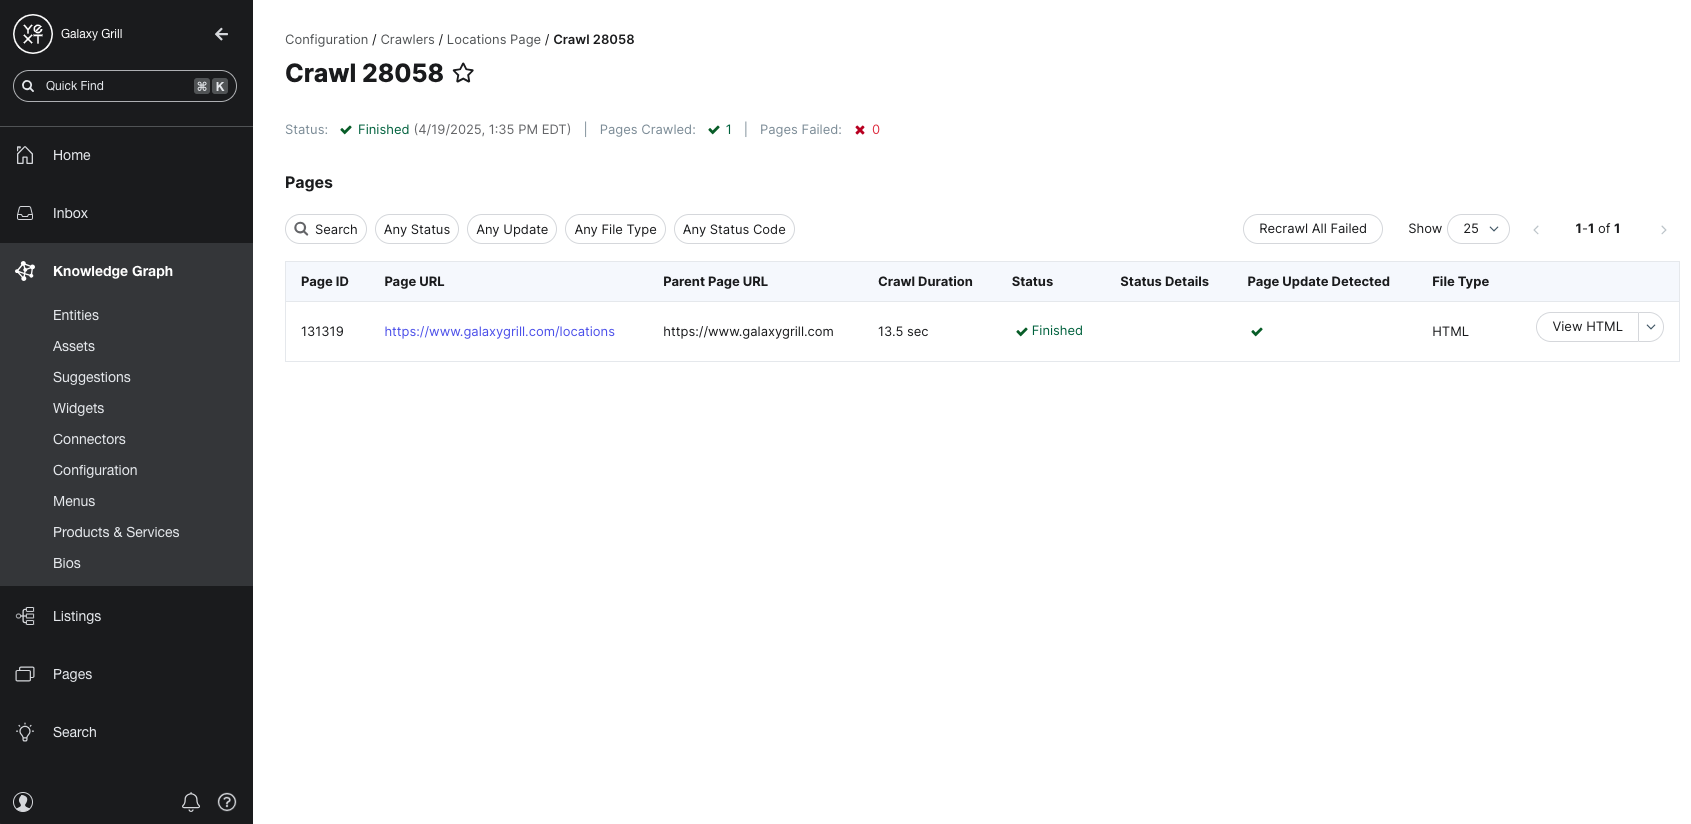
You can also click into any individual crawls to see exactly which pages were successfully crawled during that specific crawl and if there were any failures. The Parent URL column displays the URL where each page in the crawl was found.
From the Crawler’s page, you also have the option to Disable or Delete the crawler.
The Settings tab gives you an overview of your Crawler’s configuration. From here, you can make adjustments to any of the Crawler settings.

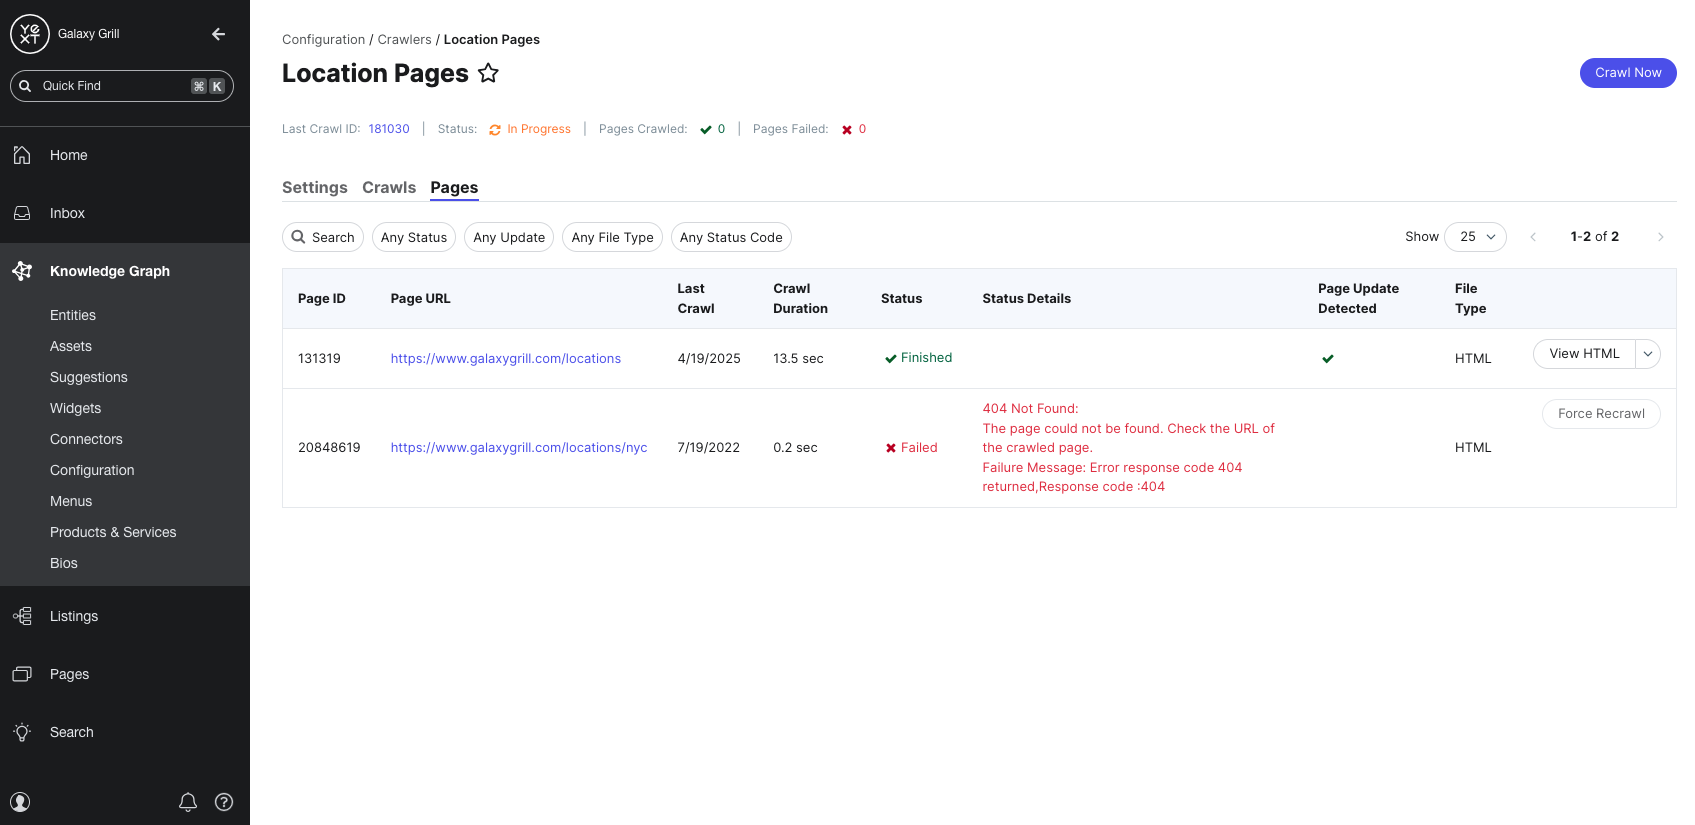
The Pages tab gives you a complete list of all crawled pages from all completed crawls.
Delete or Disable a Crawler
Disabling a Crawler will halt any in-progress crawls, but you can enable it again at any time.
Deleting a Crawler will permanently remove it, as well as delete any raw HTML data that was found by the crawler. Data that is already saved within existing entities in the Knowledge Graph will not be removed.
Where in the platform do you navigate to in order to create a Crawler?
Which of the following are options for the Crawl Schedule? (Select all that apply)
A Hitchhiker in the making! 🔥
