
Create a Connector and Map Fields | Yext Hitchhikers Platform
What You’ll Learn
In this section, you will learn:
- How to convert crawled pages into entities
- An understanding of all Connector settings for the Crawler
Overview
After you set up your crawl, you can configure your Connector. This will allow you to take the raw HTML that the Crawler pulled in from your site and add or update entities in the Knowledge Graph.
Turn Crawled Pages into Entities in your Graph
To do this, you will navigate to the Knowledge Graph and click Add Data. Then, in the Add Data modal, click Build Connector.
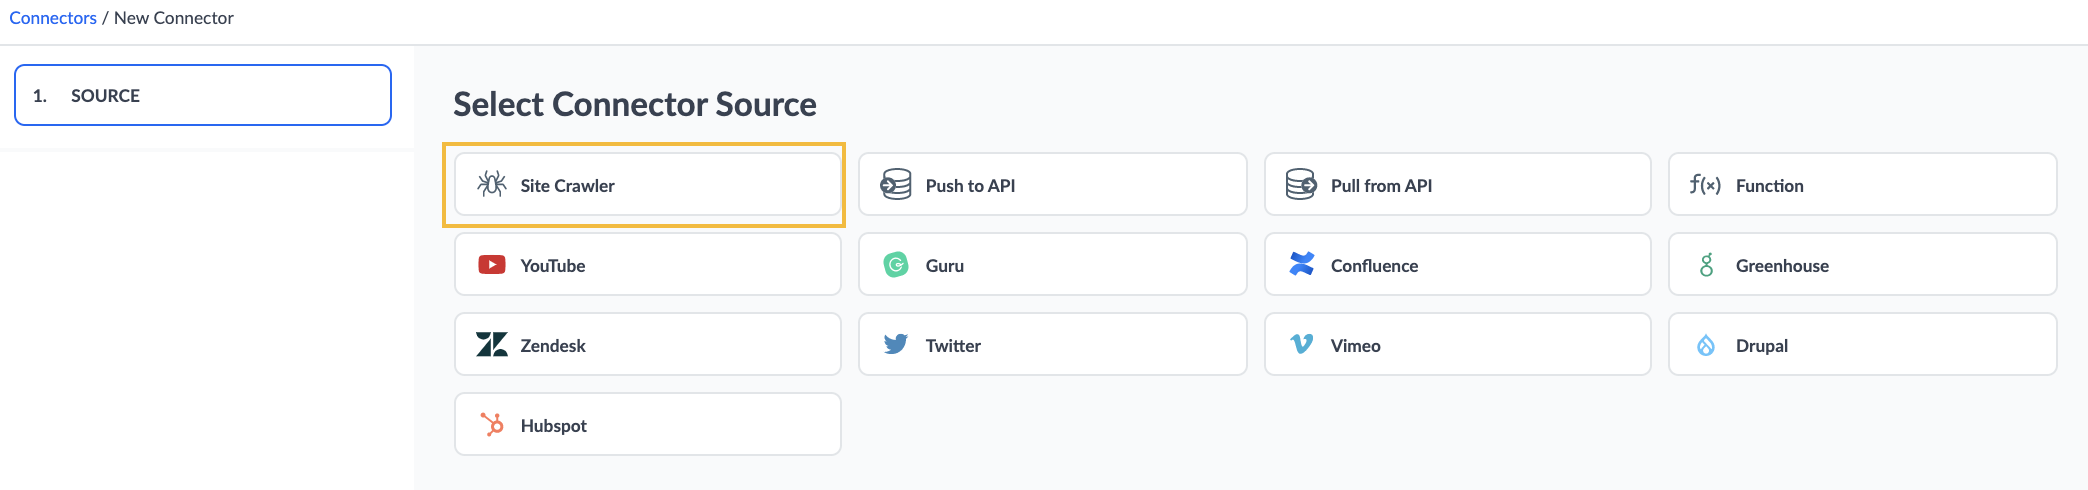
This will bring you to the source selector page, where you will select Site Crawler as your source.
Crawler Settings
Next, you will choose your Crawler Settings, which is where you determine which content you want to pull in from the Crawler to load as entities.
First, you will choose which Crawler you want to pull data from.
Then you can choose to extract data from all of the URLs that the crawler crawled, or choose to extract data from a specific subset of URLs or a URL pattern.
URLs
If you select All URLs, you will see the total number of URLs that this crawler crawled.
In almost all cases, we recommend setting this up to a specific URL Pattern. Today, you can do this by using an asterisk (*) to represent wildcards. This is the only supported expression today, but support for additional expressions may be added over time.
For example, if you set up a crawler for your Help Articles on http://help.yourbrand.com you wouldn’t want to create an entity for the homepage, but it is included in the pages crawled. You’d instead want to set the url pattern to http://help.yourbrand.com/* so that the Connector only pulls URLs that are hanging off the homepage.
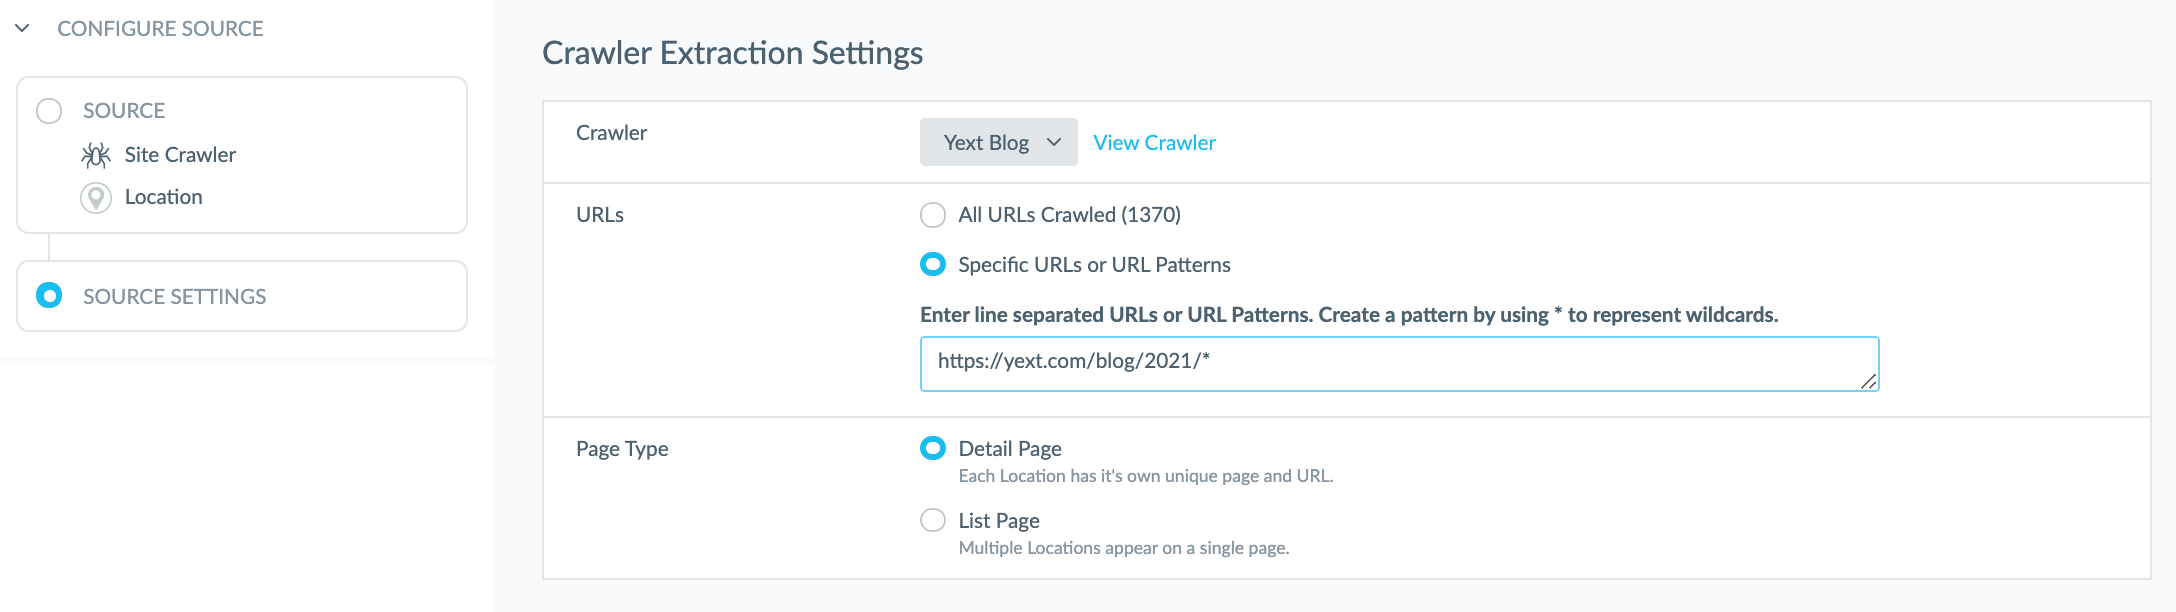
Another more specific example: if you set up a crawler for the Blogs section of your website, and you only wanted to extract blog posts that were written in 2021, you could create a pattern that just corresponds to those blog posts if that’s how your page urls are constructed. In this case, if your blog urls are https://yext.com/blog/year/month/blog-title then your URL pattern might be the following format: https://yext.com/blog/2021/*/* where the first asterisk means that it can be any month and the second asterisk means it can be any blog-title.
So, using that logic, you can set up a pattern to pull in all blog posts from 2021 using the following pattern: https://yext.com/blog/2021/*.
You can also specify an optional additional wildcard URL path to spider to in addition to pages that match the inputted URL’s base domain. To continue the blog example, let’s say you have some blogs that live on URLs with the structure https://yext.com/products/blog/2021/*. Because the base URLs do not match exactly, some pages will be left out of the https://yext.com/blog/2021/* crawl. To include the blogs that live under the products section of the site and therefore crawl all desired pages, you can specify the sub page structure to include https://yext.com/products/blog/2021/*.
You can add wildcard sub page specifications in the “Sub Pages URL Structure” field on the Settings page of the crawler you are interested in updating.
Page Type
The next step is selecting the Page Type:
- Detail Page: There is a one-to-one relationship between the page and entity type. Meaning, each entity you are creating has its own unique page and URL. This is common for landing pages, which can include things like: blog post pages, store landing pages, individual product pages, etc.
- If you select Detail Page you can move onto the next step of specifying the selectors for the fields that you would like to extract.
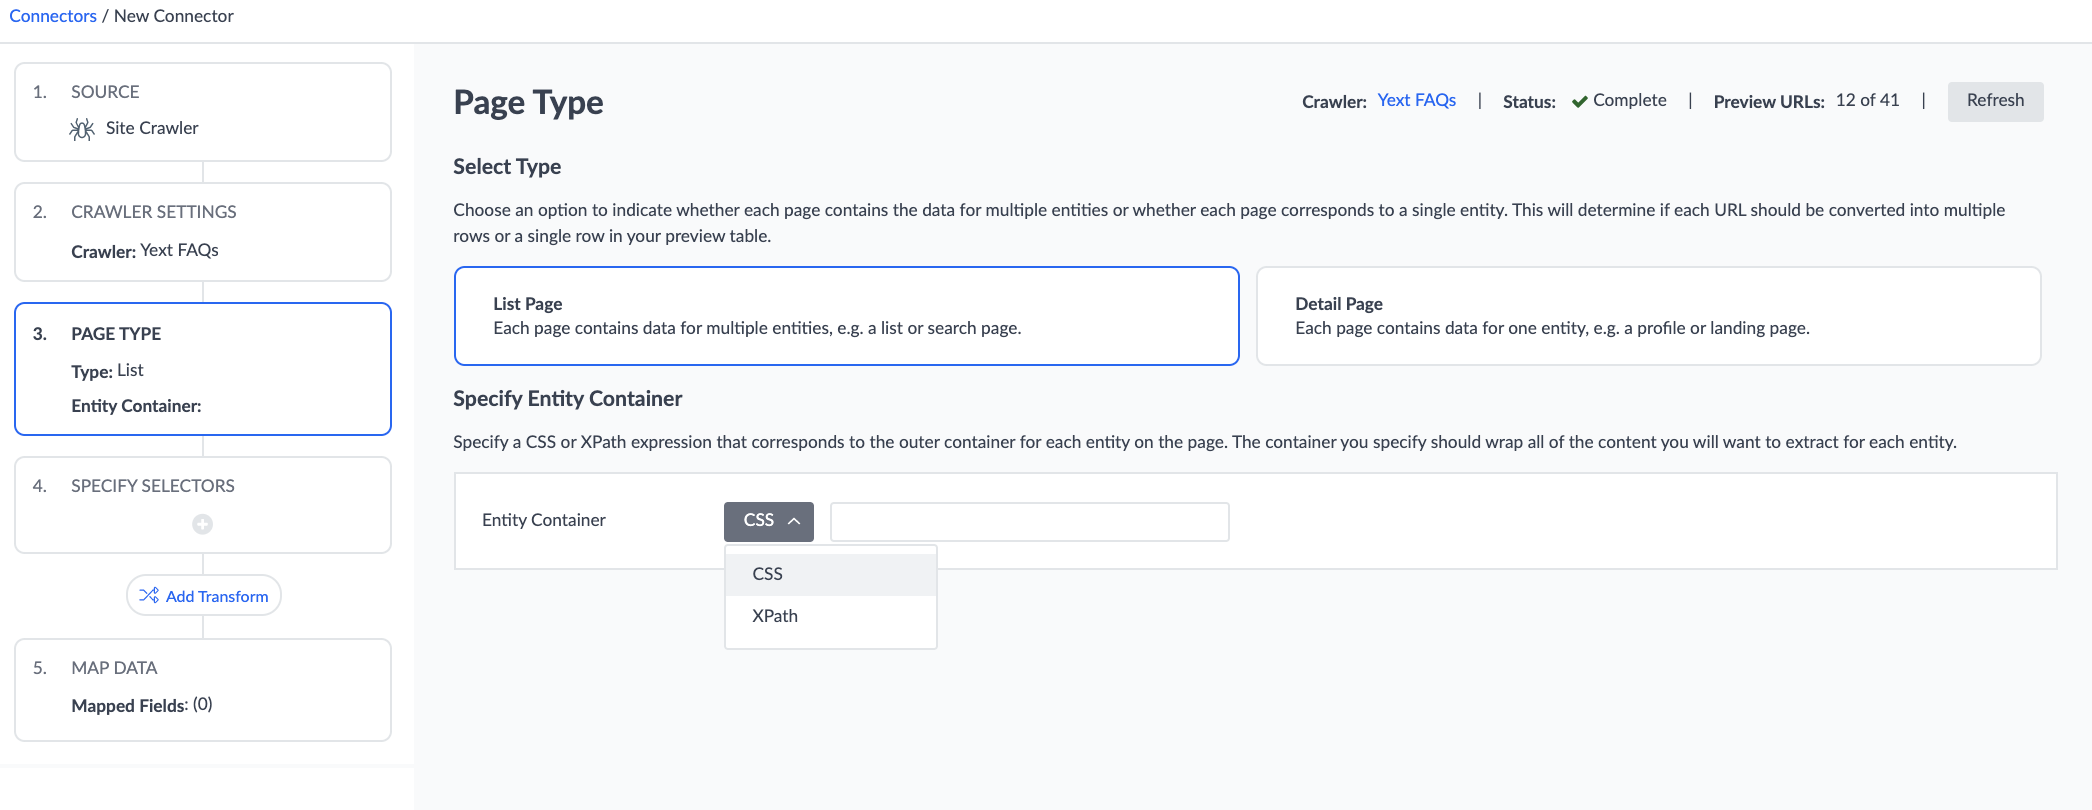
- List Page: There is a one-to-many relationship between the page and entities. Meaning, the pages you crawled each contain information about multiple entities. This option can be used for things like FAQ pages, product catalog pages, or other pages with a list of multiple items.
- If you select List Page you will need to provide a CSS or XPath select that points to the outer container for each entity on the page.
List Page Selector Example
For example, if we wanted to extract each FAQ on this Yext FAQ page into a separate entity, the Entity Container CSS selector could be “.faq” because the information for each FAQ is contained within the HTML element with the “faq” CSS class.
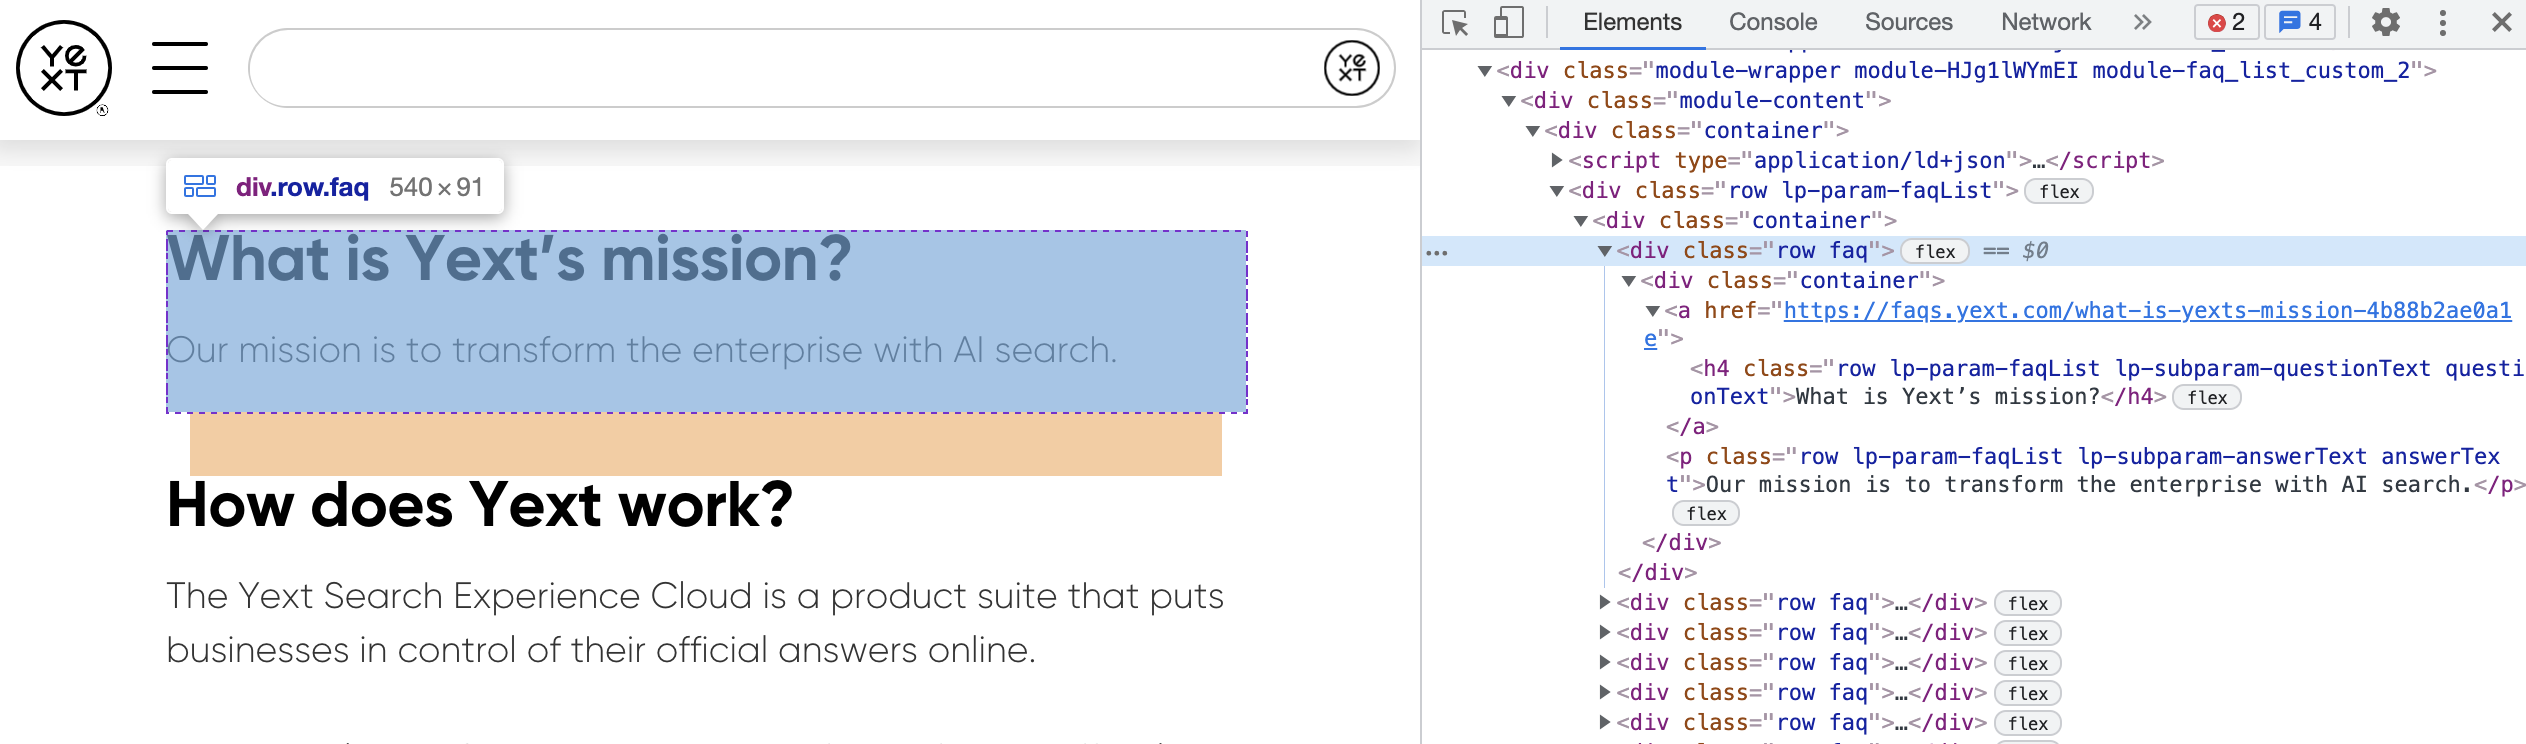
Each object extracted from your page based on that Entity Container selector will be treated as an entity, or a row in your preview table.
Once you provide your Entity Container, you can specify the selectors for the actual fields you want to extract – more on that below!
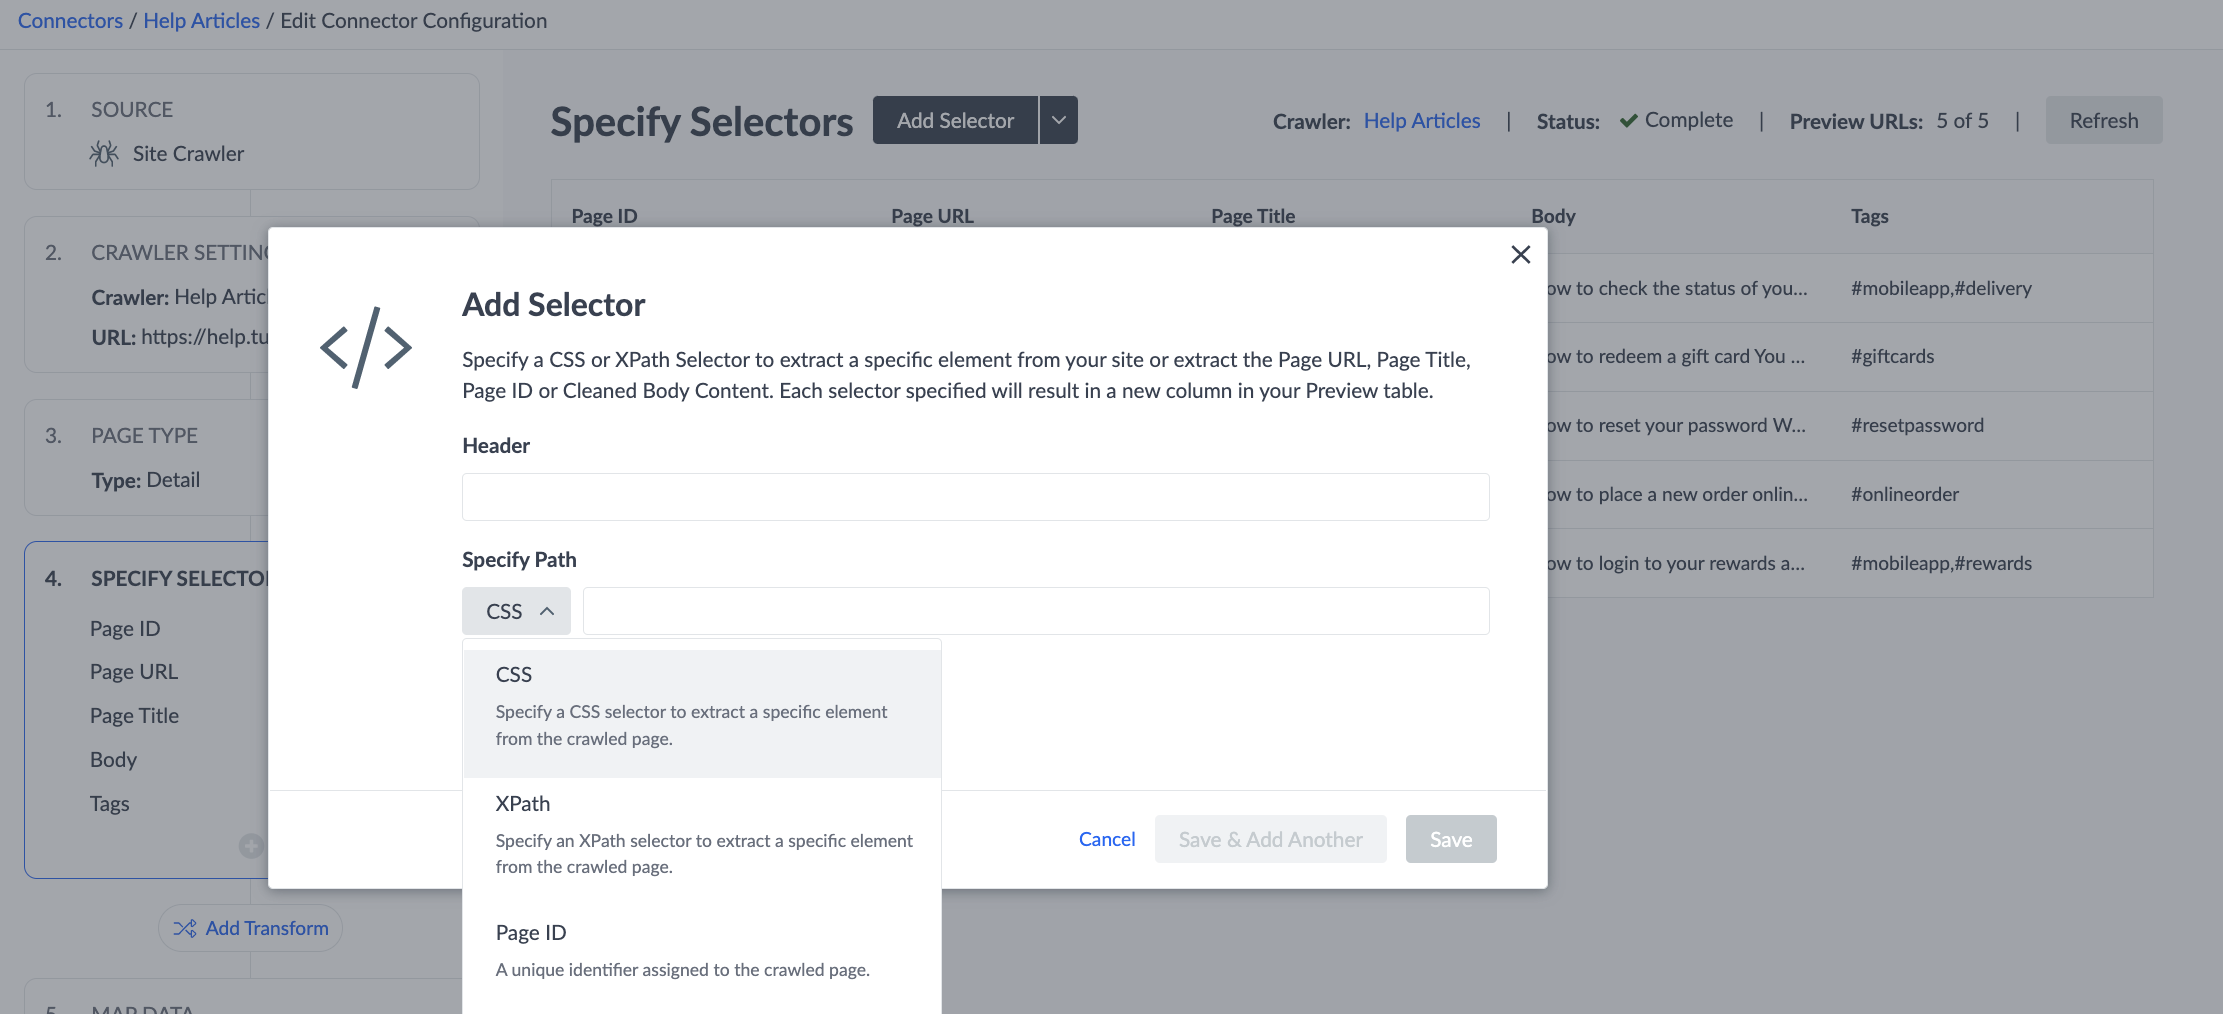
Specify Selectors
Selectors allow you to extract data columns from specific parts of your HTML. This allows you to build up a Preview Table, where each row aligns with an Entity and each column aligns with a Field.
You can choose to Add Default Selectors and we will pull in all identified selectors. However, you also have option to make any adjustments to those as needed.
When adjusting Selectors, you will select which data you want to extract from those pages, choosing from any of the following options, divided into 2 categories — Pre-built vs. Manual:
Pre-built Selectors
- Page ID: This is a unique identifier for each unique URL.
- If your Crawler Source Setting is set to Detail Page, where each page equals one entity, the Page ID will be automatically selected and mapped to the Entity ID field. However, you can always remove this and map another column to Entity ID if you would like.
- Item ID: This is a unique identifier for each item on a page.
- This option is only applicable for the List Page use case, where each page contains multiple entities.
- The Item ID is a unique identifier for the item on the page, made up of the Page ID and the item’s index ([Page ID]-[Item Index]). This ID will be automatically selected and mapped to Entity ID, but you have the option to remove it and map another column to Entity ID.
- Page URL: This will pull in the URL of the page that was crawled.
- Page Title: This will pull in the title of the crawled page as defined by the
<title>HTML element. - Cleaned Body Content: This will pull all of the text from the page. This is commonly used for the ‘body’ of a blog post, help article, or document.
Manual Selectors
- CSS: You can specify a CSS selector to extract a specific element from your site.
- XPath: You can specify an XPath selector to extract a specific element from your site.
CSS & XPath selectors provide additional flexibility, as you can extract specific elements from your site. We have included some examples and additional details on these selector types below.
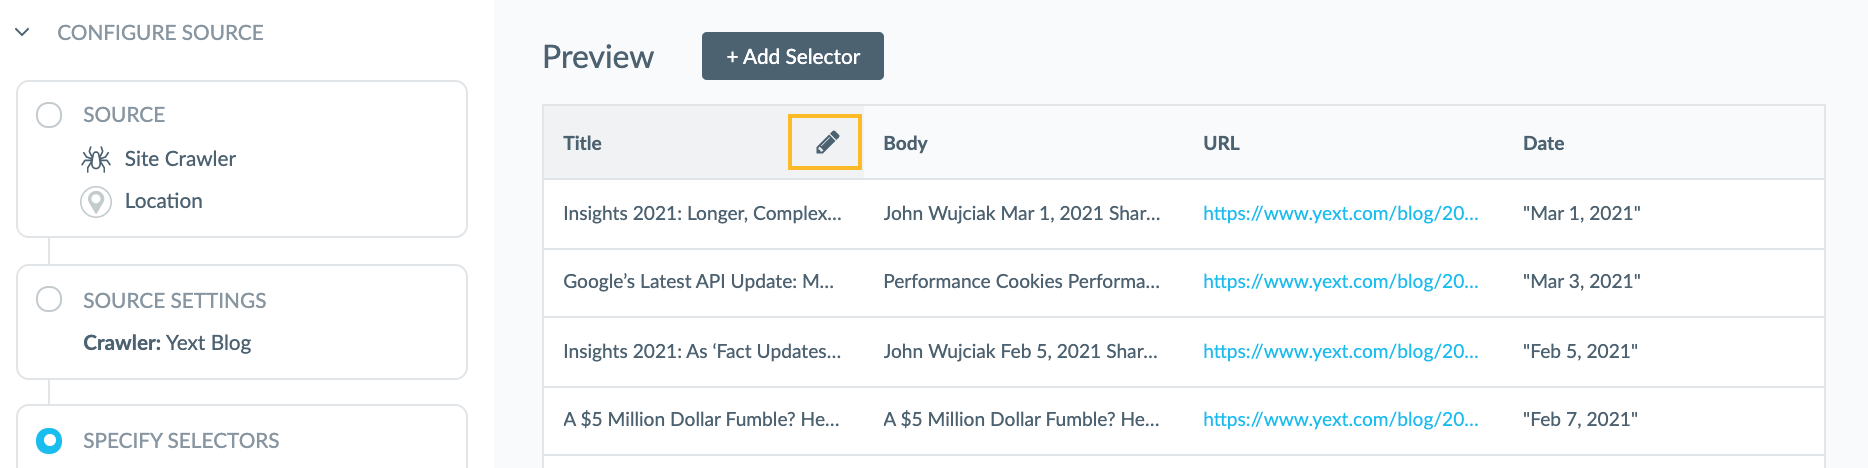
Once you click Save. You will see the table with all of the elements pulled in.
To remove, or edit a selector, simply click on the pencil icon next to the table.
CSS Selector Details and Examples
CSS Selectors are used to find, or “select” specific elements in an HTML document. If you have worked on a website before, you may be familiar with CSS selectors. For an intro to CSS Selectors, we recommend reviewing the Intro to CSS training module .
CSS selectors are used in CSS files to specify which page elements you want to apply styling to. These CSS selectors can be used in Connectors to extract specific data from your crawled website.
For example, if you wanted to extract the question text in the snippet below, you could use the following CSS selector: .question. The “.” notation indicates a class name, so this selector indicates that we should select anything with the class name “question”.
<div class="faq" id="12542">
   <div class="question">
      Can I place an order online?
   </div>
   <div class="answer">
      Yes! Place an order online by visiting <a
      href="www.turtleheadtacos.com/order">our website</a>.
   </div>
   <img src="www.turtleheadtacos.com/1021830/cdn/logo.png" class="imgLarge"/>
</div>
For a slightly more complex example, if you wanted to select the link text only (“our website”), you could use the following CSS selector: .answer > a. Again, we are using a class selector (“.answer”), but this time it is followed by a “>” combinator and an element selector (“a”). This selector indicates that we should select any <a> elements that are direct children of any elements with the class name “answer”.
To learn more about CSS Selectors, check out the following resources:
- https://www.w3schools.com/cssref/css_selectors.asp
- https://devhints.io/css
- https://try.jsoup.org/
- This is a great tool to test with, as you can enter the URL of your site to pull in the HTML, and then you can see a list of all of the CSS tags for the various elements.
XPath Selector Details and Examples
Similar to CSS Selectors, XPath Selectors are used to find, or “select”, specific elements in an XML or HTML document. XPath stands for XML Path and is a query language that uses path expressions to select nodes in the document.
For example, if you wanted to extract the question text in the same snippet, you could use the following XPath selector: //div[@class="question"]. This selector tells us to look for a <div> at any depth in the document that has the class “question”.
<div class="faq" id="12542">
   <div class="question">
      Can I place an order online?
   </div>
   <div class="answer">
      Yes! Place an order online by visiting <a
      href="www.turtleheadtacos.com/order">our website</a>.
   </div>
   <img src="www.turtleheadtacos.com/1021830/cdn/logo.png" class="imgLarge"/>
</div>
If you wanted to select the link text only (“our website”), you could use the following XPath selector: //div[@class="answer"]/a. This selector tells us to look for a <div> at any depth in the document that has the class “answer” and a direct <a> child element.
To learn more about XPath Selectors, check out the following resources:
Add Transforms
Transforms allow you to manipulate incoming data in the Connectors workflow. To add a transform click Add Transform in the sidebar and select the desired transform and the column you’d like to apply this transform to. For more details on transforms visit the Transforms unit in the Data Connectors modules.
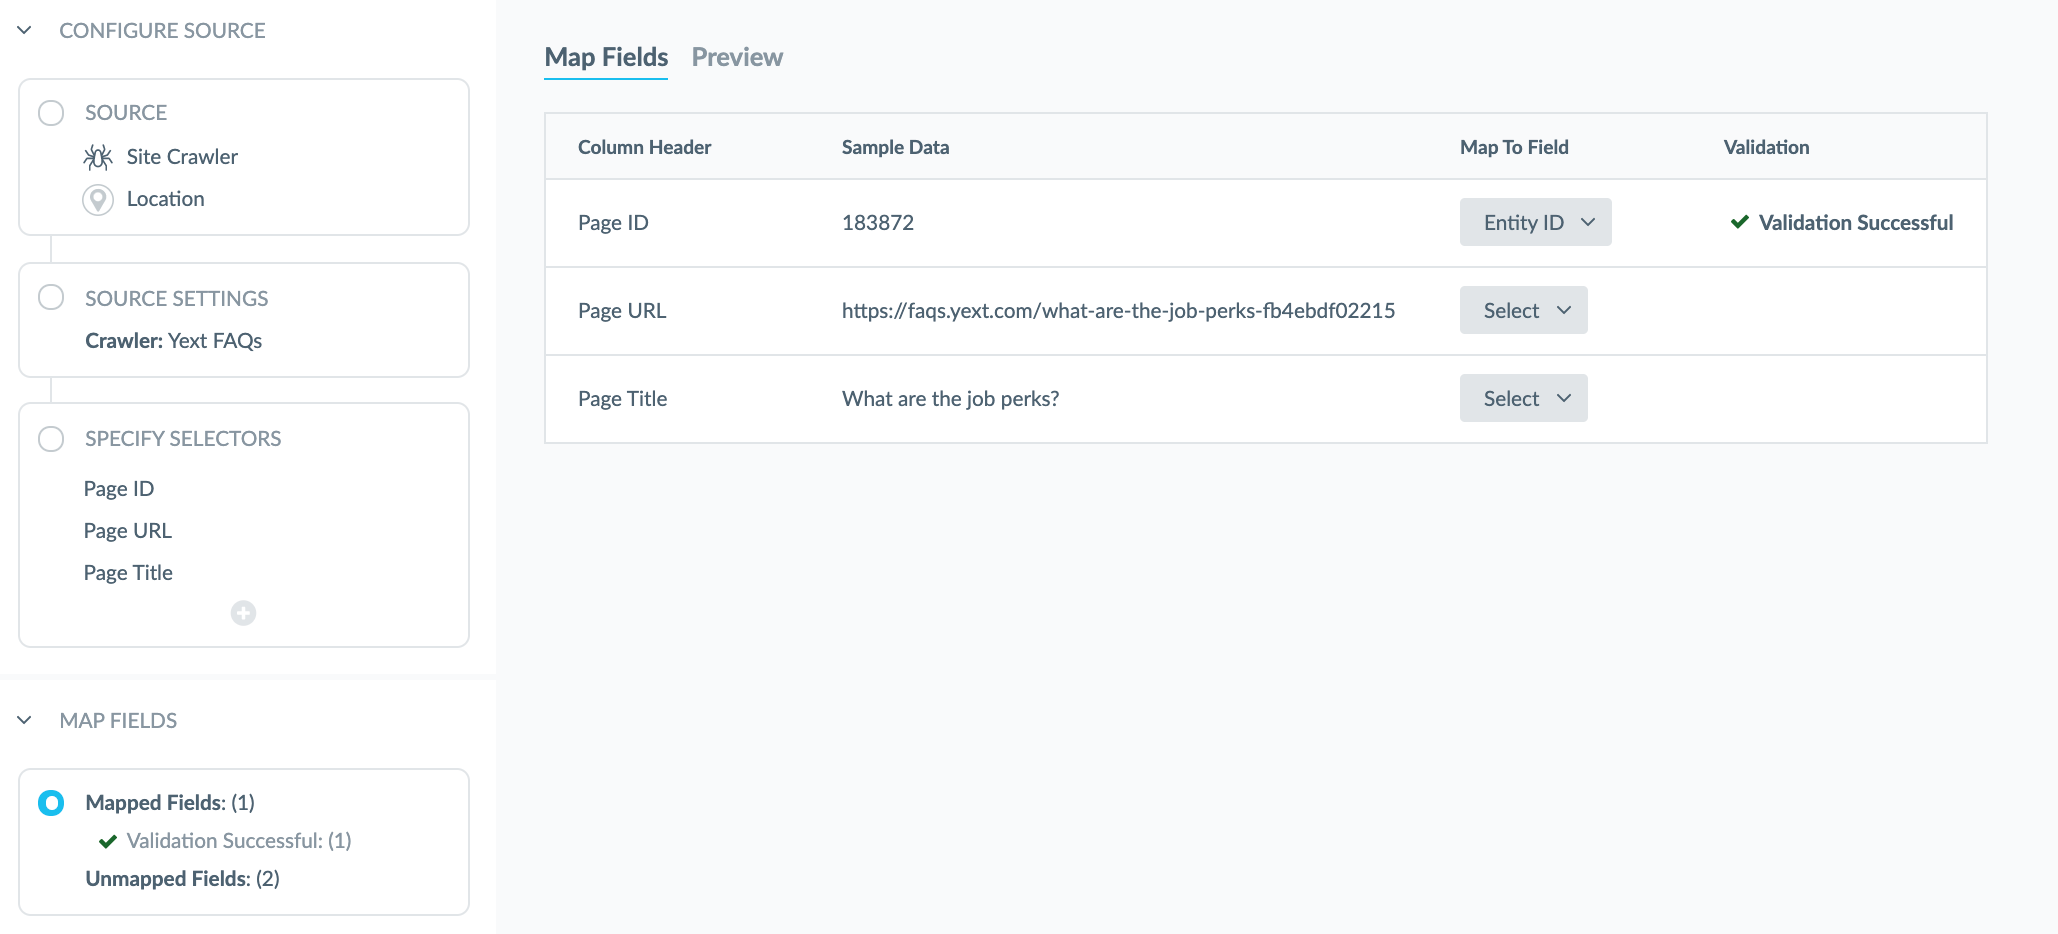
Map Selected Fields
Once you have selected all the elements you would like to pull into the Knowledge Graph, you will then need to map the fields you have selected to fields in Yext.
First, you will need to select the Entity Type you would like to create or udpate with the data you are pulling in via the Crawler.
Once you select the desired entity type, the Map Fields Screen will show you a table of your data with a row for each selector that was added on the previous step. And this is where you map those selectors to fields that are being pulled into the Knowledge Graph.
To do this, you will click on the Select button, or field name if the field is automatically mapped, in the Map to Field column. This will open a drop-down where you will select the applicable field, then click Apply.
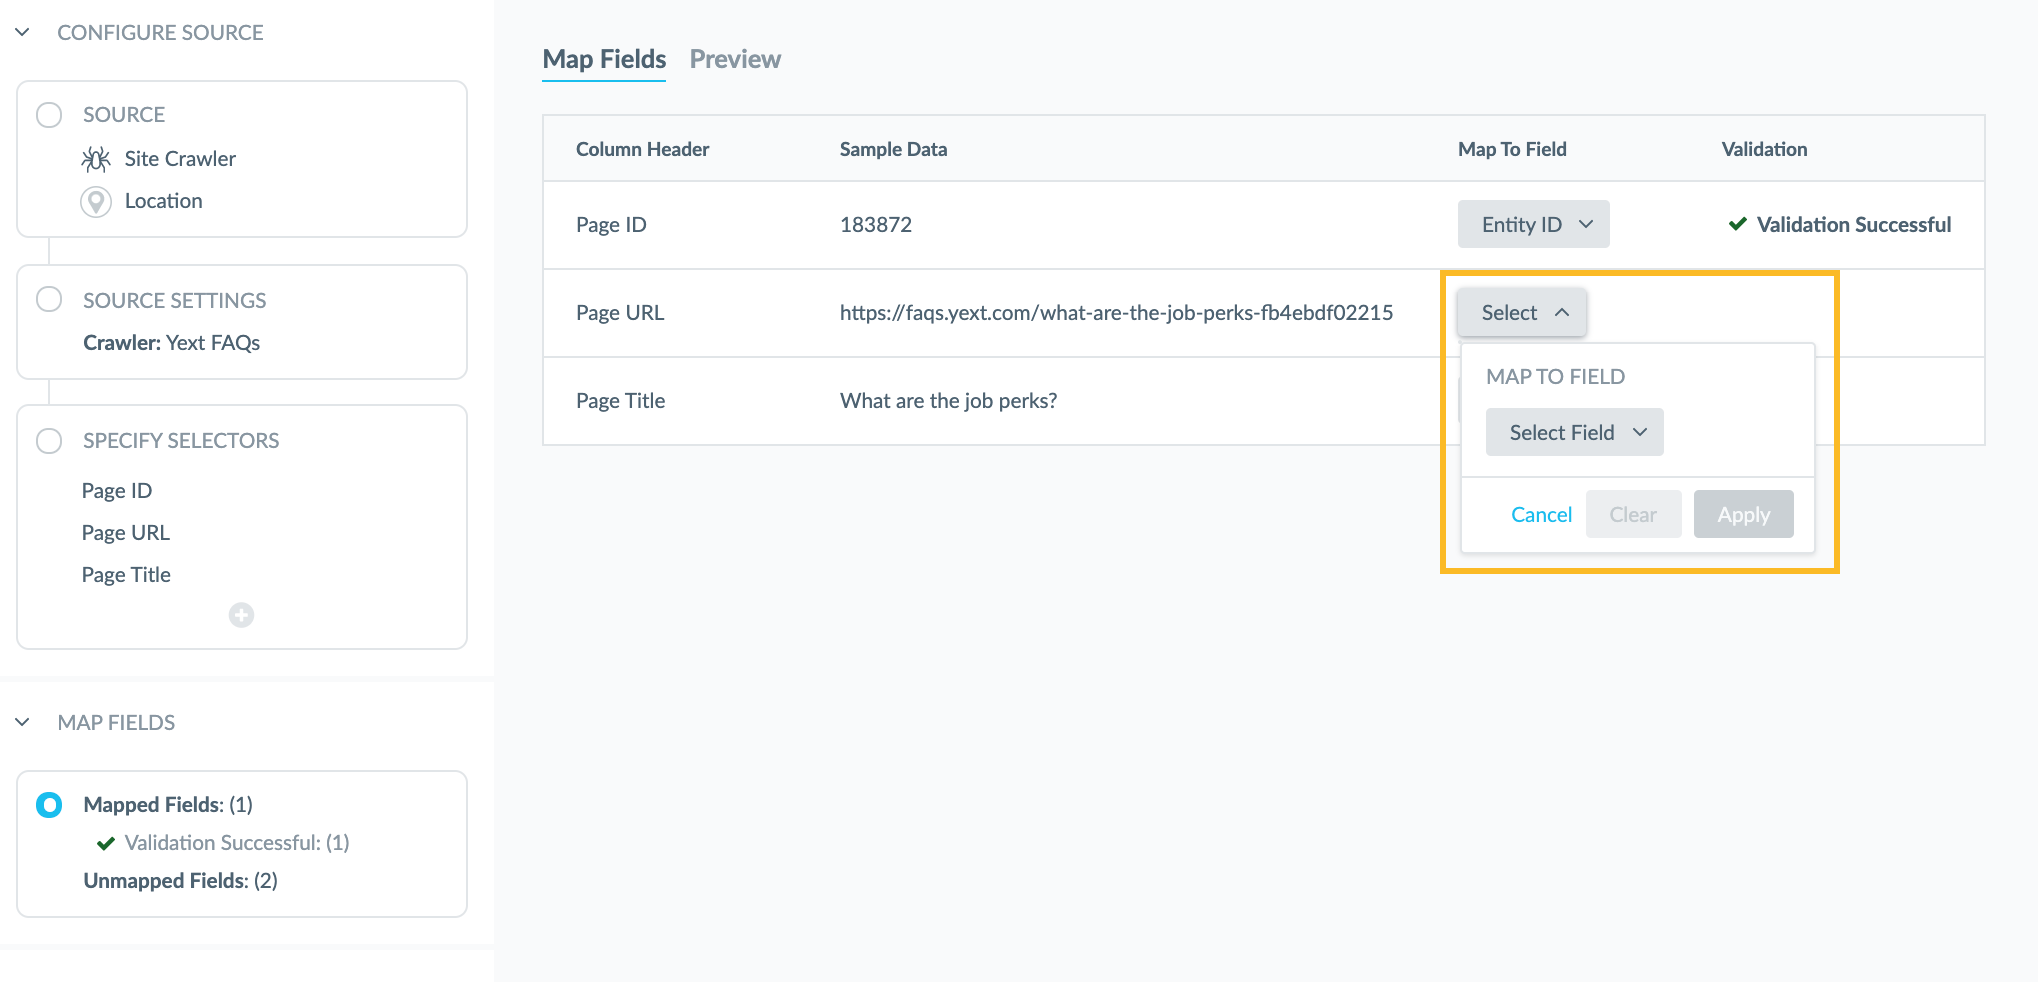
Once you have configured your field mappings, click Save. For more details on mapping fields, visit the Load — Map & Run unit in the Data Connectors module.
You will then be prompted to enter a name for your Connector. We recommend giving your Connector a name that describes its functionality, so that you can easily identify which Connector you want to reference when you view the Connectors screen in the Knowledge Graph.
Then, click Save or Save & Run Now depending on whether you want to run the Connector or not.
Connector Summary
Once you save and run your Connector, you will land on the Summary page.
This will give you an overview of your configuration, and you have the option to adjust the name or ID of your connector, as well as view the source and the Schedule.
If needed, you can cancel Runs that are in Progress.
Connector Schedule
This schedule will be pulled from the schedule you have set up from the Crawler. If you want your Data Connector to run and process any updates each time a new crawl completes, set this option to ‘Auto’. If you only want to run your Data Connector on-demand by clicking Run Now, toggle this option to Manual.
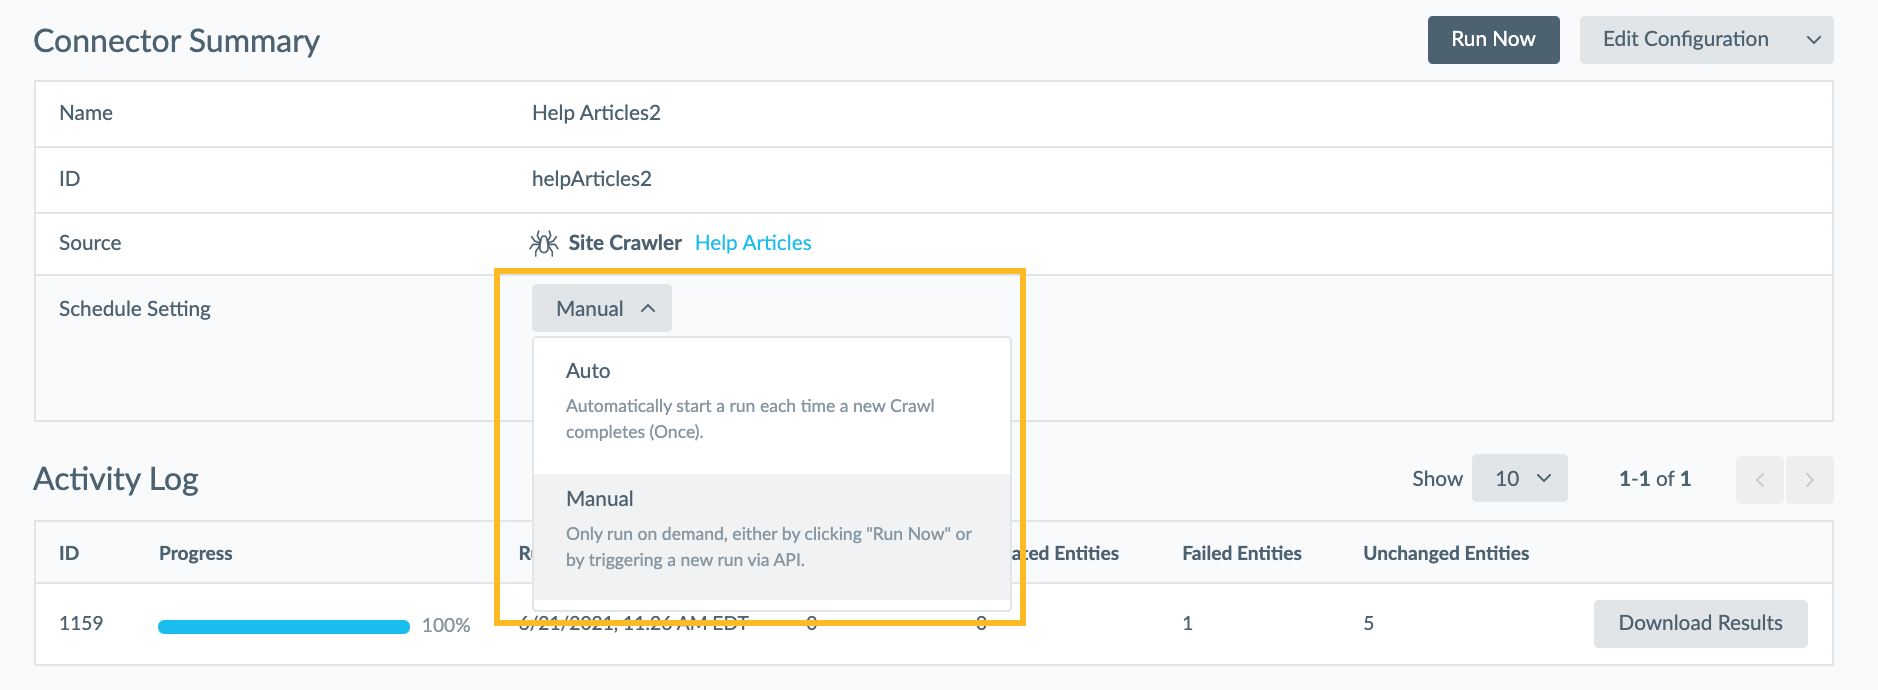
Run the Data Connector
On this Summary page, you will see the option to click Run Now — this will start the process of creating entities with the fields you selected.
You will see an Activity Log appear on this screen that shows you the progress being made on adding those entities to your account.
Once it is complete you will see the total number of:
- New Entities
- Updated Entities
- Failed Entities
- Unchanged Entities
You can click Download Results to view the results of the data upload, and use that as a reference to fix any entities that may have failed during the process.
Then, when you click Knowledge Graph, you should see all the new and updated entities that have been loaded in from this Data Connector!
What functionality can you use to only extract data from a specific subset of crawled URLs?
True or False, you can extract any HTML element from your pages?
Soon you'll be your brand's hero! 🎓
