Initial Deploy | Yext Hitchhikers Platform
What You’ll Learn
In this section, you will:
- Create a site in the Yext platform and connect it to GitHub
- Make your first deploy in Yext
Overview
Now that you’ve built your site locally, let’s create and deploy your site in the Yext platform. You’ll create a site in Yext and then connect it to your GitHub repo with the site you just created. This will automatically deploy it to Yext.
Our goal here is to get up and running quickly so you can see what your site will look like. We’ll go through how to customize your site and more about deploys in coming modules!
Video Walkthrough
In the video, Andrew walks through the steps below.
Deploy to Yext
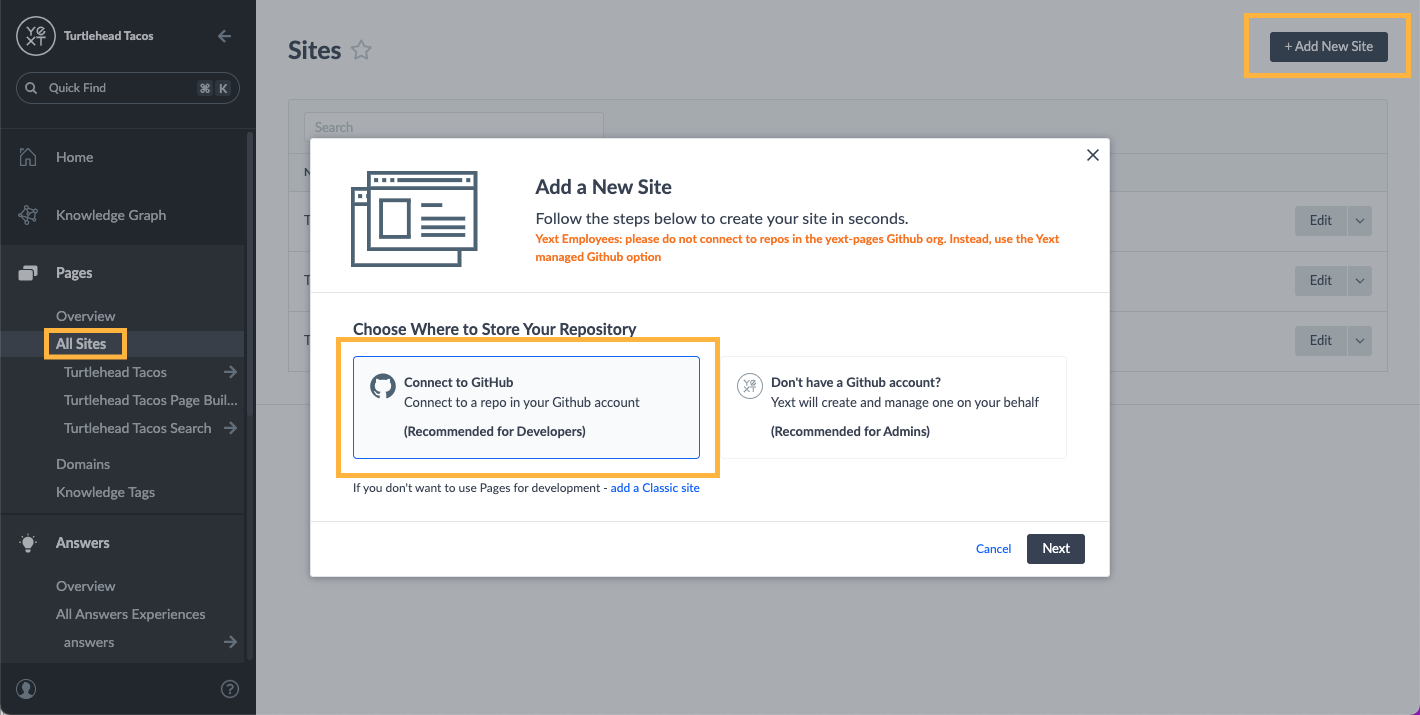
- In your Yext account, navigate to Pages > All Sites and click Add New Site.
Make sure the Connect to GitHub option is selected and click Next. Then, complete the GitHub authorization flow.

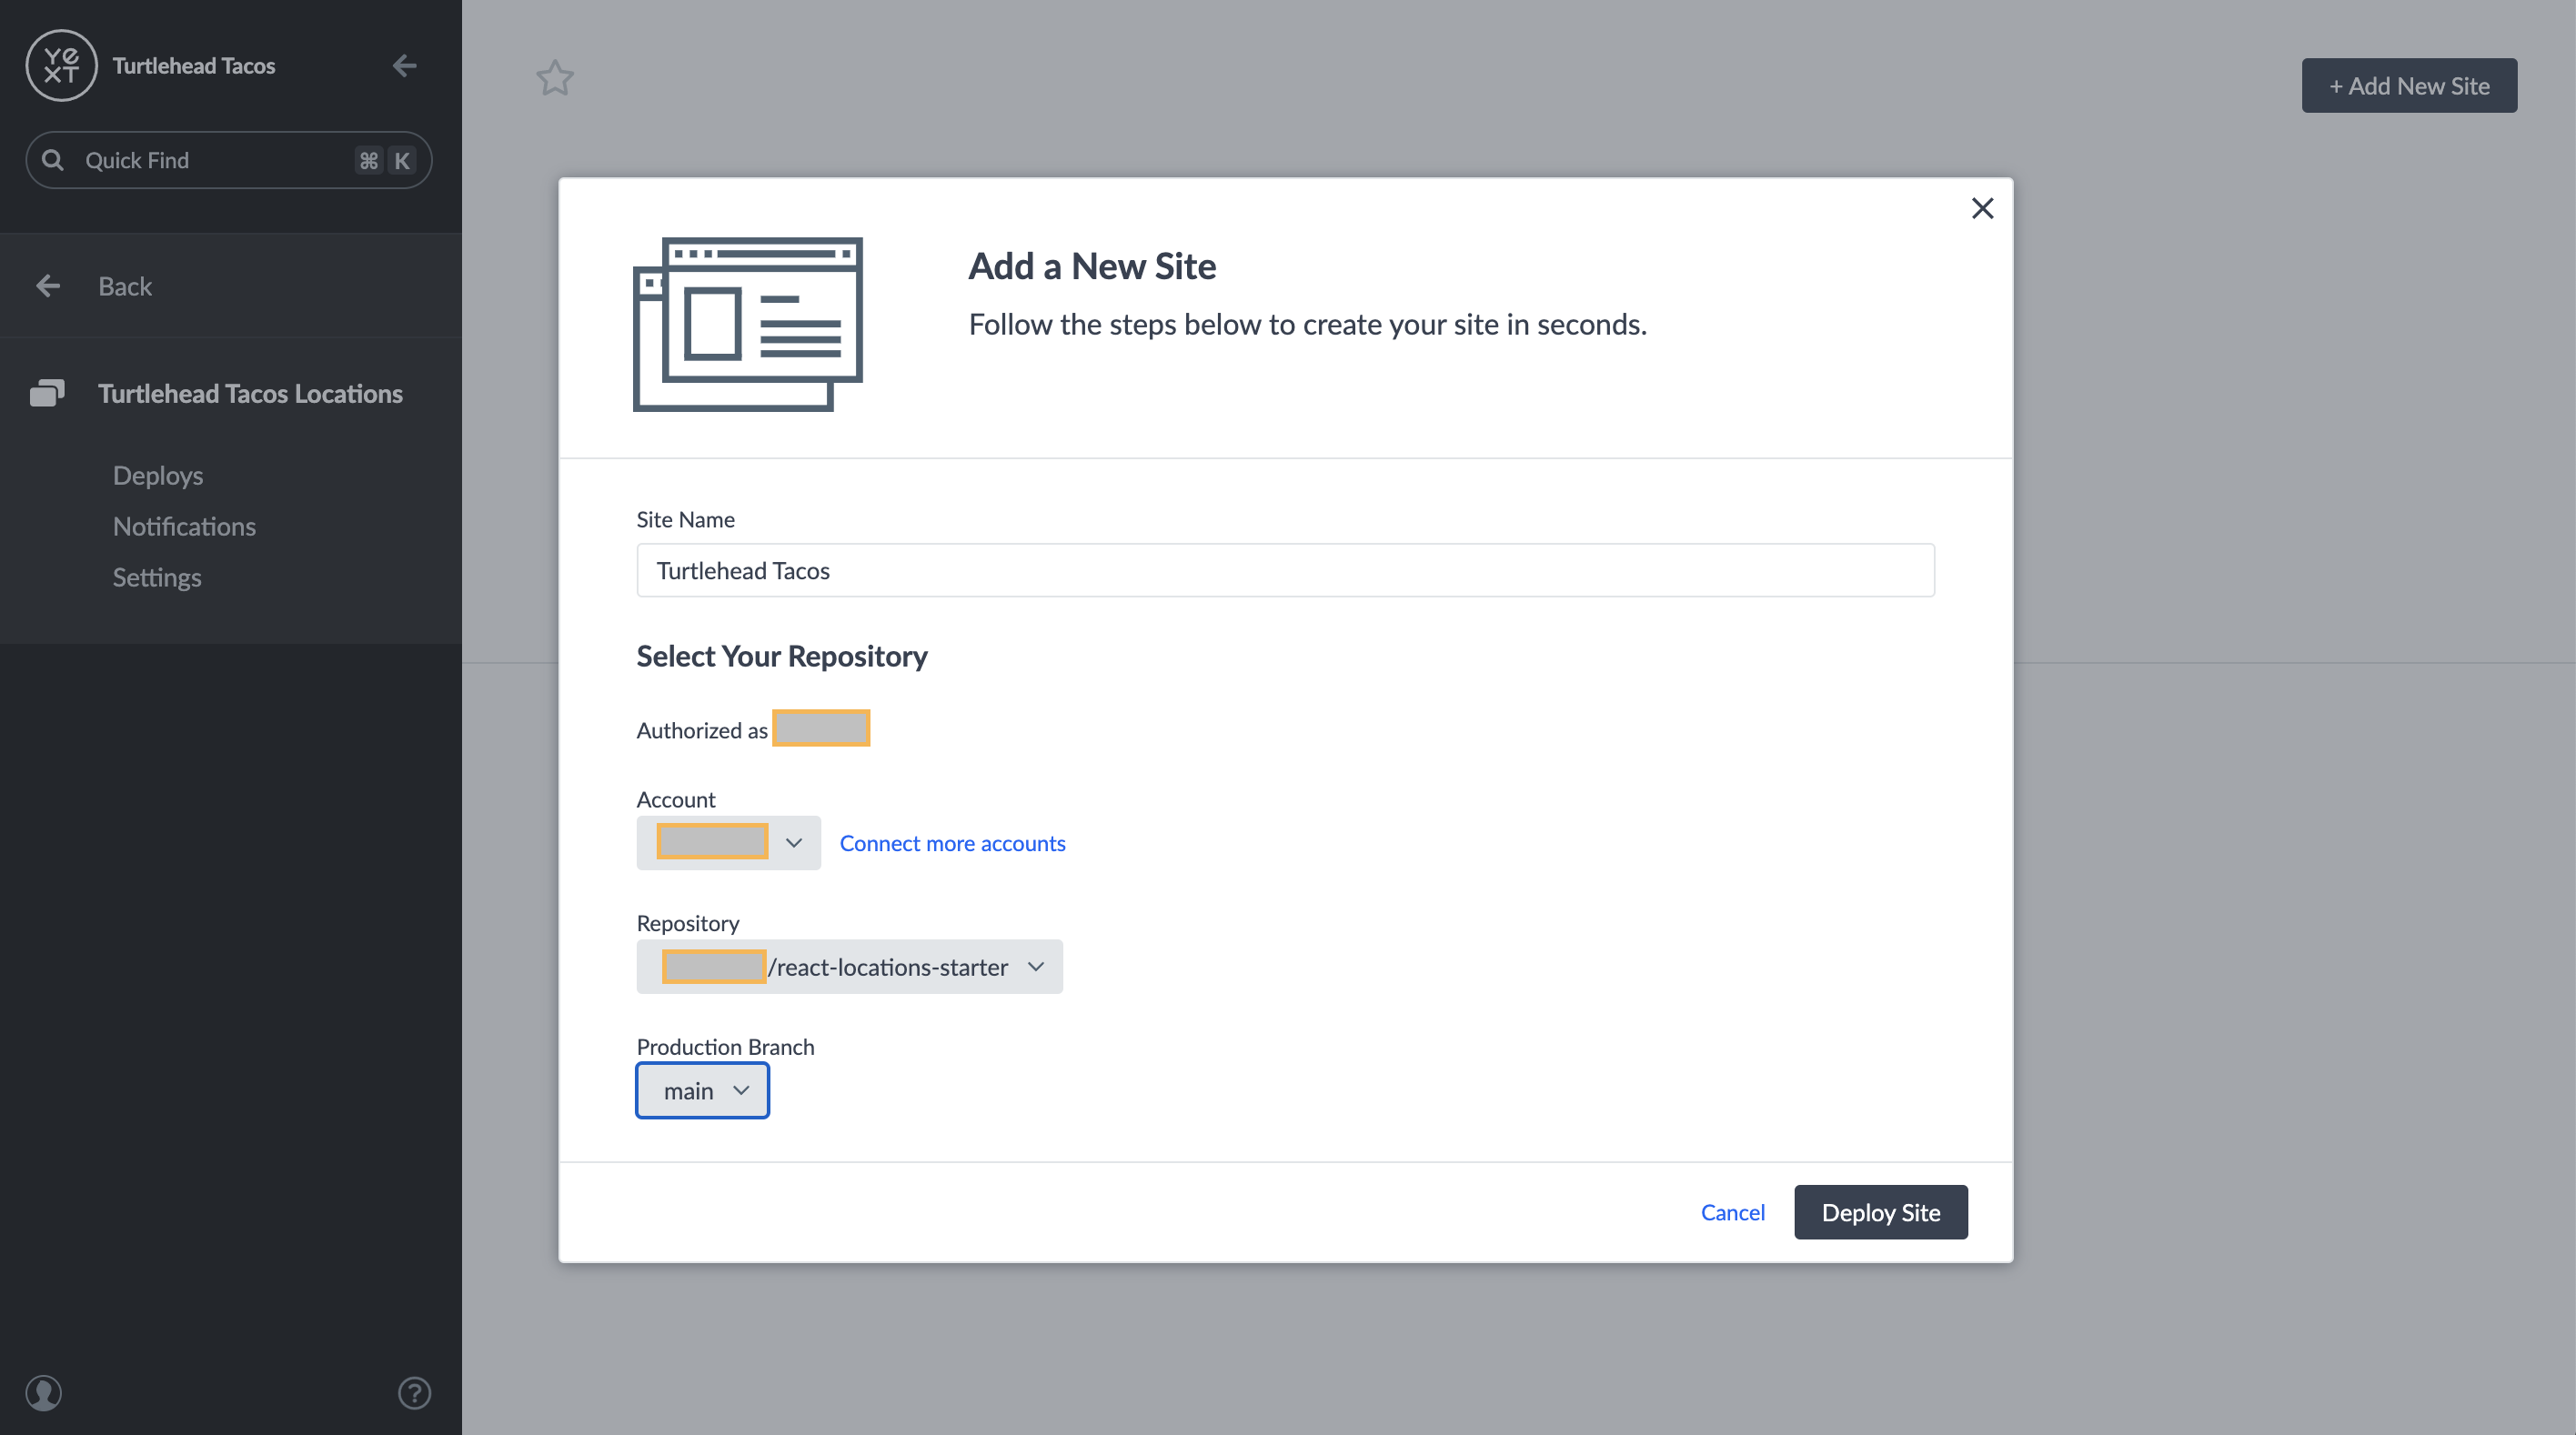
Once you go through the GitHub authorization flow, you will see the
Add a New Sitemodal where you will complete the following steps.Add Site Name — this is an internal name that should help you easily identify your site in the Yext platform.
Select the GitHub account to which you would like to connect.
Select a repository. This should be the starter repo you created earlier.
Select the production branch. This is the “main” or “master” branch from the repo you selected.

Click Deploy Site. You should see a deployment in progress — we are now building and hosting your site based on the starter code in your Github repo and the entity data in the platform.
Once your deploy finishes, you’ll have two deploy links that you can share.
- Deploy Preview: Click Preview on the right of your deploy.
- Staging link: The most recent deploy is automatically staged. At the top of the screen, click the URL next to the orange “Staging” pill.
You’ll learn more about deploys later in the Deployment Screens unit !

Congratulations! You’ve successfully deployed a Pages site on Yext - see how easy it was?
Why are you creating another site?
Way to go, you passed! 🏁

