Deploy Changes | Yext Hitchhikers Platform
What You’ll Learn
In this section, you will:
- Deploy changes to GitHub and your Yext site
Overview
In the previous module, you learned how to make changes to customize your repo. As you make changes, you’ll want to deploy your changes to share with others. In this unit, we’ll walk through how to do both.
Deploy Your Changes
Let’s deploy your customizations to production! Once you’ve confirmed your code looks good locally, it’s time to push these changes to your GitHub repository.
In your terminal, terminate your dev server if it is still running (press CTRL + C).
Save your files in your code editing tool.
Add your modified files to the git staging area with
git add -A. If you only want to commit certain files, usegit add <file-name>.Commit your changes with a commit message by running:
git commit -m "<commit-message>"Push your changes to the remote repo:
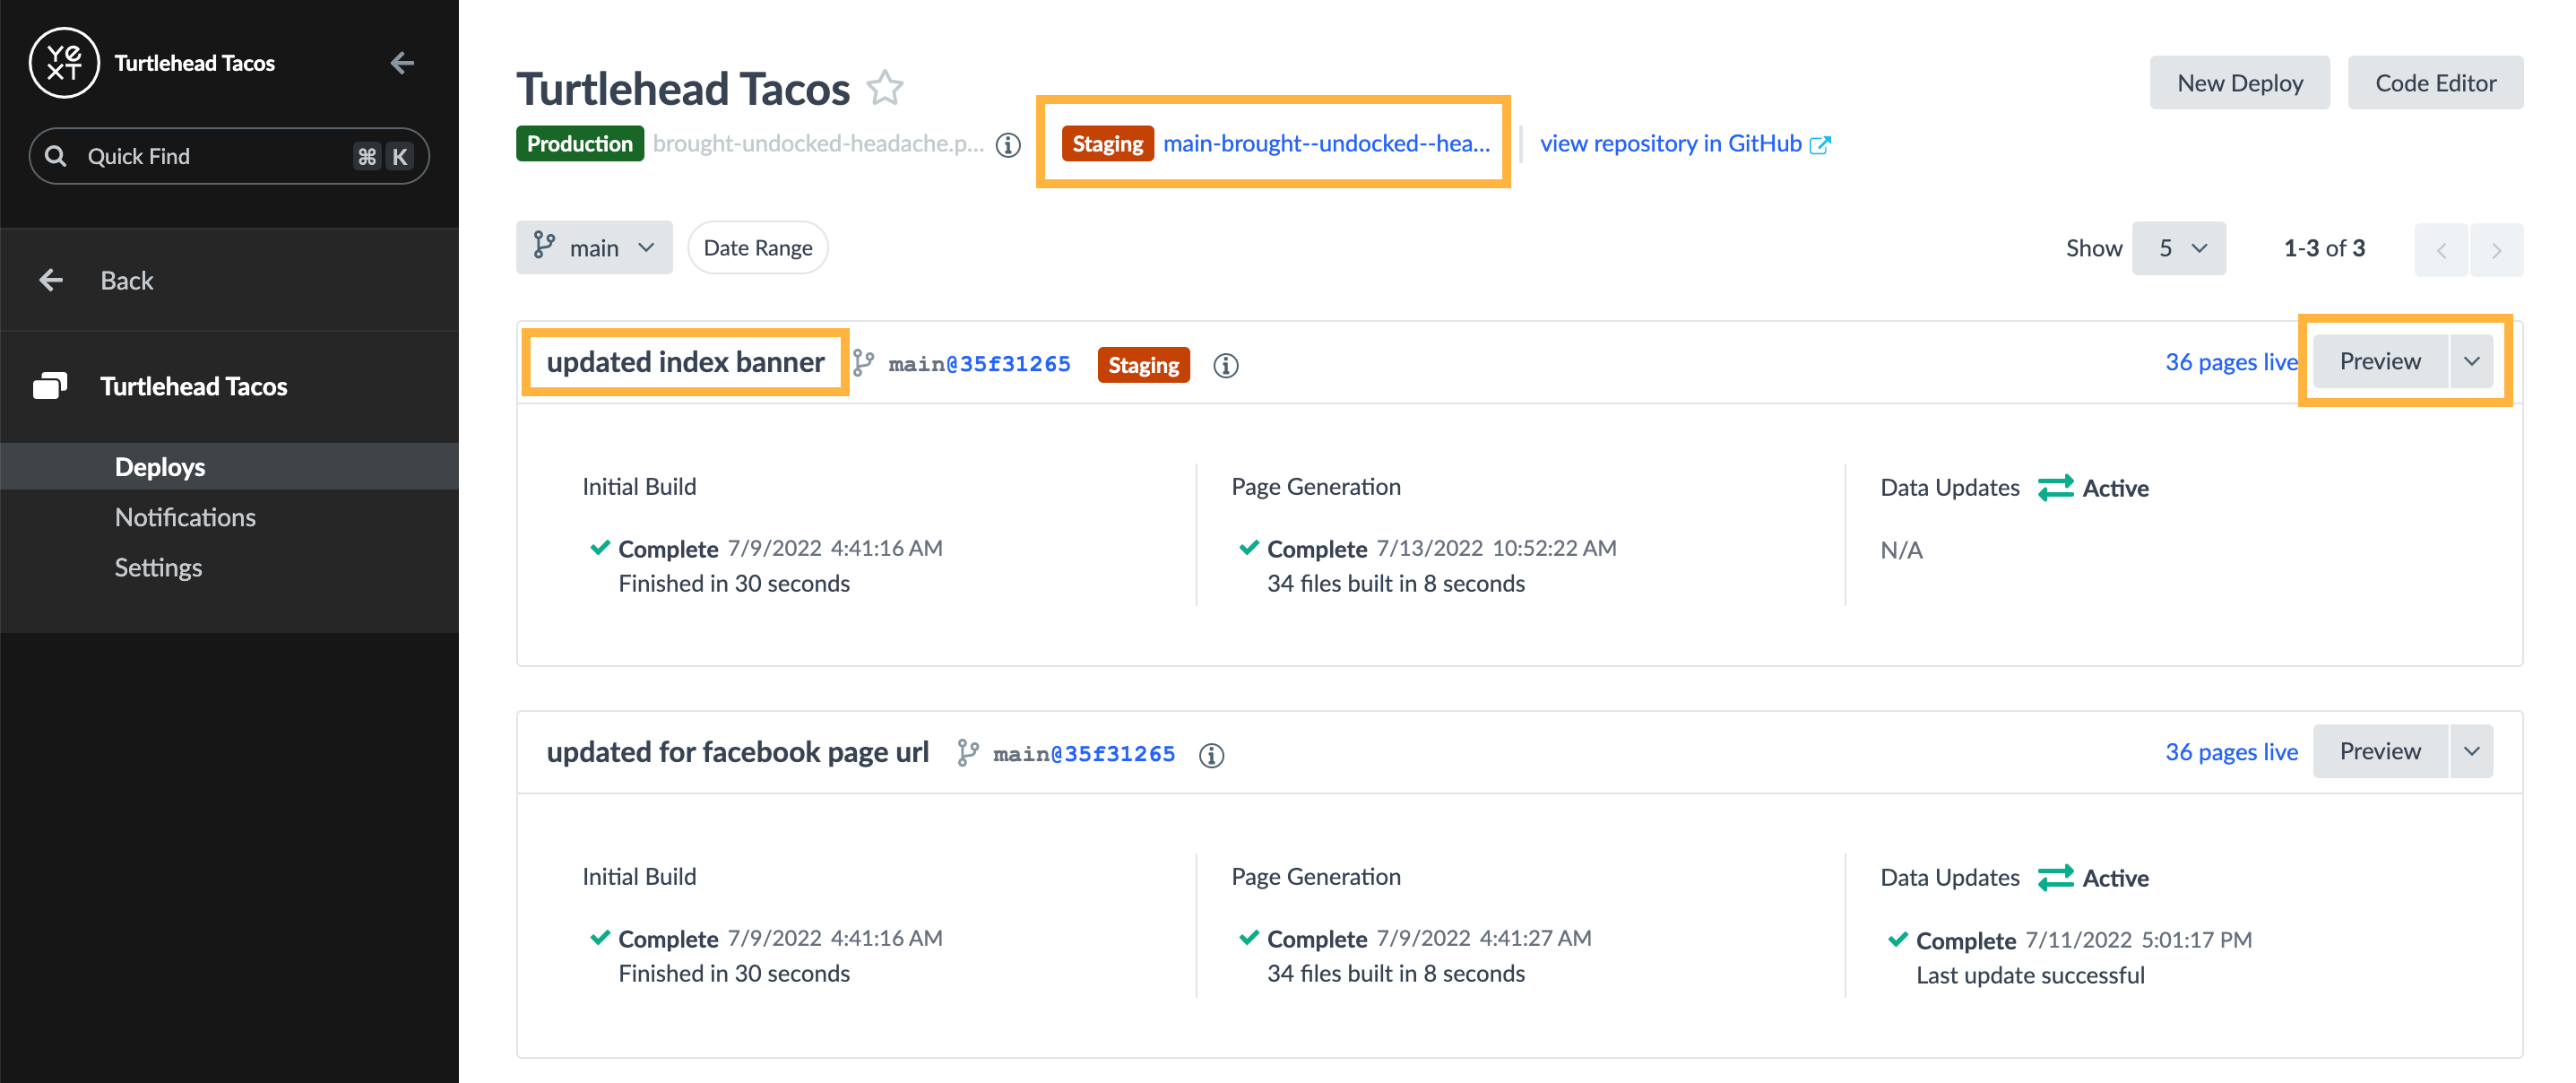
git push origin <master/main>Navigate back to your site in Yext. Pages will listen for any changes to your GitHub repo and build a new version of your site accordingly. You should see a new deploy in the UI with the same commit message you just wrote:
Once your deploy finishes, you’ll have two deploy links that you can share.
- Deploy Preview: Click Preview on the right of your deploy.
- Staging link: The most recent deploy is automatically staged. At the top of the screen, click the URL next to the orange “Staging” pill. This is the same staging link you opened in the Initial Deploy unit , however it’s been updated to your latest commit.

You also have the ability to deploy a backup version of your site as it existed at a previous point in time. Check out the backups guide and reference doc for more info.
In what order should you run commands to deploy local changes to GitHub?
Climbing that leaderboard! 📈

