
Integration Options and the Results Page | Yext Hitchhikers Platform
What You’ll Learn
By the end of this unit, you will be able to:
- List the difference between the two integration options and understand when to use each
- Create a domain for both the JS Snippet and Subdomain methods
- Assign a domain to Pages site
Overview
Once you launch an experience to production, you will need to create your results page! The results page is simply a landing page for the search results. It can be hosted through your brand with a JS snippet integration or through Yext on a subdomain.
The two integration phases affected by the integration option you choose are adding a domain and standing up the results page, both of which we’ll cover below.
Check out the results page at search.yext.com below:
Integration Options
The above page can be created through either integration option. There are two main differences between these two options to consider when deciding how to add your results page:
- The results page URL format
- The header and footer set up and workflow
In this unit, we will walk through these difference more in depth as well as the domain set up and configuration for each one.
redirectUrl property. As a reminder, this step is required for header search bar integrations and overlay modules that link out to a standalone search results page.
JS Snippet
With the “JS snippet” path, you host the search results page and inject or iFrame the Search experience as a component onto the page using a script tag. The page itself maintains the integrity of a website’s header/footer since it is a page on your site. Any changes made to the header/footer flow separately from changes made to the Search experience.
The Search results page will typically live at brand.com/search.
Subdomain
With the subdomain path, Yext hosts the search results page and thus the header/footer is created using Yext products or by a Yext team. Thus workflow is required with Yext any time the header/footer is updated to ensure changes flow through. To see an example of how to add a header and footer to a subdomain experience, see this reference doc .
The Search results page will typically live at search.brand.com.
Adding a Domain
You only need to add a domain if you are integrating via the subdomain method. For the client-hosted JS snippet path, since we will be injecting the Search experience into an existing CMS page template (e.g., brand.com/search), you can use the existing placeholder domain to integrate with. For the Yext-hosted subdomain path, we will publish directly to a Yext-hosted page (e.g., search.brand.com).
When you are ready to add your domain, navigate to Pages > Domains. To see step by step instructions, see the Manage Domains via the UI help article
JS Snippet
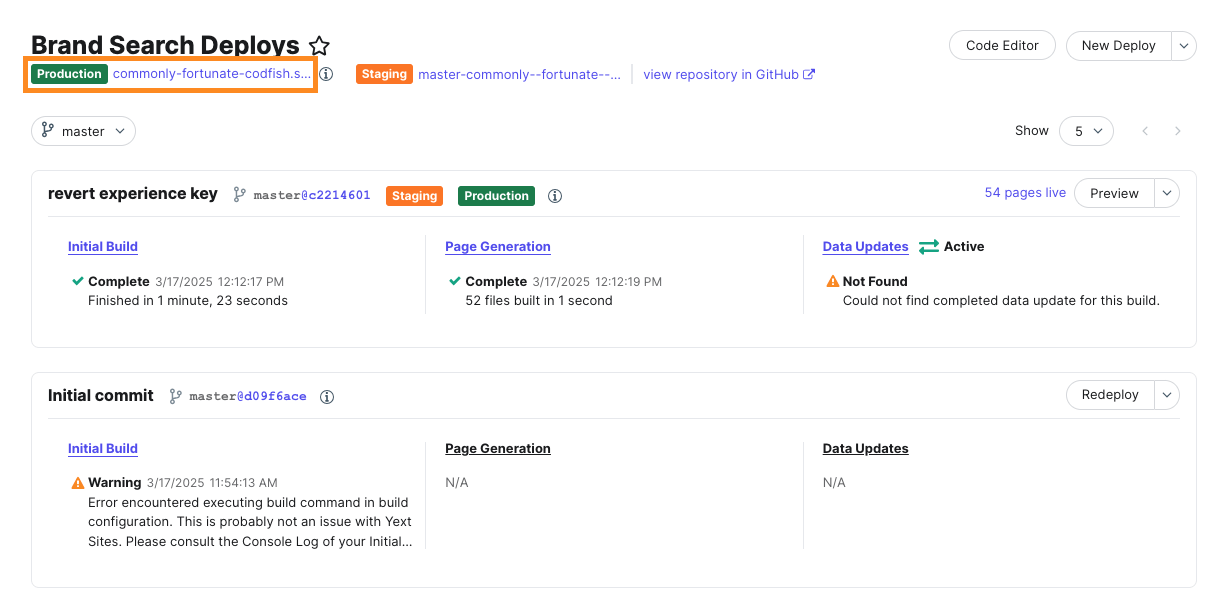
To create a client-hosted JS snippet to inject into your page, use the placeholder domain that is automatically created when you create your Pages site. You can find this by navigating to your site and clicking on Deploys.
Here you’ll see the placeholder domain as a staging and production link. Once you are ready, publish your site to production and use the production URL for your integration.
Subdomain
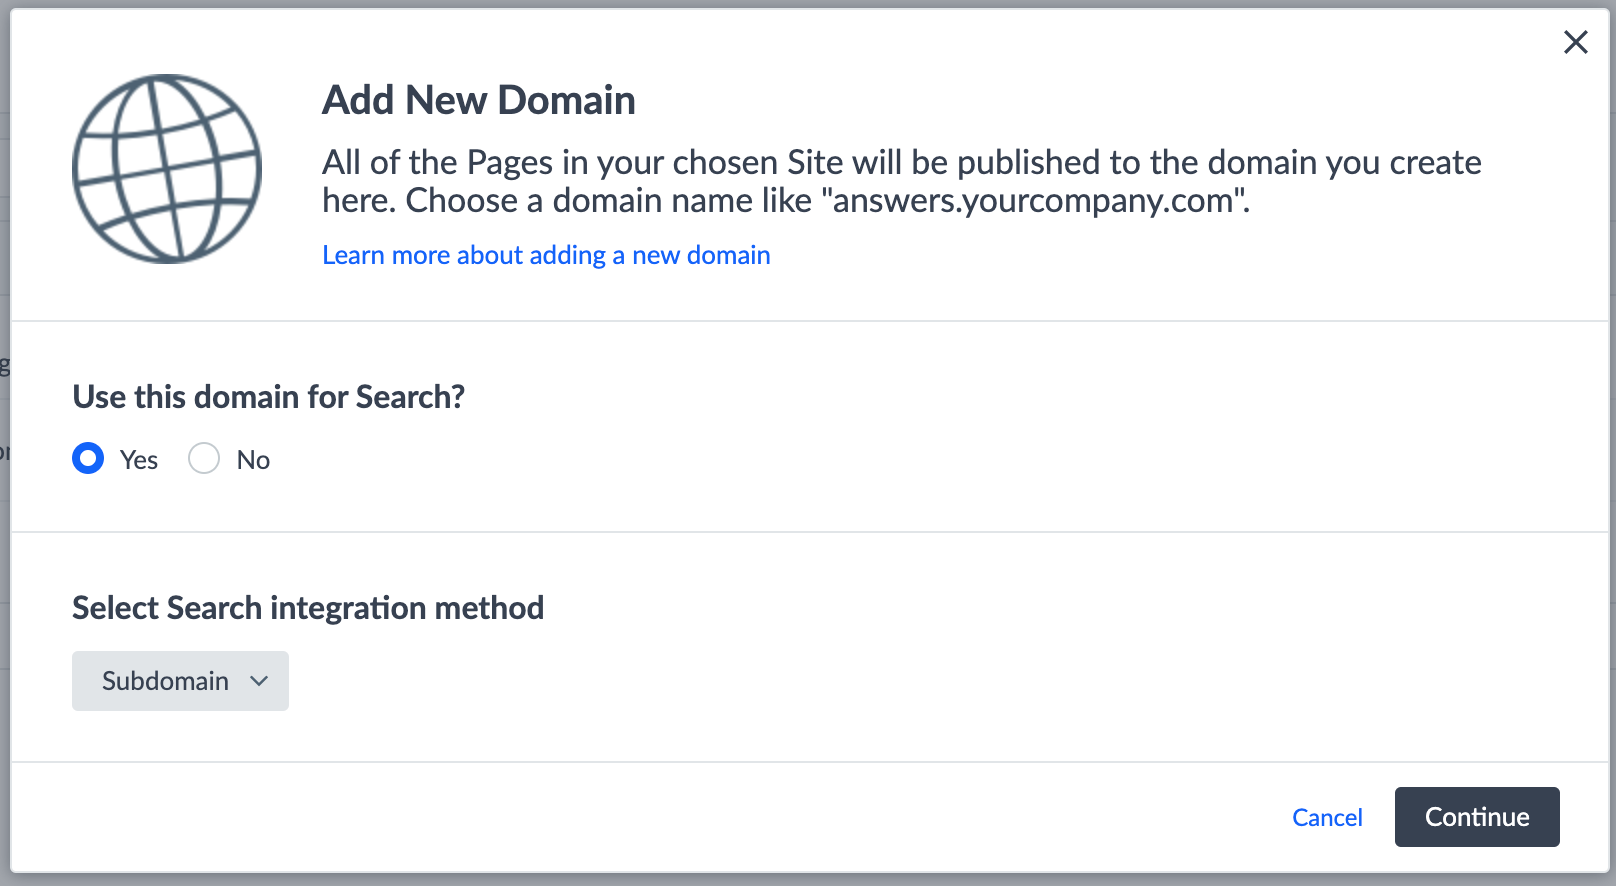
In order to use the Yext-hosted subdomain path, you will add the following domain information to the “Add New Domain” modal:
- Use this domain for Search? = Yes
- Integration method = Subdomain
- Domain Name formatted as
search.brand.com(ex.search.turtlehead-tacos.com)
Once you input your domain format, you’ll be given a bridge domain to set up the CNAME record.
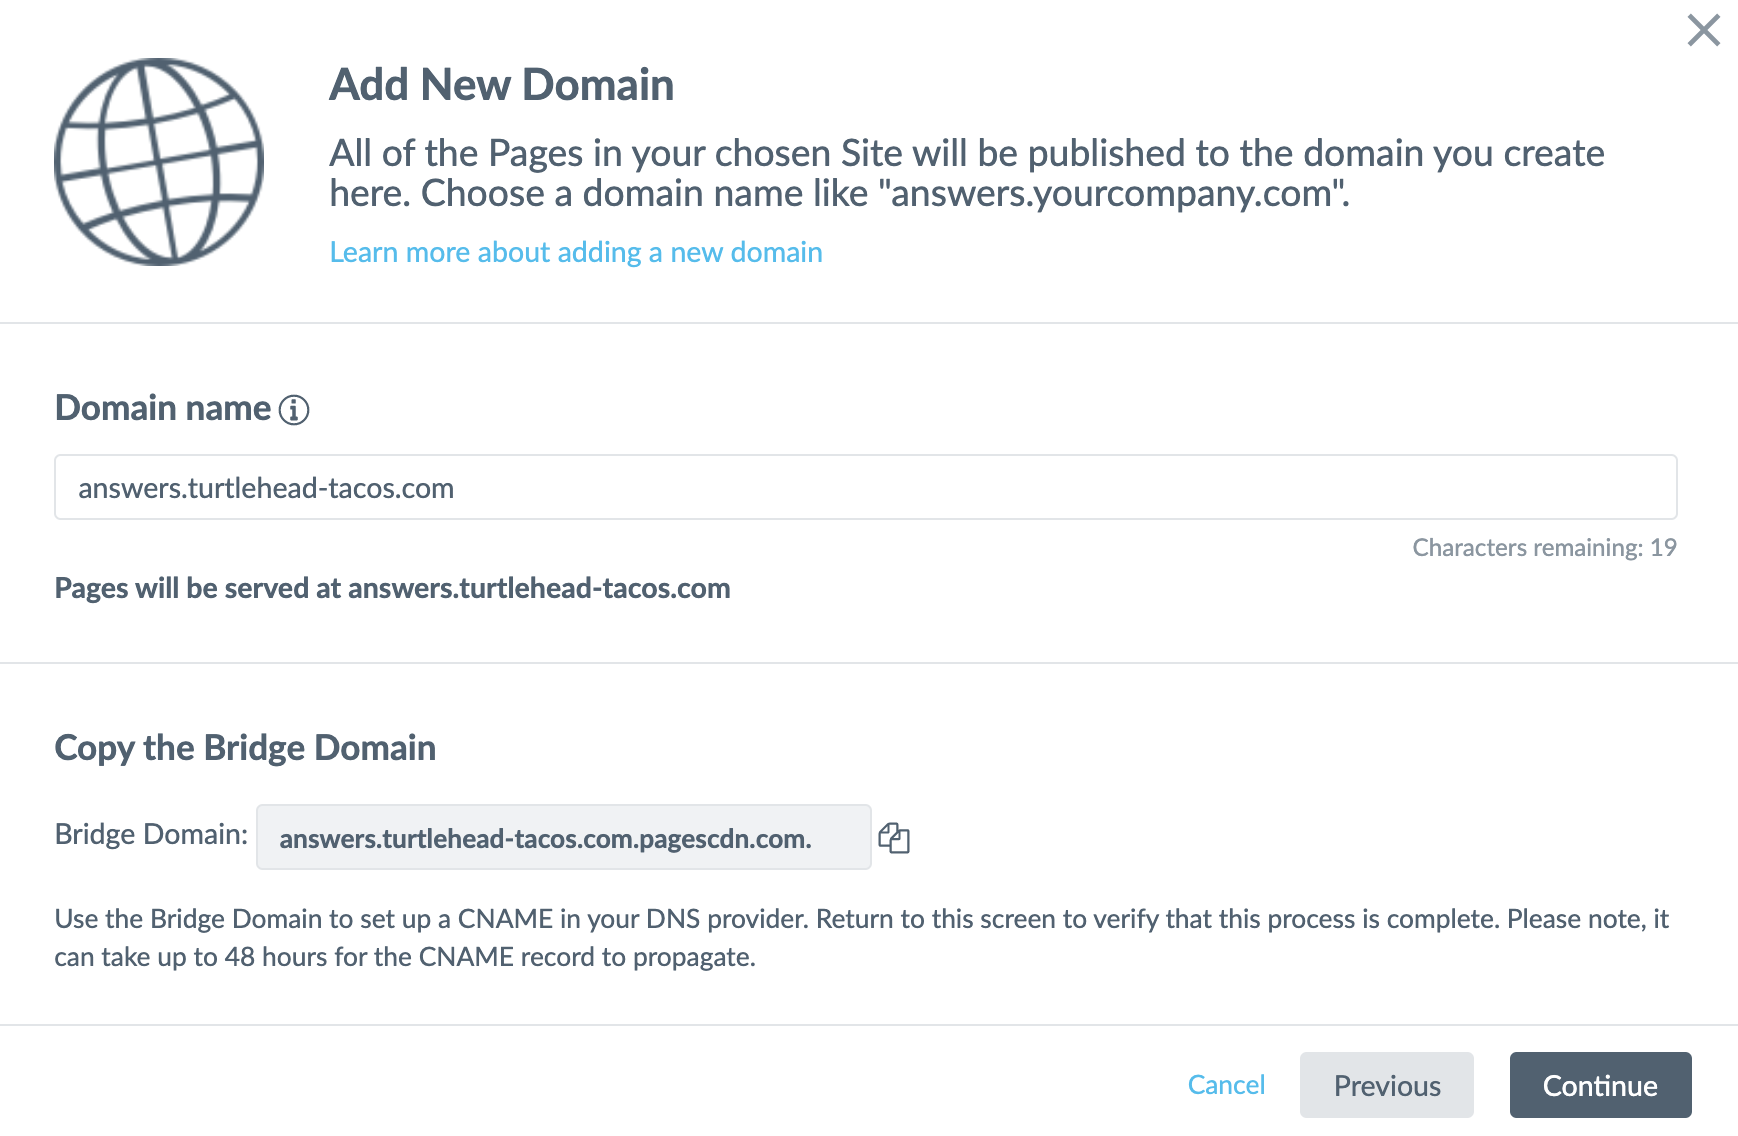
The DNS status will remain in “Pending” until you create a CNAME record.
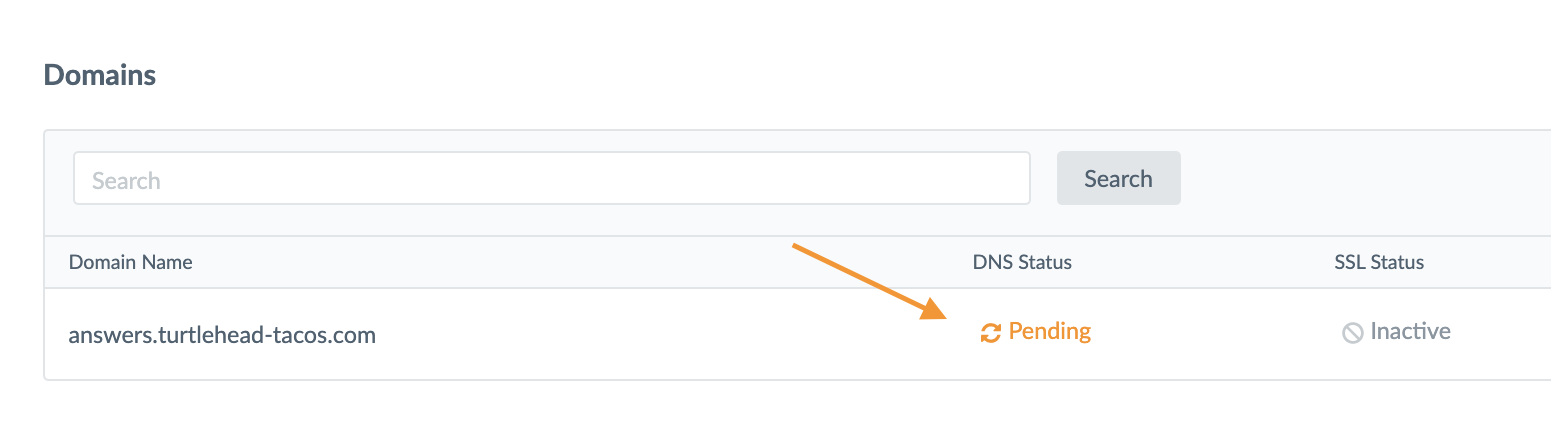
You will be able to publish as soon as the DNS Status switches to “Active” (meaning the CNAME is set up correctly).
Assigning a Domain
For the subdomain integration method, once you successfully add a domain, you will need to assign the domain to your site. To do this, navigate to Pages > [[Your Site]].
The steps to assign will then differ based on the type of site you are using:
- Classic Pages (Legacy) - click the Select Domain dropdown at the top left of the page and select your domain.
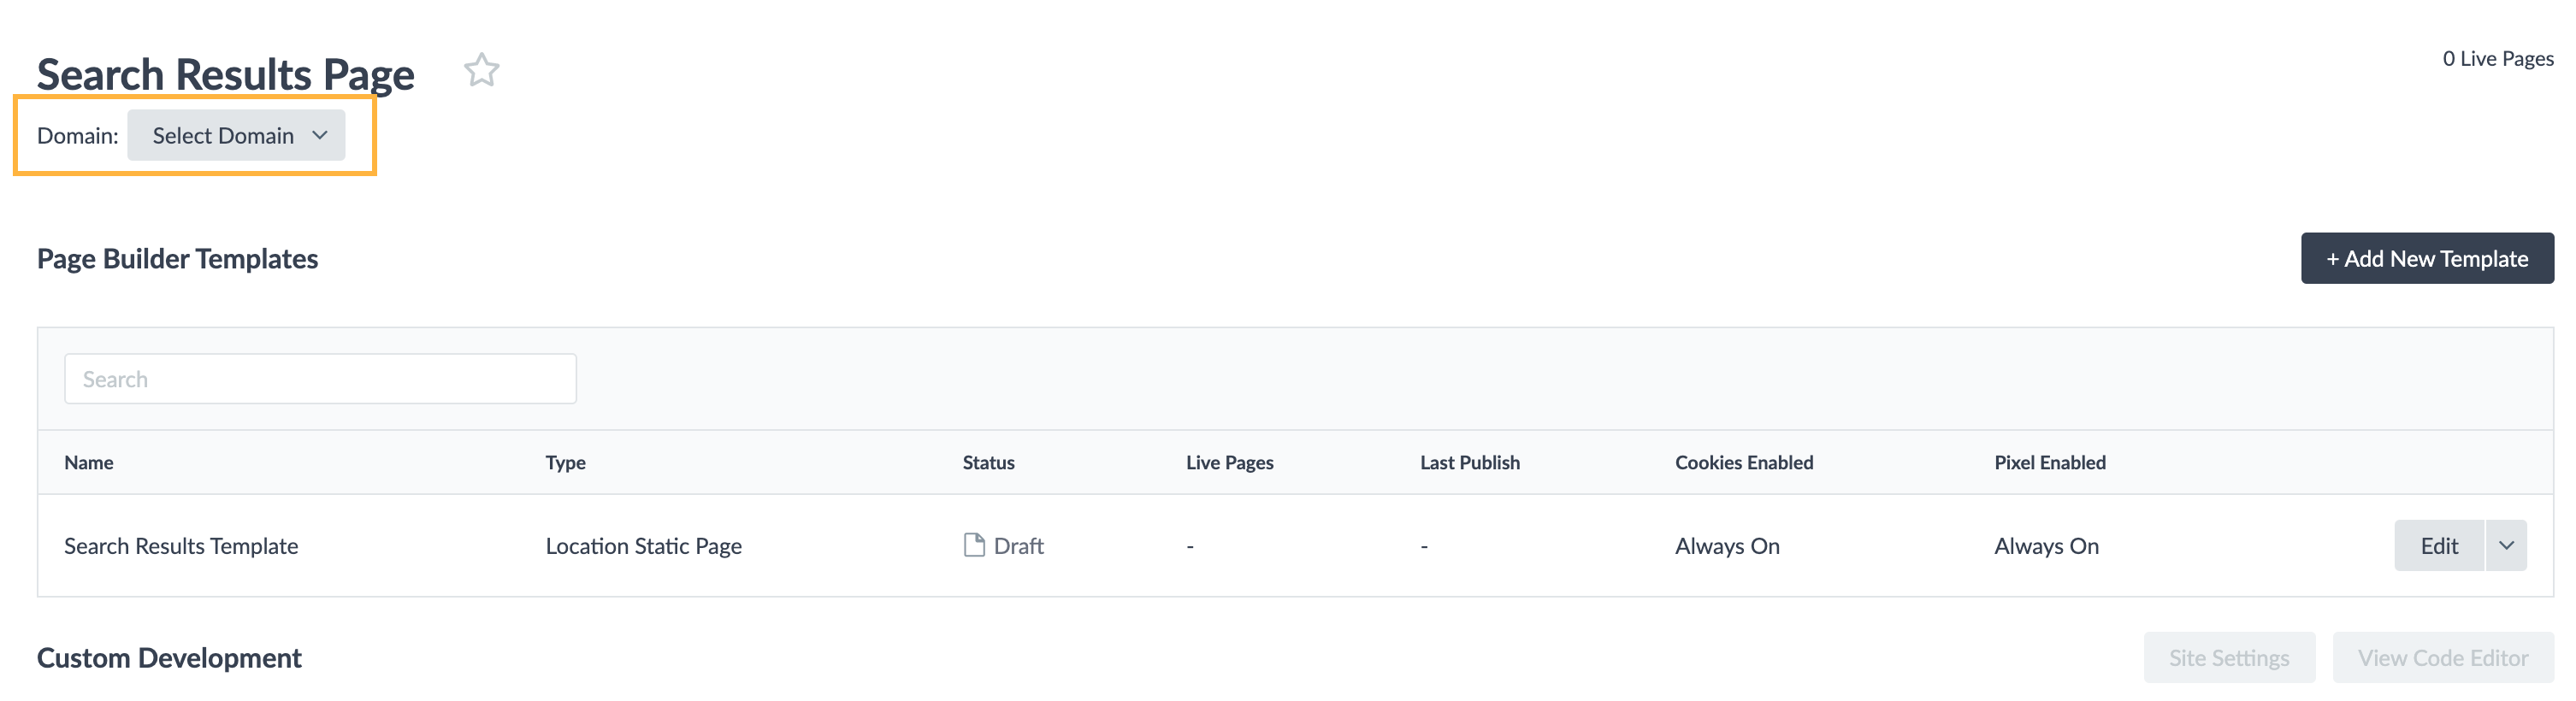
- Pages - Select Settings for your site in the left navigation. On the Site Settings screen, click the Domain field, open the Select Domain dropdown, and select your domain. Save once completed.

Standing up a Results Page
Once you set up your domain, you are able to add your Search experience to your site. Step-by-step guidance can be found in the Creating Search Results Page guide.
To make the process quick and seamless for creating your search results page, you’ll find an Integrations screen that provides code snippets for the various ways you may want to integrate Search onto your site. For standing up the results page, you will only need code for the JS Snippet option.
Navigate to Search > [[Your Experience]] > Integrations and select “Embed Code”.
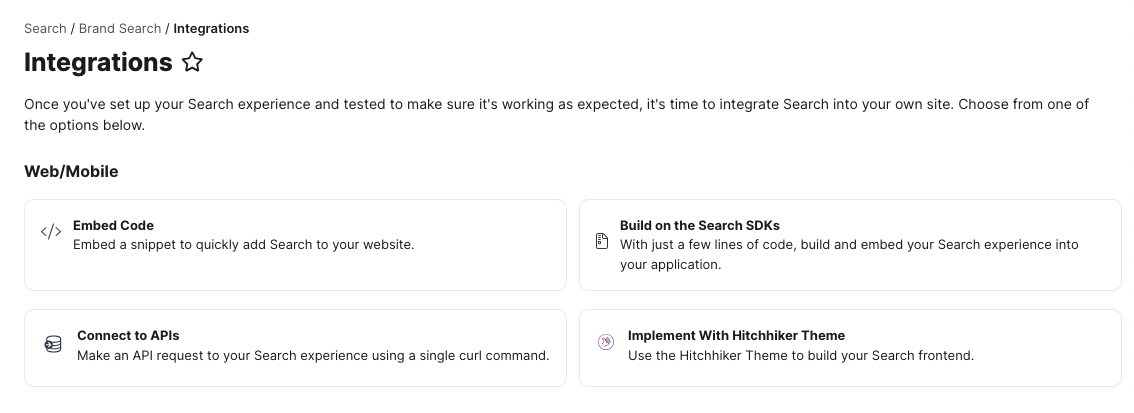
In the modal, click the tab for Search Results. Select your site and copy the code snippet to embed your search results.
JS Snippet
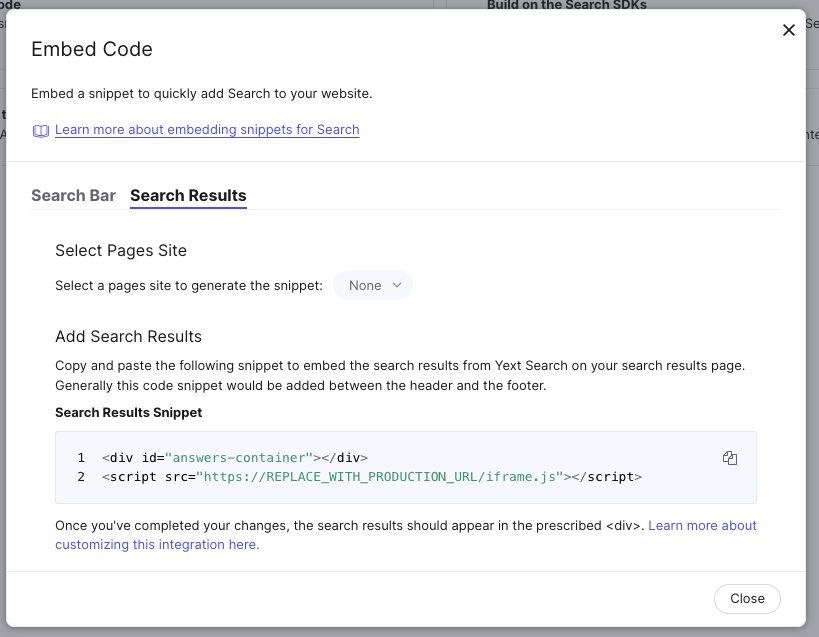
The “JS Snippet” path utilizes the Javascript snippet below to inject the Search experience onto an existing search results page (see here for instructions on how to create a search results page):
<div id="answers-container"></div>
<script src="REPLACE_ME_PRODUCTION_URL/iframe.js"></script>
Any existing content on the search results page should be removed and the REPLACE_ME_PRODUCTION_URL parameter should be updated to the production URL. You can use the production version of the placeholder domain.
Once the developer has added this code snippet, you’ll see the Search experience surface on the search results page!
Modifying the Script Tag to Embed Staging Version of Search
If you want to use the JS Snippet to preview the staging version of your Search experience, you will need to slightly modify the code listed above. It should look something like this:
<div id="answers-container"></div>
<script src="REPLACE_ME_STAGING_URL/iframe-staging.js"></script>
You can learn more about this in the Creating Search Results Page guide .
Subdomain
For this path, the client will need to first determine the subdomain (as mentioned above) on which Yext will host the Search experience.
The client will then need to create a CNAME record - they should point this record to something like subdomain.brand.com.pagescdn.com.
Be sure to include the subdomain in its entirety and include the trailing dot (“.”). For example, if the client selected search.[[clientdomain]].com, then the CNAME will point to search.[[clientdomain]].com.pagescdn.com.
You will need to copy the subdomain in its entirety including the trailing dot (“.”). For reference, the trailing dot is required by DNS specification when setting up a CNAME to another domain (pagescdn.com, in this case). There are some DNS providers that handle this automatically. The client will also need to set up the CNAME record on their internal DNS, if they have one. This will ensure the subdomain displays on the client’s internal network.
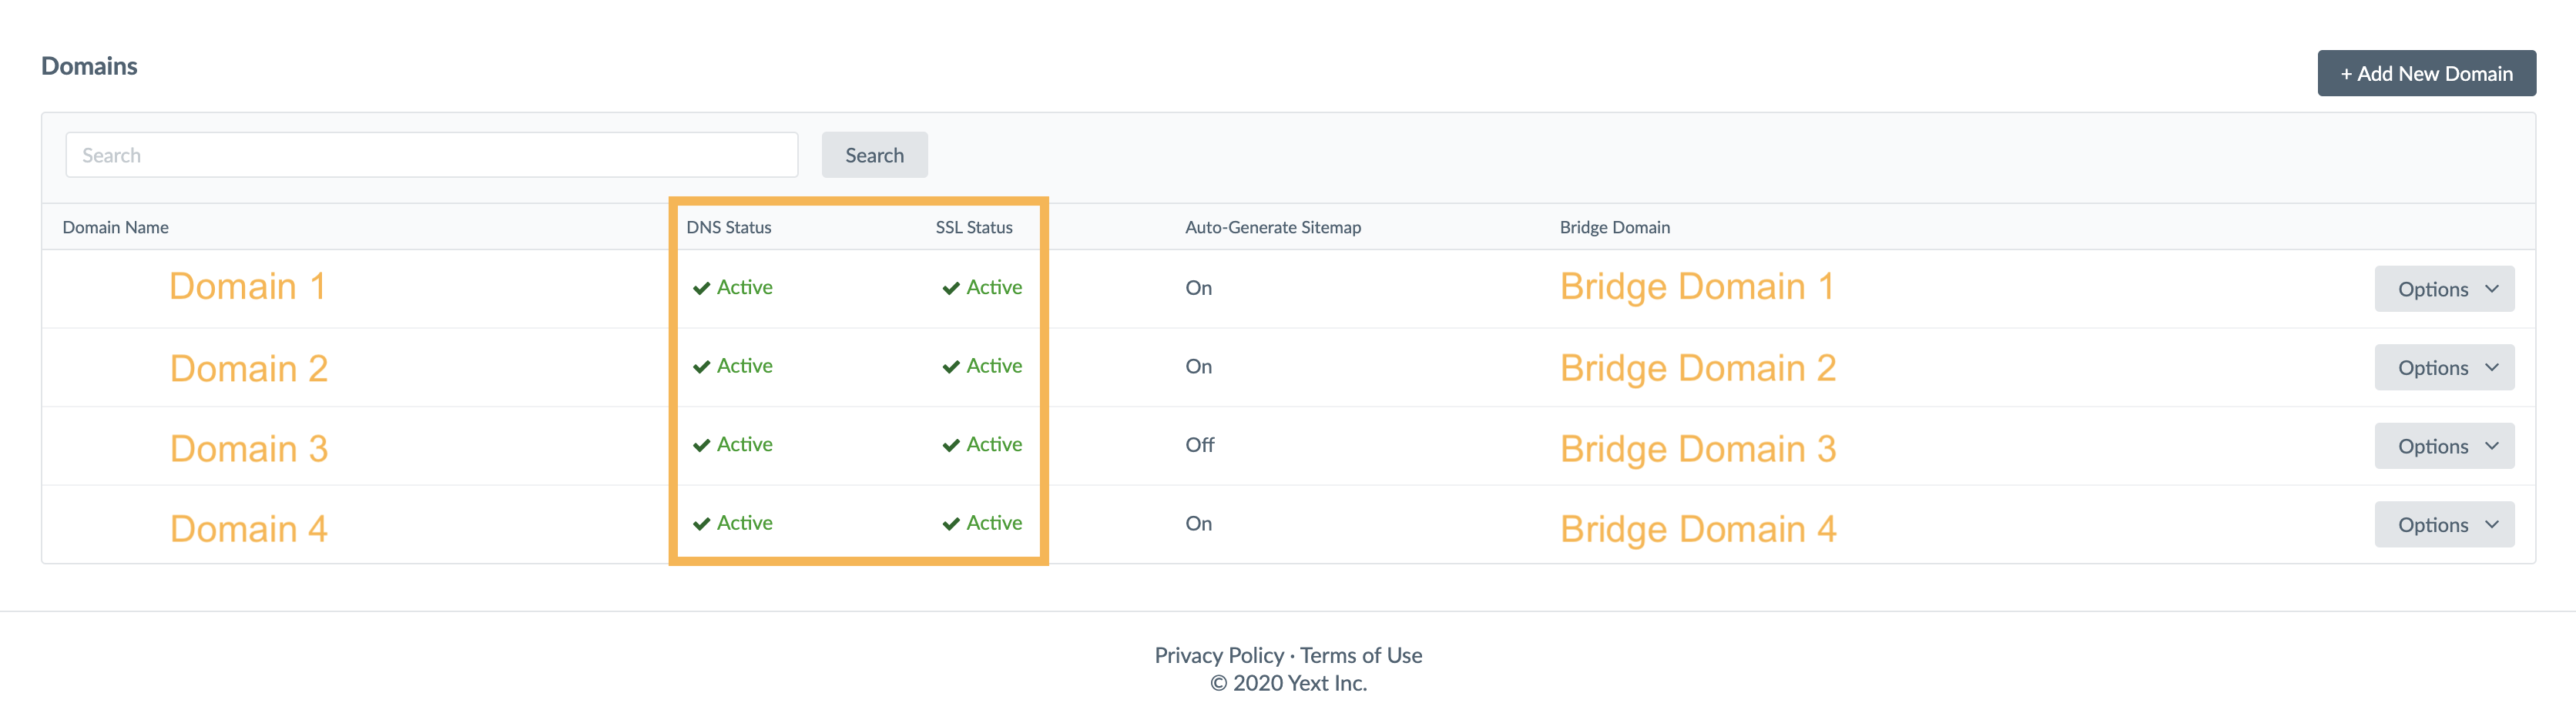
Once the CNAME has been configured properly, you will see the DNS Status and SSL Status update to “Active” on the Domains tab which means you will be able to publish!
Which URL below is leveraging the subdomain integration path?
Which integration method would you use if you want the results page to be client-hosted?
Where do you go to assign a domain? (Select all that apply)
Climbing that leaderboard! 📈
