
Create Your Site | Yext Hitchhikers Platform
What You’ll Learn
In this section, you will:
- Build and preview your site locally
- Learn about Entity vs. Static Page Types
Overview
Let’s start building! We’ll walk through how to create a site locally.
Video Walkthrough
In the video, Andrew walks through the steps below.
1. Connect to your Yext Account
Log in to your Yext account and copy your account ID which is visible in the URL (refer to the screenshot below):

Determine if you are using a
sandboxorproductionenvironment.- In the screenshot above, the URL begins with
sandbox.yext.com; meaning you are using a sandbox account. - If you are using a production account, the url will be simple
yext.com.
- In the screenshot above, the URL begins with
Connect to your account using the CLI.
If you are connecting to a sandbox (aka Playground) account, run:
yext init -u sandbox <account_id>If you are connecting from a production account, run:
yext init <account_id>
A new tab will open in your browser asking you to authorize access. Click Authorize. If you are not logged in to your Yext account, you will be prompted to log in.
2. Build Your First Site
Once logged in, navigate to suitable directory to contain your Pages project and run:
yext pages newYou will then be walked through a series of prompts. To follow along with this project, respond to the prompts with the following:
- Would you like to create a new repo or link and existing GitHub repo? Create a new repo
- Which starter repository would you like to use? Locations Starter (Basic)
- What would you like to call your new Pages repo? turtlehead-tacos-demo-restaurant-site
- Would you like to setup a remote GitHub repository for turtlehead-tacos-demo-restaurant-site? Y or enter
- This will set up a remote repo and make deploying your site really easy.
- If you are not logged into GitHub, the command will prompt you to log in. Follow the instructions through the browser and return to the command line when finished. If you are already logged in, just continue with enter.
- Would you like to install dependencies for turtlehead-tacos-demo-restaurant-site? Y or enter
- This runs
npm iunder the hood and install all the required dependencies.
- This runs
- Would you like to populate your account with seed data? (Recommended if you are starting with a fresh account) Y
- Be careful when adding seed data to an account with existing data as it may update or delete existing data.
- Warning: Are you sure you want to overwrite configuration resources for the current configuration? Yes
- Confirm you are connected to the correct account.
Once you have started your site, follow the directions from the terminal and run the following:
cd turtlehead-tacos-demo-restaurant-site
npm run dev
Your site will now be running locally at
localhost:5173. You should see the Pages Development page as in this screenshot: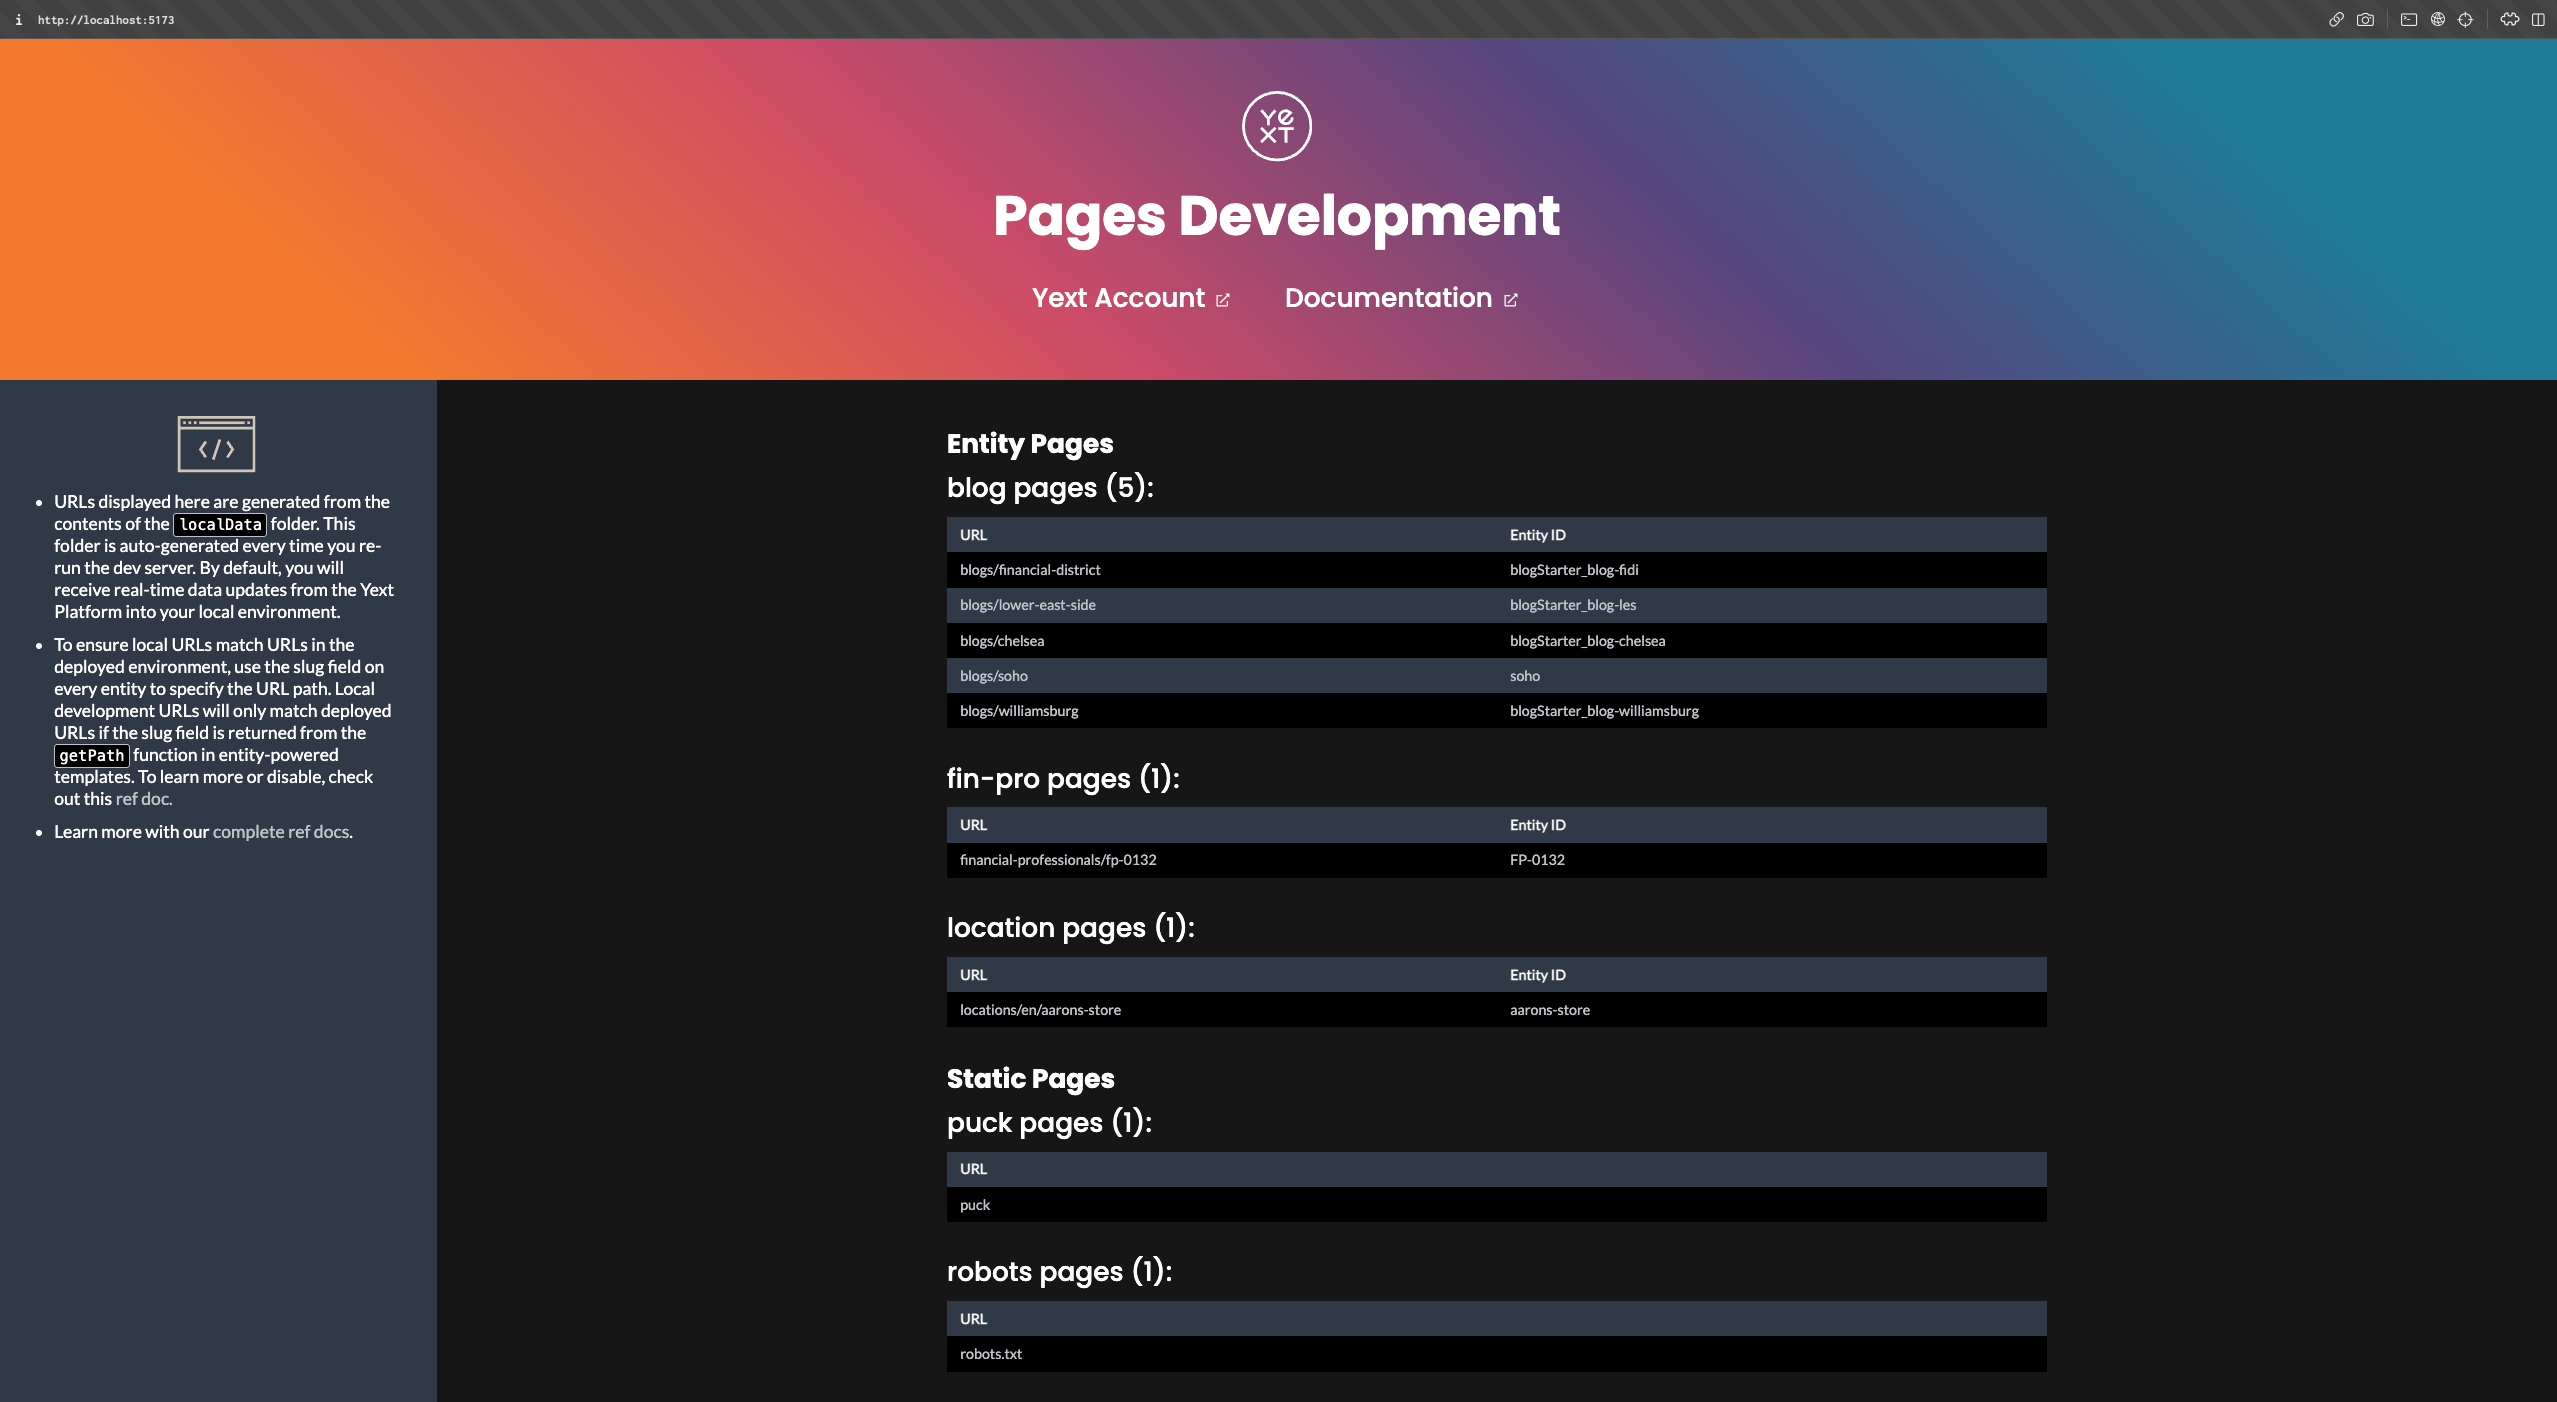
Types of Pages
From the Pages Development Screen, you can see there are two types of supported pages: static and entity pages.
Entity pages are powered by Streams, which is the Yext system responsible for delivering data from the Knowledge Graph to your frontend code. An entity template is used to create a page for each eligible entity delivered via stream.
Static pages, on the other hand, are individual, one-off pages (e.g. index, about, etc.).
We’ll dive into more detail in the Overview of Templates unit .
Entity Pages
Let’s explore the Entity Pages. From the Pages Development Page at localhost:5173, you can see multiple entity pages, which are generated from streams. Click through some of the entity pages and you’ll notice they have the same structure but different data (click “Home” in the nav bar to return to the Pages Development Page).
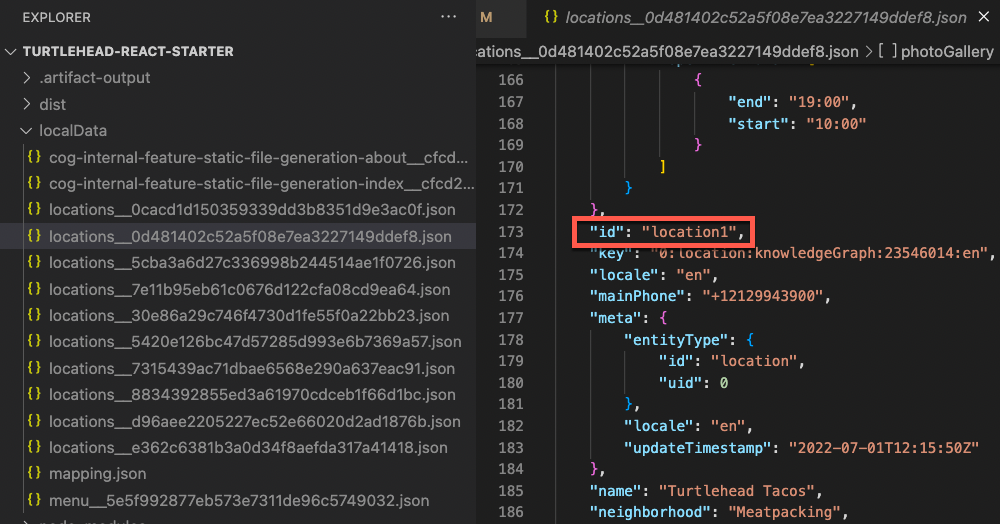
Take a look at the path for the entity pages. For example:
localhost:5173/location1-meatpackingis the page generated based on data from entity IDlocation1.- You’ll notice the location-specific data displayed on the page comes directly from the “location1” JSON document in your
localData/folder. This folder is a local JSON representation of the data that lives in your Knowledge Graph! - If you search for the
slugfield in this document, you’ll notice this field is what currently defines the page path:location1-meatpacking.
Static Pages
View the static page at localhost:5173/index.html or you can navigate directly to the page from the Pages Development Page. You can edit this file at ./src/templates/static.tsx.
Static pages are simple and are generally used when you want to develop a page that isn’t directly based on data stored in the platform (e.g. index, about-us, privacy policy, etc.).
Although static pages are not powered directly by Streams, they can still be updated through Global Data , which you’ll learn more about in Module 2.
You’re hosting various events at Turtlehead Tacos locations and want each event to have a page that uses the same structure. Which type of Pages template should you use?
Where can you get entity content to view your site locally?
High five! ✋
