
Upgrade the Theme Version | Yext Hitchhikers Platform
What You’ll Learn
By the end of this unit, you will be able to:
- Explain the difference between a theme file and a top-level file
- Recall when breaking changes occur
- List examples of files that may have been previously overridden
Overview
Before we go into the process of a theme upgrade, it’s important to have a conceptual understanding of what a theme upgrade does. Once you understand it more intuitively, the things that can go wrong make much more sense and you’ll be better equipped to debug issues.
Follow the Theme Upgrade guide for the step-by-step instructions on how to upgrade the theme version for your Search frontend.
The Theme Folder vs Top-Level Files
The theme files can be viewed from any Search frontend code editor. Navigate to the themes/answers-hitchhiker-themes folder and you’ll see the set of files included in the theme.

Upgrading the theme of your Search experience (i.e. clicking Tools > Jambo Commands > Upgrade Theme) will replace the answers-hitchhiker-theme folder with an updated folder, containing updated files for the latest theme version. This allows your Search experience to reference the features of the latest theme. Once you upgrade to the latest version, you will need to click Restart Live Preview in order to review the updates.
Any files that are not in this theme’s folder are considered top-level files. Barring a few exceptions, top-level files are not touched when you upgrade the theme.
Because upgrading the theme replaces the entire answers-hitchhiker-theme folder, it is extremely important to never update the theme files directly. If you update the theme files directly, those updates will be overwritten the next time you go to do a theme upgrade.
Instead, if you want to stray from the theme, you should override the file, which will create a top-level copy that you are free to edit. We will talk more about this in the next sections.
Breaking Changes
Breaking changes can occur when you upgrade the theme if top-level files are outdated and are not compatible with new theme files. Overriding the theme will copy that file at that moment in time. This means that if you upgrade the theme after a file has been overridden, that file will not automatically pull in updates the next time you do a theme upgrade. Thus, only override the theme if it’s deliberate.
The changelog will call out which files to check for forked versions for each version of the theme. If you previously overrode the theme, you will have to manually add updates yourself (which you should do to stay up-to-date on new features) by either:
- Referencing the theme file and copying over new lines of code (only recommend for small changes where you know exactly what changed), or
- Overriding the theme file again and adding in the changes you had made previously.
Override Theme Files using Jambo Commands
Pages and cards are common examples of files that you may have previously overridden that may need to be updated the next time you upgrade the theme.
Jambo commands such as “Add Page” or “Add Card” create new files for the page or card using the theme templates from that moment in time. If you created pages or cards instead of using the built-in pages and cards, you overrode the theme. As mentioned in the previous section, if you want to add new theme features to customized pages or cards that were created before doing the theme upgrade, you’ll need to either override those files again or copy the new lines of code over.
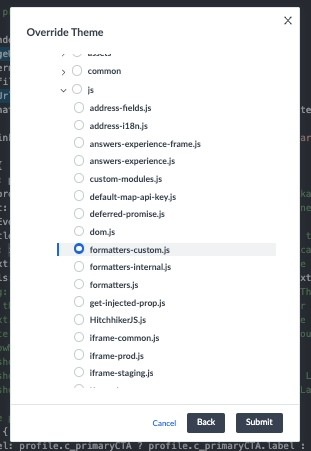
You can also use the Jambo command “Override Theme” to make an exact copy of a file in the top level directory. The command automatically updates jambo.json to say you’re providing an override. You can then make any changes you want to this top-level file but keep in mind that you may need to account for later theme changes to the file.
Use the theme when you can to easily take advantage of new features as they come out. A great example of this is Direct Answers: you may have added some additional formatting changes to the allfields-standard card, but as soon as you fork and customize it, you will not get the card changes from future theme upgrades.
Theme Branches
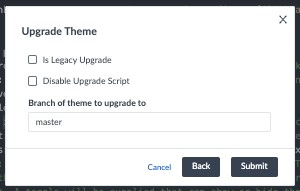
Keep in mind that the theme itself is a repository of files that can have multiple branches as mentioned in the Intro to Search Frontend Theme unit. When you upgrade the theme, it’ll ask you which branch of the theme you’d like to upgrade to. Leave this on master to upgrade to the most recent version of the theme.
True or False: You can customize the icons on the universal page and each results card directly in the theme files.
Where do you go to find out which theme upgrades have breaking changes and how to deal with them?
True or False: Top-level files get updated when you upgrade the theme.
High five! ✋
