Yext User History Guide
For Freshdesk and Zendesk Case View
Yext’s User History component displays a user’s journey through your help site, up until and after case creation. Arm your agents with this information so they can provide more relevant answers to your customers.
The component displays all of the actions a customer has taken in Yext Search. With this visibility, your agents can both communicate more efficiently with customers as well as identify documentation that hasn’t effectively answered customer questions.
The app is dependent on configuring your help site to identify your visitors where possible. Be sure to follow the steps in the latest Freshdesk or Zendesk integration guide to configure your portal and get Yext User History up and running in no time!

PI Disclaimer
This component relies on a combination of authentication and cookies, both configured in your help desk portal, to accurately attribute searches. The below steps are best practices for capturing the most information possible. However, please consider any PI policies that your brand or country have in place. All analytics passed to the Yext platform are opt-in. For reference, you can refer to Yext’s Data Processing Agreement here.
Configuration
Site Configuration Guide
The Yext User History Component is only able to return user logs if your website is configured to capture a user’s identity. By following the latest Zendesk to Freshdesk configuration guide you’ll attribute queries to individuals once authenticated.
However, to capture the most comprehensive view of user activity possible, we can use cookies to retroactively attribute queries to a user even if they were not actually authenticated at query time.
First, add code to your help site to mint a cookie on the search results page. You can find an example of the necessary cookie code here.
Once you have added cookie code, you’ll use it to determine the visitor ID passed in each query. You can copy the below code into your search results page, under where the iframe is initialized.
<script>

window.addEventListener("DOMContentLoaded", (event) => {

/* Set Visitor Object from user email address and/or Yext.com Cookie */

if ((HelpCenter.user.email != null) && (getCookie("YextAnswersUserID") != null)) {

var visitor = {

id: getCookie("YextAnswersUserID") + "&" + HelpCenter.user.email,

idMethod: "COOKIE & ZD_EMAIL"

};

AnswersExperienceFrame.runtimeConfig.set("visitor", visitor);

} else if (getCookie("YextAnswersUserID") != null) {

var visitor = {

id: getCookie("YextAnswersUserID"),

idMethod: "COOKIE"

};

AnswersExperienceFrame.runtimeConfig.set("visitor", visitor);

} else if (HelpCenter.user.email != null) {

var visitor = {

id: HelpCenter.user.email,

idMethod: "ZD_EMAIL"

};

AnswersExperienceFrame.runtimeConfig.set("visitor", visitor);

}

/* Set Query Source */

AnswersExperienceFrame.runtimeConfig.set('querySource', 'HELP_SITE');

/* Init Manually */

AnswersExperienceFrame.init({});

});

</script>
New_request_page.hbs
You’ll then do the same on your Case Submission page. Be sure to update any necessary variables such as querySource to reflect the case submission placement.
In addition to this visitor ID update, we suggest you also add code to set the visitor ID to the email value once it’s set on case submission in cases where a cookie is rejected and a user never authenticates. To do this you can use the below code.
let submitBtn = document.getElementsByName("commit")[0];
submitBtn.onclick = function(event) {
var email = document.getElementById("request_anonymous_requester_email");
if (email != null) {
var visitor = {
id: email.value,
idMethod: "REQUESTER_EMAIL"
};
AnswersExperienceFrame.runtimeConfig.set("visitor", visitor);
setCookie("YextAnswersUserID", email.value);
}
const response = fetch('https://answers.yext-pixel.com/realtimeanalytics/data/answers/'+businessId, {
method: 'POST',
body: '{"data":{"eventType":"CASE_SUBMITTED","verticalKey":"","searcher":"UNIVERSAL","entityId":"","experienceKey":"' + experienceKey + '","experienceVersion":"","queryId":"' + queryId + '"}}',
headers: {
'Content-Type': 'application/json'
}
});
}
App Configuration
Once you have configured your help site you’re ready to download the component from the Zendesk or Freshdesk app directory.
The only variable needed to configure this component in your case view is a Yext App API key. To create an app in your Yext platform reference this guide. Your app will need permissions for the Logs endpiont. Your Yext app name is arbitrary but we suggest naming it “User History Component”.
Note: This component uses the Knowledge API which has a default quota of 5,000 requests per hour including all includes Analytics, Listings, Knowledge Manager, Reviews, Social, and User endpoints. The component uses two API requests per page load. If you need to increase your API quota reach out to your Yext account manager or submit a ticket at support@yext.com.
How to Use
This component displays all actions (searches, clicks, etc.) taken by the ticket requester in any search experience associated with your Yext account that is configured to capture user identities.
Changing the ticket requester will change the results displayed.
It returns up to the 100 latest actions.
Searches and entities are clickable within the component. Clicking on the search will redirect to your Yext platform search logs where you can view exactly the results that were returned for that specific query. Content will redirect to the landing page if it exists.
User Activity Summary
The User Activity Summary highlights up to the five most recent queries and content (any entity type) viewed. The latest events appear first.
User Activity Timeline
The User Activity Timeline section displays a timeline of actions taken by the user. It displays the ten most recent actions by default. Click ‘Show More’ at the bottom of the component to view an additional ten. Timestamps will be converted to your machine’s local settings.
Known Limitations
The component can take up to 15 seconds to load as it queries the database for the user’s actions. This is due to latency in the Yext Logs API.
Assuming you have integrated using cookies and users have accepted them, you will capture all queries as long as the user cookie persists, both before and after authentication. However, if a user does not accept cookies, or you are not leveraging them, no queries will be captured until authentication within a session.
Debugging
You may also encounter instances where the component does not render any logs for a specific user, despite them having taken actions within Yext. Reasons can vary depending on if you’ve implemented using cookies, and if the user in question has in fact accepted cookies.
First, confirm with the user that they have accepted cookies if you are using them. If a user has not accepted cookies, the component will not return any unauthenticated queries.
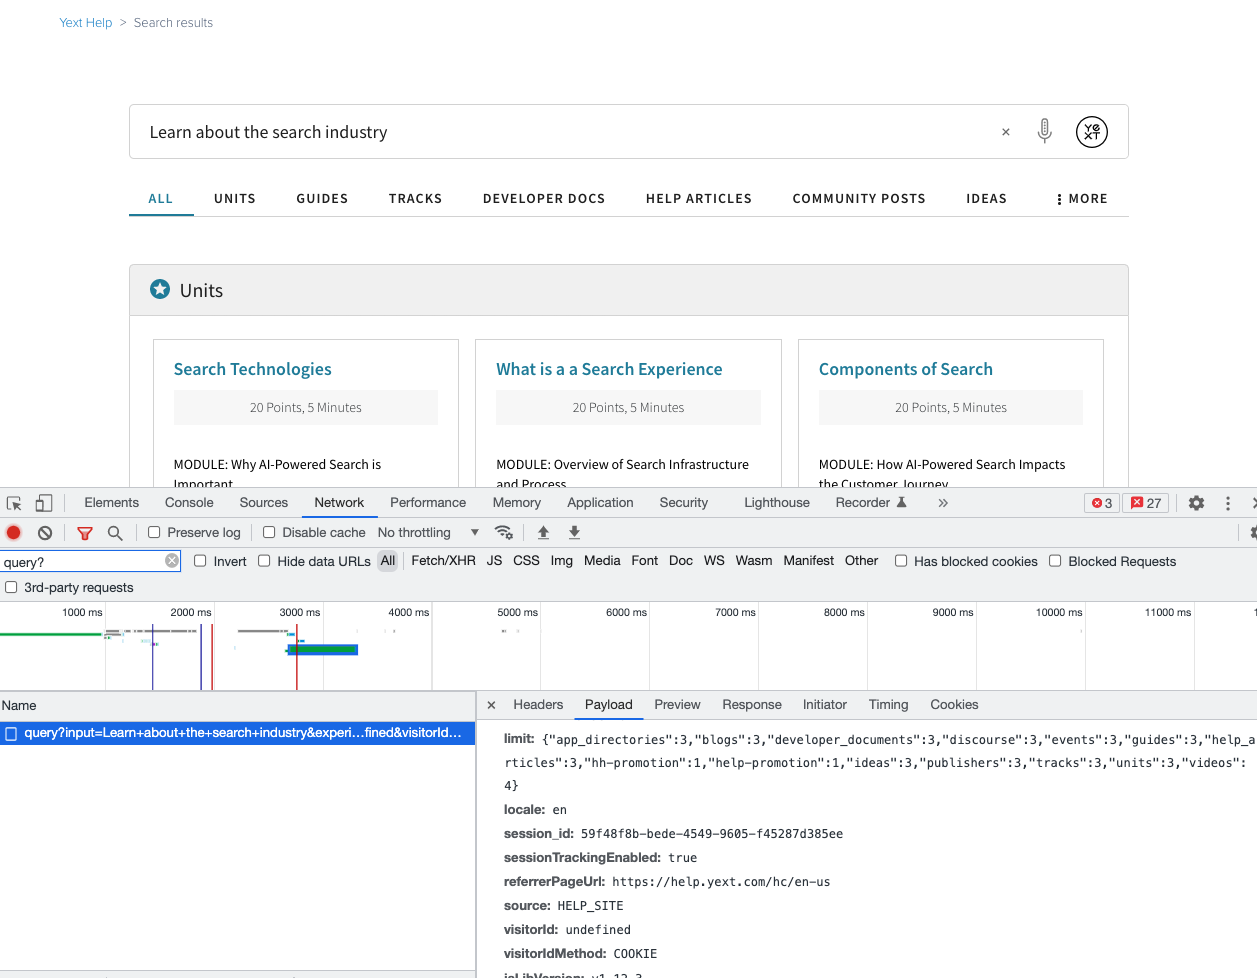
Next you’ll want to verify that identities are in fact being passed to Yext. To do this open your Yext Search integration (your help site, or case form) and run a query. Open the network request tab in your browser and confirm that there is in fact a visitor ID set with the Yext query. If you are not yet authenticated, the visitor ID will simply be the cookie id. If you are authenticated, the visitor ID will be [cookieId]&[userEmail]. If these values aren’t being set check your cookie code and your Yext integration code in your Zendesk Guide backend.
Finally, confirm in your Yext platform Developer console that your Yext app hasn’t run out of API quota. If you need to increase your quota, be sure to reach out to your Account Manager, or submit a service request at support@yext.com.