

Step 1: Add a New Custom Provider
Prerequisites
Setting up an App in your Provider Account
Before configuring your custom provider in the Yext platform, you’ll need to create a developer app within the provider to get credentials, including a client ID and client Secret, as well as the provider’s authorization URL & token URL settings, and any desired scopes. This process will differ depending on your specific provider.
Currently, our system will only support Authorization Code and Client Credentials as available Grant Types. Should your provider utilize a different flow, such as Implicit or Password Credentials , you will not be able to successfully configure your custom provider.
Defining a Custom Provider
Creating a new Custom Provider can be done from the Linked Accounts Landing Page, where you can find all other Provider and Linked Accounts Settings. You can find the Linked Accounts Page by navigating to Knowledge Graph > Configuration > Data Ingestion & Processing > Linked Accounts. (Note that this page is different than the Linked Accounts Page found under Account Settings, which is explicitly for Listings.)
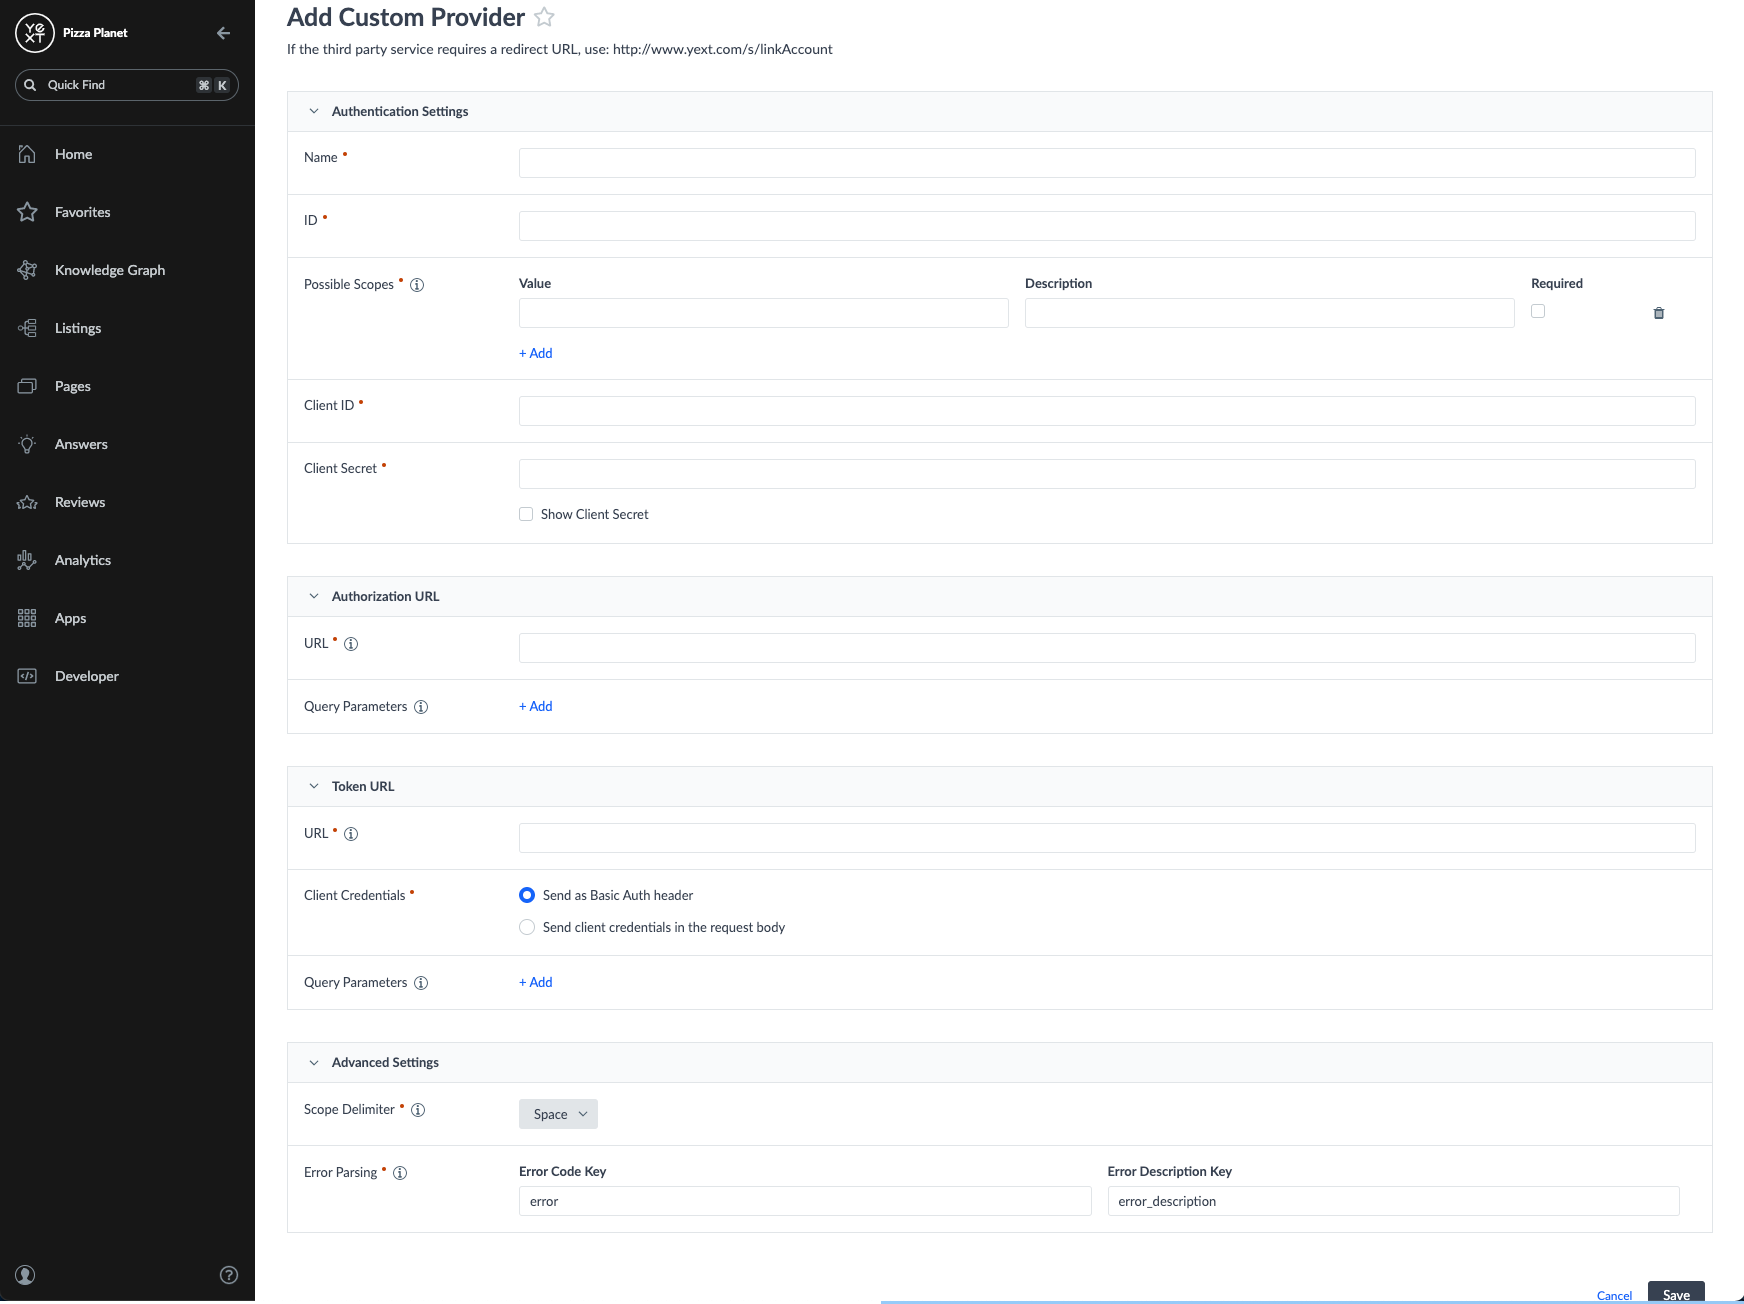
To add your Custom Provider, click +Add Custom Provider in the upper right hand corner. To define your custom provider settings and establish an OAuth connection between the provider and Yext, you’ll need to fill out the following key details:
- Grant Type
- Select either Authorization Code or Client Credentials based on the grant type that your specific provider requires.
- Name
- Provide a unique name that will be used to reference your Custom Provider, such as Shopify.
- ID
- Provide an ID used to reference your provider via the API. This ideally will match the name of your provider, and must be preceded by
c_, for example,c_shopify.
- Provide an ID used to reference your provider via the API. This ideally will match the name of your provider, and must be preceded by
- Possible Scopes
- Add a list of possible scopes that the application can request the user to grant upon linking an account. For each provided scope, you can:
- Optionally provide a description, so that users can understand the requested permissions and data that each scope would allow the app to access.
- Designate whether it is always required when requesting the access token, or if the user is allowed to optionally not pass the scope along with the request for a specific linked account. Information on required scopes is provider specific, which you can likely find with your provider’s authentication setup guide.
- Add a list of possible scopes that the application can request the user to grant upon linking an account. For each provided scope, you can:
- The following items apply only to the Authorization Code grant type. If you are not using the Authorization Code grant type, skip to Step 6.
- Client ID (this should be taken directly from the app created in your provider account)
- Client Secret (also taken from the app created in your provider account)
- Authorization URL Settings
- Authorization URL, which is the endpoint used to get an authorization code to access the protected resource
- Any query parameters to be sent along with the request
- Token URL Settings
- Provide the following information to configure the token URL:
- Token URL, which is the endpoint used to fetch an access token and refresh tokens from the provider
- Client Authentication credential location – indicate whether the client ID and secret should be passed in the request body or as a Basic Auth header
- Any query parameters to be sent along with the request
- Provide the following information to configure the token URL:
- Scope Delimiter
- You must specify the delimiter used to separate each scope if returned in the response. The supported delimiter(s) should be found in your provider’s authentication guidelines. If left unset, a space will be used by default.
- Error Parsing
- Provide the configuration used to find the errors to parse in the response. For the Error Code Key and Error Description Key, provide the respective JMES paths to get the keys from the response. If left unset, error and error_description will be used by default.
Once you have provided all of the above configuration settings, click Save.