Step 1: Index the Data
Overview
As part of your account creation, we have added some sample entity types and entities to get you off the ground. During this step, we want to make sure that your experience returns your brand’s actual data instead of placeholder data.
In this step, you will connect Yext and ServiceNow in order to pull your ServiceNow knowledge articles into the Knowledge Graph.
Note: This will only pull in published articles from your ServiceNow instance.
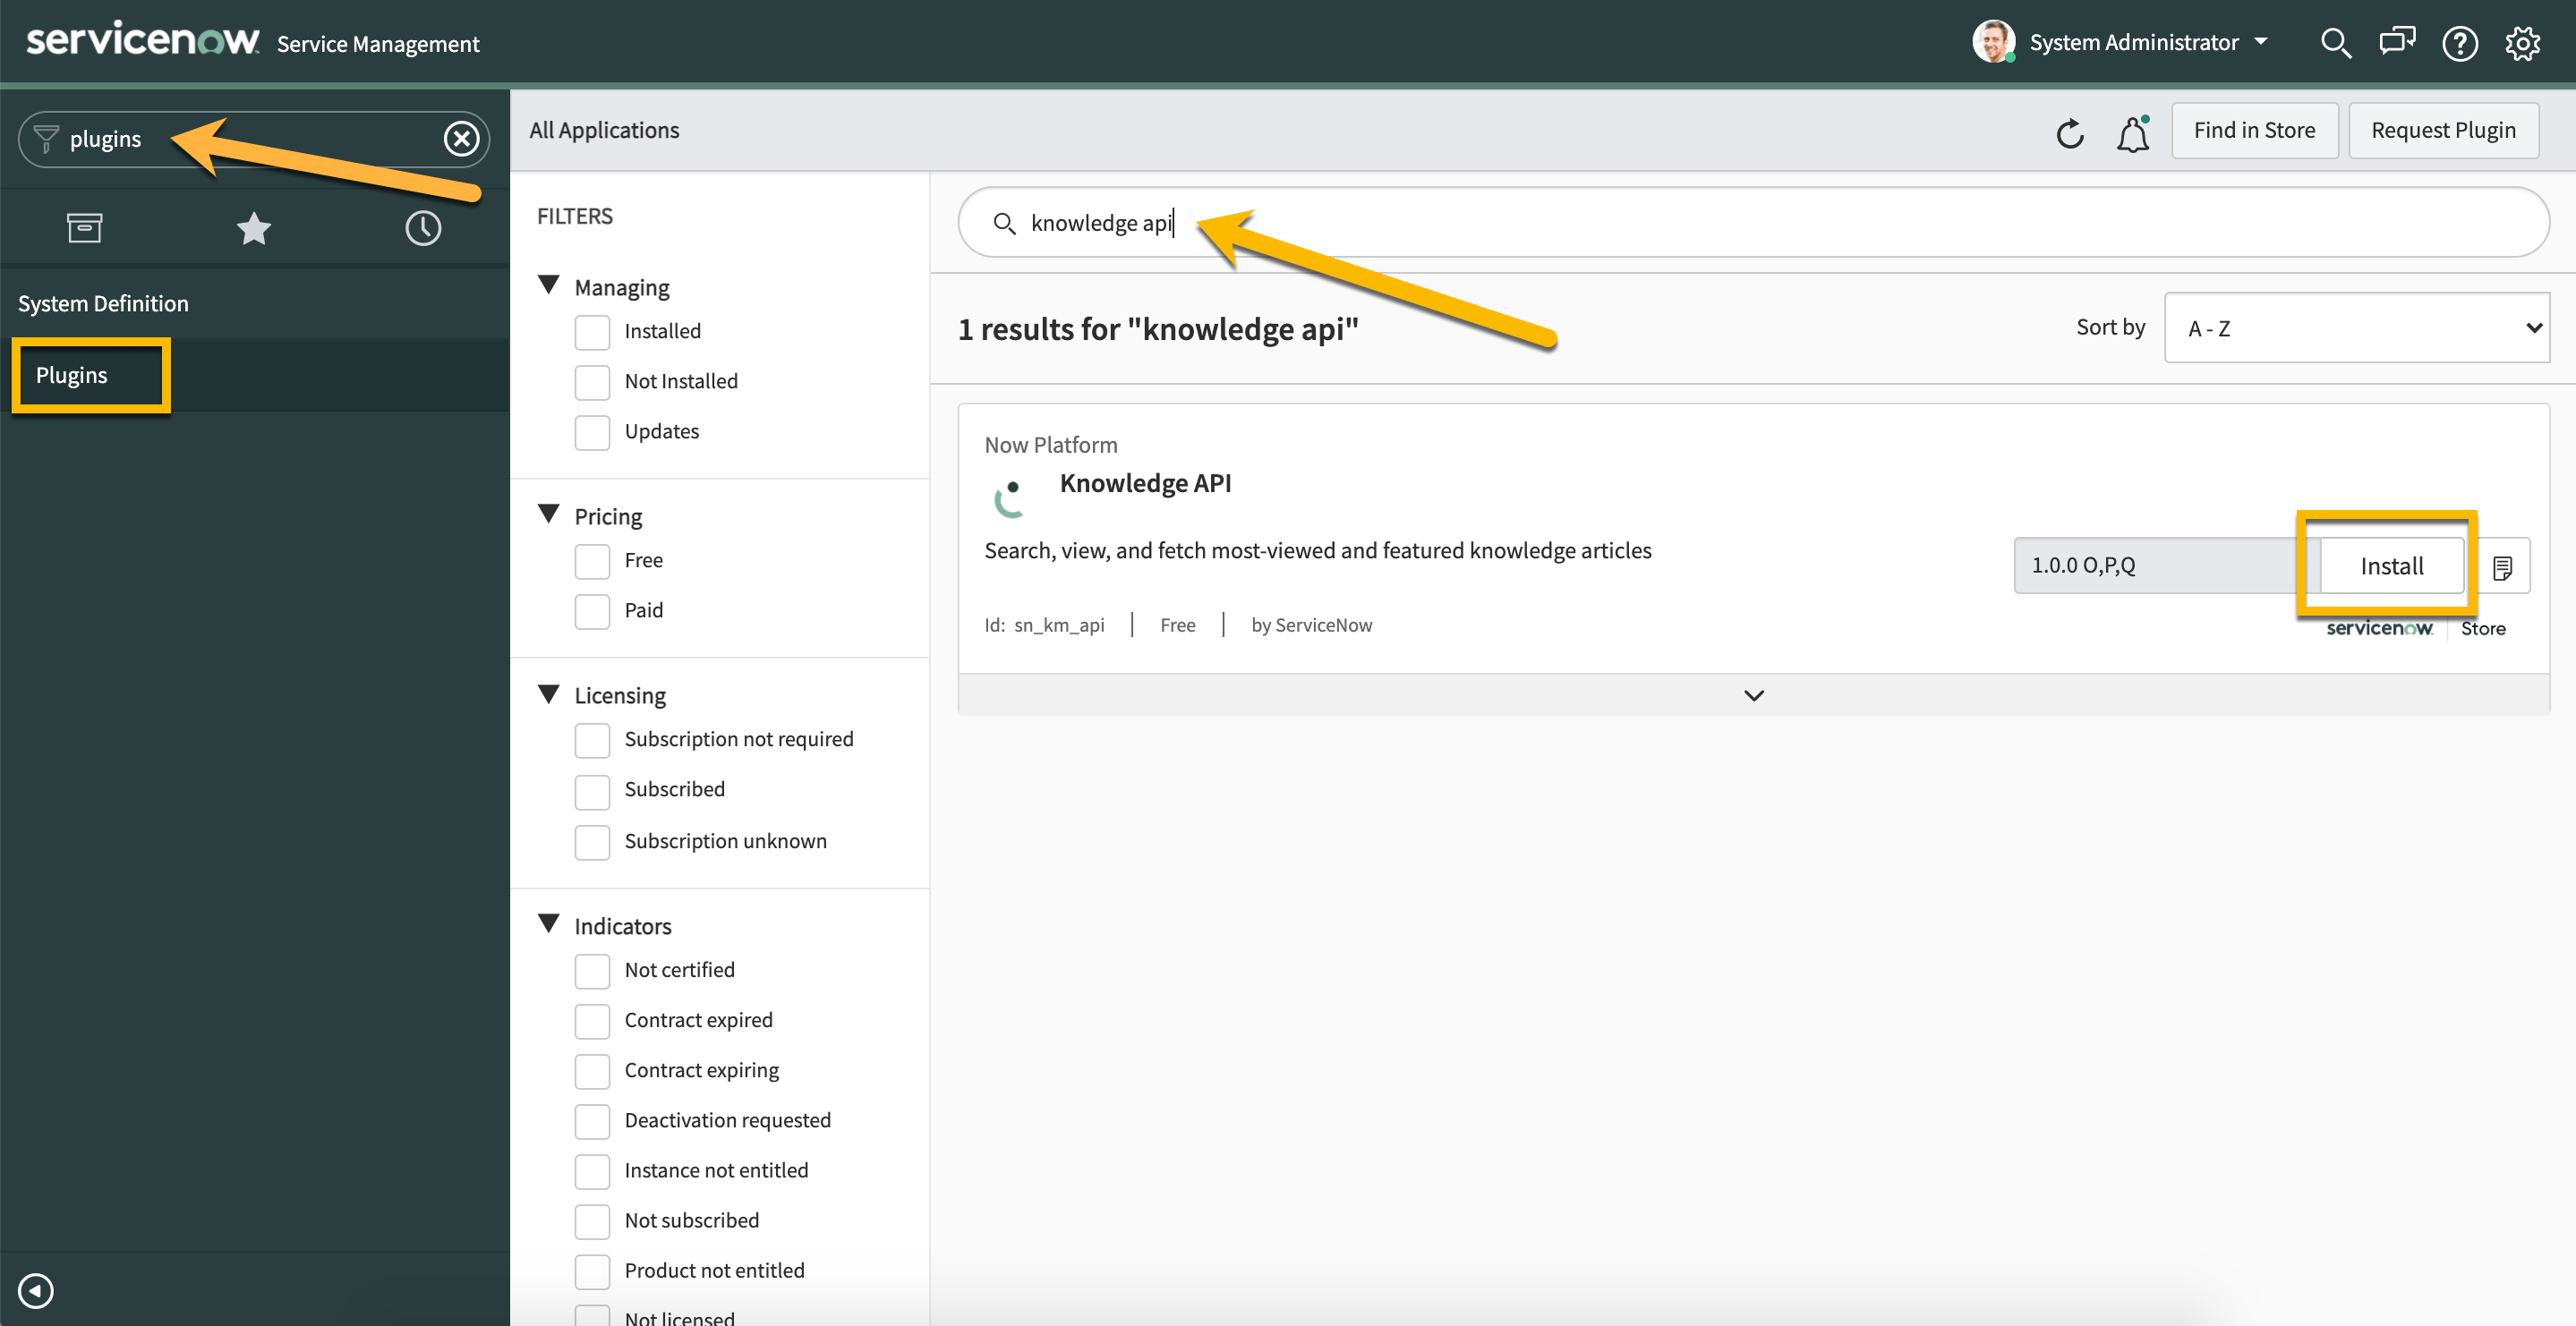
Install the Management API Plugin within ServiceNow
Before you can sync your ServiceNow knowledge articles to Yext, you will need to install the Management API Plugin in ServiceNow. This enables Yext to make calls to ServiceNow’s Management API to retrieve your ServiceNow content.
Note: You must have the administrator role to activate a plugin.
Navigate to System Definition > Plugins.
On the Plugins page, search for and install Management API.

Add Data to Yext
Navigate to Knowledge Graph > Entities in the navigation bar and click Add Data at the top of the screen.
Click Install an App in the Connectors section of the modal.
Select the ServiceNow Knowledge Article Connector App from the Directory.
Click Install to start the installation flow.
You will be prompted to authorize Yext to access your account and update your Entities. Click Next at the bottom.
You will be asked to provide your ServiceNow credentials as well as the domain for your ServiceNow instance. This should be the full URL which may look something like “https://company.service-now.com”. Note: Do not include trailing slashes.
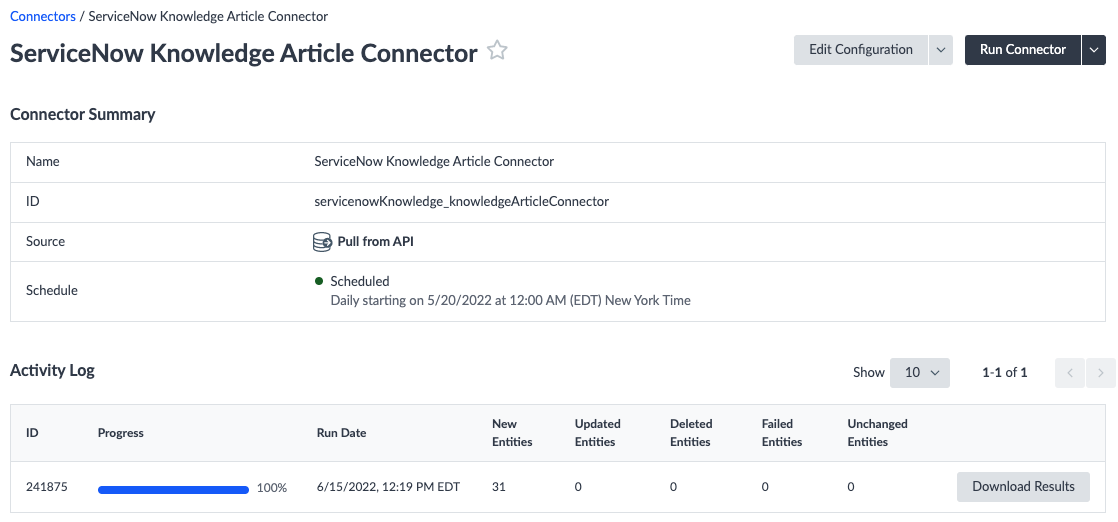
Once you hit Authorize, the connector will run automatically and you will be taken to this screen:

Note that the time it takes the connector to run will vary depending on how many articles you have to sync.
Alternatively, you can bulk upload your data to Yext using Excel. Review the Uploading Data to Yext training on how to use the Entity Upload.

