

Step 3: Create a Yext Search Bar Widget for your Service Portal
Overview
Generally a help site will have a search bar persistent in the header of each page and might also have a search bar placed more prominently on the homepage. These search bars will redirect users to a central search results page to show the results, which we set up in the last step. In this step, we’ll walk through how to create the search bar in your ServiceNow instance.
Create a Custom Search Bar Widget
Navigate to Service Portal > Widgets. Click New to create a new widget.
Fill in the widget name as
Yext Search Barand the ID asyextsearchbar.Replace the code in the Body HTML template box with the following code:
<div class=”search_form”></div>Check off the box for Has Preview.
Fill in the Option schema box with the following code:
[{"name":"experience_key","section":"other","default_value":"","label":"Experience Key","type":"string"},{"name":"experience_version","section":"other","default_value":"","label":"Experience Version","type":"string"},{"name":"api_key","section":"other","default_value":"","label":"API Key","type":"string"},{"name":"yext_business_id","section":"other","default_value":"","label":"Yext Business ID","type":"string"},{"hint":"This is the ServiceNow Portal Page that contains the Yext Search Results Widget","name":"redirect_url","section":"other","default_value":"","label":"Redirect URL","type":"string"},{"name":"locale","section":"other","label":"Locale","type":"choice","choices":[{"label":"en","value":"en"},{"label":"es","value":"es"},{"label":"fr","value":"fr"},{"label":"it","value":"it"},{"label":"de","value":"de"},{"label":"ja","value":"ja"}]}]Click Submit. Then navigate back to the widget and click on it (you can search for the widget name in the search bar).
Scroll to the bottom. Under Related Links click Open in Widget Editor. This opens a new tab.
Replace the Client script box with the following code. Then click Save. ServiceNow’s code editor may flag a syntax error related to the
TemplateBundle.defaultreference which you can ignore.function() { /* widget controller */ var c = this; c.initAnswers = function() { var experienceKey = c.options.experience_key; var experienceVersion = c.options.experience_version; var apiKey = c.options.api_key; var businessId = c.options.yext_business_id; var redirectUrl = c.options.redirect_url; var locale = c.options.locale; if (experienceKey) { ANSWERS.init({ apiKey: apiKey, experienceKey: experienceKey, businessId: businessId, experienceVersion: experienceVersion, locale: locale, templateBundle: TemplateBundle.default, onReady: function() { ANSWERS.addComponent("SearchBar", { container: ".search_form", name: "search_form", placeholderText: "Search here", redirectUrl: redirectUrl }); } }); } }; c.initAnswers(); }- You can also configure the
placeholderTextand optionally add apromptHeaderin theaddComponentcall above to fit your needs. For a full list of properties, visit the Add Search Bar guide .
- You can also configure the
Check the box for “CSS - SCSS” to enable the CSS editor. As a starting point for styling the widget, we recommend adding the following and adjusting as needed:
  .search_form {
width: 800px;
font-size: larger;
  }
  .yxt-SearchBar-input {
font-size: 1.5rem
  }
Return to the Service Portal Widget tab you have open to the Yext Search Bar widget you’ve been editing. Scroll to the bottom of the page to the Dependencies table. Click New to create a dependency for the Search SDK.
Fill in the content for the widget dependency:
- Fill in the Name as
Search SDK. - Check off
Include on page load. - Click Submit.
- Fill in the Name as
Scroll back to the Dependencies table and click on the Search SDK dependency you just created. You will add two items to the JS Includes tab and one item to the CSS Includes tab.
 NoteIf you are hosting data in the EU cloud region, replace all references to the URL
https://assets.sitescdn.netwithhttps://assets.eu.sitescdn.net.Dependency 1. On the JS Includes tab, click New.
- Fill in the Name with the URL https://assets.sitescdn.net/answers-search-bar/v1.6/answers.min.js.
- Change the Source to URL.
- For the JS file URL, click the lock icon to unlock. Paste this URL in the text box: https://assets.sitescdn.net/answers-search-bar/v1.6/answers.min.js. Then click the lock again.
- Click Submit.
Dependency 2. On the JS Includes tab, click New.
- Fill in the Name with the URL https://assets.sitescdn.net/answers-search-bar/v1.6/answerstemplates.compiled.min.js.
- Change the Source to URL.
- For the JS file URL, click the lock icon to unlock. Paste this URL in the text box: https://assets.sitescdn.net/answers-search-bar/v1.6/answerstemplates.compiled.min.js. Then click the lock again.
- Click Submit.
Dependency 3. On the CSS Includes tab, click New.
- Fill in the Name with the URL https://assets.sitescdn.net/answers-search-bar/v1.6/answers.css.
- Change the Source to URL.
- For the file URL, click the lock icon to unlock. Paste this URL in the text box: https://assets.sitescdn.net/answers-search-bar/v1.6/answers.css. Then click the lock again.
- Click Submit.
Congratulations, you’ve created your search bar widget! The Yext search bar is designed to look great out of the box, but you can further style it to fit your brand’s needs by adding any customization to the CSS - SCSS editor in the widget editor.
Replace the Search Bar in the Service Portal Home Page
Navigate to Service Portal > Pages.
Find and open your Service Portal home page record (typically this is the record whose ID is
index).Create a backup copy of the record. Click Clone Page in the upper-right corner of the record form.
Navigate back to the original record. Scroll to the bottom of the page. In the Related Links section and click Open in Designer.
Make room for the search bar. In the Service Portal Designer application that opens in a new browser tab, delete the current search box widget. To delete a widget, hover over and click the trash can icon in the upper right corner of the container.
Add the new widget to your home page. Drag the new yext-search-bar widget you created above from the left side pane to the container the previous search box widget was in.
Fill in the widget options. Click the pencil icon in the upper right corner of the newly added widget to fill in the Options. Read more about where to find these properties in the Add a Search Bar integration guide. Then click Save.
- The Redirect URL is the search results page you just created in the previous step! Make sure to use a relative URL since that page is also hosted in your ServiceNow instance. This will be something like
/sp?id=search_yext&referrerPageUrl=index.
- The Redirect URL is the search results page you just created in the previous step! Make sure to use a relative URL since that page is also hosted in your ServiceNow instance. This will be something like
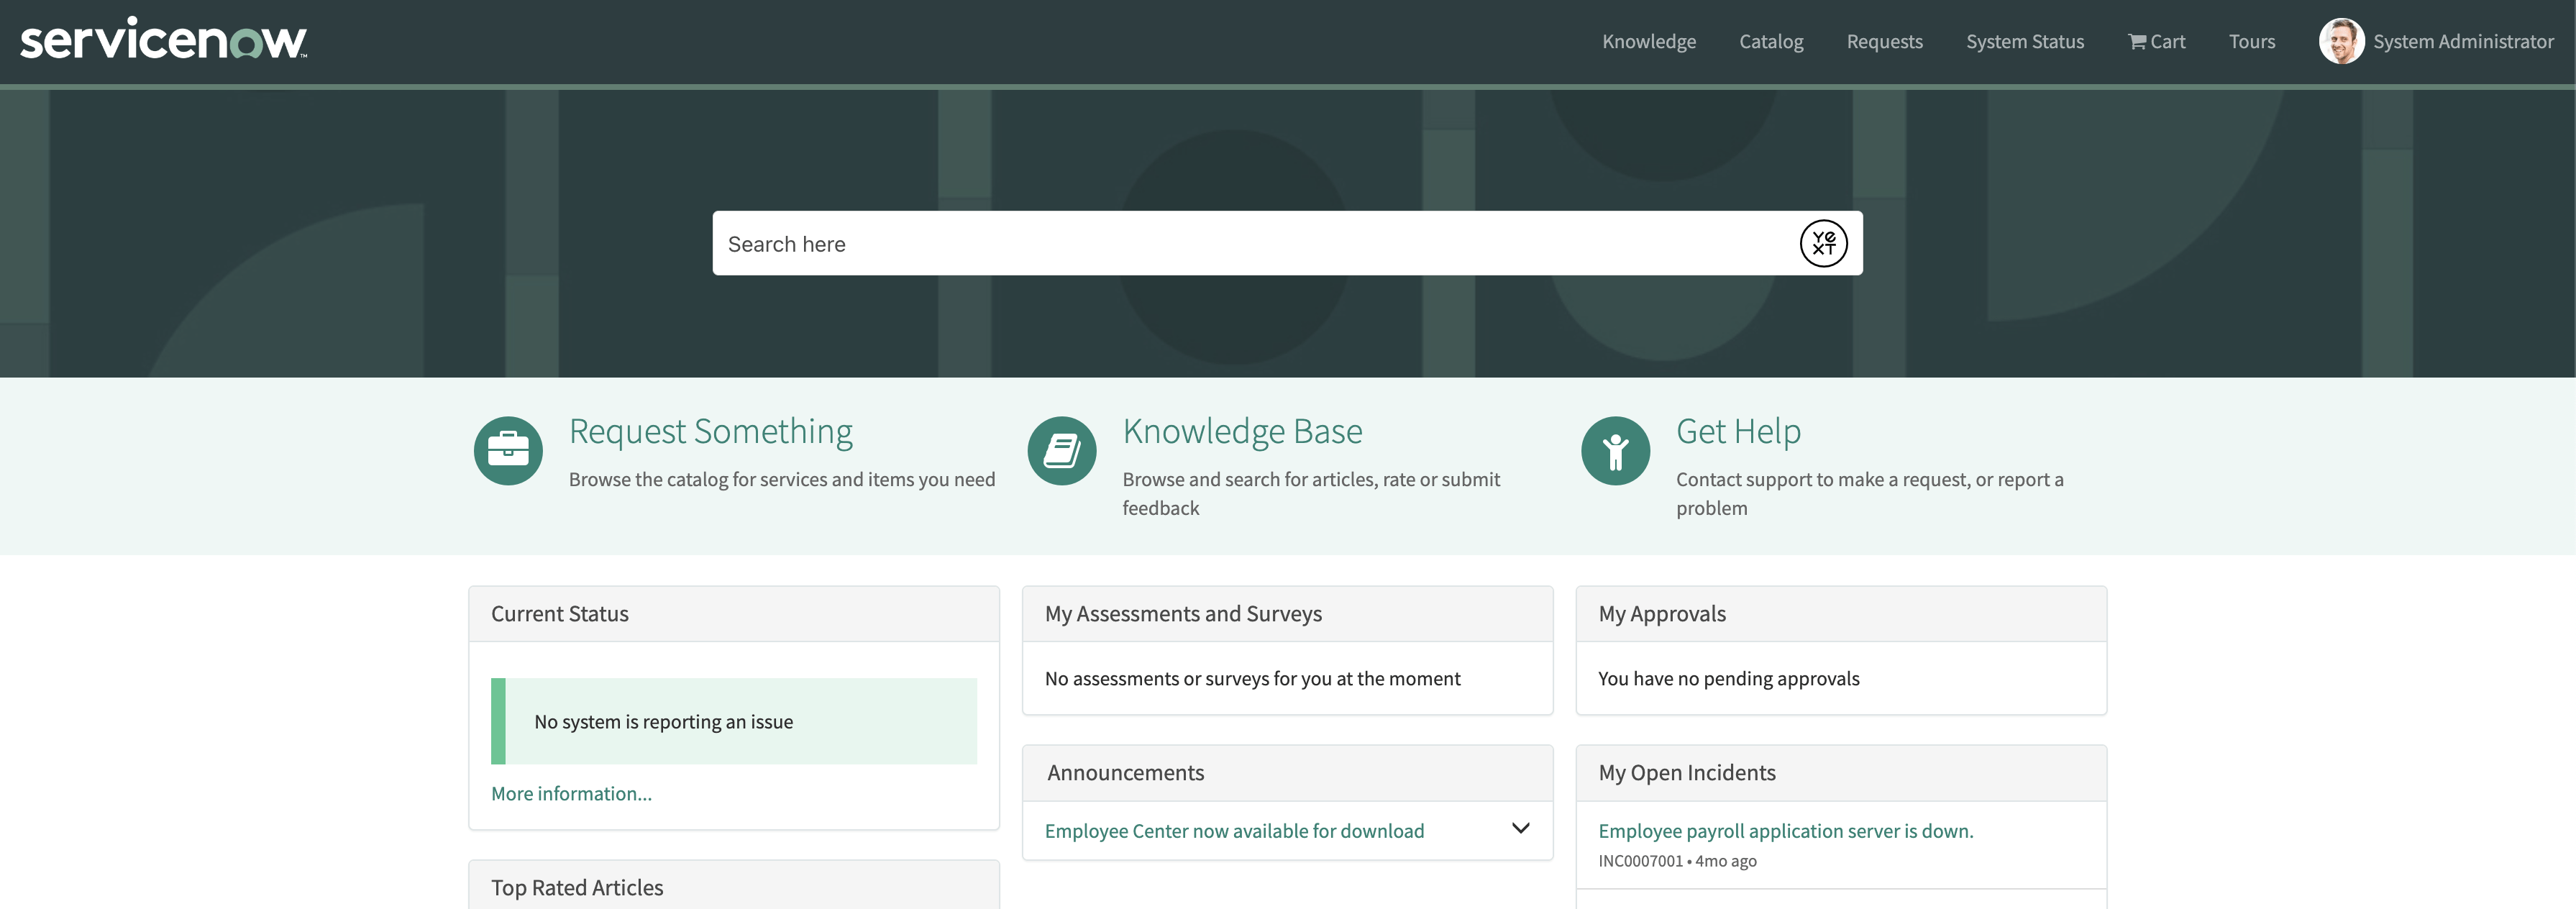
In the right corner of the Designer, click on the button with a gear icon that says Page. We recommend adding the following styles as a starting point and adjusting as needed. Note: the following CSS attribute selector assumes the widget name is “Yext Search Bar”. If you chose a different name, adjust the selector accordingly.
  .div[sn-atf-area='Yext Search Bar'] {
 height: 200px;
display: flex;
justify-content: center;
align-items: center;
  }
Click Preview to see how the search bar looks on your home page! It should look something like this:
Replace the Search Box in Other Service Portal Pages
We recommend funneling as much traffic as possible into search. You can easily replace the search box of other Service Portal pages with your new Yext Search Bar widget. To do so, repeat these steps for each page you wish to replace the search box on.
Additionally, we recommend redirecting any existing links into search that make sense. For example, if you have a “find a location” link on your website, redirect that to the new search results page!