Listings Setup | Yext Hitchhikers Platform
What You’ll Learn
In this section, you will learn:
- How to set your alternate brand names to match your listings
- How to configure your Listings sync settings
Listings Setup
To go through the launch flow, follow the steps on the left side of the screen.
In the Listings Setup section, you will:
- Select the entities you want to launch on Listings
- Specify any alternate brand names, if your business uses them
- Set your configurations for how each publisher should handle creating and updating listings
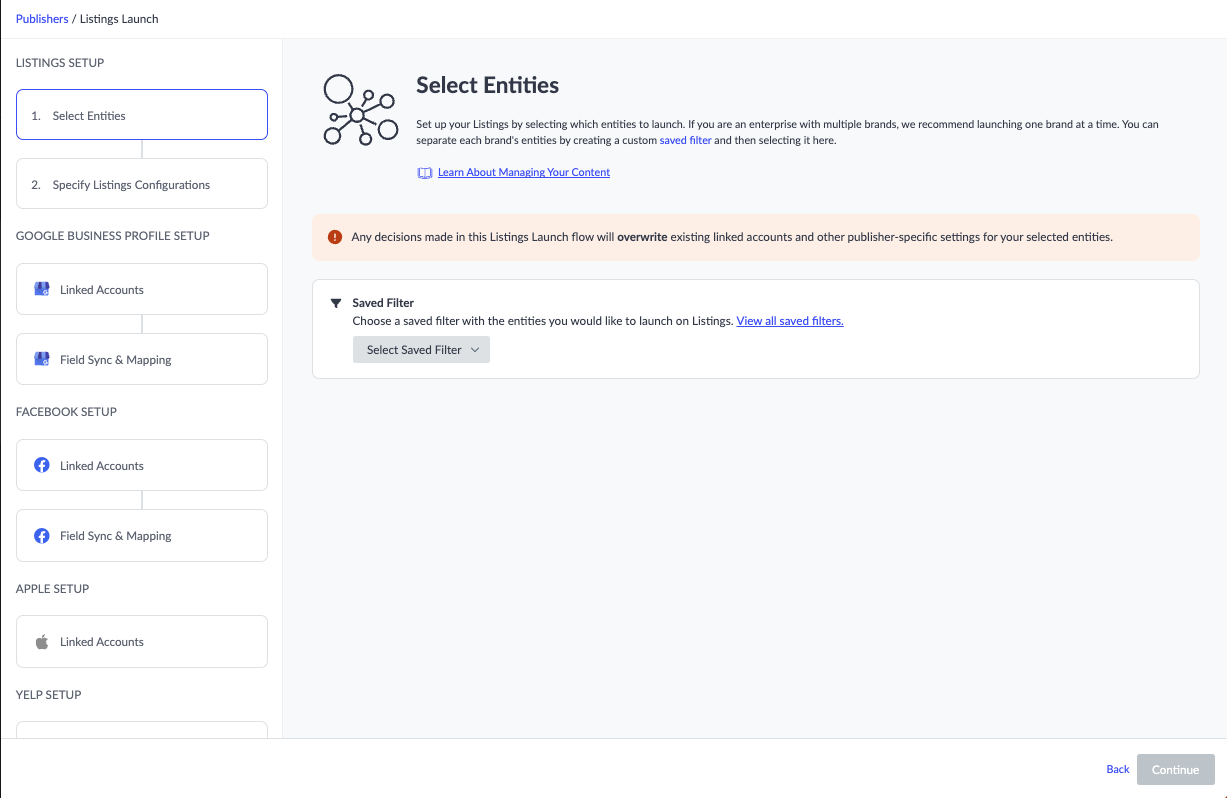
Select Entities
Choose the entities you want to launch on Listings by selecting the saved filter that you created in the Create a Saved Filter unit.
Click the Select Saved Filter dropdown and select your saved filter. Then, click Continue in the bottom-right of the screen.

Specify Listings Configuration
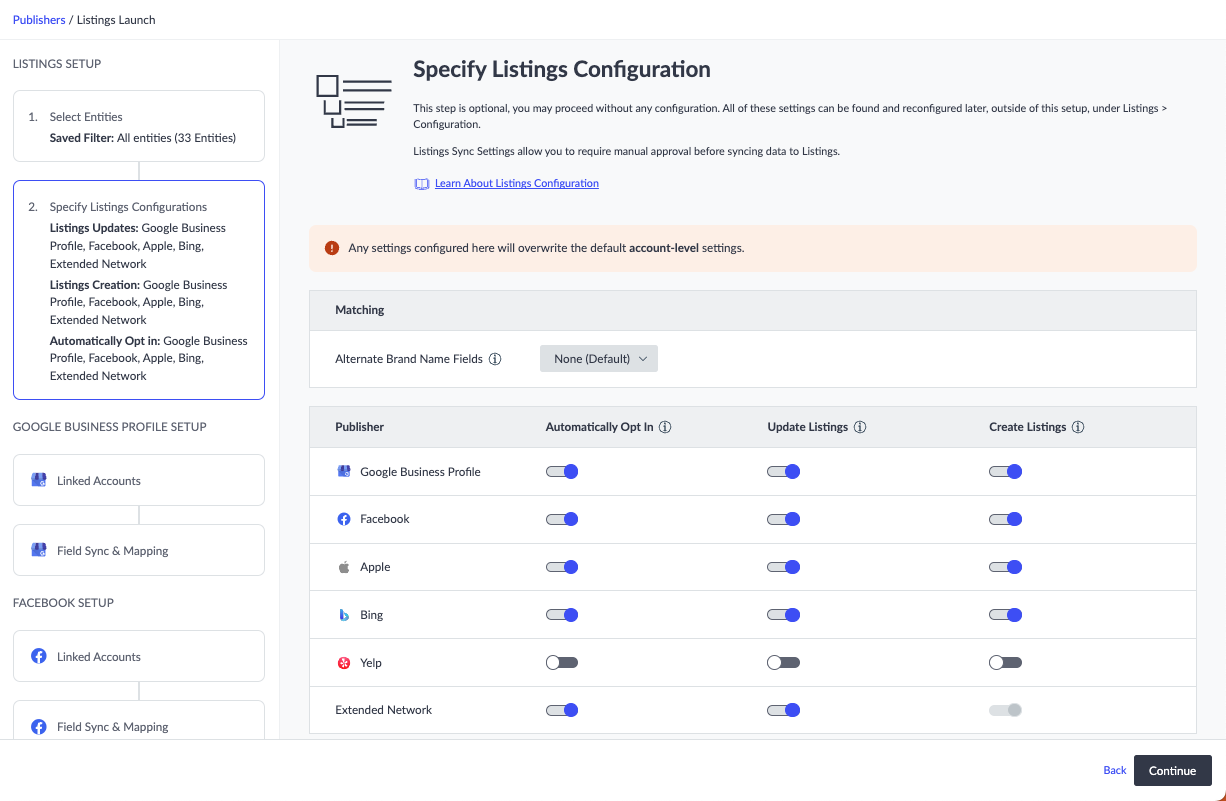
Specify your configuration settings for Listings. These settings will apply to the entities in the saved filter you just selected, as well as any new listings you launch moving forward.

Matching
If you created a custom field for any alternate brand names in the Set Up Your Entities unit, this is where you should specify it.
Click the dropdown menu next to Alternate Brand Name Field and choose the custom field that you created to store alternate brand names on your entities.
Listings Sync Settings
Set the configuration for how each publisher should handle creating and updating your listings. These are the settings that will appear on the Listings Configuration page after launch.
These settings will all be enabled by default. You can modify them now if needed, as well as after launching. If any of the settings are disabled here, you can manually enable them later.
You can go back to the Listings Configuration unit for a refresher on each of these settings, or see the Listings Configuration reference for more details.
Once you have selected your options, click Continue to move to the next step of the flow.
What do you do in the Matching section of Listings Setup?
Where do the Listings Sync Settings live after launch?
Wahoo - you did it! 🙌

