
How to Install a Solution Template | Yext Hitchhikers Platform
What You’ll Learn
In this section, you will learn:
- How to install a Solution Template
Installing Solution Templates
Let’s walk through installing the Primary Care Network Solution.
Navigate to Apps > Solutions.
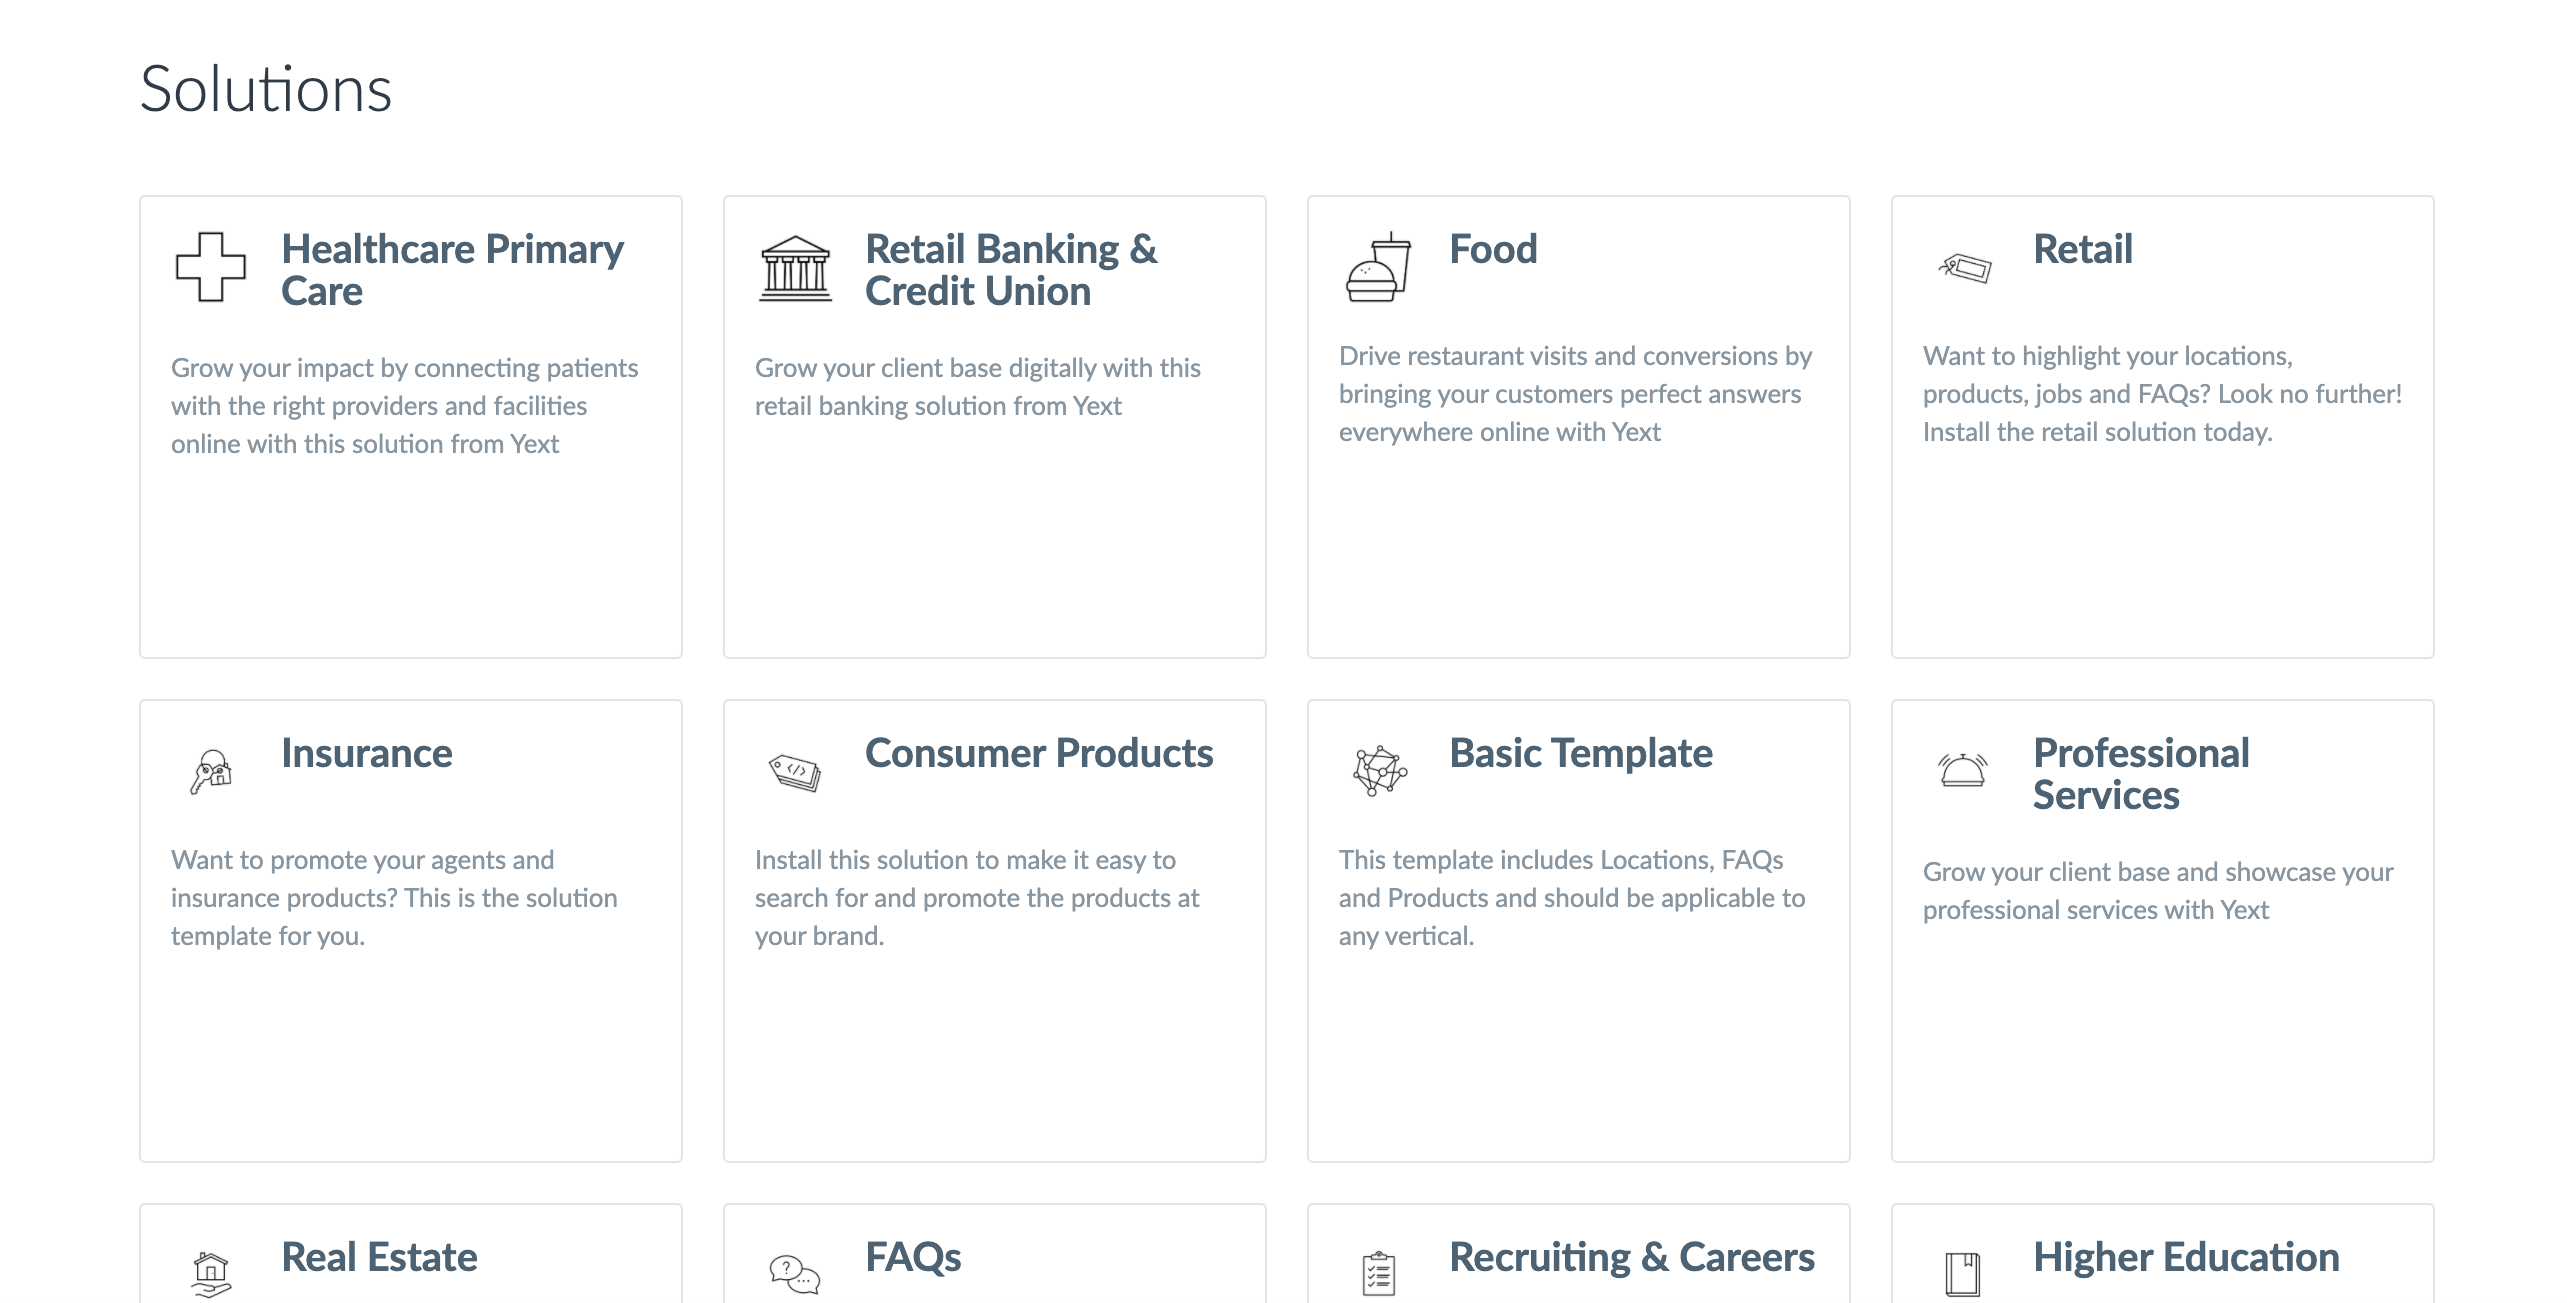
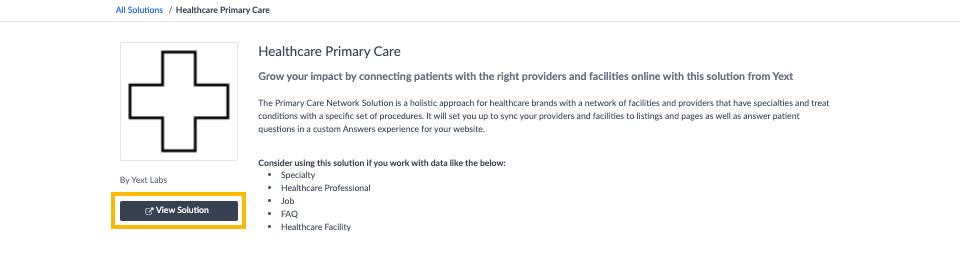
Browse through the solutions to see what might be most applicable to you. In this example, we’re going to install the Healthcare Primary Care Solution, but you can read the descriptions to help make this decision – or you can click in to see the configuration files themselves to help decide. For now, click into the Healthcare Primary Care Solution. This will take you to the Healthcare Primary Care Solution Screen.
Click on the View Solution button on the left side.
This will open a new window in our Admin Console. You’ll learn more about the ins and outs of the Admin Console in the Intro to Admin Console module . High level, you’re looking at the series of configuration files that make up an account. In later modules, you’ll learn all about how to modify these files or delete files that might not be relevant for you to apply as part of your solution template. We’ll keep it simple for now and assume you want to install the solution exactly as-is. To do so, you’ll click on Apply in the top right corner.

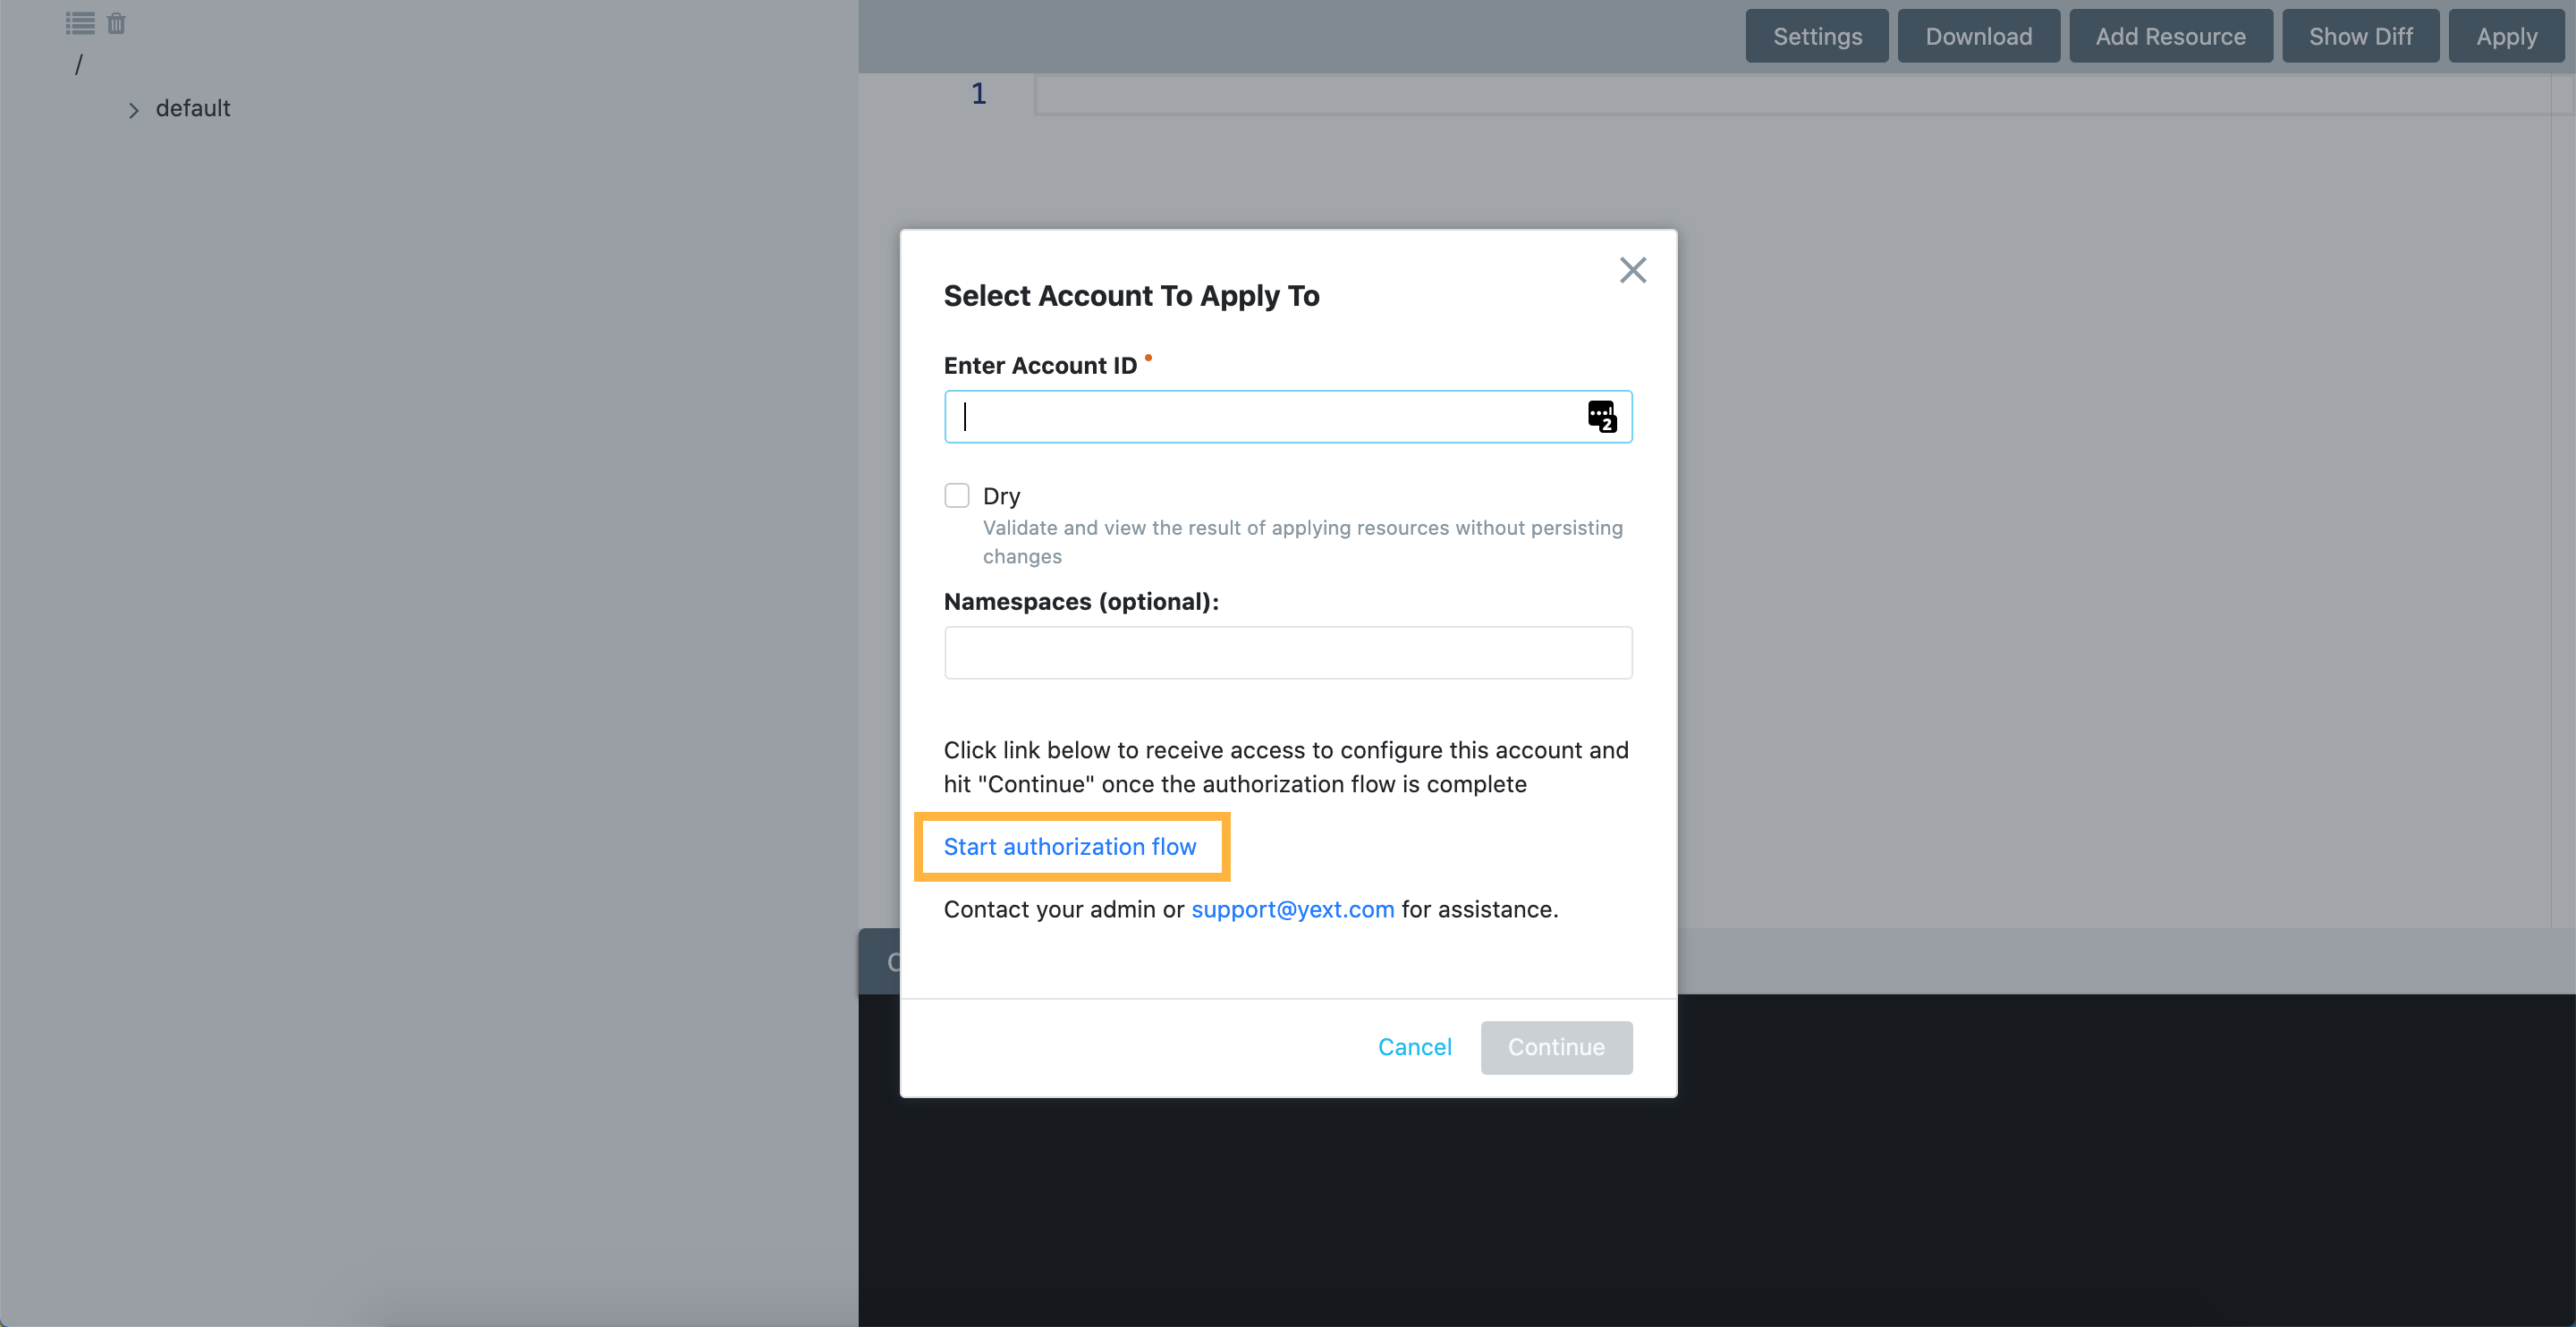
Enter your account ID and click Continue. Remember that your account ID can be found in the URL path of your account or in Account Settings > Personal Settings > Account ID.

Click “start authorization flow.” A new tab will open, which you can close once it fully loads. This is checking to make sure you have the right authentication to update the account ID you just entered. Click Continue.
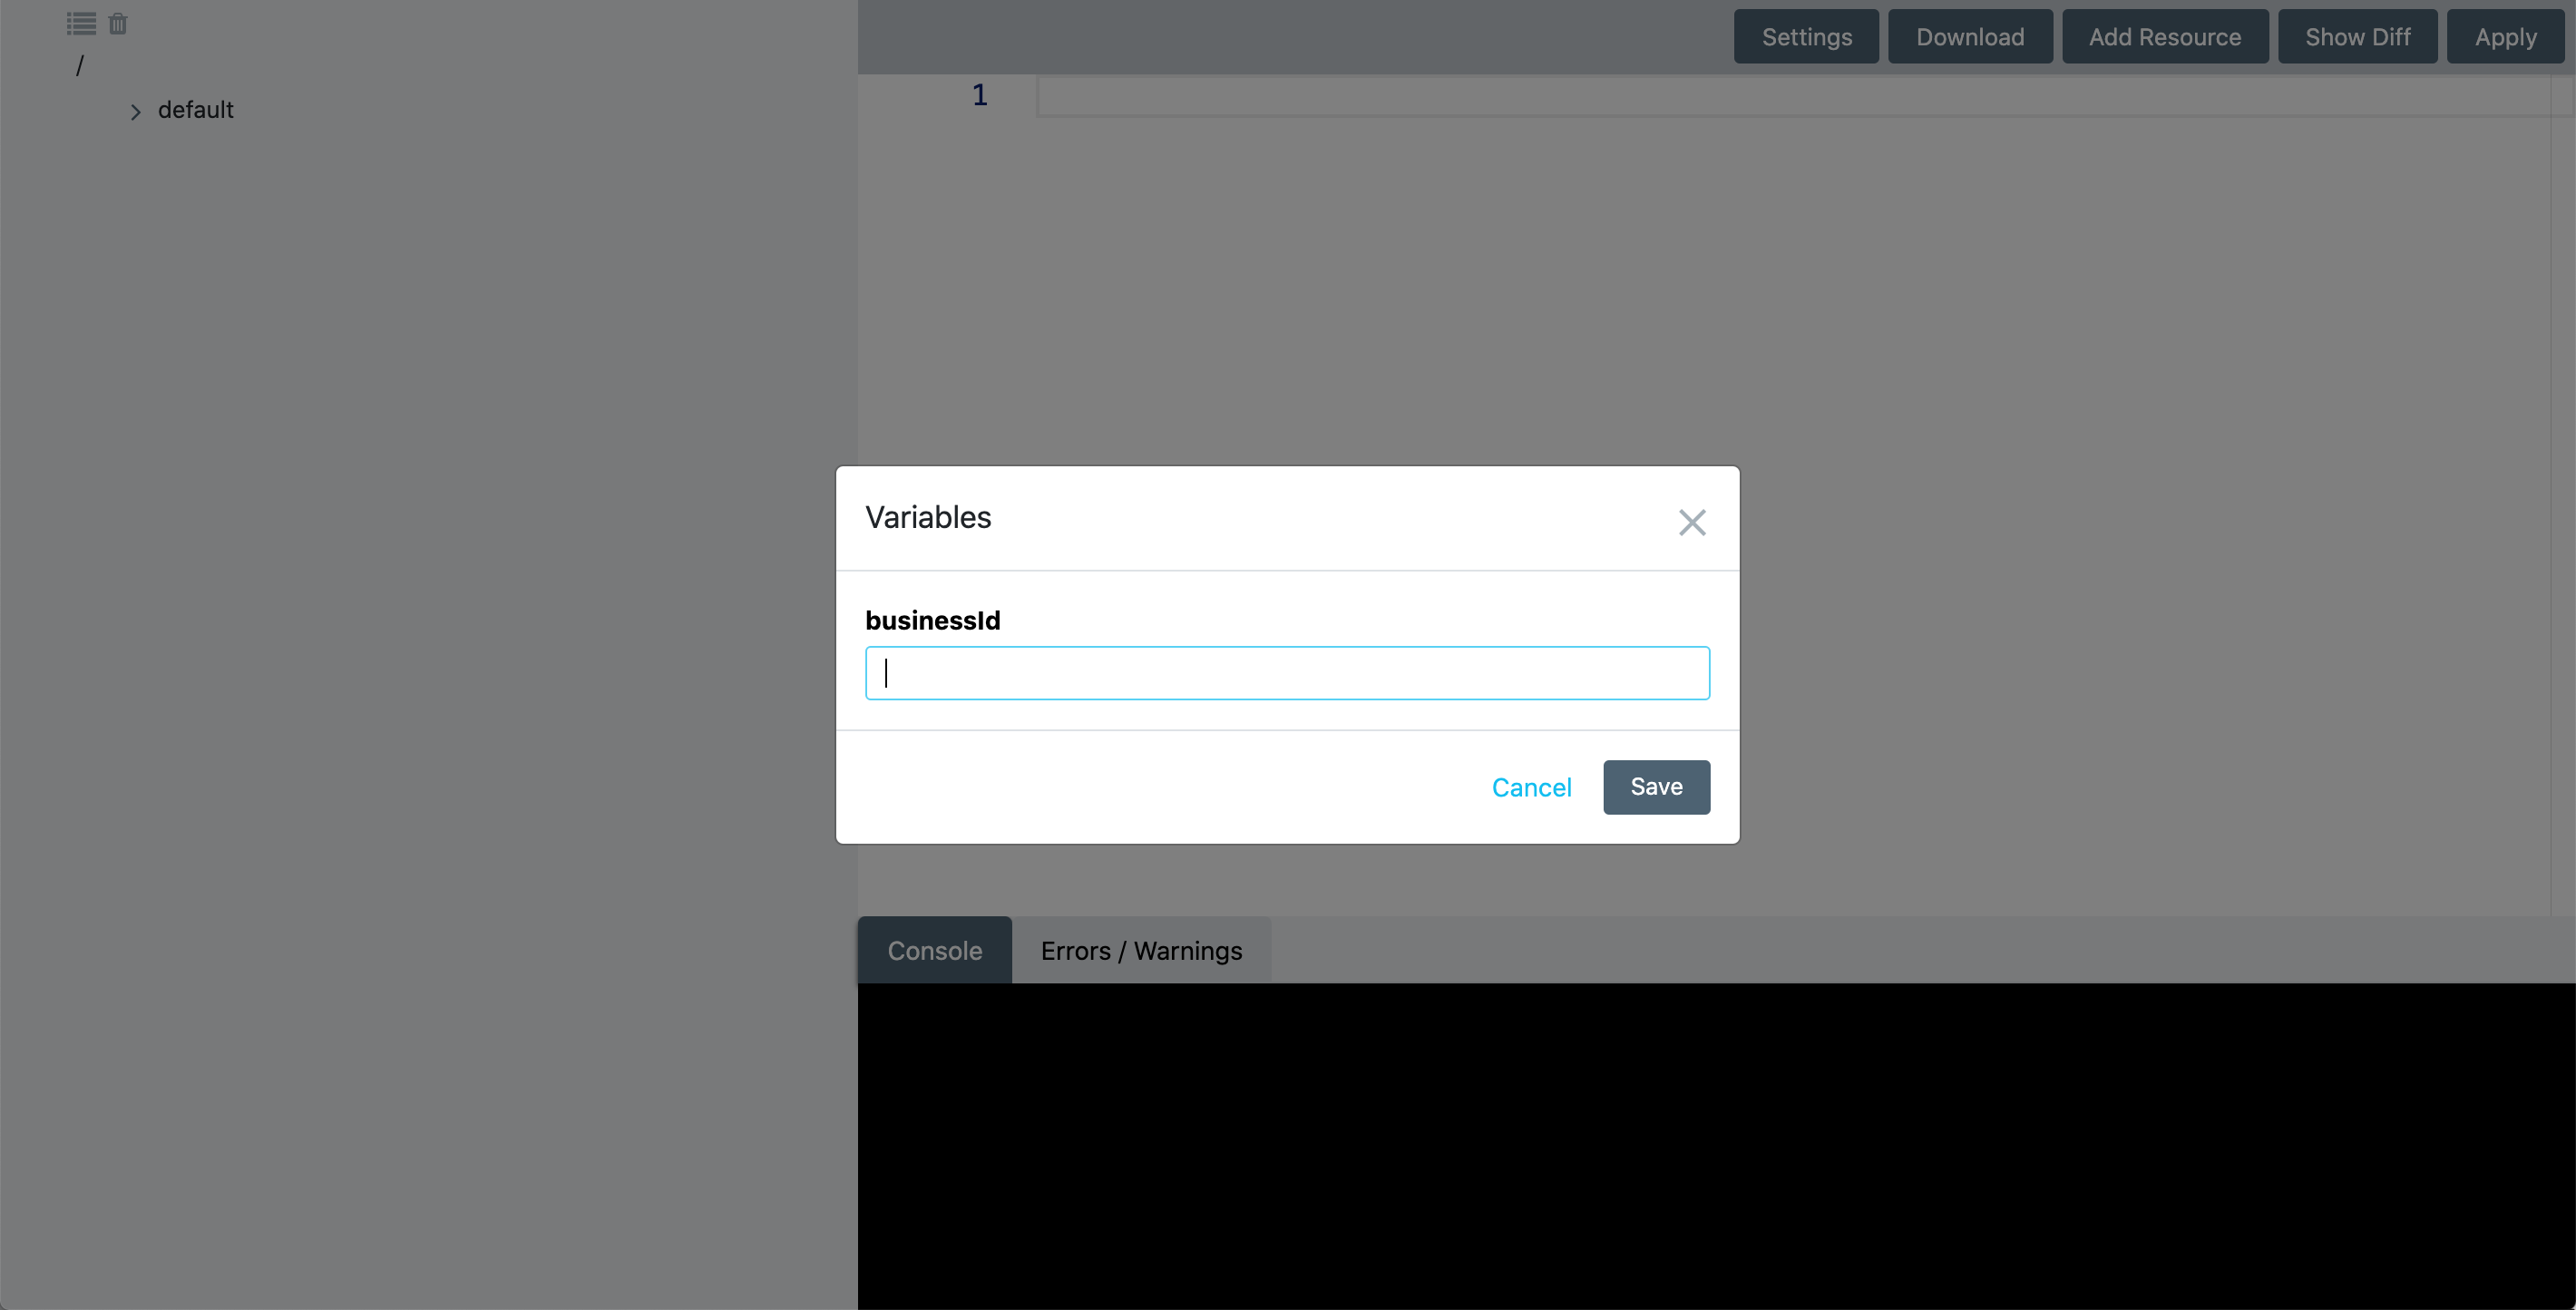
Enter your business ID and click Continue. This is the same as your account ID, which can be found in the URL path of your account or in Account Settings > Personal Settings > Account ID.
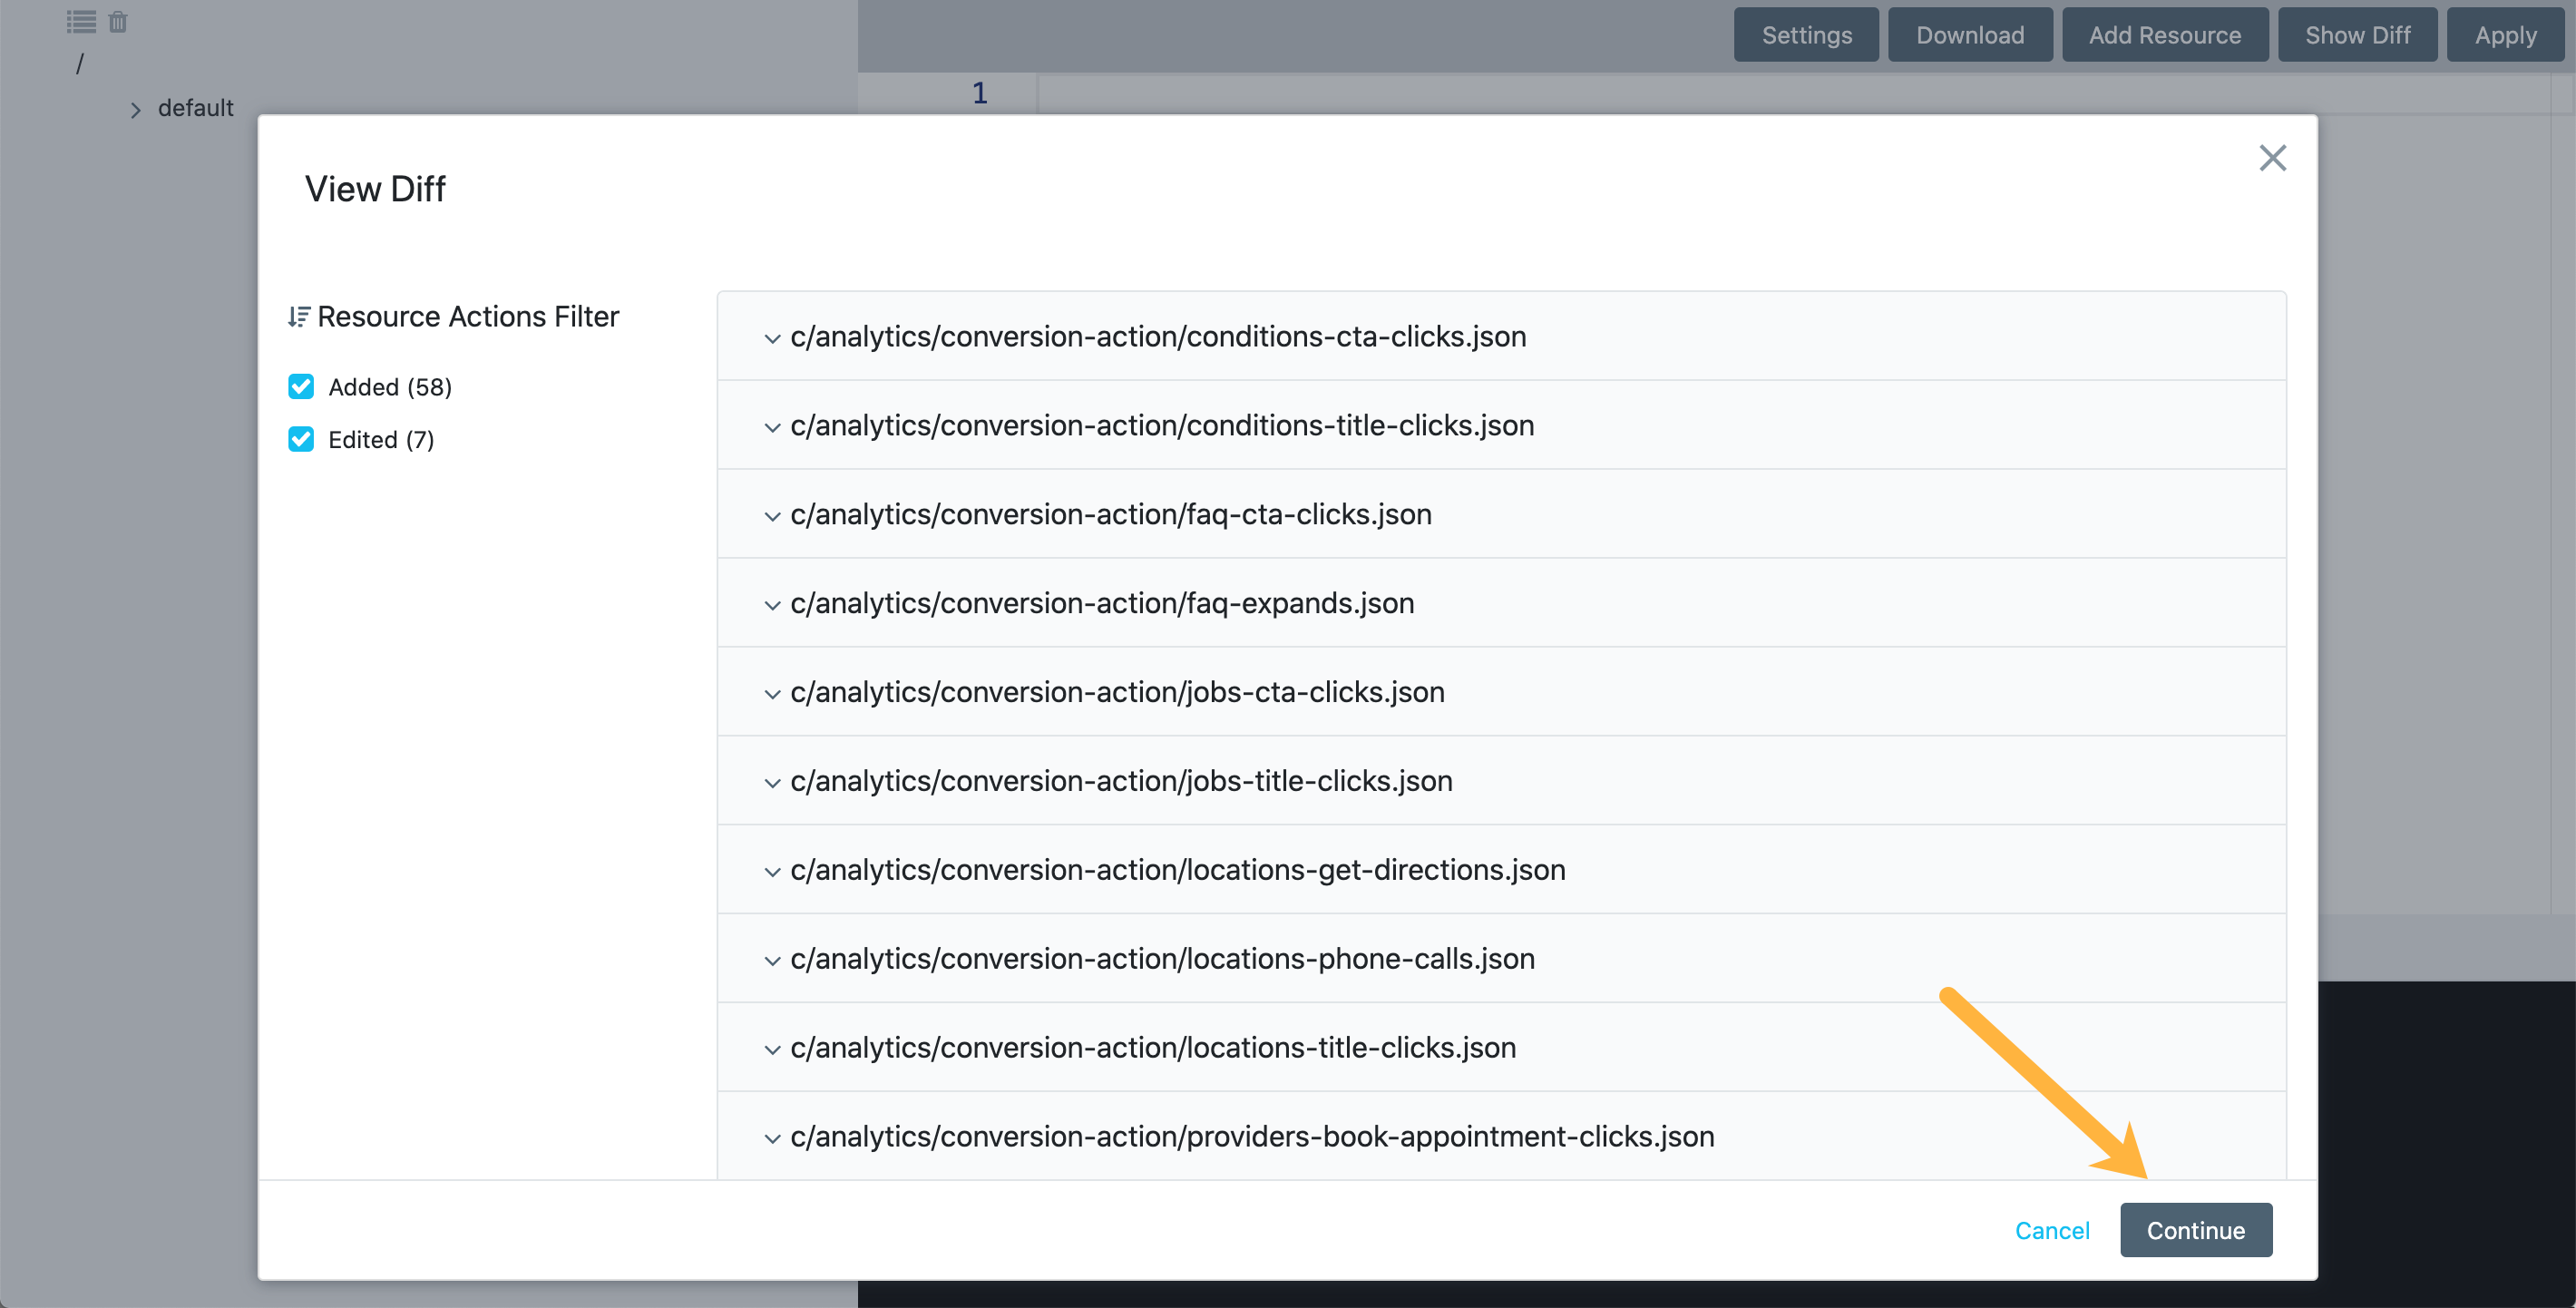
Here you’ll see the “Diffs” – basically, the changes that you’re making to the account if you complete the template application. This is helpful to make sure you’re not making any changes you don’t want to. Click onto a file to view more and once you feel good about it, click Continue.
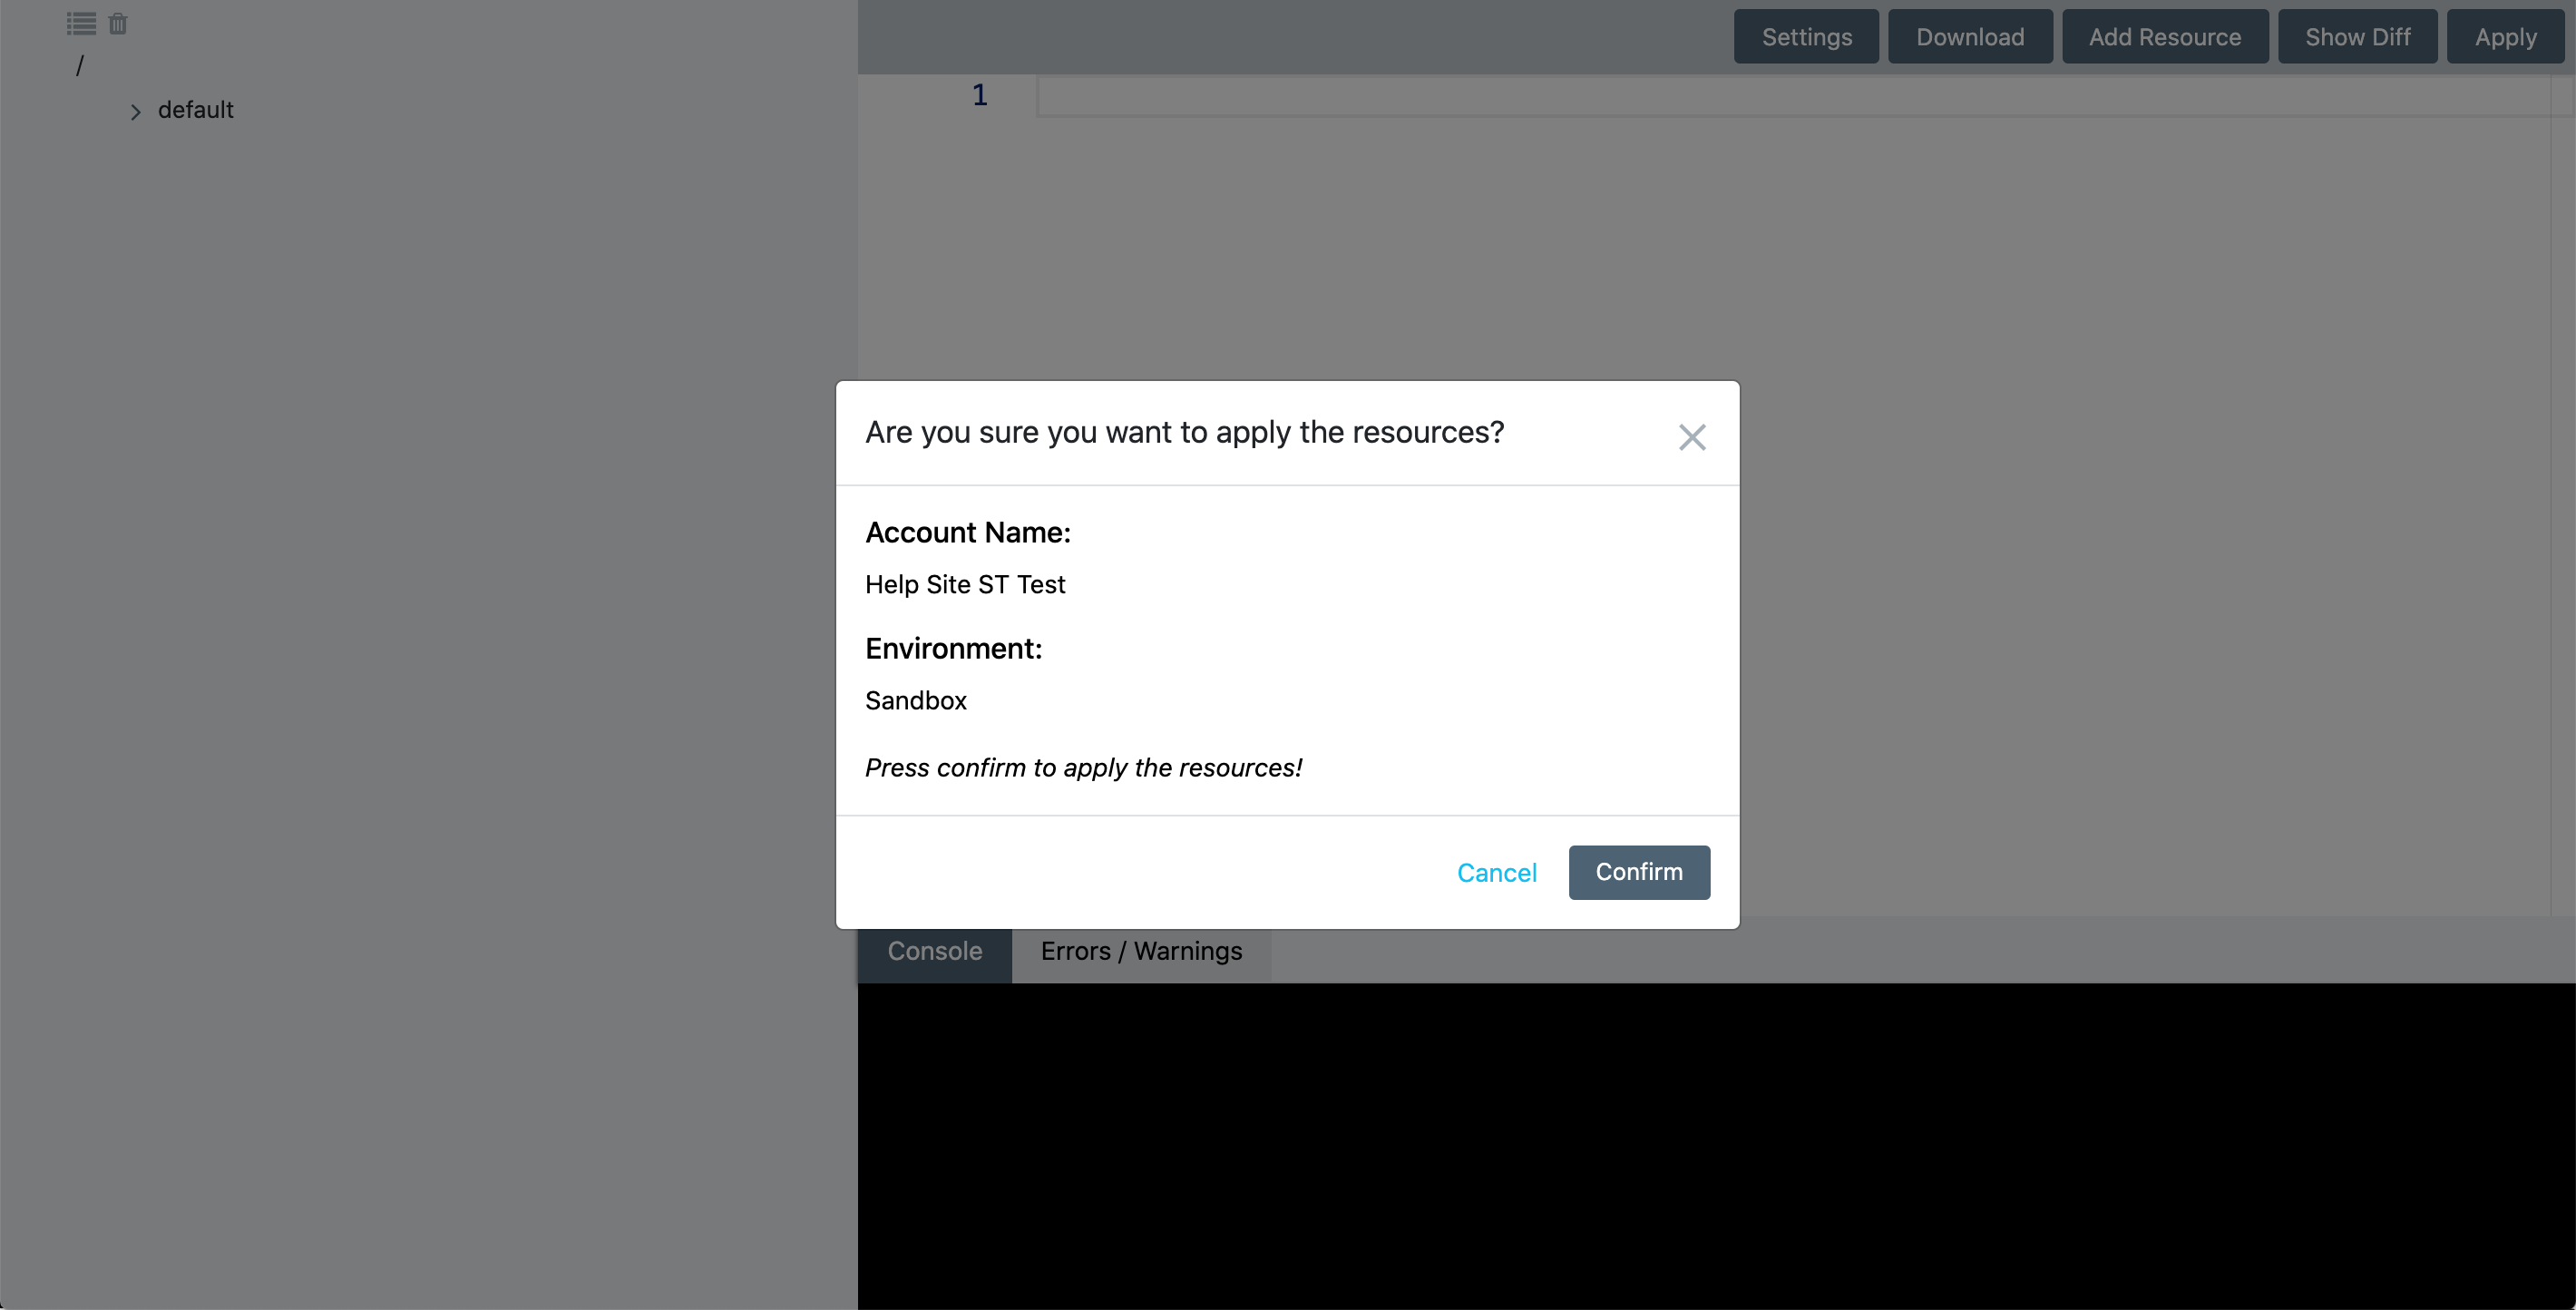
Finally, you’ll get a last confirmation screen to make sure you want to make the changes. Read it carefully and when you’re ready, click Confirm.
After a few quick moments, the Healthcare Primary Care Solution will be installed. How easy was that?
True or False: Solutions are installed via the Admin Console.
What is the purpose of diffs?
Soon you'll be your brand's hero! 🎓
