

Step 7: Final Tweaks, QA, and Audit Links
Before we push the pages live, we’ll want to run a few quick checks on the page. As a reminder, Yext Page Builder pages are designed for a quick launch, meaning that we have built in an out-of-the box solution that is thoroughly and actively monitored by Yext Product Managers and Engineers. Out of the box, the page template will be mobile and tablet optimized, tested across various browsers, and engineered for SEO success. However, you should still test various breakpoints and devices to ensure success.
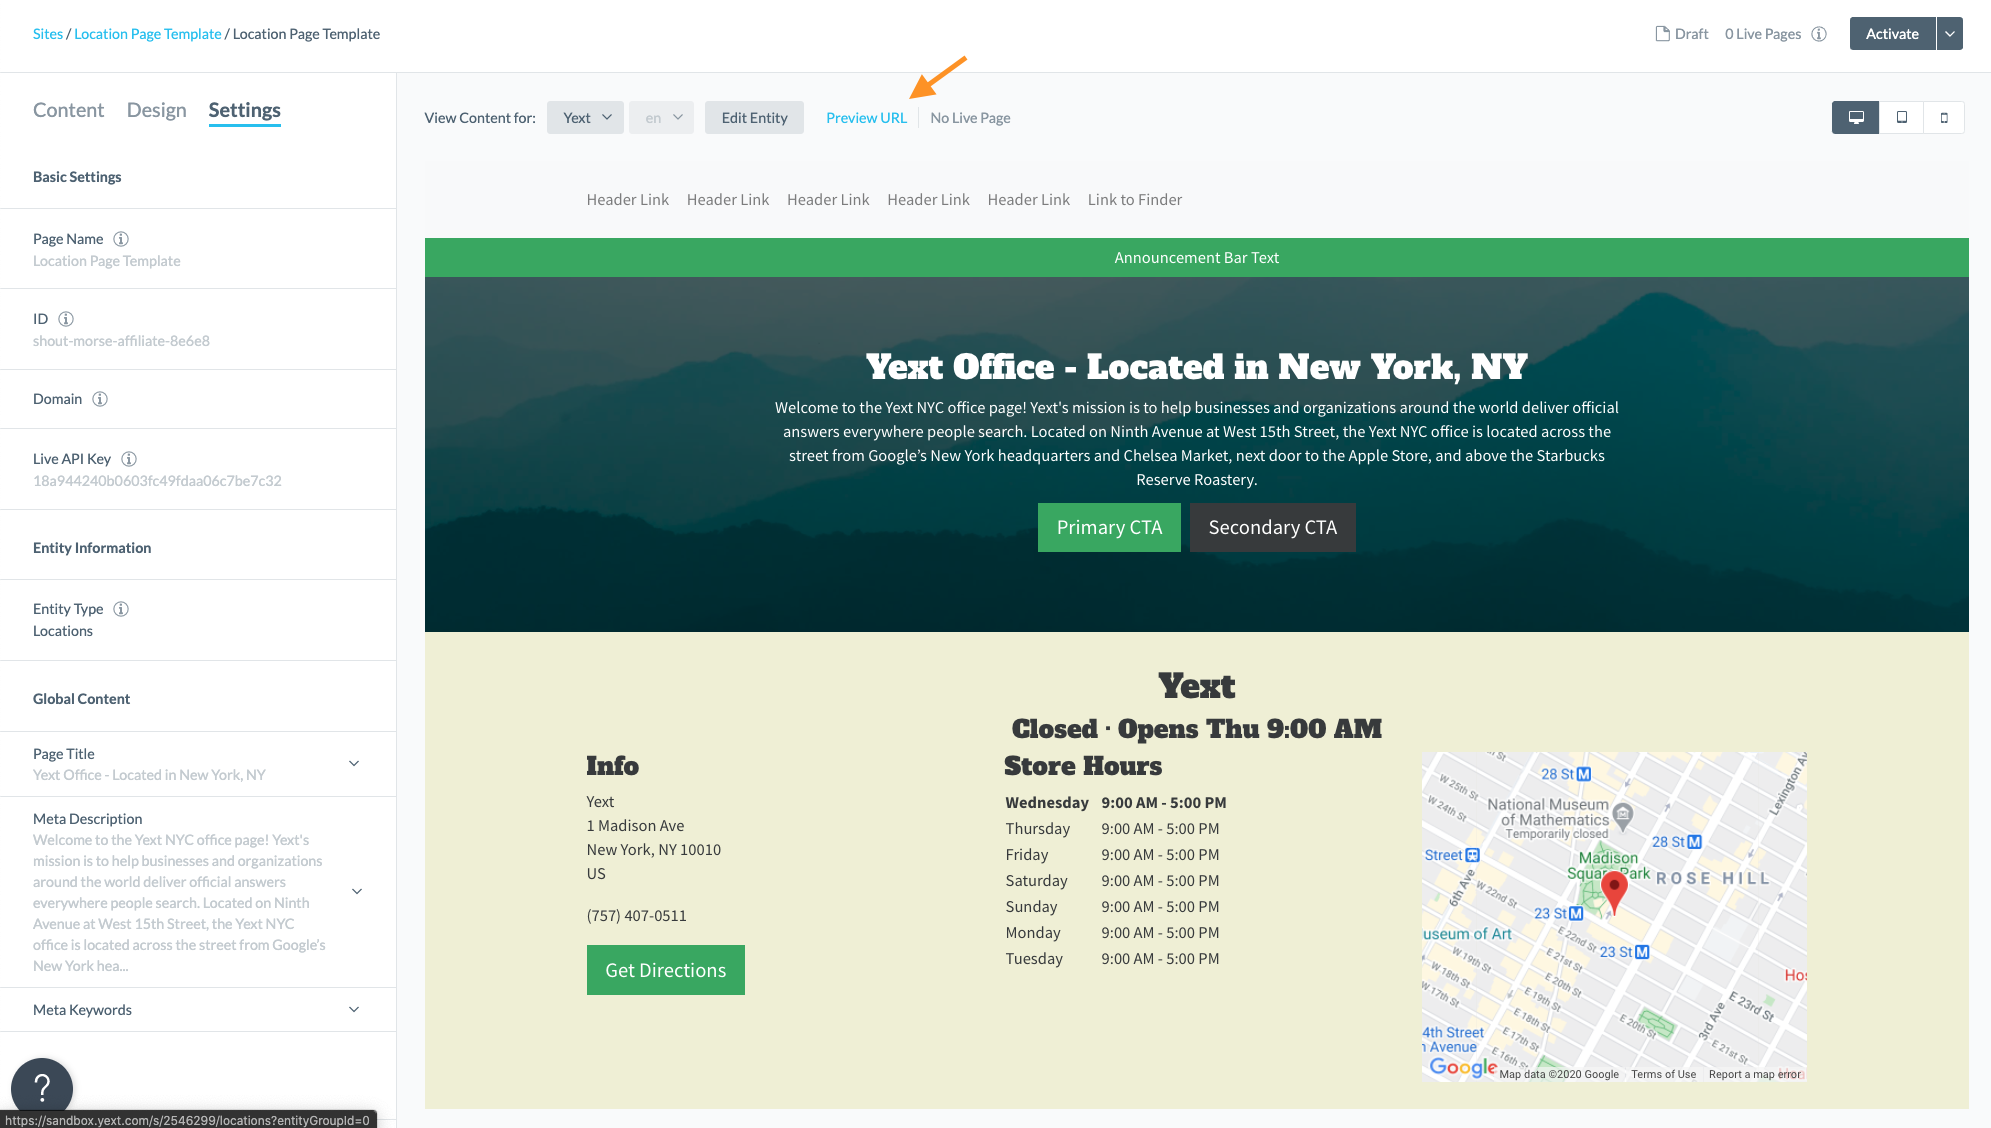
Preview URL
There are a few ways you can QA your page. First, at any point during the build, you can click “Preview URL” at the top of your screen. This URL can be sent around to coworkers and peers as a way to gather feedback and optimize the page:
Make Final Tweaks
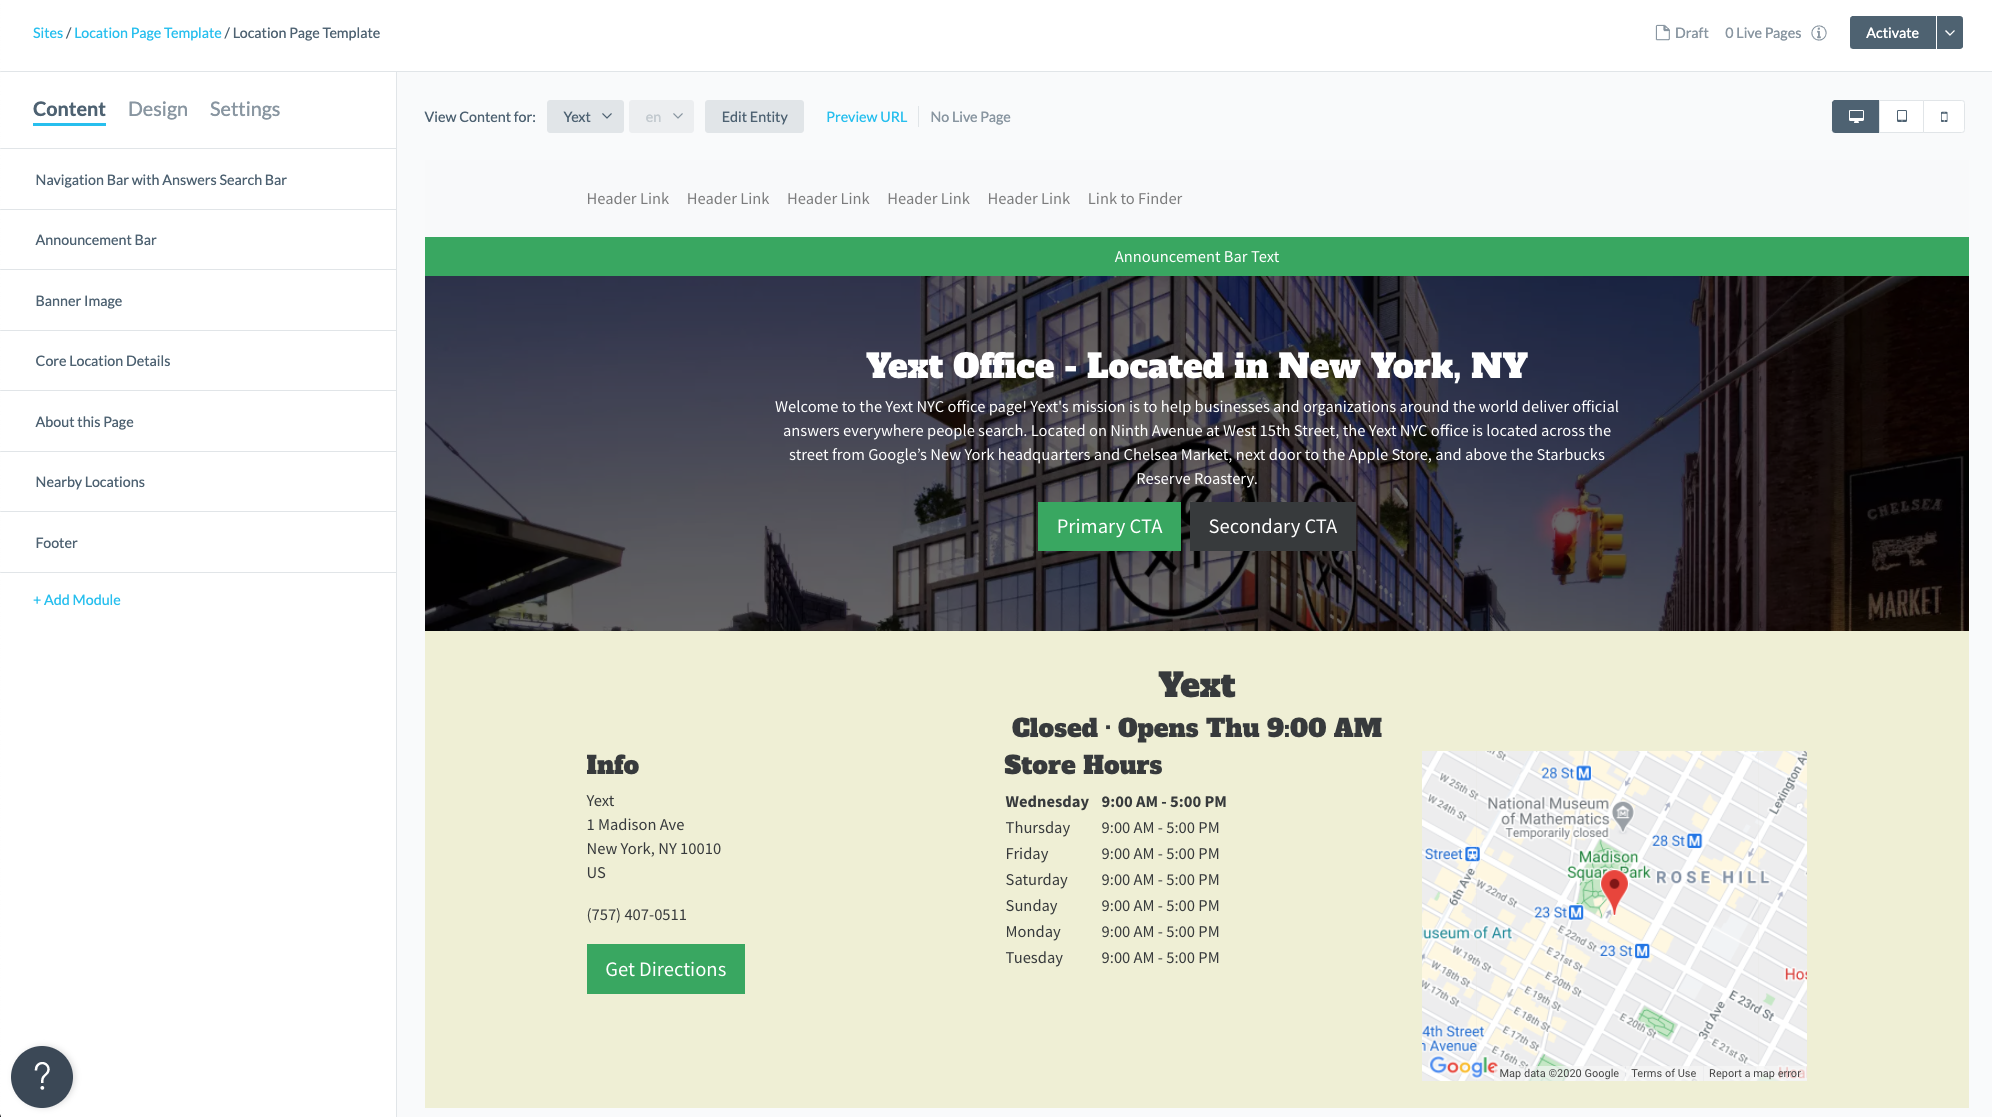
Banner Image
After sending around your Preview URL, let’s say one of your colleagues asks you to change the cover photo to the company office:
https://www.yext.com/wp-content/uploads/2019/07/61-Ninth-Rendering-op3.jpg
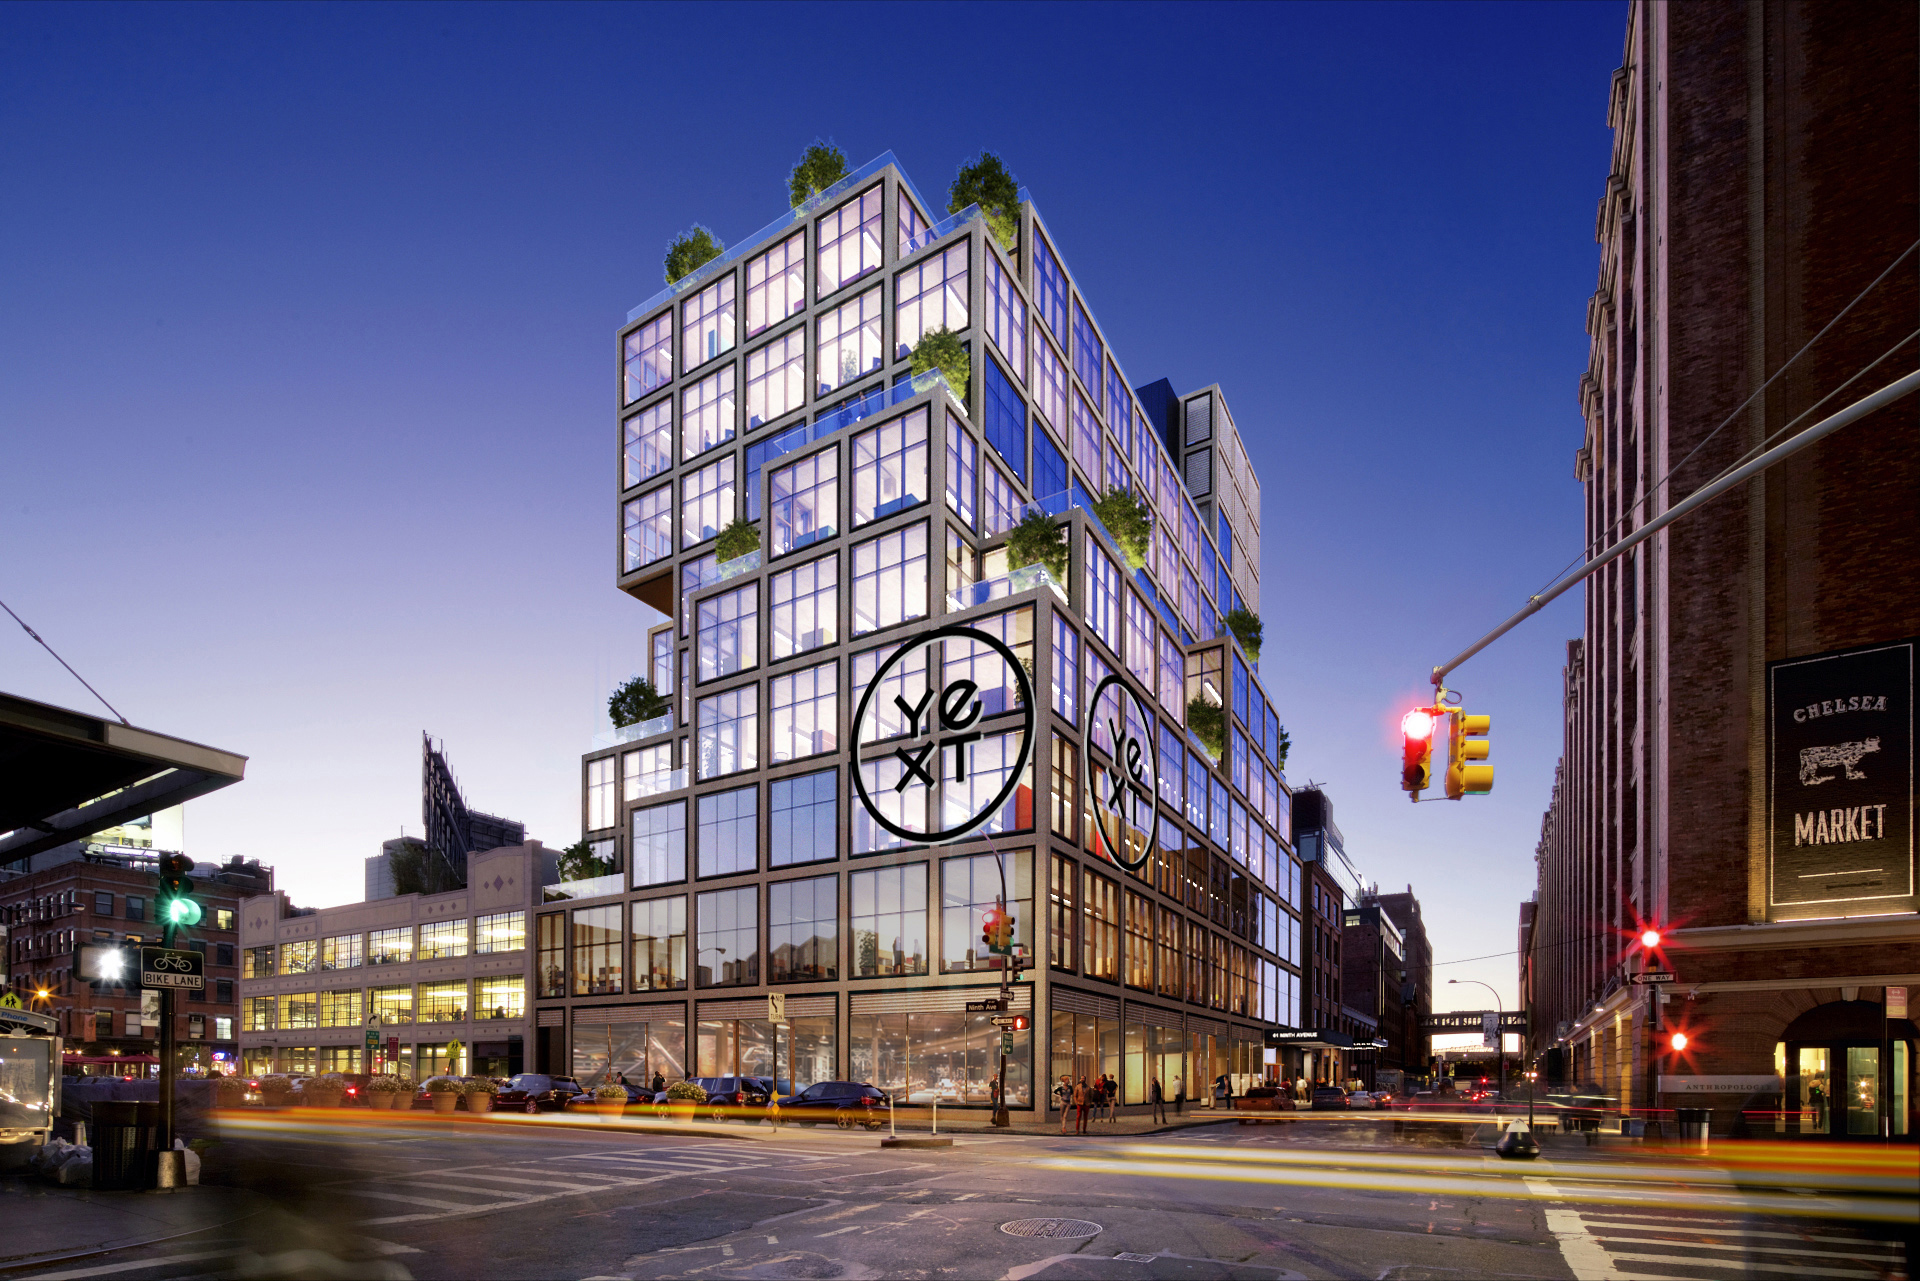
Let’s add this image to the Banner Image module. Navigate back to the module and select into the “Background Image” section. Click “Add Image” > “Enter URL” and input the URL above. Your template should show the Yext NYC building as the cover photo:
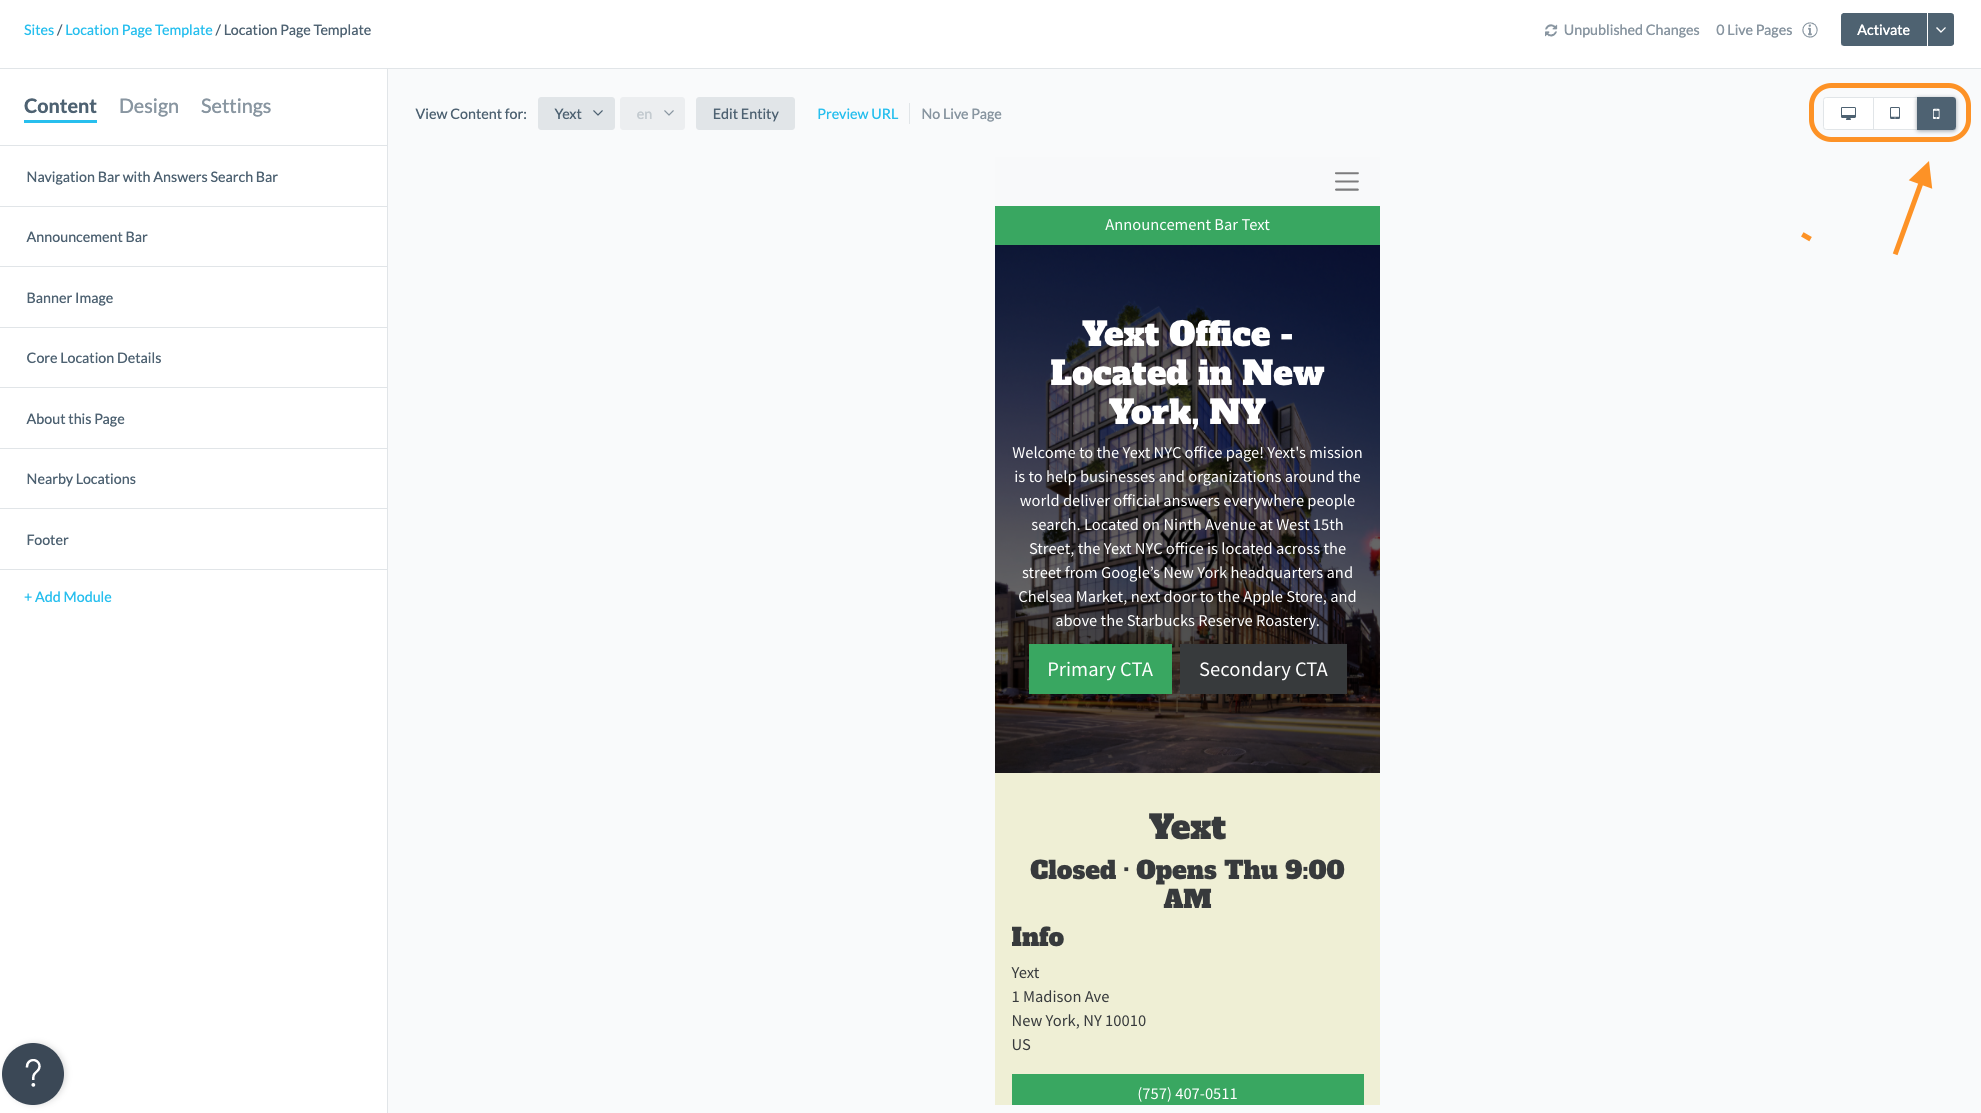
Test Devices
Within the Page Builder interface, there are device selectors on the right side of the page preview. The left option is for desktop, the middle option is for tablet, and the third option is for mobile. Make sure to click on these various device options to ensure that the content and modules are optimized and aligned to your expectations. For example, you may want to shorten or lengthen the amount of text on a given field to help optimize the mobile layout. Maybe you decide you want to add additional styling on mobile screens with custom CSS; that is possible, too!
More Final Tweaks
Bonus: Custom CSS
Let’s say you test out the various devices and want to add some padding to the CTAs in your Banner Image module. You can override the CSS by clicking into your module and “Edit CSS”:

Within the .image-outer-container CSS selector, add the following to the .ctas class:
padding-top: 10px;
Click save. You should see some additional padding above your Banner Image CTAs. It will help visually by creating more space in the content.