

Publishing, Integrating, and Next Steps | Yext Hitchhikers Platform
Congratulations on building your Page Builder templates! The next part is getting your Pages live. Going live consists of four steps:
- Set up your domain
- Active your template
- Publish your pages
- Integrate with your website
Set Up Domain
These pages are intended to link out from your existing website and should live under the same domain as the rest of the site to ensure a seamless experience for your customers. In order to do this, you will need to choose your desired subdomain, and register it with your website’s DNS provider.
Yext-Hosted Subdomain
The Yext hosted domain is the default format for Page Builder pages. This integration path is simply the subdomain of your choosing. We recommend choosing a short and meaningful subdomain (e.g., restaurants.mydomain.com, locations.mydomain.com, agents.mydomain.com, or branches.mydomain.com) that helps users clearly distinguish between the different pages on your website.
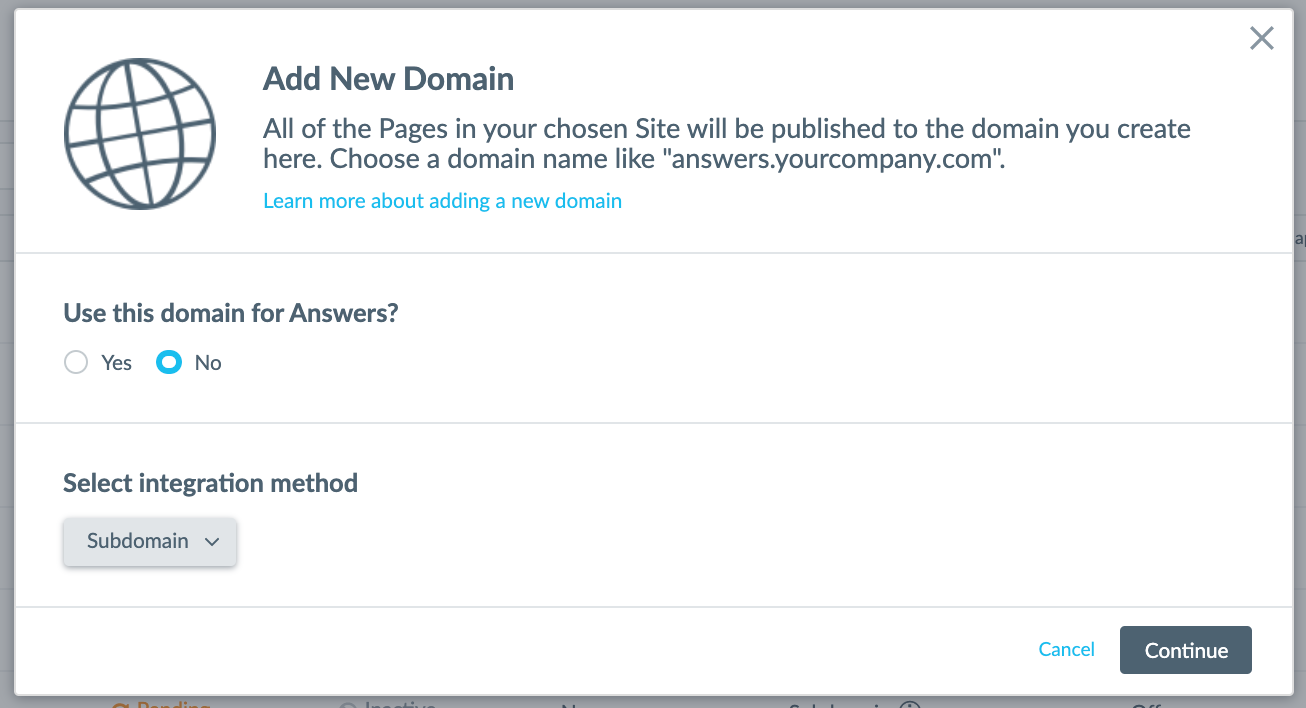
Click Pages in the navigation bar, then Domains.
Click Add New Domain in the upper right. In the dialog box, select No for use with Answers, and the Subdomain integration method should be selected by default. Click Continue.
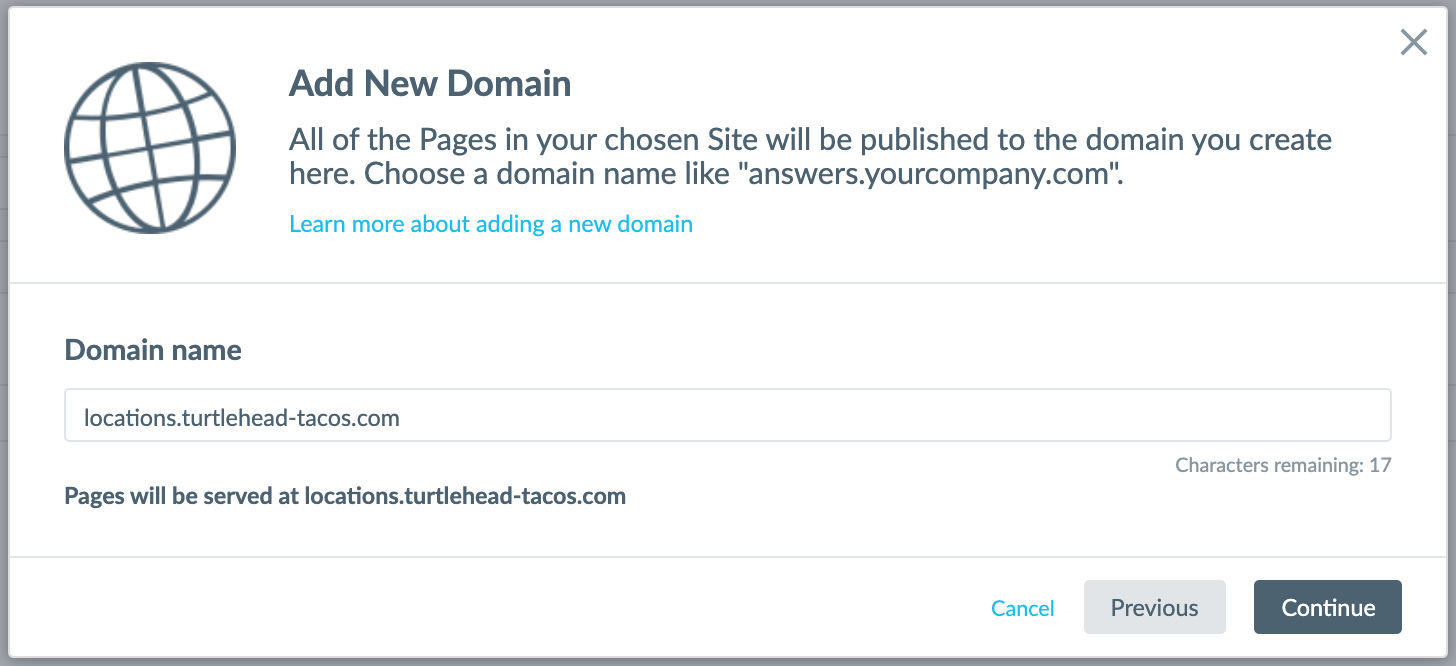
- Enter your desired domain. Per the above format, you will add the domain as subdomain.domain.com. If your main homepage is turtlehead-tacos.com, you would add the domain as
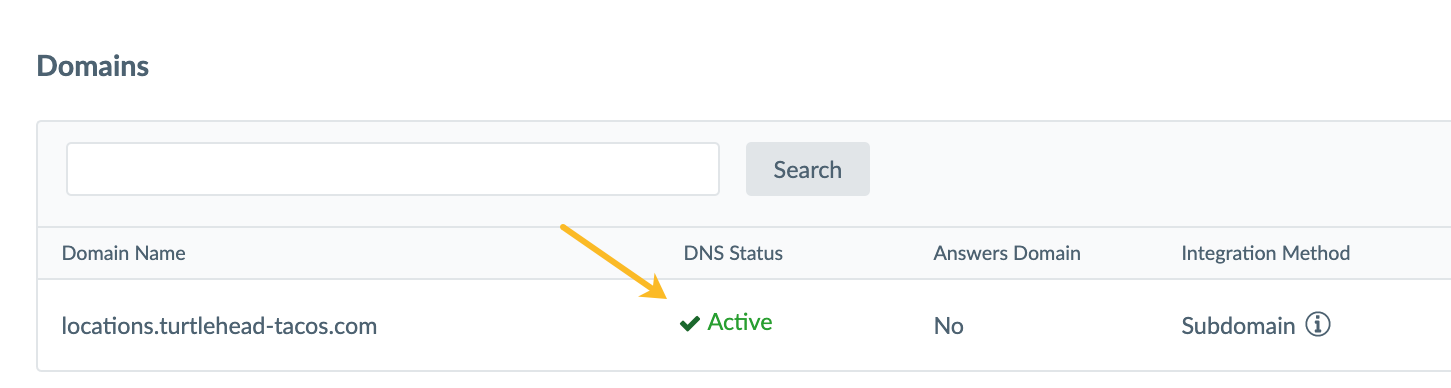
locations.turtlehead-tacos.com:
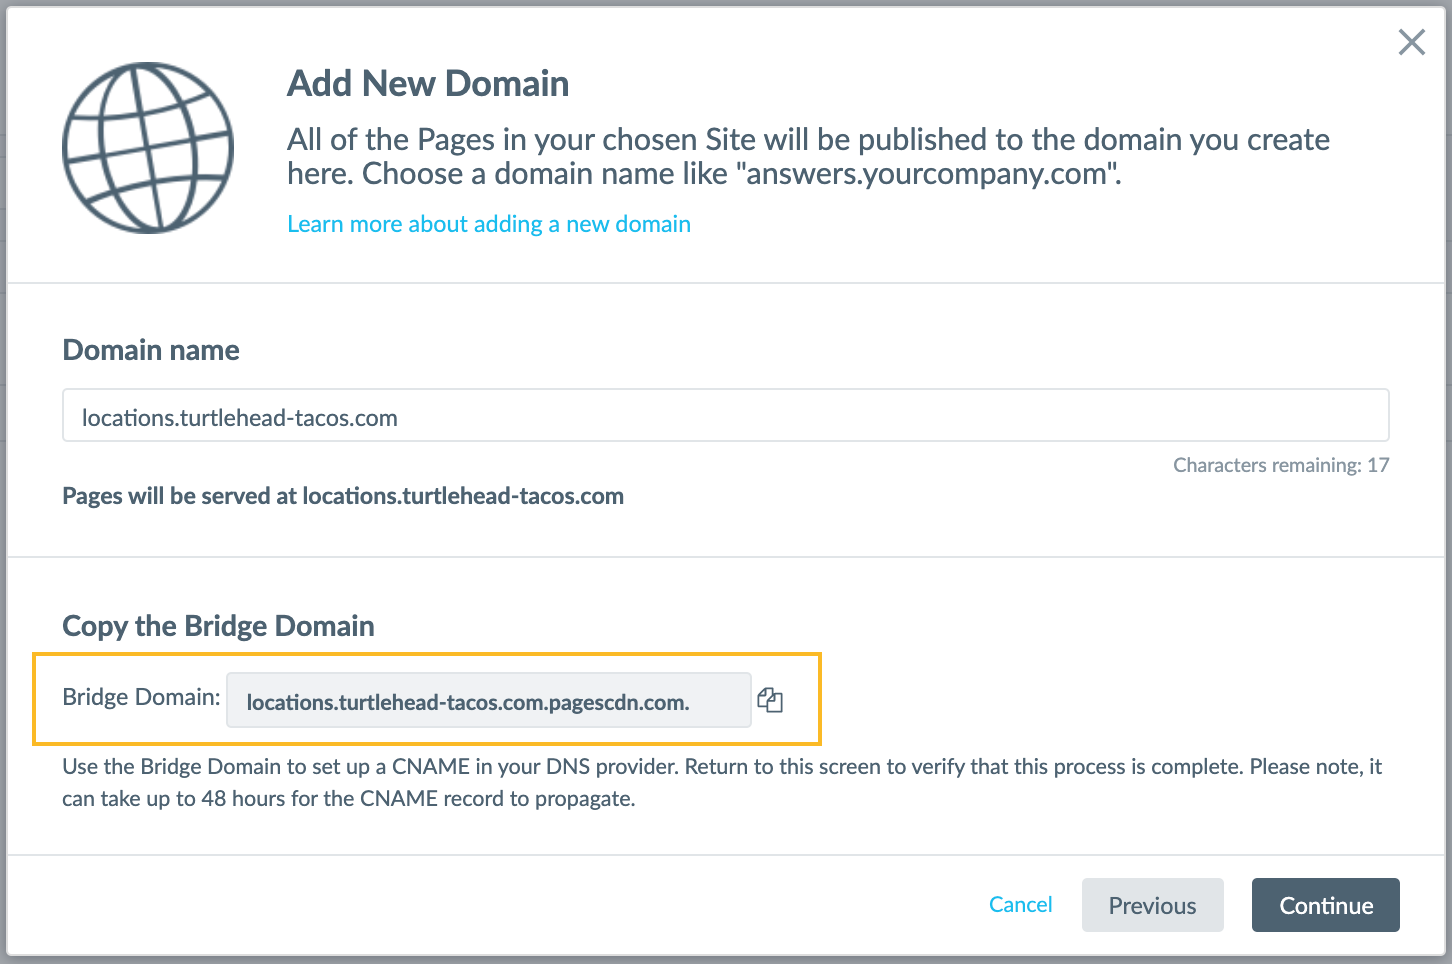
- Once you input your domain, you’ll be prompted to set up the bridge domain using a CNAME record:
- Congratulations! You’ve added the domain. Once the CNAME record is configured, the DNS status will switch from “Pending” to “Active” (under Domains in the navigation bar).
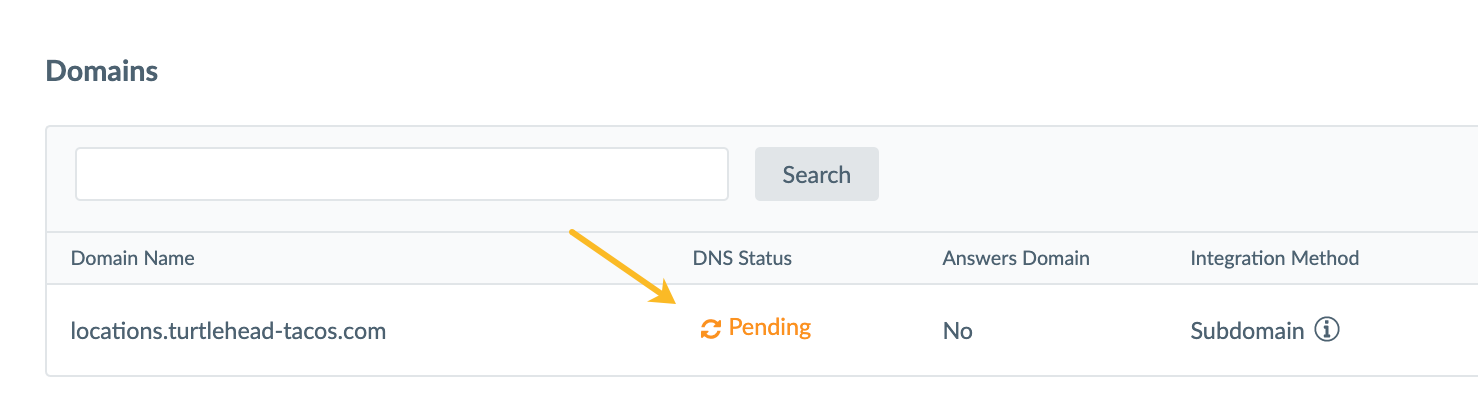
You will be able to publish as soon as the DNS Status switches to “Active” (meaning the CNAME is set up correctly).
Lastly, assign the domain to your Pages site.
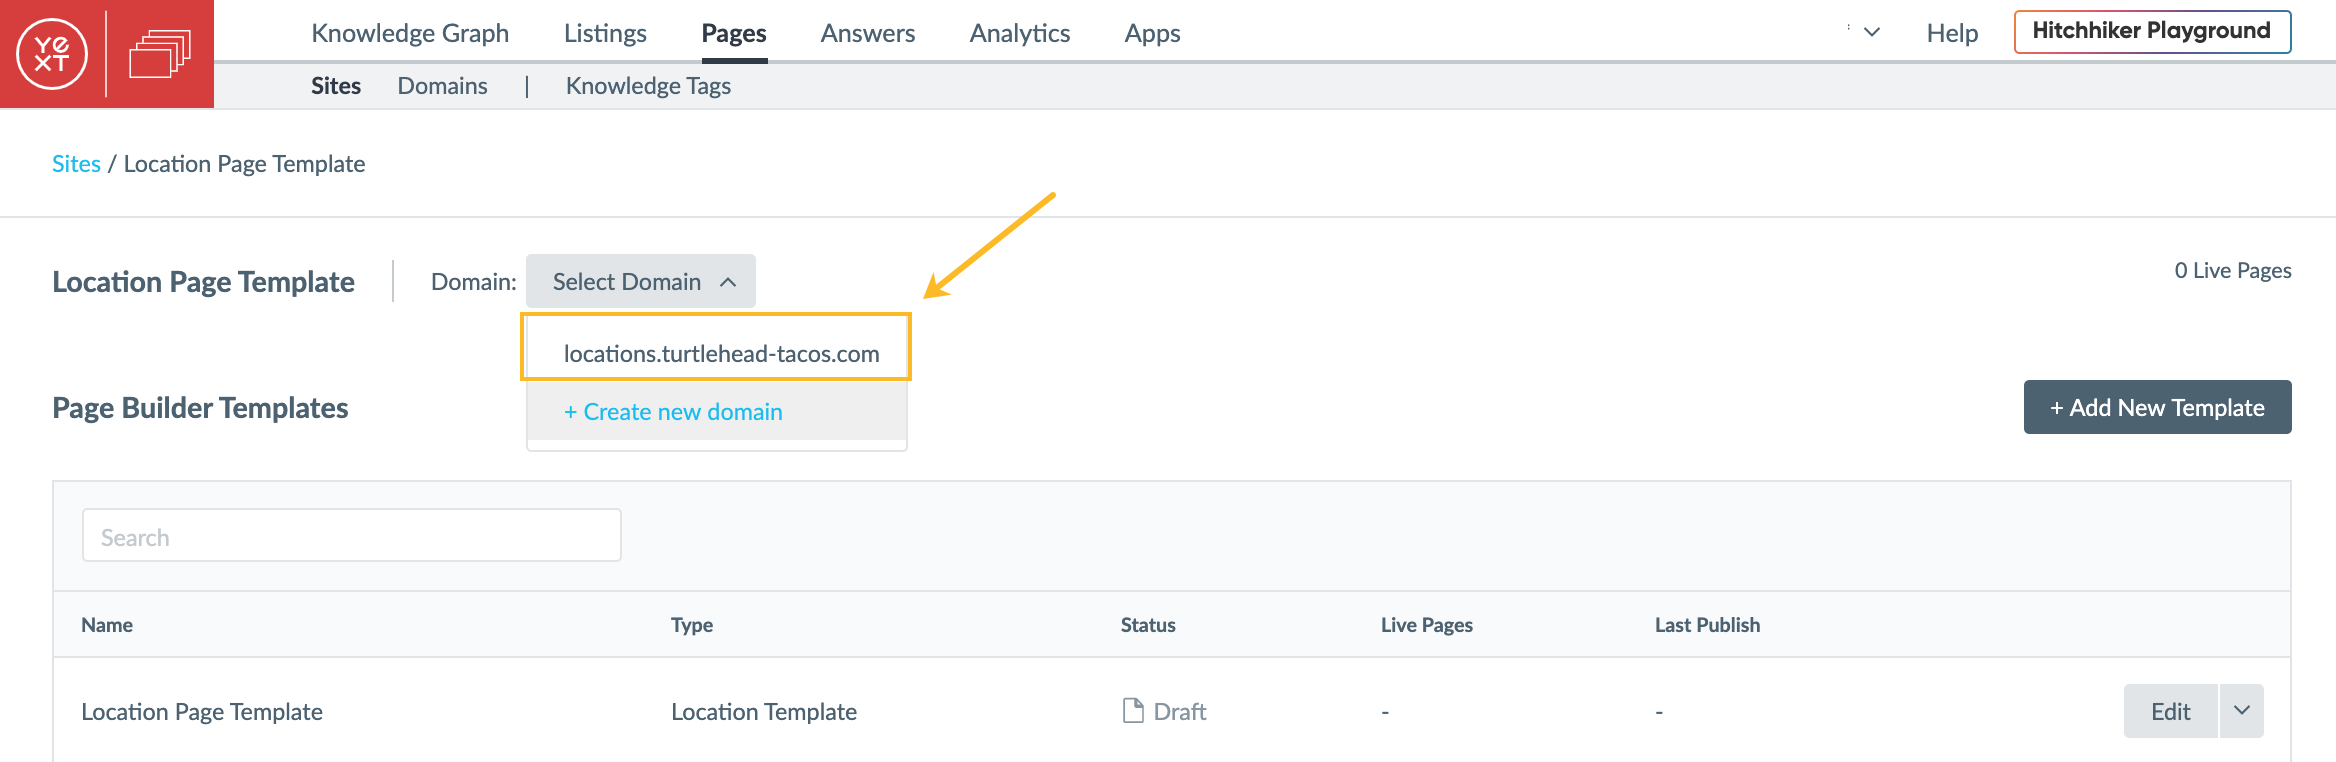
Now you’re done setting up your domain!
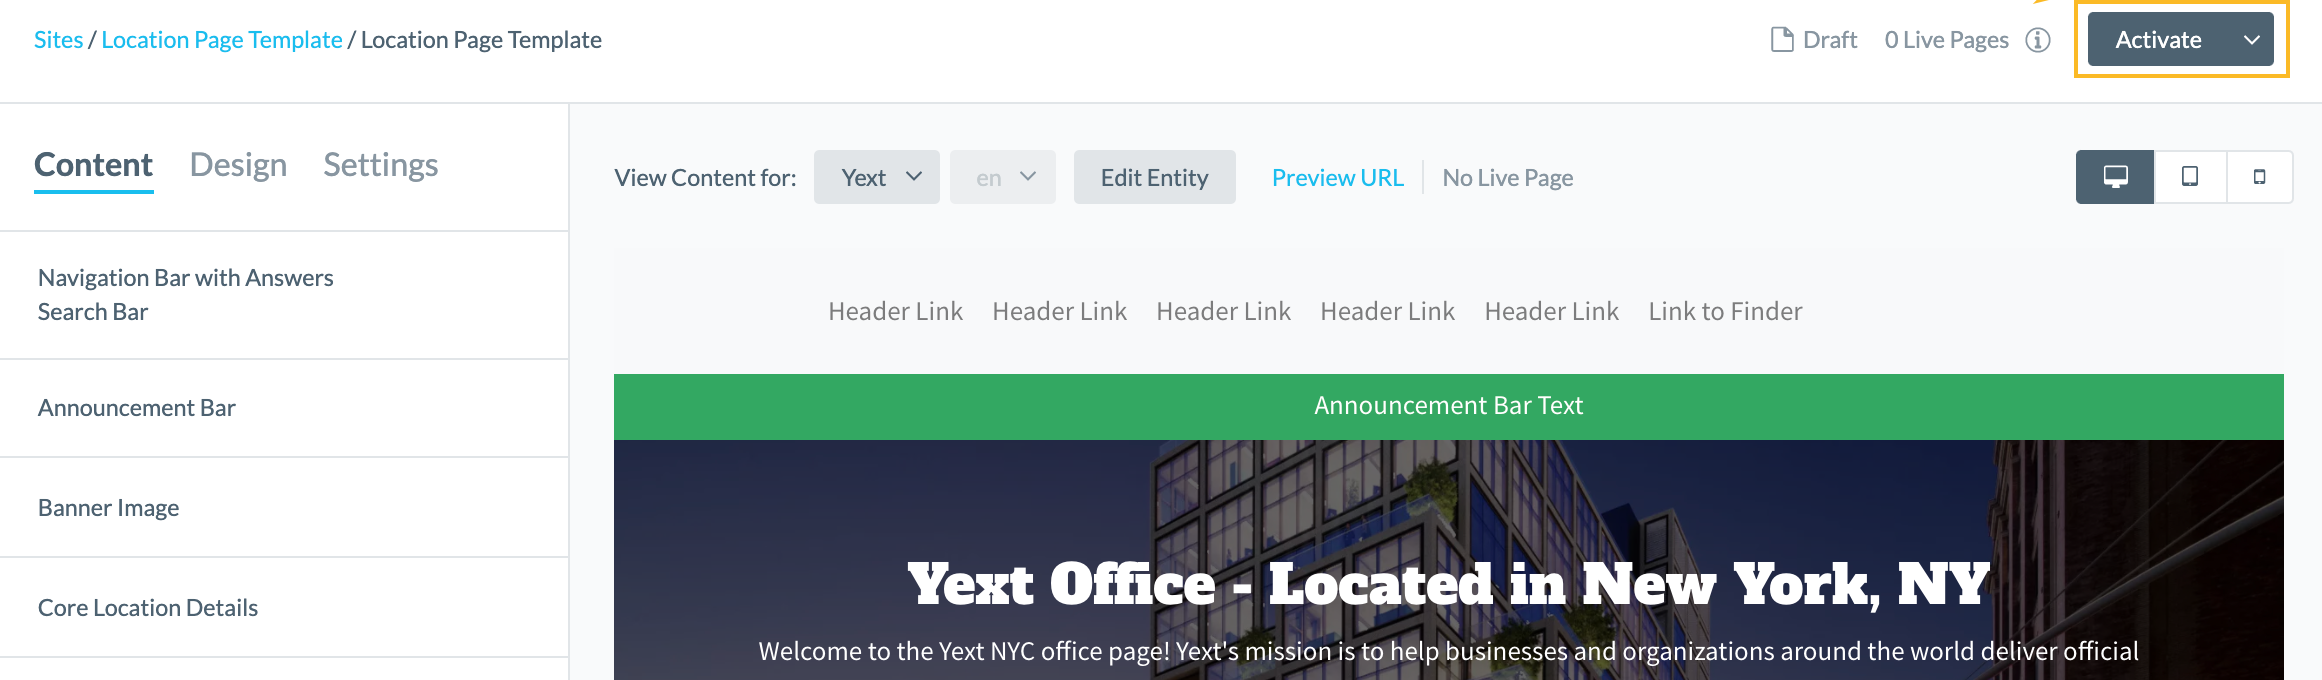
Activate Your Template
Click “Activate” in the top right of the page. This will enable you to publish entities to the template and generate a live URL for each entity.
Publish Your Pages
Navigate back to the Content and select the entities that you’d like to publish. Then click the “More Actions” button and select “Add Services.” Simply step through the in-platform Wizard to assign your Pages licenses to your entities. Once you finish stepping through the Wizard, each entity will be published at a live, unique URL! You can always find the URL at the “Landing Page URL” field on the entity itself, or you can find it in the page template next to the “Preview URL” link we previously discussed.
Consider Integration
How will a user get to these pages from your website?
Think about how a user should land at your pages. For example, if you created a location page template, you are likely going to integrate the URLs into your existing Find a Location page.
Do you need to set up any redirects from previous pages?
If the Yext pages are replacing any previous web pages on your site, you may consider updating those links or implementing redirects to ensure that if a user is linked to an old URL that he/she is redirected to the new, Yext pages.
Post-Launch Analytics
Congrats on going live on Pages! Now you’ll want to quantify your Pages performance. Build reports to measure metrics to show value towards your KPIs. You can look at metrics such as Page Views, Sessions, clicks on Calls to Action, and the number of times a page has appeared or been clicked in a Google search results page.