
How to Create Users | Yext Hitchhikers Platform
What You’ll Learn
In this section, you will learn:
- The different ways you can create users in Yext
- How to create a user manually
- How to create users in bulk
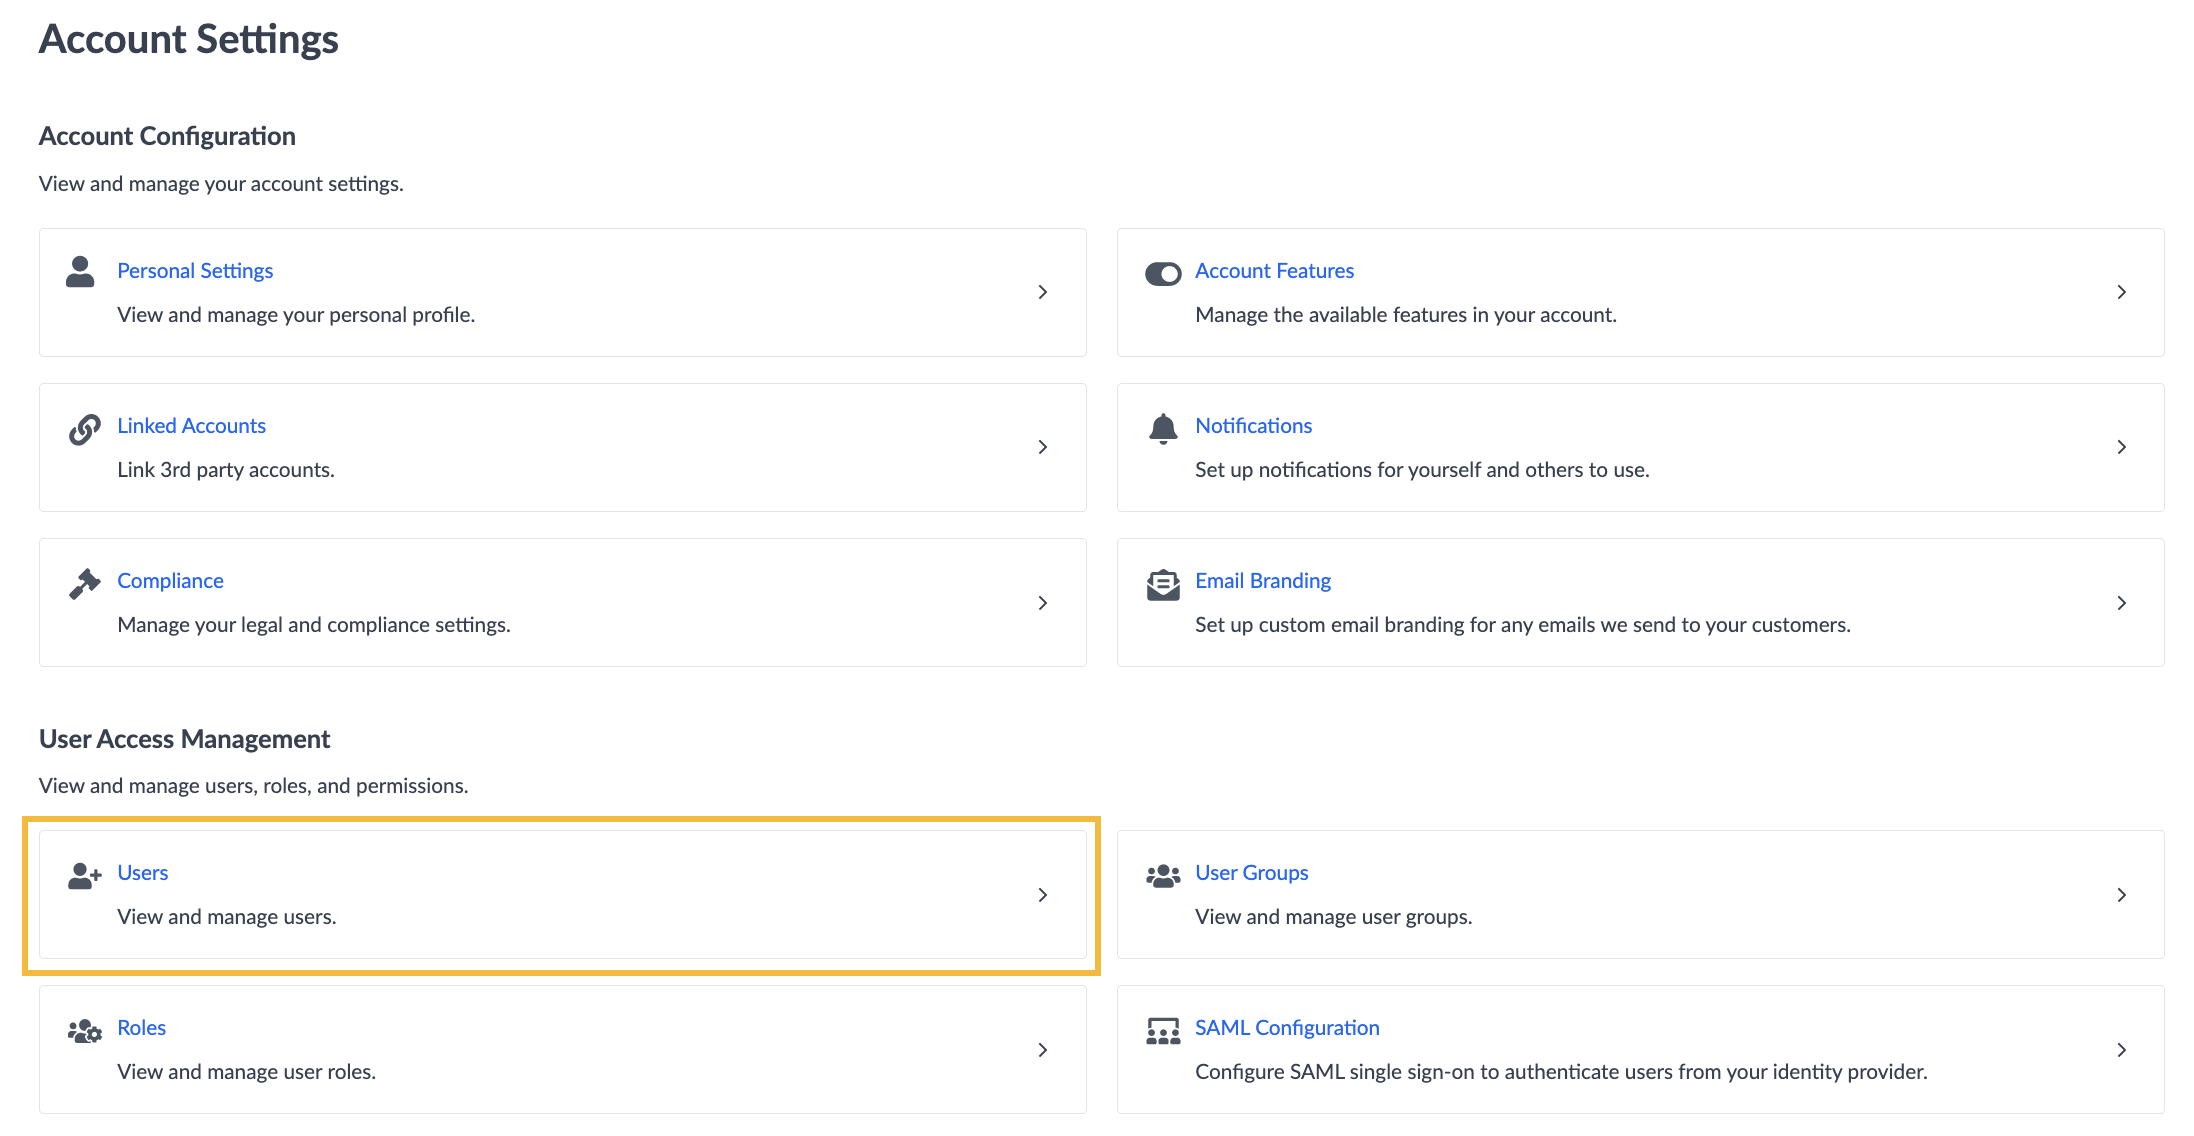
Users Screen
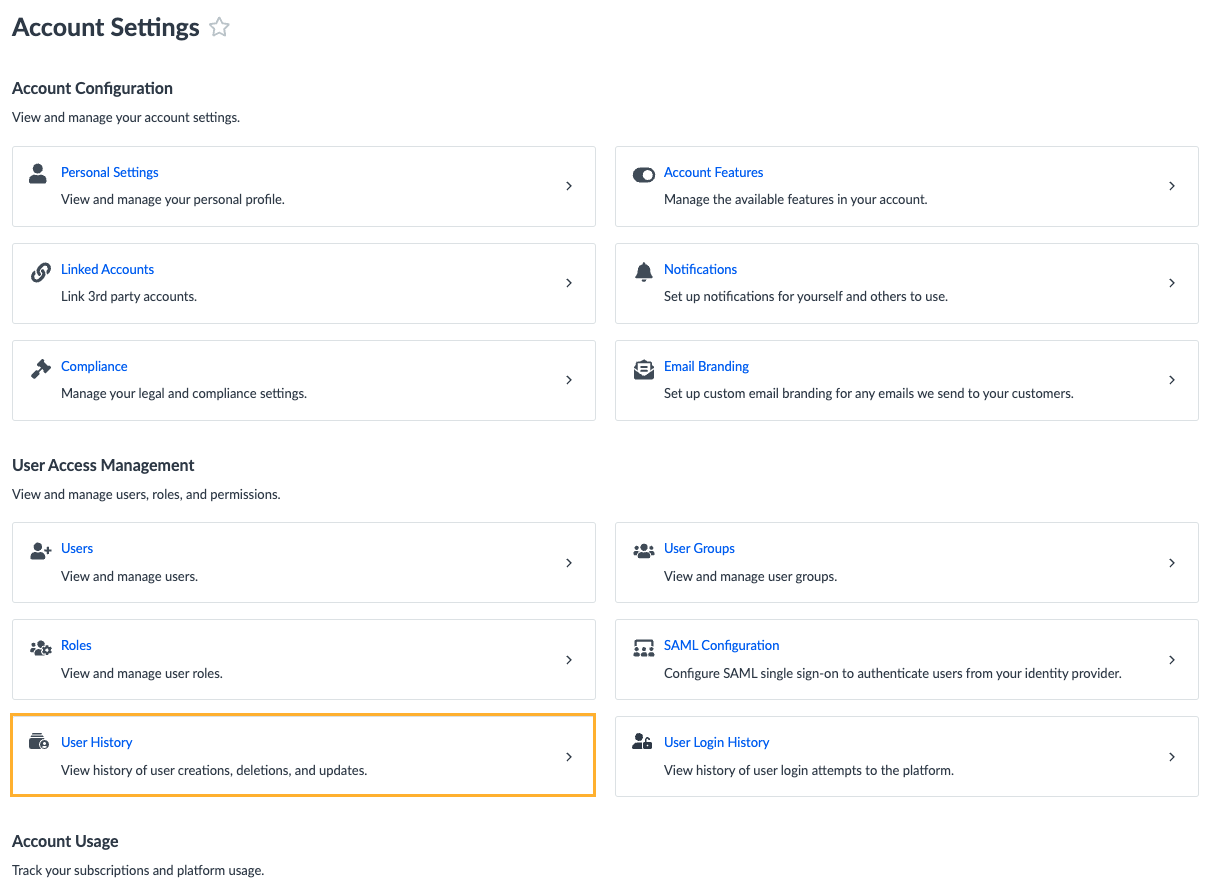
To actually start managing users, you can navigate to the Users section of Account Settings.
This brings you to the screen where you can see all of the users that are in the account, what access controls they have, and even things like date created or last login date. This screen is very powerful for understanding how users are engaging with Yext.
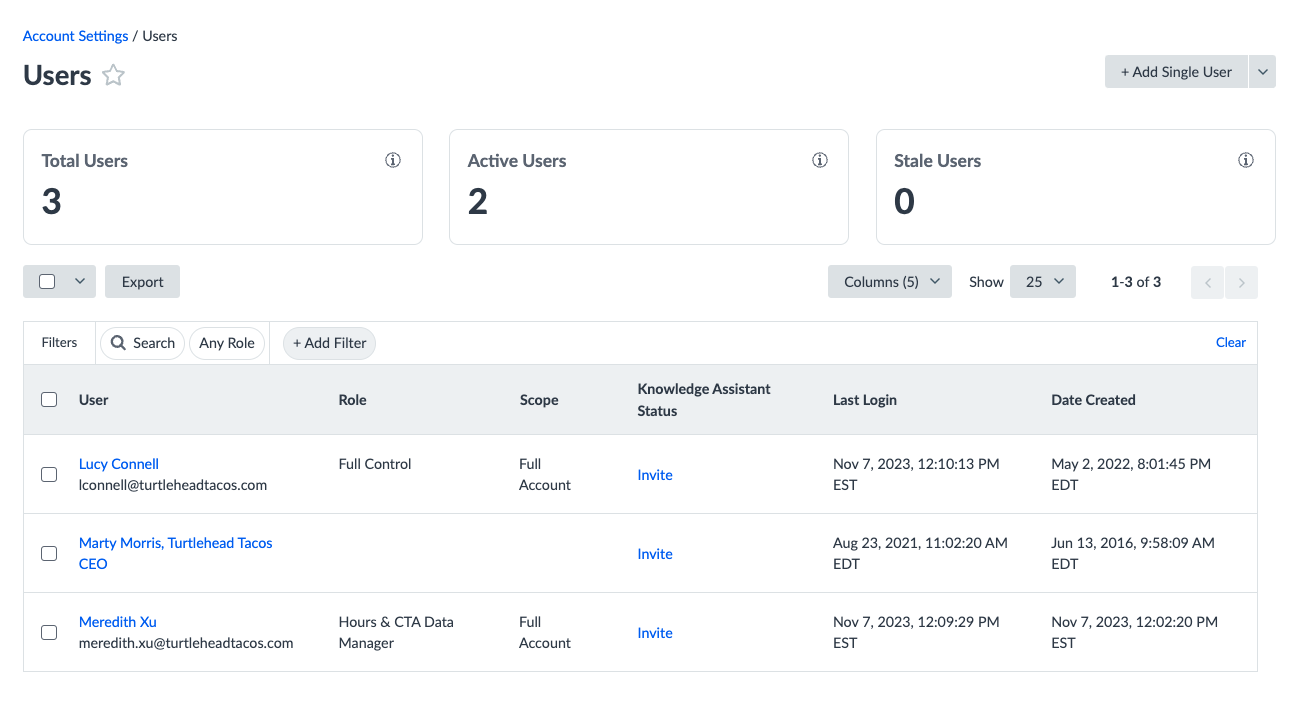
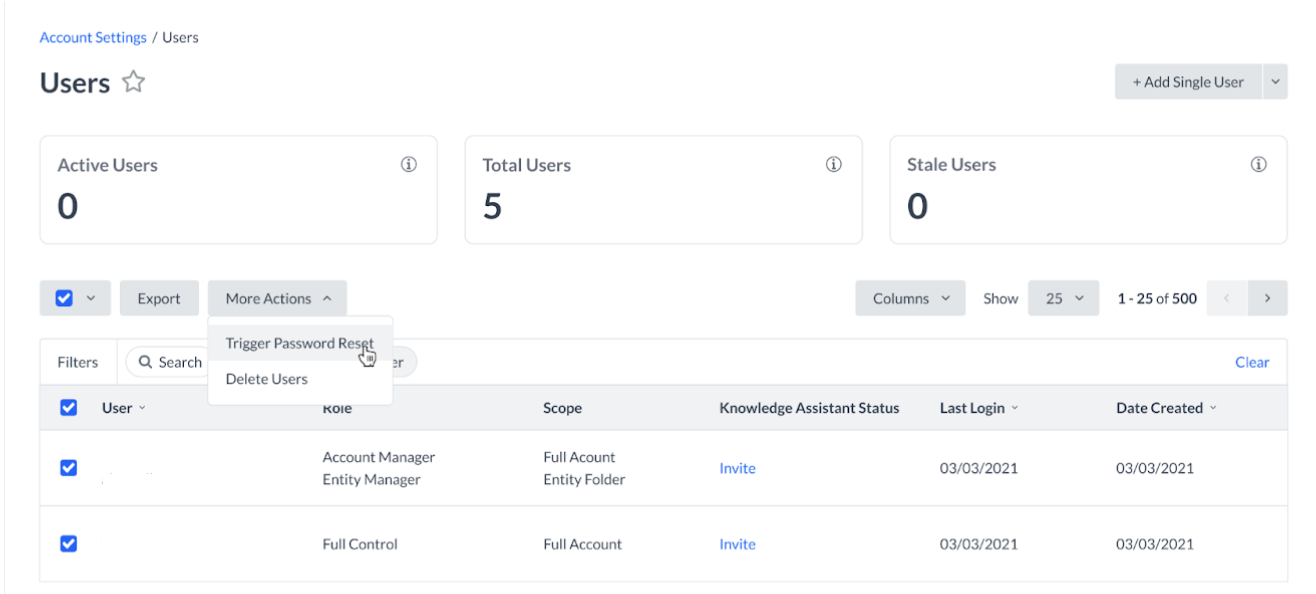
From this screen you can:
- Click to add new users
- See User engagement
- Make actions to user in bulk such as:
- Export users
- Delete users
- Reset password
The hero numbers at the top will give you an at-a-glance peek at how your users are interacting with Yext.
We also encourage you to periodically review the list of users in your account and the controls you’ve assigned to each.
Creating Users
There are 3 ways to create users in Yext:
- Manually one by one
- In bulk via a spreadsheet upload
- Via API
In this unit, we’ll cover 1 and 2, but we recommend visiting our developer documentation if you’re interested in a users integration.
User Properties
Before we get into the mechanics of how to create a user, it’s important to understand the properties of the user and best practices.
First Name: The user’s first name, or how they would like to be addressed in the Platform.
Last Name: The user’s last name, or how they would like to be addressed in the Platform.
Email Address: The email address at which they’d like to be contacted for Yext-related matters. This will also be used as their username for logging in by default; if they already have a user with that email in another account, you will be prompted to enter a unique username.
Password: By default, we recommend having users create their own password for security purposes. If you select that option, the user will be emailed to the Email Address provided in the previous field. If you’d also like someone else to be copied on that email for visibility, you can enter in the optional “Send Copy of Email to” field. Alternatively (and not recommended), you can set the password for the user yourself by selecting that option and entering a secure password.
Country: The user’s country is used to determine things like preferred language for communications or timezones. We will default on the account’s primary language if left unspecified.
Phone: This is only used for your own storage, if needed. We will never contact the user at the phone provided, nor will we share this phone number with anyone.
Access Controls: As discussed in the last unit, the Access Controls are the combination of a Role and a Scope (Account, Folder, Entity). You can add as many as you need depending on if you have multiple folders/entities or if you have different kinds of roles you want to assign the user.
Manually Creating Users
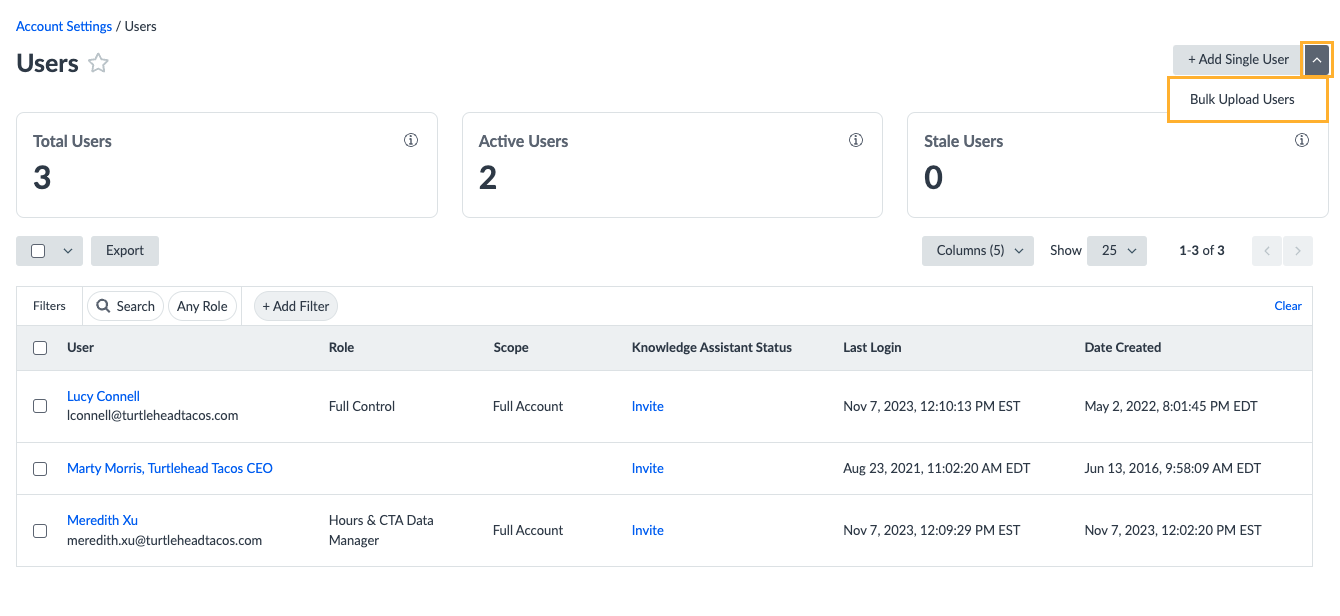
To actually start creating users, you can navigate to the Users section of Account Settings.

To add a user manually, you would click on the + Add Single User button and then fill out the user form for the person you are giving access to.

After you enter the users settings, it’s time to add their Access Controls. To do this, click + Add in the Access Controls section.
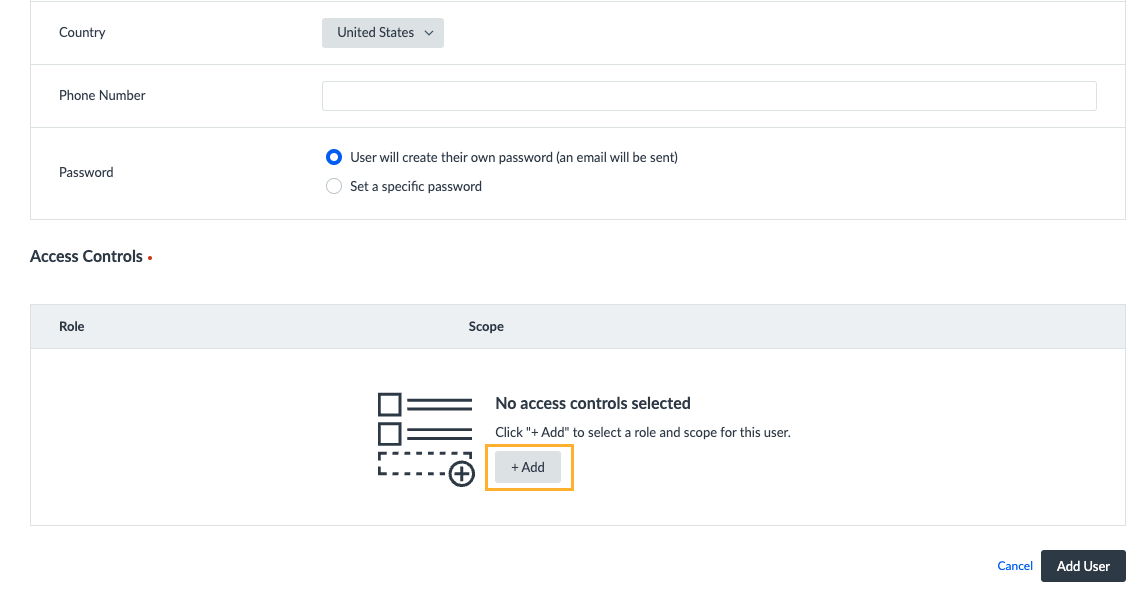
This will open a modal where you can select the Role and Scope that you would like to apply to this user.
You can add multiple permissions to a user at once if they are on the same role by selecting the relevant folders or entities, and then clicking Apply. In the example below this user will now have the ‘Account Manager’ role for 20 entities within the account.
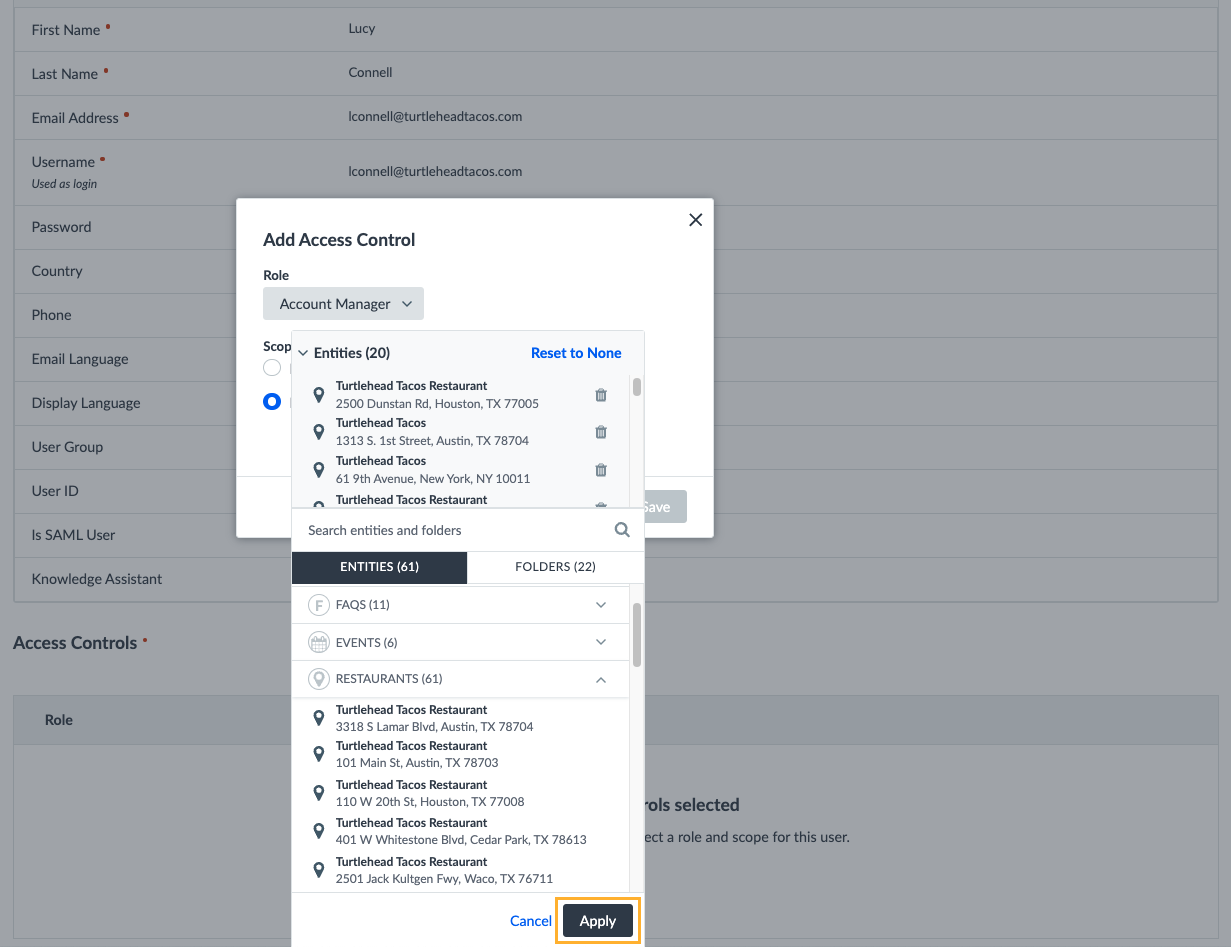
Click Save to add the Access Control.
To add additional Access Controls for different roles, simply save the first Access Control and click + Add again.
Voila! Once you click Add User, the user will be added to the platform and should receive access immediately.
Creating Users in Bulk
Just like with Entities, we give you an upload tool to add or update your users in bulk. With this tool, you can easily export information from your employee database and upload to Yext, especially if you’re managing multiple users.
The fields required for the bulk upload are mostly the same as those required for adding a single user. The differences are:
You have additional fields for:
- “Email Language Code” which controls the language we use for built-in email communication (select from a list of supported codes)
- “Display Language Code” which controls the default display language when you login to our platform. If left blank, we will use browser language to determine this by default.
- “Overwrite Existing Access Controls”, which allows you to choose whether you want to replace the existing access for users or add to it
You have to explicitly provide an email address AND a username for all users (whereas in the single user add flow you can provide just the email address and our system dynamically determines if it’s unique).
Remember that the username has to be globally unique across all of Yext’s customers, just like other user systems you use every day like Facebook or GMail or Instagram.
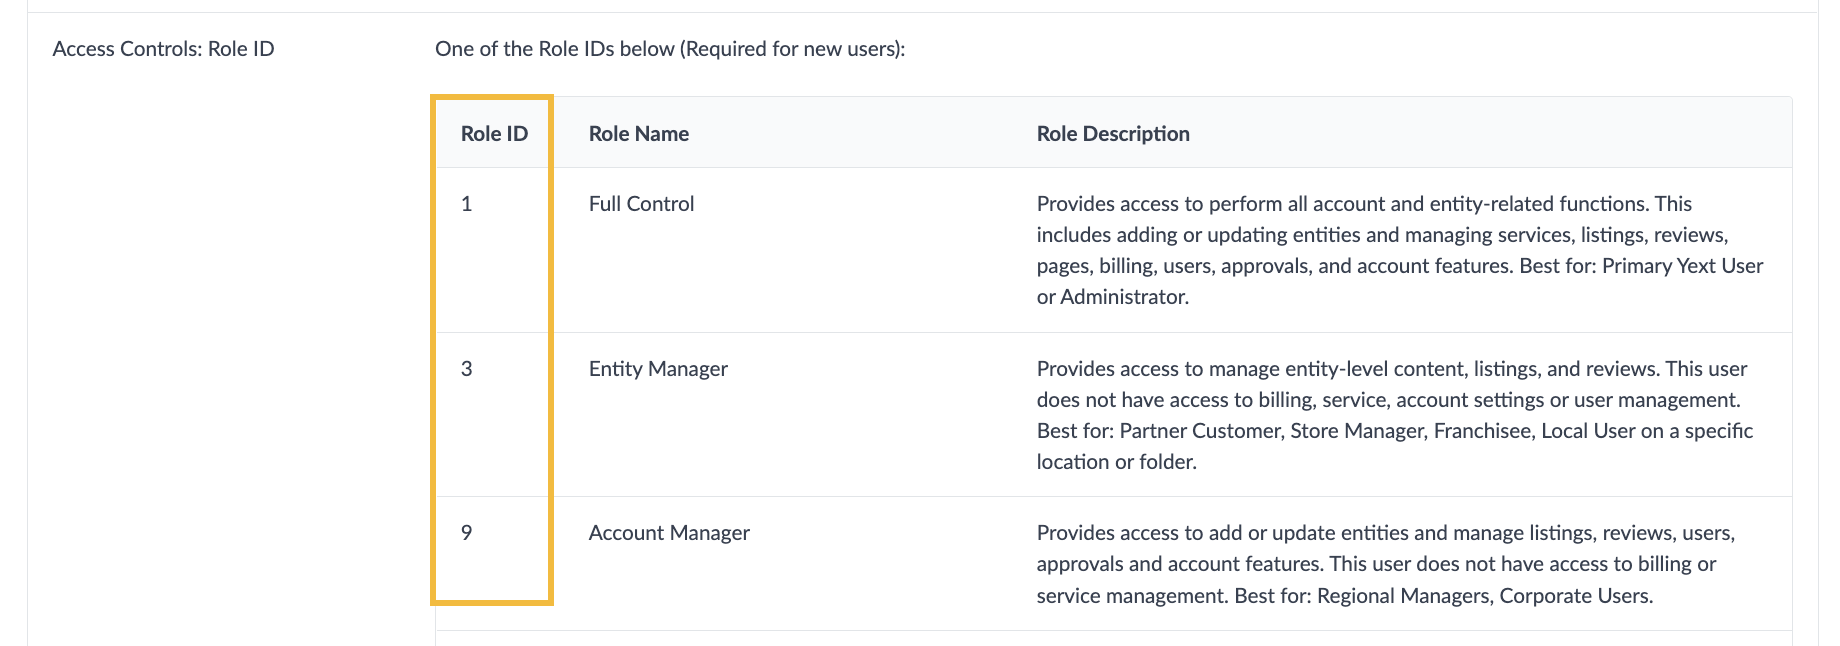
Instead of a dropdown of Roles to select from, you have to provide the Role ID in the spreadsheet. The Role IDs for the roles available for your account can be found on the Bulk User Upload screen before you select your file to upload.
Instead of a dropdown of Folders or Entities, you must provide the unique identifier for these objects (if it’s for the account, you can leave this field blank). For Entities, the unique identifier is the Entity ID. For Folders, the unique identifier can be accessed by downloading the account’s folder information on the Bulk User Upload screen in the “Access Controls: Scope ID” section.

To add multiple access controls for a user, you can add multiple rows in the spreadsheet. For the additional access control rows, you can leave things like email or username blank.

We recommend downloading the Bulk User Upload sample file as a starting point to create your spreadsheet (option available near the top of the Bulk User Upload screen). This will have all of the headers formatted appropriately and will give you some sample data to help guide you. In general, this screen provides a lot of great information, tips, and best practices on how to format your upload. If you encounter any errors or have any issues, we recommend reviewing this screen carefully to troubleshoot those errors. If you’re still having issues, you can reach out to support.
Bulk Upload Process
The process for bulk uploading a users spreadsheet is pretty straightforward.
- To get started, navigate to the Users Screen in Account Settings and click on the drop-down button next to + Add Single User and select Bulk Upload Users in the drop-down menu.
We recommend downloading the sample file, especially if it’s your first upload. This will ensure that your field headers are properly formatted and you have all of the required information in your spreadsheet. Otherwise, be sure to read the instructions carefully.
Fill out your spreadsheet.
Click to upload file at the bottom of the screen. Remember that the spreadsheet must be a csv.
Click Process Upload.
Confirm the changes that you will be making.
If you encounter any errors, be sure to review the error messaging carefully to start troubleshooting. Most errors are related to missing required fields, improperly formatted headers, or invalid identifiers (role ID, entity ID, folder ID, usernames). Be sure to check these before you upload.
Setting up SSO Users
We recognize that many brands prefer to manage users via SSO. To learn more about how to enable this, visit our Developer Portal and check out the available SSO guides .
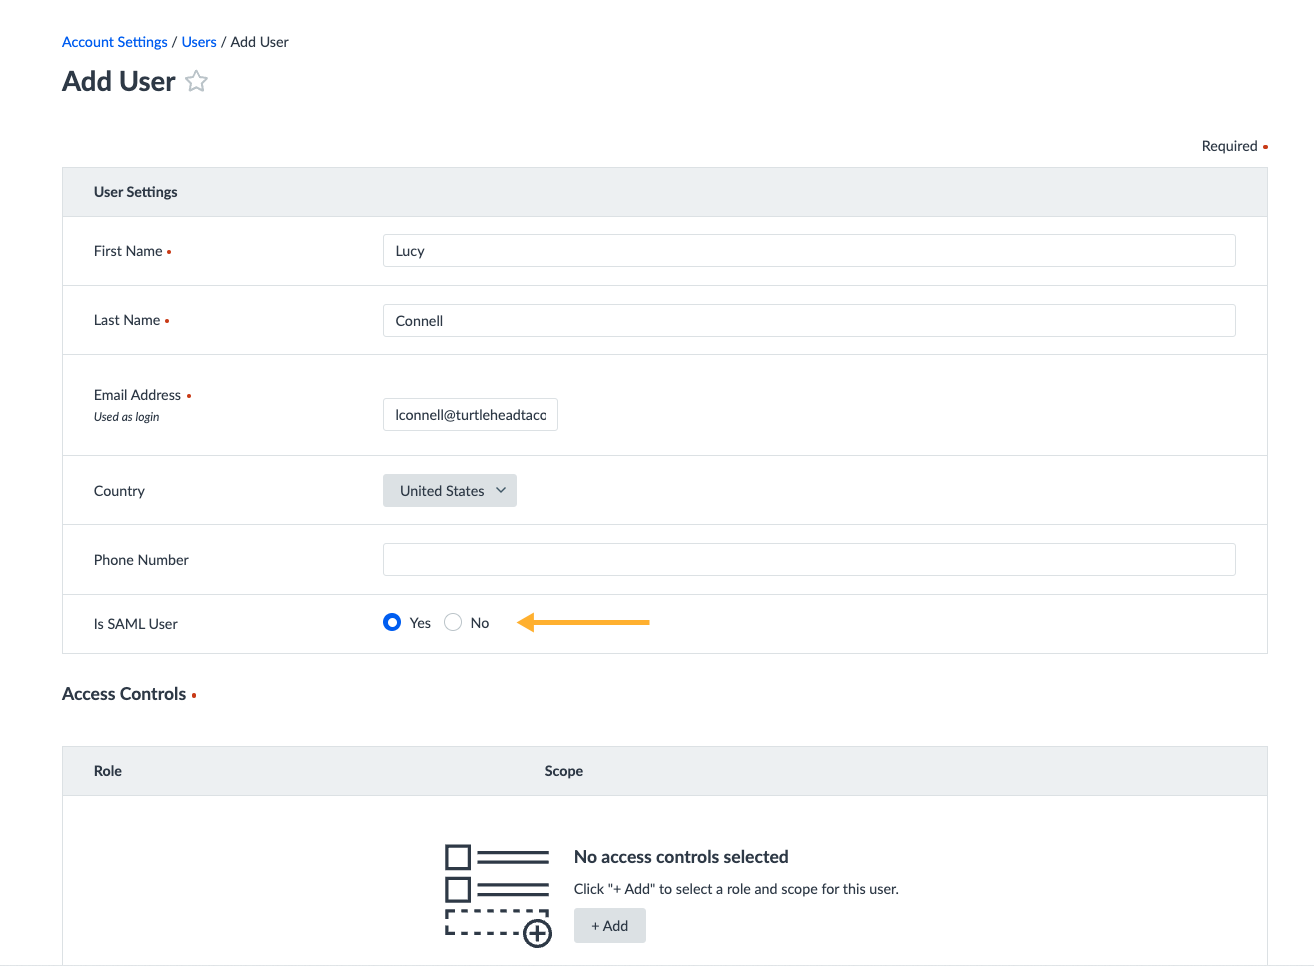
Once SAML SSO is configured for your account, you have the option to select whether the user should be configured for SSO. When you create or edit a user, you can easily provide an SSO distinction by toggling the Is SAML User in the platform (as seen below). You also have the ability to include this designation when uploading users in bulk.
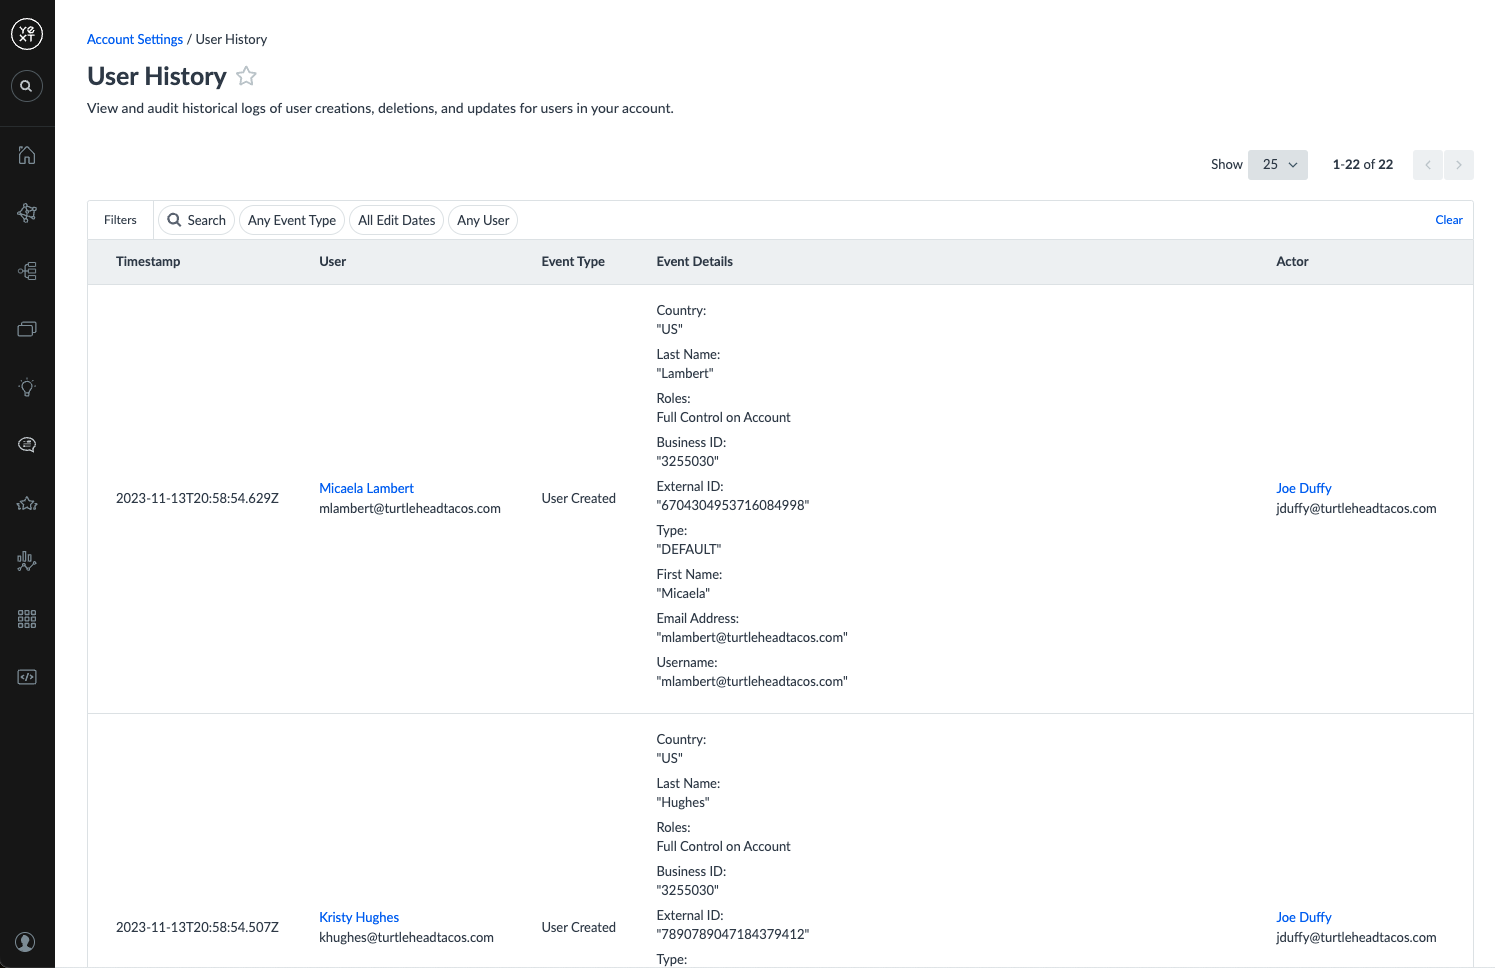
Viewing User History
When a user is created, deleted, or their information is updated, the User History screen will surface this information. You can see user activity by navigating to Account Settings > User History.
The table on the User History screen shows relevant information pertaining to user updates, along with a search bar and filter options at the top of the table. The columns include:
- Timestamp: The date and time that the action was made to a user
- User: The user that was actioned on
- Event Type: The type of activity completed (Role Created, Role Deleted, User Updated)
- Event Details: The information that was modified for a user and how it compares the the original user information
- Actor: The individual who modified the user
What are all the ways you can add or manage users in Yext? (Select all that apply)
Can you upload a spreadsheet with only additional Access Controls for the users in the spreadsheet (keep all other existing access controls as-is)?
Where can you find the Role IDs for the spreadsheet upload?
A Hitchhiker in the making! 🔥
