

Step 3: Add Search to Your Portal
Overview
Next, we recommend that you integrate your Search experience into your Freshdesk Help Site to deliver better answers for your customers. There are two main steps to this process:
- Update the Search Results page to return Yext Search experience
- Add the Yext Search Bar to the Help Site homepage.
REPLACE_ME.
Create a Search Results page for the Help Site
Most websites have search results live on a specific page. In this step, we will walk through how to embed the Yext search results into the Freshdesk search results page. If you would like to host the search results page using Yext, a CMS or different system, you can certainly do so.
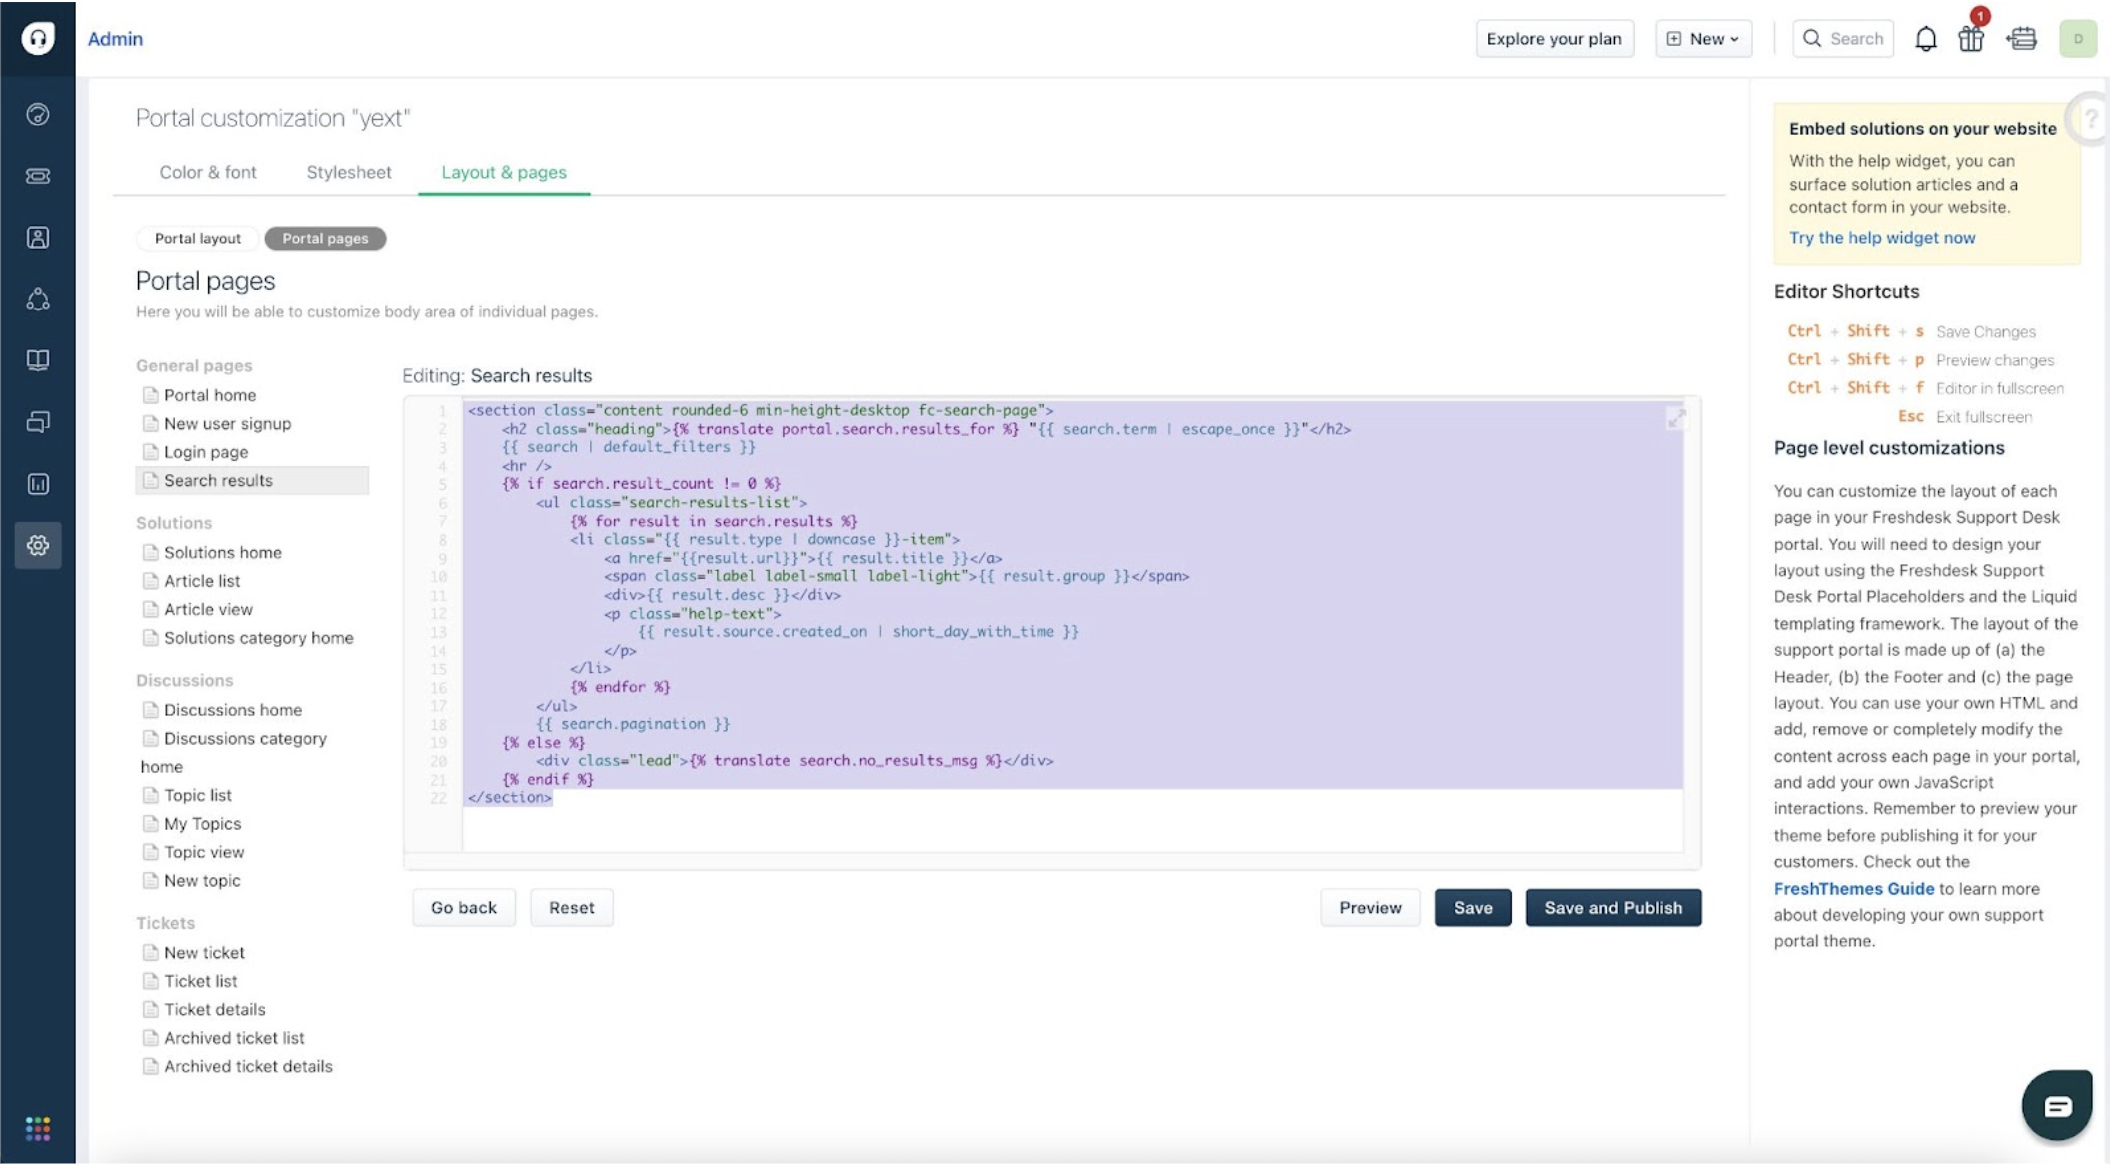
Navigate to Admin > Portals > Customize Portal > Layouts & Pages > Portal Pages > Search Results.
Delete the existing code and add:
<div id="answers-container"></div>
  <script src="REPLACE_ME_PRODUCTION_URL/iframe.js"></script>
  <script>
    window.addEventListener('DOMContentLoaded', (event) => {
      AnswersExperienceFrame.runtimeConfig.set('querySource', 'HELP_SITE');
        {% if portal.user.email %}
        const visitor = {
        id: '{{portal.user.email}}',
        idMethod: "Portal_User_Email"
        };
      AnswersExperienceFrame.runtimeConfig.set("visitor", visitor);
      {% endif %}
      AnswersExperienceFrame.init({});
    })
  </script>
Note: Insert the production URL from when you published to production in step 2.
Save and preview your work.
Add the Yext Search Bar to the Help Site
Generally, a help site will have a search bar persistent in the header and might also have a search bar more prominently on the site. These search bars will redirect users to a central search results page to show the results. In this step, we’ll walk through how to add the Yext search bar to your homepage as well as in the header of your help site.
Initialize the Library
First, we need to add the Search JS SDK and CSS to the site via a CDN and then initialize Search. This library will need to exist on every page we have a search bar. If the search bar is in the header this will mean it’s on every page on the site.
- Within the Portal Layout navigate to the Head file.
Insert the following code. Make sure you replace any of the properties prefixed with
REPLACE_ME. Read more about where to find them in the Adding a Search Bar integration guide.<head> <!-- Other stuff in the head here --> <link rel="stylesheet" type="text/css" href="https://assets.sitescdn.net/answers-search-bar/v1.6/answers.css"/> <script src="https://assets.sitescdn.net/answers-search-bar/v1.6/answerstemplates.compiled.min.js"></script> <script> function initAnswers() { ANSWERS.init({ apiKey: "REPLACE_ME_API_KEY", experienceKey: "REPLACE_ME_EXPERIENCE_KEY", experienceVersion: "PRODUCTION", locale: "en", // e.g. en businessId: "REPLACE_ME_BUSINESS_ID", templateBundle: TemplateBundle.default, cloudRegion: "us", // replace with "eu" to host data in EU cloud region cloudChoice: "multi", onReady: function() { ANSWERS.addComponent("SearchBar", { container: ".search_form", name: "search-bar", //Must be unique for every search bar on the same page redirectUrl: "/support/search", placeholderText: "Search...", }); }, }); } </script> <script src="https://assets.sitescdn.net/answers-search-bar/v1.6/answers.min.js" onload="ANSWERS.domReady(initAnswers)" async defer ></script> </head>Be sure to replace all parameters in the code snippet that are prefixed with
REPLACE_ME. These parameters include the following:apiKey- Found in the Yext platform, under Search > [Your Search Experience] > General SettingsexperienceKey- You can find it in the Yext platform, under Search > [Your Search Experience] > General Settings.businessId- Found both in the URL and in the Yext platform, under Account Settings > Account ID (to find Account Settings, hover over your username in the top right section the Yext platform)locale- For English sites, this will always be'en'redirectUrl- This is the url of the search results page you created above, where a user will and after conducting a search (i.e. https://[account_subdomain].freshdesk.com/support/search).JS version- The code above uses v1.6 as the version number. Before deploying it’s always a good idea to make sure you use the latest version of the JS Library. You won’t need to keep this version up to date over time unless you want access to the latest features but for the best performance use the latest version. You can find the JS changelog here .
You can also configure the
placeholderTextand optionally add apromptHeaderin theaddComponentcall above to fit your needs. For a full list of properties, visit the Add Search Bar guide .Save your work.
Add Search Bar to Homepage
- Within Portal Layout navigate to Page Layout.
Replace the current search bar with the below code.
<div class="search_form"></div>
Save your work.
Add Search Bar to the Header
So users can access the search bar from any page, we’ll also add it to the header.
- Stay in Portal Layout and navigate to Header.
Replace the current search bar with the below code.
<div class="search_form">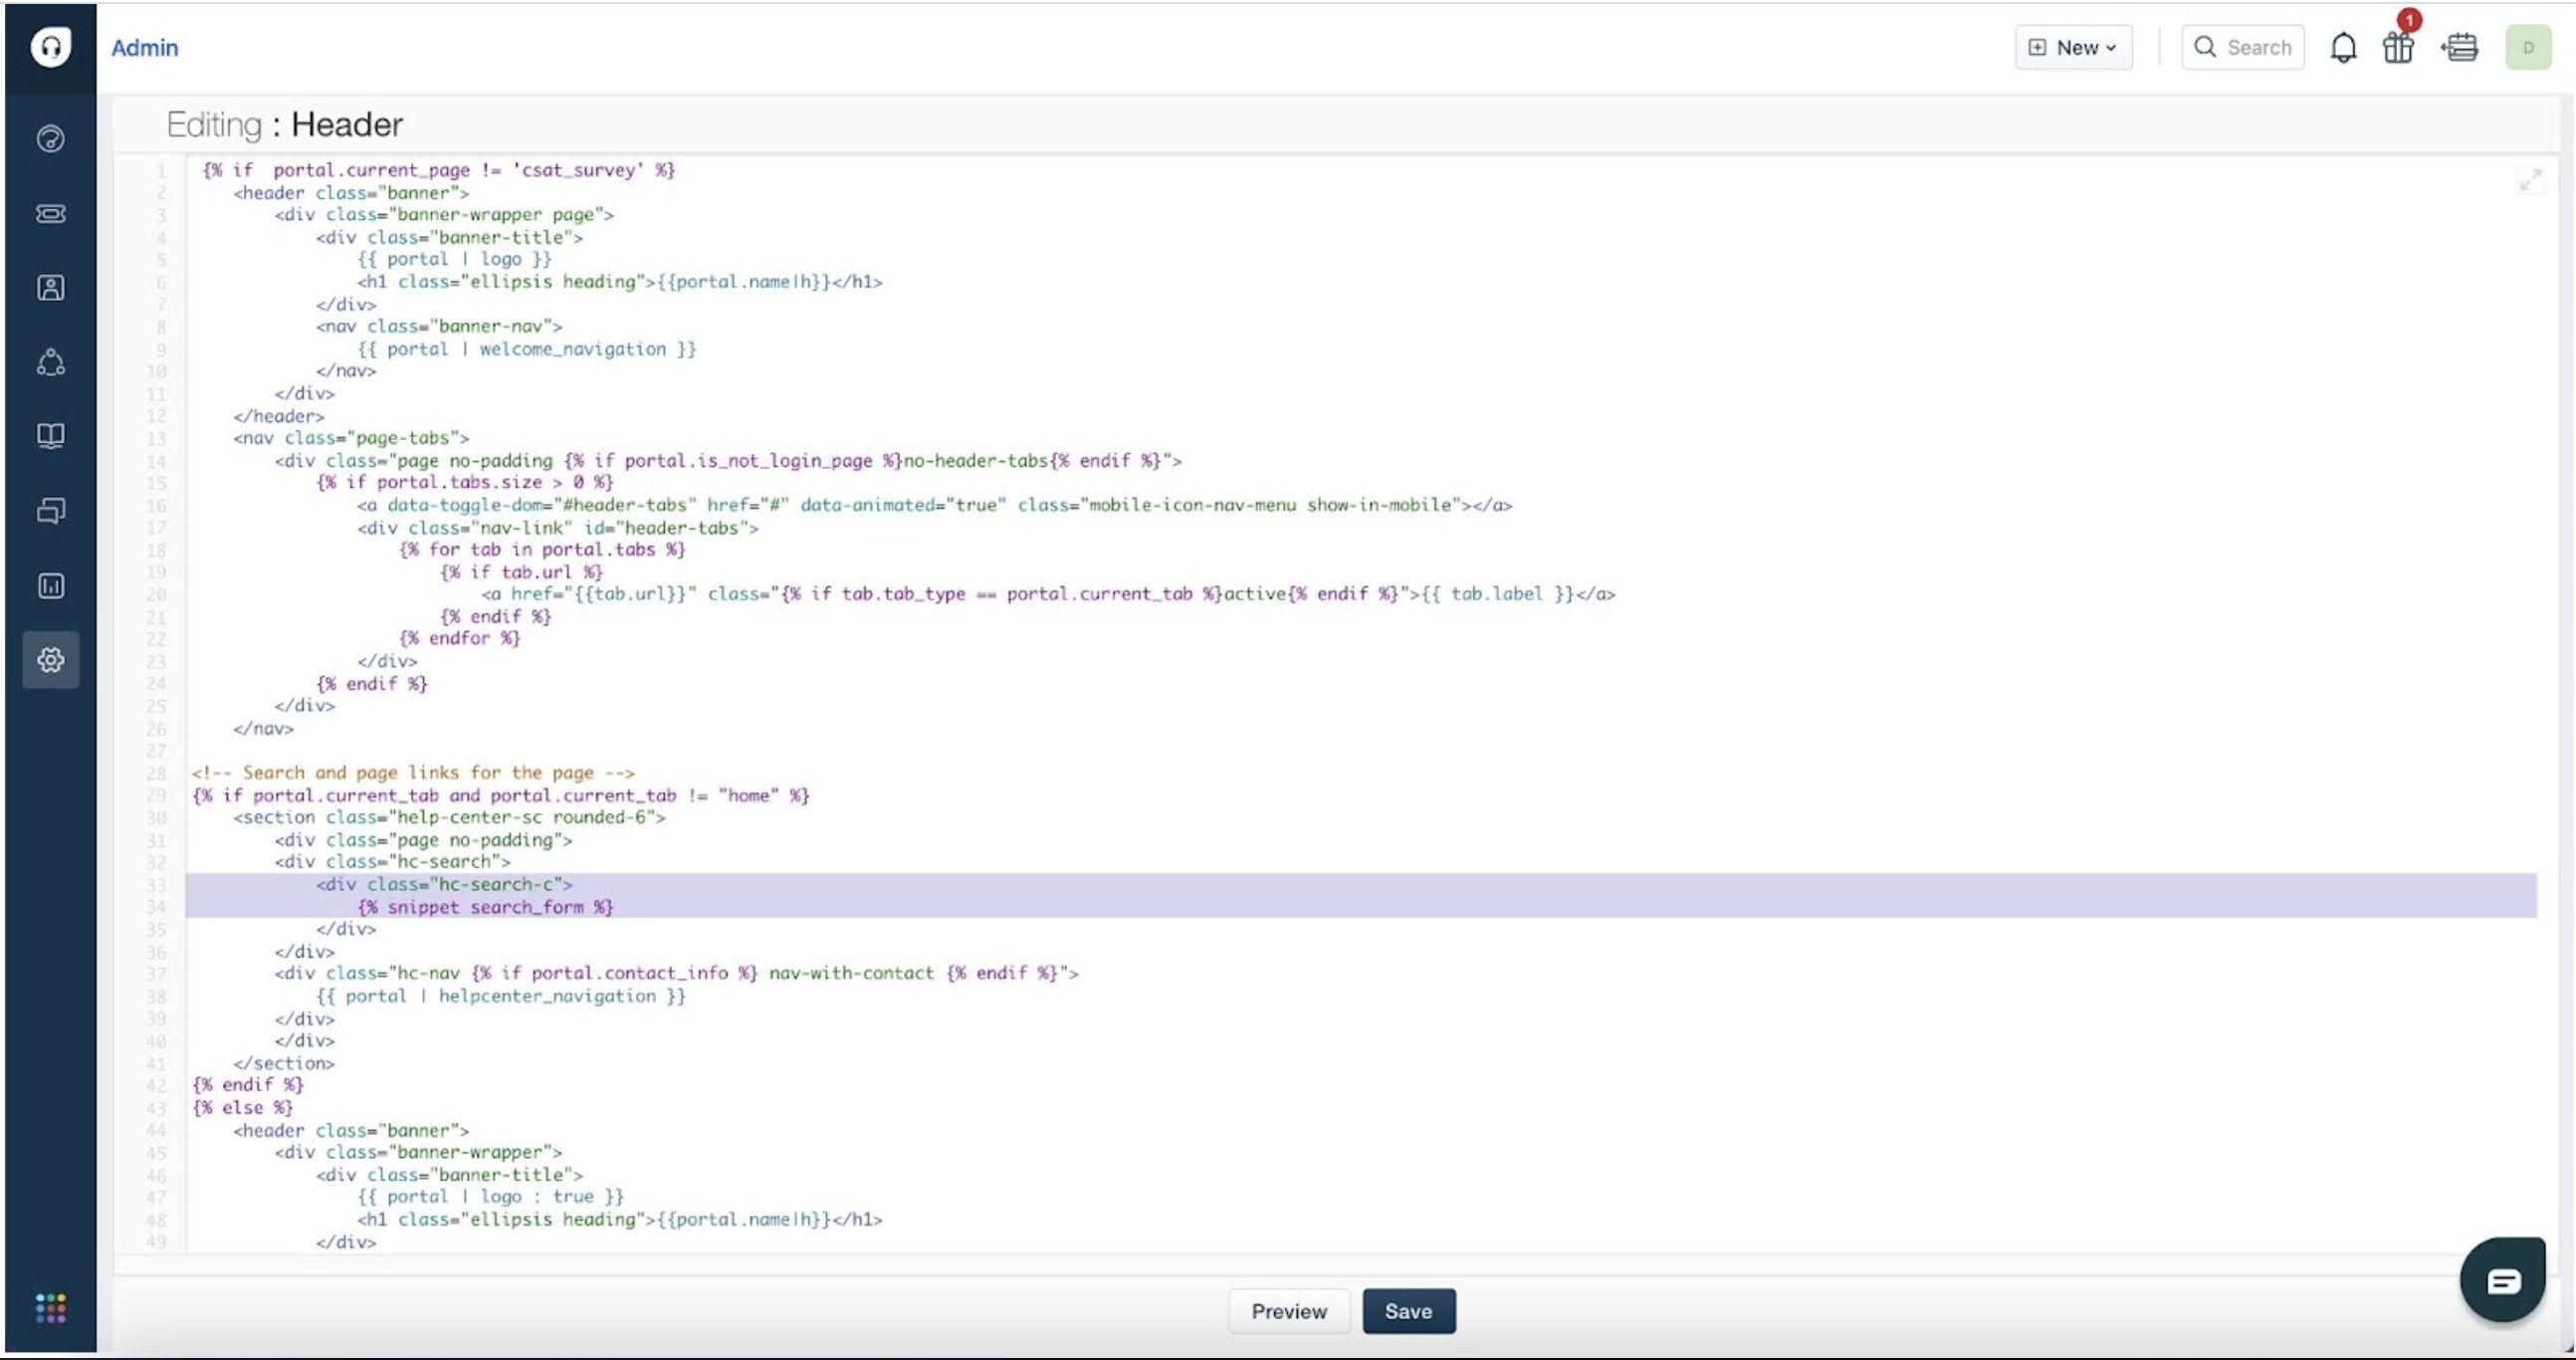
Save your code.
Add Styling
With everything in place you can add the below code to put the finishing touches on your portal homepage!
Navigate to your stylesheet (customize portal > stylesheet) and copy the below code in.
The below code is our suggested styling to optimize Search within a blank Freshdesk portal. Depending on your existing portal configuration you may want to make some changes.
/* search bar in header */
.yxt-SearchBar {
  margin: 10px 0 6px 0;
}

/* ticket buttons */
.help-center-sc .hc-nav {
  margin-top: 15px;
}

/* more search bar styling */
input#yxt-SearchBar-input--search-bar {
    border: inherit;
    background-color: inherit;
    border: inherit;
    border-radius: inherit;
    -moz-box-shadow: inherit;
    -webkit-box-shadow: inherit;
    box-shadow: inherit;
    -moz-transition: inherit;
    -o-transition: inherit;
    -webkit-transition: inherit;
    transition: inherit;
    height: inherit;
    -moz-box-shadow: inherit;
    -webkit-box-shadow: inherit;
    box-shadow: inherit;
    color: inherit;
    display: inherit;
    padding-left: 16px;
    margin-bottom: inherit;
    font-size: inherit;
    line-height: inherit;
    color: inherit;
}

/* tablets */
@media (max-width: 45em) {
  section#answers-container {
    display: none;
  }
  .help-center-sc .hc-search, .hc-search {
    width: 80% !important;
    padding-right: 2% !important;
    position: relative !important;
    background-color: inherit !important;
    border: inherit !important;
    margin-top: -10px !important;
  }
  .help-center .hc-nav {
    margin-right: -55%;
    margin-top: -14%;
  }
  .help-center-sc .hc-nav {
    margin-right: -29%;
    margin-top: 3%;
  }
  .footer {
    margin-top: 30px;
  }
}

/* iphone */
@media (max-width: 25em) {
   .help-center-sc .hc-search, .hc-search {
    width: 68% !important;
  }
  .help-center .hc-nav {
    margin-right: -61%;
    margin-top: -24%;
  }
  .help-center-sc .hc-nav {
    margin-right: -20%;
    margin-top: 4%;
  }
  .footer {
    margin-top: 50px;
  }
}
Click Preview to see how the search bar looks on the main page.