

Step 4: Add Search to your Help Site
Open your site builder. Select the Lightning Icon on the upper left side of the page. If you scroll down you’ll see four Yext lightning components as custom options within the Experience Cloud site builder.
You will see two search bars appear: Yext Search Bar - Component and Yext Search Bar - Native Search.
- The difference between the two is that Yext Search Bar - Component is a Lightning component that you can drag and drop onto any page, but is best used on a page that doesn’t already have a Search Bar on it. In the Help Site and Customer Service templates, there already is a search bar, so we can use the Yext Search Bar - Native Search component to change what type of search is being used in the pre-existing search bar.
If you have a custom site and need to add in a search bar:
- Click on Yext Search Bar - Component and drag it onto your page.
If you are using a Salesforce template and there is already a search bar:
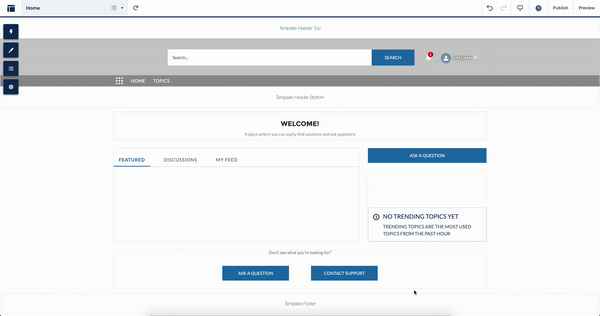
For the Help Center Template
- Click on the Hero area of the page.
- A box will appear on the right side with options for how to update the Hero part of the page. Click on the drop down section under Search Component.
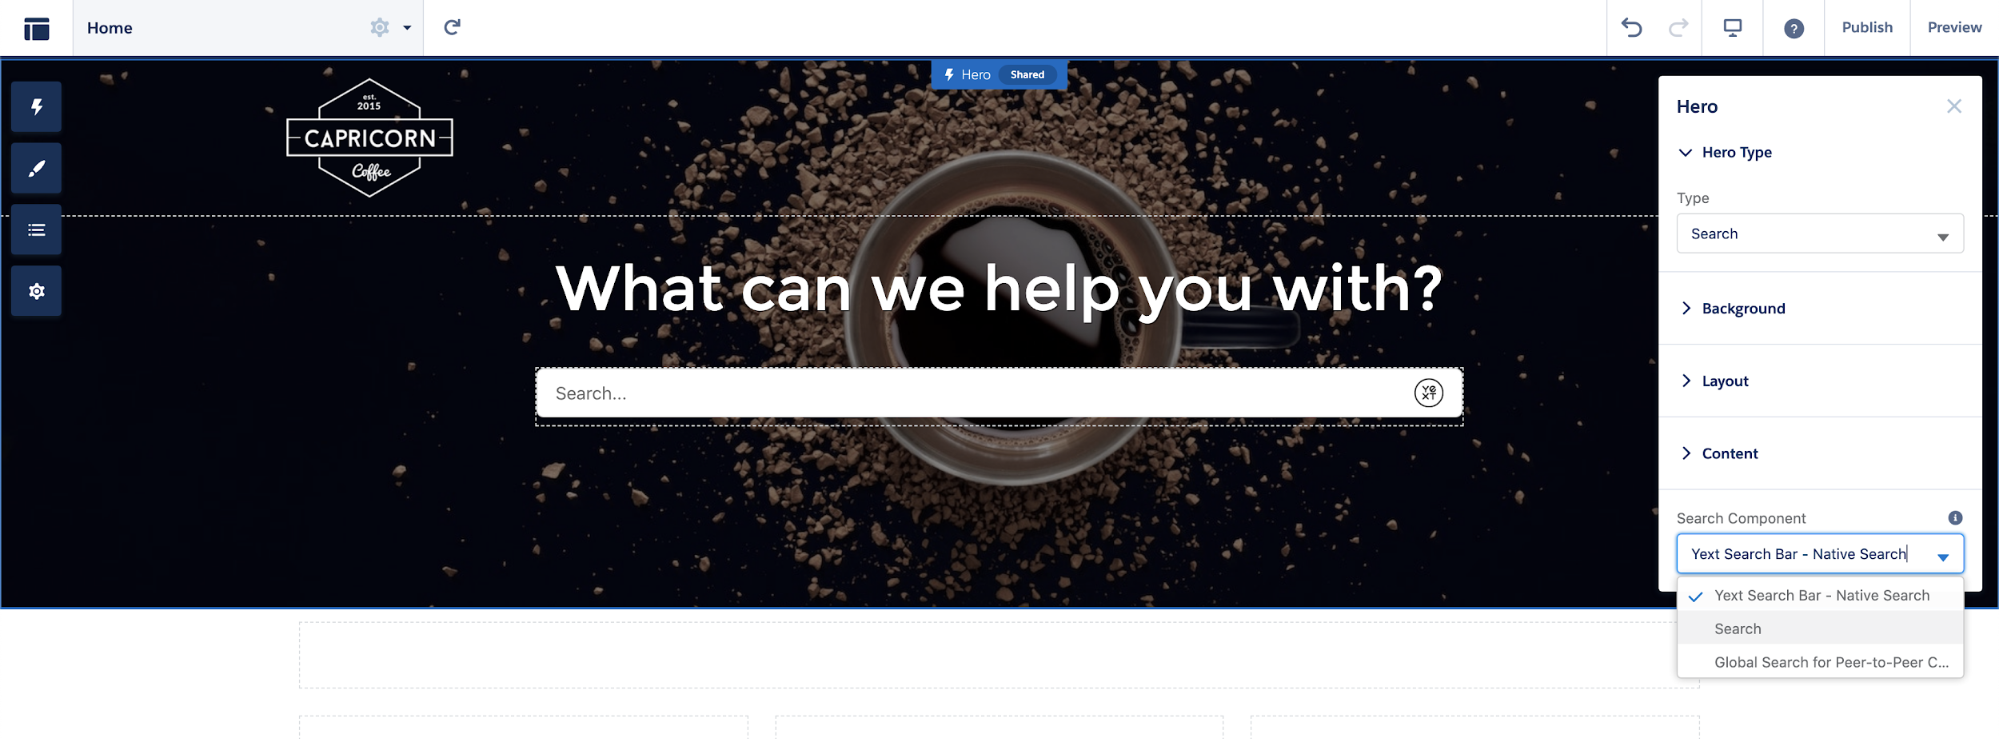 3. From the options, choose Yext Search Bar - Native Search.
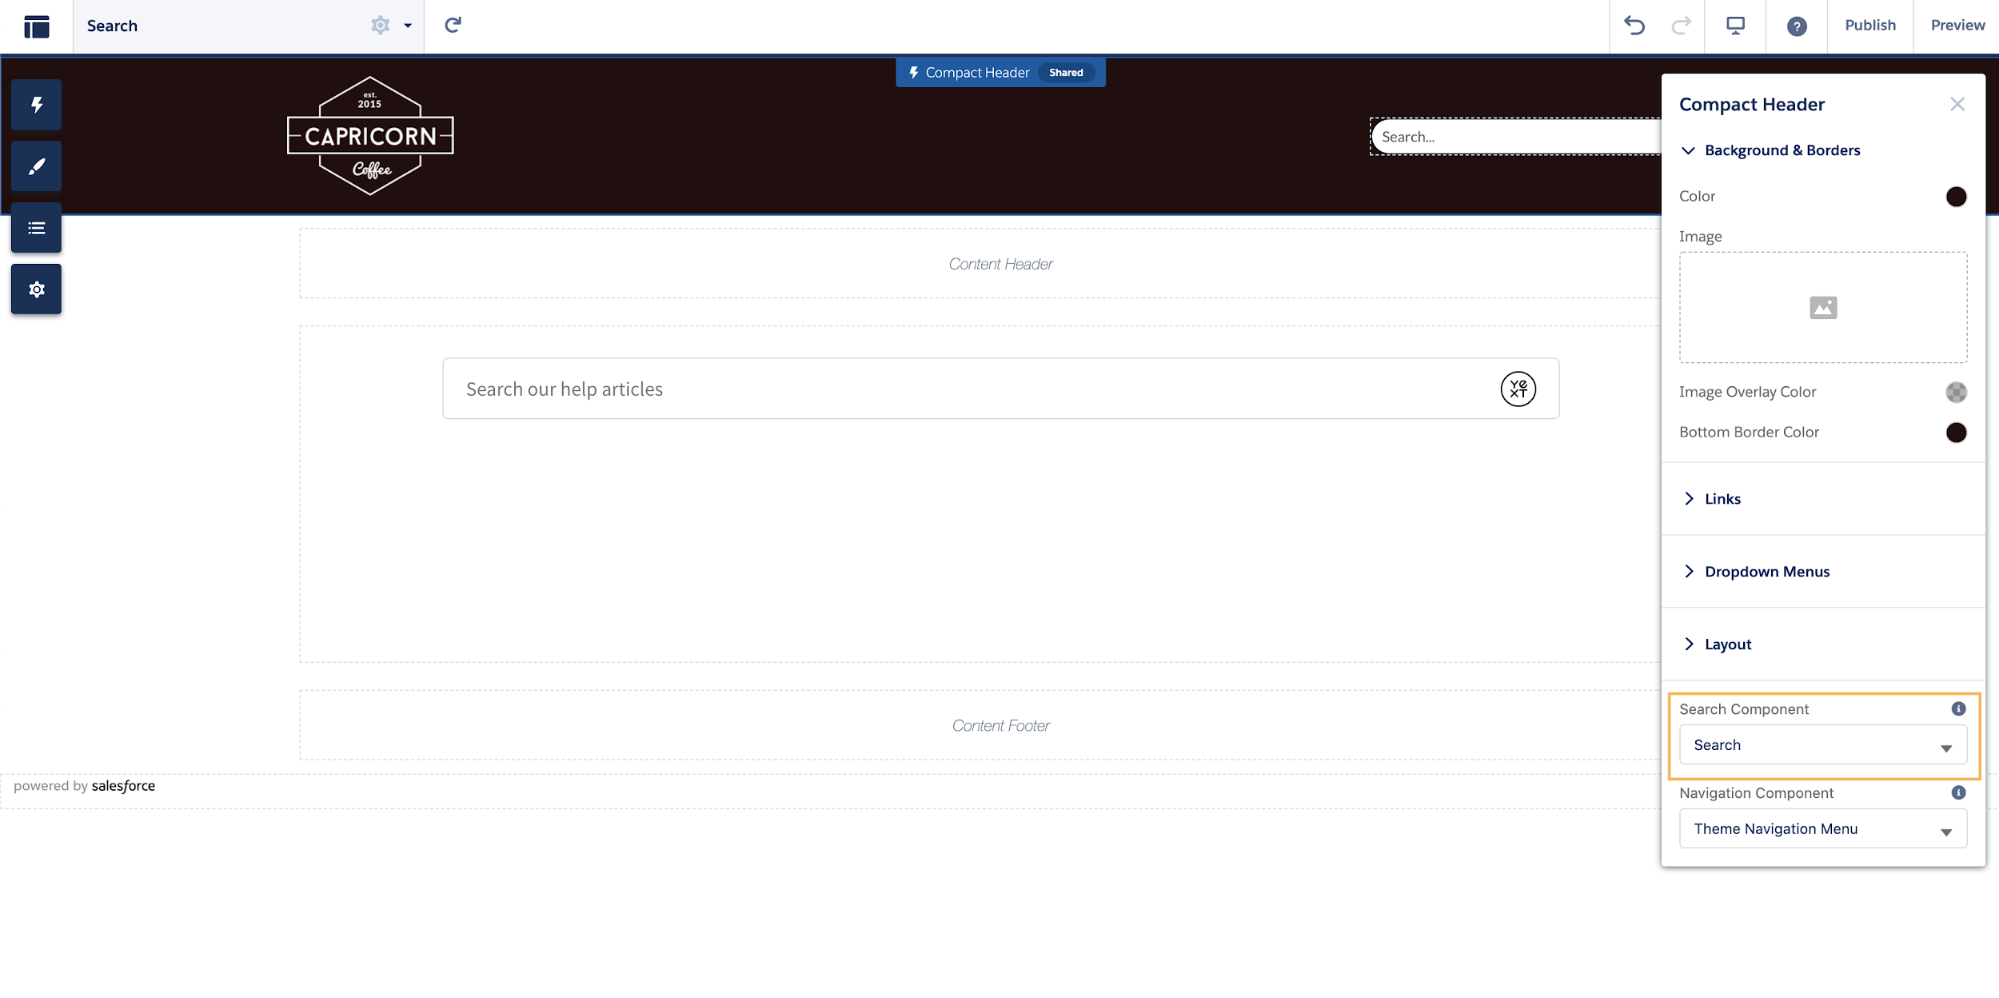
 4. In the help center template, there is a smaller search bar that appears on every page (besides the home page). To update this search bar so it uses Yext Search, you can click on the Compact Header part of the page.
5. Click on the drop down section under Search Component.
6. From the options, choose Yext Search Bar - Native Search.
For Customer Service Template
- Click on Theme on the left side of the page. This opens up the theme settings for the page.
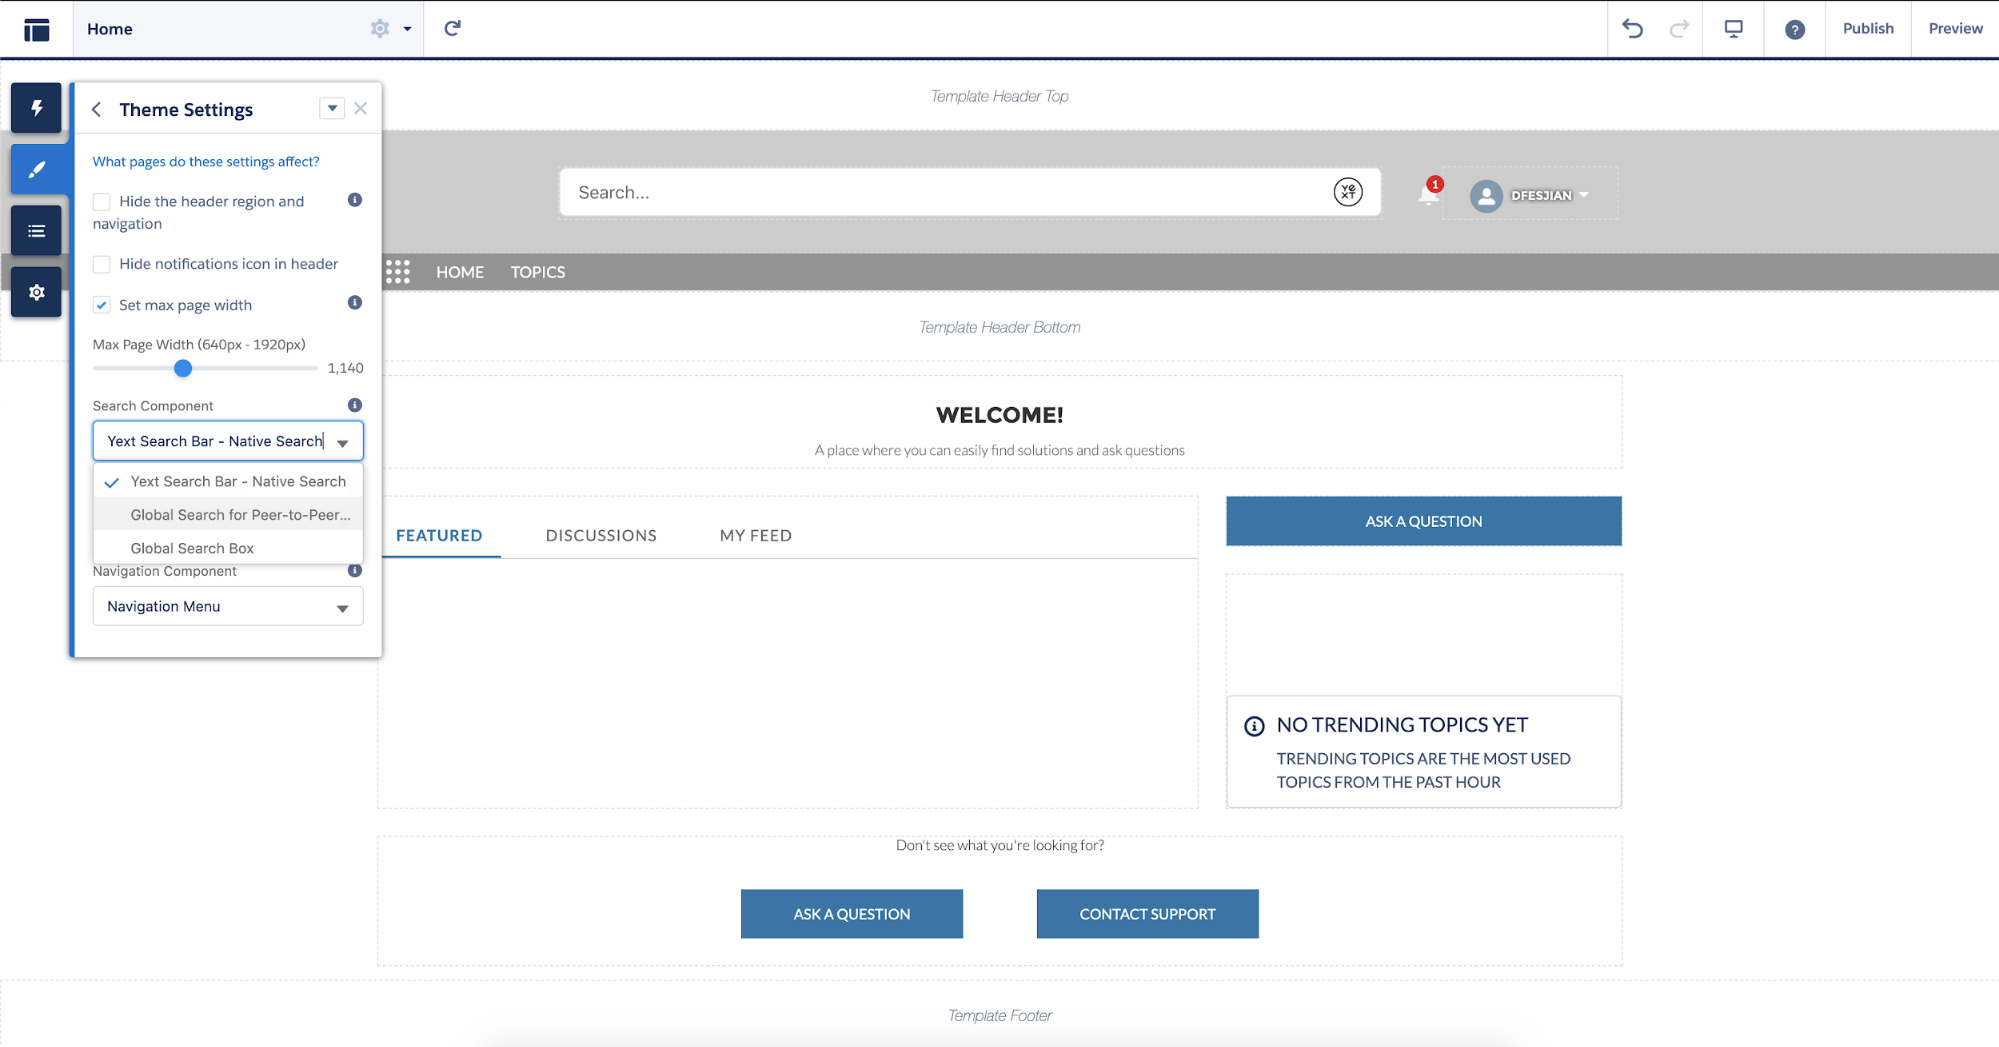
- Click on the drop down section under Search Component.
- From the options, choose Yext Search Bar - Native Search.
<% elem.innerText %>